Easy No-Bake Candy Cane Pie: A Decadent Peppermint Dessert for Holidays and Beyond
Prepare to be enchanted by this incredibly light and wonderfully fluffy No-Bake Candy Cane Pie Recipe that is destined to become a cherished family favorite for years to come. This dessert seamlessly blends convenience with gourmet taste, making it an ideal choice for holiday gatherings, festive celebrations, or simply a delightful treat any time of year. Starting with a rich, dark chocolate Oreo crust, this pie lays the perfect foundation for a lusciously creamy filling. Each bite delivers a harmonious balance of sweet, cool peppermint, creating a truly unforgettable flavor experience that simply does not disappoint. Its vibrant presentation and refreshing taste make it a standout dessert that will garner rave reviews from everyone who tries it. Perfect for those busy seasons when oven space is limited, this no-bake wonder allows you to create an impressive dessert with minimal effort and maximum impact.

This Christmas dessert, Candy Cane Pie, is a celebration in itself, featuring a decadent Oreo cookie crust paired with a luscious, airy filling. Our Peppermint Pie Recipe is truly the perfect dessert to craft for the holiday season, embodying the spirit of winter festivities. The invigorating peppermint flavor is not only delicious but also inherently festive, making it an absolute must-have for your holiday table or any special occasion demanding a touch of minty magic. It’s a dessert that’s as delightful to look at with its creamy white and red hues as it is to eat.
During the festive period, I often find myself baking a variety of pies to share with family and friends. This delightful Candy Cane Pie frequently joins other seasonal favorites, like a rich Eggnog Pie, alongside a selection of my other beloved Christmas Pie Recipes. It’s always a highlight, bringing a refreshing twist to traditional holiday sweets.
What’s in this post: Easy Candy Cane Pie Recipe
- Why we love this recipe:
- Candy Cane Pie Ingredients:
- Variations
- How to Make Candy Cane Pie:
- How to Serve:
- Pro Tips:
- Frequently Asked Questions
- Try these other easy pie recipes:
- More Candy Cane Desserts:
- Candy Cane Pie Recipe
Why We Love This Easy No-Bake Candy Cane Pie:
- Irresistible Peppermint Flavor. The candy cane filling is not just sweet; it’s a wonderfully refreshing and invigorating taste experience. It evokes feelings of festive cheer and provides a delightful contrast to the rich chocolate base, making every bite a burst of cool, creamy deliciousness. This vibrant flavor is especially beloved during the holiday season but is equally enjoyable year-round when you crave a minty treat.
- Effortless No-Bake Peppermint Pie Recipe. The sheer convenience of a no-bake recipe cannot be overstated. This pie comes together with minimal fuss and absolutely no oven time required, freeing up your valuable time and oven space – a true blessing during busy holiday preparations or for a quick weeknight dessert. It’s a perfect project for aspiring bakers of all ages, requiring simple steps and rewarding results.
- Budget-Friendly Ingredients. Crafting this impressive dessert won’t break the bank. Made with readily available and affordable ingredients that you can easily find at any grocery store, this pie proves that you don’t need exotic components to create a show-stopping treat. It’s an economical yet incredibly satisfying way to indulge your sweet tooth and share joy without stretching your budget.
Essential Candy Cane Pie Ingredients:

Crafting this delightful Candy Cane Pie requires just a handful of simple ingredients. Each component plays a crucial role in creating the perfect balance of texture and flavor that makes this dessert so special.
For the Decadent Oreo Crust:
- Oreo Cookies: These iconic chocolate sandwich cookies form the rich, dark, and slightly crumbly base of our pie. Using both the wafers and the cream filling adds to the unique texture and flavor.
- Unsalted Butter: Melted butter binds the crushed Oreo crumbs together, creating a firm and flavorful crust that holds its shape beautifully once chilled.
For the Creamy Candy Cane Pie Filling:
- Cream Cheese: Softened cream cheese is the backbone of our filling, providing a rich, tangy, and incredibly smooth base that complements the sweetness of the other ingredients.
- Powdered Sugar: Also known as confectioners’ sugar, this fine sugar dissolves easily, ensuring a silky-smooth filling without any grainy texture. It provides the perfect amount of sweetness.
- Red Food Coloring: A few drops of red food coloring give the pie its signature festive hue, mimicking the classic candy cane stripes. You can adjust the amount to achieve your desired shade.
- Peppermint Extract: This is where the magic happens! Peppermint extract delivers that classic cool, minty flavor that defines our candy cane pie. Ensure you use a good quality extract for the best taste.
- Cool Whip (Thawed): This whipped topping adds lightness and airiness to the filling, making it wonderfully fluffy and easy to spoon into the crust. It also helps to stabilize the pie.
- Peppermint Candy Canes: Crushed candy canes are folded into the filling and sprinkled on top, providing bursts of intense peppermint flavor and a delightful crunchy texture that contrasts with the creamy filling.
You can find the complete ingredient list with precise measurements and detailed step-by-step instructions in the printable recipe card located at the bottom of this post.
Delightful Variations to Personalize Your Pie
While the classic Candy Cane Pie is undeniably delicious, don’t hesitate to get creative with these simple variations to tailor it to your taste or what you have on hand:
- Store-Bought Crust for Ultimate Convenience. If time is of the essence or you simply prefer a shortcut, feel free to use a pre-made, store-bought Oreo crust. This is a fantastic option that shaves off significant preparation time without compromising on flavor. Just ensure it’s a 9-inch crust.
- Add Festive Sprinkles. For an extra touch of holiday cheer and visual appeal, consider adding festive sprinkles to the top of the pie. Red, green, and white sprinkles can make this dessert even more eye-catching and fun, especially for children.
- Experiment with a Graham Cracker Crust. While the Oreo crust offers a rich chocolate foundation, this pie recipe is also incredibly delicious with a classic graham cracker crust. The subtle honey and buttery notes of a graham cracker crust provide a different, yet equally appealing, flavor profile that pairs beautifully with the peppermint filling. Either option works wonderfully in this easy recipe.
- Incorporate White Chocolate Chips. For an added layer of sweetness and texture, you can sprinkle white chocolate chips on top of the pie before chilling. I find that white chocolate complements the crushed candy canes and peppermint flavor exceptionally well, creating a harmonious blend of creamy and crunchy. You could even melt some white chocolate and drizzle it over the top for a more elegant finish.
- Substitute with Peppermint Candy. If you don’t have candy canes readily available, crushed peppermints can be used instead. They offer the same classic minty flavor and satisfying crunch, making them a perfect substitute for the candy canes.
- Mint Chocolate Chip Twist. For a slight flavor variation, consider adding a handful of mini chocolate chips to the filling along with the crushed candy canes. This adds another layer of chocolatey goodness and texture, creating a “mint chocolate chip” pie experience.
- Cream Cheese Swap. While cream cheese provides a rich base, you could experiment with mascarpone cheese for an even silkier, milder filling if you’re looking for a slightly different texture and less tang.

How to Make Your Irresistible Candy Cane Pie: A Step-by-Step Guide
Creating this stunning no-bake Candy Cane Pie is surprisingly simple. Follow these easy steps to achieve a perfect, crowd-pleasing dessert every time:
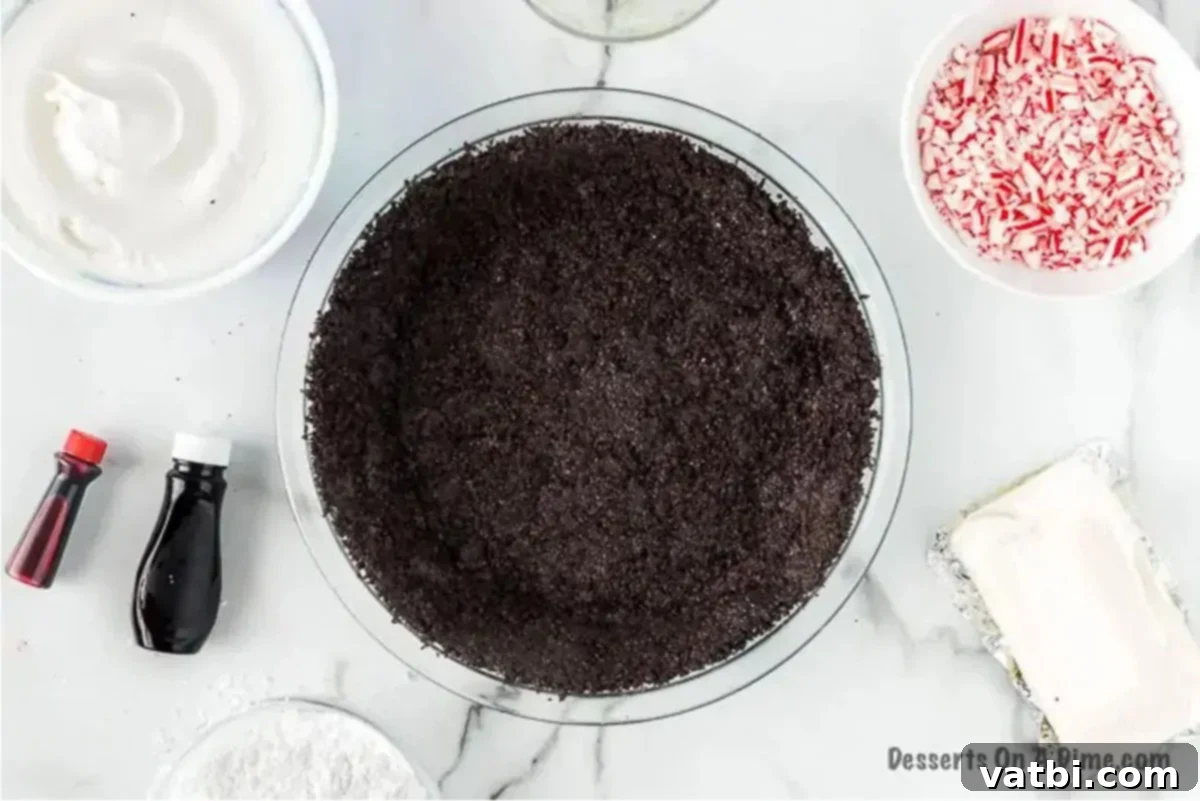
Step 1: Prepare the Oreo Crust. Begin by crushing your Oreo cookies. A food processor makes quick work of this, creating fine, even crumbs. Alternatively, place the cookies in a sturdy Ziplock bag and use a rolling pin or the bottom of a heavy pan to smash them. Once crushed, combine the crumbs thoroughly with melted unsalted butter. Press this mixture firmly and evenly into the bottom and up the sides of a 9-inch pie plate. For a smooth and compact crust, use the back of a glass cup to press it down. Refrigerate the crust while you prepare the filling to help it set.

Step 2: Create the Peppermint Filling. In a large mixing bowl, beat together the softened cream cheese and powdered sugar until the mixture is light, fluffy, and completely smooth, ensuring there are no lumps. Add a few drops of red food coloring, mixing until you achieve your desired festive pink or red shade. Stir in the peppermint extract. Finally, gently fold in one container of thawed Cool Whip and half a cup of the crushed peppermint candy canes. Spoon this creamy, vibrant filling evenly into your chilled Oreo pie crust, spreading it with a spatula to create a smooth surface.

Step 3: Add the Whipped Topping. Once the peppermint filling is evenly spread, gently top it with the remaining container of thawed Cool Whip. Carefully spread the whipped cream over the entire surface of the pie, creating a beautiful, smooth, and fluffy layer. This adds another dimension of creamy texture and a pristine white canvas for your final touches.

Step 4: Garnish and Chill. Finish your masterpiece by generously sprinkling the remaining crushed candy canes over the whipped topping. This not only adds a burst of color and a delightful crunch but also reinforces the signature peppermint flavor. Once garnished, place the pie in the refrigerator to chill for at least one hour (or longer for a firmer set) before serving. This crucial step allows the pie to firm up, making it easier to slice and enhancing its refreshing taste.
How to Serve Your Festive Candy Cane Pie:
This Candy Cane Pie is a showstopper on its own, but you can elevate the experience even further with a few simple serving suggestions. Top each slice with a scoop of creamy Vanilla Ice Cream for a delightful temperature contrast, or a dollop of fluffy Homemade Whipped Cream for extra indulgence. A drizzle of chocolate syrup can also add a touch of decadence.
For the ultimate cozy treat, I love to serve a slice of this pie alongside a warm mug of Hot Chocolate. The combination of cool, minty pie and rich, comforting hot cocoa is simply magical, especially during chilly evenings or holiday celebrations. It’s the perfect end to any meal.

Pro Tips for a Perfect Candy Cane Pie:
Achieving pie perfection is easier than you think with these expert tips:
- Ensure Softened Cream Cheese. This is perhaps the most crucial tip for a smooth and creamy filling. Make sure that your cream cheese is completely softened at room temperature before you start mixing. Cold cream cheese will result in a lumpy filling that is difficult to incorporate smoothly. Allow it to sit on the counter for at least an hour before use.
- Choose the Right Pie Plate. While various pie pans can work, I personally find that a glass pie plate works best for this easy pie recipe. Glass distributes cold evenly, helping the crust and filling set perfectly, and it also allows you to admire the beautiful layers of your pie. While you can use other types of pie pans, I don’t prefer to use a disposable aluminum pie pan for this recipe as it’s not as sturdy and can make transporting the pie more challenging.
- Crushing Candy Canes. For perfectly crushed candy canes, place them in a Ziploc bag and gently crush them with a rolling pin or the flat side of a meat tenderizer. Avoid over-crushing, as you want small pieces for texture, not a fine powder.
- Proper Chilling Time. Do not rush the chilling process! This pie needs adequate time in the refrigerator to set properly. A minimum of one hour is recommended, but 2-3 hours (or even overnight) will yield a firmer, more stable pie that slices beautifully.
- For a Finer Peppermint Flavor. If you desire a more intense peppermint flavor, consider adding an extra ¼ to ½ teaspoon of peppermint extract to the filling. Always taste and adjust to your preference.
Frequently Asked Questions About Candy Cane Pie
Yes, you can certainly choose to leave the peppermint extract out if you prefer a milder mint flavor or wish to avoid it altogether. However, be aware that the characteristic peppermint flavor will not be as strong, or present, in the candy cane pie. If you’re looking for an alternative flavor, you can substitute it with vanilla extract for a more classic, sweet taste, or almond extract for a subtle nutty note.
Absolutely! This pie is an excellent make-ahead dessert, perfect for reducing stress during busy holiday preparations. It can easily be made the day before you plan on serving it. Simply prepare the pie, cover it loosely with plastic wrap to prevent it from drying out, and store it in the refrigerator. It will be perfectly chilled and ready to serve after dinner the next day. For the best presentation, I usually recommend waiting to top the pie with the crushed candy canes right before serving. This prevents them from softening or sinking into the pie while it’s being refrigerated, ensuring a fresh, crunchy garnish.
To keep any leftover pie fresh and delicious, cover it tightly with plastic wrap or cling film. Alternatively, you can transfer individual slices to an airtight container. Store the pie in the refrigerator, and it will remain fresh and tasty for up to 5-7 days. While it might last longer, the texture and freshness are best within this timeframe.
Based on our experience, this particular pie recipe does not freeze well. The creamy, fluffy texture of the filling tends to change when thawed, often becoming watery or grainy. Therefore, we do not recommend freezing this candy cane pie recipe to maintain its optimal texture and flavor. It’s best enjoyed fresh and chilled from the refrigerator.
This no-bake peppermint pie is an ideal dessert for potlucks, family gatherings, or holiday parties because it’s so easy to transport. I can’t wait to make this for the next family gathering! To ensure it arrives safely and beautifully, I highly recommend using one of these handy pie carriers. They are designed to keep your pie level and protected, making transportation super easy and helping to prevent any unfortunate spills or smudges in the car. This is a practical item I use frequently, especially during the holidays.
Explore These Other Easy & Delicious Pie Recipes:
If you’ve enjoyed the simplicity and deliciousness of this Candy Cane Pie, you’re in for a treat! We have a wide array of easy-to-make pie recipes perfect for any occasion. Don’t miss out on these other fantastic options:
- Easy Chocolate Pecan Pie Recipe
- No Bake Oreo Pie Recipe
- Kool Aid Pie Recipe
- And for even more inspiration, discover our 30 Best Pie Recipes – there’s a pie for everyone!
Indulge in More Candy Cane & Peppermint Desserts:
The refreshing flavor of peppermint and candy canes isn’t just for pie! If you’re a fan of this delightful combination, be sure to explore these other incredible candy cane and peppermint-inspired desserts:
- Peppermint Bark
- White Chocolate Peppermint Brownies Recipe
- Chocolate Peppermint Cookies Recipe
We truly hope you enjoy making and sharing this delightful Candy Cane Pie! Once you’ve tried this delicious recipe, please come back and leave a comment to tell us what you think. Your feedback is always appreciated, and I love to hear about your baking successes and how much your family enjoyed it!
Pin
Candy Cane Pie
Ingredients
- Ingredients
- For the Oreo crust:
- 25 Oreo cookies the wafers and fillings
- 5 tbsp unsalted butter melted
- For the Candy Cane pie filling:
- 8 oz cream cheese softened
- 3/4 cup powdered sugar
- Red Food Coloring
- 1 tsp Peppermint Extract
- 2 tubs of Cool Whip Thawed
- 3/4 cup peppermint candy canes crushed
Instructions
-
For the Oreo crust:
-
Crush the Oreo cookies in a food processor until fine crumbs are formed. If you don’t have a food processor, place the cookies in a sturdy Ziplock bag and bash them with a rolling pin or the flat side of a meat tenderizer until finely crushed.
-
In a medium bowl, mix the crushed cookies thoroughly with the melted unsalted butter until well combined. The mixture should resemble wet sand.
-
Press the cookie and butter mixture firmly into the bottom and up the sides of a 9-inch pie plate. For best results, use the bottom of a glass cup or a flat-bottomed measuring cup to ensure the crust is compact and even.
-
Place the prepared crust in the fridge to chill and firm up while you prepare the delicious filling.
-
For the Candy Cane pie filling:
-
In a large mixing bowl, using an electric mixer, beat the softened cream cheese and powdered sugar together until the mixture is light, fluffy, and completely smooth with no lumps. Add several drops of red food coloring, mixing until you achieve your desired festive pink or red shade.
-
Gently fold in one container of the thawed Cool Whip, followed by ½ cup of the finely crushed peppermint candy canes. Mix until just combined, being careful not to overmix to maintain the light and airy texture.
-
Spoon the entire peppermint filling evenly into the chilled Oreo pie crust. Use a spatula to gently smooth the top surface of the filling.
-
Finally, top the pie with the other container of thawed Cool Whip, spreading it evenly. Then, generously sprinkle the remaining crushed candy canes over the whipped topping for garnish and extra crunch.
-
Place the pie back in the fridge to chill for at least an hour before serving. For a firmer set and easier slicing, chill for 2-3 hours or even overnight. Enjoy your festive and delicious no-bake candy cane pie!
Recipe Video
Nutrition Facts
Pin This Now to Remember It Later
Pin Recipe
