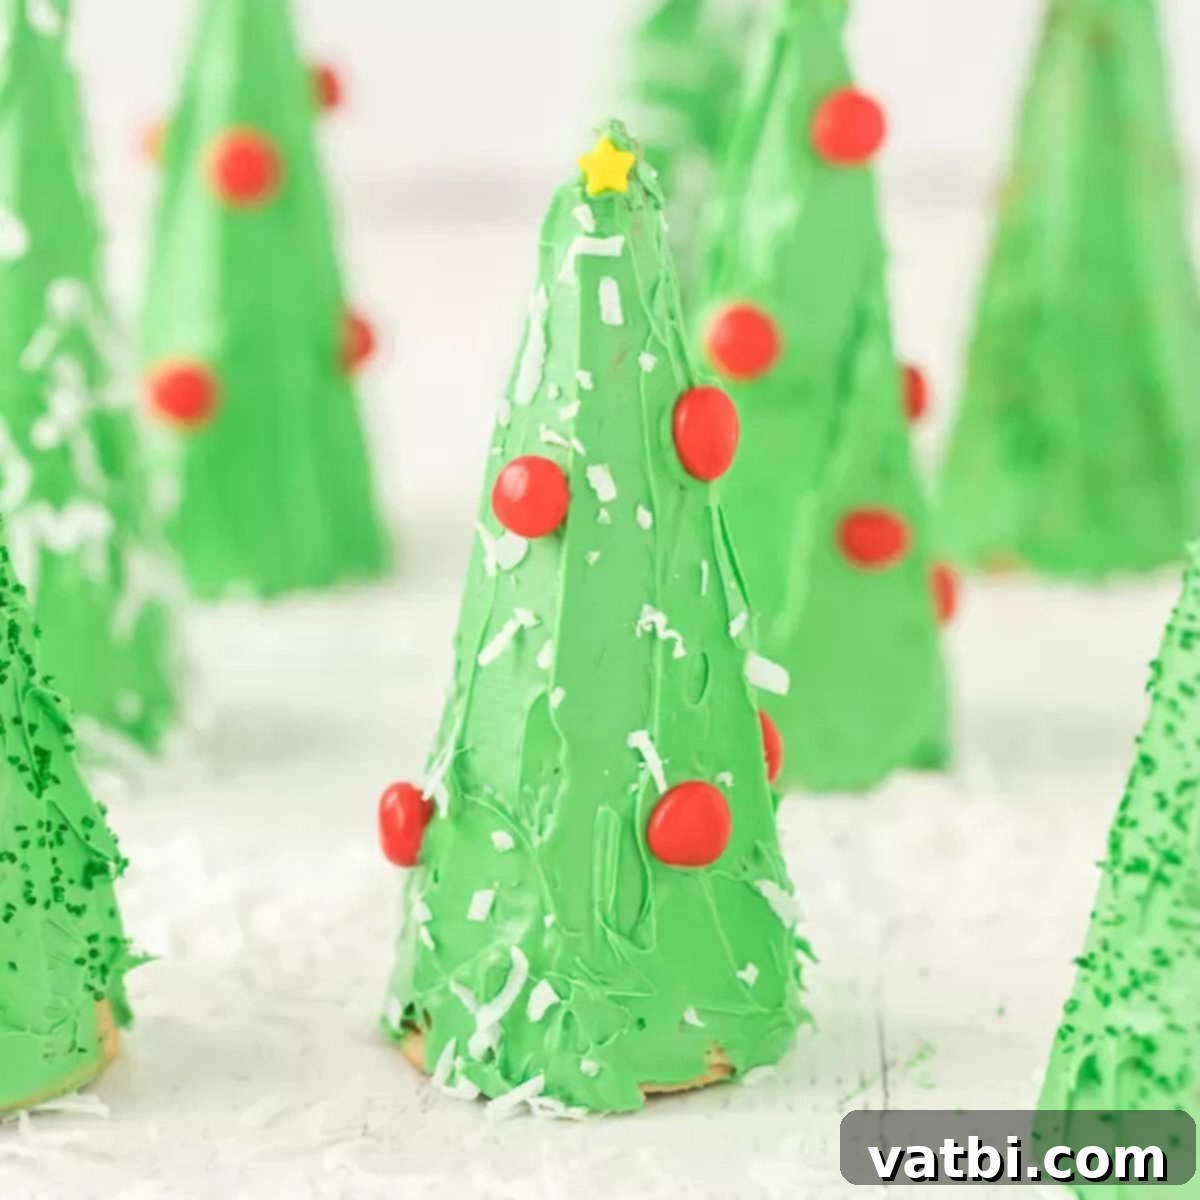
Easy & Festive Ice Cream Cone Christmas Trees: A Delightful Holiday Activity for All Ages!
Ice Cream Cone Christmas Trees are not just a treat; they’re a cherished holiday tradition and a fantastic activity for kids and adults alike. These charming sugar cone Christmas trees are wonderfully tasty, incredibly fun to make, and bring an extra touch of magic to any festive gathering or holiday party. Whether you’re looking for a simple craft or a delicious dessert, these edible trees are guaranteed to be a hit!
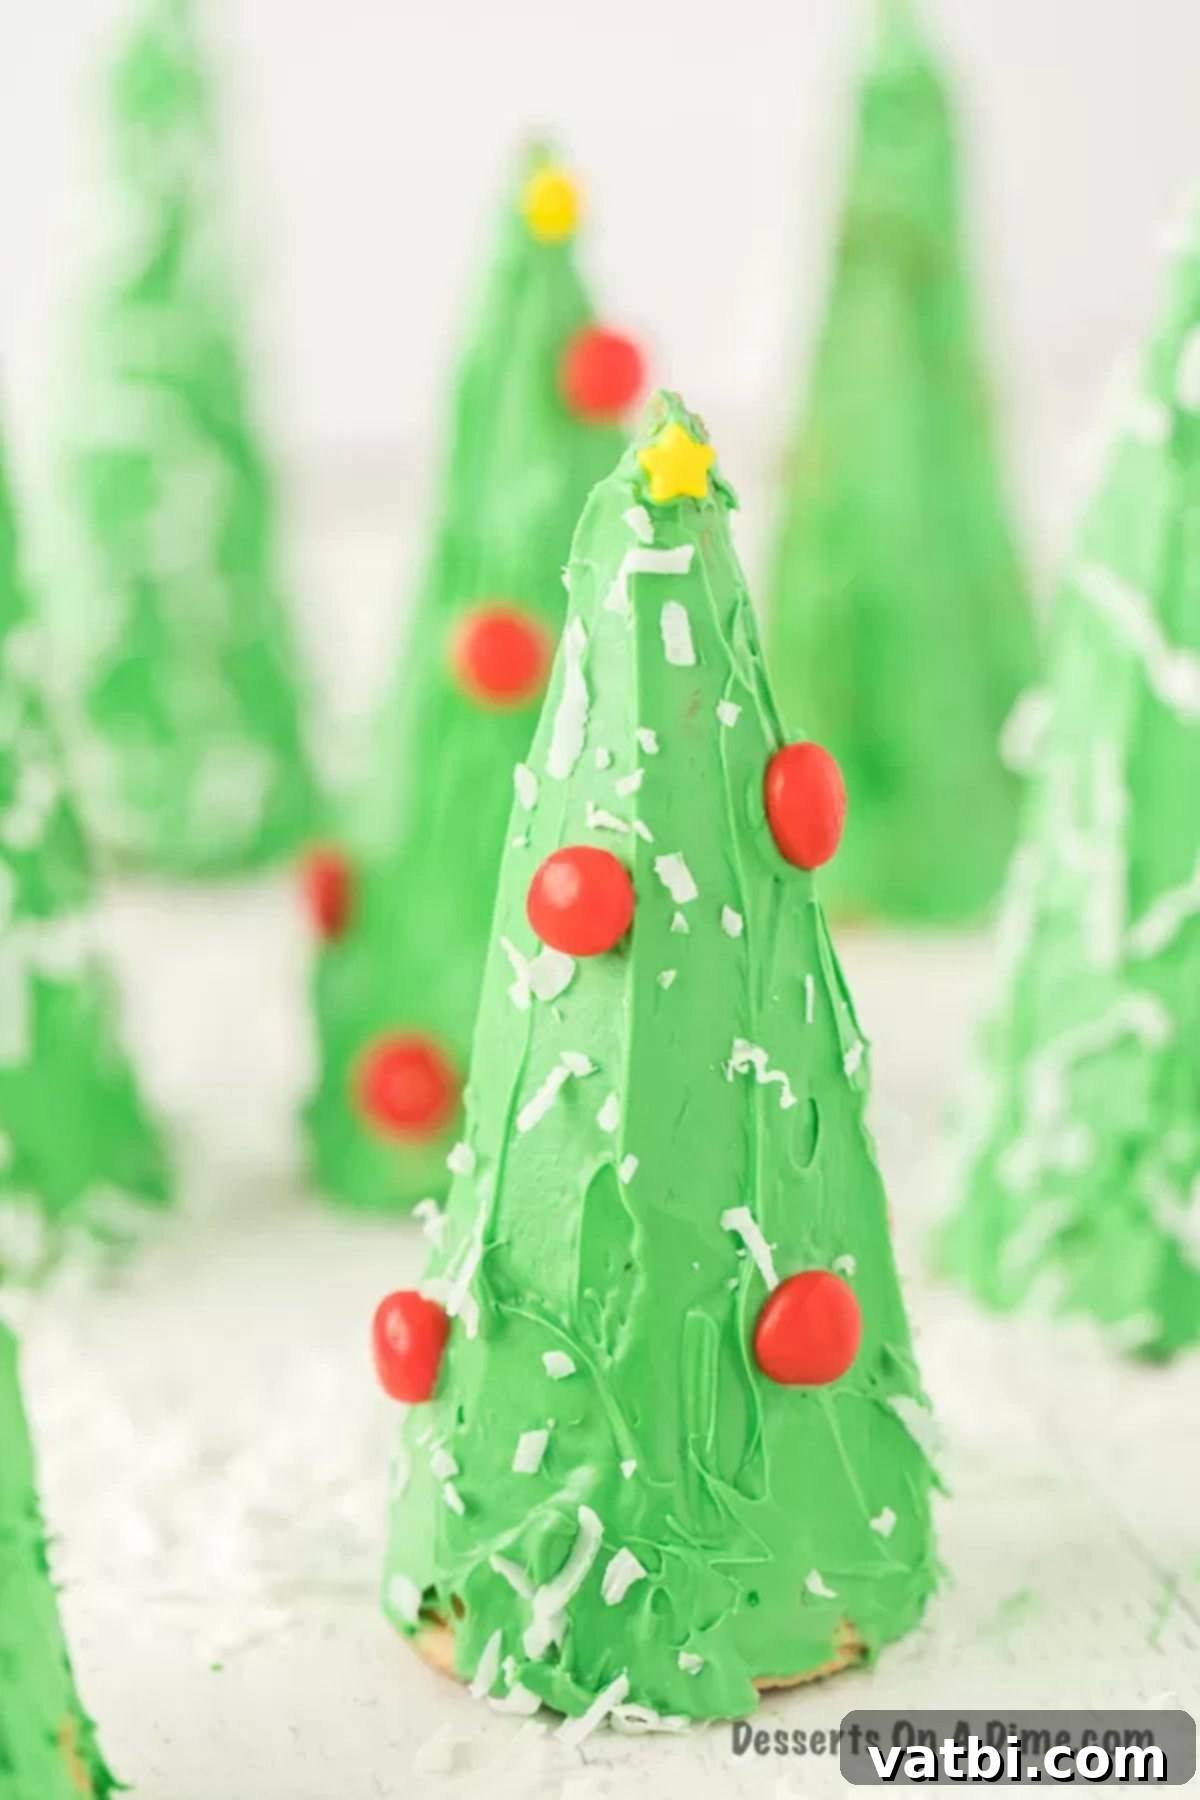
As a busy parent, I truly appreciate how effortlessly these Ice Cream Cone Christmas Trees come together. They require minimal preparation, making them perfect for those hectic holiday seasons. The kids absolutely adore getting involved in every step, from dyeing the frosting green to meticulously placing the tiny candies. It’s become a beloved yearly tradition in our household, creating joyful memories and delicious results.
Beyond these festive cone trees, we also enjoy making other delightful holiday treats with the children. Some of our other favorites include Christmas Tree Brownies, creamy Christmas Ice Cream, and sweet Christmas Tree Rice Krispie Treats. These easy and fun recipes are perfect for engaging the whole family in the spirit of the season.
What’s in this post: Easy Ice Cream Cone Christmas Trees
- What are Ice Cream Cone Christmas Trees?
- Essential Ingredients for Your Cone Trees
- Creative Variations & Decoration Ideas
- Step-by-Step: How to Make Ice Cream Cone Christmas Trees
- Frequently Asked Questions About Edible Christmas Trees
- Pro Tips for Perfect Christmas Cone Trees
- More Festive Christmas Desserts to Try
- Ice Cream Cone Christmas Trees Recipe
What are Ice Cream Cone Christmas Trees?
Ice Cream Cone Christmas Trees are charming, edible holiday decorations that double as delightful desserts. Imagine an ordinary sugar cone transformed into a mini Christmas tree, adorned with vibrant green frosting and an assortment of colorful candies. Each cone is carefully frosted to resemble the classic shape of a fir tree, then decorated with small candies that mimic shimmering ornaments and festive lights. The beauty of this activity lies in its simplicity and the boundless room for creativity, making it a perfect project for any skill level, especially for younger children who love to personalize their treats.
These adorable treats utilize pointed sugar cones as their base, providing the perfect conical shape for a tree. The magic truly begins when you cover the cone in green frosting, creating a lush canvas for your decorations. While the frosting is still soft, you can add an array of festive toppings. Traditional choices include various candy pieces, small sprinkles, and often, shredded coconut to give the appearance of freshly fallen snow blanketing the branches. This snowy effect adds a wonderful winter wonderland touch to each edible tree.
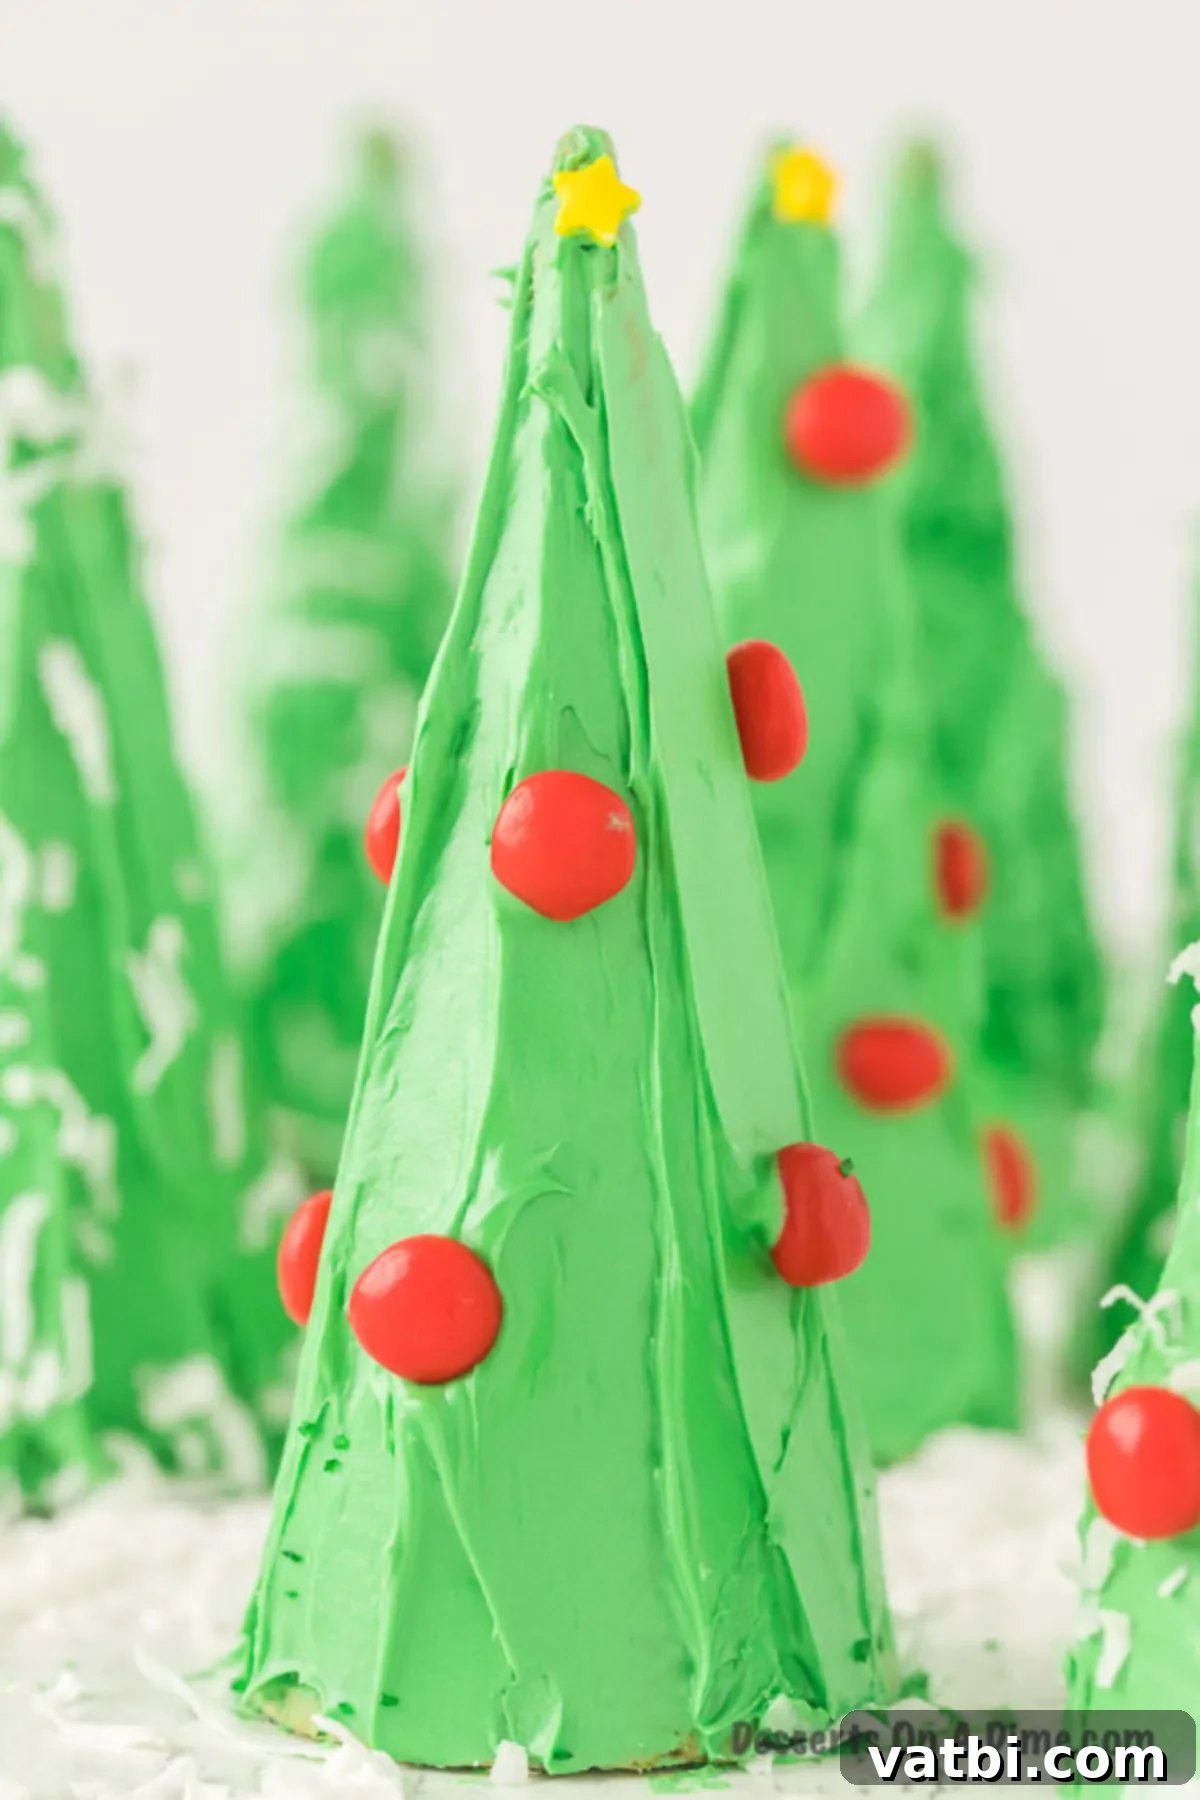
The fun truly comes alive in the decorating phase. You can select any assortment of small candies to serve as “ornaments” for your miniature trees. This is an excellent opportunity to get creative and even use up leftover Halloween candy or small decorative sprinkles from your pantry. Imagine tiny M&M’s, Skittles, or Reese’s Pieces twinkling on your green trees. For a truly seasonal touch, crushed candy canes can add a refreshing minty flavor and a beautiful red-and-white sparkle. The customization possibilities are endless, allowing each participant to create a unique and special Christmas tree dessert that reflects their personal style and holiday spirit. These festive cones are not just desserts; they are edible works of Christmas art!
Essential Ingredients for Your Cone Trees
Gathering your ingredients for these delightful Ice Cream Cone Christmas Trees is quick and easy, requiring only a few readily available items. Most of these can be found at your local grocery store, making this a convenient last-minute holiday activity. Here’s what you’ll need to create these festive treats:
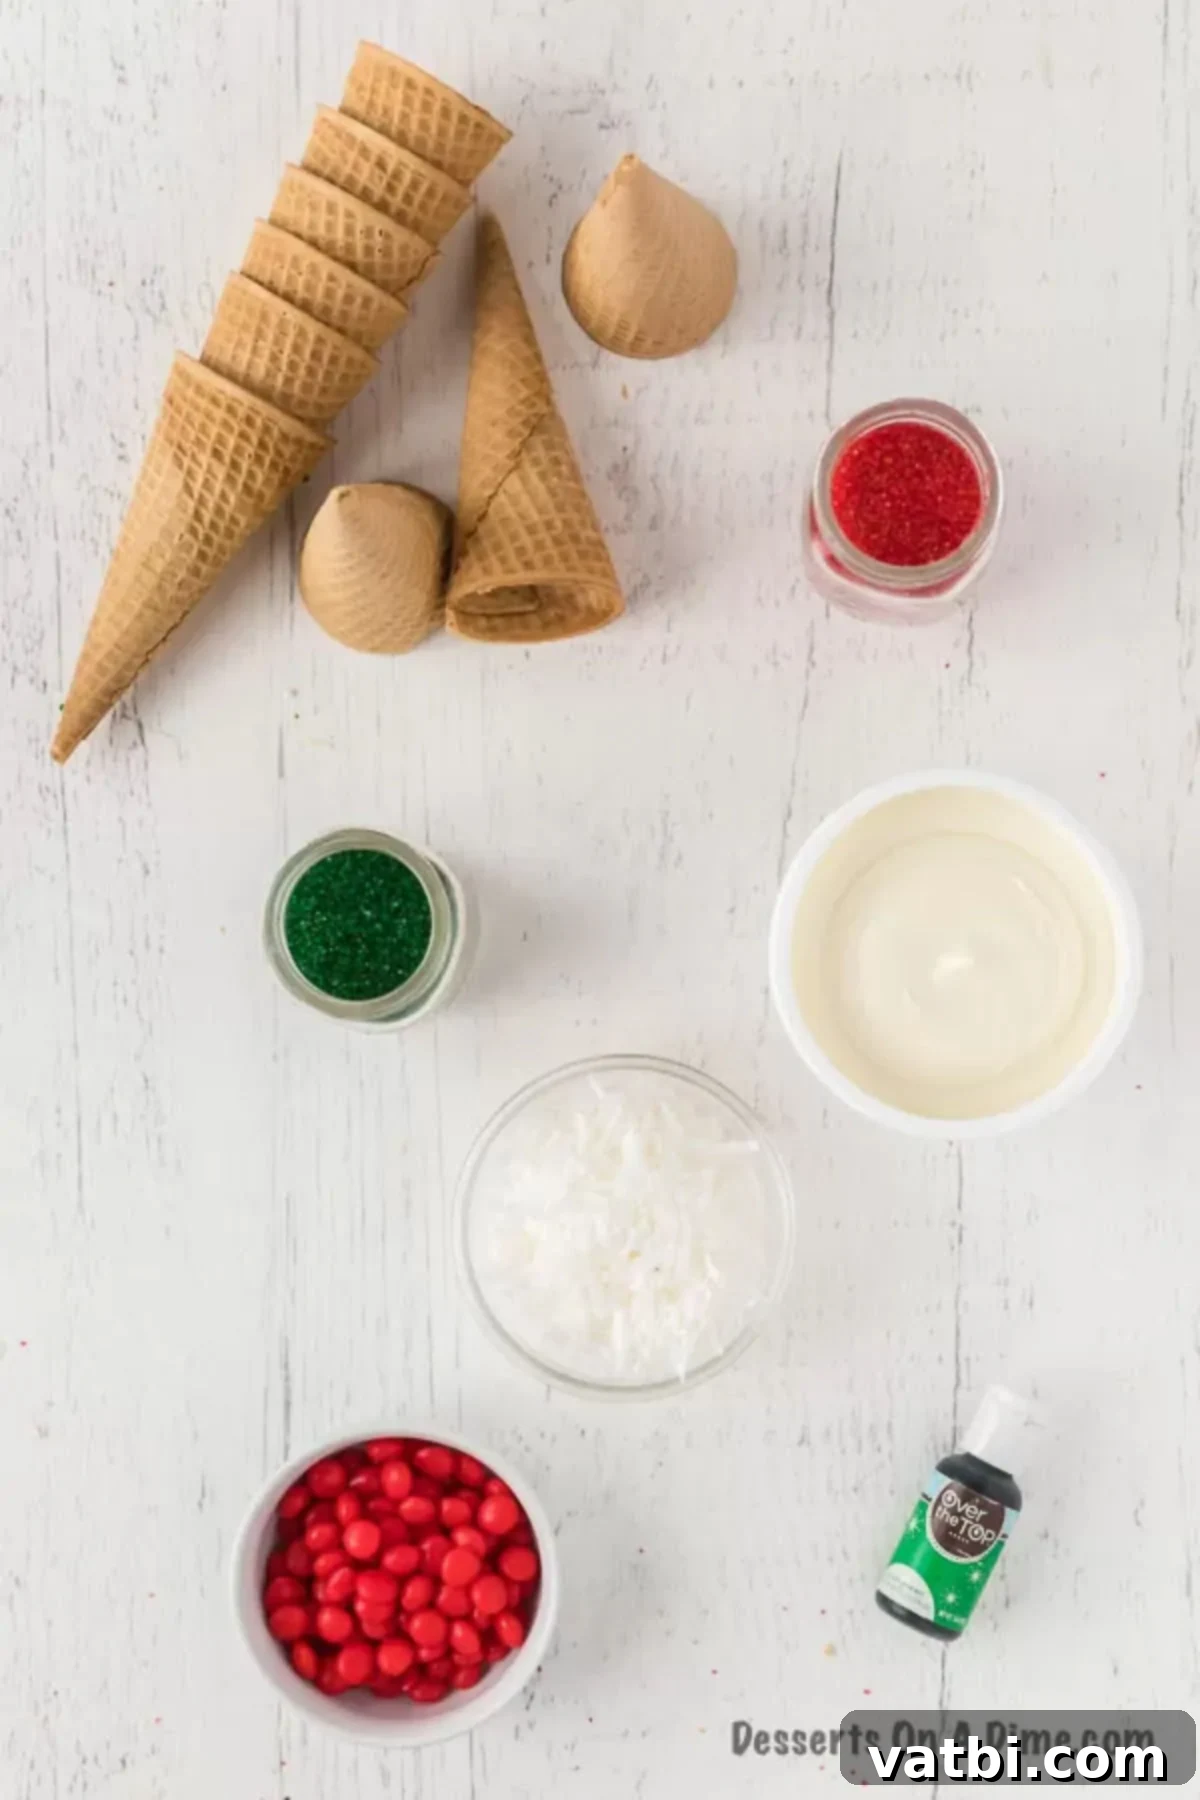
- Sugar Ice Cream Cones: Opt for the pointy variety, as their conical shape is perfect for creating miniature Christmas trees. Flat-bottomed cones can also work but won’t give the same classic tree silhouette.
- Tub of White Frosting: A store-bought tub of vanilla or white frosting makes this recipe incredibly simple. It serves as the base for your green “tree” color and the adhesive for all your decorations.
- Green Gel Food Coloring: Gel food coloring provides a more vibrant and intense color without thinning out the frosting’s consistency, which is crucial for good coverage.
- Assorted Candies: These are your “ornaments”! Think small, colorful candies like M&M’s, mini chocolate chips, sprinkles, Skittles, mini Reese’s Pieces, or even crushed candy canes for a festive touch.
- Shredded Coconut: This magical ingredient instantly transforms into sparkling “snow,” giving your trees a beautiful winter wonderland appearance.
You’ll find the complete, detailed ingredient list, including quantities, further down in the recipe card section for this wonderful Christmas treat. Make sure to have everything ready before you start to ensure a smooth and enjoyable decorating process!
Creative Variations & Decoration Ideas:
One of the best aspects of making Ice Cream Cone Christmas Trees is the incredible flexibility and endless possibilities for customization. You can easily tailor these treats to match your holiday theme, dietary needs, or simply let creativity lead the way. Here are some fantastic variations to inspire your next batch of edible trees:
- Powdered Sugar Snow: For a delicate, freshly fallen snow effect, a light dusting of confectioners’ sugar (also known as powdered sugar) over the finished trees is a perfect alternative to shredded coconut. It melts slightly, creating a beautiful glazed look that glistens like frost.
- Store-Bought or Homemade Icing: While a tub of store-bought white frosting offers ultimate convenience, don’t hesitate to use homemade buttercream or cream cheese frosting if you prefer. Both options work wonderfully. If you’re aiming for precision or more intricate designs, using pastry bags or piping bags with various tips can elevate your trees. However, for a fun, kid-friendly project, simply spreading the frosting with a butter knife or a plastic knife is perfectly effective and less messy for little hands.
- Twizzlers Garland: Get truly creative by adding edible “garland” to your trees. Thin candy ropes, such as pull-apart Twizzlers or licorice laces, can be draped around the cones to mimic festive garlands. Choose red, green, or white ropes to complement your tree’s decor.
- Gum Drop Presents: Place colorful gum drops or small square candies around the base of each tree. These can look like tiny wrapped presents, adding an extra layer of charm and making your edible trees appear as if they’re surrounded by gifts under the tree.
- Star Sprinkles Topper: No Christmas tree is complete without a star on top! Finish off each of your cone trees with a yellow or gold star-shaped sprinkle. You can also use a small piece of star-shaped candy or even a tiny piece of a candy star, carefully placed at the peak of the cone to complete the classic Christmas tree look.
- Varying Frosting Colors: Don’t feel limited to green! Experiment with white frosting for “snowy” trees, blue for a frosty winter theme, or even red for a bold, festive statement. You can also use different shades of green for a more dynamic “forest” effect.
- Edible Glitter and Sparkles: For an extra magical touch, sprinkle edible glitter (found in baking supply stores) over the frosted trees before the icing sets. This adds a beautiful shimmer that catches the light and makes your trees truly sparkle.
- Mini Chocolate Chips and Sprinkles: Beyond the larger candies, mini chocolate chips (milk, dark, or white) make excellent tiny ornaments. Assorted colorful sprinkles – jimmies, nonpareils, or holiday mixes – can add texture and a burst of color when generously applied.
With these variations, you can create a diverse and stunning forest of edible Christmas trees, making your holiday celebration even more memorable and delicious!
Step-by-Step: How to Make Ice Cream Cone Christmas Trees:
Making these charming Ice Cream Cone Christmas Trees is an incredibly simple process, perfect for little helpers and guaranteed to bring smiles to everyone’s faces. Follow these easy steps to create your own festive edible forest:
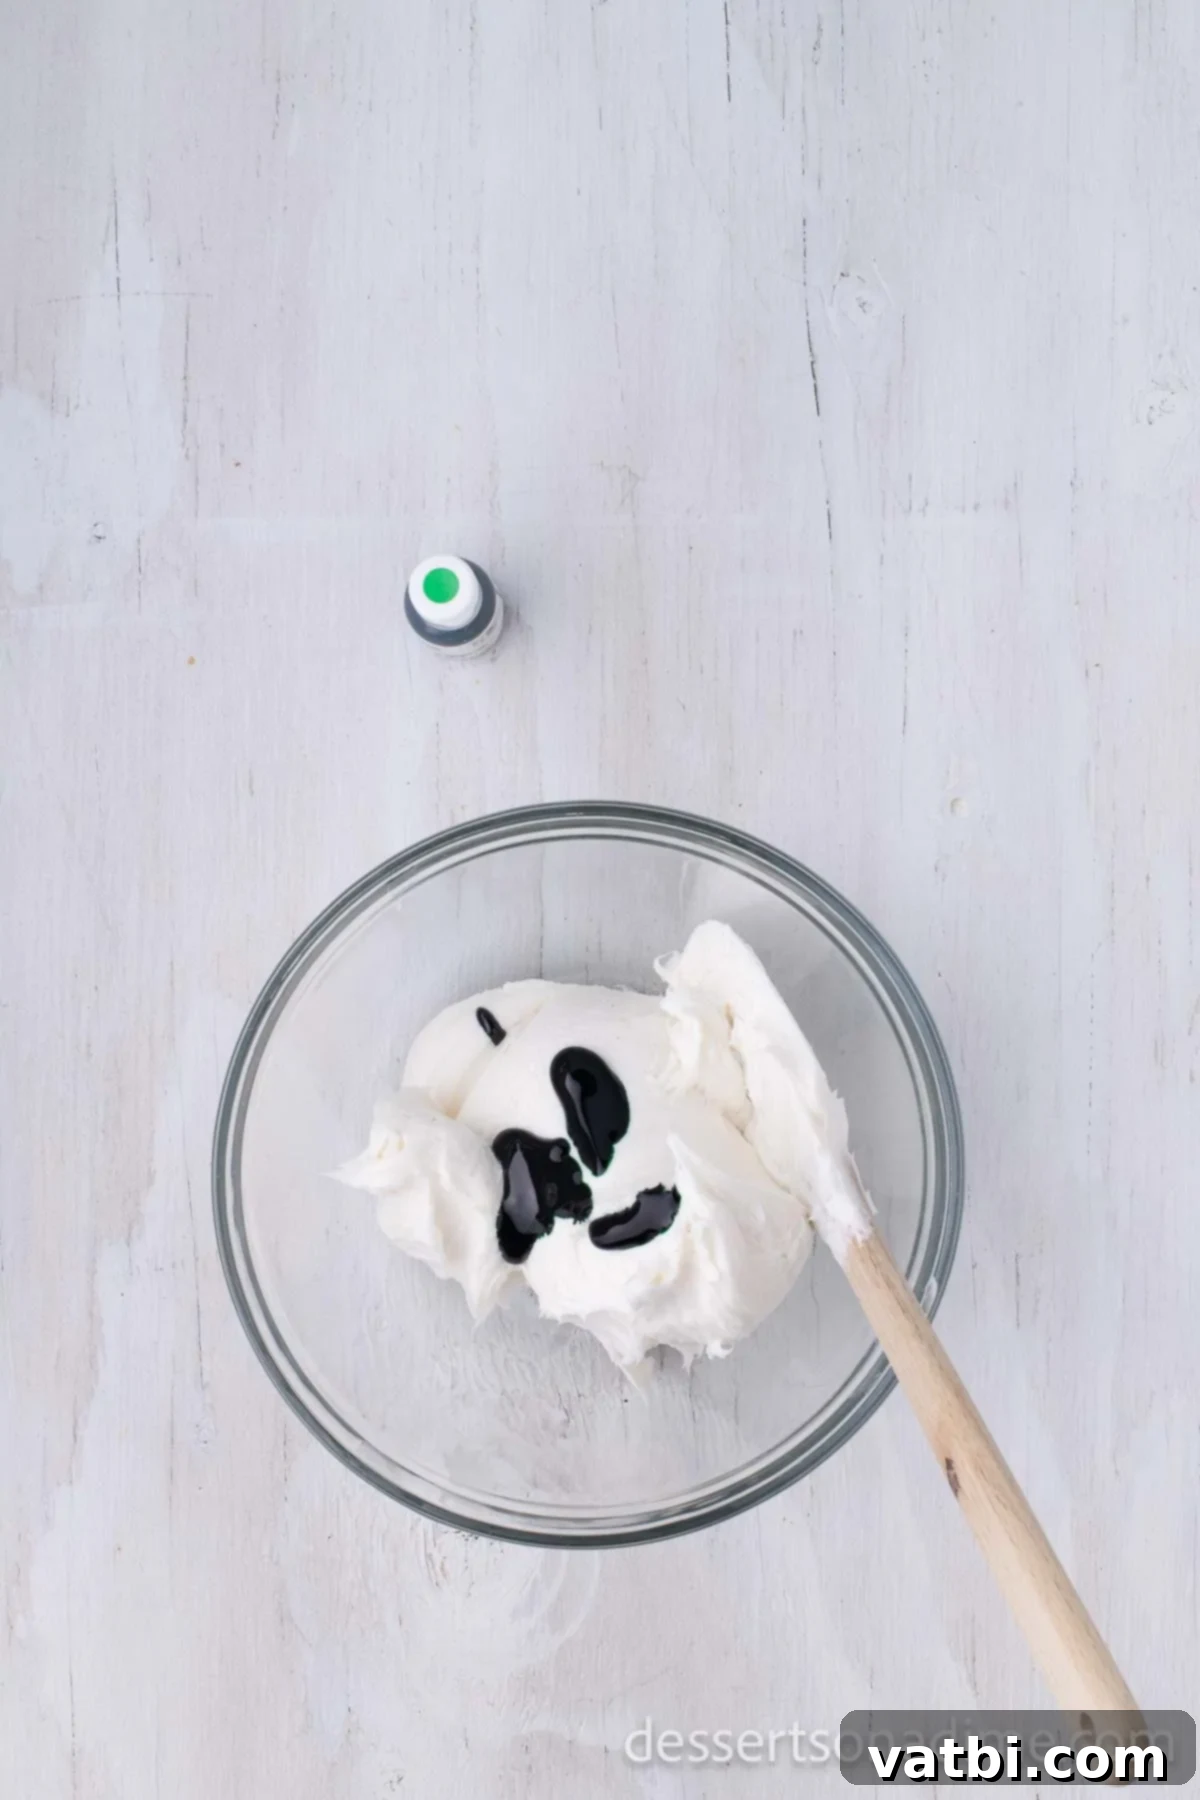
Step 1. Dye the white frosting green. Open your tub of white frosting and transfer it to a mixing bowl. Add several drops of green gel food coloring. Stir well until the frosting reaches your desired shade of vibrant Christmas green. Start with a few drops and add more if you want a deeper color. Gel food coloring works best for intense hues without altering frosting consistency.
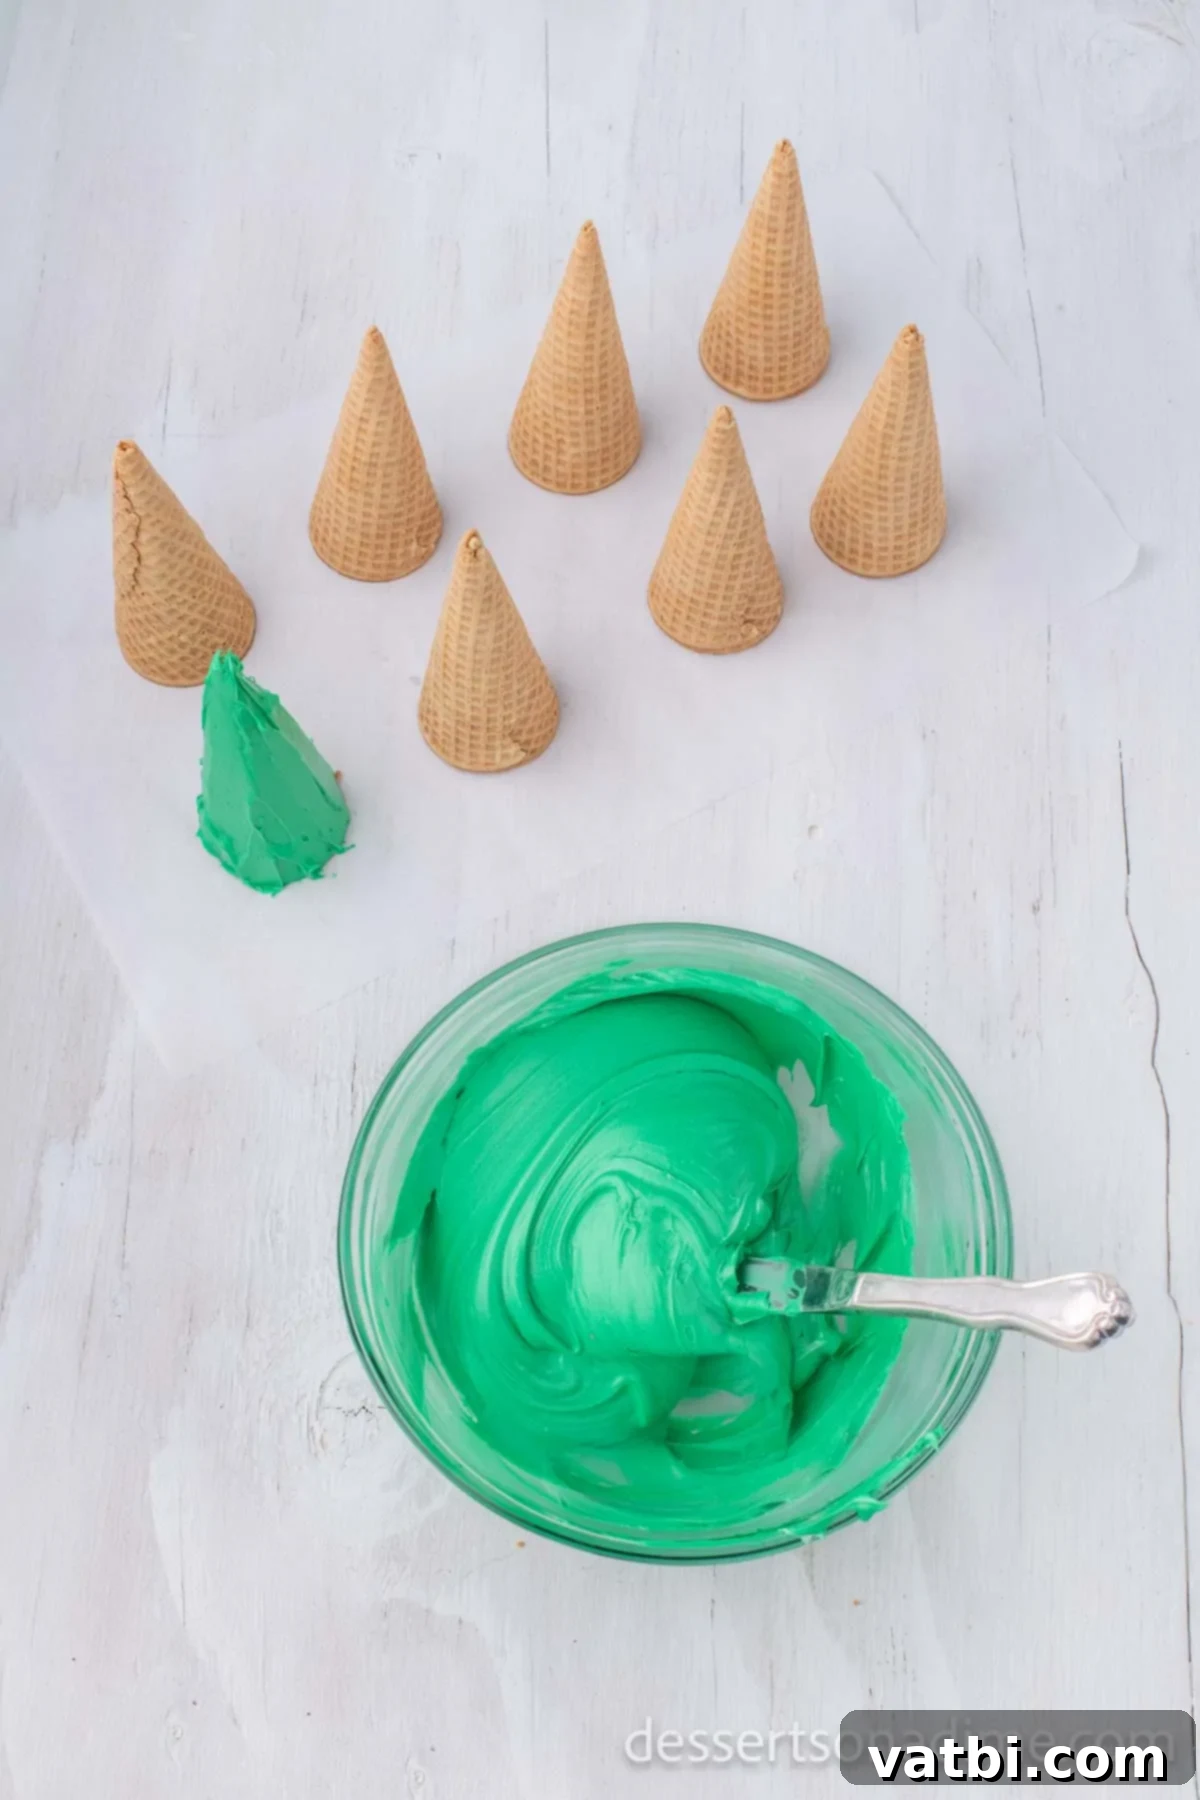
Step 2. Prepare your workspace. Lay out sheets of wax paper or parchment paper on a flat surface. This will make cleanup much easier. Then, carefully place the sugar ice cream cones upside down on the prepared wax paper. Arranging them this way provides a stable base for frosting and decorating, mimicking the upright stance of a Christmas tree.
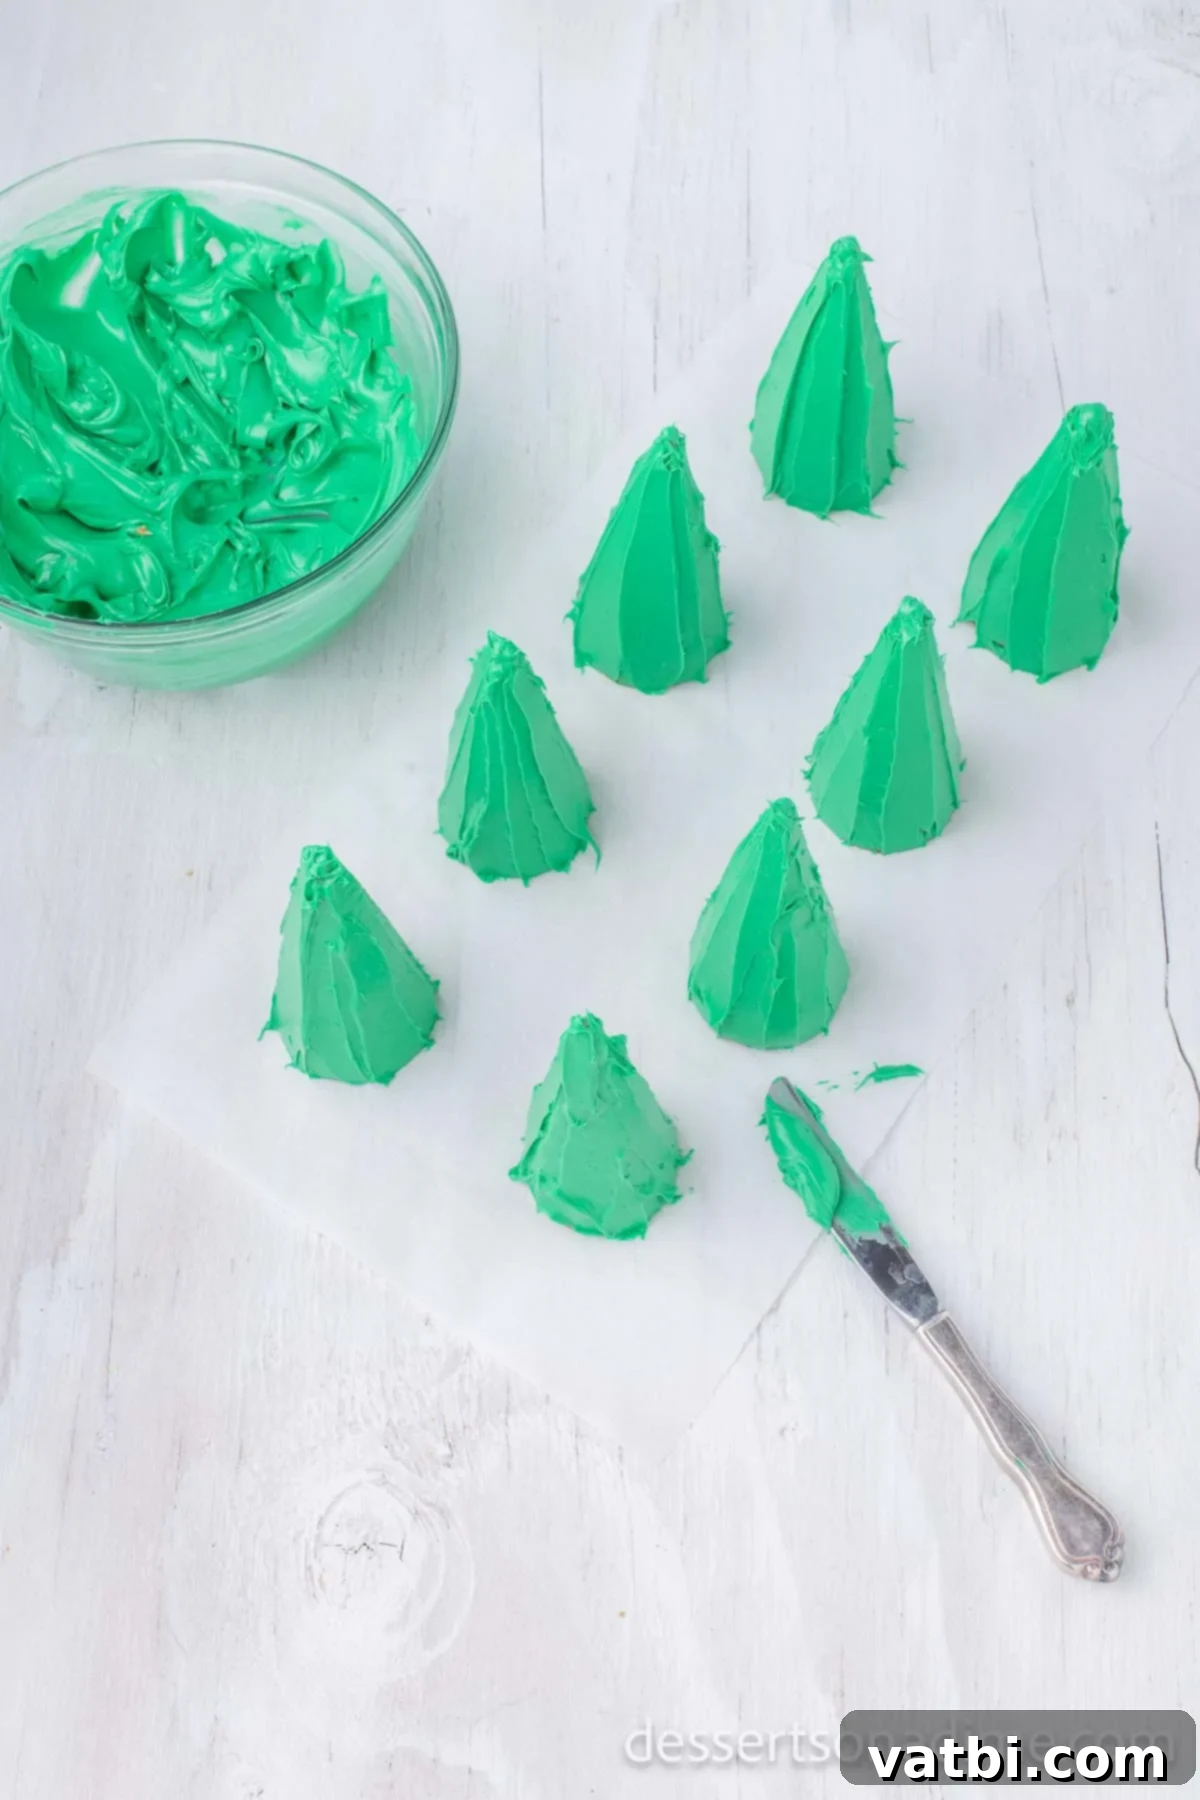
Step 3. Frost the cones. Using a butter knife or a plastic knife (perfect for kids!), begin to spread the green frosting evenly onto the outside of each ice cream cone. Start from the bottom edge and work your way up to the point, ensuring complete coverage. Aim for a smooth, even layer, thick enough to hold decorations but not so thick that it becomes too heavy and slides off.
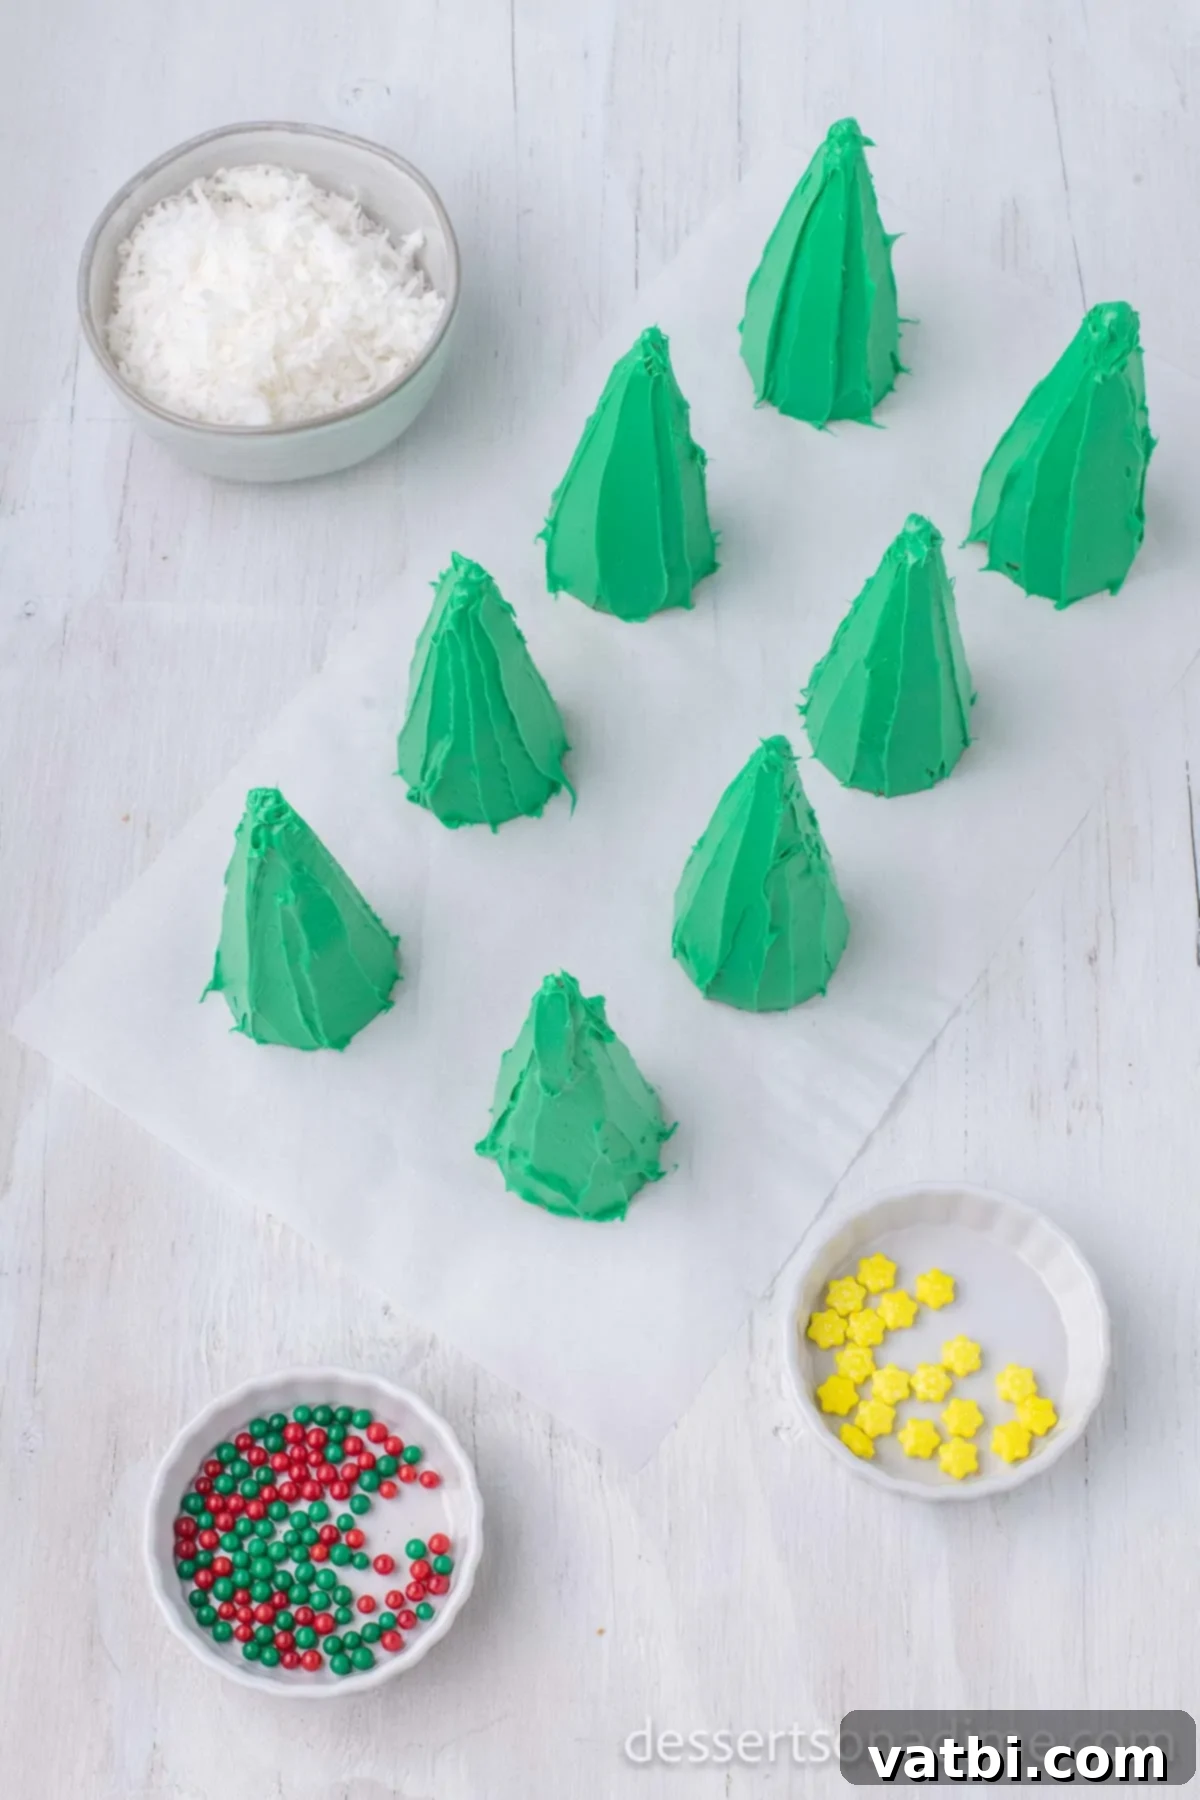
Step 4. Ensure full coverage. Continue to spread the frosting until the entire surface of the cone is covered in a beautiful green hue. Make sure there are no bare spots. The goal is to create a seamless “tree” appearance. Work quickly, as frosting can start to set, making it harder for candies to stick.
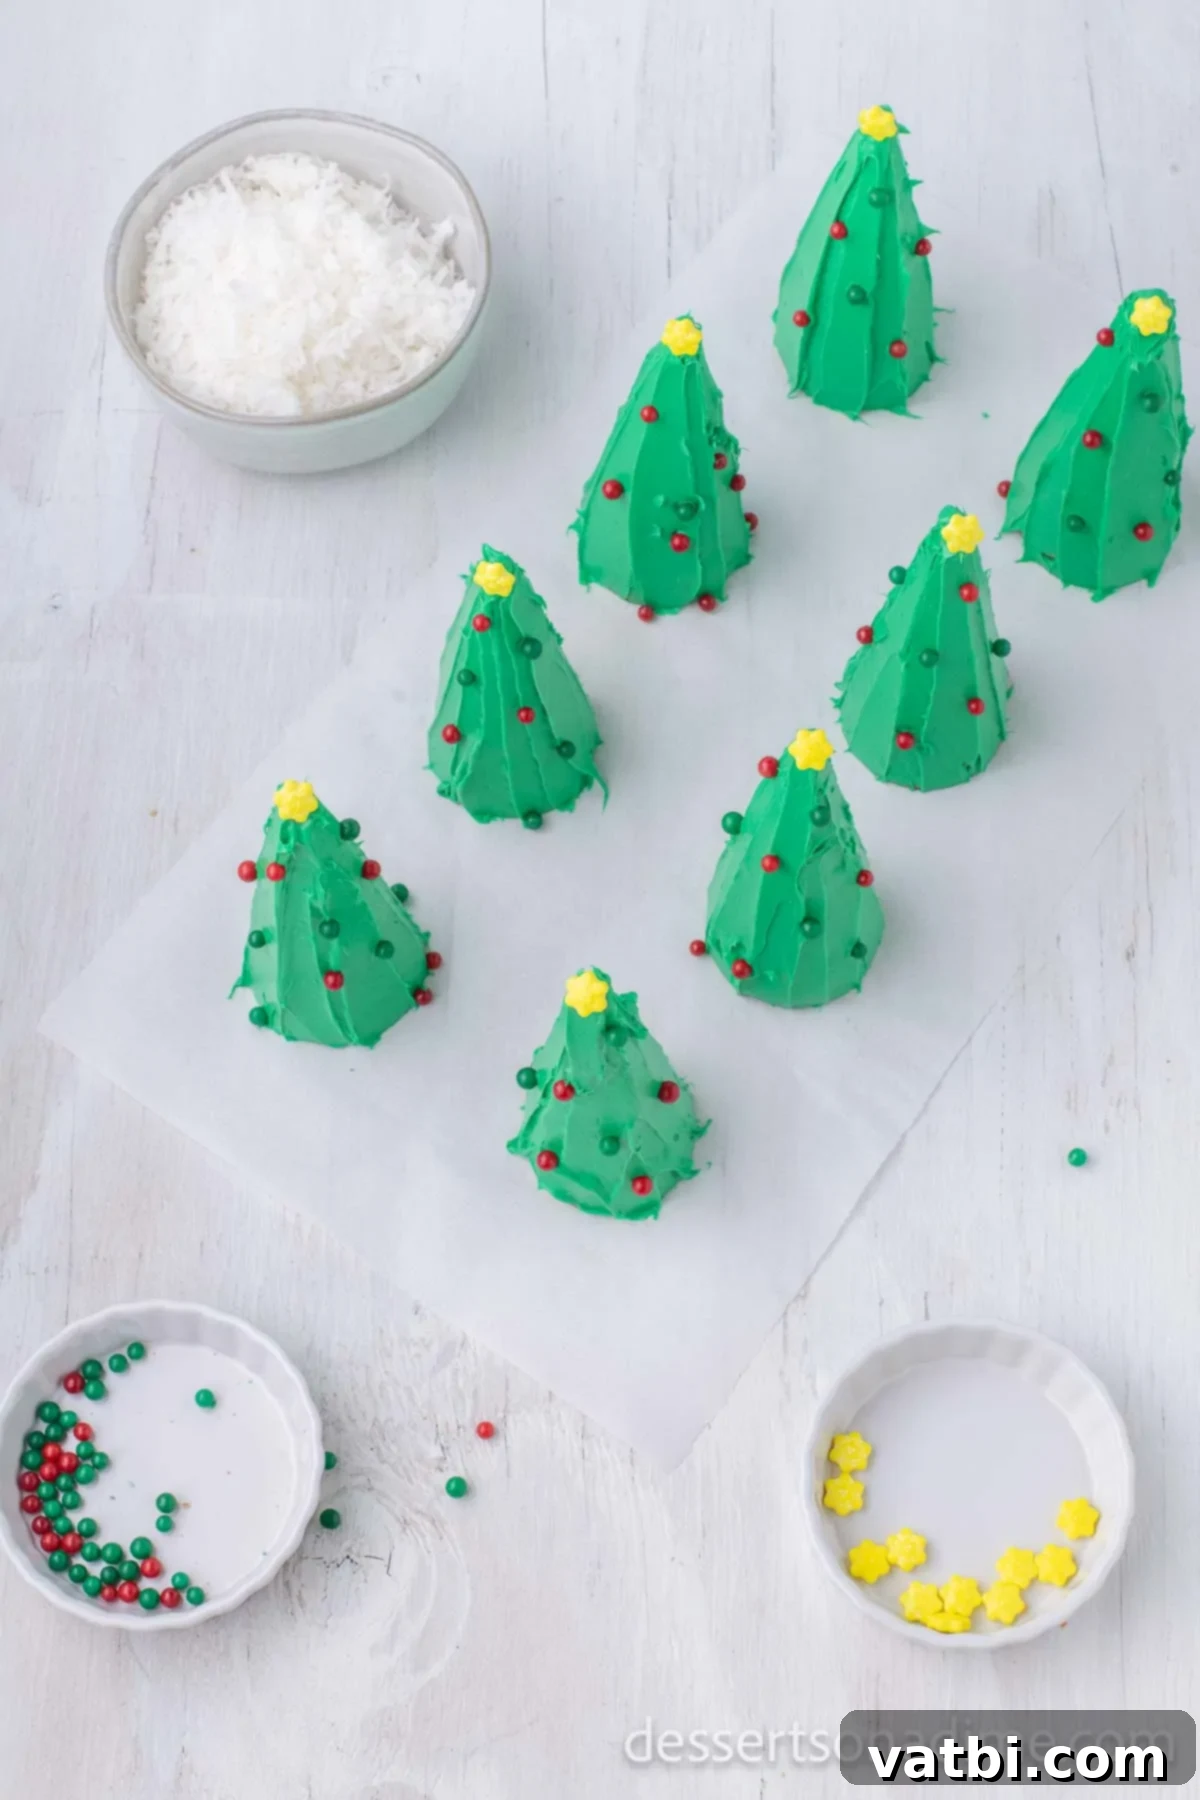
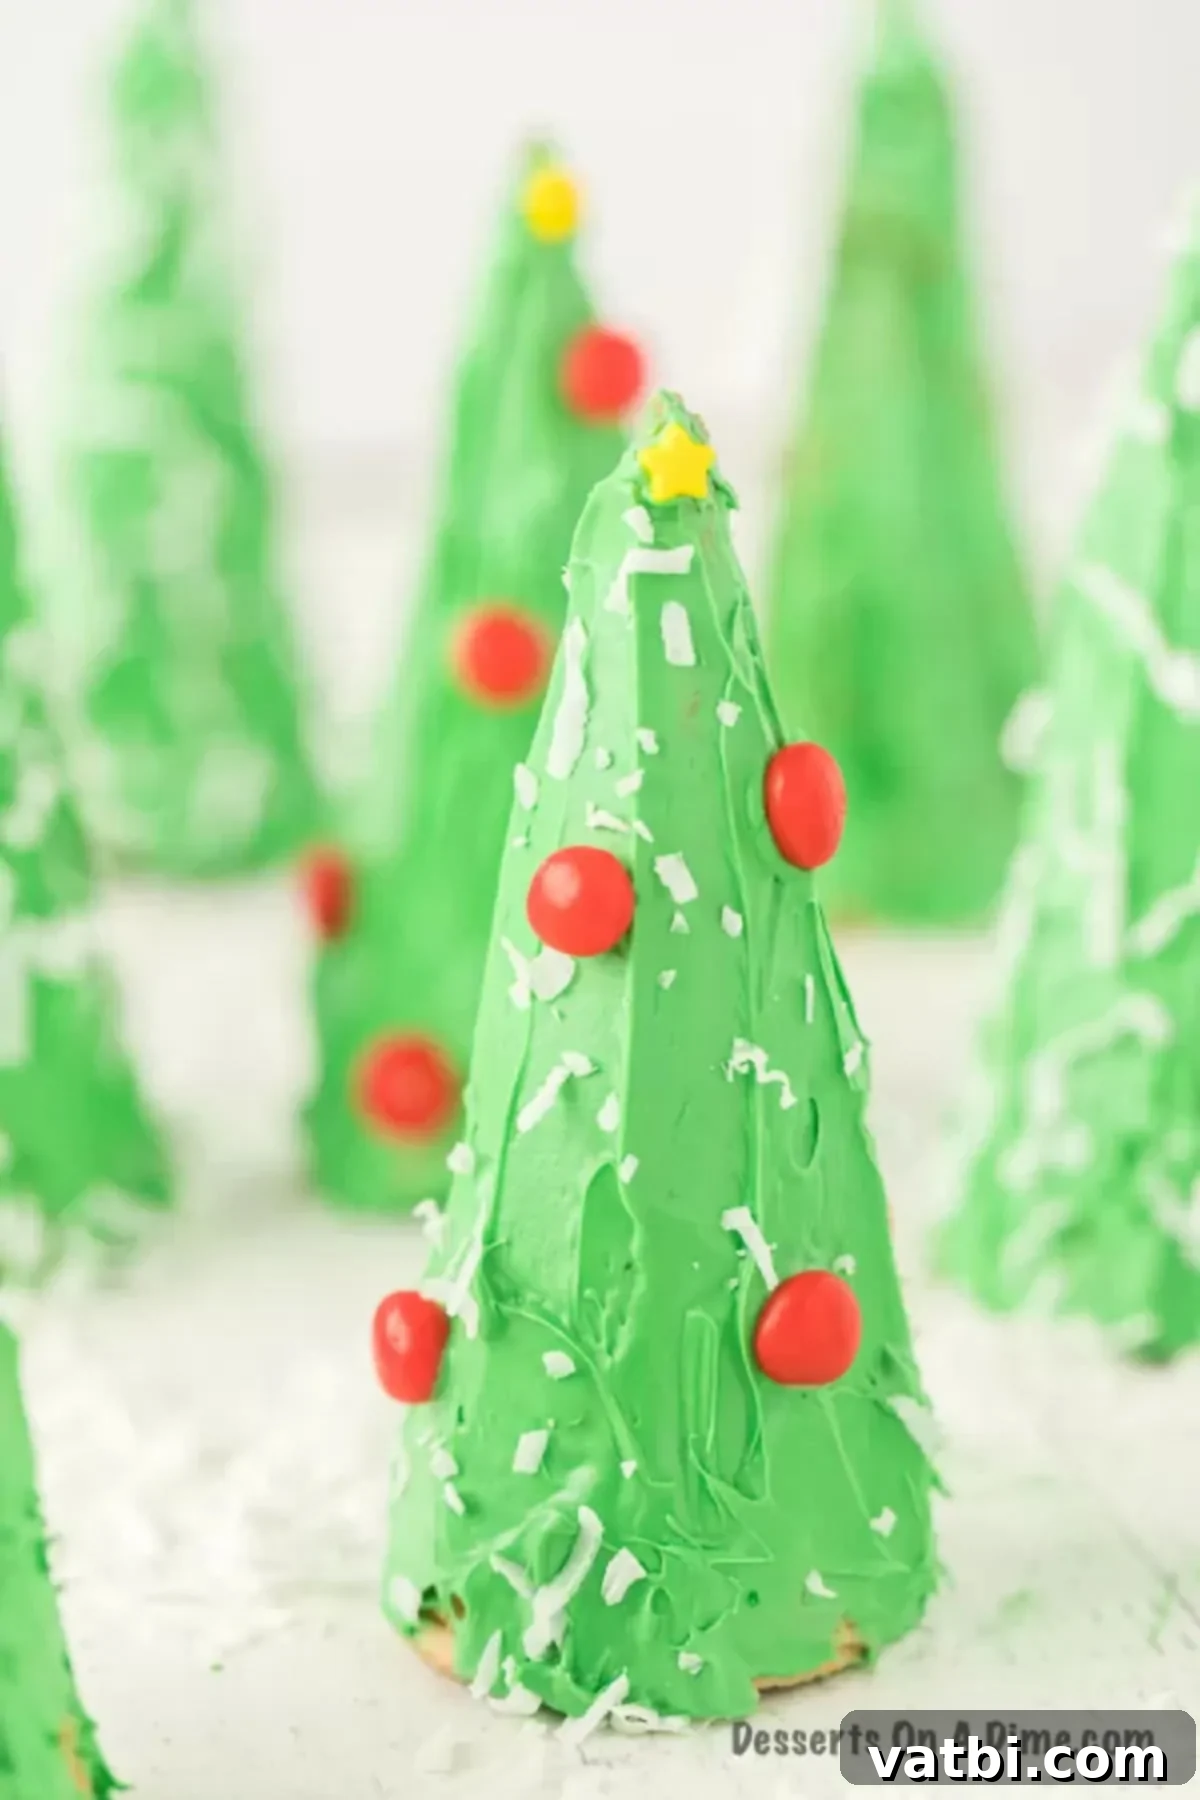
Step 5. Decorate your trees! This is the most exciting part! While the frosting is still soft and tacky, begin to decorate the ice cream cones with your chosen assortment of candies. Gently press the candies onto the frosting to create the look of colorful ornaments, lights, and garlands. Encourage creativity – there’s no right or wrong way to decorate your edible Christmas trees!
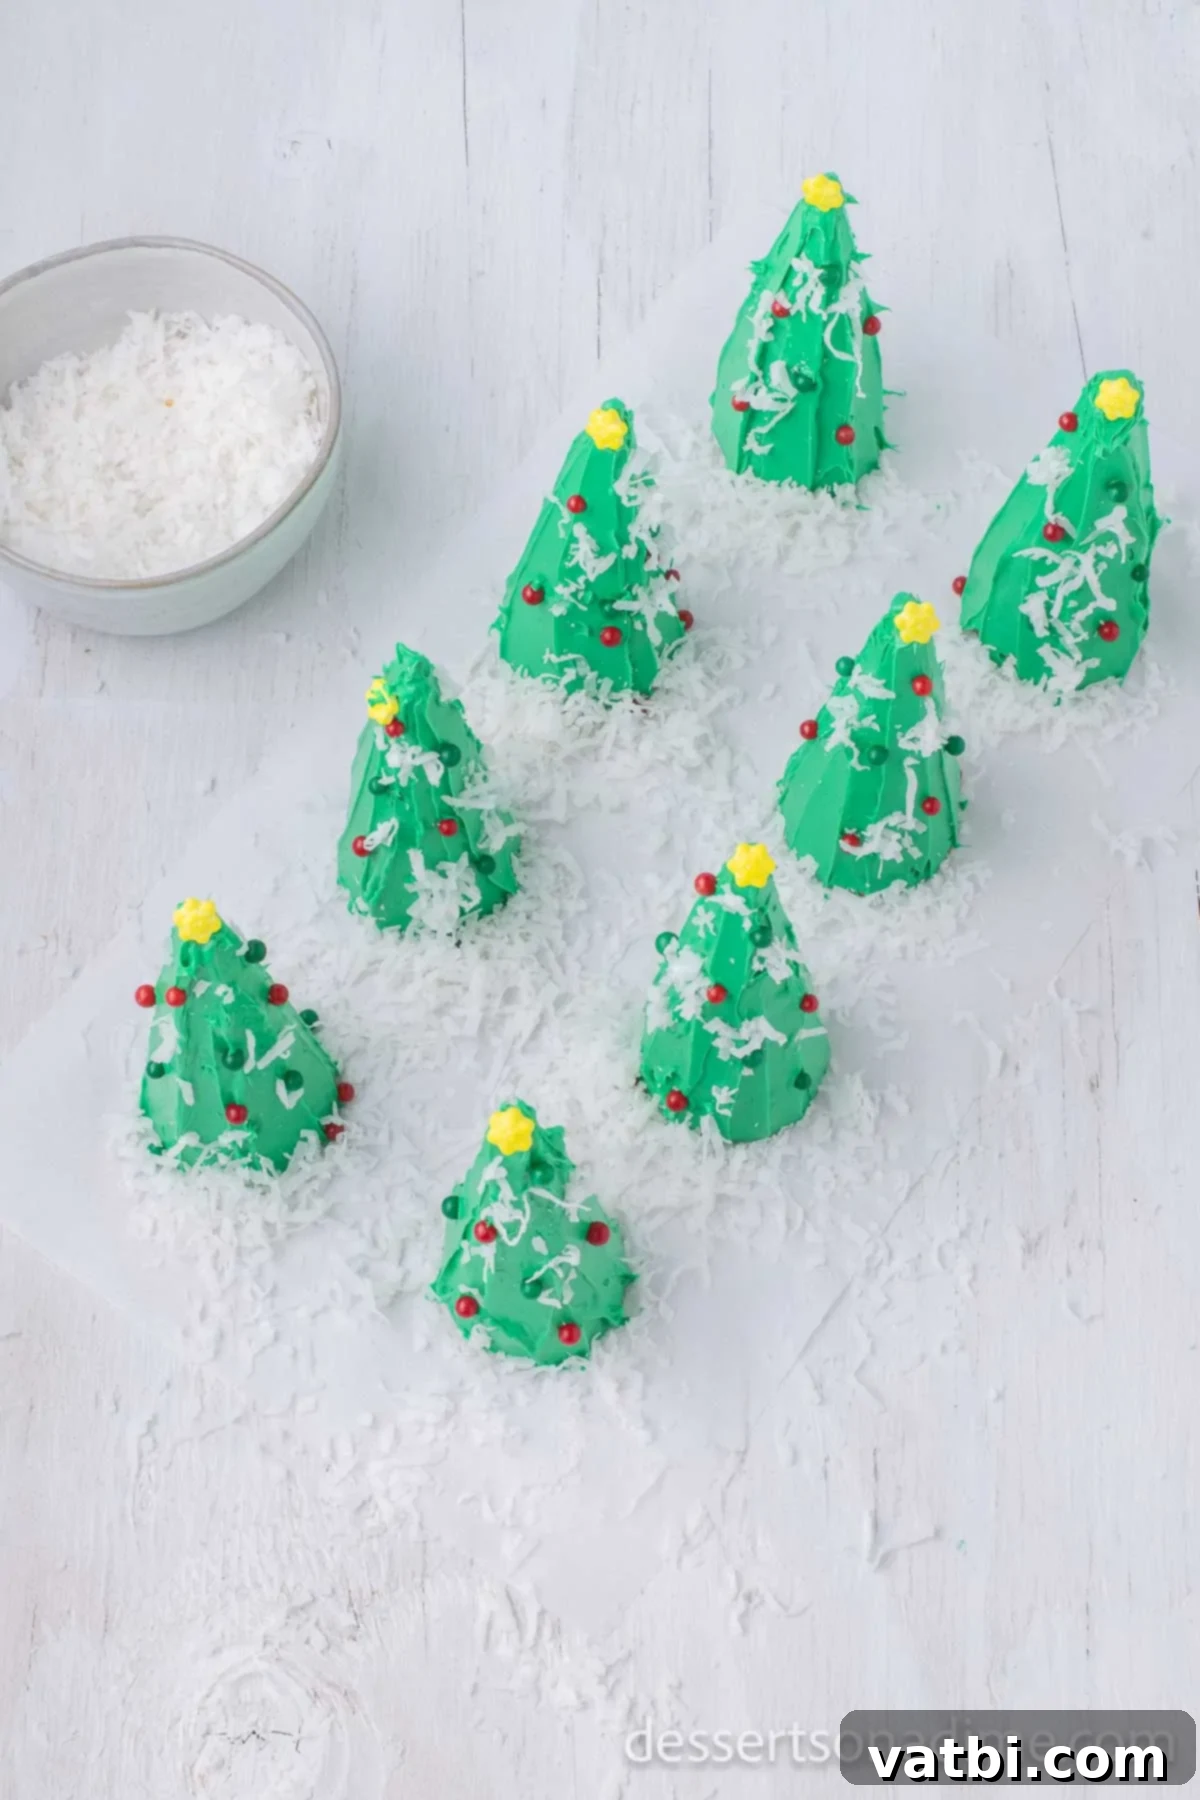
Step 6. Add the finishing touches. To give your trees a magical, snowy appearance, sprinkle a generous amount of shredded coconut over the frosted and decorated cones. You can also add a star sprinkle to the very top. Once decorated, your Ice Cream Cone Christmas Trees are ready to enjoy! These festive creations can serve as beautiful edible decorations for your holiday table or simply as a delightful treat to devour.
Frequently Asked Questions About Edible Christmas Trees
Absolutely, yes! These Ice Cream Cone Christmas Trees are entirely edible, from the crispy sugar cone base to the vibrant green frosting and all the colorful candies. Kids especially will have an absolute blast eating their creations, enjoying every bite of the sweet icing and crunchy candy ornaments. It’s a dessert and an activity rolled into one!
If stored correctly, your Ice Cream Cone Christmas Trees can last for several days. To maintain their freshness and prevent the cones from becoming stale or the frosting from drying out, make sure to cover them properly. Place them inside an airtight container at room temperature. When stored this way, they will remain delicious and visually appealing for up to 5 days. For best flavor and texture, however, it’s always recommended to enjoy them within 1-2 days of making them.
Yes, you can definitely prepare these ahead of time, which is a huge convenience for holiday entertaining! They hold up well for a few days when stored in an airtight container at room temperature. If you plan to serve them at a party, making them the day before will ensure they are fresh and the frosting is perfectly set for display and enjoyment. Just be sure to handle them gently when transporting.
No green food coloring? No problem! You can still create beautiful and festive ice cream cone trees. Consider making “snowy” white trees by using plain white frosting and decorating with silver sprinkles and white chocolate chips. You could also tint the frosting light blue for a “winter wonderland” theme, or even red for a bold, festive look. The key is to be creative with what you have!
Pro Tips for Perfect Christmas Cone Trees:
To ensure your Ice Cream Cone Christmas Trees turn out perfectly and provide maximum enjoyment, keep these expert tips in mind:
- Decorate Before Icing Sets: Timing is crucial! Make sure to decorate the trees immediately after applying the frosting, while the icing is still wet and sticky. This allows the candies and sprinkles to adhere securely to the cone, preventing them from falling off once the frosting begins to harden.
- Proper Storage for Freshness: If you plan to eat these delicious treats over several days or want to prepare them in advance, proper storage is key. Store them inside an airtight container at room temperature. Alternatively, you can gently wrap each tree in plastic wrap or aluminum foil to keep them fresh and prevent them from drying out.
- Choose Appropriate Candy Sizes: When selecting your candy “ornaments,” avoid using very large or heavy pieces of candy. If the decorations are too heavy, they can weigh down the frosting, causing it to slide off the cone or the candies themselves to fall. Opt for lighter, smaller candies like mini M&M’s, sprinkles, small gumdrops, or crushed peppermints for the best results.
- Achieve Even Frosting Coverage: Aim to cover the cone entirely with frosting so that no part of the plain cone is visible, creating a lush, green tree effect. However, be mindful not to use an excessive amount of frosting. Too much icing can become unstable, especially as you add candy, leading to sliding frosting and a messy situation. A moderately thick, even layer is ideal for both aesthetics and stability.
- Stabilize Your Cones: For easier frosting and decorating, you can press the bottom (open end) of each cone slightly into a piece of bread, a firm marshmallow, or even a small dollop of frosting on your serving platter. This creates a stable base and prevents the cones from tipping over while you work.
- Prepare Your Decorating Station: Before you even start frosting, set out all your candies and sprinkles in small bowls. This makes it easy for everyone, especially kids, to grab their chosen decorations quickly, ensuring they can apply them while the frosting is still pliable.
More Festive Christmas Desserts to Try
If you’re looking to expand your holiday baking repertoire beyond these adorable Ice Cream Cone Christmas Trees, here are some other fantastic Christmas dessert ideas that are sure to bring joy to your festive celebrations:
- Christmas Tree Cake Pops
- Easy Christmas Rice Krispie Treats
- Homemade Christmas Brownies
- Christmas Light Cookies
- Grinch Puppy Chow
Now it’s your turn to embrace the holiday spirit and create your own batch of fun Ice Cream Cone Christmas Trees! They’re a simple, delightful, and memorable way to add some cheer to your celebrations. Please share your experiences and leave a comment below once you’ve tried this festive activity – we’d love to hear about your creations!
Pin
Ice Cream Cone Christmas Trees
Ingredients
- 8 Sugar Ice Cream Cones the pointy ones for a classic tree shape
- 16 oz. Tub of White Frosting vanilla or cream cheese flavor recommended
- Green Gel Food Coloring for vibrant green frosting
- Assorted Candies small M&M’s, sprinkles, crushed candy canes, mini chocolate chips
- Shredded Coconut optional, for a snowy effect
Instructions
-
In a bowl, dye the white frosting green using the green gel food coloring until you achieve your desired festive shade.
-
Place the sugar ice cream cones upside down on a clean surface covered with wax paper or paper plates for easy cleanup.
-
Carefully spread the green frosting onto the entire outside of each ice cream cone using a butter knife or a plastic knife, ensuring full and even coverage.
-
While the frosting is still wet, decorate the ice cream cones with an assortment of candies of your choice to resemble colorful ornaments. For a snowy effect, sprinkle with shredded coconut.
-
Once decorated, your beautiful ice cream Christmas trees are ready to be displayed and enjoyed!
Nutrition Facts
Pin This Now to Remember It Later
Pin Recipe
