Festive Peppermint Candy Cane Cookies: Your Essential Guide to Holiday Baking Magic
There’s nothing quite like the delightful sight and taste of **Candy Cane Cookies** to usher in the holiday season. These festive Christmas cookies, with their signature twists of vibrant red and pristine white dough, are not just a treat for the palate but also a feast for the eyes. Infused with the refreshing essence of *peppermint flavor*, they capture the quintessential taste of the holidays, making them an indispensable addition to any festive gathering or cookie exchange. Imagine the joy of biting into a soft, buttery cookie, where every swirl promises a burst of cool peppermint, perfectly complementing the cozy warmth of winter celebrations.

This Candy Cane Cookie Recipe stands out as one of the cutest and most iconic Christmas desserts. The magic lies in how simple cookie dough is artfully weaved together, transforming into the instantly recognizable shape of classic candy canes. These charming treats are guaranteed to bring smiles and a touch of nostalgic wonder to your holiday table. They would look absolutely enchanting served alongside other festive delights like Christmas Tree Brownies at any holiday party, creating a truly memorable dessert spread. Get ready to impress your guests and fill your home with the inviting aroma of peppermint and fresh-baked cookies!
What’s in this post: Candy Cane Cookies
- What are Candy Cane Cookies?
- Why You’ll Love These Peppermint Cookies
- Essential Ingredients
- Step-by-Step: How to Make Candy Cane Cookies
- Expert Tips for Success
- Frequently Asked Questions
- More Delightful Christmas Cookie Recipes
- Printable Candy Cane Cookies Recipe Card
What are Candy Cane Cookies?
Candy Cane Cookies are a cherished classic, transforming simple cookie dough into a visually stunning and incredibly delicious candy cane-shaped treat. The artful combination of vibrant red and pure white dough, twisted together, not only perfectly mimics the look of a traditional peppermint candy cane but also delivers a delightful burst of flavor. This timeless recipe has graced holiday tables for generations, beloved for its festive appeal and unmistakable peppermint aroma. These cookies are typically made with a buttery shortbread-like dough, making them wonderfully tender and melt-in-your-mouth. The contrast in colors and the striking shape make them a standout on any dessert platter, embodying the spirit of Christmas in every bite. They are more than just a cookie; they are a symbol of holiday cheer and tradition, perfect for gifting, sharing, or simply enjoying with a warm cup of cocoa.
Why You’ll Love These Peppermint Cookies
There are countless reasons why these peppermint candy cane cookies will become a new favorite in your holiday baking repertoire. Firstly, their incredible festive appearance makes them an instant showstopper. The vibrant red and white swirls are unmistakably Christmassy, adding a pop of color and charm to any cookie platter. Beyond their looks, the taste is equally enchanting. The refreshing burst of peppermint extract perfectly complements the sweet, buttery cookie base, creating a flavor profile that is synonymous with the festive season. They evoke a sense of nostalgia, reminding many of childhood Christmases and the magic of the holidays. Furthermore, the process of making them, while requiring a bit of chilling time, is surprisingly fun and rewarding, especially when shared with family. The sparkling sugar coating adds a delightful crunch and extra shimmer, making each cookie feel extra special. Whether you’re baking for a cookie exchange, a holiday party, or just to enjoy with your loved ones, these candy cane cookies promise to be a delightful and memorable treat.
Essential Ingredients:
Crafting these beautiful Candy Cane Cookies requires a few simple, high-quality ingredients that come together to create a truly magical holiday treat. Each component plays a vital role in achieving the perfect texture, flavor, and festive appearance.
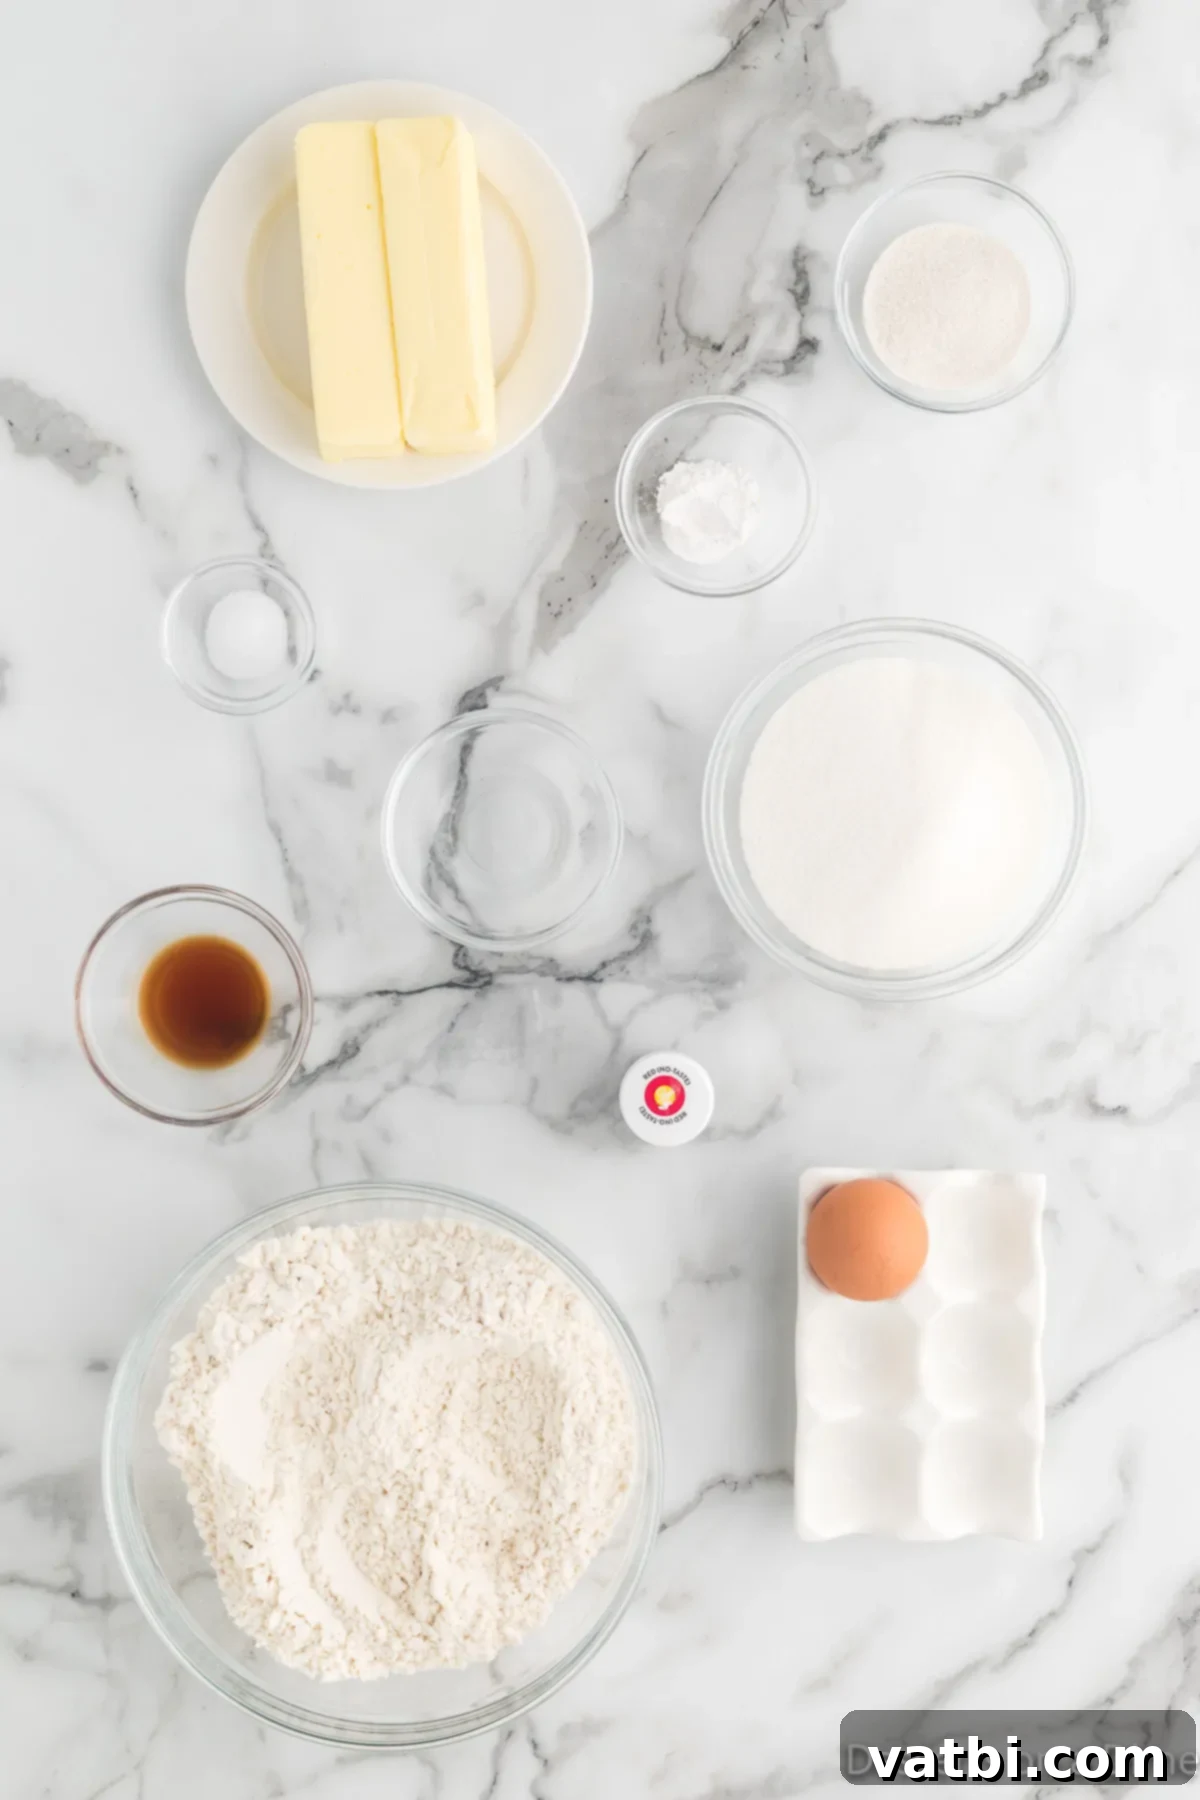
- Softened Butter: The foundation of our cookie dough. Using softened, unsalted butter is crucial for achieving a smooth, creamy texture when mixed with sugar, which leads to tender cookies.
- Granulated Sugar: Provides sweetness and helps create that crisp-chewy edge. It also contributes to the cookie’s structure.
- Vanilla Extract: A classic flavor enhancer that rounds out the sweetness and adds depth to the cookie base.
- Peppermint Extract: The star of the show, delivering that signature cool and refreshing holiday flavor. Ensure you use good quality extract for the best taste.
- All-Purpose Flour: The primary dry ingredient, giving the cookies their structure.
- Baking Powder: A leavening agent that helps the cookies rise slightly and become light.
- Salt: Balances the sweetness and enhances all the other flavors.
- Large Egg: Acts as a binder, holding the dough together and adding richness.
- Red Gel Food Coloring: Essential for achieving that vibrant, deep red color without significantly altering the dough’s consistency. Gel food coloring is much more potent than liquid.
- Sparkling Sugar: For a beautiful, glistening finish that adds a delightful crunch and enhances the festive look.
For the complete ingredient list with exact measurements and detailed step-by-step instructions, please scroll down to the bottom of the printable recipe card. There you’ll find everything you need to successfully bake these delightful holiday cookies.
Step-by-Step: How to Make Candy Cane Cookies
Creating these festive candy cane cookies is a fun and rewarding process that comes together in a few key steps. Follow these instructions carefully to ensure your cookies are both beautiful and delicious!
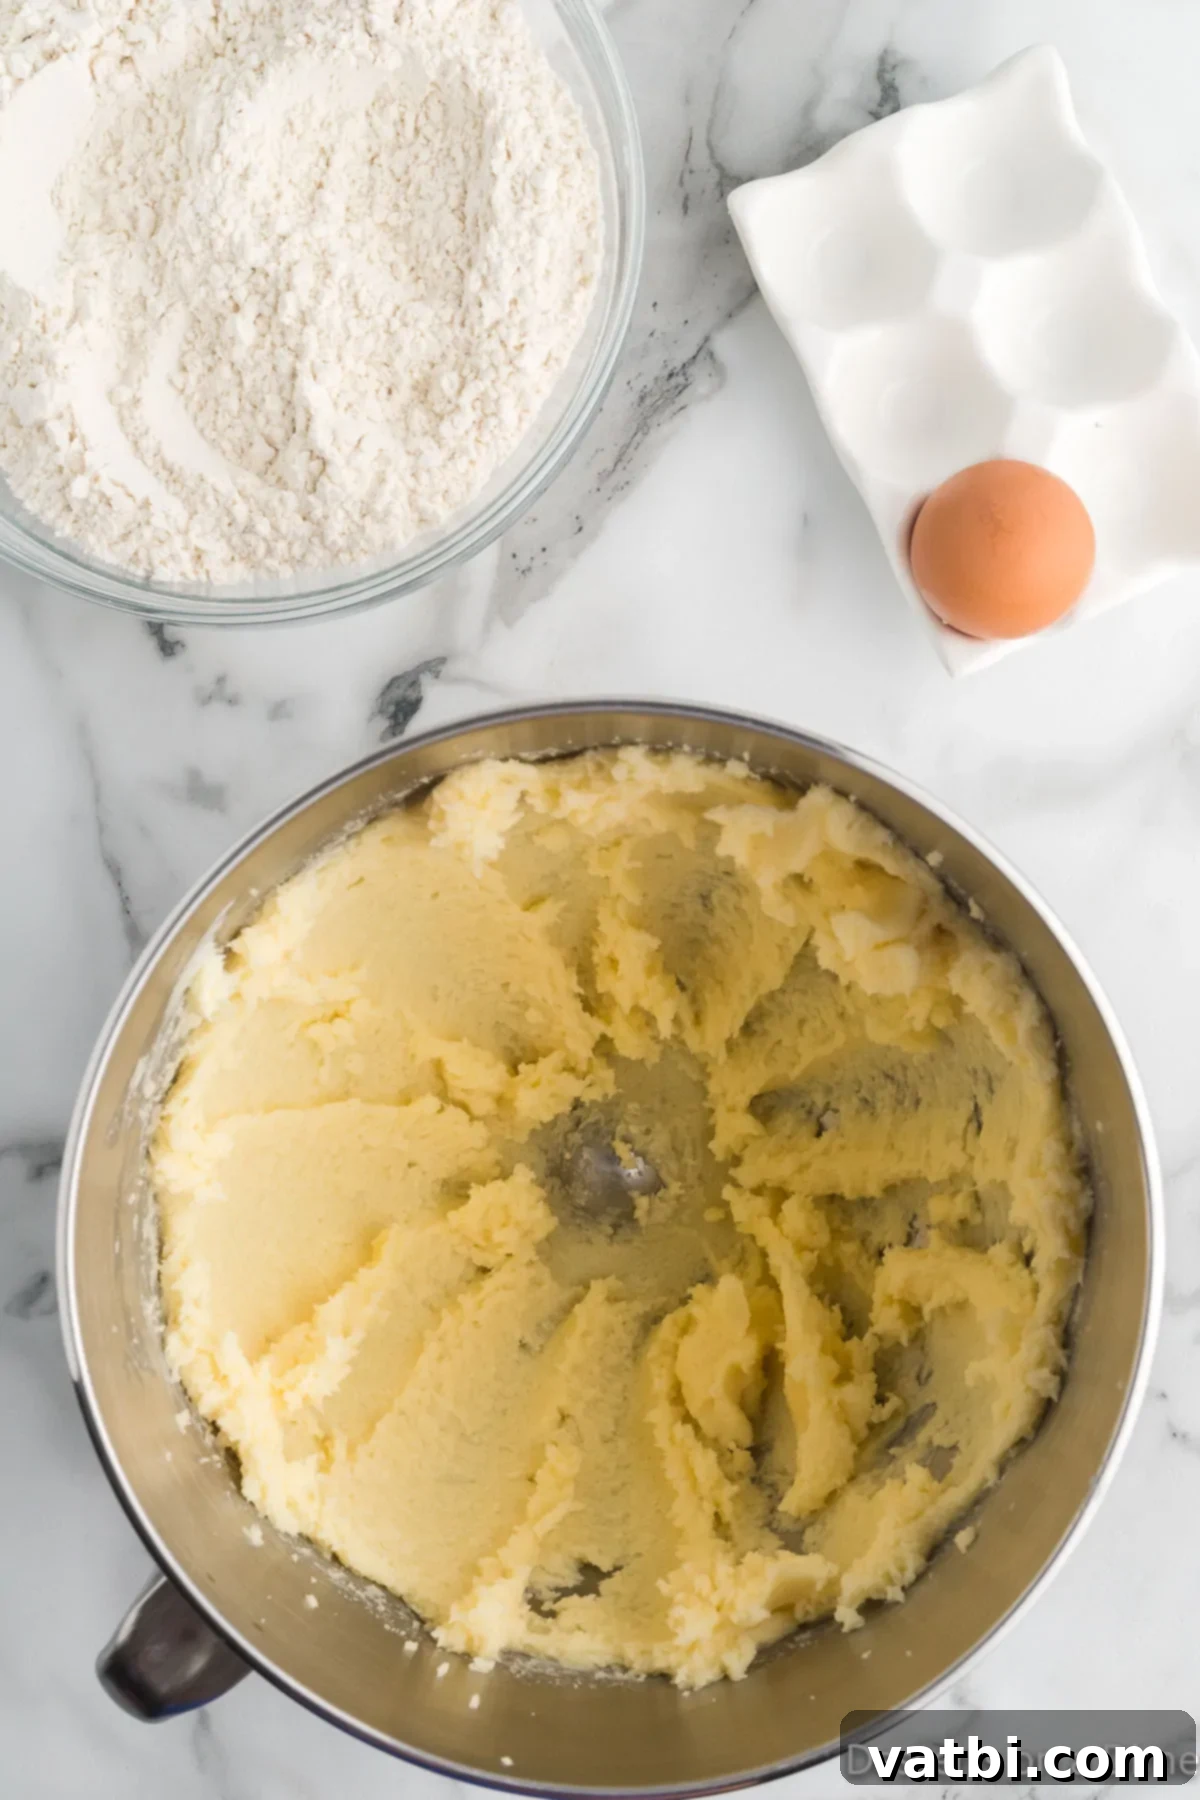
Step 1. Cream Wet Ingredients: In a large mixing bowl, preferably using an electric mixer with the paddle attachment, cream together the softened unsalted butter, granulated sugar, vanilla extract, peppermint extract, baking powder, and salt. Beat on medium speed until the mixture is light, fluffy, and pale in color. This process incorporates air into the butter and sugar, which is crucial for a tender cookie texture. Once well combined, add the large egg and continue mixing until fully incorporated, scraping down the sides of the bowl as needed to ensure everything is evenly blended.
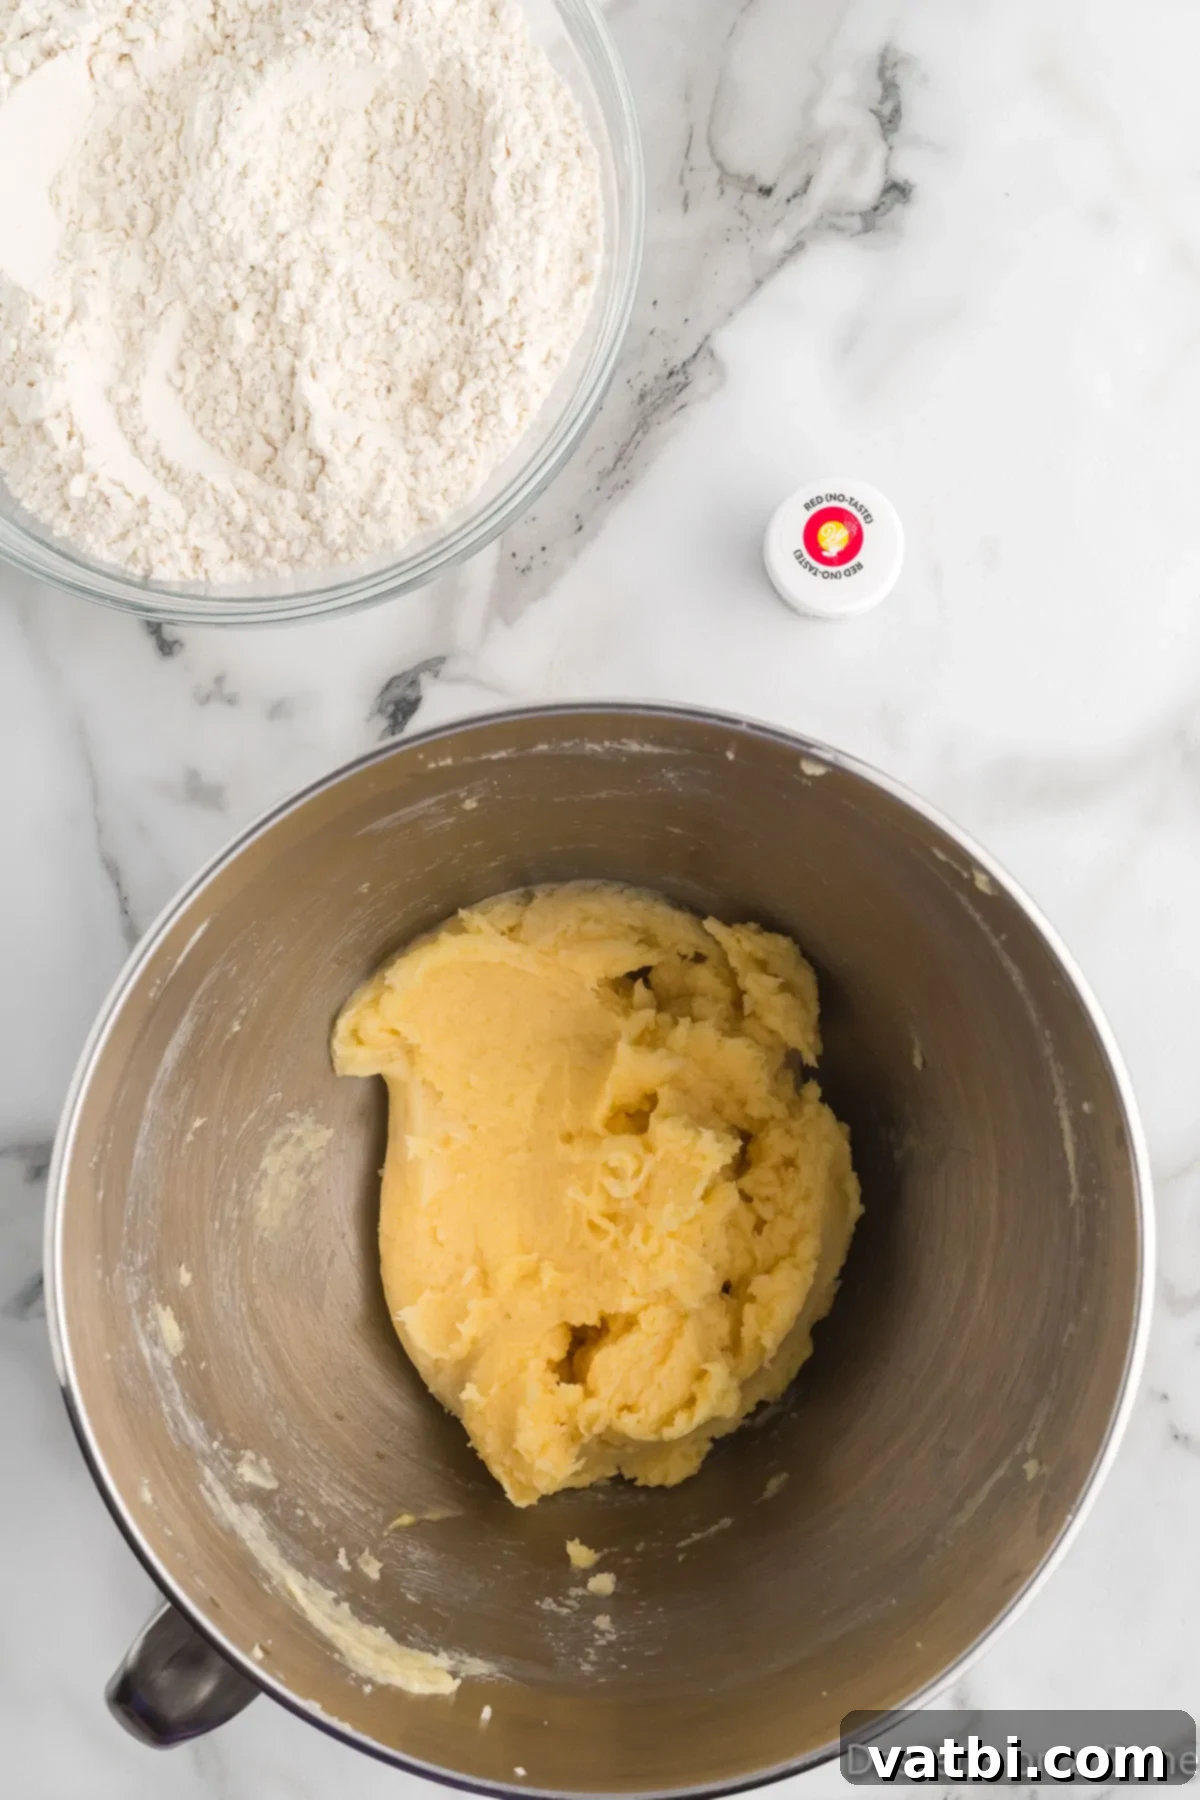
Step 2. Incorporate Flour Mixture: Reduce the mixer speed to low. Gradually add the all-purpose flour to the wet ingredients, mixing until just combined. It’s very important not to overmix at this stage, as overworking the dough can result in tough cookies. Stop mixing as soon as no more dry streaks of flour are visible. Gently scrape the sides and bottom of the mixing bowl with a rubber spatula to ensure all ingredients are evenly incorporated into a soft, pliable cookie dough.
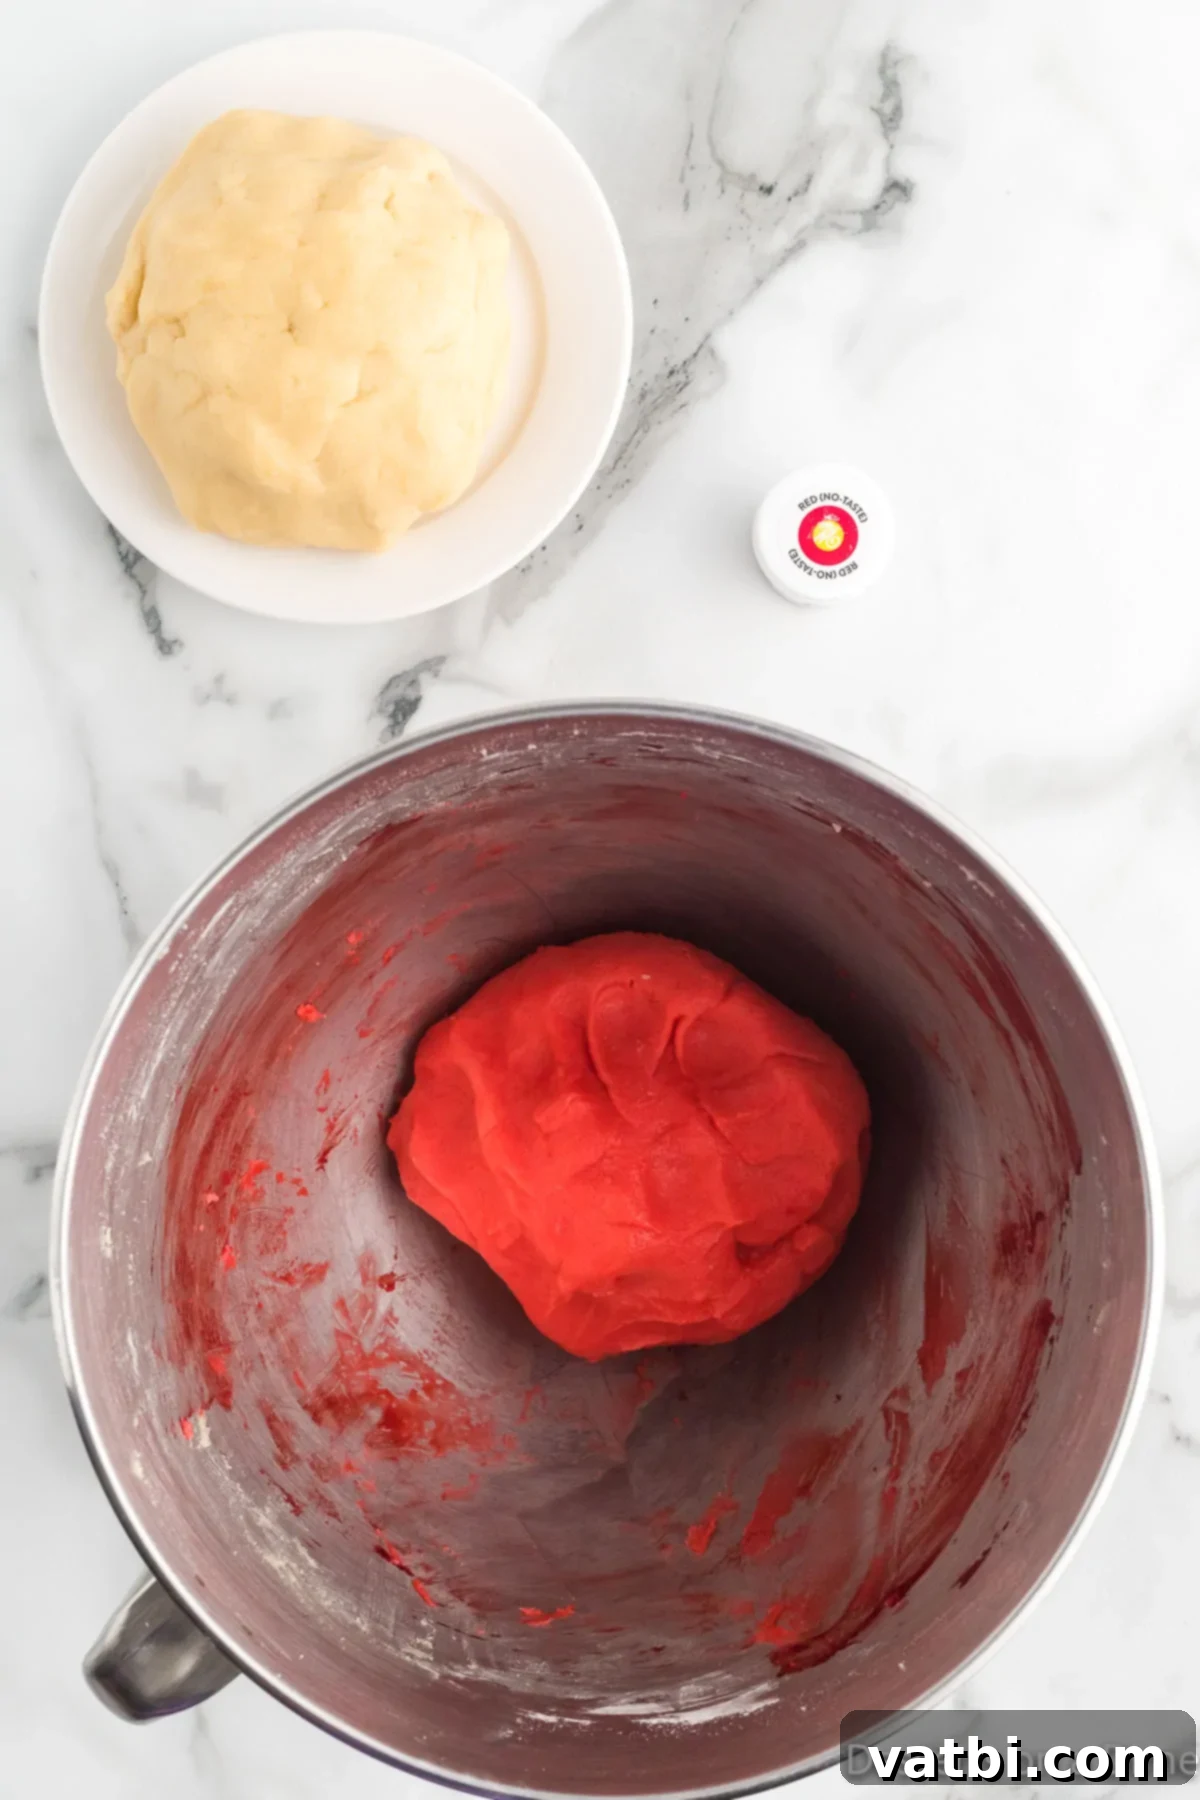
Step 3. Divide and Color Dough: Carefully separate the prepared cookie dough into two equal halves. Remove one half from the bowl – this will be your plain white dough. To the remaining dough in the bowl, add several drops of red gel food coloring. Mix on low speed until the color is evenly distributed and you achieve a vibrant, deep red hue. Gel food coloring is recommended as it provides intense color without adding excess liquid, which could alter the dough’s consistency. Continue mixing until the color is consistent throughout the dough, ensuring there are no streaks.
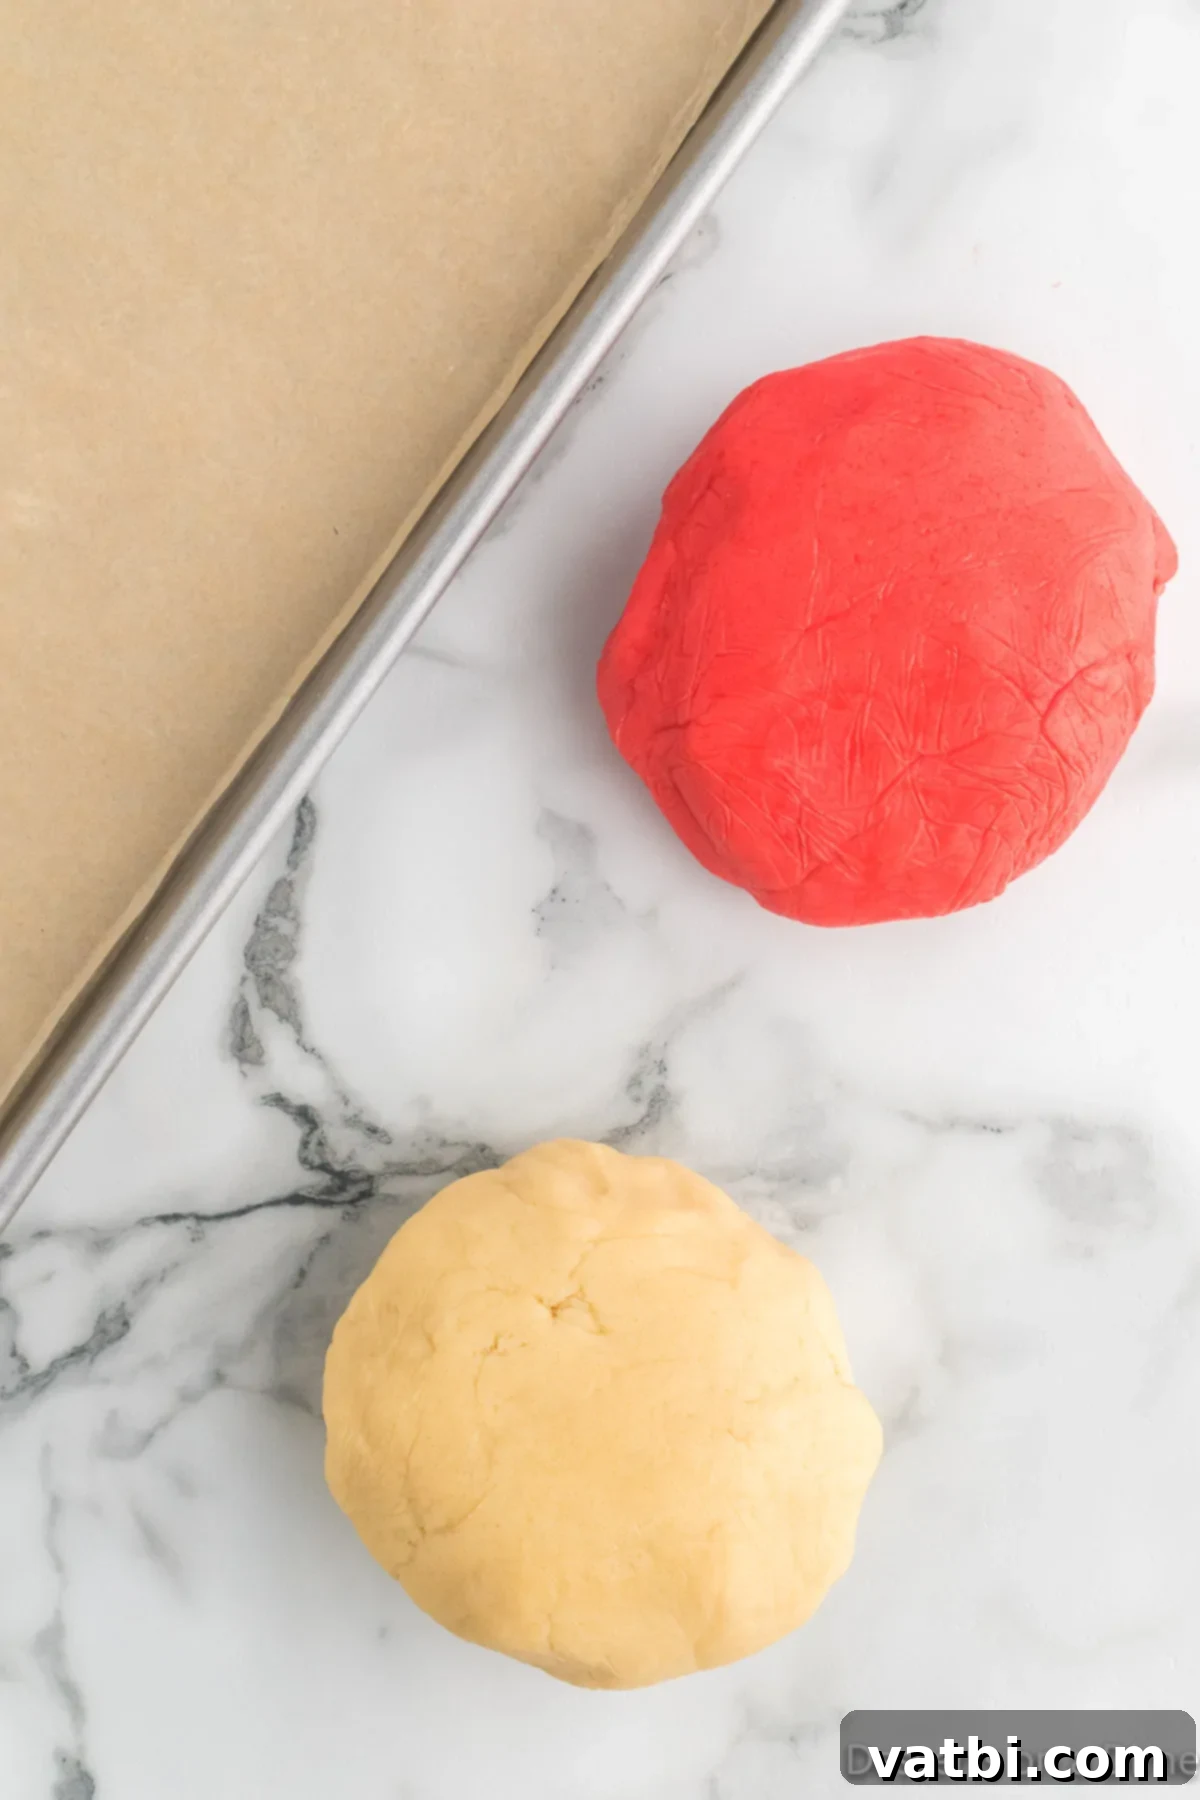
Step 4. Chill the Dough: Shape each half of the dough (one white, one red) into a flat disk. Wrap each disk tightly in plastic wrap, ensuring no air can get in. Refrigerate both portions for at least 2-3 hours, or even overnight. Chilling is a crucial step as it firms up the butter in the dough, which prevents the cookies from spreading too much during baking and makes the dough much easier to handle when shaping the delicate candy cane forms. Don’t skip this step for best results!
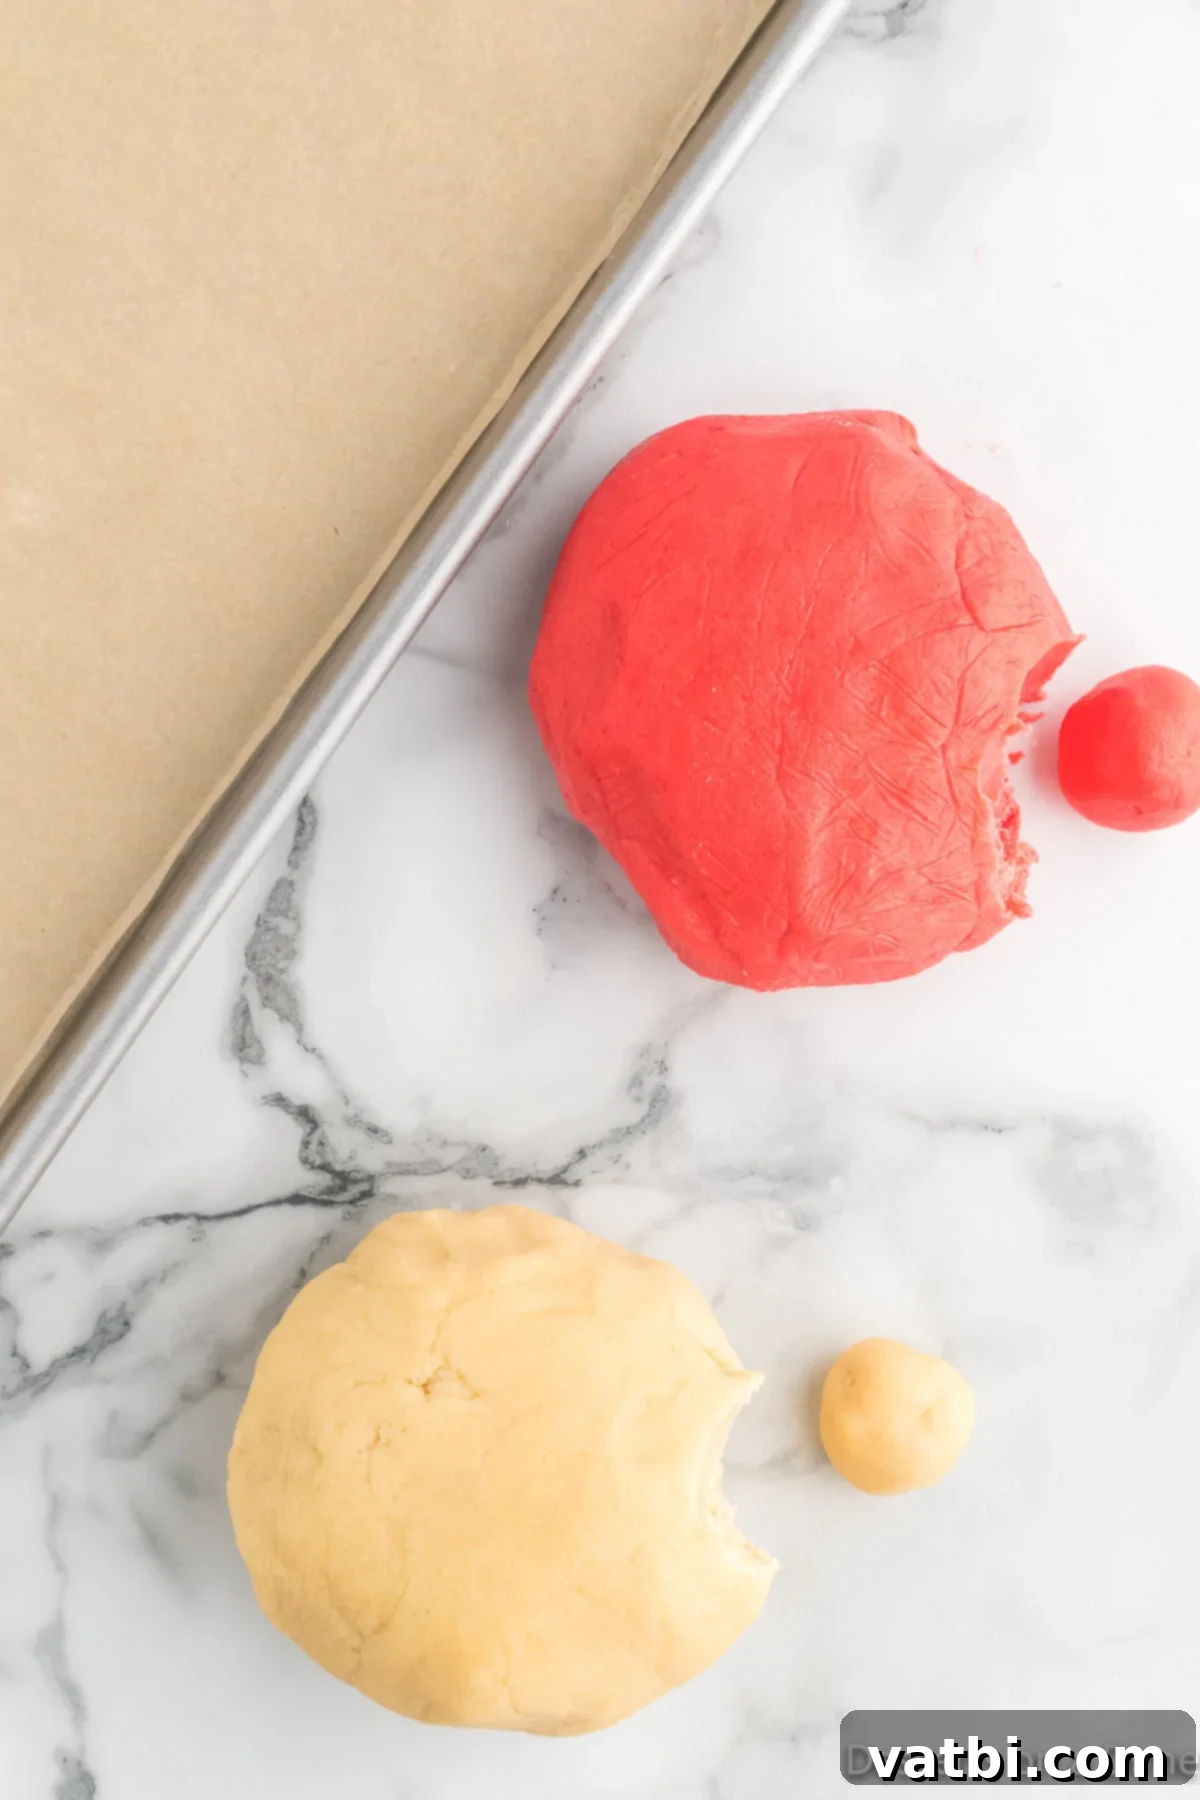
Step 5. Prepare Dough for Shaping: Once chilled, remove the dough from the refrigerator. Pinch off small, approximately 1-inch round pieces from both the red dough and the white dough. It’s important to work quickly and with cold hands if possible, to prevent the dough from warming up too much. For best results, keep any unused dough refrigerated while you work on a batch. This ensures the dough remains firm and easy to shape without becoming sticky or losing its form.
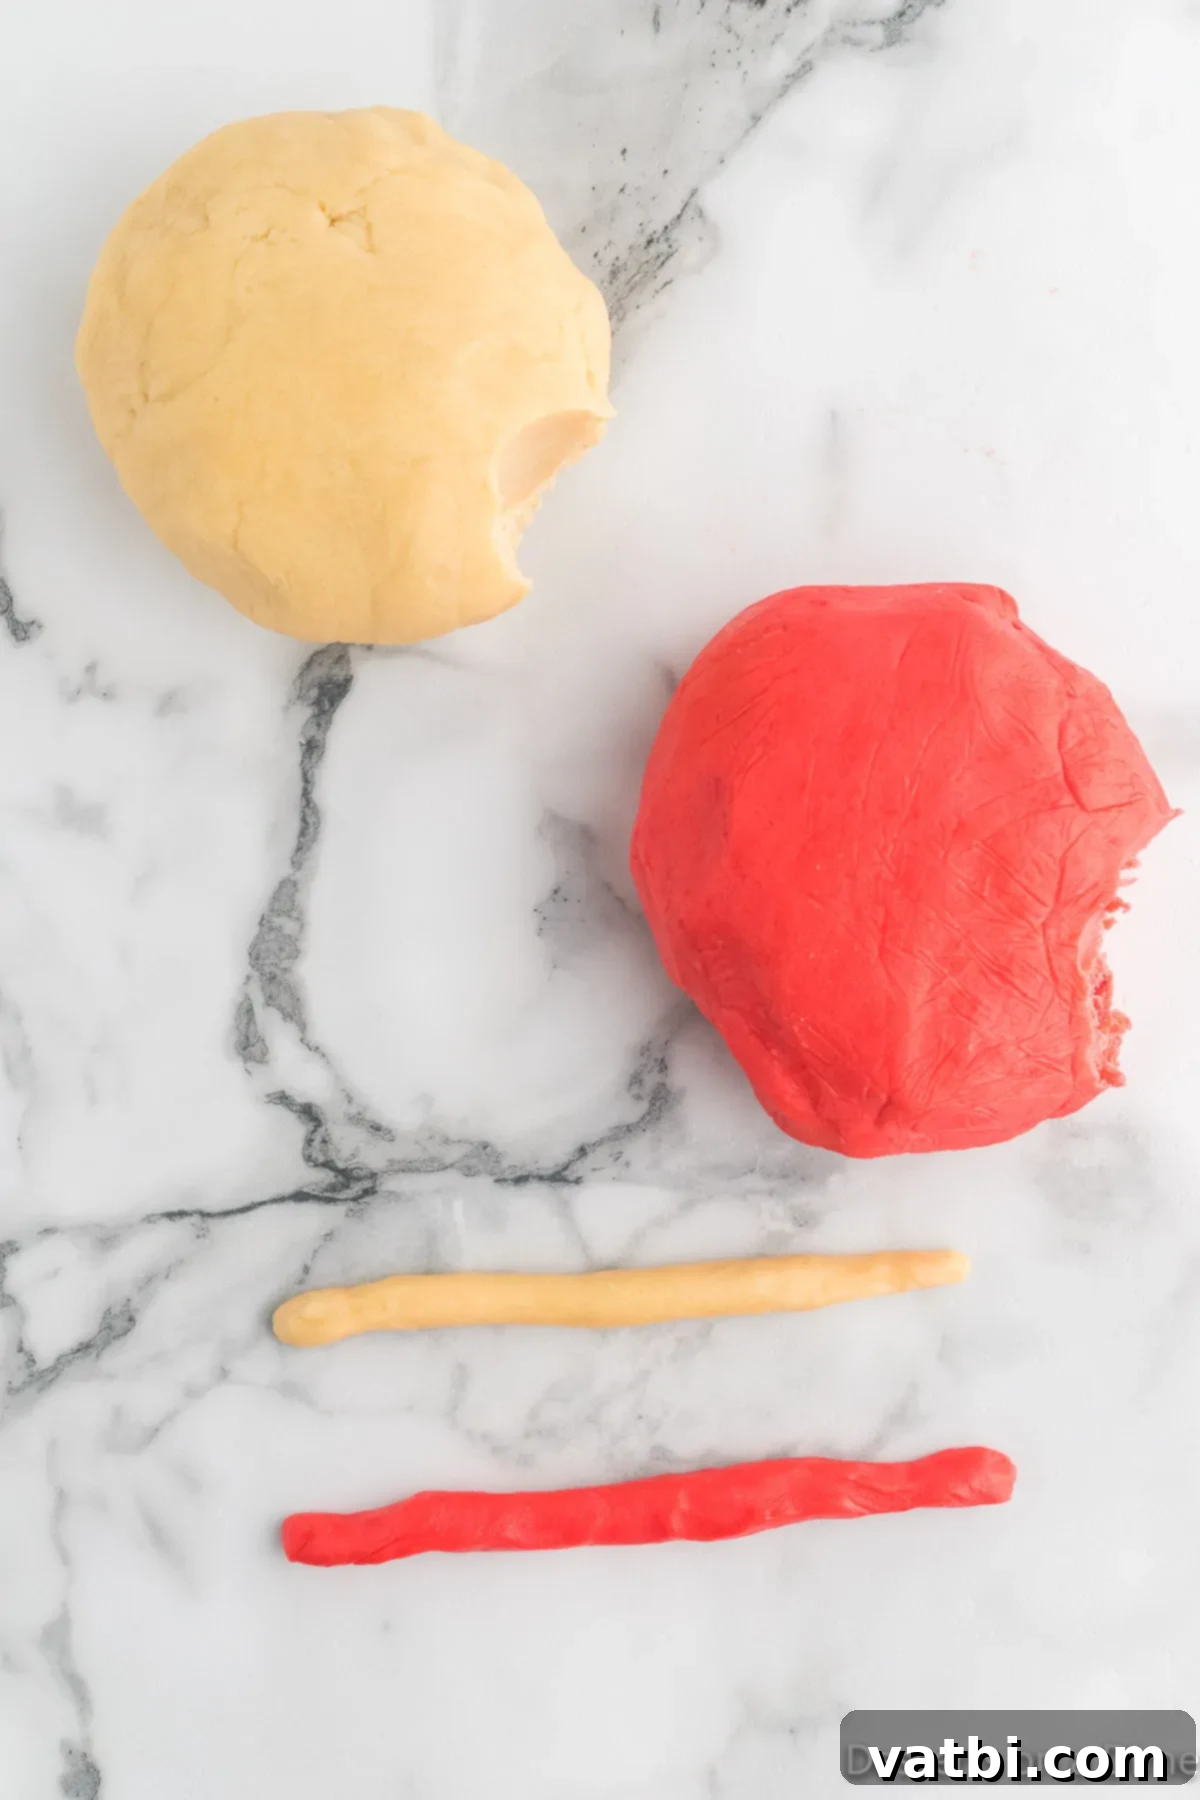
Step 6. Roll and Twist: Take one 1-inch piece of red dough and one 1-inch piece of white dough. On a lightly floured surface, roll each piece into a thin rope, approximately 5 inches long. Try to make the ropes even in thickness for a uniform cookie. Once you have two ropes (one red, one white), carefully place them side by side and gently twist them together. Pinch the ends firmly to seal them and prevent them from unraveling during baking. The twisting motion should create the classic candy cane stripe effect.
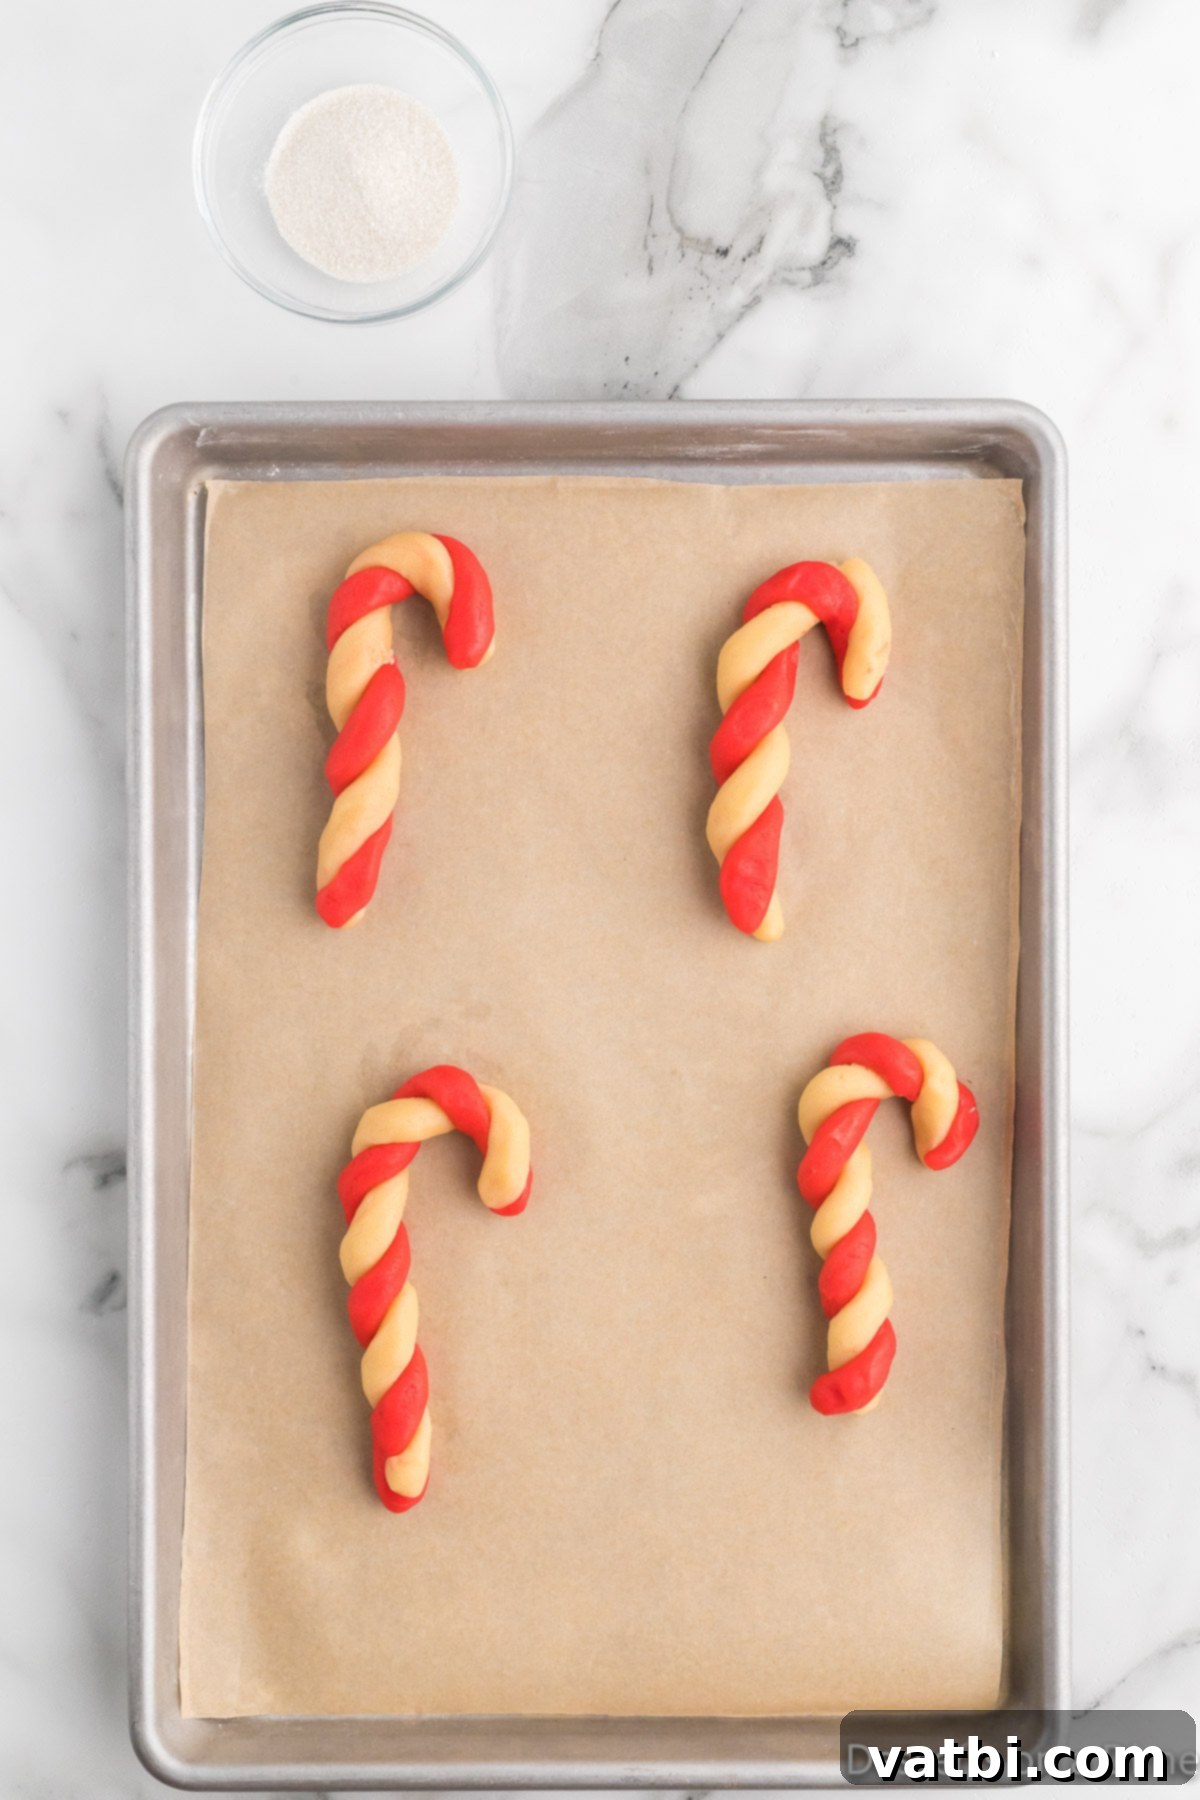
Step 7. Shape and Top: Once twisted, gently transfer each cookie to a baking sheet lined with parchment paper. Carefully curve the top half of the twisted dough to form the iconic “hook” shape of a candy cane. Ensure the curve is gentle and doesn’t cause the dough to crack. Leave at least 2 inches between each cookie on the baking sheet to allow for slight spreading. Before baking, generously sprinkle sparkling sugar over the shaped cookies. Gently press the sugar down so it adheres well to the dough, creating a beautiful, glittering finish.

Step 8. Bake to Perfection: Preheat your oven to 350 degrees Fahrenheit (175°C). Bake the shaped cookies for approximately 8-10 minutes. Baking time may vary depending on your oven, so keep a close eye on them. The cookies are done when the edges begin to turn a very light golden brown. They should still be soft in the center when removed from the oven. Avoid overbaking, as this can make the cookies dry and crumbly. The goal is a tender, melt-in-your-mouth cookie.

Step 9. Cool Completely: Once baked, remove the cookies from the oven. Allow them to cool on the baking sheet for about 5 minutes. This brief resting period helps them firm up and prevents them from breaking when transferred. After 5 minutes, carefully move the partially cooled cookies to a wire rack to cool completely. Ensure they are fully cooled before storing or decorating further. This step is crucial for maintaining their delicate structure and crispness.

Step 10. Serve and Enjoy: Once the candy cane cookies have completely cooled, they are ready to be served! Arrange them on a festive platter to showcase their beautiful colors and unique shape. They are perfect for holiday parties, cookie exchanges, or simply as a delightful treat with your afternoon tea or coffee. Enjoy the satisfying crunch of the sparkling sugar and the refreshing burst of peppermint with every bite. These cookies are not just a dessert; they’re a centerpiece of holiday cheer!

Expert Tips for Perfect Candy Cane Cookies
Achieving perfectly shaped and delicious Candy Cane Cookies can be a breeze with a few expert tips. These suggestions will help you overcome common baking challenges and ensure your festive treats turn out beautifully every time.
- Allow Baking Sheet to Cool When Baking in Batches: This tip is absolutely critical if you’re baking multiple trays of cookies. Placing dough on a warm cookie sheet will cause the butter in the dough to soften prematurely and melt before the cookie structure sets. This leads to cookies spreading too much and losing their distinct candy cane shape. Always let your baking sheets cool completely between batches, or use multiple baking sheets. You can even pop hot baking sheets into the refrigerator for a few minutes to speed up the cooling process.
- Ensure Room Temperature Dough (If it Breaks): While chilling the dough is essential, sometimes it can become too firm and prone to cracking when you try to roll it. If your dough starts to break or crumble as you’re shaping it, let it sit out at room temperature for 5-10 minutes. This will allow the butter to soften slightly, making the dough more pliable and easier to roll into smooth ropes without cracks. Just be careful not to let it get too warm, or it will become sticky.
- Gel Food Coloring for Vibrant Hues: For the best, most vibrant red color, always opt for gel food coloring over liquid. Liquid food coloring can add too much moisture to the dough, potentially altering its consistency and making it sticky or difficult to work with. Gel coloring is highly concentrated, so a little goes a long way to achieve a rich, deep red.
- Work with Cold Dough in Small Batches: When shaping the individual candy canes, it’s best to work with small portions of dough at a time. Keep the remaining dough refrigerated. This prevents the dough from becoming too warm and soft from the heat of your hands, which can make it sticky and hard to handle, and cause the shapes to lose their definition.
- Consistent Rope Thickness: For the most visually appealing candy canes, try to roll both the red and white dough ropes to a consistent thickness. This ensures even twisting and baking. If one rope is significantly thicker than the other, your candy cane might look lopsided or bake unevenly.
- Don’t Overbake: These cookies are delicate. Overbaking can lead to dry, crumbly cookies and diminish their tender texture. Look for just a hint of golden color around the edges as your cue that they are done. They will continue to firm up as they cool.
Frequently Asked Questions about Candy Cane Cookies
Here are some common questions bakers have when making Candy Cane Cookies, along with helpful answers to ensure your baking experience is a success.
Once your delicious Candy Cane Cookies have completely cooled, store them in an airtight container at room temperature. They will stay fresh and soft for up to 1 week. To keep them extra soft and prevent them from drying out, an old baker’s trick is to place a slice of fresh bread in the container along with the cookies. The cookies will absorb moisture from the bread, maintaining their tender texture. Replace the bread every couple of days if it becomes hard.
Absolutely! Candy Cane Cookies freeze exceptionally well, whether they are baked or unbaked. This makes them a fantastic make-ahead option for busy holiday seasons.
Unbaked Cookies: If you plan to freeze them unbaked, first shape the dough into candy canes as instructed. Place the shaped, unbaked cookies on a baking sheet lined with parchment paper, ensuring they don’t touch. Flash freeze them for about 1-2 hours, or until they are solid. Once frozen solid, transfer the candy cane-shaped dough pieces to a freezer-safe bag or an airtight container, separating layers with parchment paper to prevent sticking. They can be frozen for up to a month. When you’re ready to bake, place the frozen cookies on a prepared baking sheet and bake as usual, adding a few extra minutes to the baking time (typically 2-4 minutes) since they are frozen. Do not thaw before baking.
Baked Cookies: If you are freezing already baked cookies, ensure they are completely cooled first. Arrange them in a single layer on a baking sheet and flash freeze until firm. Then, transfer them to an airtight freezer-safe container, again separating layers with parchment paper. They can be frozen for up to a month. To serve, simply allow them to thaw overnight in the refrigerator or for a few hours at room temperature. They’ll taste just as fresh as the day they were baked!
While peppermint is the traditional and most popular flavor for Candy Cane Cookies, you can certainly experiment with other extracts! Vanilla extract alone would create a classic sugar cookie flavor. Almond extract offers a sweet, nutty twist. You could even try a touch of lemon extract for a brighter, citrusy note. Just be mindful of the strength of different extracts and adjust the quantity accordingly. For a truly unique touch, consider a mix of vanilla and a tiny hint of almond or even a few drops of orange oil.
Several factors can cause cookies to spread excessively. The most common reasons include insufficient chilling time for the dough, using butter that was too soft or melted, or placing the dough on a warm baking sheet. Ensure your dough is thoroughly chilled (2-3 hours minimum, or until firm). Use butter that is truly softened but still cool to the touch, not greasy or melted. And always, always use cool baking sheets for each batch of cookies to prevent premature spreading. Overmixing the dough after adding flour can also contribute to spreading.
More Delightful Christmas Cookie Recipes
If you’re looking to expand your holiday baking repertoire beyond these wonderful Candy Cane Cookies, here are some other fantastic Christmas cookie recipes that are sure to bring cheer to your celebrations:
- Classic Christmas Cut Out Sugar Cookies: A timeless favorite perfect for decorating with icing and sprinkles.
- Easy Christmas Tree Sugar Cookies: Simple yet charming, these cookies are shaped like Christmas trees and can be decorated in endless ways.
- Delightful Snowman Cookies Recipe: Fun and whimsical snowman-shaped cookies that are a hit with kids and adults alike.
I am genuinely excited for you to try your hand at making these enchanting Candy Cane Cookies. They are truly a highlight of holiday baking and bring so much joy. Please come back after you’ve made them and share your experience! We’d love for you to leave a star recipe rating and a comment to let us know how they turned out for you. Happy baking!
Pin
Candy Cane Cookies
Ingredients
- 1 cup Butter softened, unsalted preferred
- 1 cup Granulated Sugar
- 1 teaspoon Vanilla Extract
- 1 teaspoon Peppermint Extract
- 1 teaspoon Baking Powder
- ½ teaspoon Salt
- 1 Large Egg
- 2 ¾ cup All Purpose Flour
- Red Gel Food Coloring (for vibrant color)
- Sparkling Sugar (for garnish)
Instructions
-
In a large mixing bowl, beat together the softened butter, granulated sugar, vanilla extract, peppermint extract, baking powder, and salt using an electric mixer on medium speed until the mixture is light and fluffy.
-
Add in the large egg and mix until it is thoroughly combined and incorporated into the butter mixture.
-
Reduce the mixer speed to low. Gradually add the all-purpose flour to the wet ingredients and mix only until just combined, ensuring there are no more dry streaks of flour. Be careful not to overmix.
-
Divide the cookie dough in half. Remove one half from the bowl (this will be your white dough). To the remaining dough in the bowl, add red gel food coloring and mix until the color is evenly distributed and vibrant.
-
Shape each dough half (red and white) into a disk, wrap tightly in plastic wrap, and refrigerate for at least 2-3 hours (or overnight) until firm. This is essential for preventing spread and easier handling.
-
Preheat your oven to 350 degrees Fahrenheit (175°C) and line a baking sheet with parchment paper.
-
Take approximately 1-inch round pieces from both the red and white chilled dough. Roll each piece into a thin rope, about 5 inches long, on a lightly floured surface. Work quickly to keep the dough cold.
-
Place one red rope side by side with one plain (white) rope. Gently twist them together to form a striped pattern, pinching the ends to secure them.
-
Carefully transfer the twisted dough to the prepared baking sheet. Gently curve the top half of the dough to create the classic candy cane “hook” shape.
-
Repeat the rolling, twisting, and shaping process until all the cookies are formed. Place them on the baking sheet at least 2 inches apart to allow for slight expansion during baking.
-
Generously sprinkle sparkling sugar on top of the shaped cookies. Gently press the sugar down with your fingers to ensure it adheres to the dough, providing a beautiful, glittering finish.
-
Bake the cookies for 8-10 minutes, or until the edges just begin to brown slightly. Avoid overbaking to keep them soft and tender.
-
Once baked, remove the baking sheet from the oven and allow the cookies to cool on the sheet for 5 minutes. Then, carefully transfer them to a wire rack to cool completely before storing or serving.
-
Once fully cooled, your beautiful and delicious Candy Cane Cookies are ready to serve and enjoy with friends and family!
Recipe Notes
Nutrition Facts
Pin This Now to Remember It Later
Pin Recipe
