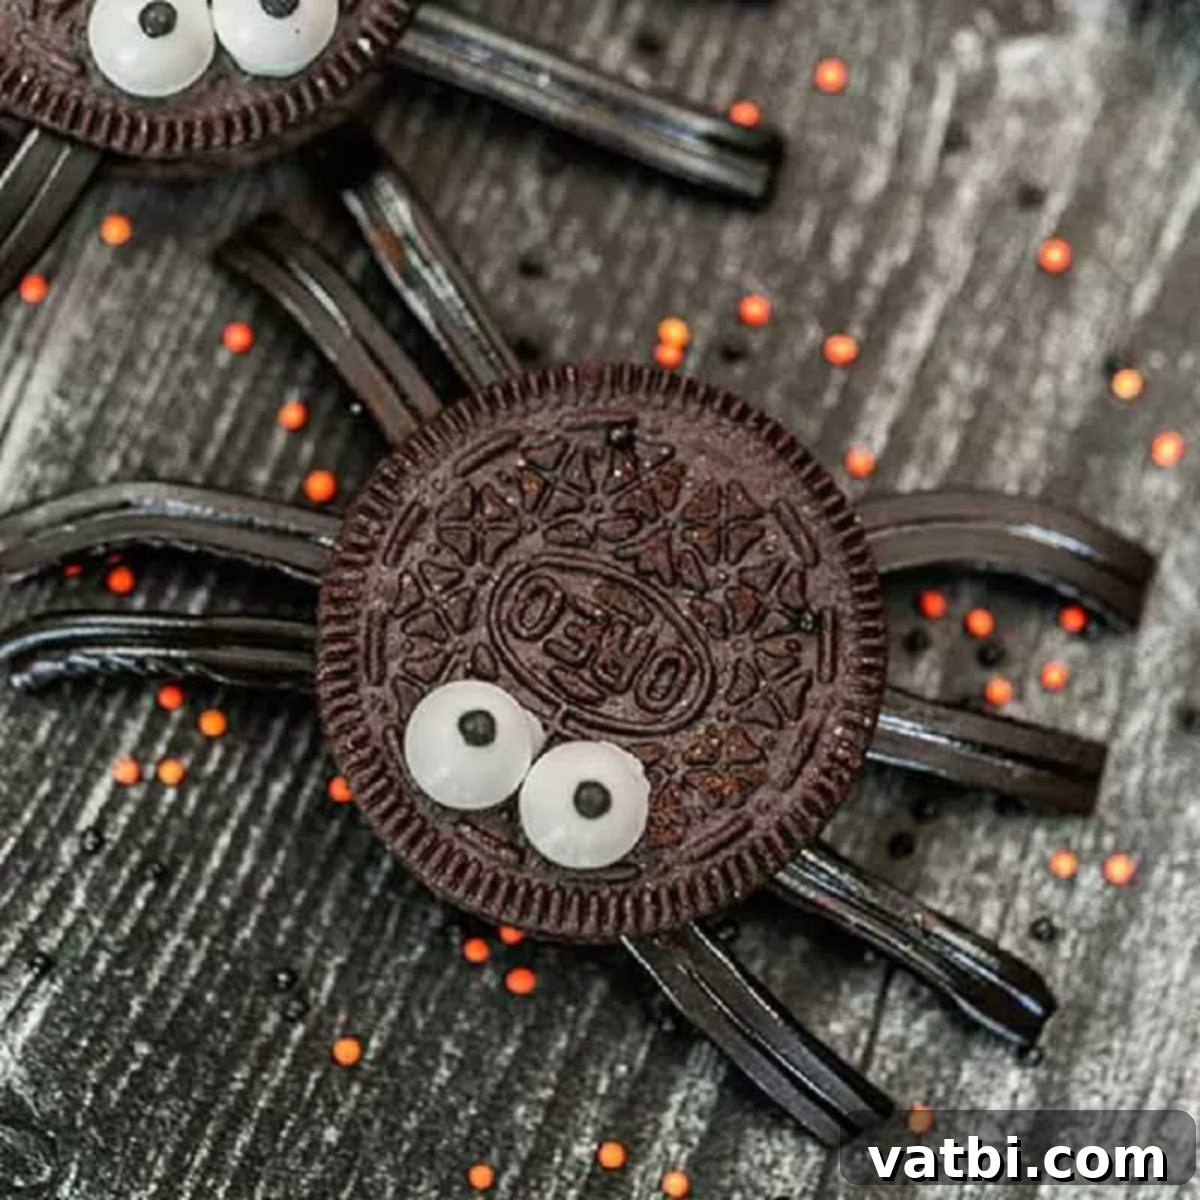
Easy Oreo Spider Cookies: The Ultimate No-Bake Halloween Treat for Kids!
Get ready to weave some magic this Halloween with these absolutely adorable and incredibly simple Oreo Spider Cookies! As one of my all-time favorite no-bake Halloween desserts, these spooky treats are guaranteed to be a huge hit with kids and adults alike. Best of all, they are super easy to make, requiring just a handful of ingredients and minimal effort – perfect for busy ghouls and goblins!
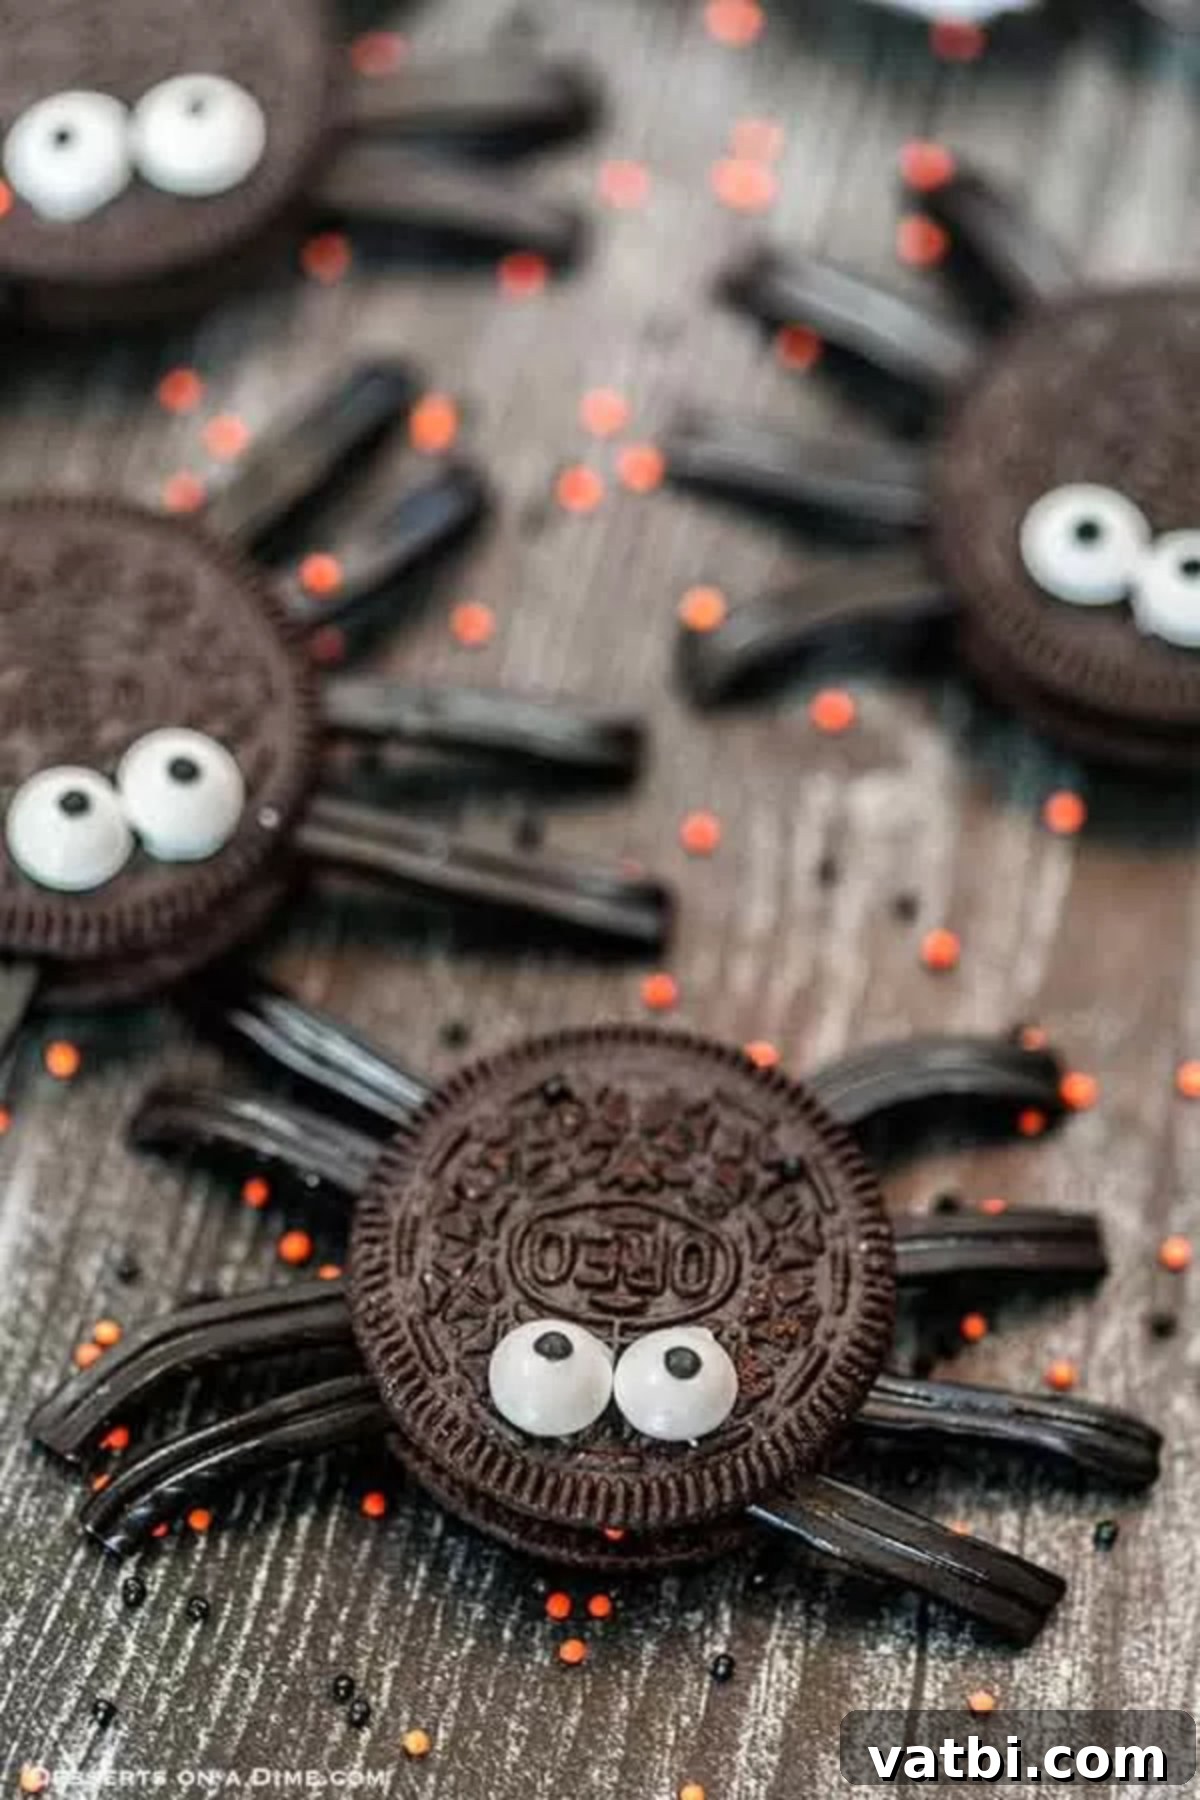
If you’ve enjoyed crafting other fun and frightful treats like our Spider Brownies, then you’ll absolutely love this no-bake dessert recipe for Spider Oreos. You only need a few common ingredients, easily found at any grocery store, to create these delightful Oreo Spider Cookies. They’re quick, easy, and sure to bring smiles to every face!
These fun, festive, and utterly delicious treats are ideal for your upcoming Halloween party, school celebrations, or simply as an after-school surprise. Oreo Spiders are always a crowd favorite, disappearing almost as quickly as they appear! Don’t forget to explore even more of our Best Halloween Cookies recipes to complete your spooky spread.
Looking for more easy Halloween treats? Be sure to check out our Easy Halloween Witch Hat Cookies, Halloween Puppy Chow, or Halloween Cake Pops. For a cozy fall treat that isn’t Halloween specific, try our delicious Pumpkin Chocolate Chip Cookies Recipe.
What’s in this post: Oreo Spider Cookies
- Why We Love These Oreo Spider Cookies
- Ingredients for Spooky Oreo Spiders
- Creative Substitutions and Fun Additions
- Step-by-Step Instructions: How to Make Oreo Spider Cookies
- Pro Tips for Perfect Oreo Spiders
- Frequently Asked Questions About Oreo Spider Cookies
- Discover More Easy Halloween Treats
- Spider Oreo Cookies Recipe Card
Why We Love These Oreo Spider Cookies
There are countless reasons why these delightful Oreo Spider Cookies have become a staple in our Halloween celebrations. Their undeniable charm and straightforward preparation make them a top choice for anyone looking to add a touch of festive fun without all the fuss. Here’s why they’ll quickly become your new favorite spooky treat:
- Effortless No-Bake Fun: Who has time for complicated baking during the Halloween season? These no-bake Halloween treats are incredibly simple to assemble, requiring no oven or complex techniques. You only need a few basic ingredients, making them perfect for last-minute party preparations or spontaneous creative fun.
- Perfect for All Ages: One of the best aspects of this recipe is its universal appeal. Kids absolutely adore these cute, edible spiders, and they’re easy enough for little hands to help with! Get your children involved in twisting the Oreos, placing the licorice legs, and adding the googly eyes – it’s a fantastic, interactive activity that results in a delicious reward.
- Versatile for Any Occasion: Whether you’re hosting a grand Halloween bash, preparing treats for a school party, or simply looking for a fun after-school snack, these Oreo Spider Cookies fit the bill perfectly. They’re transport-friendly and always a hit, making them a fantastic addition to any festive gathering. You don’t even need a holiday to enjoy these playful cookies; they’re great any time you want a fun, chocolatey treat!
- Budget-Friendly & Accessible Ingredients: You won’t need to scour specialty stores for obscure ingredients. Everything required for these spider cookies can be found in your local supermarket, making this an economical and stress-free recipe to pull together.
Ingredients for Spooky Oreo Spiders
Crafting these adorable Oreo Spider Cookies couldn’t be simpler, thanks to a short and sweet list of ingredients. You likely have some of these on hand already, and the rest are easily picked up during your next grocery run. Here’s what you’ll need to transform ordinary cookies into extraordinary Halloween creatures:
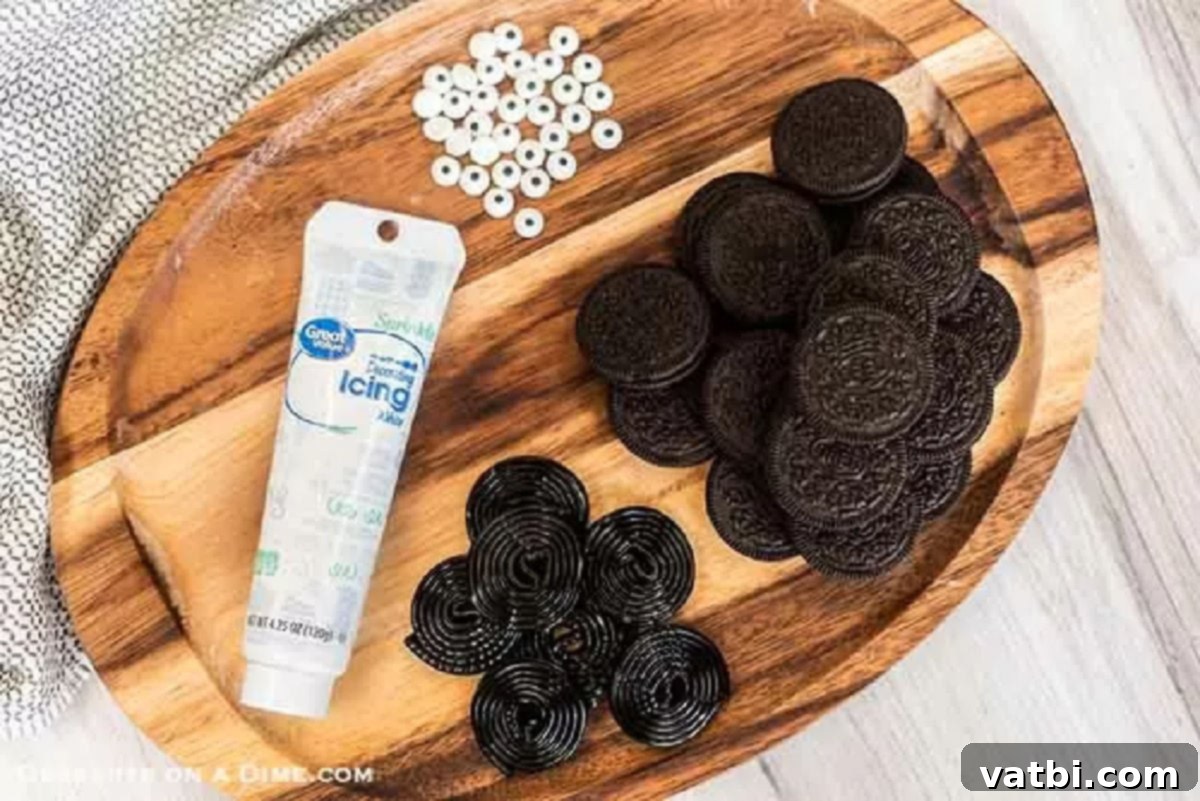
- Oreo Cookies: The classic chocolate sandwich cookie is the star of our show. We recommend using regular Oreo cookies, rather than double-stuffed, as their thinner cream filling makes them easier to untwist and reassemble without breaking, providing a more stable base for your spider creations.
- Rope Black Licorice: This is key for creating those iconic spider legs! Licorice ropes are wonderfully flexible and easy to cut into the precise lengths needed for eight creepy-crawly appendages per cookie.
- Candy Eyes: These small, edible googly eyes are what give your spiders their charmingly spooky personalities. You can typically find them in the baking aisle of most grocery stores or craft shops, especially around the holidays. They add an instant touch of whimsy and character!
- White Icing: Whether you opt for store-bought pre-made frosting or whip up a quick homemade batch, white icing serves two crucial purposes: it helps secure the licorice “legs” in place and acts as the “glue” for those adorable candy eyes, bringing your spiders to life. Using store-bought icing makes the process incredibly quick and easy.
Make sure to scroll to the bottom of this post for the complete recipe card, including exact measurements and detailed ingredients list.
Creative Substitutions and Fun Additions
While the classic Oreo Spider Cookie recipe is fantastic on its own, don’t be afraid to get creative and customize your spooky treats! These simple substitutions and fun additions can add extra flavor, visual flair, or adapt the recipe to what you have on hand. Let your imagination run wild and create a whole colony of unique spider cookies!
- Melted Chocolate Dipped Spiders: For an extra layer of rich chocolate flavor and a more polished look, carefully dip the entire Oreo spider in melted chocolate (milk, dark, or white) after assembly. Allow it to set on parchment paper before adding the eyes.
- Double Stuffed Oreos or Flavored Varieties: While regular Oreos are recommended for ease of assembly, feel free to experiment! You can use Double Stuffed Oreos (just be extra gentle when separating them), or try different flavors like Mint Oreos for a refreshing twist, Peanut Butter Oreos for a nutty kick, or even the seasonal Halloween Oreos with orange cream filling for extra festive color!
- Alternative Eyes with Chocolate Chips: No candy eyes? No problem! Small white or dark chocolate chips can easily be used as a substitute. Simply place two tiny dots of icing on the cookie and press the chocolate chips (pointy side down) into them. Mini M&Ms or other small candies also work well.
- Homemade Frosting Option: We love the convenience of already prepared frosting, but if you prefer, you can certainly use homemade icing. Simply pipe a small dot onto the cookie to hold the licorice legs in place, and another tiny dot for the candy eyes. This gives you more control over the consistency and flavor.
- Peanut Butter for Extra Flavor: For an irresistible combination of chocolate and peanut butter, spread a thin layer of creamy peanut butter on one half of the Oreo before adding the licorice legs and reassembling. It adds a delicious depth of flavor that’s hard to resist.
- Spooky Candy Corn Fangs: To give your spiders a truly menacing (yet still cute!) look, carefully cut tiny triangles from candy corn and place them in the Oreo’s cream filling, near where the eyes will go, to create little fangs.
- Pretzel Stick Spider Legs: Black licorice ropes are traditional, but pretzel sticks are an excellent alternative! They offer a satisfying crunch and a slightly salty contrast to the sweet cookie. Break them into smaller pieces and insert them into the cream filling just like the licorice. Chocolate-covered pretzel sticks would also be a fantastic option for an extra indulgent touch.
Step-by-Step Instructions: How to Make Oreo Spider Cookies
Creating these charming Oreo Spider Cookies is a breeze! Follow these simple steps, and you’ll have a platter full of spooky-sweet treats in no time. Remember, this is a fantastic activity to get the kids involved – they’ll love helping bring these little spiders to life!
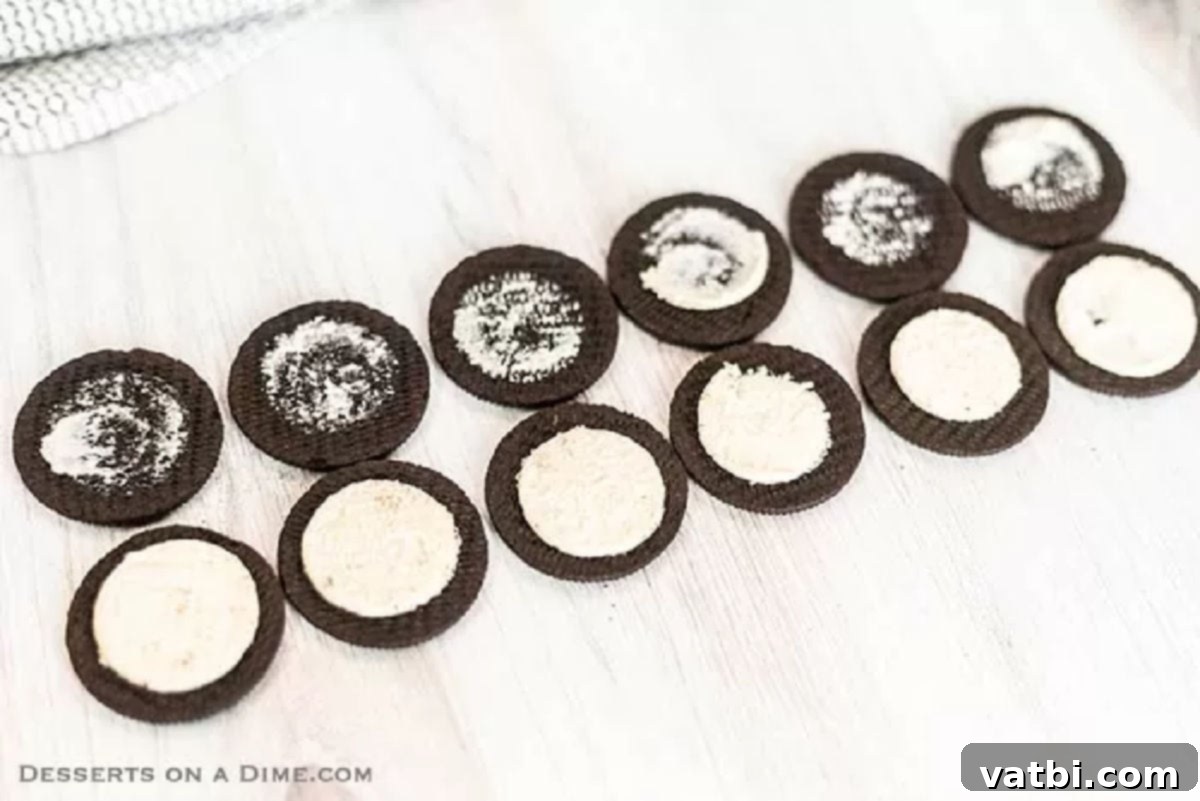
Step 1. Carefully untwist each Oreo cookie. The goal is to separate the two chocolate wafers while keeping as much of the white cream filling as possible attached to one side. This cream filling will serve as the “body” of your spider and the adhesive for its legs.
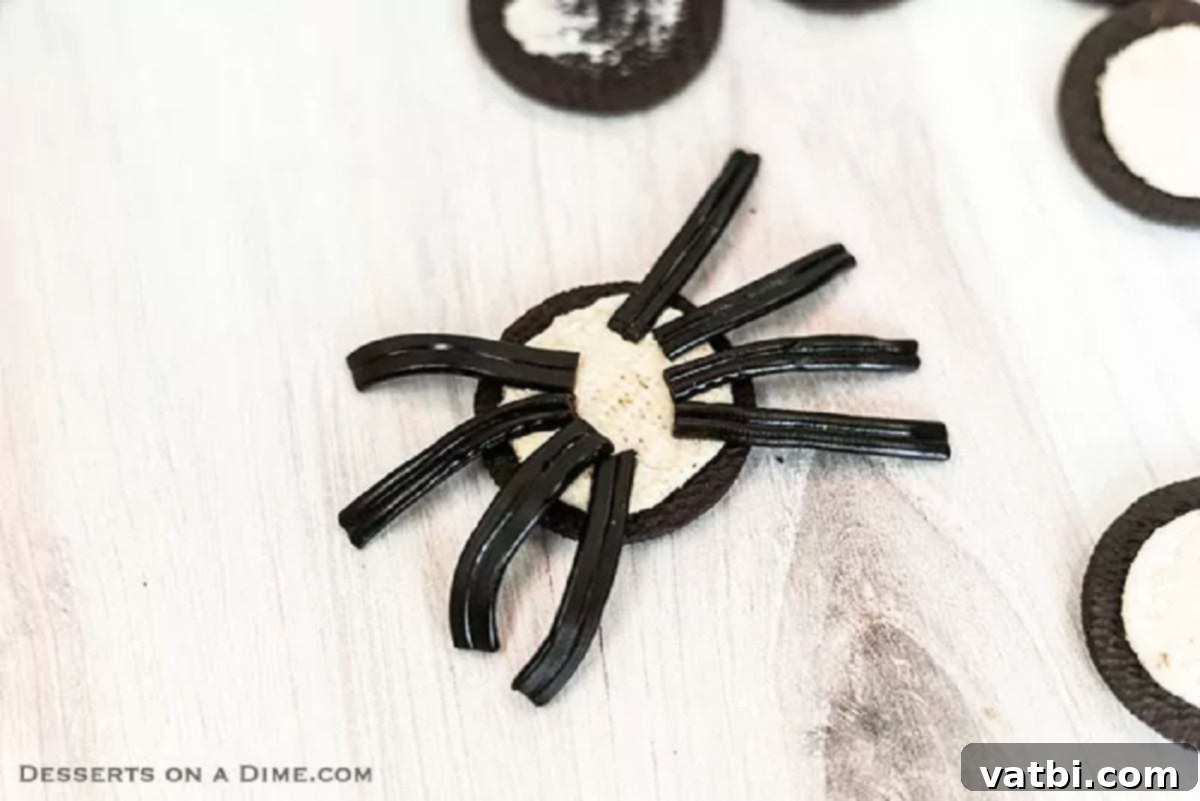
Step 2. Next, prepare the spider legs. Cut the black licorice ropes into approximately 2-inch pieces. You’ll need 8 pieces per Oreo spider. Carefully place 4 pieces of the cut licorice on each side of the cream-filled cookie half, gently pressing them into the filling. On the bottom of the plain cookie wafer (the one without the cream), dab a small amount of white icing. This icing will help secure the top wafer back onto the spider’s body, effectively sandwiching the licorice legs in place.
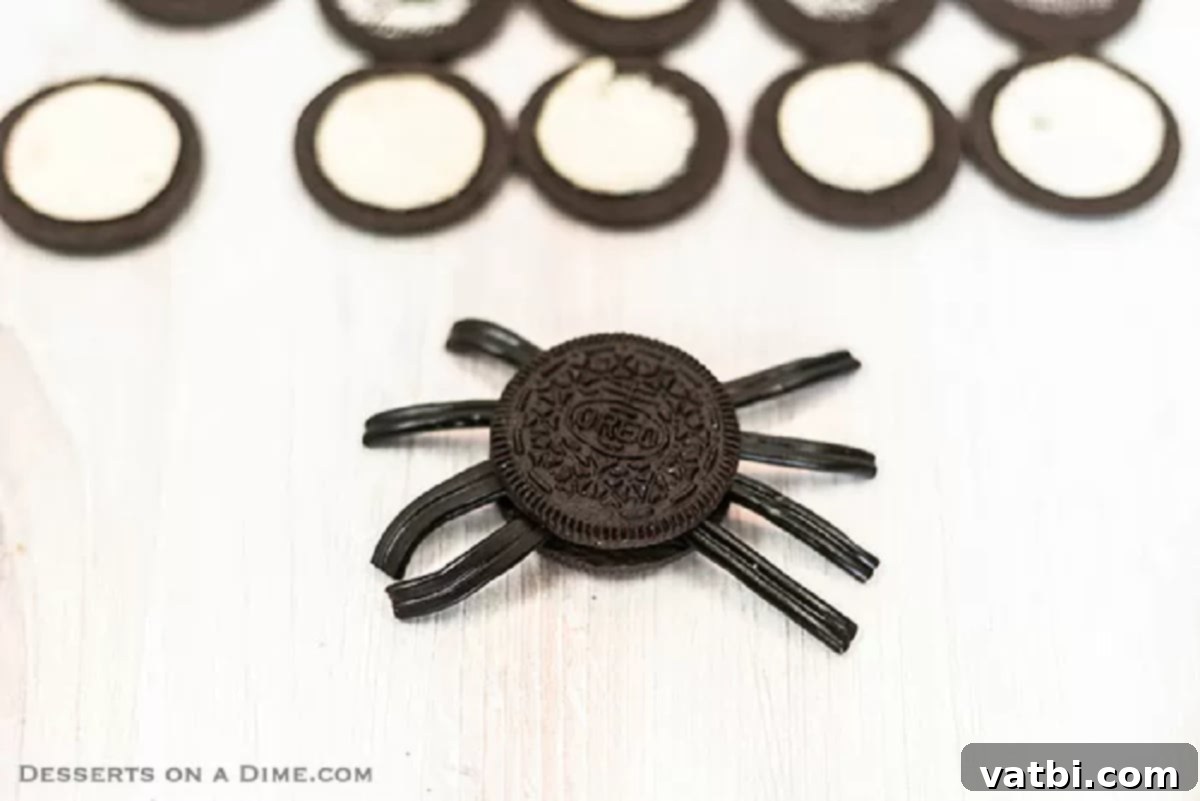
Step 3. Now, carefully place the plain cookie wafer back on top of the cream-filled half, gently pressing down to sandwich the licorice legs firmly between the two wafers. Ensure that the legs are evenly spaced and secure. The icing you dabbed on in the previous step will help everything adhere together nicely.
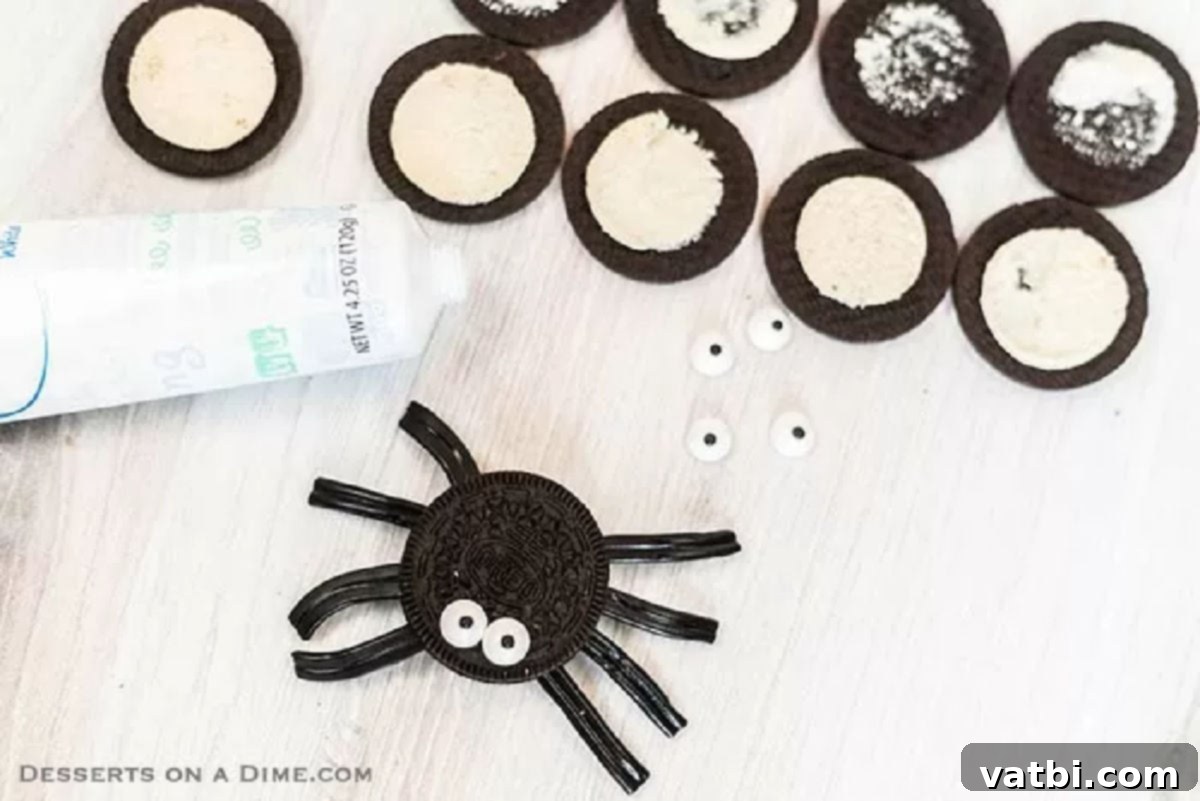
Step 4. Finally, it’s time to give your spiders their charming faces! Use a tiny dab of white icing as “glue” and press two candy eyes onto the top of each assembled Oreo cookie. You can place them close together for a cute look or slightly wider apart for a more bewildered expression. Repeat with all remaining cookies. And just like that, your spooky Oreo spiders are ready to crawl onto your serving platter!
Pro Tips for Perfect Oreo Spiders
While making Oreo Spider Cookies is straightforward, a few expert tips can elevate your creations from simple treats to show-stopping Halloween delights. Keep these pointers in mind for the best results and the most enjoyable experience:
- Choose the Right Oreo Cookies: We highly recommend using regular Oreo cookies for this recipe. Double Stuffed Oreos, while delicious, have a thicker cream filling that can make them more prone to breaking when twisted apart, and it can be trickier to secure the licorice legs firmly. The standard thickness provides the perfect balance for stability and ease of assembly.
- Cut Licorice Legs to Proportion: When cutting the licorice, aim for pieces that are approximately 2 inches long. If the licorice pieces are too long, they might become floppy or put too much strain on the cookie, potentially causing it to break when handled. Shorter, proportional legs will look better and be more stable. Remember, you’ll need 8 pieces per cookie!
- Strategic Icing Application:
- For Reassembly: Apply a sufficient amount of icing to the bottom of the plain cookie wafer before reattaching it. This ensures a strong bond that holds the two cookie halves and the licorice legs securely together.
- For Candy Eyes: Use just a tiny dab of icing for each candy eye. Too much icing can be messy and might cause the eyes to slide around or not adhere properly once it starts to dry. A small dot is all you need for a firm, clean attachment.
- Involve Small Hands: This is truly one of the best easy Halloween activities for kids! Supervise younger children while they cut the licorice (or pre-cut it for them), but let them take the lead in placing the legs and, most excitingly, attaching the candy eyes. It’s a fun, interactive way to create lasting holiday memories.
- Prepare Ahead for Parties: These Oreo Spider Cookies are excellent for making ahead of time. Their sturdy nature means they hold up well, allowing you to prepare them a day or two before your event. This frees up valuable time on party day for other preparations.
- Get Creative with Leg Placement: While placing 4 legs on each side is standard, encourage children to experiment with different leg arrangements for unique spider characters. Some might have all legs facing forward, others might look like they’re mid-crawl!
Frequently Asked Questions About Oreo Spider Cookies
Got questions about these spooky-sweet treats? We’ve got answers! Here are some common inquiries to help you make the best Oreo Spider Cookies possible:
Store your finished Oreo Spider Cookies in an airtight container at room temperature. They will stay fresh, delicious, and creepy-crawly for up to a week. No need to refrigerate!
Absolutely! These Oreo Spider Cookies are the perfect Halloween treat to make ahead of time. You can assemble them a day or two before your party or event, which helps alleviate last-minute stress. Just store them in an airtight container until you’re ready to serve.
No licorice? No problem! Pretzel sticks are an excellent substitute for spider legs. Break them into smaller pieces (about 2 inches long) and insert them into the cream filling just like you would the licorice. Chocolate-covered pretzel sticks would also add a delicious touch!
While Oreo cookies are ideal for their twist-apart design and cream filling, you could experiment with other sandwich cookies if you’re feeling adventurous. Just ensure they have a stable cream center that can hold the “legs” in place. Vanilla sandwich cookies would make for a fun contrast!
Yes, these Oreo Spider Cookies are generally a fantastic choice for school parties! They are nut-free (if using standard Oreos and not adding peanut butter), easy to portion, and very visually appealing to kids. Always double-check with the school for any specific allergy guidelines or dietary restrictions before bringing treats.
Discover More Easy Halloween Treats
The fun doesn’t have to stop with these adorable Oreo Spider Cookies! If you’re looking to expand your collection of spooktacular treats, we’ve got plenty more easy and creative ideas that are perfect for any Halloween celebration. Get inspired with these festive recipes:
- Halloween Spider Cookies: Explore another take on spider-themed cookies, offering even more variety for your spooky dessert table.
- Spider Web Cupcakes: Transform ordinary cupcakes into creepy-crawly masterpieces with simple icing techniques that create stunning spider web designs.
- Halloween Chocolate Covered Strawberries: Elevate a classic treat with a spooky twist! These chocolate-covered strawberries are elegant, delicious, and easy to decorate for Halloween.
- Halloween Popcorn: A quick and addictive snack, perfect for movie nights or party favors. Loaded with festive colors and candies, it’s a sweet and salty crowd-pleaser.
- Ghostly Pretzel Rods: Dip pretzel rods in melted white chocolate and add mini chocolate chips for eyes to create adorable edible ghosts.
- Mummy Dogs: Wrap hot dogs in strips of puff pastry to resemble mummies, then bake for a fun savory Halloween snack.
We hope you have an absolutely fantastic time creating and enjoying these Fun and Festive Oreo Spiders! If you try this recipe, please make sure to leave a comment or a star review below. We always love hearing from you and seeing your wonderful creations!
Pin
Spider Oreo Cookies
Ingredients
- 12 Oreo Cookies
- Rope Black Licorice
- 24 Candy Eyes
- 4 oz White Icing
Instructions
-
Untwist each Oreo.
-
Cut the black licorice into approximately 2 inch pieces. You will need 8 per Oreo (96 total).
-
Place 4 pieces of the licorice on each side of the cookie with the majority of the filling on the Oreo cookie. Put some of the white icing on the bottom of the opposite cookie to help hold it back on top.
-
Place the cookies back together.
-
Use the icing to put the candy eyes on the Oreos to create the face of the spider.
-
Enjoy!
Nutrition Facts
Pin This Now to Remember It Later
Pin Recipe
