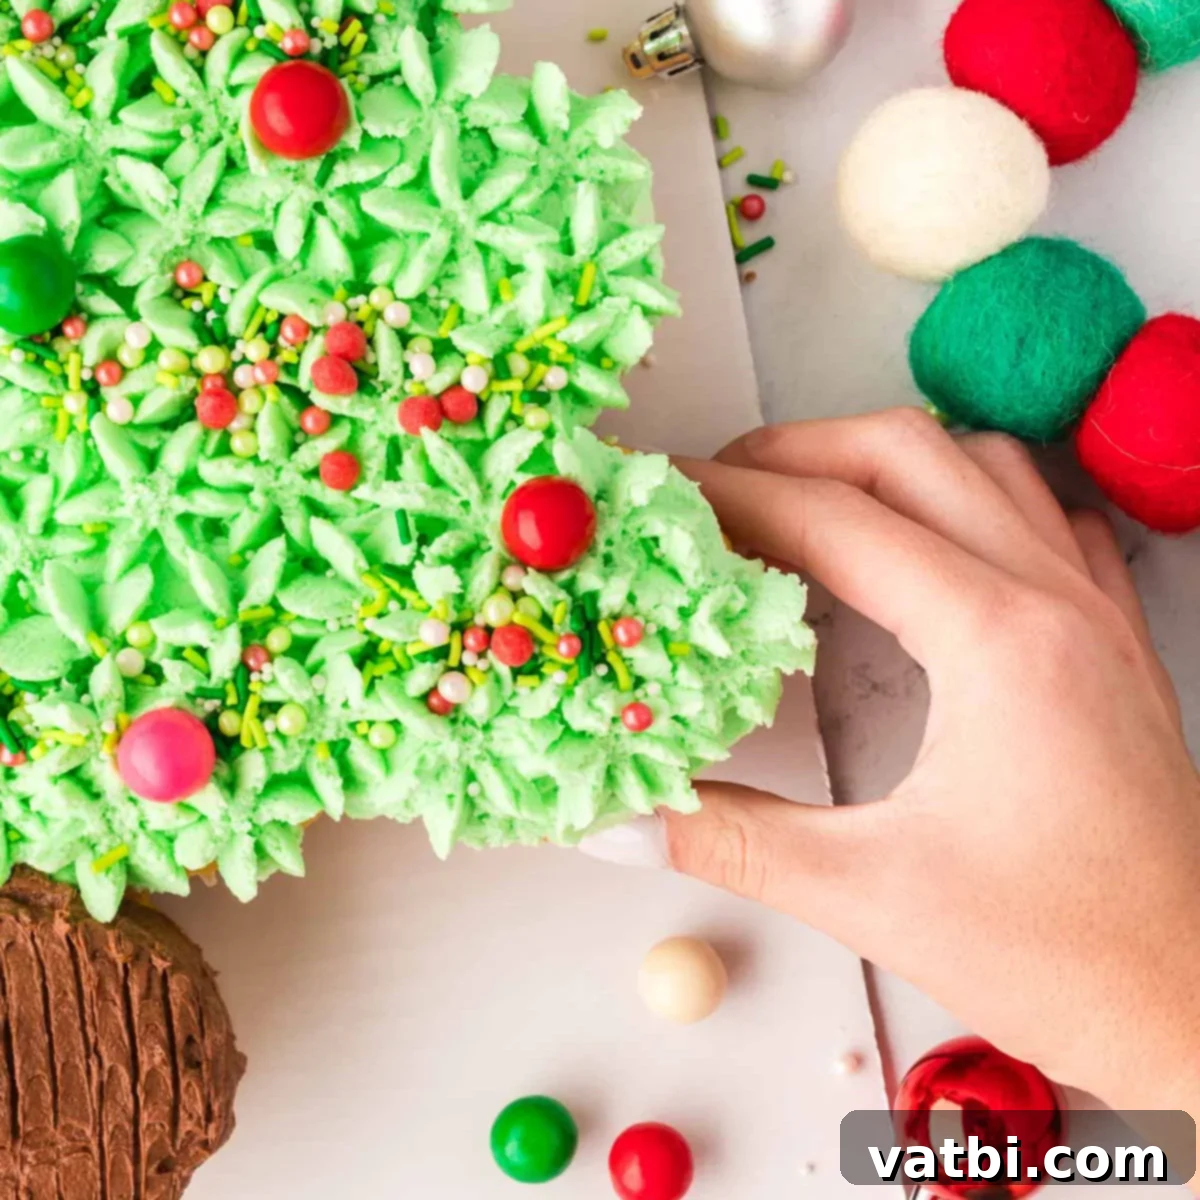
Effortlessly Create a Festive Christmas Tree Cupcake Cake: Your Ultimate Guide to Holiday Baking Fun
Transform a simple batch of cupcakes into a showstopping centerpiece this holiday season with our easy-to-follow guide for creating a delightful Christmas Tree Cupcake Cake. This visually stunning dessert is surprisingly simple to assemble and decorate, making it a perfect activity for the whole family. Imagine the smiles and cheers as your guests admire this edible Christmas tree, then effortlessly pull apart individual cupcakes to enjoy. It’s truly a fantastic, fun, and memorable way to celebrate!
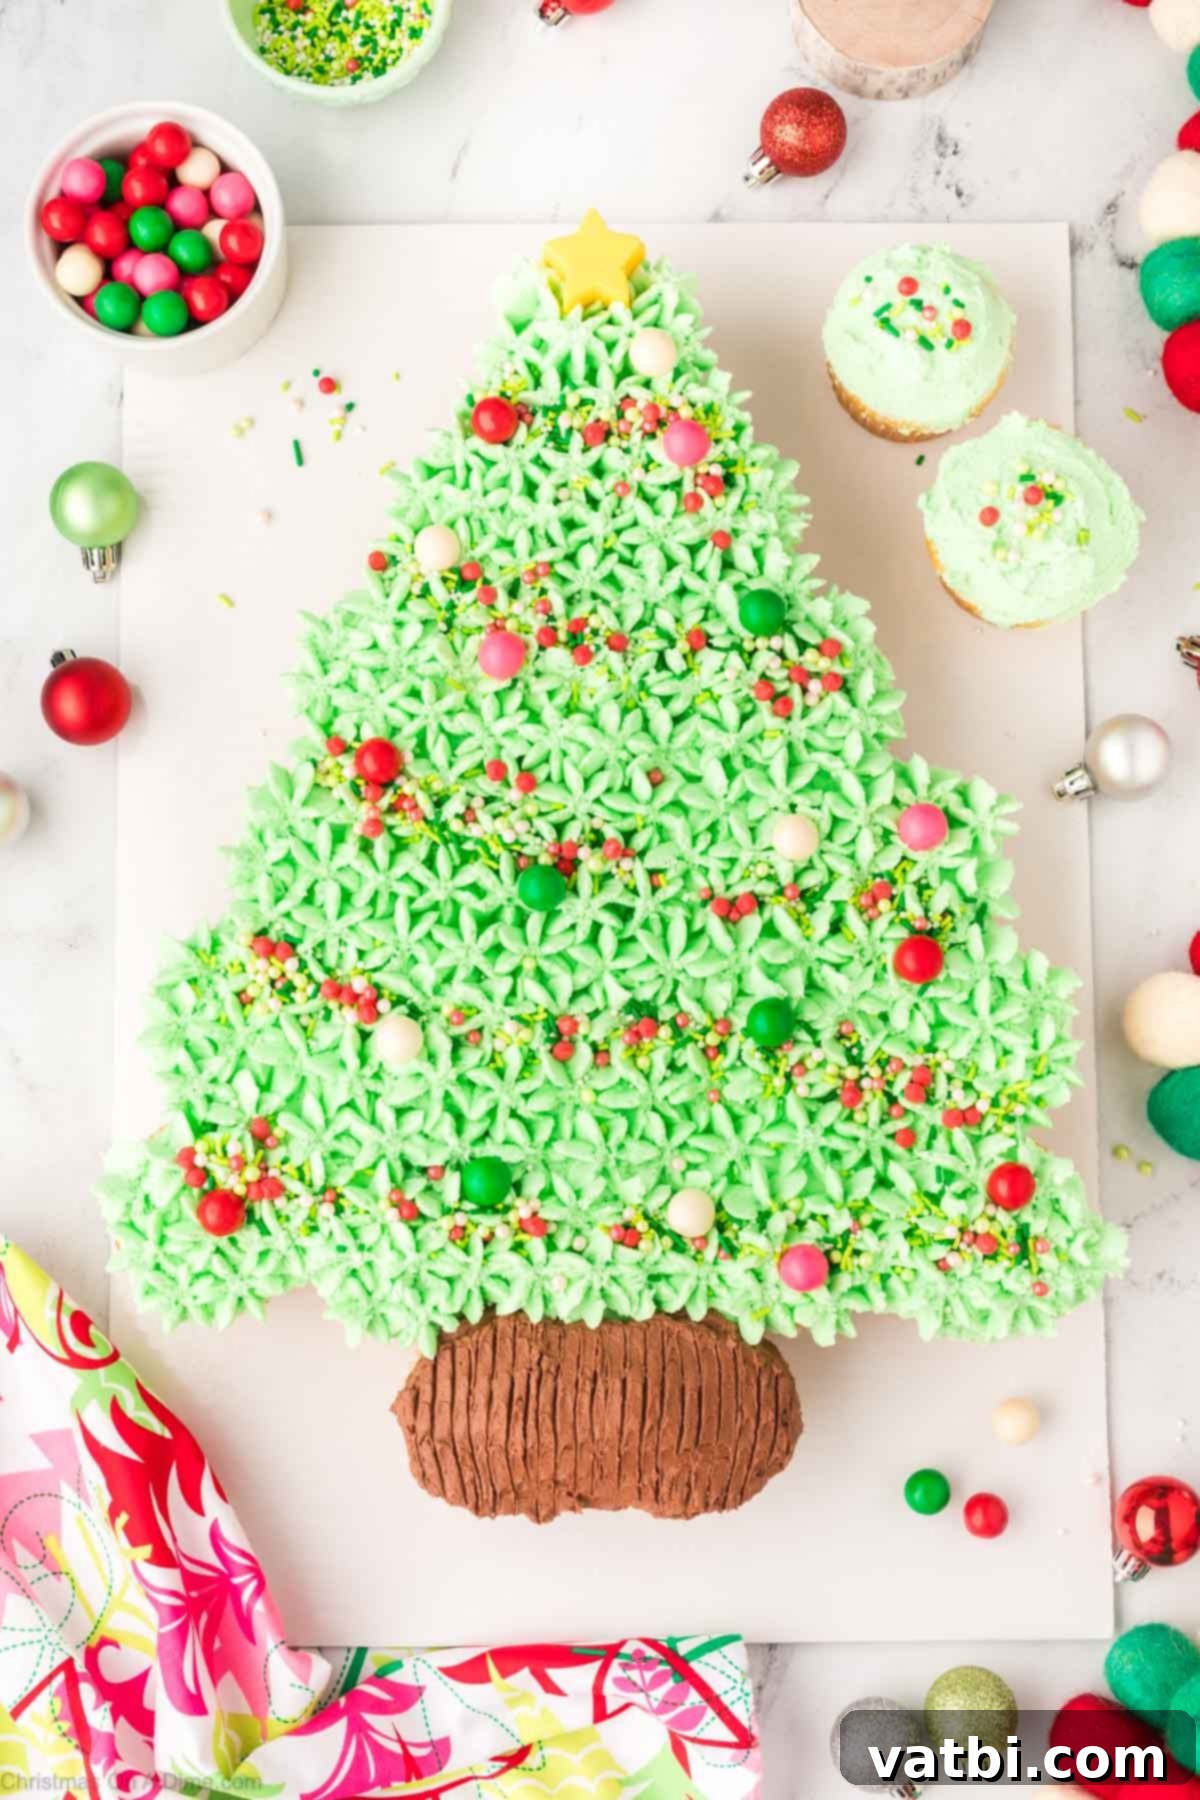
The holiday season is synonymous with cozy gatherings, festive decorations, and, of course, delicious baking! This Christmas Tree Cupcake Cake is a must-try addition to your holiday baking list. It’s celebrated as one of our favorite Easy Christmas Dessert Recipes because it combines the simplicity of cupcakes with the grand appeal of a cake. Children especially love to get involved in the creative process, turning a basic cupcake recipe into a magical Christmas Tree. The individual serving size means no messy slicing, making it incredibly convenient for parties!
This recipe is not only incredibly easy to execute but also perfectly suited for any holiday celebration, from intimate family dinners to larger festive parties. If you’re looking for more fun Christmas tree-themed desserts to complement your spread, we highly recommend trying our enchanting Meringue Christmas Trees and our classic Christmas Tree Sugar Cookies Recipe. Each offers a unique way to bring the spirit of Christmas to your dessert table.
Table of contents
- Why We Love This Festive Cupcake Tree
- Essential Ingredients for Your Cupcake Christmas Tree
- Step-By-Step Guide to Assembling Your Christmas Tree Cupcake Cake
- Proper Storage for Your Cupcake Cake
- Expert Tips for a Perfect Christmas Tree Cupcake Cake
- Frequently Asked Questions About This Holiday Dessert
Why We Love This Festive Cupcake Tree
This Christmas Tree Cupcake Cake is the ultimate holiday dessert for several compelling reasons. Firstly, it offers the perfect balance of being incredibly festive and charmingly cute without demanding hours of intricate work in the kitchen. While it boasts an elaborate appearance, its actual creation is surprisingly straightforward, making it accessible even for novice bakers. The “pull-apart” design means no knives are needed, making serving a breeze and minimizing mess, especially appealing for parties with many guests or small children.
Beyond its ease, the recipe is remarkably versatile, allowing you to adapt it with any color scheme or embellishments you desire. Want a blue and silver tree? Go for it! Prefer a whimsical, multi-colored tree? The possibilities are endless. We’ve found so much joy and creative freedom in the decorating process, and it’s a wonderful activity to share with family, creating lasting holiday memories as you design your edible masterpiece together.
Essential Ingredients for Your Cupcake Christmas Tree
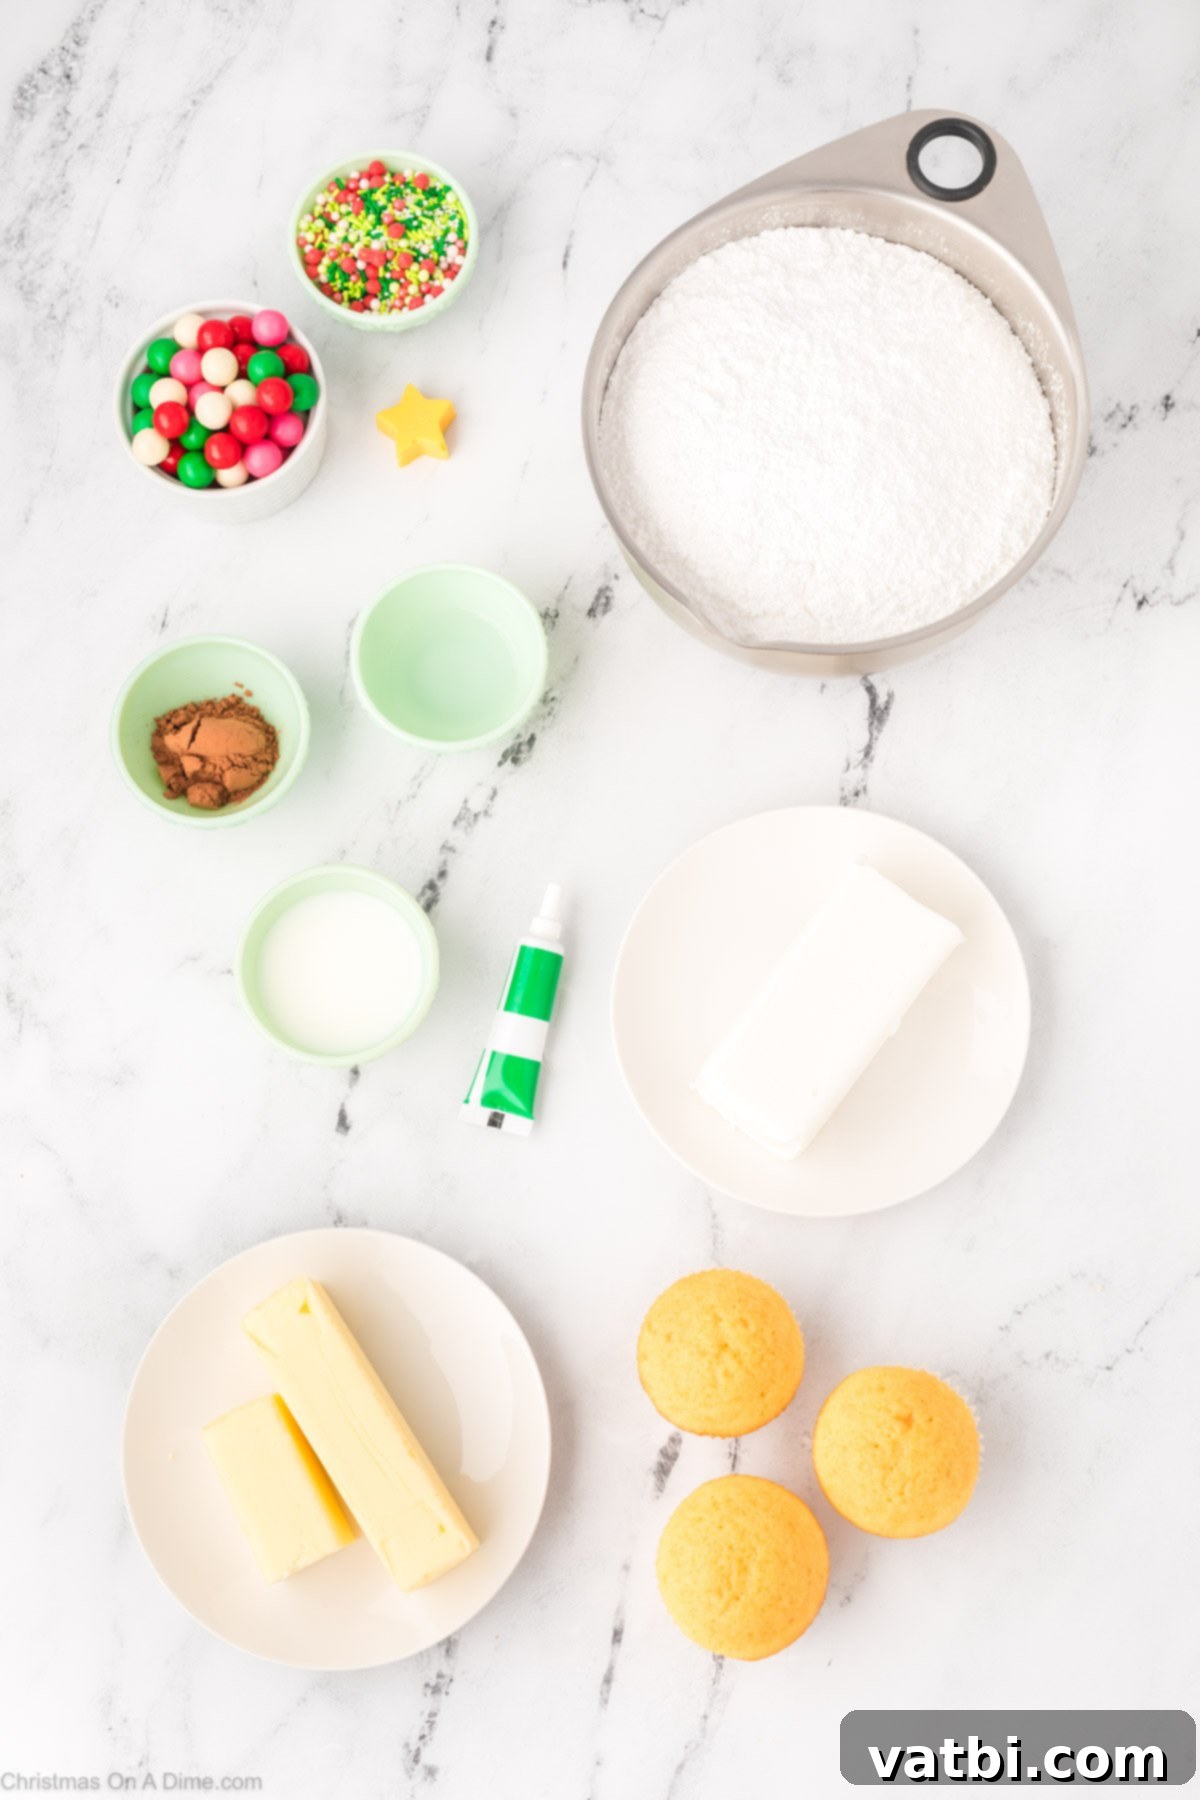
Creating the perfect Christmas Tree Cupcake Cake starts with gathering the right ingredients. Here’s a detailed look at what you’ll need:
- Vanilla cupcakes. You’ll need at least 24 prepared and completely cooled cupcakes. While we opted for classic vanilla for its universal appeal, feel free to use any flavor you prefer! Chocolate, red velvet, or even a festive spice cupcake would work wonderfully. You can bake them from scratch or use a good quality boxed mix to save time during the busy holiday season.
- Butter or Margarine. For the rich, creamy frosting, I personally prefer unsalted butter for its flavor. However, margarine can also be used if that’s your preference. The key is to ensure it is softened to room temperature before you begin, which will allow it to whip up light and fluffy.
- Clear vanilla extract. This is a crucial ingredient if you want a vibrant green frosting without any yellow tint. Regular vanilla extract has a brownish hue that can dull your colors. Clear vanilla ensures your frosting remains bright and true to color.
- Confectioners’ sugar. Also known as powdered sugar, this is the base of our buttercream frosting. Sifting it before use is highly recommended to remove any lumps, ensuring your frosting is perfectly smooth and easy to pipe.
- Milk. Any type of milk you prefer can be used to achieve the desired consistency for your frosting. Whole milk will yield a slightly richer frosting, but skim or plant-based milks work too.
- Green gel food coloring. For the most vibrant and rich green color that truly mimics a Christmas tree, gel food coloring is superior to liquid. It’s highly concentrated, so a little goes a long way, and it won’t thin out your frosting like liquid coloring can.
- Cocoa powder. A small amount of cocoa powder is used to create the brown “tree trunk” frosting. I like to use unsweetened Hershey’s cocoa powder for a deep, natural brown color and subtle chocolate flavor.
- Sprinkles. Get creative here! Any festive sprinkles will work beautifully to decorate your tree. Think colorful nonpareils, edible stars, silver or gold dragees, or even tiny candy pearls to mimic ornaments.
For the complete, precise ingredients list with measurements, please scroll to the bottom of the page to access the recipe card.
Step-By-Step Guide to Assembling Your Christmas Tree Cupcake Cake
Follow these detailed instructions to create your stunning Christmas Tree Cupcake Cake. Remember, precision in steps will lead to a beautiful and delicious result!
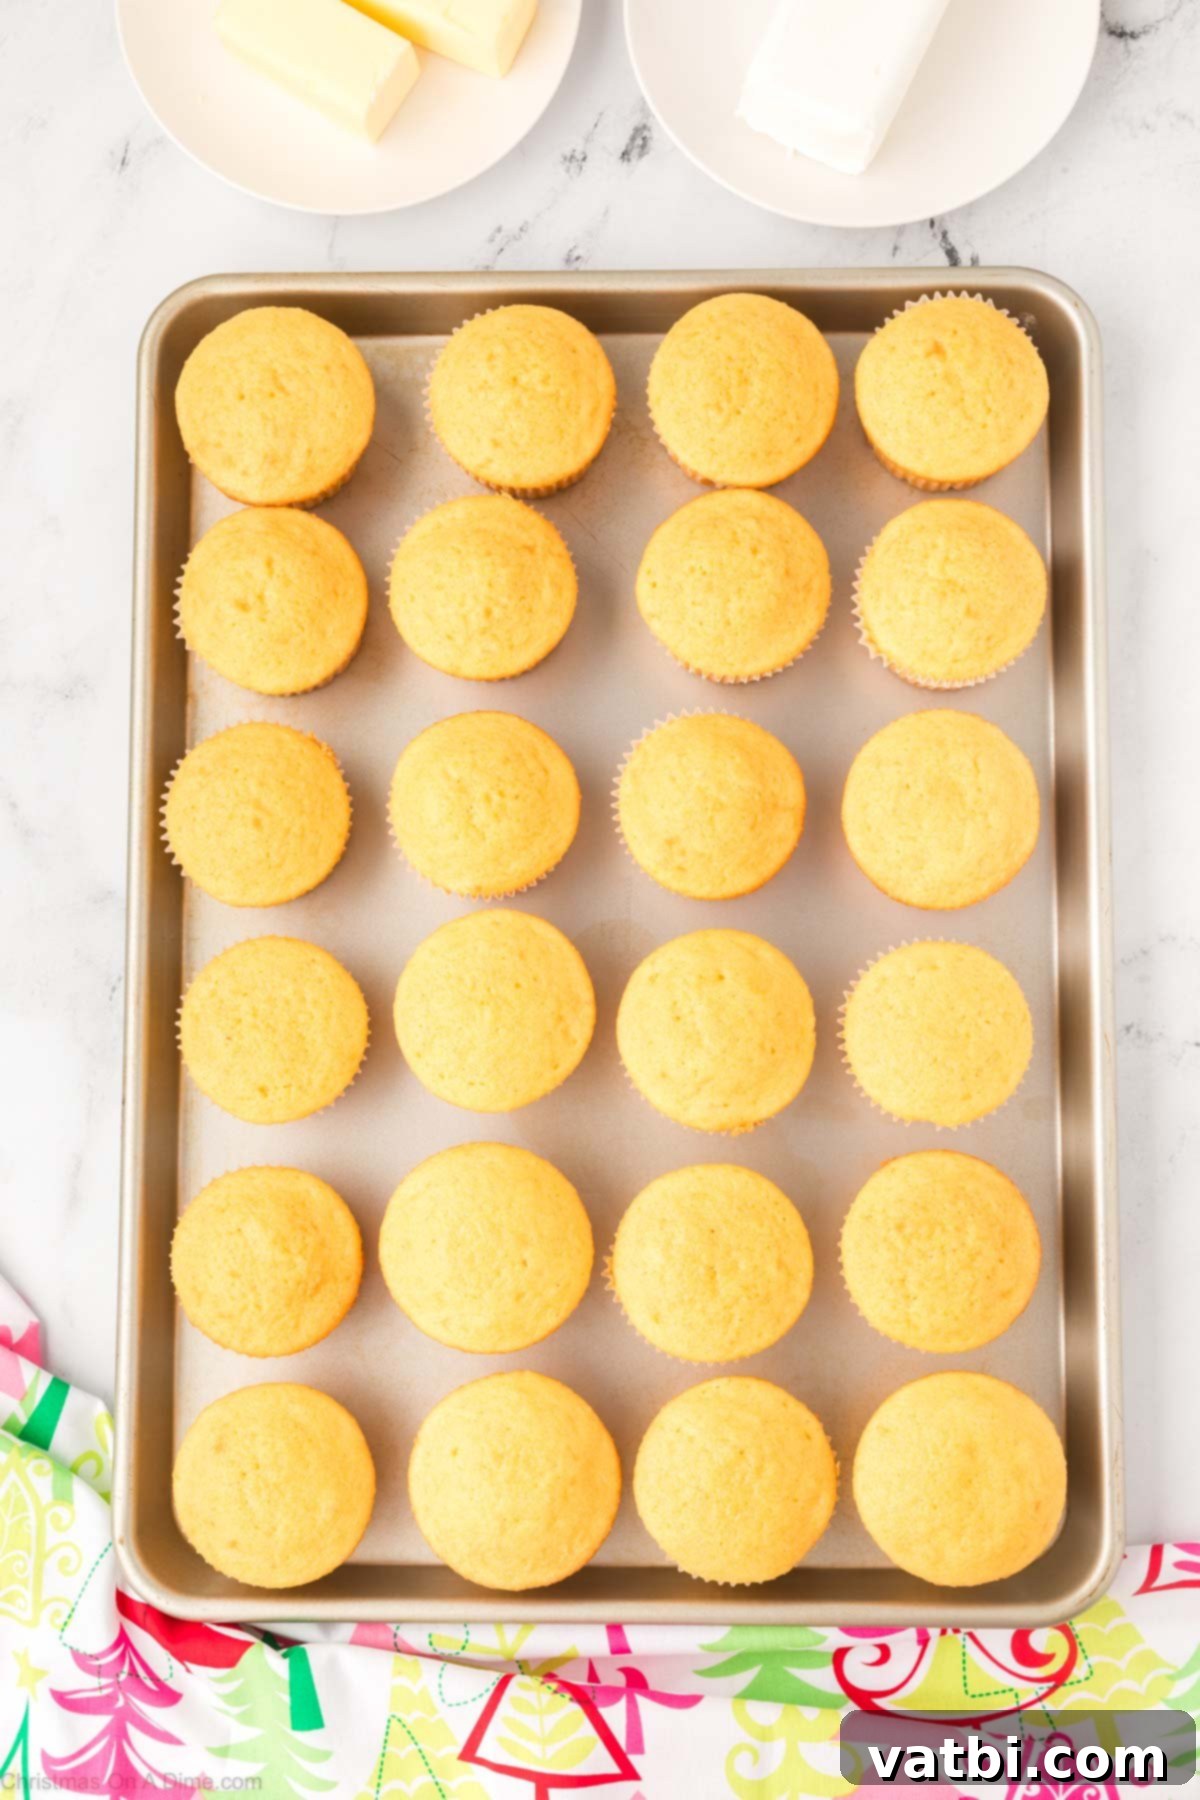
Step 1. The foundation of your cupcake tree starts with perfectly baked cupcakes. Go ahead and prepare a batch of at least 24 cupcakes using your preferred recipe – store-bought mix for convenience or homemade for that extra touch. The most critical part here is to ensure they cool completely on a cooling rack before you even think about frosting them. Warm cupcakes will melt your beautiful buttercream, turning your tree into a gooey mess.
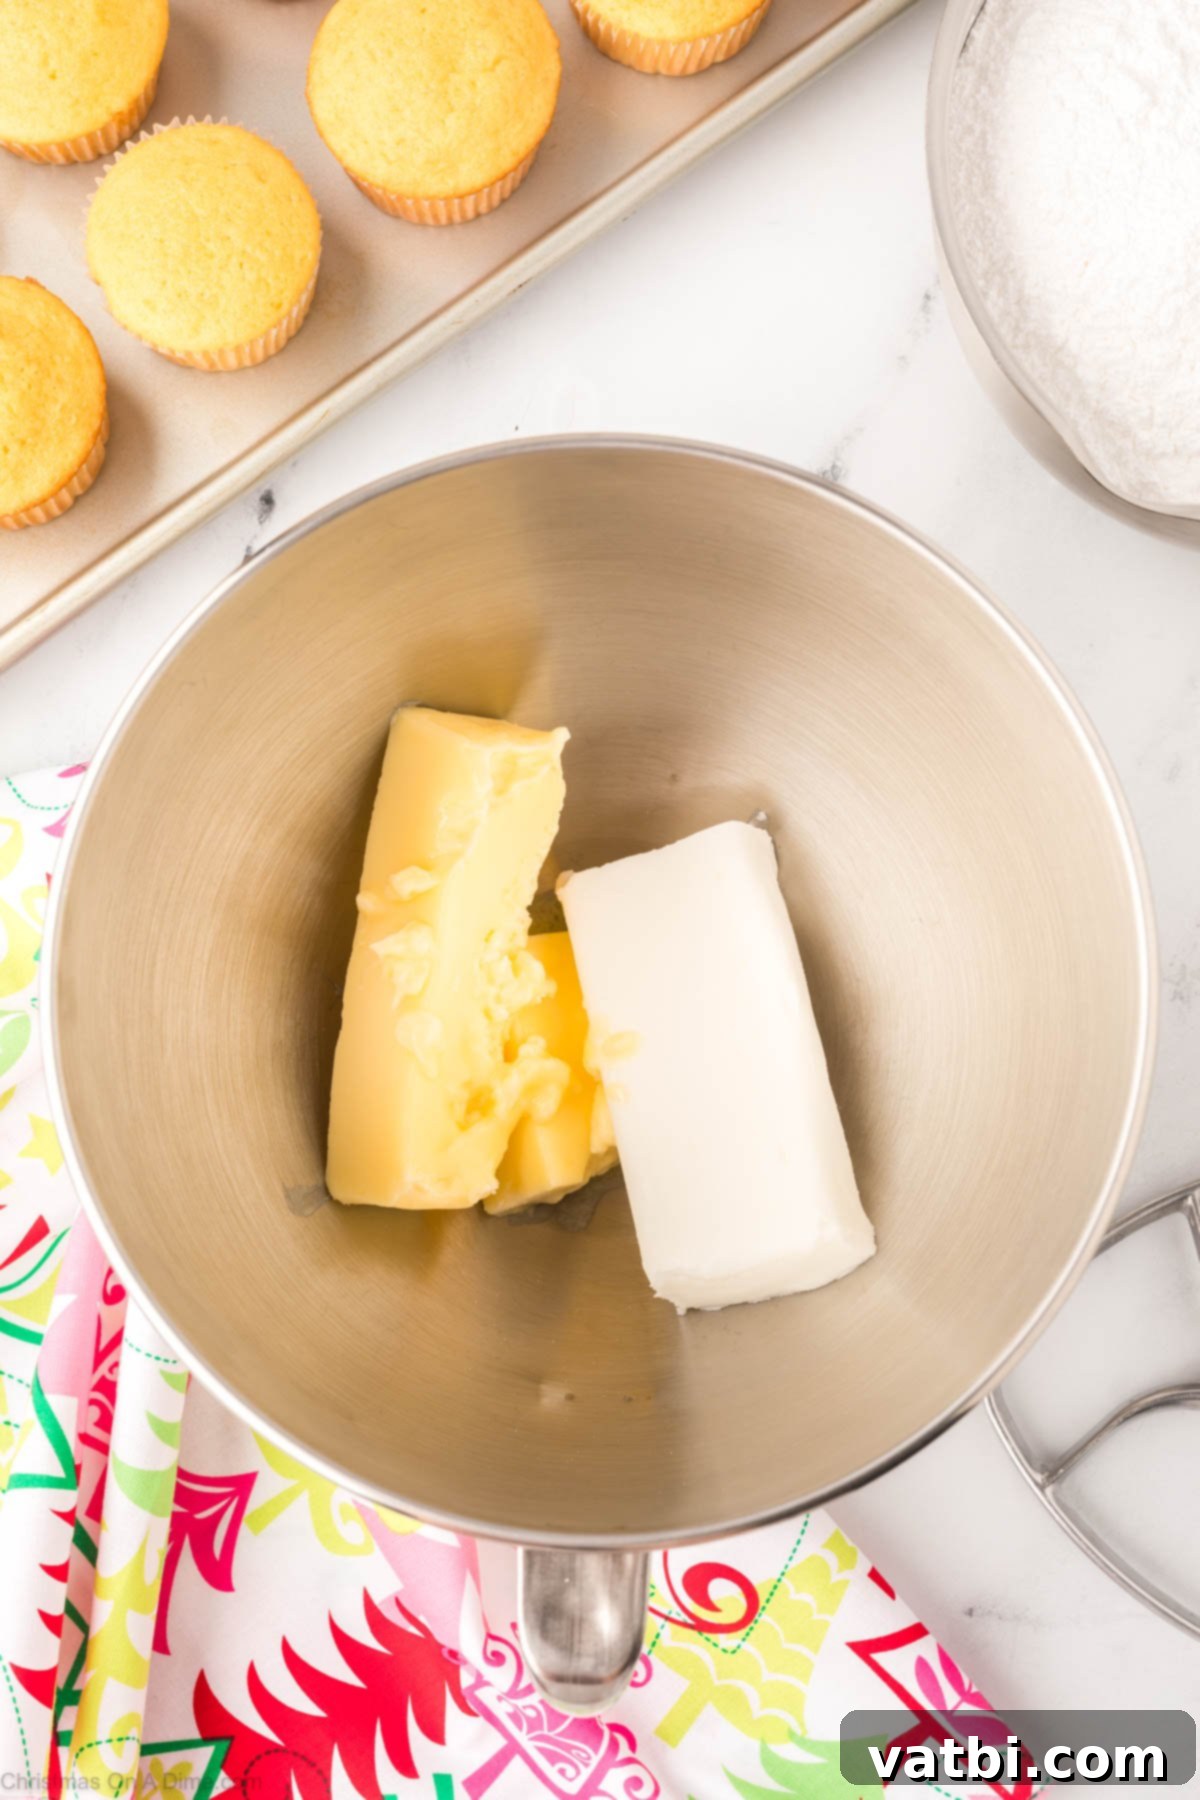
Step 2. Now, let’s create the star of the show: the delicious buttercream frosting. I highly recommend using a stand mixer fitted with the paddle attachment for the best results. Begin by whipping your softened butter and solid vegetable shortening together. Beat on medium-high speed for about 5-7 minutes, scraping down the sides of the bowl occasionally to ensure everything is evenly incorporated. The mixture should become incredibly light, airy, and fluffy – this is key to a smooth, pipeable frosting.
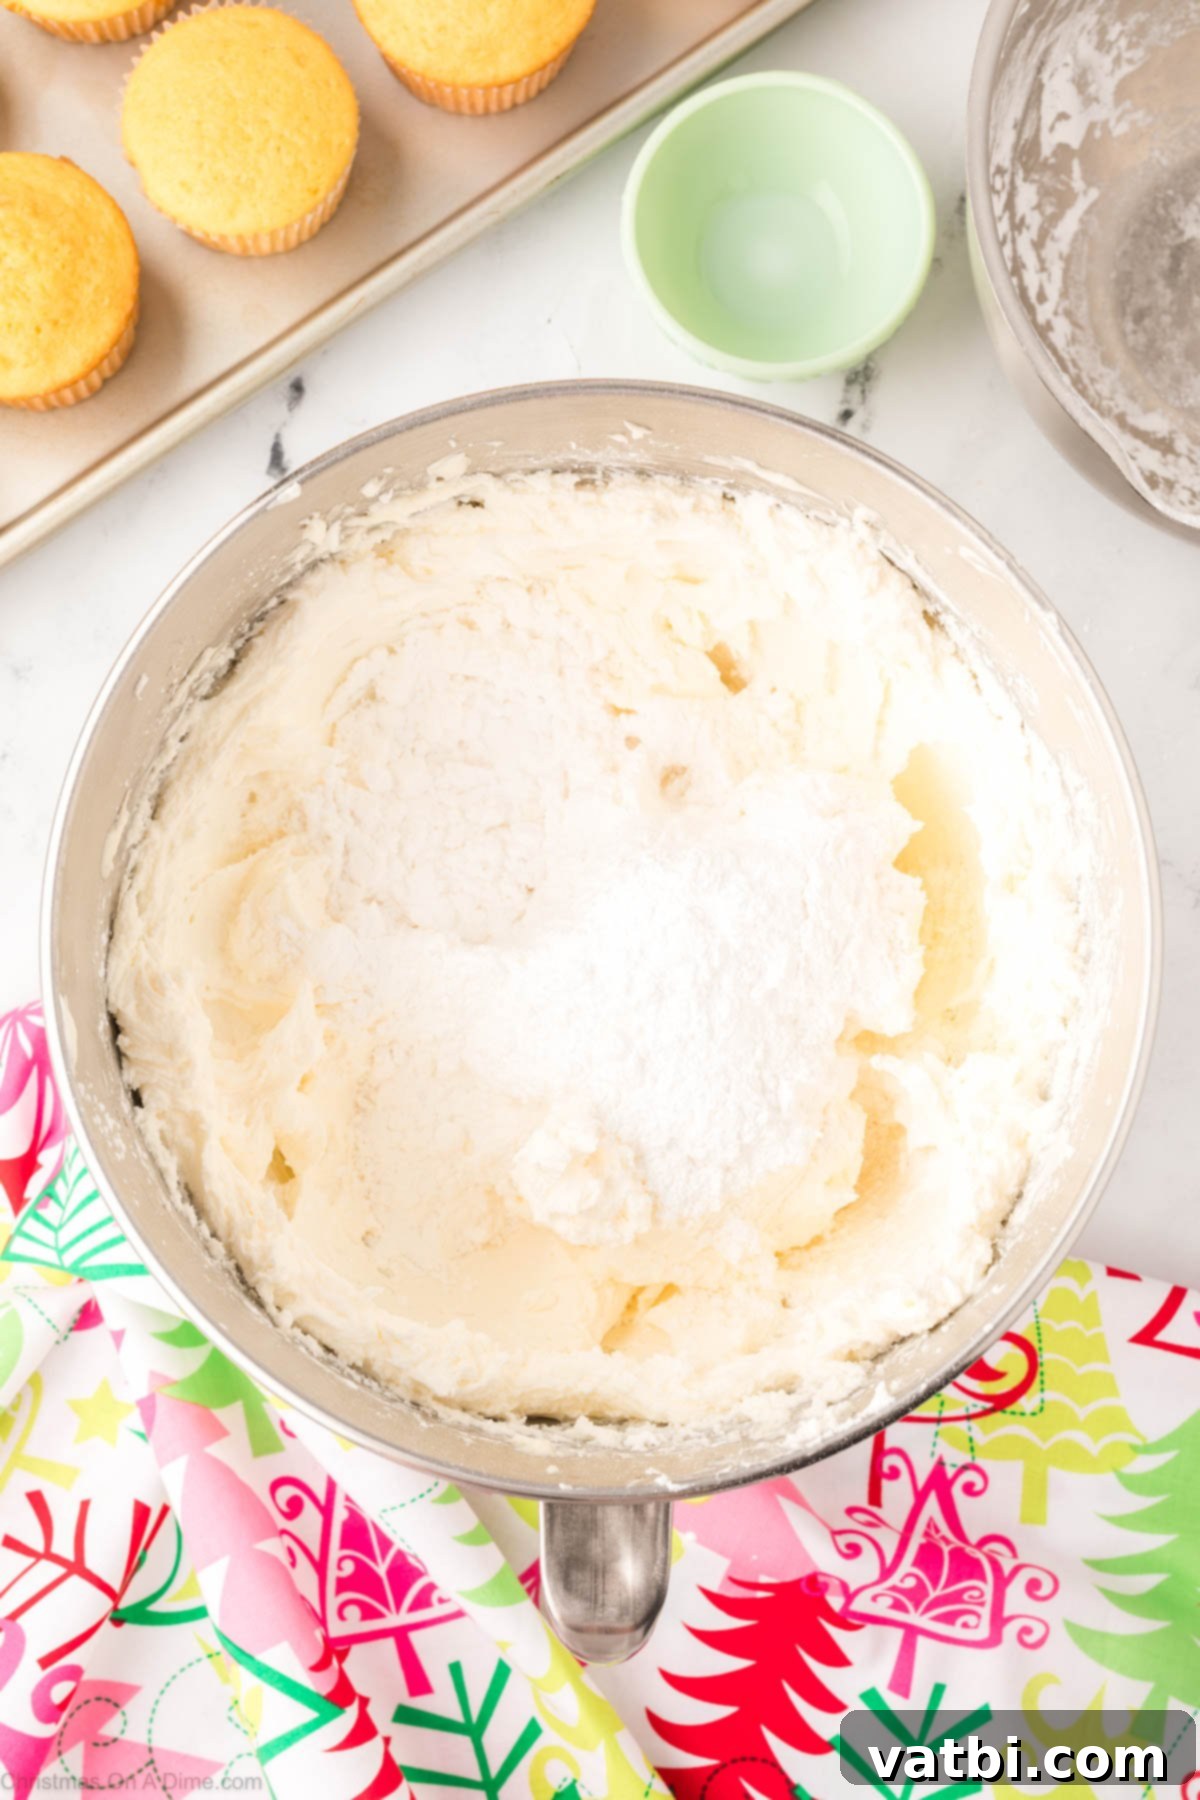
Step 3. With your butter and shortening mixture fluffy, it’s time to incorporate the sweetness. Gradually add 3 cups of the sifted powdered sugar to the bowl. Start mixing on a low speed to prevent a sugar cloud from forming, ensuring the sugar is thoroughly combined into the butter mixture. Once incorporated, add the clear vanilla extract and continue mixing until fully combined. Beat for approximately 60 seconds to achieve a smooth base.
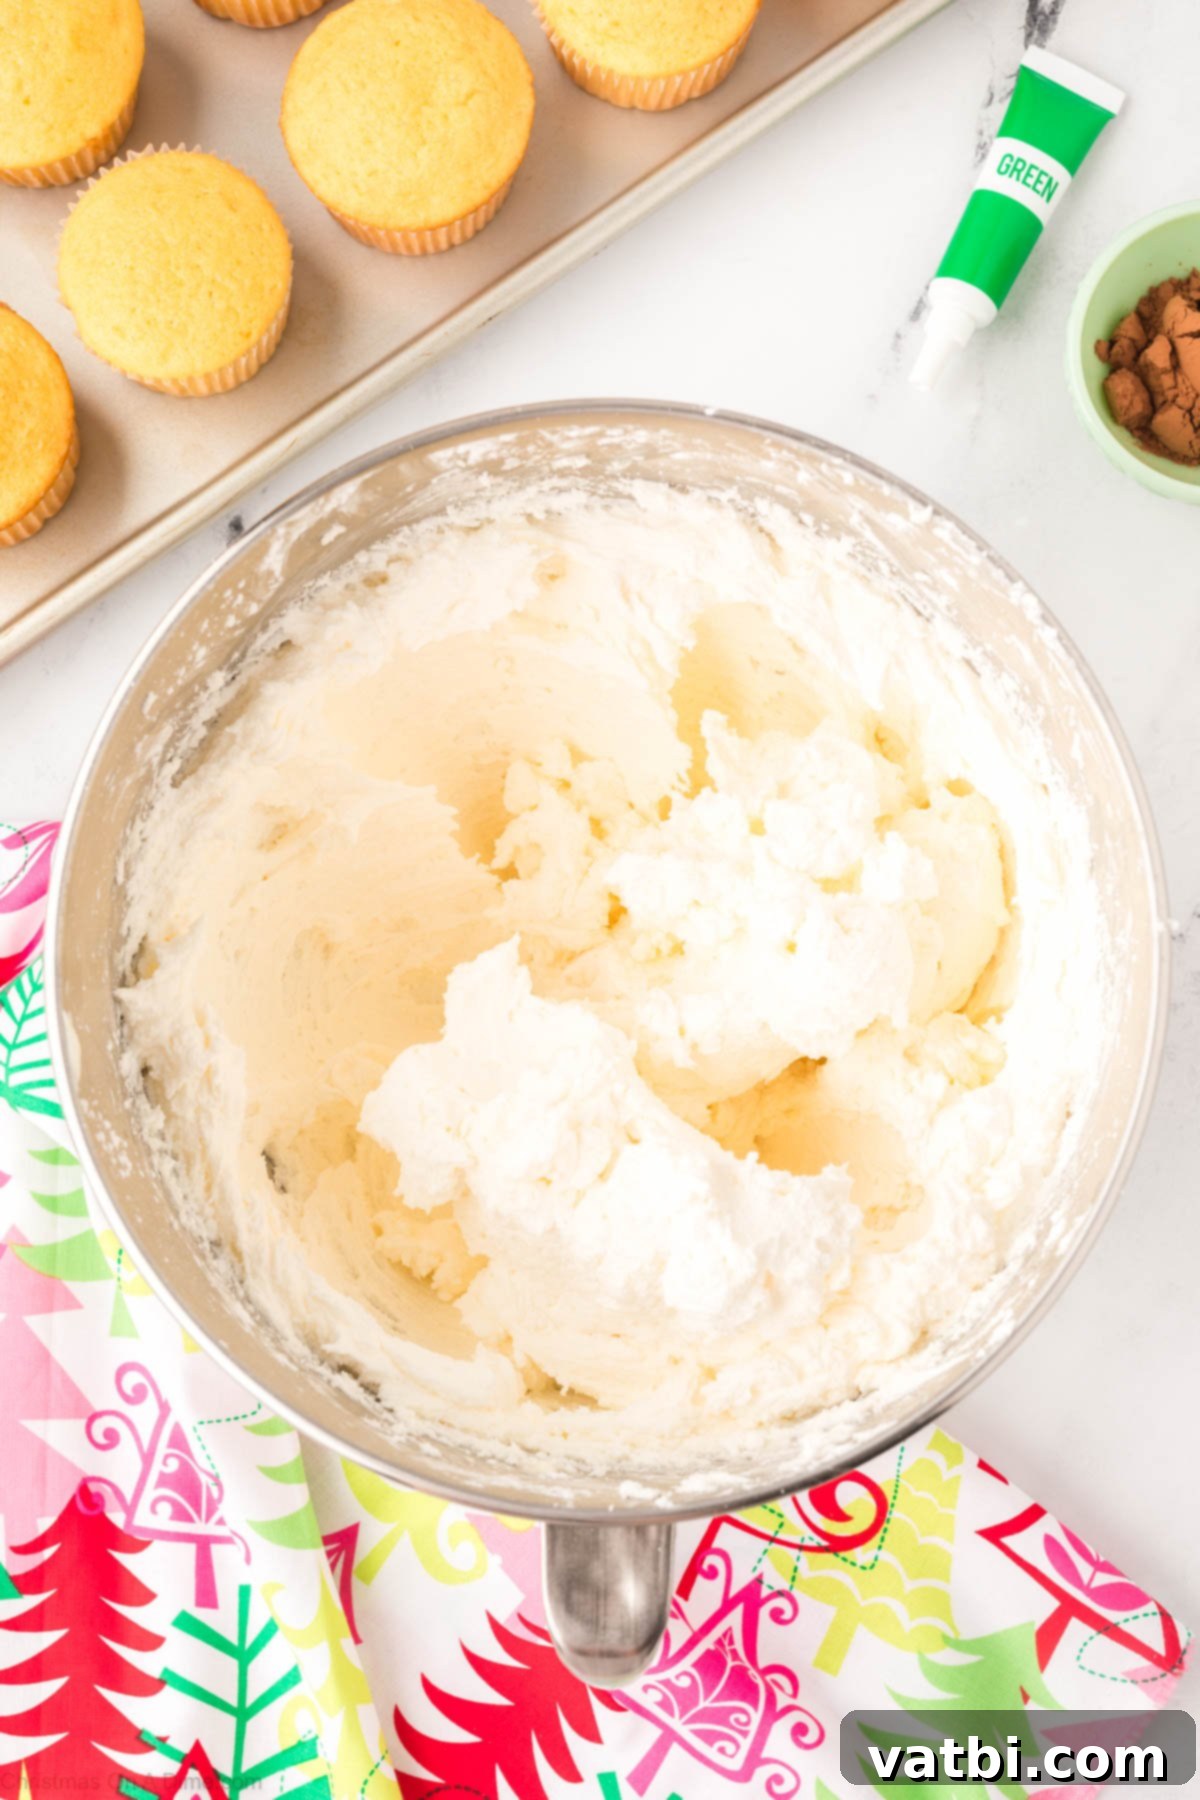
Step 4. Continue building your frosting by adding another 2 cups of powdered sugar. Again, start on low speed until the sugar is just incorporated, then increase the speed to medium-high and beat for a full 3 minutes. This step is crucial for whipping more air into the frosting, making it even lighter. Finally, add the last cup of powdered sugar along with the milk, mixing on low speed until combined, then beat on medium-high for another 3-5 minutes until the frosting is wonderfully fluffy and smooth.
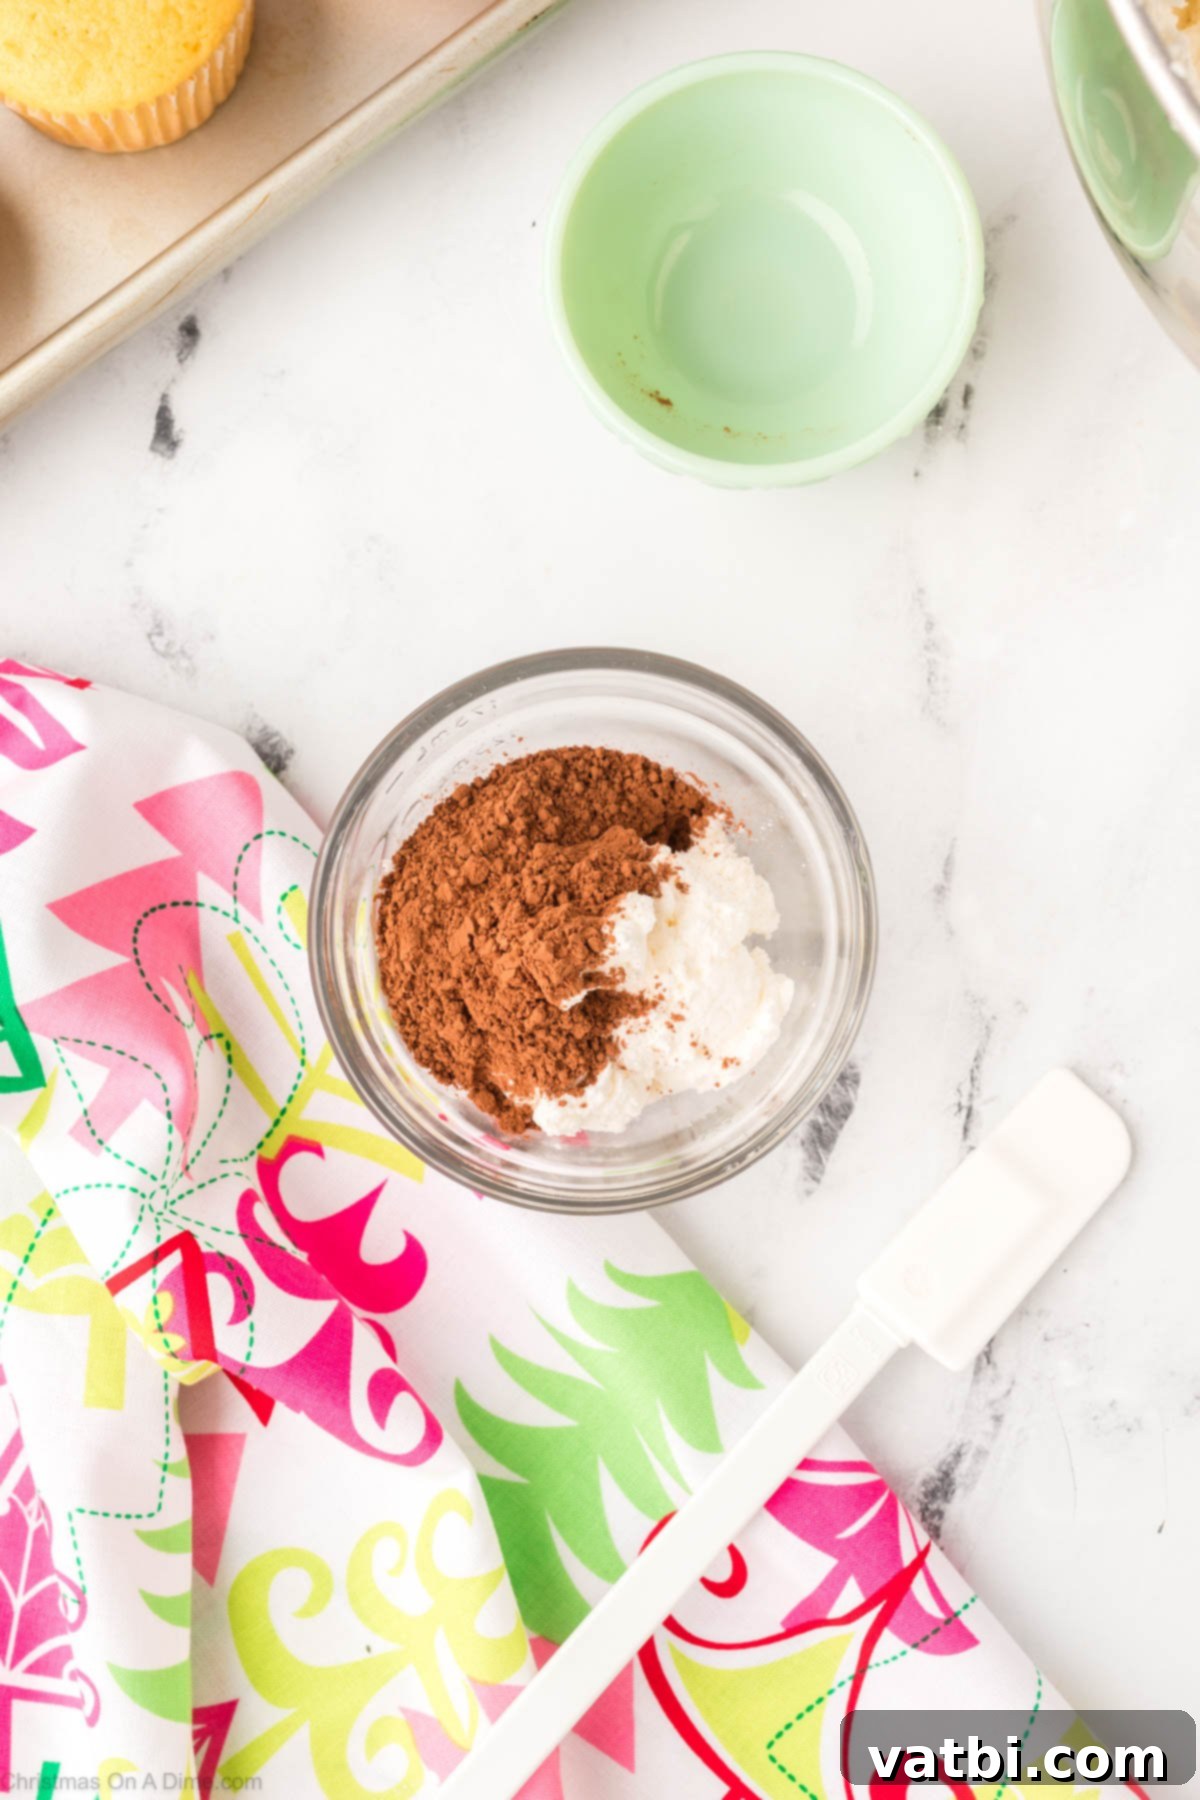
Step 5. Before coloring the main batch of frosting green, you’ll need a small amount for the tree trunk. Scoop out approximately ¼ cup of the prepared white frosting and place it into a separate, small bowl. Mix in 2-3 teaspoons of cocoa powder until you achieve a rich, consistent brown color. If the mixture seems too thick, you can add 1 teaspoon of milk at a time to help it blend smoothly and reach the desired spreading consistency.
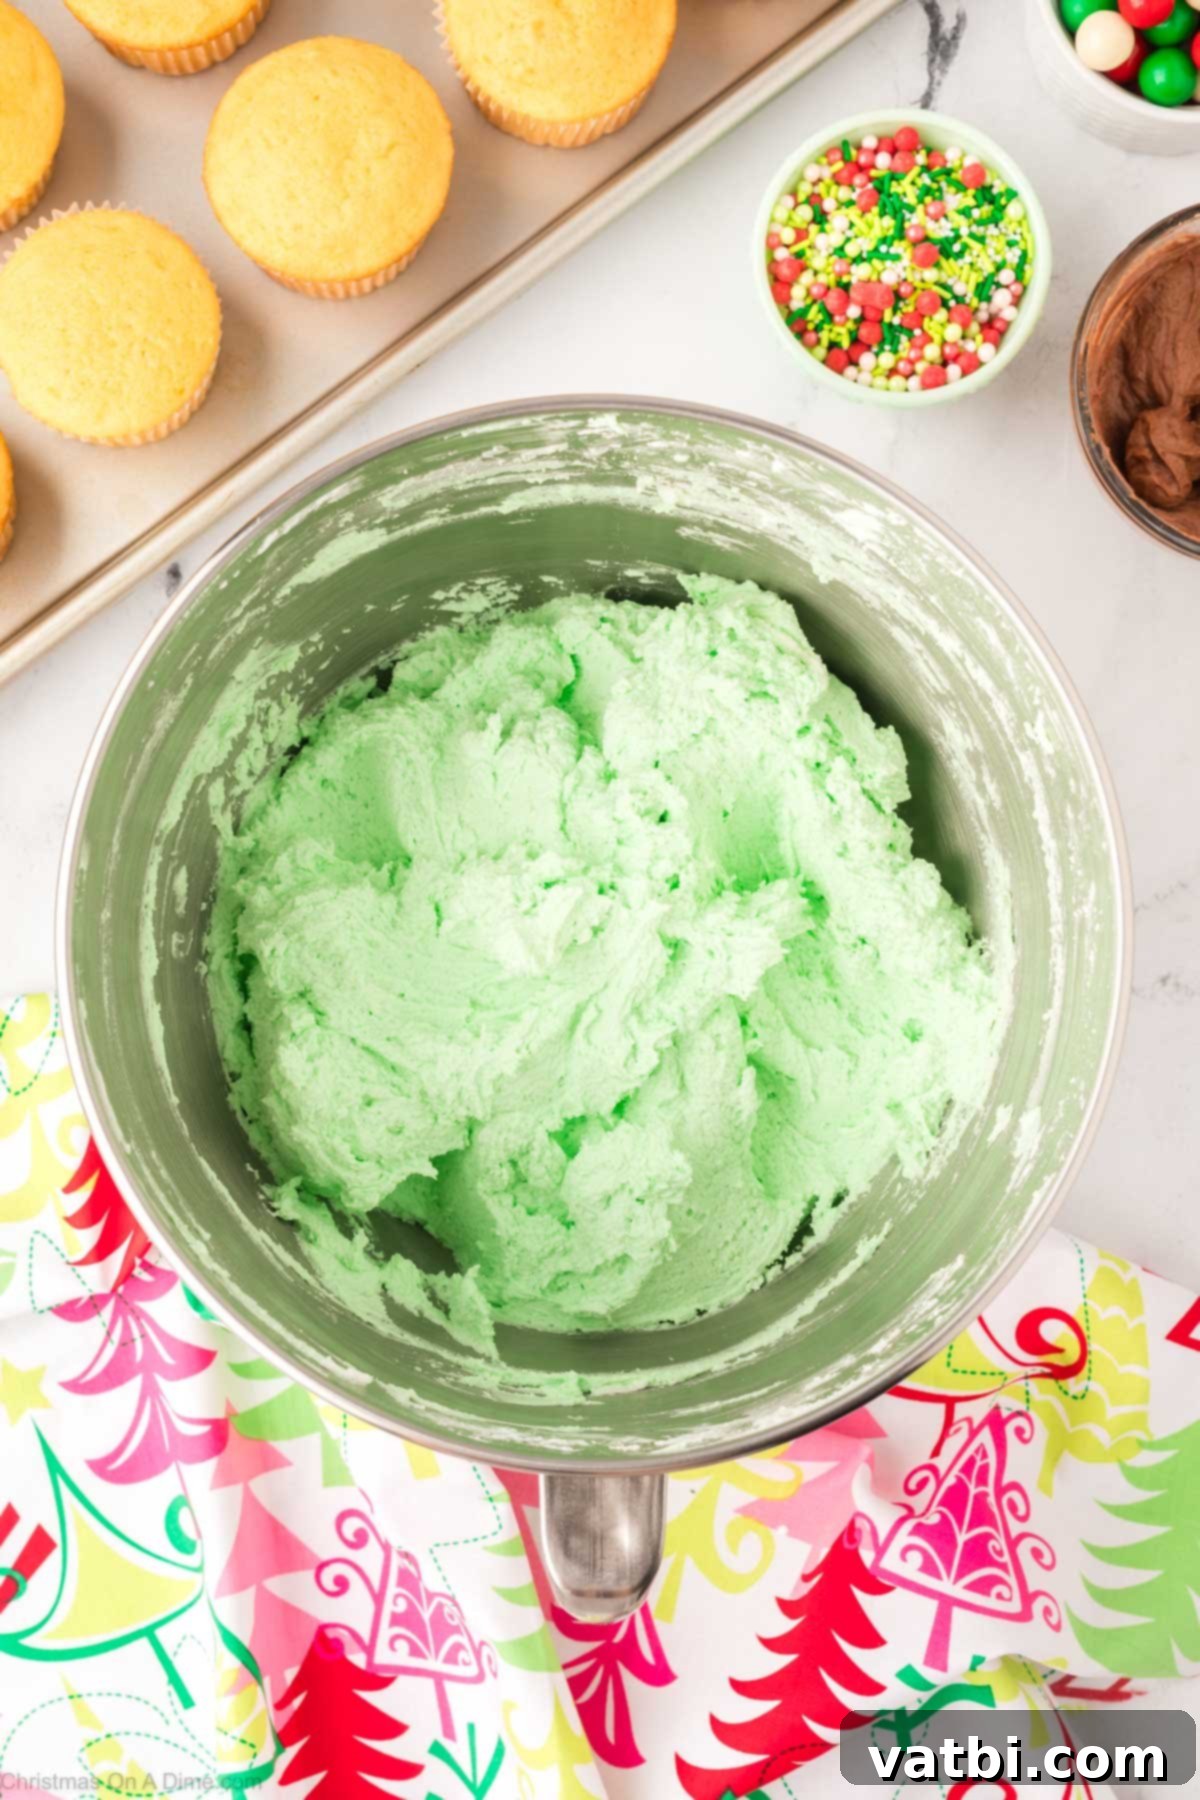
Step 6. Now for the signature Christmas tree color! Take the larger portion of remaining frosting in your stand mixer bowl and add your green gel food coloring. Start with a small amount and gradually add more, mixing thoroughly after each addition, until you achieve your desired vibrant green hue. Remember, gel coloring is potent, so add it incrementally to avoid over-coloring.
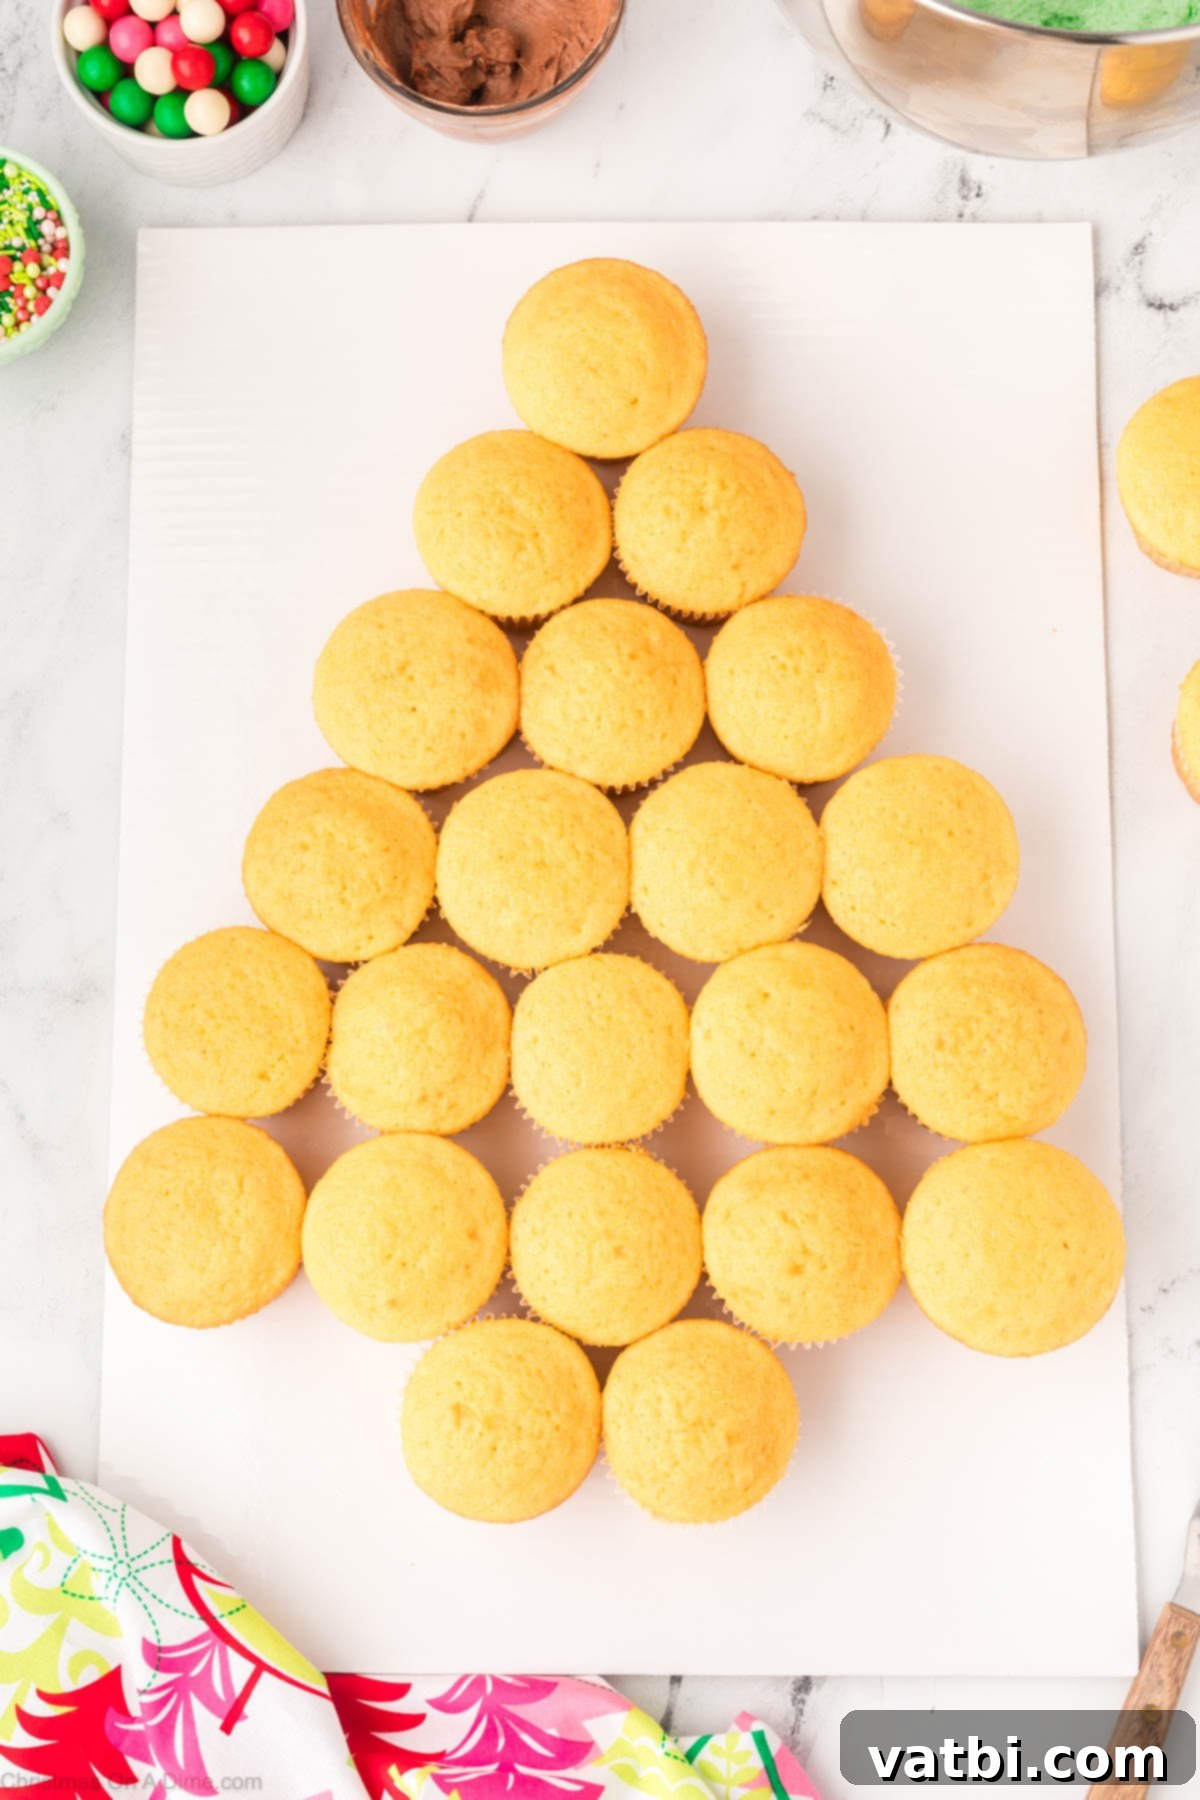
Step 7. Time to assemble your canvas! On a large serving platter or a sturdy cake board, carefully arrange your cooled cupcakes in the shape of a Christmas tree. Start by placing two cupcakes at the bottom to form the trunk. Then, build rows above them, gradually decreasing the number of cupcakes in each row to form the triangular tree shape. A common pattern is 2 (trunk), 4, 5, 6, 7 cupcakes, which uses 24 cupcakes in total. Ensure they are touching each other snugly.
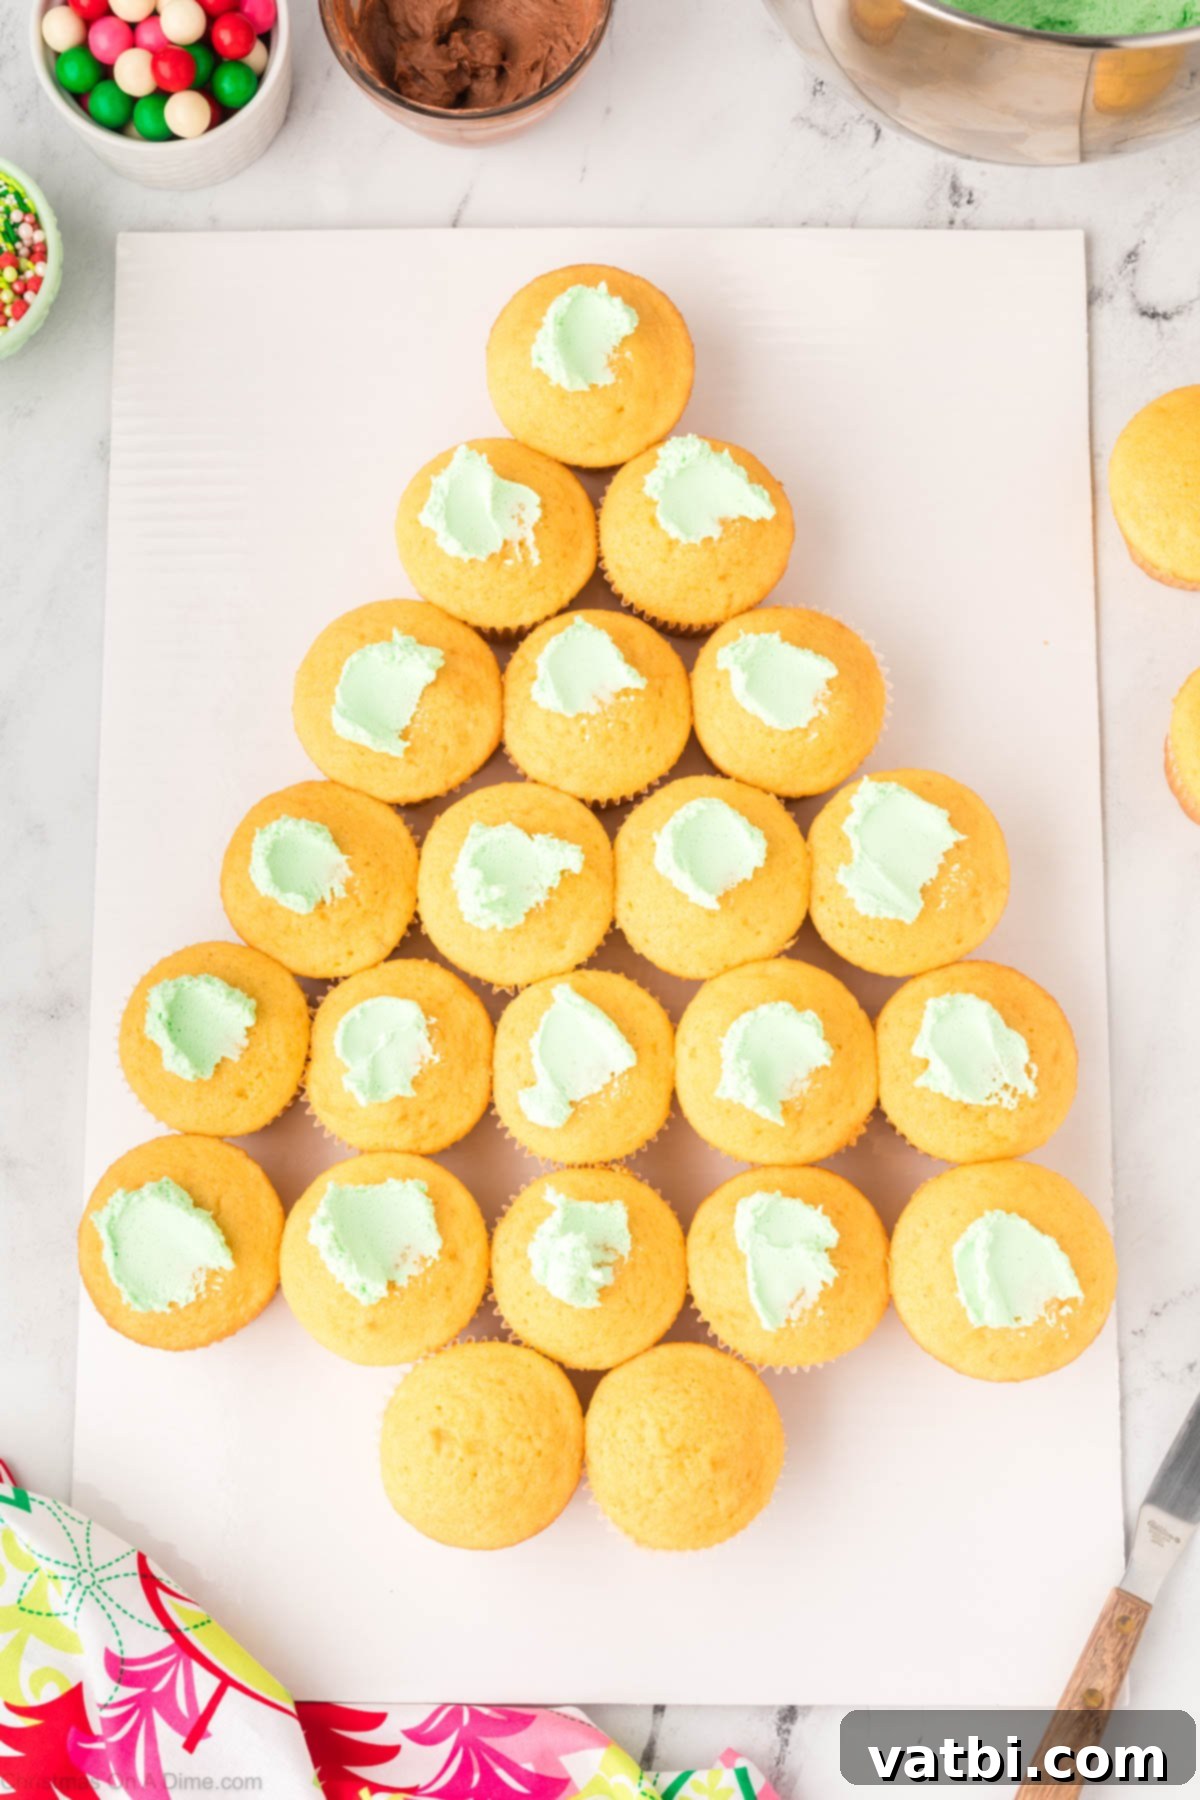
Step 8. With your tree shape formed, begin the frosting process. Take your vibrant green buttercream and place a generous dollop on top of each cupcake that forms the body of the tree. Leave the two “trunk” cupcakes unfrosted with green for now, as they will receive the brown frosting later. Don’t worry too much about perfection at this stage; we’ll smooth it out next.
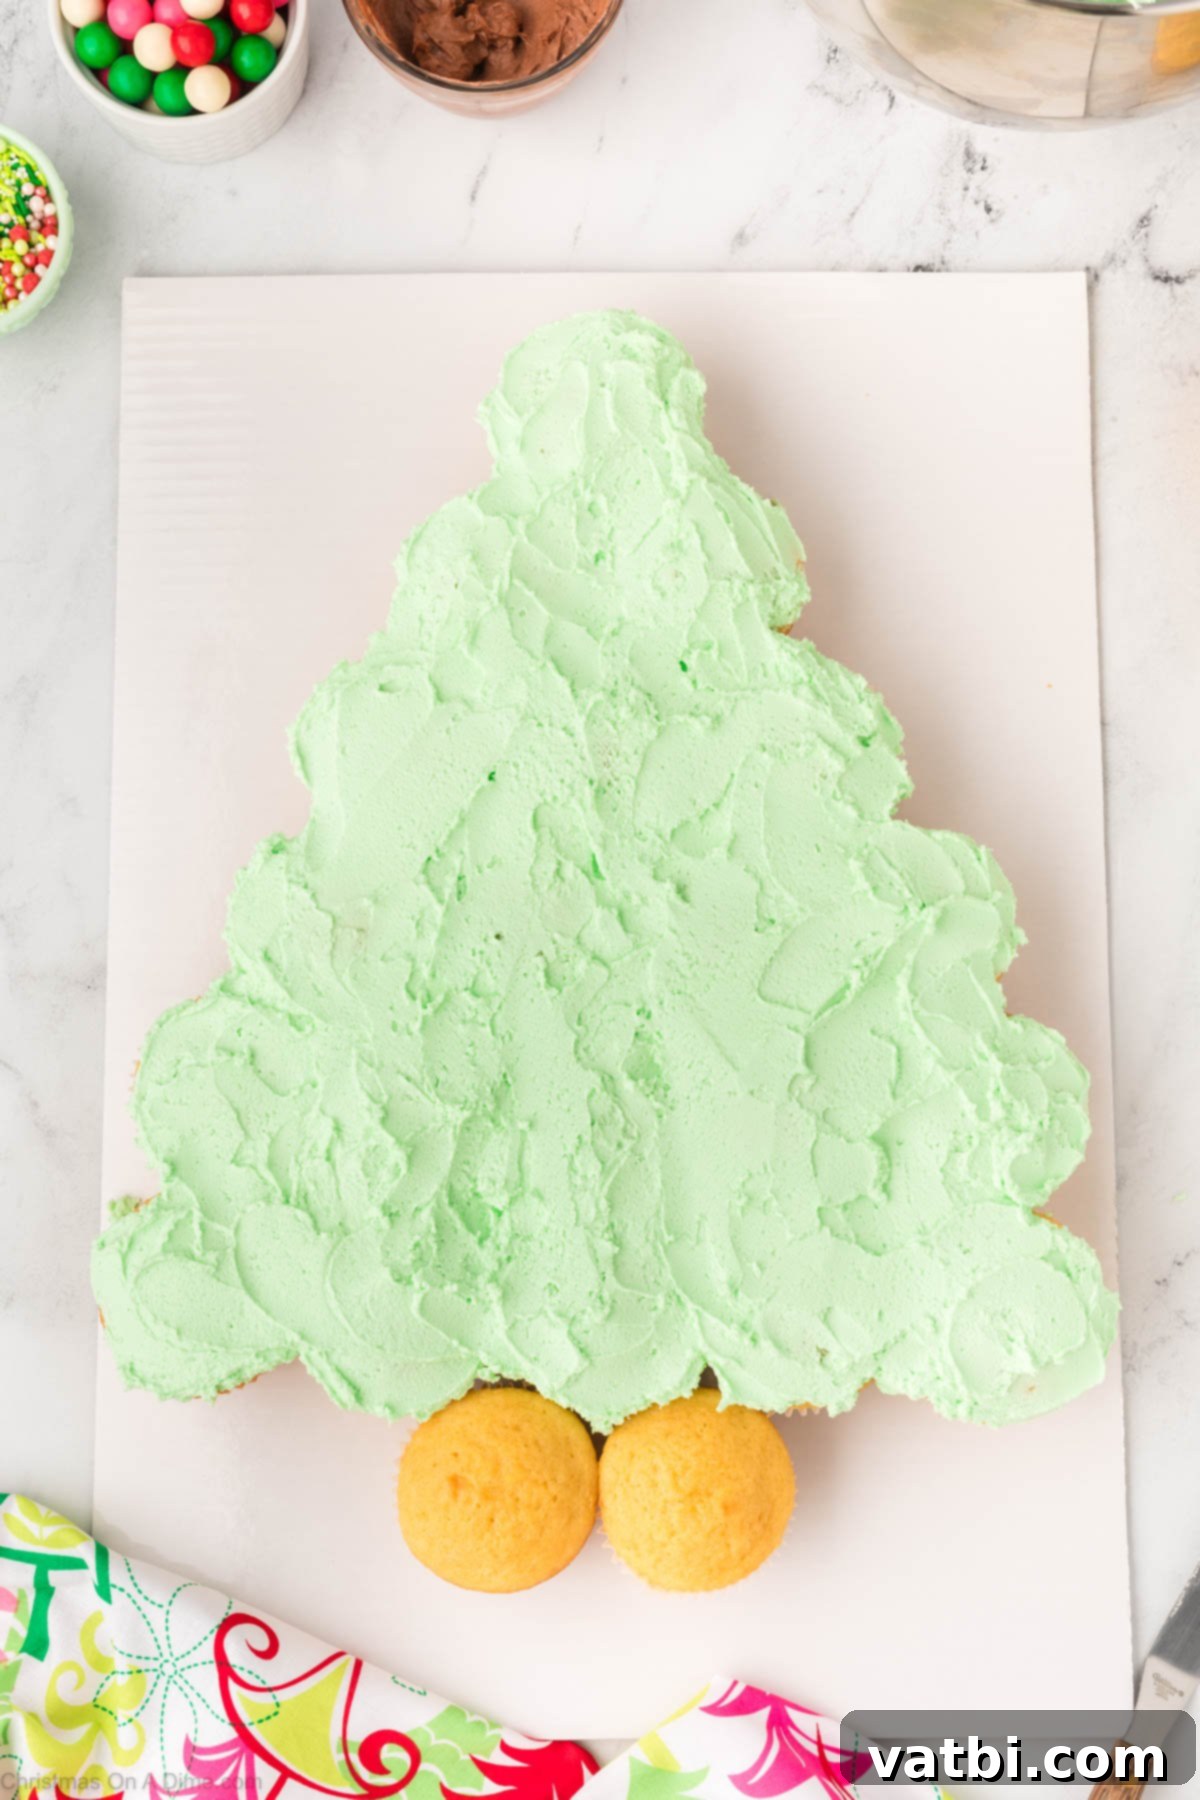
Step 9. Now, using an angled spatula or a butter knife, carefully spread the green frosting evenly across all the green-frosted cupcakes. The goal is to smooth out the frosting so that it bridges the gaps between the cupcakes, creating the illusion of one continuous cake. This initial layer ensures a uniform base for your piped details, making your Christmas tree look cohesive and professional.
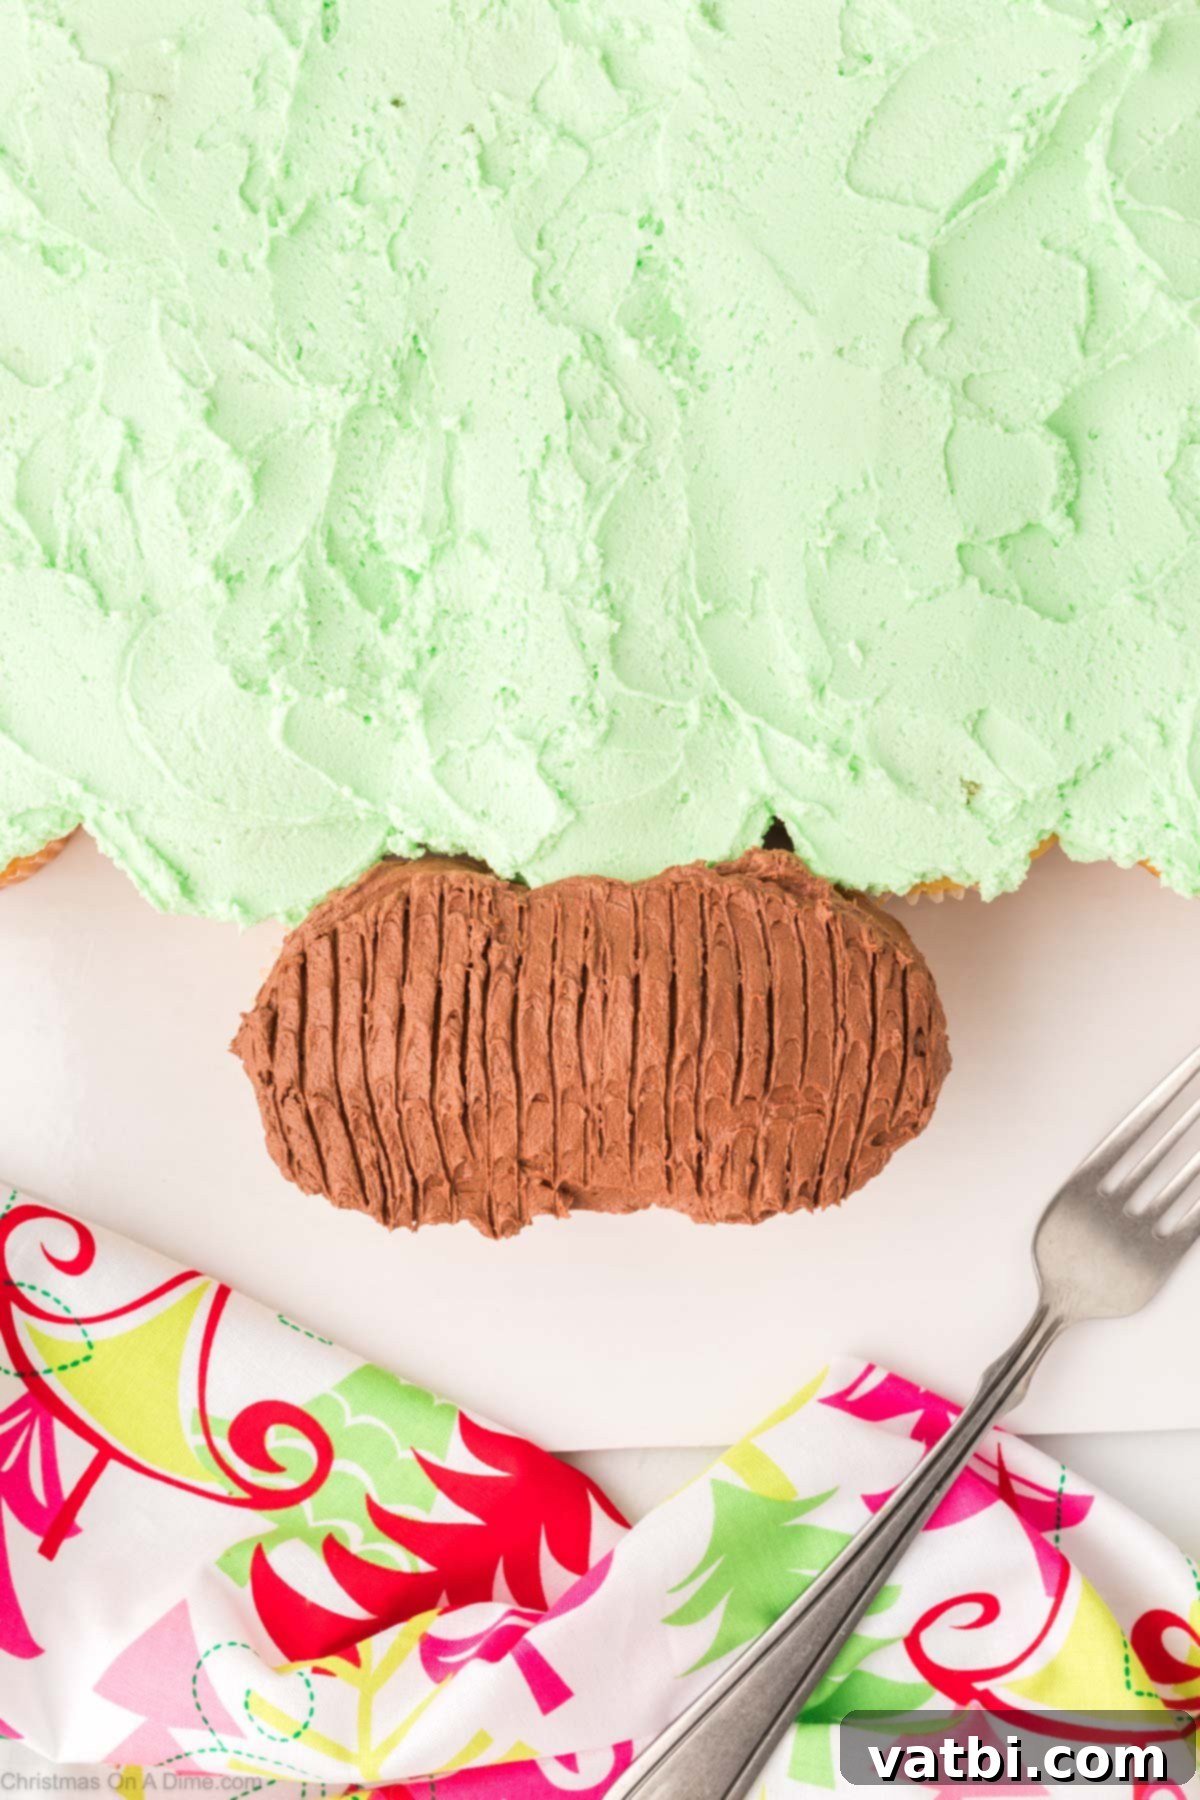
Step 10. Next, take your reserved brown frosting and spread it evenly over the two bottom cupcakes that form the tree trunk. To give it a realistic, rustic appearance, use the tines of a fork to create downward strokes, mimicking the rough texture of a tree stump or bark. This small detail adds a lot of character and charm to your edible tree.
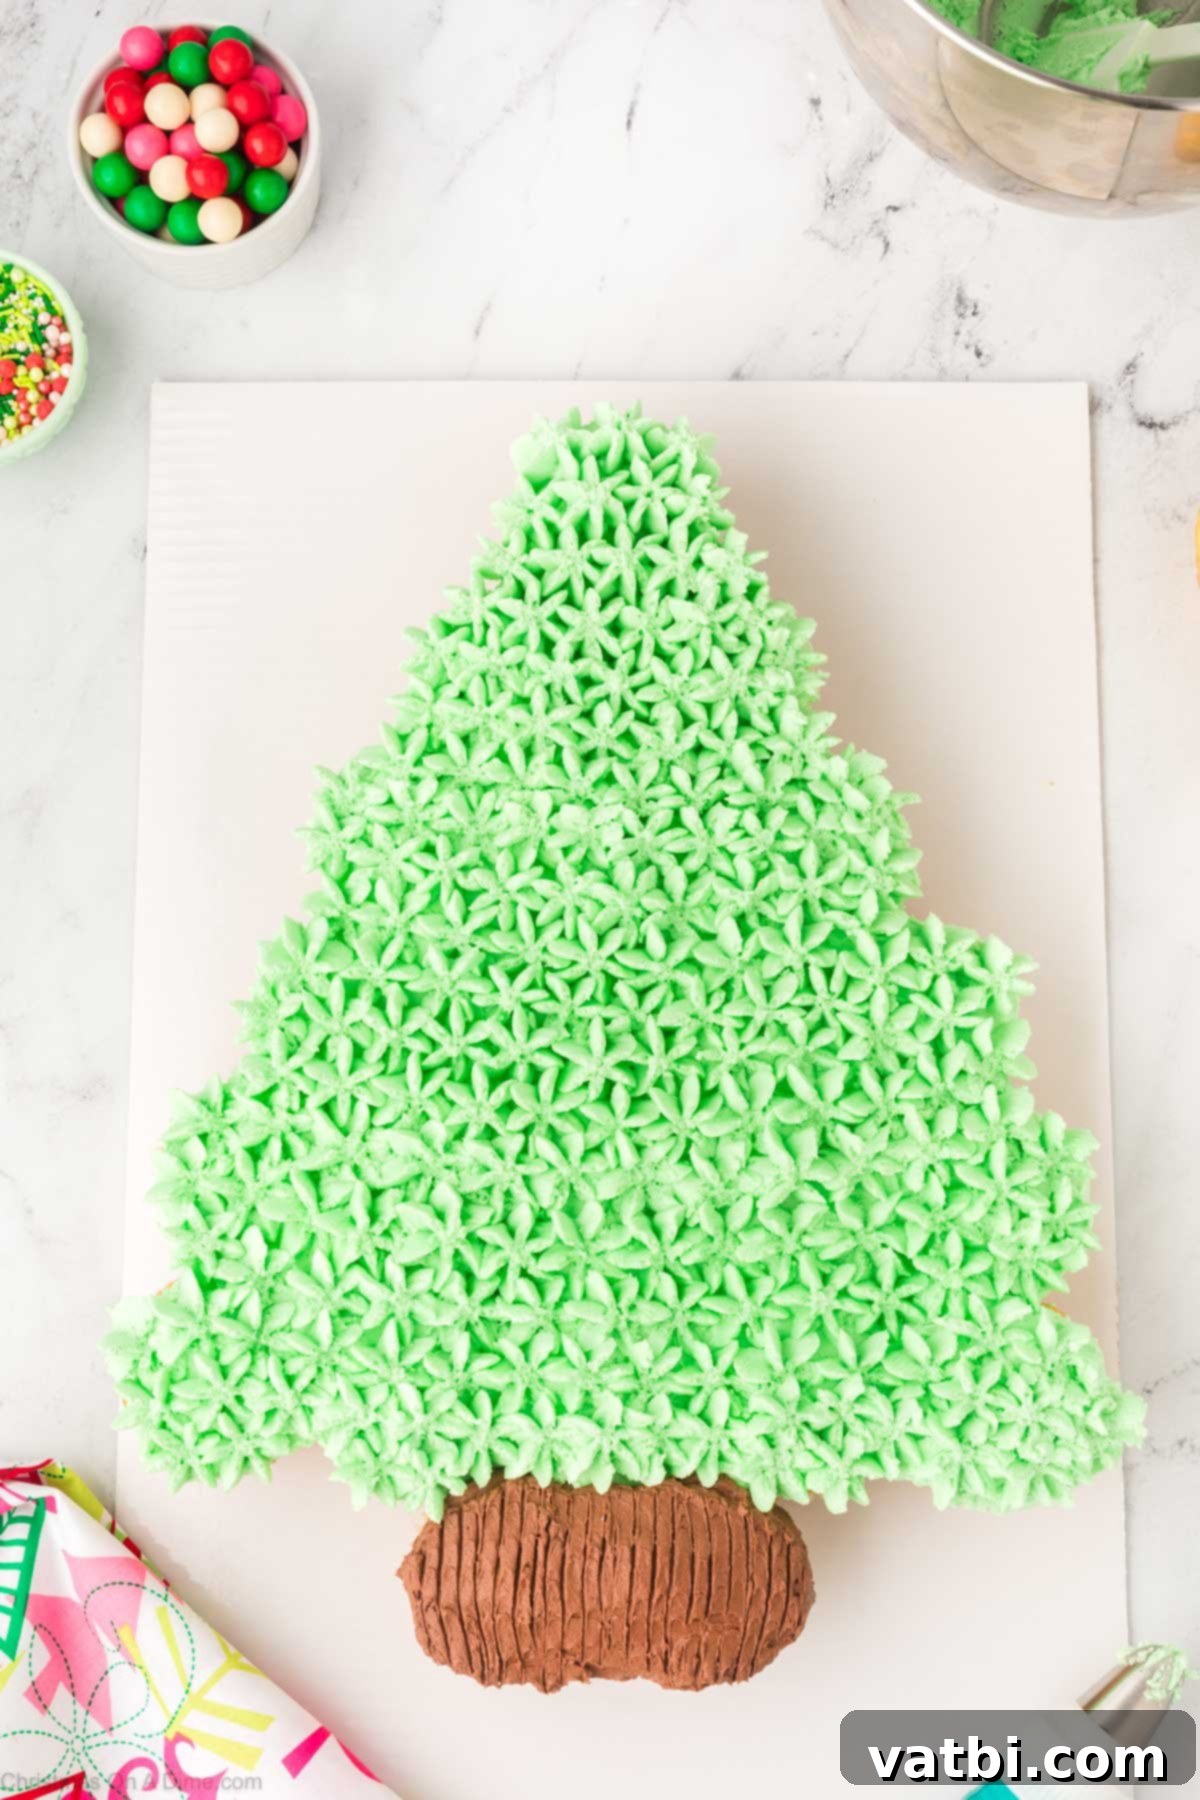
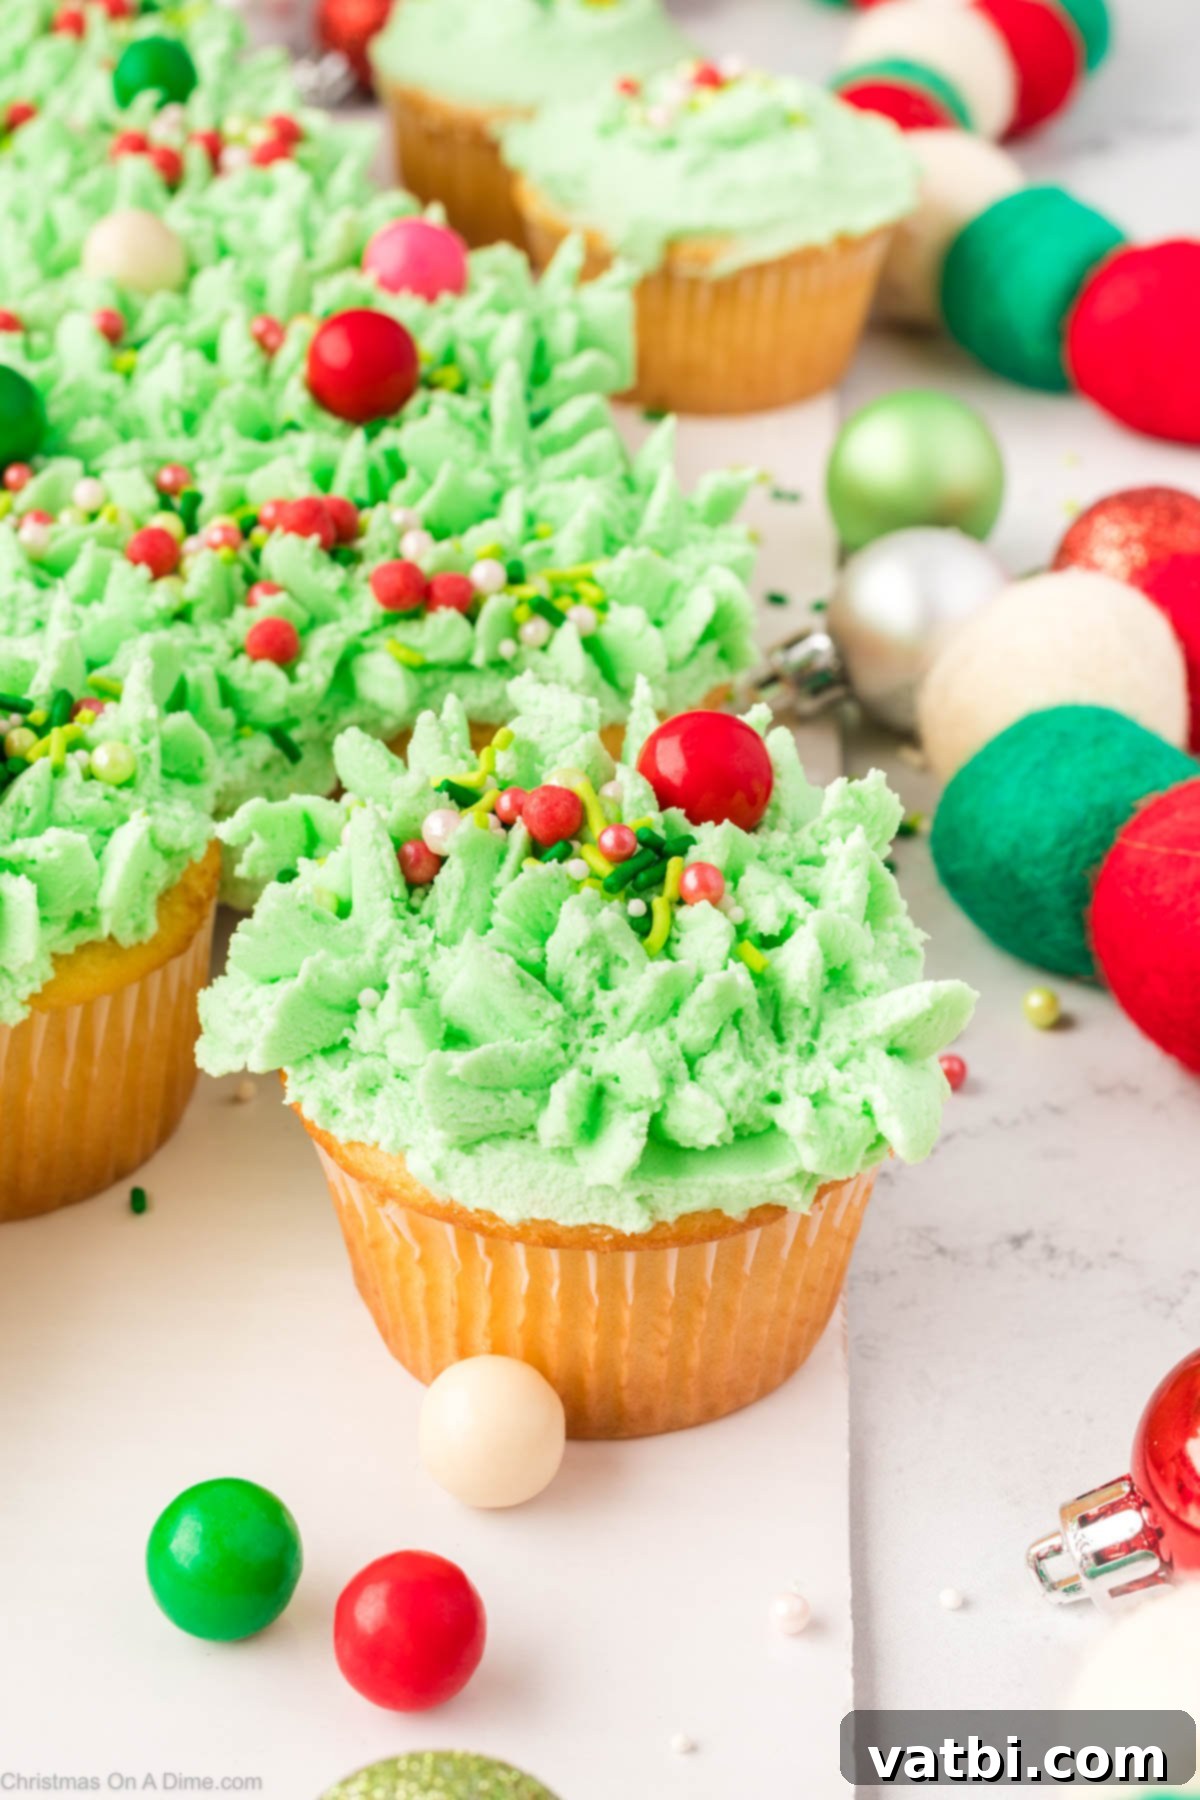
Step 11. Now for the fun part: adding the beautiful texture of the tree branches! Load the remaining green frosting into a piping bag fitted with a large star tip. Begin piping large, distinct stars or rosettes all over the surface of the green-frosted cupcakes. Work systematically to cover every inch, ensuring there are no gaps. The goal is to create a lush, full Christmas tree effect, making it look like one magnificent, textured cake.
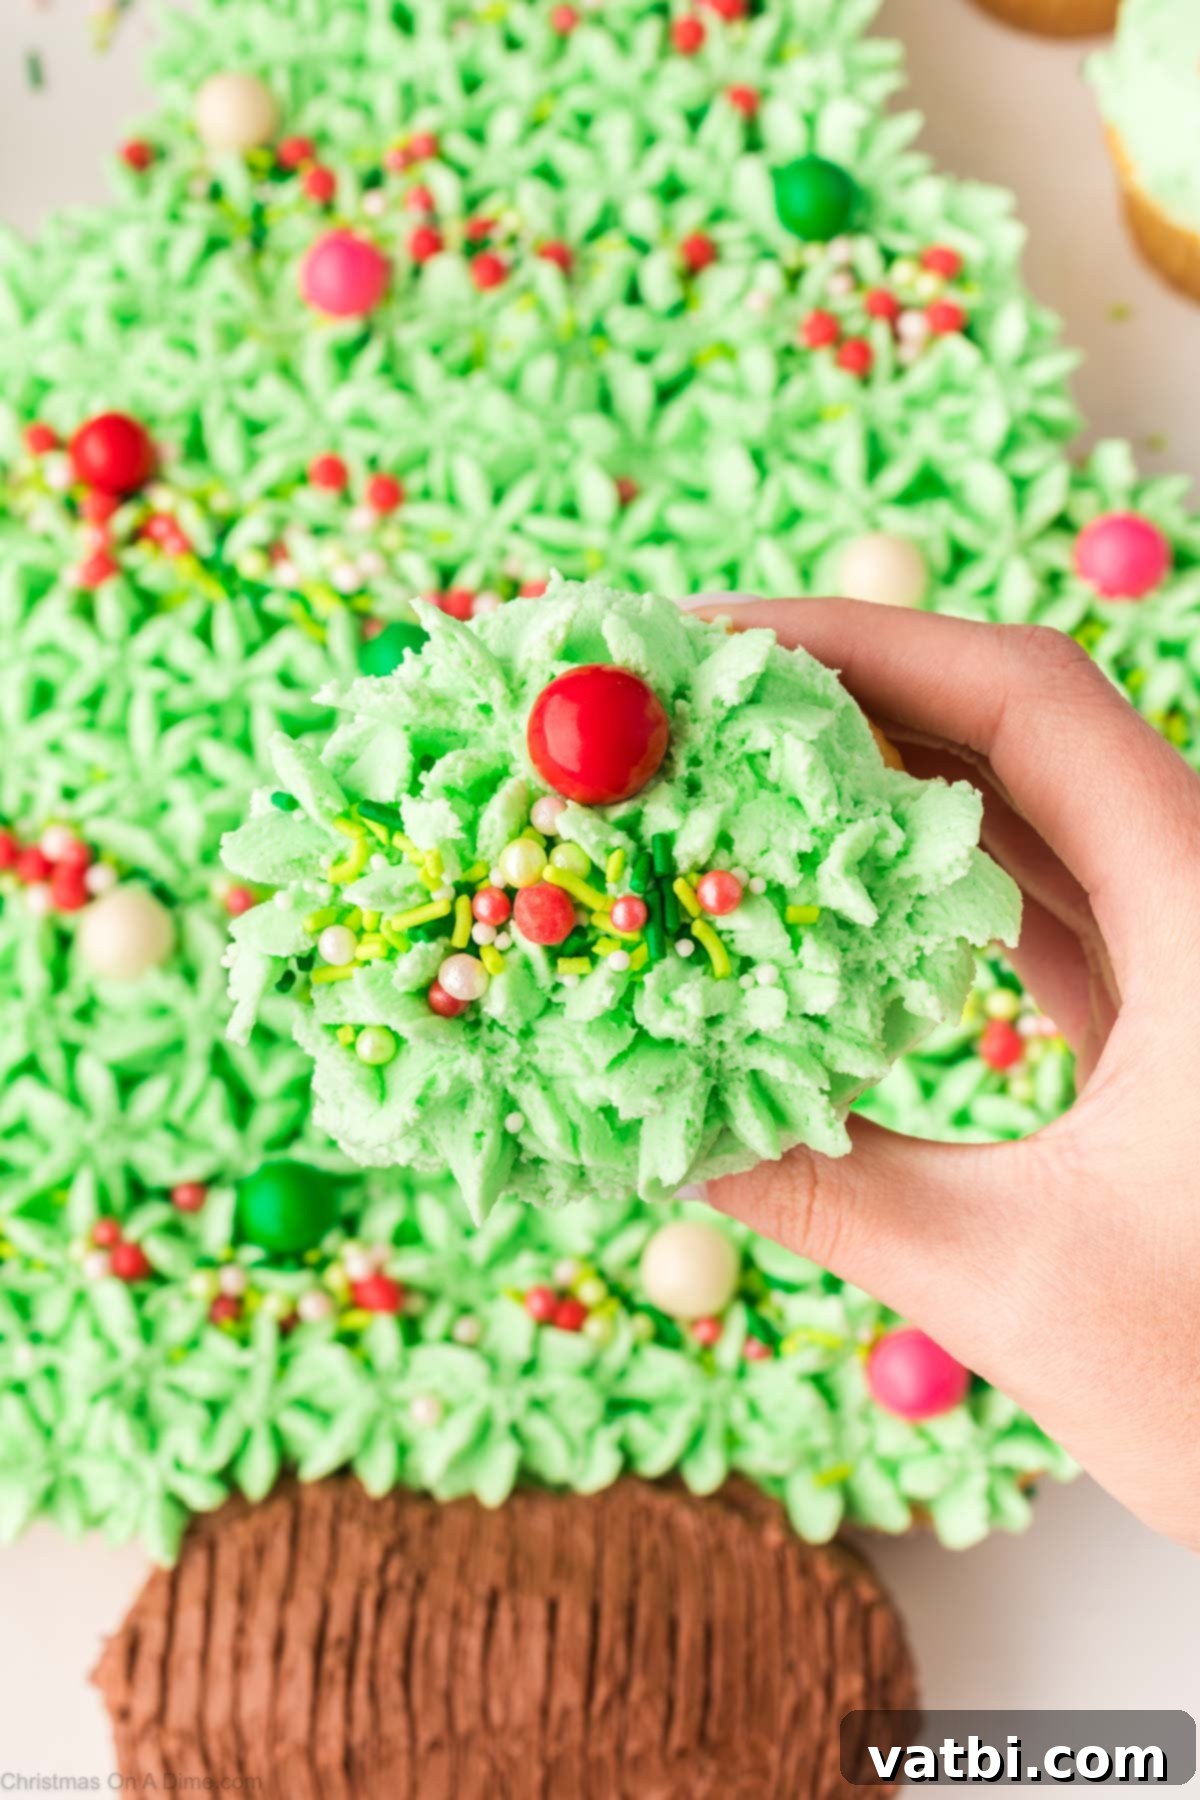
Step 12. The finishing touch! Generously scatter Christmas sprinkles over your entire cupcake tree. These act as beautiful, sparkling ornaments, adding pops of color and holiday cheer. You can arrange them carefully with tweezers for a precise look or simply sprinkle them freely for a more whimsical feel. Once decorated, your Christmas Tree Cupcake Cake is ready to impress! Allow your guests the joy of pulling apart their individual cupcakes to enjoy.
Proper Storage for Your Cupcake Cake
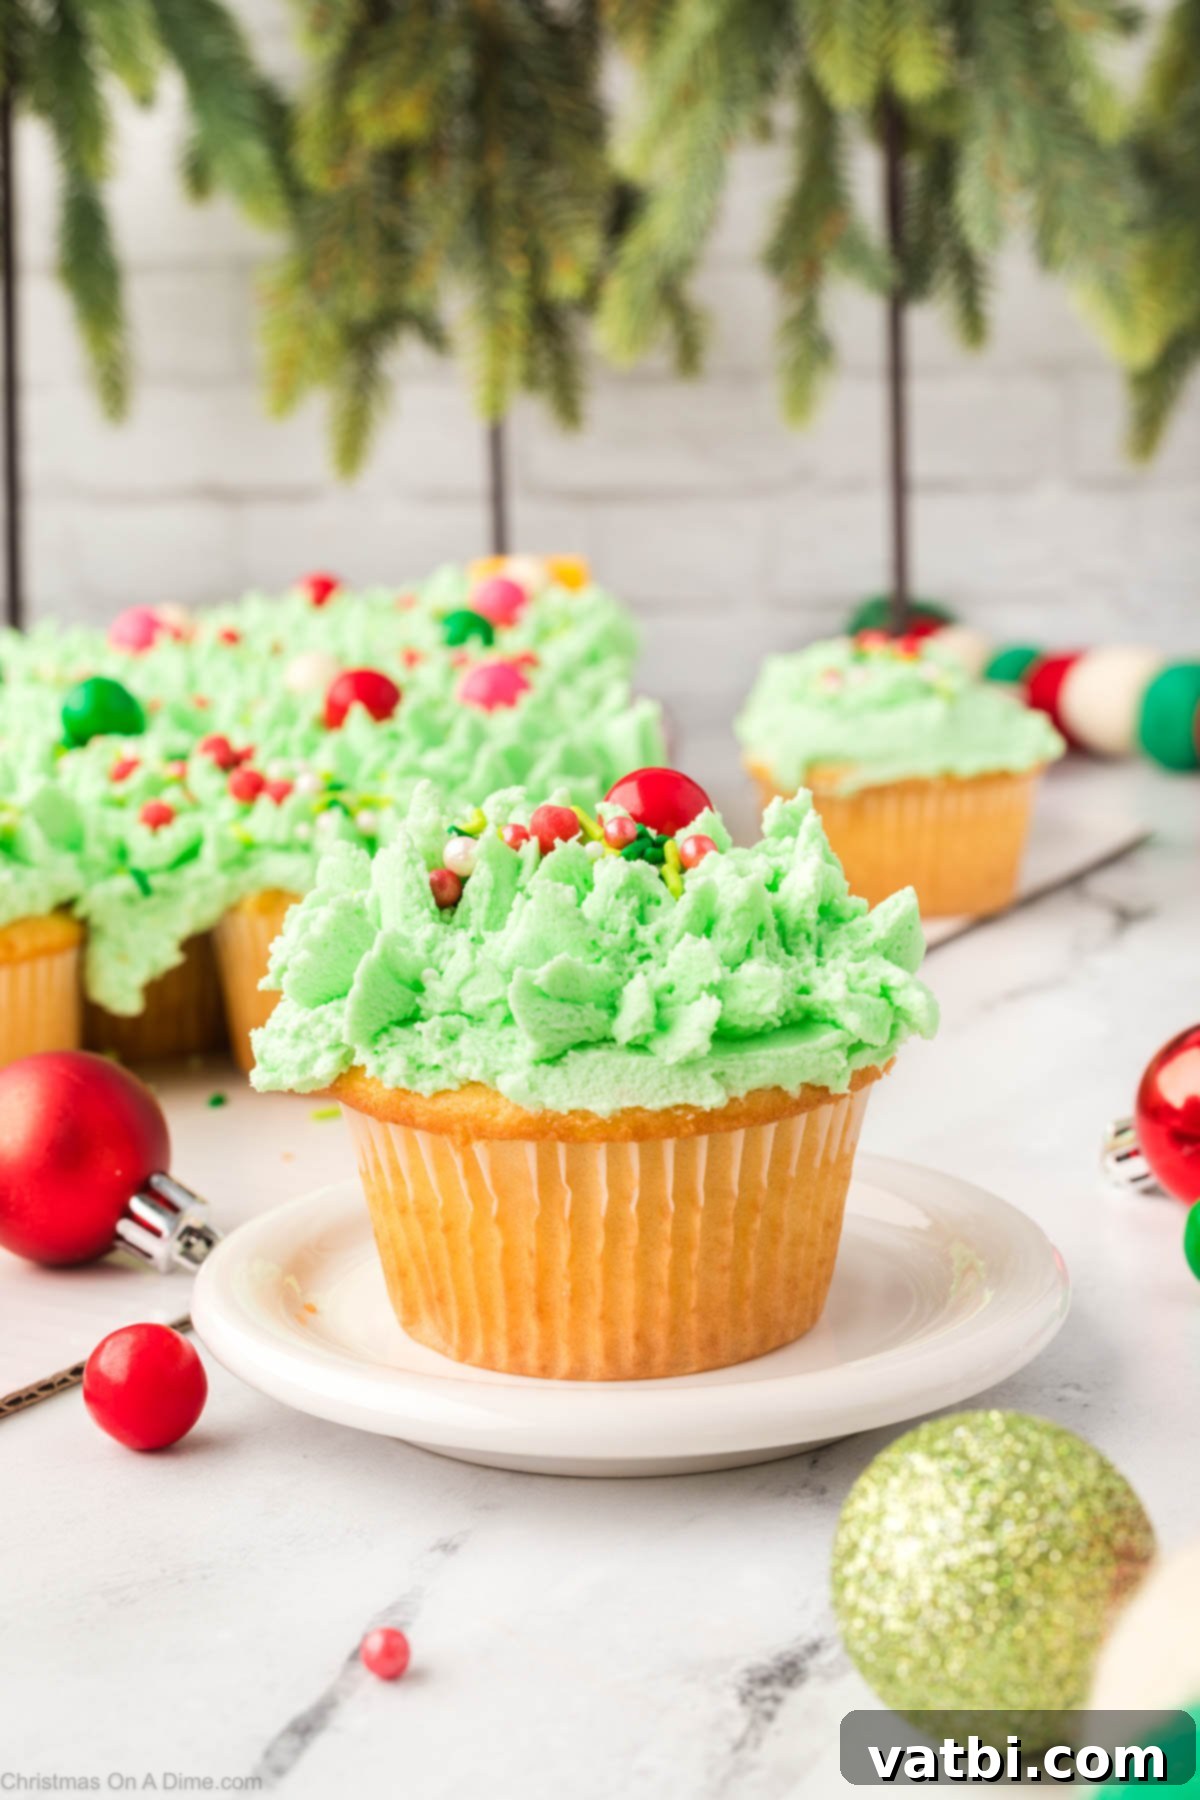
To keep your beautiful Christmas Tree Cupcake Cake fresh and delicious, proper storage is essential. Once assembled and decorated, cover the entire cake lightly with plastic wrap or foil, making sure not to disturb the frosting. Then, place it in the refrigerator until you are ready to serve. This helps the frosting set and maintains the freshness of the cupcakes. This dessert is best enjoyed within 2-3 days of assembly. For optimal flavor and texture, remove it from the refrigerator about 15-30 minutes before serving to allow the frosting to soften slightly.
Expert Tips for a Perfect Christmas Tree Cupcake Cake
Achieving a picture-perfect and delicious Christmas Tree Cupcake Cake is easy with these insider tips:
- Gel food coloring. Always opt for gel food coloring over liquid varieties when tinting your frosting. Gel coloring is much more concentrated, allowing you to achieve vibrant, rich colors with only a small amount. Crucially, it won’t add excess liquid to your buttercream, which can thin it out and make it difficult to pipe or spread evenly.
- Assemble the tree first. Before you even think about applying frosting, arrange all your cooled cupcakes into the desired tree shape on your serving platter or cake board. This pre-assembly step is invaluable as it allows you to visualize the layout and ensures you cover all areas seamlessly, making the frosting process much easier and more organized.
- Divide the icing for piping. If you’re piping the stars or other decorative elements, you might find it helpful to fill your piping bag only half full at a time. The warmth from your hands can quickly warm the frosting in the bag, making it softer and harder to work with. Dividing it ensures the frosting stays cooler for longer, allowing for crisp, well-defined piped designs.
- Room temperature ingredients. For the smoothest, most luxurious buttercream frosting, make sure your butter (or margarine) is at true room temperature. This means it should be soft enough to indent with your finger but not melted or greasy. Room temperature ingredients emulsify much better, resulting in a frosting that is wonderfully creamy, lump-free, and easy to spread or pipe.
- Adding the sprinkles with precision. While simply scattering sprinkles works fine, for a more intentional and elegant look, try using tweezers to carefully arrange individual sprinkles or edible decorations. This allows you to place them like ornaments on a real tree, ensuring even distribution and a stunning final presentation.
- Festive Cupcake Liners. Don’t overlook the humble cupcake liner! Using festive Christmas-themed liners can add an extra layer of holiday charm, especially when guests pull apart their individual cupcakes. Look for designs with snowflakes, candy canes, or classic red and green patterns to enhance the overall holiday feel of your Christmas Tree Cupcakes.
Frequently Asked Questions About This Holiday Dessert
Here are some common questions about making and serving your Christmas Tree Cupcake Cake:
Transporting a large, assembled Christmas Tree Cupcake Cake can be a bit tricky, as it’s often larger than standard cake carriers. You’ll definitely need to get creative if you’re taking this showstopper to holiday parties. Standard cake boards might also not be wide enough for the base. I highly recommend using a sturdy piece of cardboard as your base, ensuring it’s large enough to comfortably hold the entire tree formation. Cover this cardboard in festive foil or Christmas wrapping paper for a charming presentation. Once assembled, loosely and carefully cover the entire cake with plastic wrap, tenting it slightly to avoid touching the frosting. Drive cautiously!
Absolutely! To help manage your holiday baking schedule, you can prepare both the frosting and the cupcakes in advance. However, for the freshest appearance and taste, I do not suggest assembling the entire Christmas Tree Cupcake Cake until you are ready to serve it, ideally the day of or the evening before.
The buttercream frosting can be stored in an airtight container in the refrigerator for up to 7 days, or frozen for up to 2 months. If refrigerating or freezing, you’ll need to re-whip it with your stand mixer before use to restore its fluffy texture. It’s best to wait to add the green food coloring until just before assembly, as some gel colors can deepen or change slightly over time.
Your baked cupcakes can also be frozen after they cool completely for up to 2 months. To use them, simply remove them from the freezer and allow them to thaw overnight in the refrigerator, then bring to room temperature before decorating.
Yes, definitely! The beauty of this recipe is its adaptability. The ideas are truly endless when it comes to the type of cupcakes you can use. You can stick with a classic vanilla from a boxed mix for ultimate ease, or bake your favorite homemade cupcake recipe for a more gourmet touch.
For more festive Christmas cupcake options that would work wonderfully, consider using our Red Velvet Cupcake Recipe for a rich, holiday-appropriate flavor, or our unique Green Velvet Cupcakes for a fun, monochromatic tree! Classic Chocolate Cupcakes are always a crowd-pleaser and provide a delicious contrast to the sweet buttercream. Feel free to experiment with different cake and frosting flavor combinations to suit your taste!
More Festive Desserts to Brighten Your Holiday Table
Looking for more delightful and festive treats to complement your holiday spread? Here are some other cherished recipes that are sure to bring joy and sweetness to your celebrations:
Cute Christmas Desserts
Christmas Dirt Cups
These adorable and easy-to-make Christmas Dirt Cups are a hit with kids and adults alike, combining rich chocolate pudding with crushed cookies and festive candy decorations.
Cute Christmas Desserts
Christmas Tree Brownies
Rich, fudgy brownies cut into charming Christmas tree shapes and decorated with green frosting and colorful edible ornaments – a simple yet impressive holiday treat.
Cute Christmas Desserts
Christmas Rice Krispie Treats
Quick, easy, and endlessly customizable, these festive Rice Krispie treats are perfect for last-minute holiday baking or a fun activity with the kids, shaped and decorated for Christmas.
Now, it’s your turn to unleash your inner holiday baker and create this absolutely delightful and impressive Cupcake Christmas Tree. It’s the perfect centerpiece that doubles as an easy-to-serve dessert, guaranteed to spread cheer at any gathering. Once you’ve made it, we’d love to hear about your experience! Please take a moment to leave a comment and a star rating below. Your feedback on our recipes truly makes our day!
Pin
Christmas Tree Cupcake Cake
Ingredients
- 24 vanilla cupcakes (prepared and completely cooled)
- Festive Christmas Sprinkles
For the Delicious Buttercream Frosting:
- 3/4 cup solid vegetable shortening
- 3/4 cup 1 stick (1.5 sticks total) unsalted butter or margarine, softened
- 2 teaspoons clear vanilla extract
- 6 cups sifted confectioners’ sugar
- 2 tablespoons milk
- Green gel food coloring
- 2-3 teaspoons unsweetened cocoa powder
Instructions
-
Prepare a batch of at least 24 cupcakes (homemade or boxed mix) and ensure they are completely cooled on a wire rack before proceeding.
For the Buttercream Frosting:
-
In the bowl of a stand mixer fitted with the paddle attachment, whip the softened butter and solid vegetable shortening. Beat on medium-high speed for 5-7 minutes until the mixture is very light and fluffy, scraping down the bowl’s sides occasionally.
-
Add 3 cups of the sifted powdered sugar on low speed until fully incorporated into the butter mixture. Then, add the clear vanilla extract and mix to combine. Continue to beat for about 60 seconds.
-
Next, add an additional 2 cups of powdered sugar, mixing on low speed until the sugar is just incorporated. Increase the speed to medium-high and beat for 3 minutes to add more air to the frosting.
-
Finally, add the last 1 cup of powdered sugar along with the milk.
-
Beat on low speed initially until all the ingredients start to blend together smoothly.
-
Increase the speed to medium-high and beat for another 3-5 minutes. This final whipping ensures a wonderfully airy and fluffy buttercream frosting.
-
Now, to color the frosting: Separate out about ¼ cup of the finished white frosting into a small, separate bowl. Mix in 2-3 teaspoons of unsweetened cocoa powder until it’s well combined and forms a consistent brown color for the tree trunk. If needed, add 1 teaspoon of milk to help achieve a smooth consistency.
-
Dye the remaining, larger portion of your buttercream frosting green using gel food coloring, mixing until you achieve your desired vibrant Christmas tree color.
Assemble and Decorate the Christmas Tree Cupcake Cake:
-
On a large serving platter or cake board, arrange your cooled cupcakes in the shape of a Christmas tree. Start with two cupcakes at the bottom for the trunk. For the cupcakes that form the main tree body (all except the trunk), place a small dollop of the green frosting on each, then use an angled spatula to spread the icing smoothly across all these cupcakes, joining them to create the appearance of one large, continuous cake surface.
-
For the bottom two “trunk” cupcakes, spread the brown frosting evenly across their tops. Then, take a fork and gently drag the tines downward through the frosting to create a rough, bark-like texture, giving the trunk a realistic appearance.
-
Transfer the remaining green frosting into a piping bag fitted with a large star tip. Pipe large, decorative stars or rosettes over all the green-frosted cupcakes, ensuring you cover any visible gaps. This creates a lush, textured “pine needle” effect, making your cupcake cake look like a beautifully adorned Christmas tree.
-
The final goal is for the piped frosting to entirely cover the tree formation, creating a seamless and impressive “cake” appearance from the individual cupcakes.
-
Generously top your Christmas tree with an assortment of festive Christmas sprinkles. These colorful sprinkles will resemble sparkling ornaments, adding holiday cheer and a delightful crunch.
-
Refrigerate the completed Christmas Tree Cupcake Cake until you are ready to serve. When it’s time to enjoy, allow your guests the fun experience of pulling apart the individual cupcakes directly from the tree!
Nutrition Facts
Pin This Now to Remember It Later
Pin Recipe
