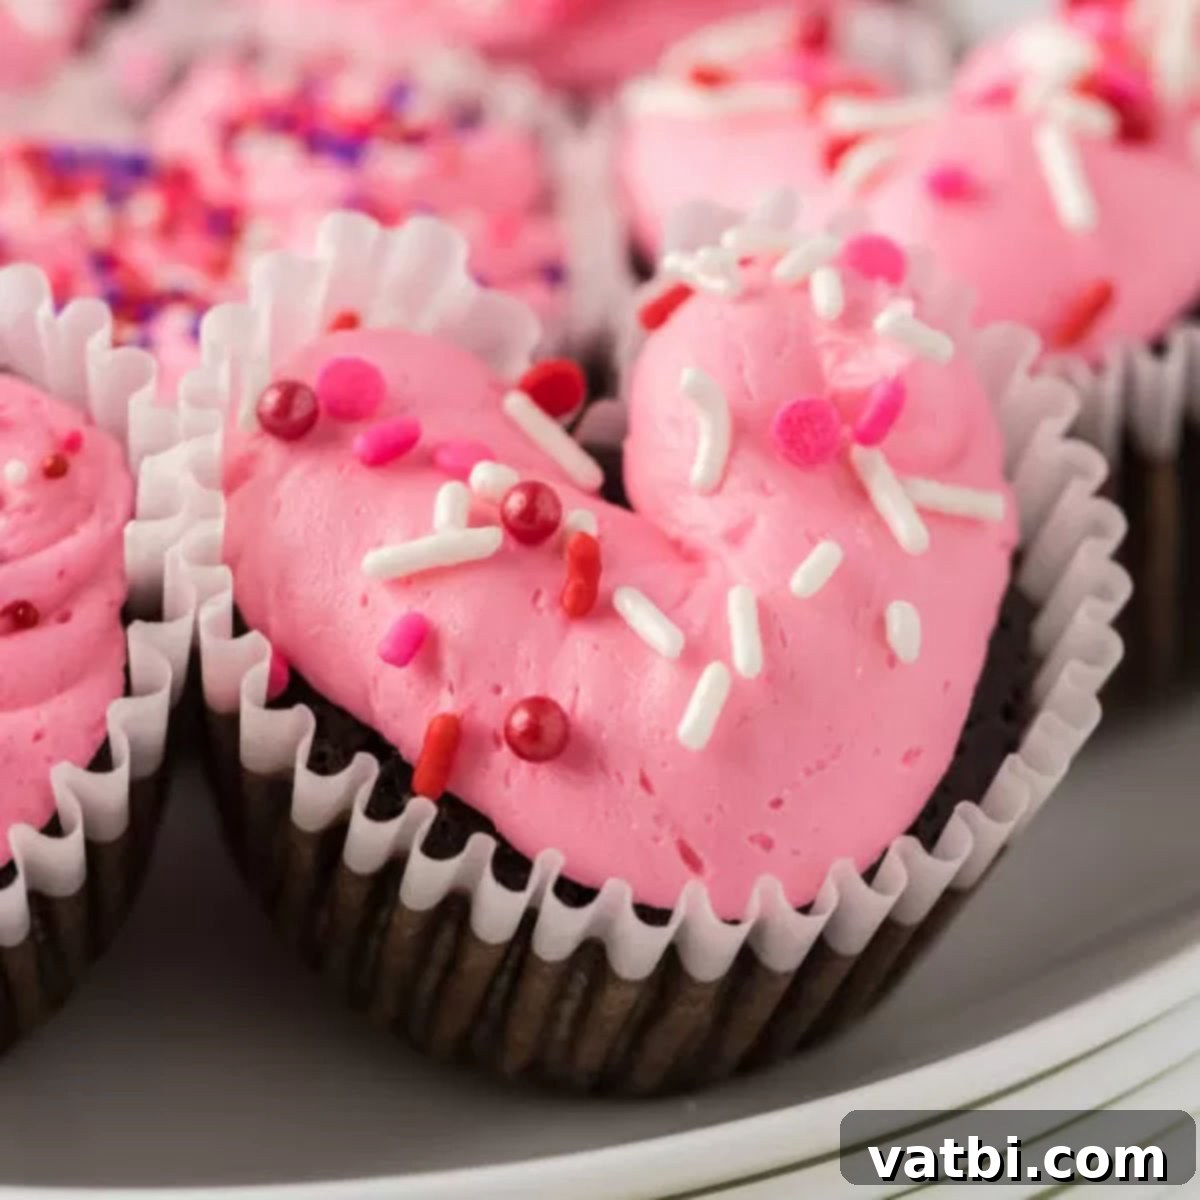
How to Make Adorable Heart Shaped Cupcakes Without a Special Pan
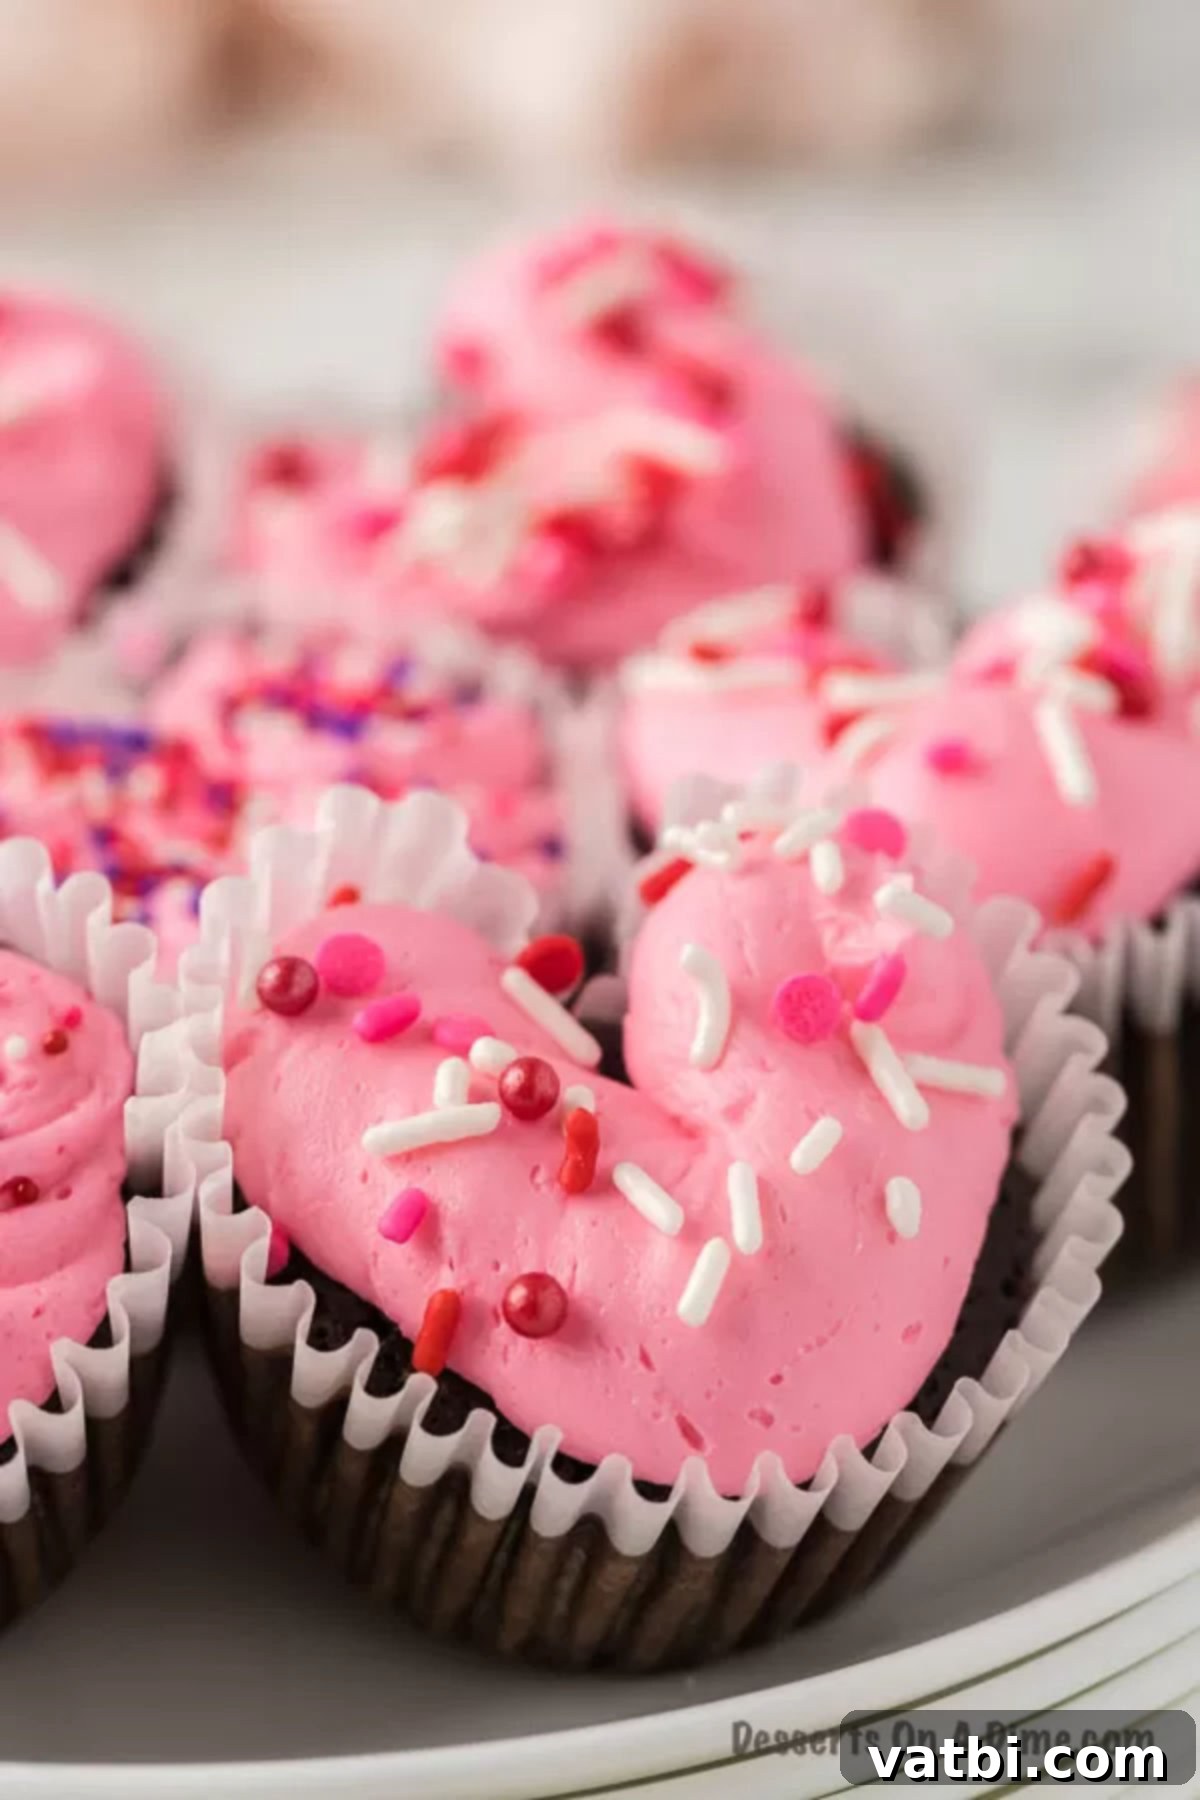
Get ready to impress everyone with these absolutely adorable heart-shaped cupcakes! The best part? You can create these festive treats without needing any special heart-shaped baking pan. Perfect for Valentine’s Day, anniversaries, or any celebration of love, these charming cupcakes are surprisingly easy to make and guaranteed to bring smiles.
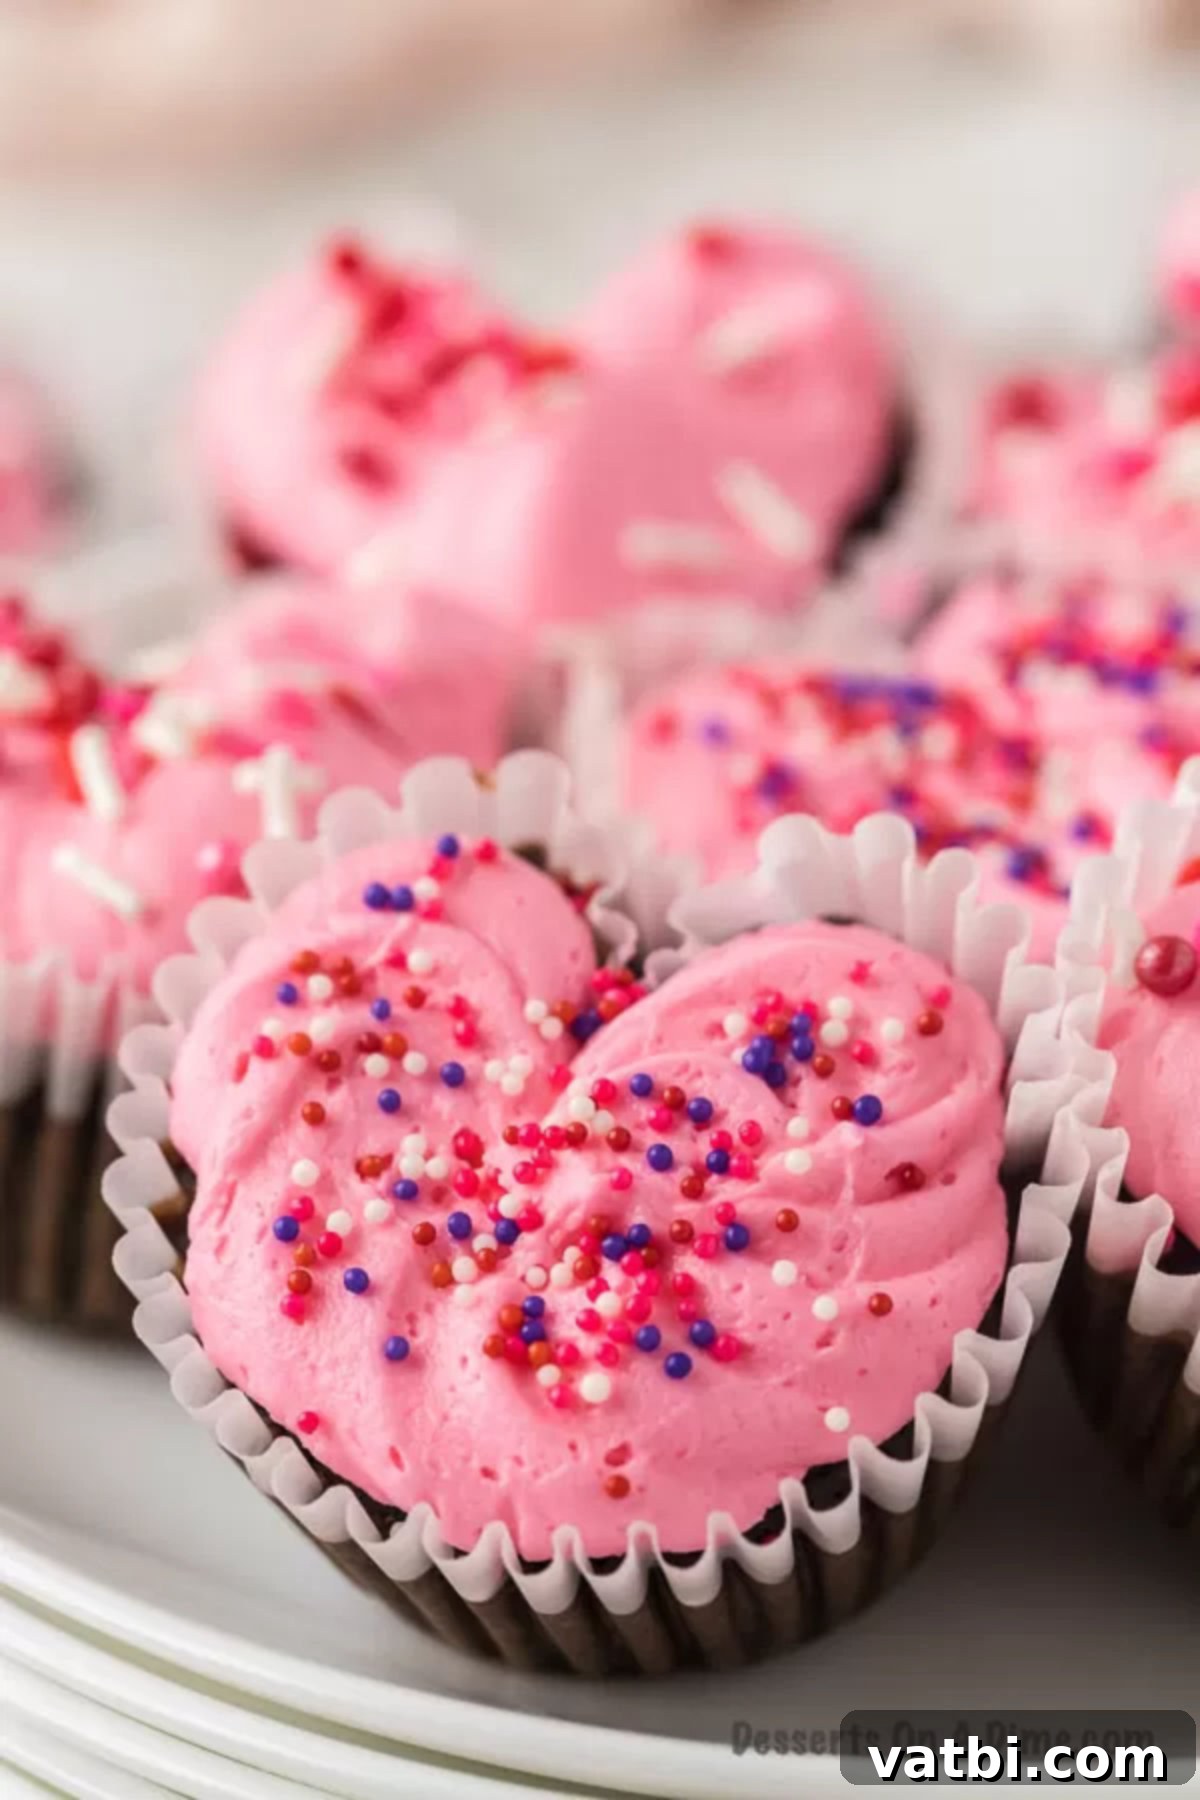
We absolutely adore making cute treats for special occasions, especially Valentine’s Day cupcakes, which are always a hit with the kids and adults alike. There’s something truly magical about heart-shaped desserts, adorned with vibrant pink and red hues, that instantly sets a festive mood. These moist, perfectly shaped heart cupcakes are not just visually appealing; they’re also incredibly delicious, making them the cutest cupcake recipe you’ll ever try. While ideal for a romantic Valentine’s Day surprise, they are also fantastic for little girl birthdays, baby showers, or any event where a touch of sweetness and love is desired.
Looking for more easy Valentine’s Day treats? Our Valentine Rice Krispie Treats are another family-favorite dessert that’s simple and fun to make.
Table of Contents
- Why You’ll Love This Recipe
- Ingredients You’ll Need
- How to Make Heart Shaped Cupcakes
- How to Store Your Cupcakes
- Creative Topping Ideas
- Expert Tips for Perfect Heart Cupcakes
- More Valentine’s Day Desserts
- Printable Recipe Card
Why You’ll Love This Recipe (No Special Pan Needed!)
What truly sets this recipe apart is its ingenious simplicity. You do not need to invest in any special heart-shaped cupcake pans or molds. That’s right – no extra kitchen gadgets required! With a simple trick involving marbles or small balls of aluminum foil, you can transform ordinary round cupcakes into charming hearts. This makes the recipe not only incredibly accessible but also a fun and creative project, especially if you’re baking with kids. It’s a cost-effective way to achieve an impressive, professional-looking result without any hassle. Beyond the clever shaping, these heart-shaped cupcakes are one of the easiest and most delicious recipes you’ll find, promising a moist, tender crumb and a delightful, sweet frosting. This method also works for other Easy Heart Shaped Desserts.
Ingredients You’ll Need to Make Heart Cupcakes
Gathering your ingredients is the first step to creating these delightful heart-shaped treats. We’re using a classic chocolate cake mix for convenience and a rich flavor, paired with a creamy homemade buttercream frosting. Most of these items are likely already in your pantry!
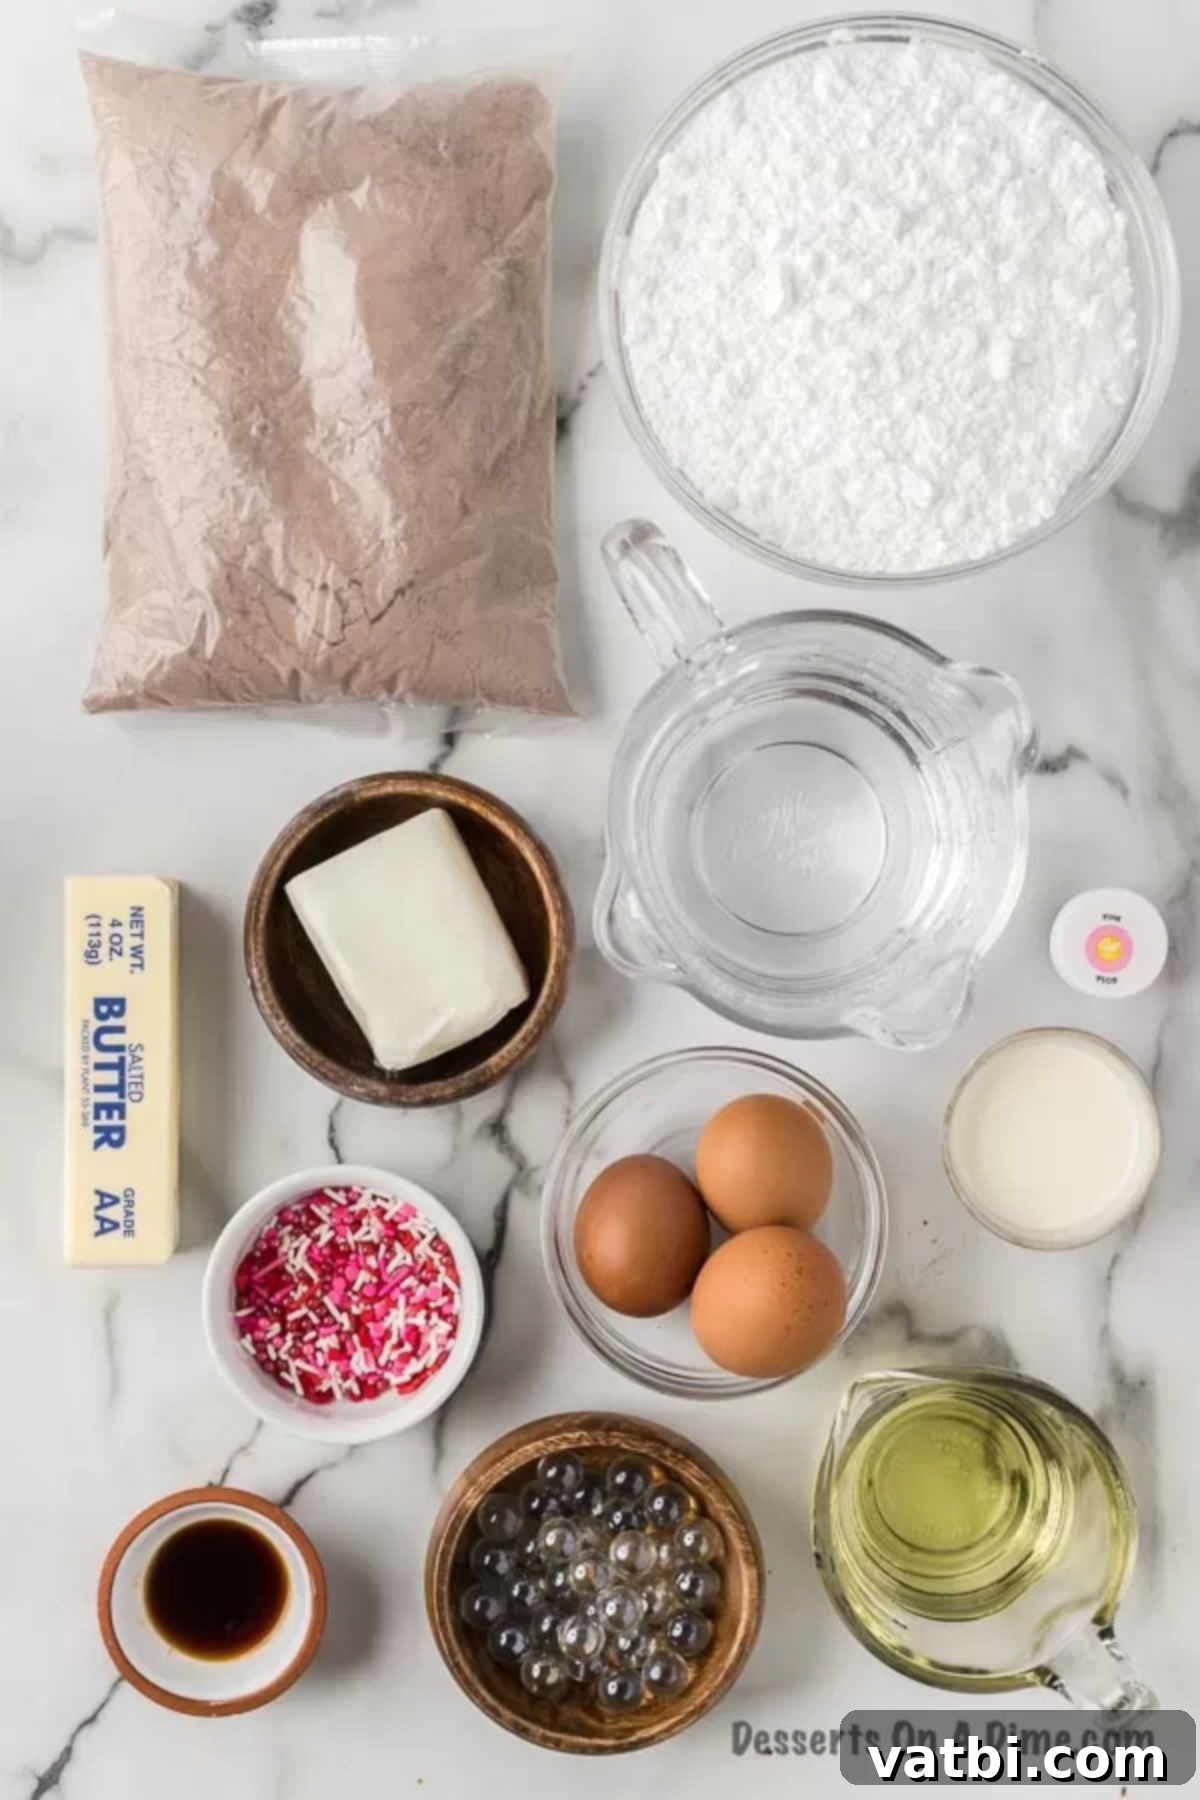
For the Cupcakes:
- 1 Box Devil’s Food Cake Mix: This provides a rich, deep chocolate flavor that perfectly complements the sweet frosting. Any standard cake mix will work, but Devil’s Food is a popular choice.
- Ingredients needed to make cupcakes based on the cake mix box: Typically, this includes eggs, vegetable oil, and water or milk. Always check your specific cake mix box for precise measurements and instructions to ensure the best results.
- 12 Regular Size Glass or Ceramic Marbles: These are the secret to our heart shape! Ensure they are clean and heat-safe. If you don’t have marbles, small balls of aluminum foil rolled tightly will work just as well.
For the Frosting:
- ½ cup Solid Vegetable Shortening: Shortening helps create a stable and fluffy buttercream that holds its shape well, especially when piping.
- ½ cup Unsalted Butter: Softened at room temperature. Using unsalted butter allows you to control the saltiness of your frosting. Room temperature is crucial for proper creaming.
- 1 teaspoon Vanilla Extract: A classic flavor enhancer that gives the frosting a delightful aroma and taste.
- 4 cups Sifted Powdered Sugar: Sifting prevents lumps and ensures a smooth, creamy frosting texture. Don’t skip this step for the best results!
- 2 tablespoons Milk: Add gradually to reach your desired frosting consistency. You might need a little more or less depending on the humidity and how thick you prefer your frosting.
- Pink Food Coloring: Liquid or gel food coloring works. Gel colors tend to be more concentrated, so start with a small amount and add more until you achieve your desired shade of pink.
- Red, Pink, and White Sprinkles: For a festive and colorful decoration! Feel free to use any sprinkles that match your theme.
How to Make Heart Shaped Cupcakes: Step-by-Step Guide
Follow these easy steps to create beautifully shaped heart cupcakes that look like they came from a professional bakery, all from the comfort of your kitchen!
For the Cupcakes:
- Step 1. Preheat the Oven: First, set your oven to 350 degrees F (175 degrees C). This ensures the oven is at the correct temperature for even baking as soon as your cupcakes are ready to go in.
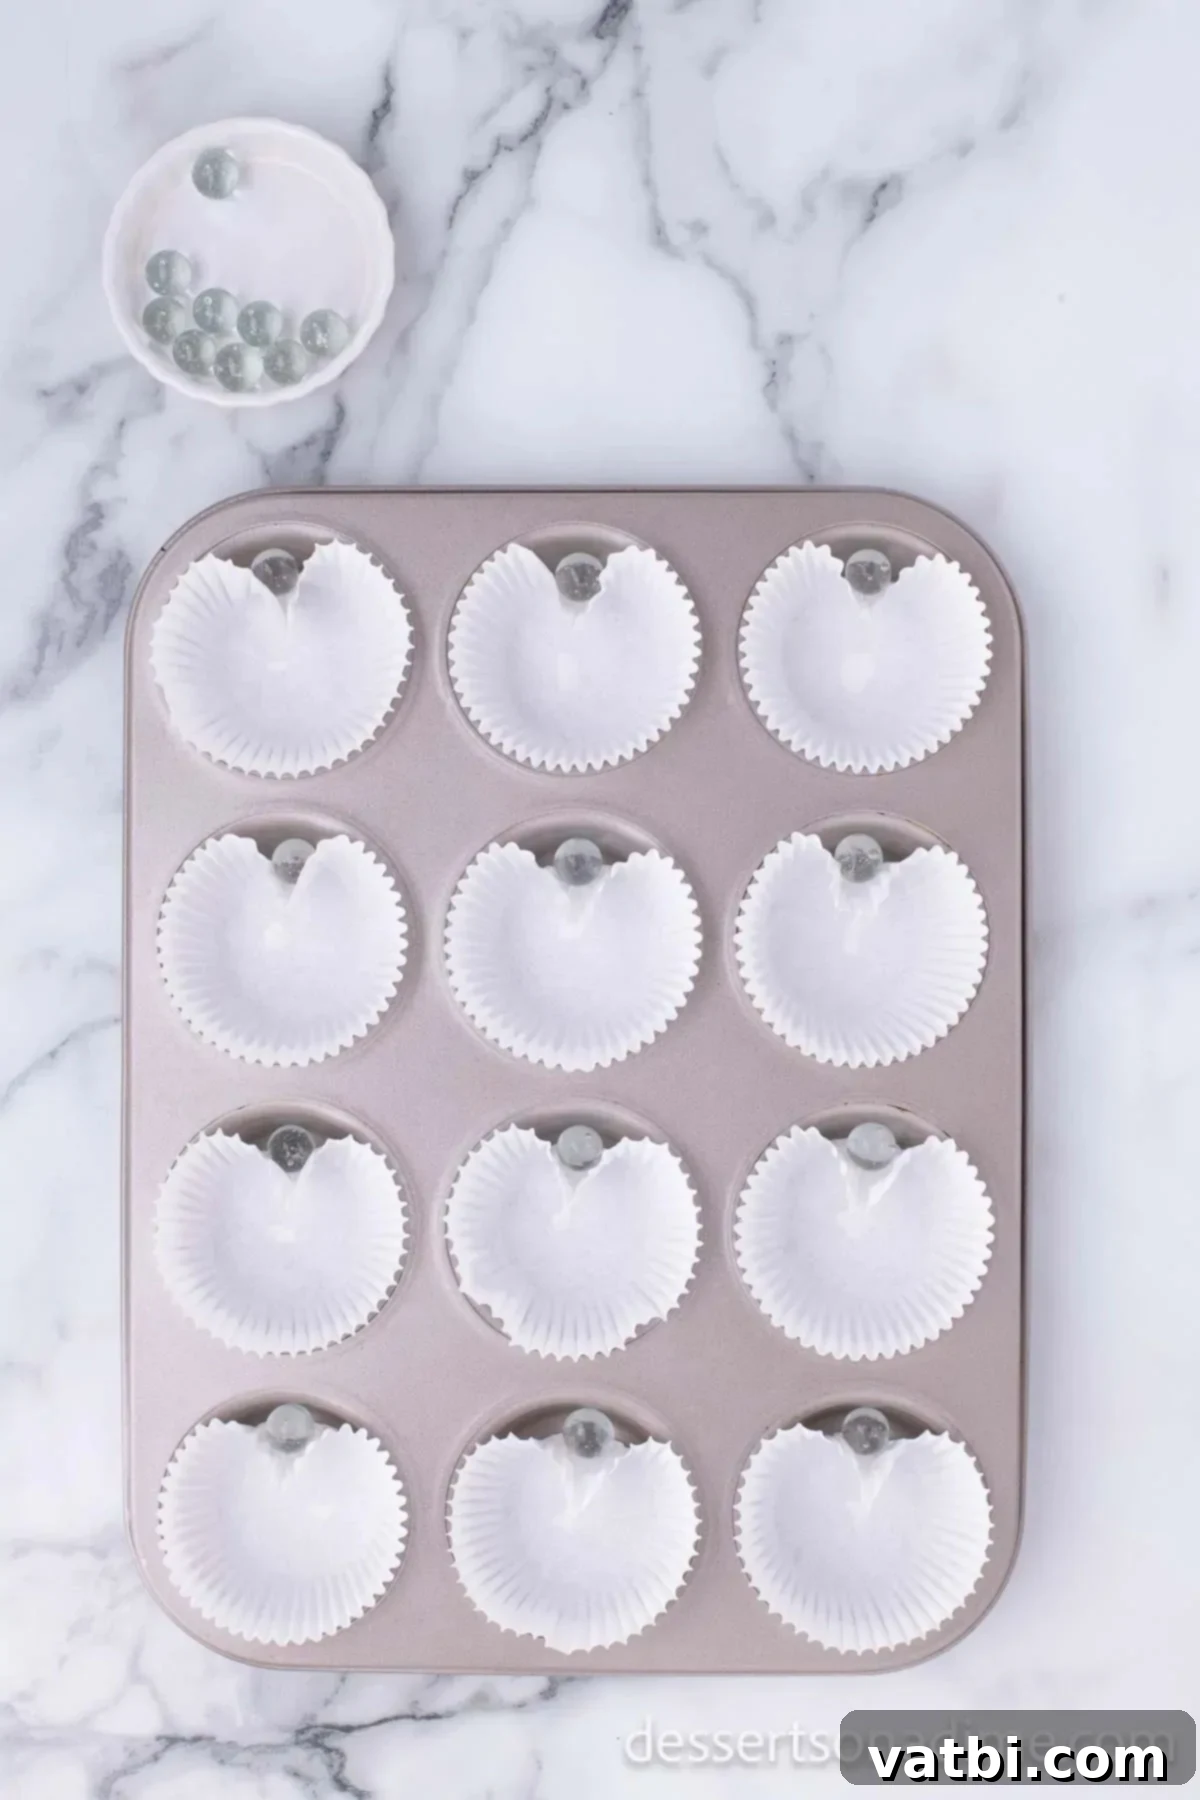
- Step 2. Prepare the Muffin Pan with the Heart Trick: While the oven is warming up, prepare your muffin tin. Line each muffin cup with cupcake liners. Now for the secret trick: gently place a marble (or a small, tightly rolled ball of aluminum foil) in each muffin cup, positioning it between the cupcake liner and the pan. This creates a small indentation on one side of the liner, forcing the batter to bake into a heart shape. Make sure the marble is snug enough to hold the shape but not so tight that it tears the liner.
Step 3. Mix the Batter and Fill Liners: Next, prepare the Devil’s Food Cake Mix according to the instructions on the box. Once your batter is smooth and well combined, carefully fill each cupcake liner with the batter. Aim to fill them about two-thirds of the way full. Do not overfill, as this can prevent the heart shape from forming correctly and cause the cupcakes to overflow.
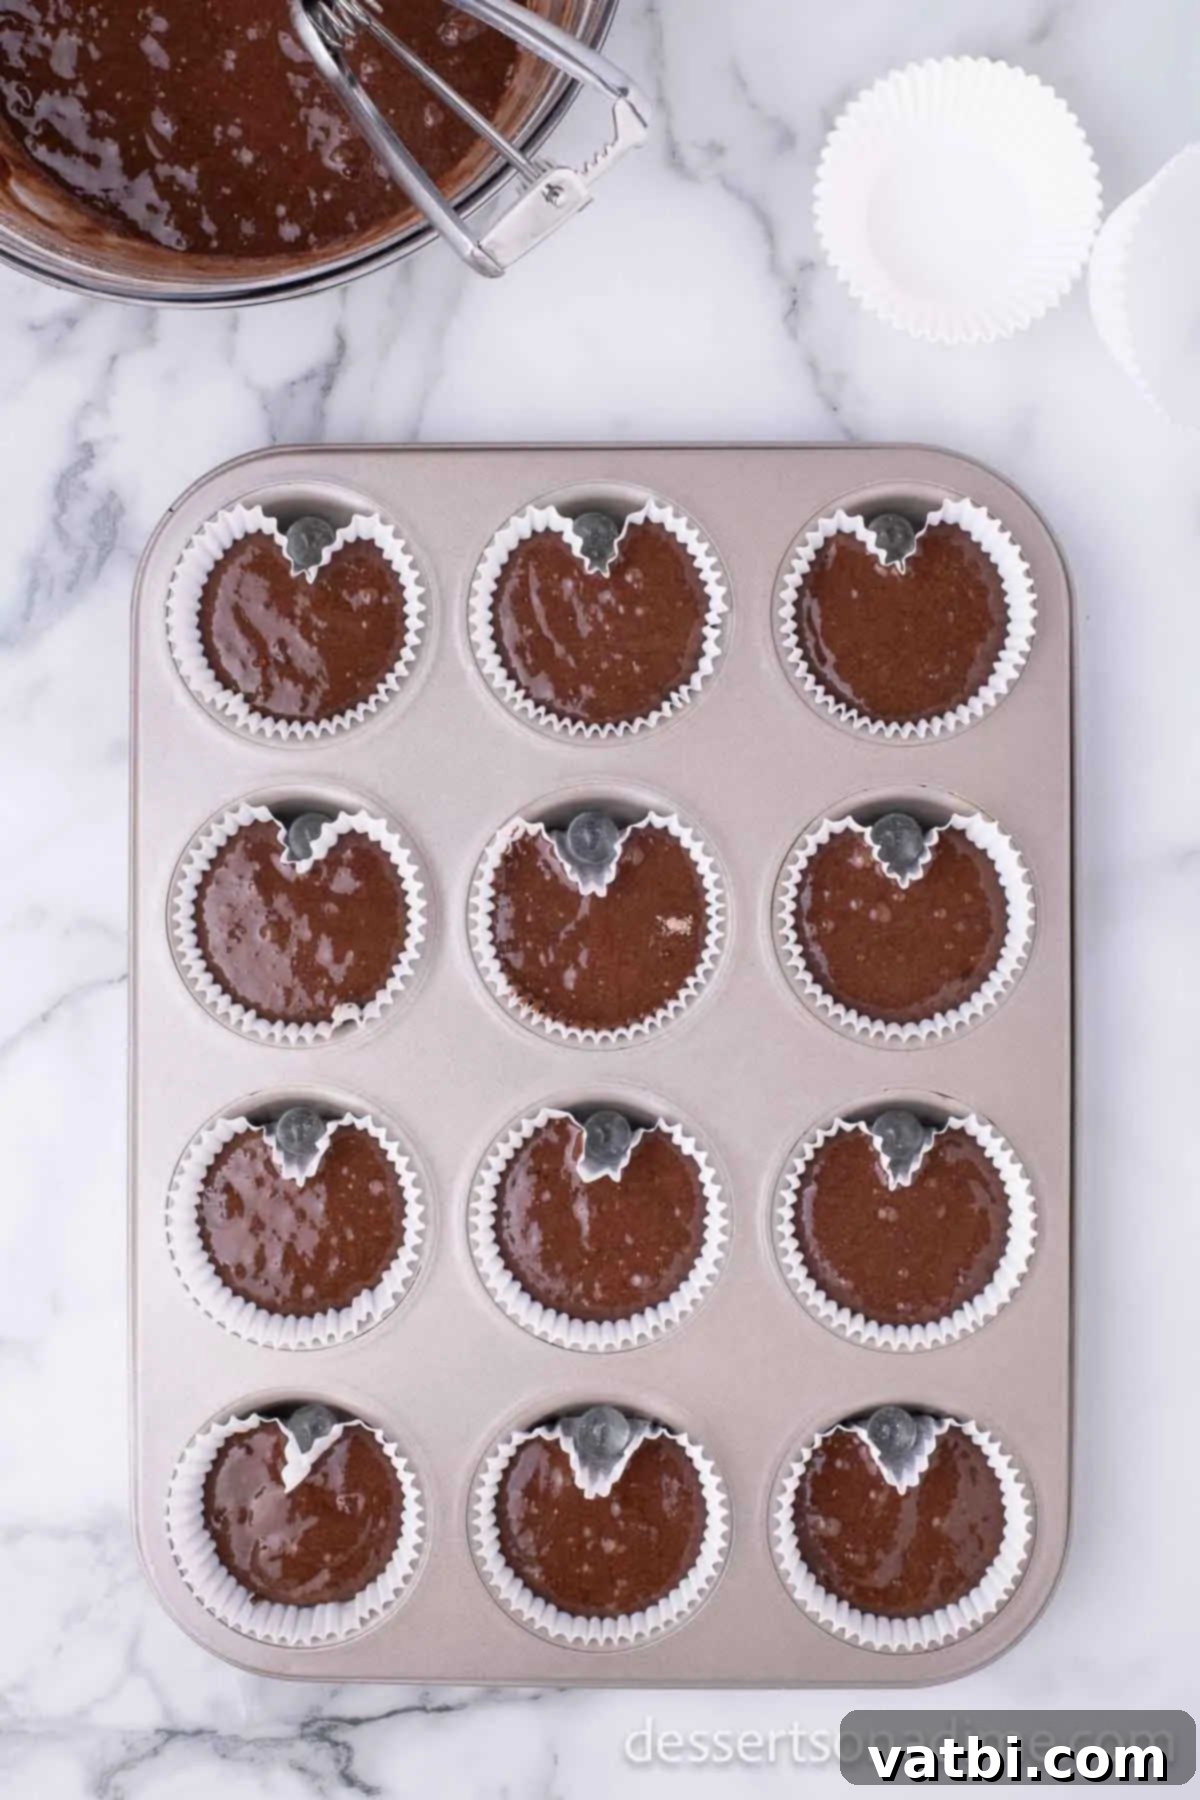
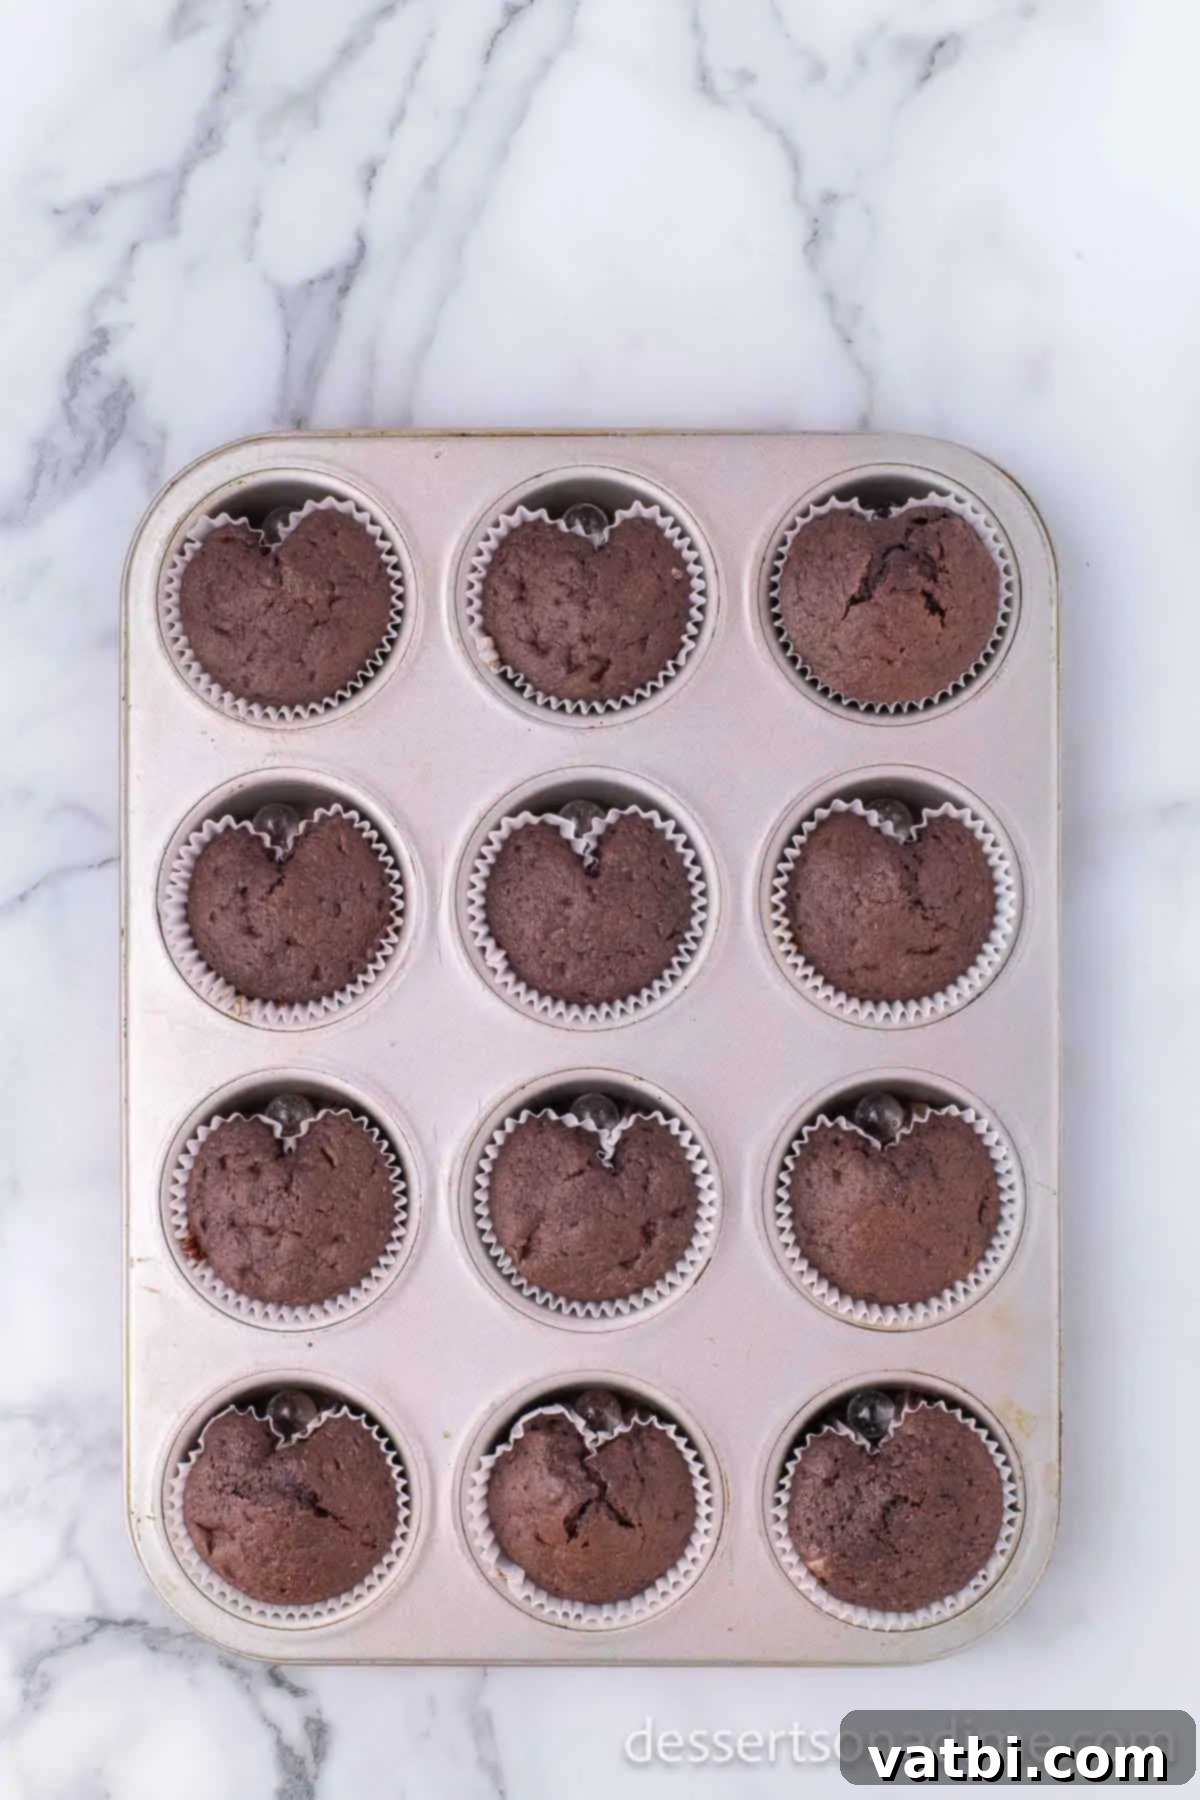
Step 4. Bake and Cool: Bake the cupcakes for approximately 14 to 15 minutes. Baking times can vary, so keep an eye on them. You’ll know they’re done when a toothpick inserted into the center of a cupcake comes out clean. Once baked, remove the muffin tin from the oven and allow the cupcakes to cool in the pan for a few minutes before transferring them to a wire rack to cool completely. Ensure they are fully cool before frosting.
For the Frosting:
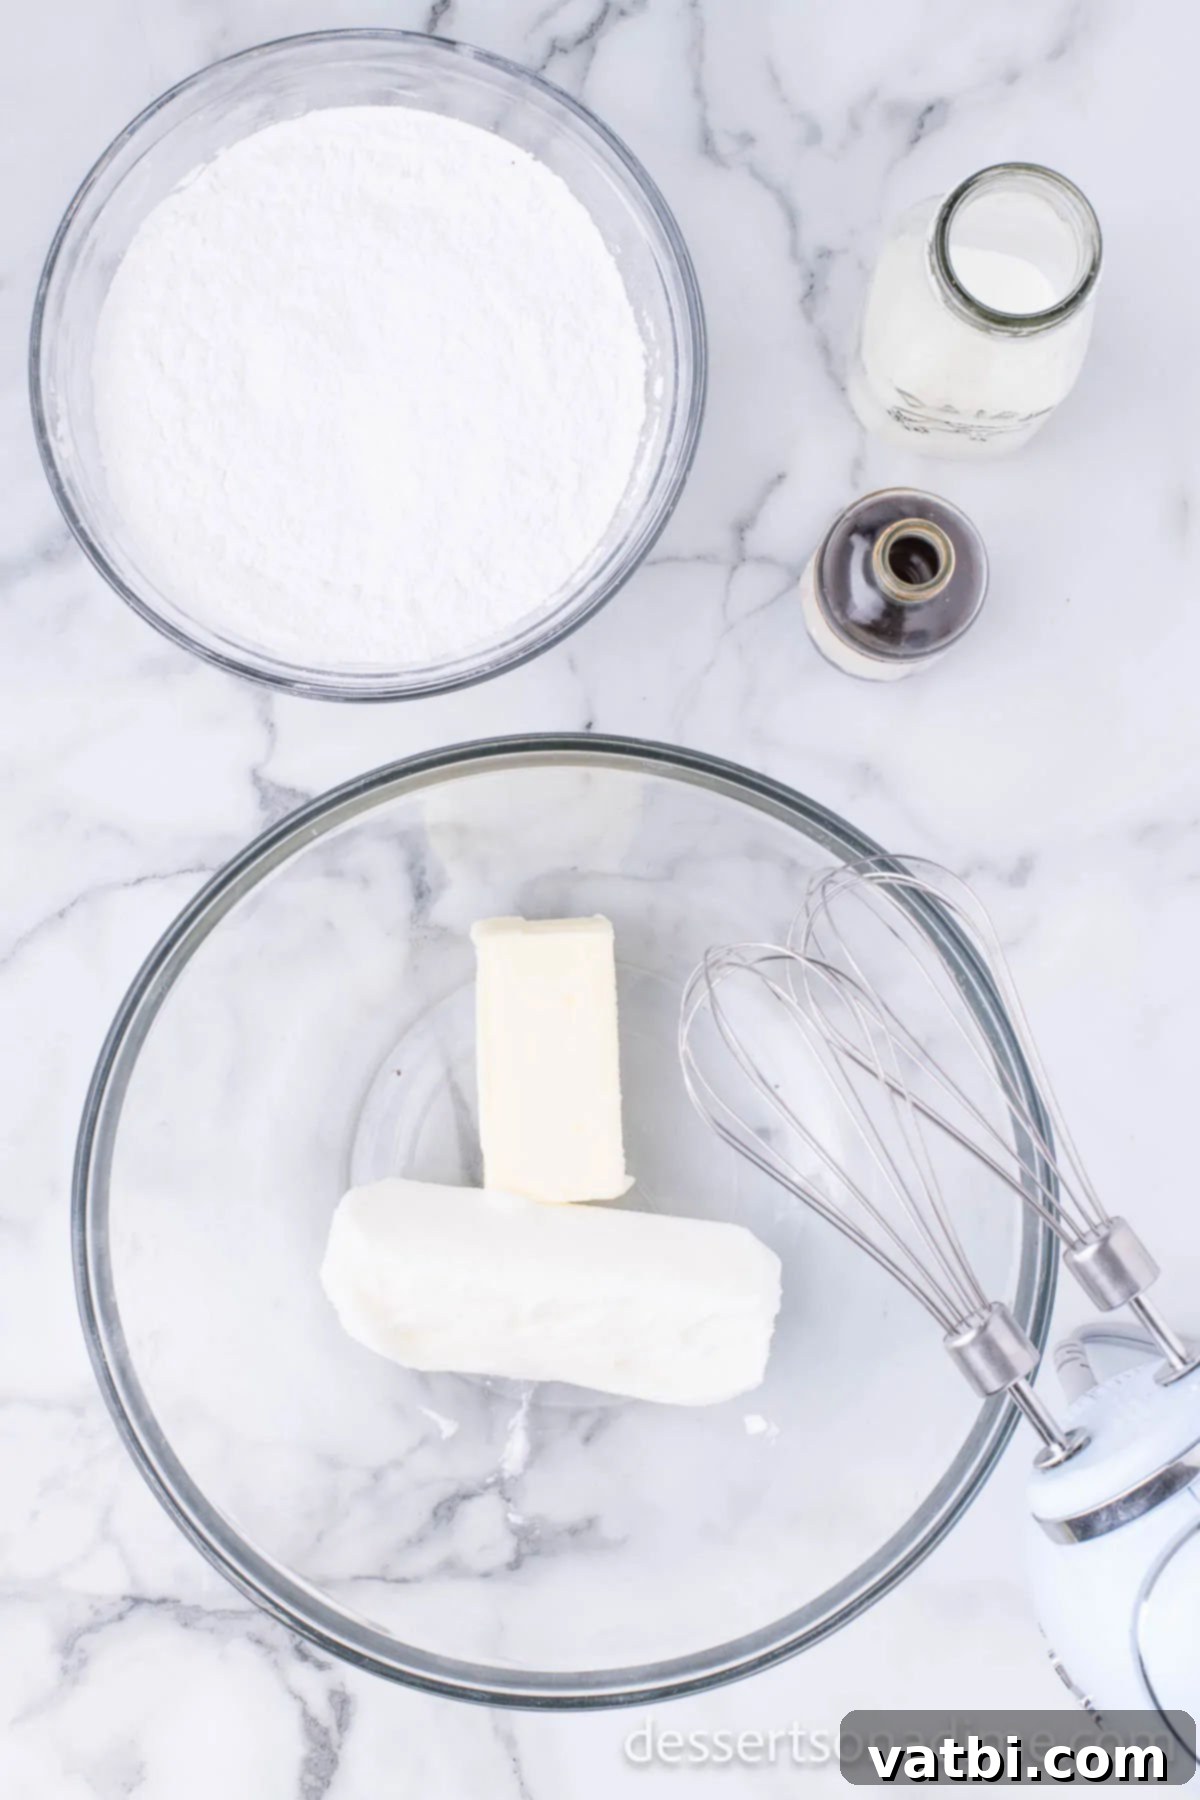
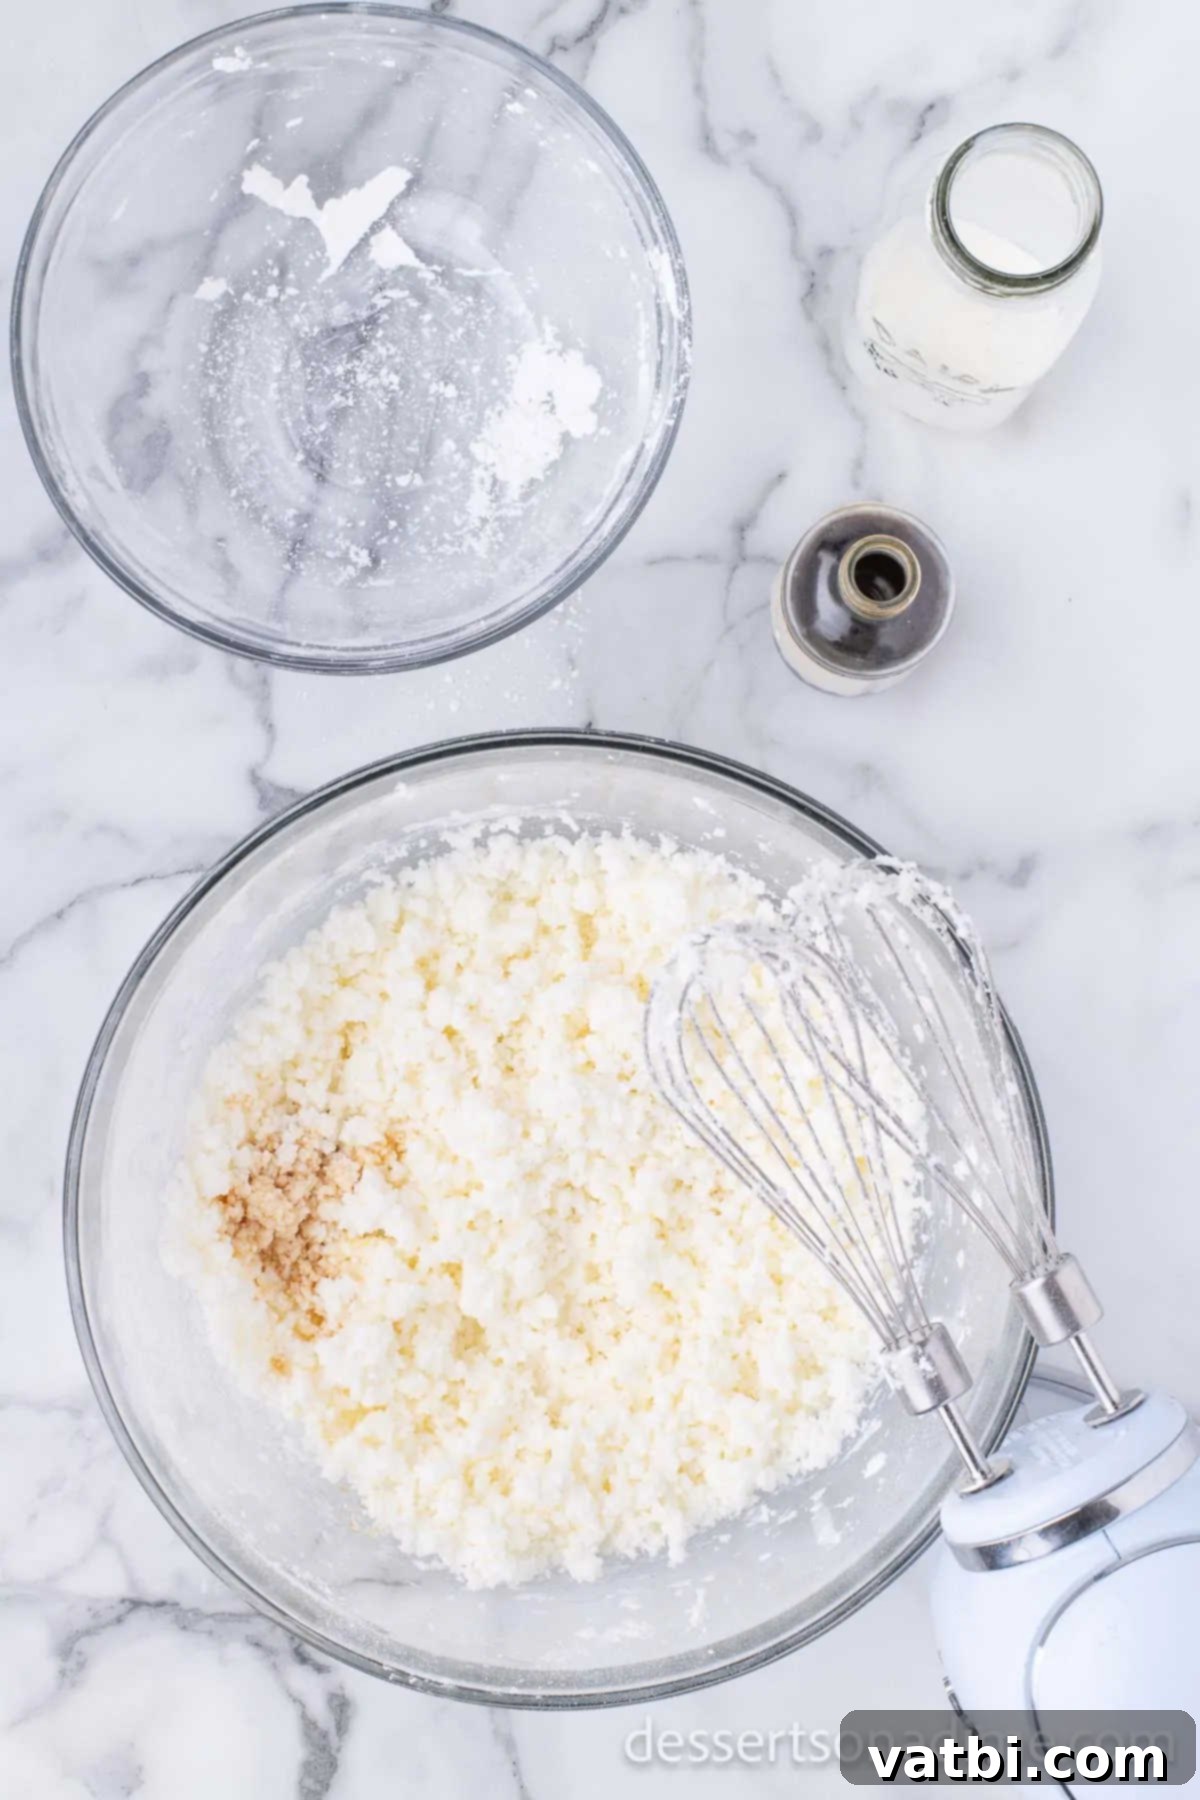
Step 5. Cream Butter and Shortening: While the cupcakes are cooling, it’s time to make the delicious buttercream frosting. In a large mixing bowl, combine the softened butter and solid vegetable shortening. Using a stand mixer with a paddle attachment or a handheld electric mixer, cream these two ingredients together until the mixture is light, fluffy, and smooth. This typically takes 2-3 minutes.
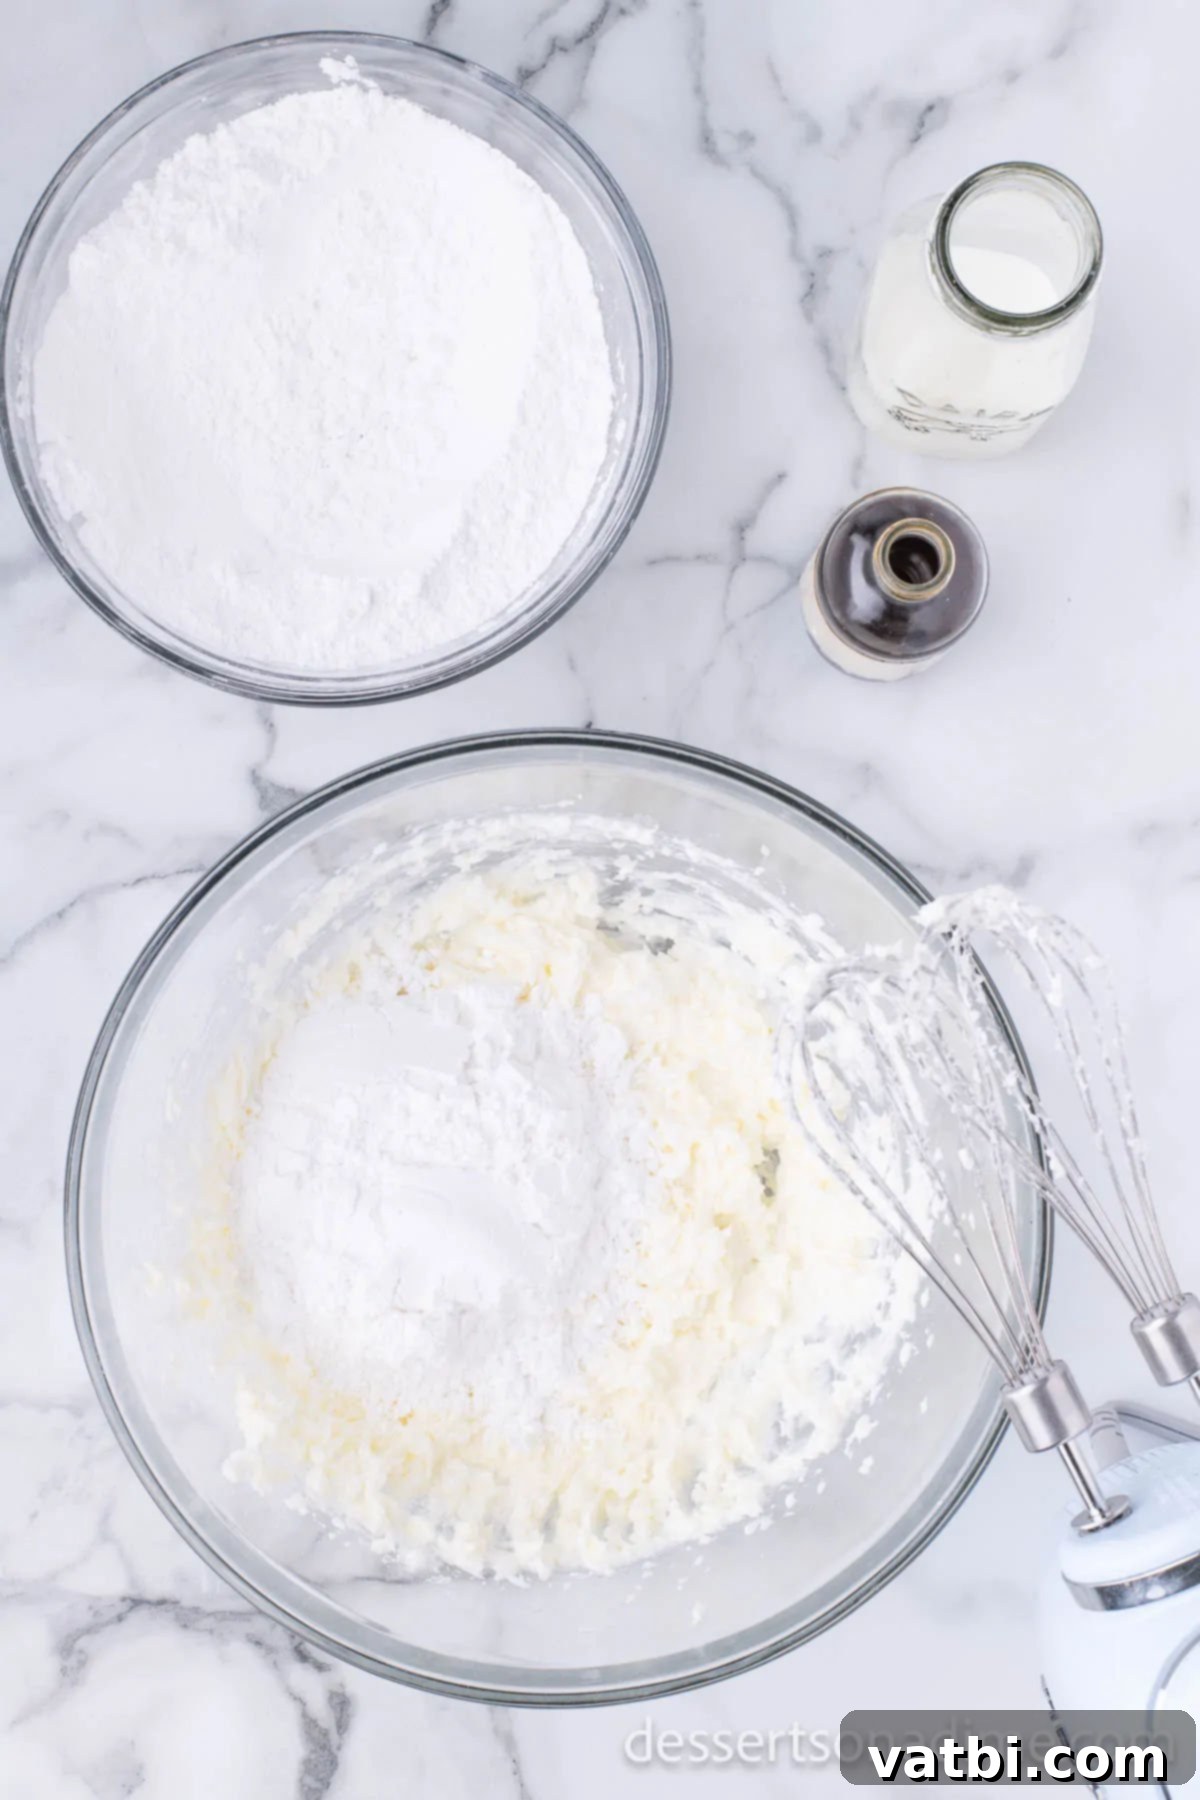
Step 6. Gradually Add Powdered Sugar: With the mixer on low speed, gradually add the sifted powdered sugar, one cup at a time. This prevents a cloud of sugar from engulfing your kitchen! Continue mixing until all the sugar is incorporated and the mixture starts to thicken. Scrape down the sides of the bowl as needed to ensure everything is well combined.
Step 7. Add Vanilla, Milk, and Pink Coloring: Once the powdered sugar is mixed in, stir in the vanilla extract and milk. Increase the mixer speed to medium-high and whip the frosting for another 2-3 minutes until it’s incredibly light, fluffy, and smooth. Now for the fun part: add a few drops of pink food coloring. Mix until the color is evenly distributed and you’ve achieved your desired shade of festive pink. Start with a small amount and add more as needed to get a vibrant color.
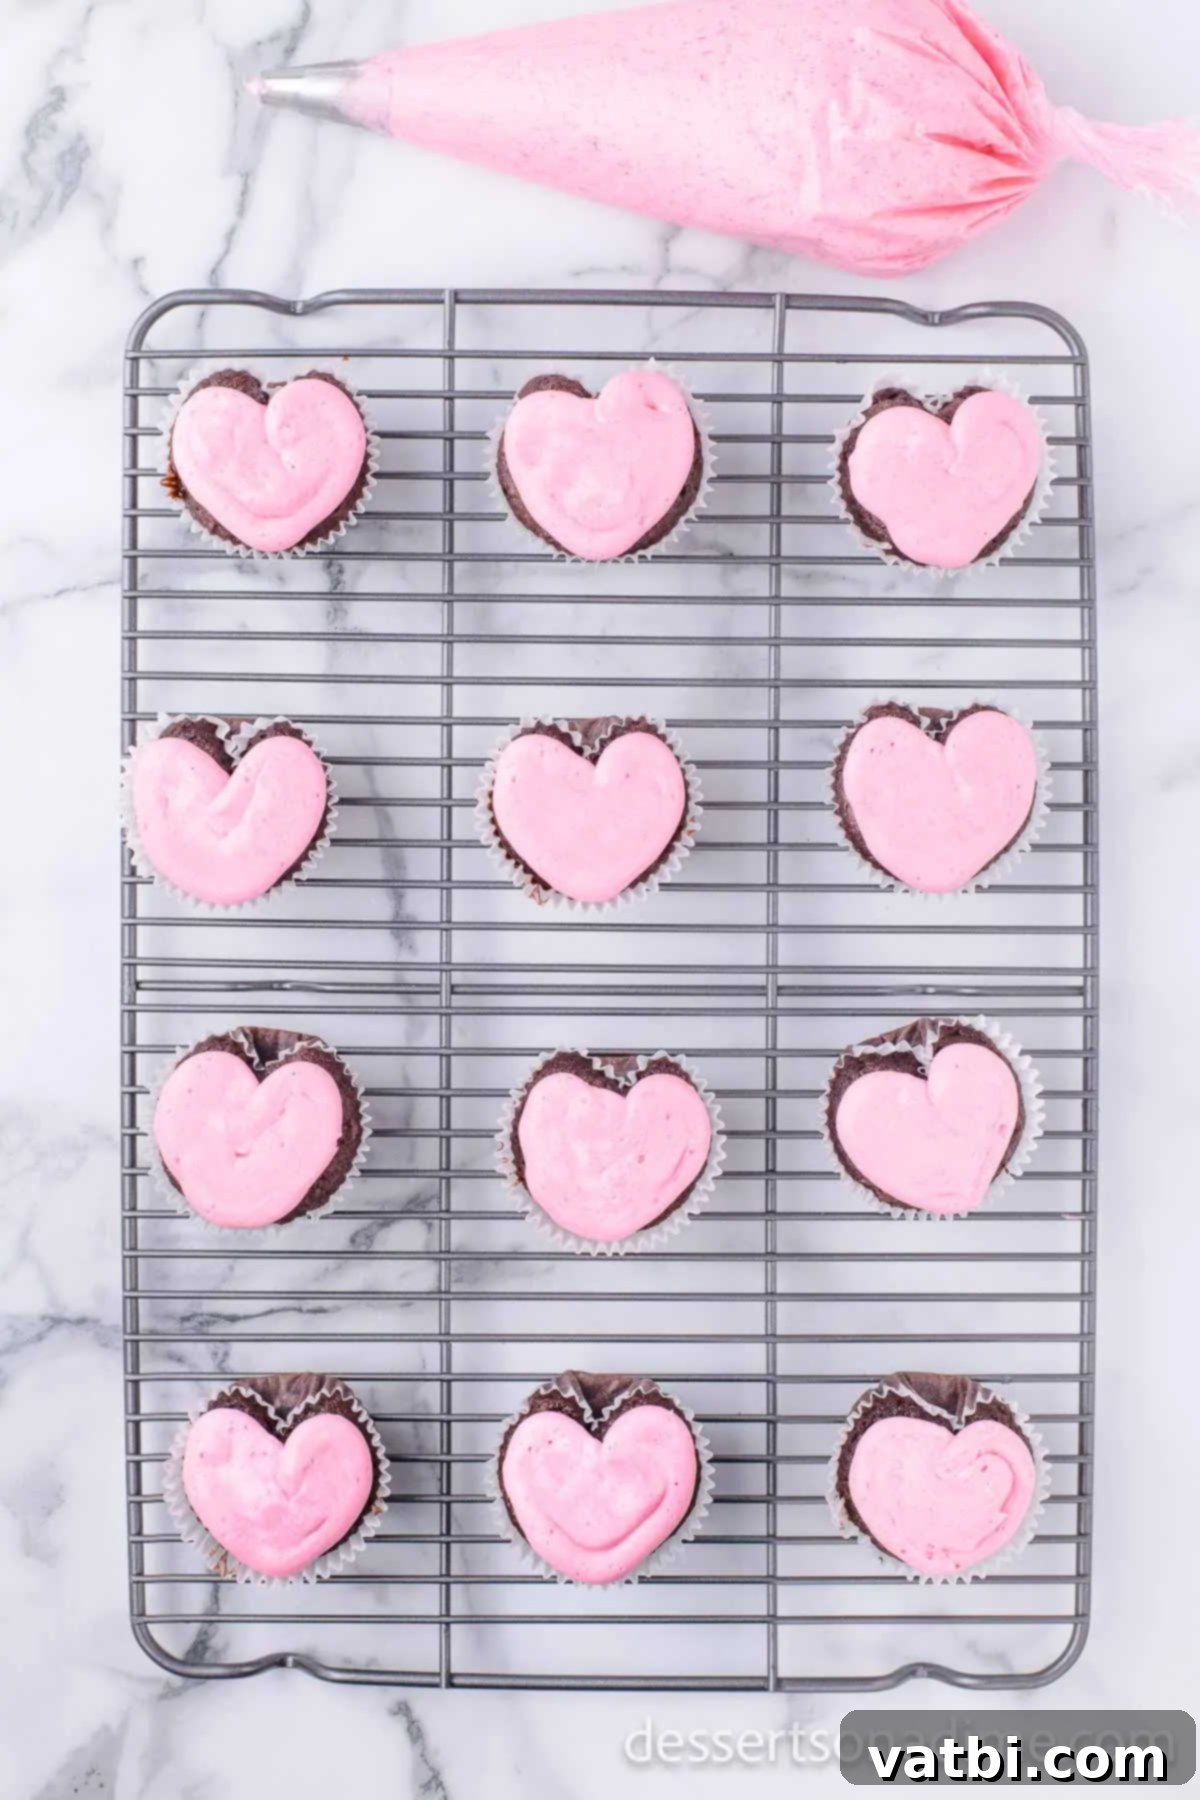
Step 8. Frost the Cupcakes: Finally, transfer your beautifully colored homemade buttercream frosting to a decorating bag fitted with a plain round tip. Pipe the pink frosting onto the completely cooled heart-shaped cupcakes, creating swirls or peaks. If you prefer a simpler approach, you can easily spread the frosting onto the cupcakes using a knife or an offset spatula. Ensure the cupcakes are completely cool, otherwise, the frosting will melt and slide off.
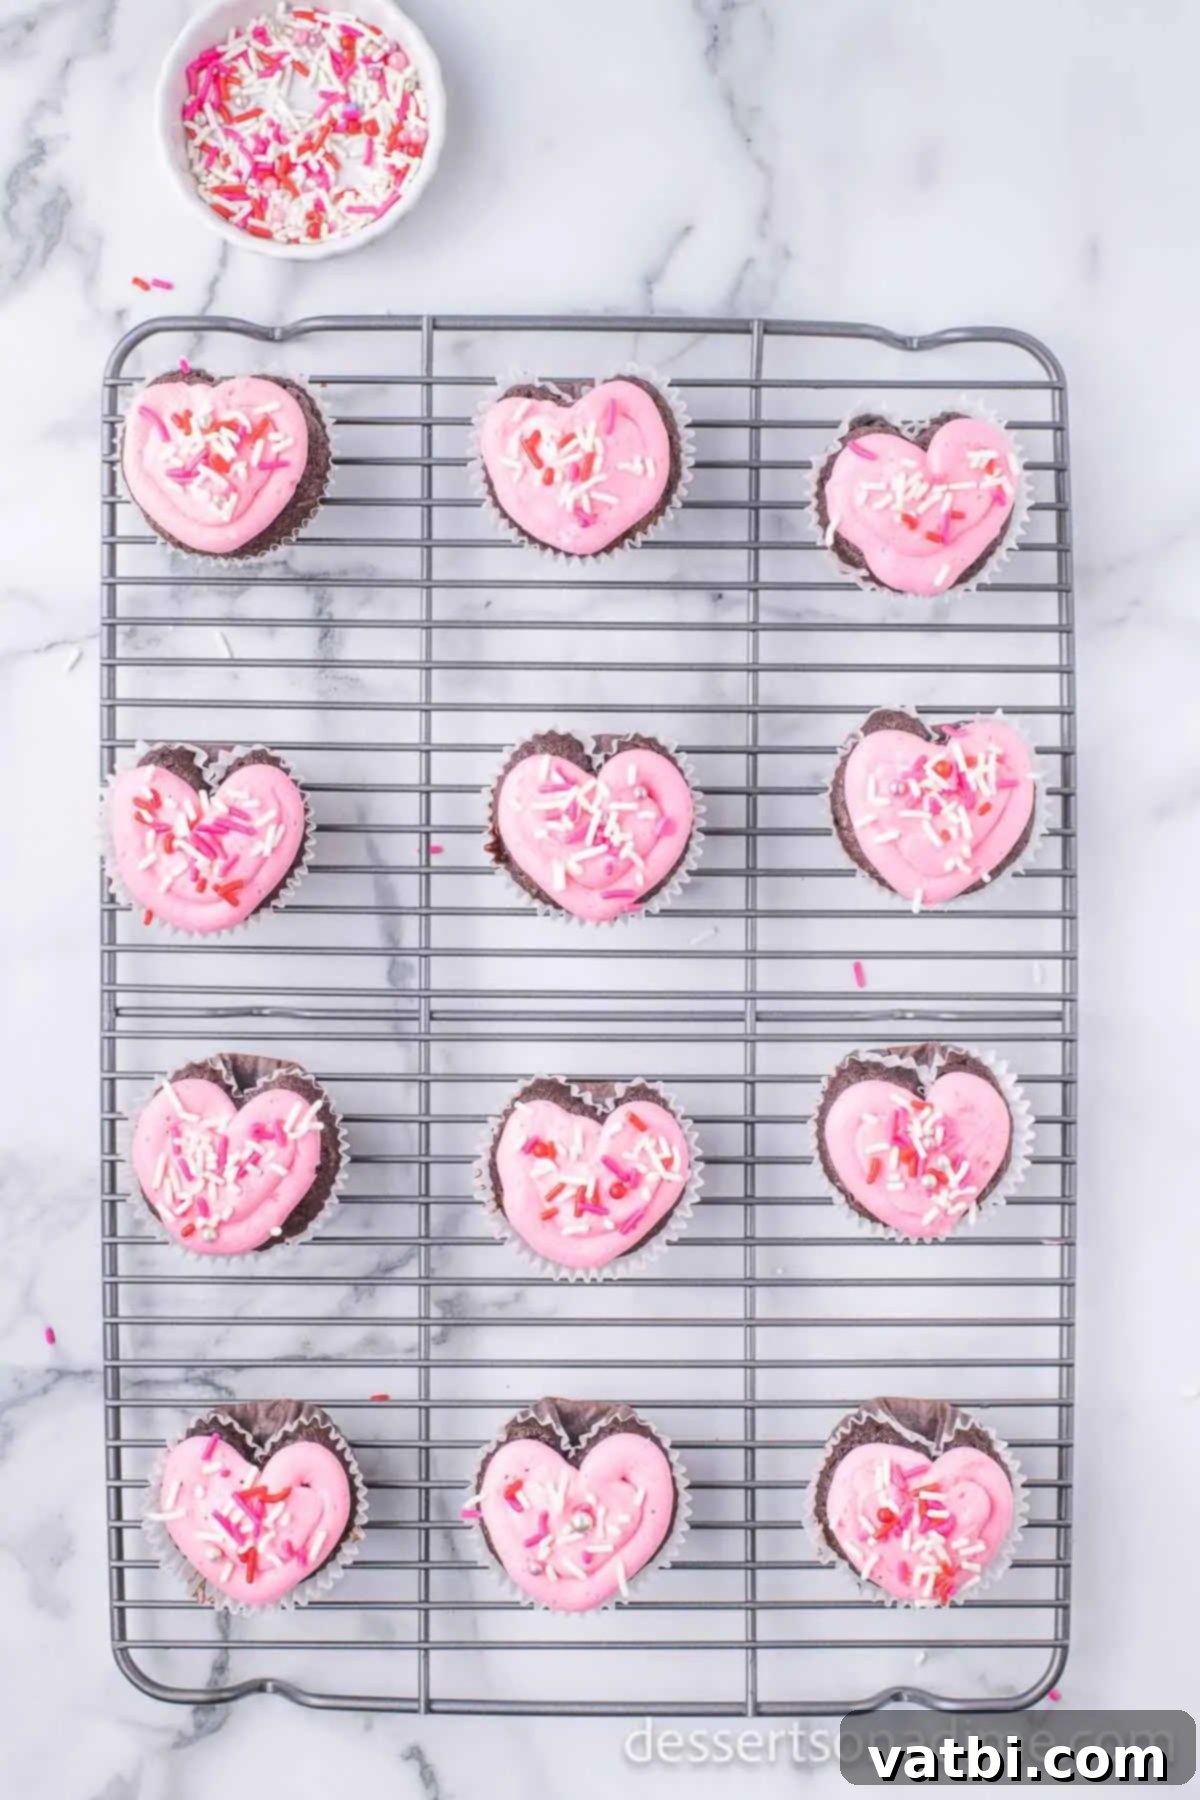
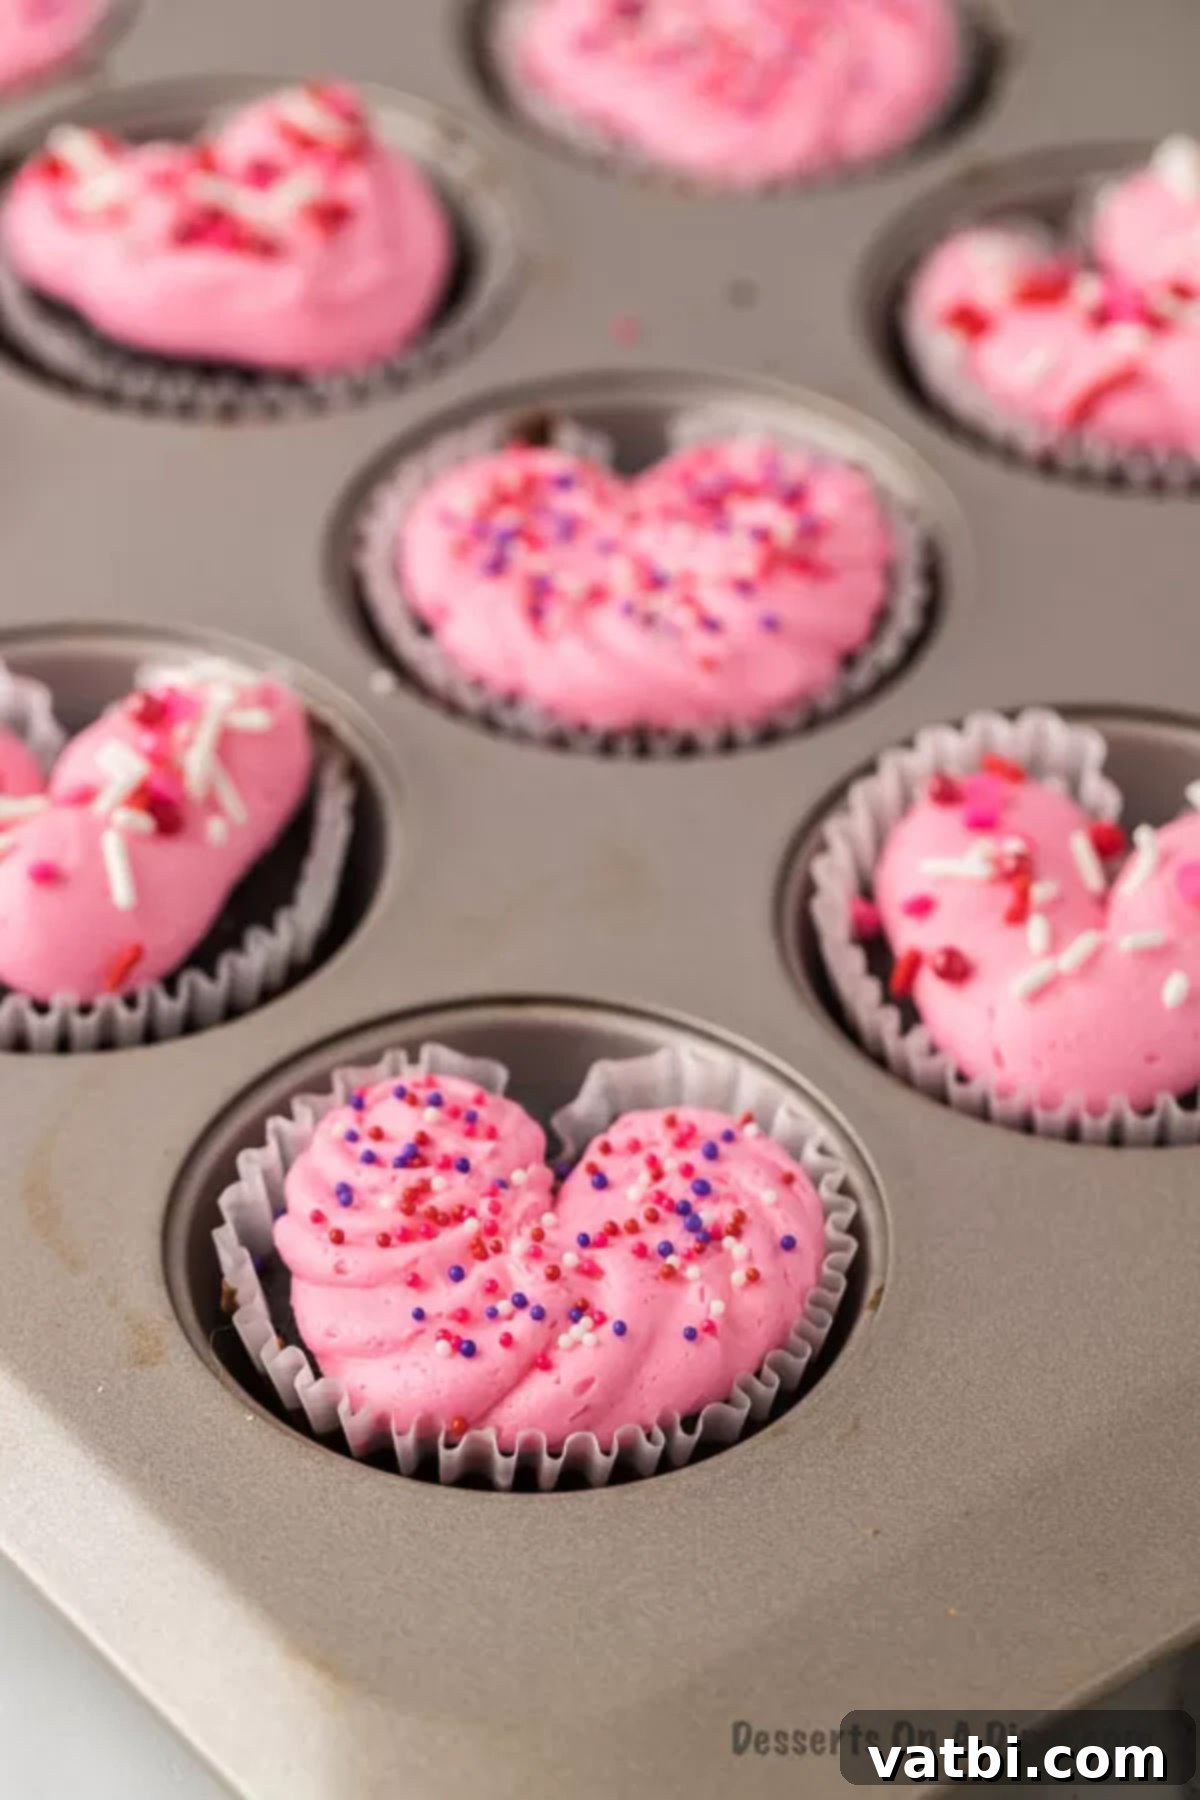
Step 9. Add Sprinkles and Serve: As a final touch, generously add your red, pink, and white sprinkles to the tops of the frosted cupcakes. The sprinkles not only add a pop of color but also a delightful texture. Your adorable heart-shaped cupcakes are now ready to be served and enjoyed! Watch as they disappear quickly at any gathering.
How to Store Your Heart Shaped Cupcakes
To keep your delicious heart-shaped cupcakes fresh and moist, proper storage is key. Store any leftover cupcakes in an airtight container at room temperature. They will remain fresh and delightful for up to 1 week. However, for optimal taste and texture, we find that these cupcakes are truly at their best within 3 to 4 days of baking. If you live in a warm or humid climate, or if your frosting contains ingredients that require refrigeration (like cream cheese, which this recipe does not), you may opt to store them in the refrigerator. Just remember to bring them to room temperature before serving for the best flavor and softest texture. Unfrosted cupcakes can also be frozen for up to 3 months when wrapped tightly.
Creative Topping Ideas for Your Heart Cupcakes
While sprinkles are a classic and charming choice, don’t limit your creativity when it comes to decorating these delightful heart-shaped cupcakes! Here are some fun and delicious topping ideas to make your treats even more special:
- Personalized Messages: Instead of or in addition to sprinkles, use contrasting icing (white on pink, or red on white) to write sweet words or small messages on your cupcakes. Think “Love,” “XOXO,” “Be Mine,” “Hugs,” or even initials. Small piping tips (like a Wilton #3) work best for this.
- Crushed Delights: Add texture and flavor with crushed toppings. Crushed candy (like conversation hearts, peppermints, or even chocolate bars), mini marshmallows, chopped nuts (like pecans or walnuts), or even crushed cookies (like Oreos or Graham crackers) make fantastic additions.
- Chocolate Drizzle: A simple drizzle of melted chocolate (white, milk, or dark) can elevate the appearance and taste. Use a piping bag with a tiny hole or a spoon to create elegant zigzags over the frosting.
- Fresh Berries: For a fresh and slightly tart contrast, top your cupcakes with a fresh raspberry, a few small strawberry slices, or blueberries. This adds a beautiful pop of natural color and flavor.
- Different Frosting Flavors: While pink buttercream is lovely, feel free to experiment with different frosting types. A rich chocolate icing would be absolutely divine with these chocolate cupcakes, especially when topped with pink and red sprinkles. You could also swap the vanilla buttercream for a Peanut Butter Frosting Recipe for a salty-sweet combo, or a luscious Salted Caramel Frosting for an indulgent twist.
- Edible Glitter or Pearls: For an extra touch of sparkle and elegance, dust your frosted cupcakes with edible glitter or place a few edible pearls on top.
Expert Tips for Perfect Heart Cupcakes Every Time
Even with a simple recipe, a few expert tips can make all the difference in achieving perfect results. Keep these pointers in mind for your heart-shaped cupcake baking adventure:
- Don’t Overfill Cupcake Liners: This is crucial for the heart shape. If you overfill them (more than two-thirds full), the batter will spread too much during baking and lose its distinctive heart shape, often resulting in rounder, less defined tops.
- Secure the Marbles: If you are having trouble getting the marble or foil ball to stay firmly in place between the liner and the pan, try this: fill the liner with batter first, and then gently push the marble into place from the outside of the liner. This helps secure it.
- Choose the Right Liner: While any type of cupcake liner will work, foil liners tend to be sturdier than paper baking cups. Their rigidity can make it easier to form and hold that distinct point in the middle of the heart shape, giving you a more defined result.
- No Marbles? No Problem! Don’t have any glass or ceramic marbles on hand? No worries! Simply tear off small pieces of aluminum foil and roll them tightly into balls about the size of a marble. These work just as effectively to create the indentation for the heart shape.
- Experiment with Cake Mix Flavors: While Devil’s Food Cake Mix is a fantastic choice for a rich chocolate flavor, don’t hesitate to experiment. Substitute with red velvet cake mix to make stunning red velvet heart cupcakes, perfect for Valentine’s Day. You can also use a classic vanilla cupcake mix for a lighter, versatile base that pairs well with any frosting color or flavor. Lemon, strawberry, or even funfetti cake mixes can also add a delightful twist.
- Room Temperature Ingredients for Frosting: Ensure your butter is truly at room temperature. This is vital for achieving a smooth, lump-free, and fluffy buttercream. Cold butter will result in a clumpy frosting, while melted butter won’t cream properly.
- Don’t Overmix the Batter: When mixing your cake batter, follow the package instructions and avoid overmixing. Overmixing can develop too much gluten, leading to tougher, less tender cupcakes. Mix just until the ingredients are combined.
- Cool Completely Before Frosting: This cannot be stressed enough! Attempting to frost warm cupcakes will cause the frosting to melt, slide off, and create a messy result. Be patient and allow your cupcakes to cool completely on a wire rack.
- Piping Bag Alternative: If you don’t have a piping bag, you can improvise by using a sturdy Ziploc bag. Simply snip off one corner to create an opening, and you’re ready to pipe!
More Valentines’ Day Desserts to Love
If you’re planning a full spread of sweet treats, here are some other fantastic Valentine’s Day dessert ideas that are just as easy and delicious:
- Valentines Day Cake Balls Recipe: Bite-sized, decadent, and perfect for sharing.
- Valentine’s Day Dirt Cake Recipe: A fun, layered dessert that’s always a crowd-pleaser.
- The Best Valentine’s Day Cake Mix Cookies: Super simple cookies made with a cake mix base.
- Valentine’s Day Chocolate Covered Pretzels: A delightful salty-sweet combination, easy to customize.
- Easy Valentine’s Day Rocky Road Fudge: A quick and indulgent fudge recipe packed with goodies.
With these simple techniques and delicious flavors, you can truly impress your family and friends by making these festive heart-shaped cupcakes for the next birthday, Valentine’s Day, or any special occasion. They’re a sweet gesture that shows you care, without requiring hours in the kitchen. We encourage you to try this fun recipe and come back to leave a comment once you do – we love hearing about your baking successes!
Pin
Heart Shaped Cupcakes
15 minutes
15 minutes
30 minutes
24
American
Dessert
181
Carrie Barnard
Ingredients
- For the Cupcakes:
- 1 box Devil’s Food Cake Mix
- The Ingredients needed to make Cupcakes based on the Cake Mix
- 12 Regular Size Glass or Ceramic Marbles
- For the Frosting:
- ½ cup Solid Vegetable Shortening
- ½ cup Butter softened at Room Temperature
- 1 tsp Vanilla Extract
- 4 cups Sifted Powdered Sugar
- 2 Tbsp Milk
- Pink Food Coloring
- Red Pink and White Sprinkles
Instructions
-
For the Cupcakes:
-
Preheat the oven to 350 degrees F. Line a muffin pan with a cupcake liner and then place a marble in each muffin cup in the pan between the cupcake liner and the pan so that the cupcake liner looks like the shape of a heart.
-
Prepare the Devil’s Food Cake Mix based on the box instructions. Then fill each cupcake liner with the batter until they are about 2/3 of the way full.
-
Bake the cupcakes for 14-15 minutes until a toothpick inserted into the middle of the cupcakes comes out clean. Then cool the cupcakes completely on a wire rack.
-
For the Frosting:
-
In a large bowl cream butter and vegetable shortening until smooth with a stand up mixer or a hand held mixer.
-
Beat in powdered sugar (one cup at a time) on low speed until well combined.
-
Stir in vanilla, and milk- whip until thoroughly mixed and fluffy on a medium-high setting. Then add the pink coloring until you get your desired color of pink.
-
Place the frosting in a piping bag fitted with a plain tip. Pipe the pink frosting onto the cooled cupcakes. You can also just spread the frosting on with a knife if you prefer.
-
Top with the Red, Pink and White sprinkles and then enjoy!
Recipe Notes
Nutrition Facts
Pin This Now to Remember It Later
Pin Recipe
