Easy St. Patrick’s Day Chocolate Covered Oreos: A Festive No-Bake Treat
Get ready to add a touch of emerald magic to your St. Patrick’s Day celebrations with these delightful St. Patrick’s Day Chocolate Covered Oreos! This recipe stands out as a remarkably fun and incredibly easy no-bake treat that anyone can master, regardless of their baking experience. With a simple requirement of just four ingredients and minimal time commitment, you can whip up a batch of these festive cookies that are sure to impress both young and old. Forget complicated baking processes; these charming chocolate-dipped Oreos offer maximum impact with minimum effort and a splash of holiday cheer.

Whenever the festive spirit of St. Patrick’s Day calls for a quick and eye-catching dessert, my go-to is always this incredibly simple no-bake recipe for chocolate-covered Oreo cookies. It’s a lifesaver for busy holidays, delivering a delicious and visually appealing treat without the need to turn on your oven. The beauty of this recipe lies in its simplicity and versatility, making it a perfect addition to any celebration, big or small. You only need a handful of ingredients to transform classic Oreos into a St. Patrick’s Day masterpiece.
Inspired by the success of our hugely popular White Chocolate Covered Oreos, it was only natural to create a special St. Patrick’s Day version. We absolutely love celebrating holidays with themed treats, and these festive Oreos fit right in with other family favorites like St. Patrick’s Day Cake Pops and St. Patrick’s Day Rice Krispie Treats. These chocolate-covered Oreos are not just desserts; they are edible decorations that bring joy and a splash of green to any St. Paddy’s celebration, making them an instant hit at parties or a charming surprise for loved ones.
Table of Contents
- Why This Recipe Works: The Ultimate Easy St. Patrick’s Day Treat
- Ingredients You’ll Need for Festive Oreos
- Variations and Customization for Your Chocolate Covered Oreos
- How to Make St. Patrick’s Day Chocolate Covered Oreos (Step-by-Step)
- Storage Tips for Freshness and Longevity
- Pro Tips for Perfect Chocolate Covered Oreos Every Time
- More Festive St. Patrick’s Day Desserts to Explore
- Recipe Card
Why This Recipe Works: The Ultimate Easy St. Patrick’s Day Treat
There’s a reason why these St. Patrick’s Day Chocolate Covered Oreos consistently receive rave reviews and disappear quickly at any gathering. The classic appeal of Oreo cookies, combined with a smooth, sweet candy coating and vibrant, festive sprinkles, creates an irresistible treat that perfectly embodies the joyous spirit of the holiday. Here’s why this recipe is an absolute winner and will become your new go-to St. Paddy’s Day dessert:
- Effortless Preparation for All Skill Levels: This is a true no-bake marvel, meaning you won’t need to turn on your oven or spend hours in the kitchen with complex instructions. The process is straightforward, involving simple steps of melting, dipping, and decorating. This makes it incredibly accessible for even the most novice of cooks or a fantastic project for kids to help with, fostering a love for baking without the stress.
- Visually Stunning and Instantly Festive: The vibrant green and crisp white candy melts, generously adorned with playful sprinkles, instantly transform ordinary Oreos into miniature works of art. They look incredibly pretty and festive, instantly elevating your St. Patrick’s Day dessert table or adding a cheerful pop of color to any snack plate. Their bright appearance makes them perfect for photo opportunities and a sure conversation starter.
- Kid-Friendly Fun and Engagement: This recipe is a fantastic opportunity to involve children in the kitchen. Dipping cookies into colorful chocolate and adding sprinkles are activities kids adore, fostering creativity, developing fine motor skills, and making cherished holiday memories. They’ll take immense pride in eating their own beautiful creations!
- Budget-Friendly Dessert Option: With just a few basic and readily available ingredients – Oreos, candy melts, and sprinkles – this recipe is remarkably inexpensive to make, especially when preparing a large batch for a crowd. You can create an impressive spread of delicious treats without putting a strain on your wallet, proving that you don’t need fancy ingredients for fantastic results.
- Versatile for Any St. Patrick’s Occasion: Whether you’re hosting a lively St. Patrick’s Day party, looking for a special surprise to pack in school lunchboxes, or simply seeking an easy and fun after-school snack, these chocolate-covered Oreos fit the bill perfectly. Their sturdy, grab-and-go nature makes them ideal for various settings and easy transport.
- Irresistibly Delicious Flavor Combination: It’s hard to beat the classic and beloved combination of a crunchy chocolate Oreo cookie with a rich, sweet, and smooth candy coating. The delightful contrast in textures – the crisp cookie and the velvety chocolate – along with the complementary flavors, make these cookies utterly addictive and a guaranteed crowd-pleaser that everyone will reach for.
- Convenience of Make-Ahead Preparation: One of the greatest benefits of this recipe is that these cookies store beautifully. This means you can prepare them several days in advance of your celebration, freeing up your valuable time on the day of the festivities. This allows you to focus on other aspects of your party planning or simply enjoy the holiday with less stress.
Every single person who tries these delicious, charming, and festive treats will be absolutely thrilled you took the time to make them. They are a testament to how simple ingredients, combined with a little creativity, can come together to create something truly special and memorable for the holidays.
Ingredients You’ll Need for Festive Oreos
One of the absolute best aspects of this recipe is its minimal ingredient list. You only need four core items to create these enchanting St. Patrick’s Day treats, making it a hassle-free option for any busy holiday schedule. Gathering your ingredients and having them ready before you start will ensure a smooth, efficient, and enjoyable preparation process.
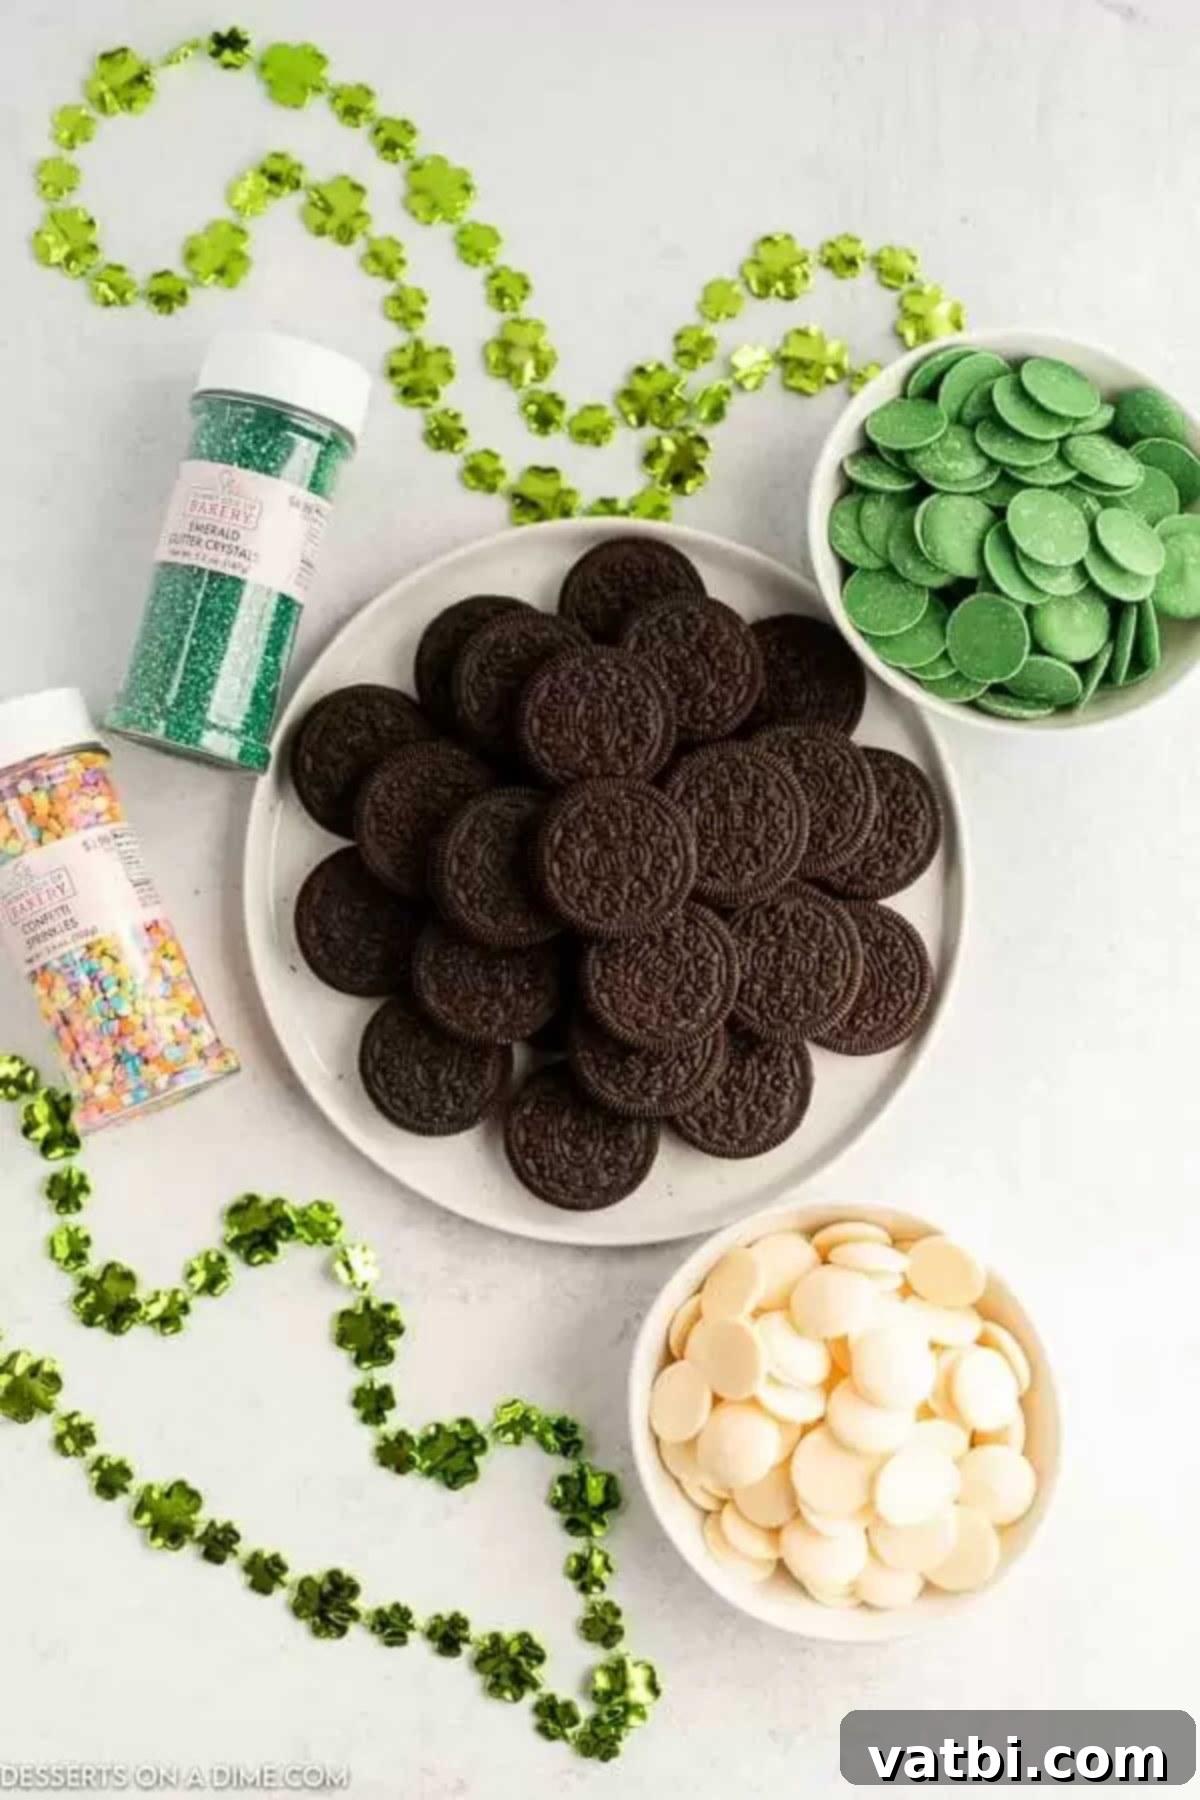
- Oreos: For the best and easiest results when dipping, we highly recommend using regular Oreo cookies. Their classic thickness provides a perfect and stable base for the chocolate coating, preventing them from breaking easily during the dipping process. While Double Stuffed Oreos are undeniably delicious on their own, their extra cream filling can sometimes make them a bit trickier to dip evenly, leading to a thicker coating. A standard 14 oz package should yield plenty of festive cookies for your celebration.
- White Candy Melts and Green Candy Melts: These are your absolute key to achieving vibrant, easy-to-work-with chocolate coatings. Candy melts are designed to melt smoothly and set quickly, providing a beautiful, glossy finish. You can typically find a wide selection of candy melts in the baking aisle of most craft stores (like Michael’s or Hobby Lobby), party supply stores, or major supermarkets, especially during holiday seasons. Wilton candy melts are a popular and highly reliable brand known for their consistent melting properties and smooth texture. Ensure you purchase both white and green to achieve that classic, eye-catching St. Patrick’s Day color scheme!
- Sprinkles: This is where you can truly let your creativity and festive spirit shine! Choose any type of festive sprinkles that evoke the luck of the Irish or simply make you smile. Excellent options include traditional green and white nonpareils, fun shamrock-shaped sprinkles, dazzling gold edible glitter, or a cheerful mix of rainbow sprinkles to represent a “pot of gold” effect. White sprinkles can look particularly elegant and striking against a vibrant green candy coating. Nonpareils are an excellent choice for their classic texture and how well they adhere to the melted candy.
The complete ingredient list with precise measurements for the recipe can be found at the very bottom of this post in the printable recipe card section, ensuring you have everything you need for success.
Variations and Customization for Your Chocolate Covered Oreos
While the basic recipe for St. Patrick’s Day Chocolate Covered Oreos is fantastic and delicious as is, there are endless ways to customize them to suit your personal taste, match a specific theme, or utilize whatever ingredients you happen to have on hand. Don’t be afraid to experiment and get creative; these treats are wonderfully forgiving!
- Alternative Coating Options:
- Using Real White Chocolate: If you prefer the flavor of actual white chocolate over candy melts, you can certainly use it. However, be aware that white chocolate chips or bars might need a touch of coconut oil or vegetable shortening (about 1-2 teaspoons per cup of chocolate) to thin them slightly for a smoother, more manageable dipping consistency. Melt white chocolate in short intervals, just as you would candy melts, being extra careful not to overheat it, as it’s more prone to seizing.
- Achieving Green with Food Coloring: To get that vivid green color with real white chocolate, you’ll need to use gel food coloring, not liquid. Liquid food coloring contains water, which can cause real chocolate to seize (thicken and become lumpy and unusable). Add gel coloring a little at a time with a toothpick, stirring well after each addition, until you achieve your desired shade of green.
- Almond Bark for Ease: Another excellent and easy-to-melt option for coating is almond bark. It’s designed to melt smoothly and sets quickly, providing a delicious, neutral base that takes color well and is very easy to work with.
- Milk or Dark Chocolate Base: If you’re not a fan of white chocolate or candy melts, you can absolutely use milk chocolate or dark chocolate for dipping. While you won’t get the bright green color directly, you can still maintain the St. Patrick’s Day theme by adding a contrasting green or white drizzle on top, or by using green and gold sprinkles. Melting chocolate wafers tend to work best for candy making as they have a good fat content for melting smoothly.
- More Colors and Drizzle Techniques: Unleash your inner artist and make your Oreos truly unique!
- Multi-Color Drizzle Fun: After your main green or white coating has fully set, melt a small amount of a contrasting candy melt (e.g., gold, yellow, or even a different shade of green for depth) and drizzle it artfully over the top. Use a small spoon, a fork, or a piping bag with a tiny hole snipped off the corner for precise lines. This adds an extra layer of visual appeal and can introduce another subtle flavor dimension.
- Holiday Versatility Beyond St. Patrick’s Day: The true beauty of this recipe lies in its incredible adaptability. Simply switch out the candy melt colors and sprinkle selections, and you instantly have a perfect themed treat for any holiday throughout the year! Think red and green for Christmas, pastels for Easter, orange and black for Halloween, or pink and red for Valentine’s Day.
- Explore Flavorful Oreo Choices: Don’t limit yourself to just classic Oreos – there’s a whole world of flavors to explore!
- Mint Oreos for Extra Zing: For an extra burst of St. Patrick’s Day flavor, use Mint Oreos as your base. The refreshing minty kick perfectly complements the sweet chocolate coating and enhances the green theme.
- Golden Oreos for Vanilla Lovers: These vanilla-flavored sandwich cookies offer a different taste profile and a lighter color that might be fun to pair with green and gold sprinkles for a “pot of gold” inspired treat.
- Other Sandwich Cookies: Feel free to experiment with other types of sandwich cookies if you’re looking for something slightly different. Many brands offer seasonal flavors that could work wonderfully.
- Using Silicone Molds for Professional Finish: While dipping by hand is perfectly fine, silicone molds specifically designed for chocolate-covered Oreos can elevate your treats to a professional level with minimal effort.
- Achieve Uniformity and Clean Edges: Molds ensure a perfectly uniform shape and a clean, glossy finish on every cookie, making them look store-bought. They also make the dipping process less messy and more consistent.
- Simple Mold Usage: To use, simply pour a small amount of melted candy into the bottom of the mold, gently press an Oreo into the candy, then cover it with more melted candy. Lightly tap the mold to release air bubbles. Chill until fully set, then easily pop them out.
- Creative Topping Ideas: Go beyond sprinkles with these fun options!
- Crushed Candies: Top your coated Oreos with crushed green M&M’s, finely chopped mint candies, or even crushed pistachio nuts for a lovely green crunch and added flavor.
- Toasted Coconut Flakes: Lightly toast some shredded coconut flakes and, if desired, tint them green with gel food coloring before sprinkling for a tropical, festive touch.
- Mini Chocolate Chips: A classic topping that always works, adding extra chocolatey goodness.
- Edible Glitter or Dust: For a truly magical and sophisticated touch, lightly brush finished (and set) Oreos with edible gold or green glitter dust using a small, soft brush.
With all these delightful variations and customization options, you can truly make these chocolate-covered Oreos a signature treat for your St. Patrick’s Day celebration or any holiday throughout the year, showcasing your unique flair!
How to Make St. Patrick’s Day Chocolate Covered Oreos (Step-by-Step)
Making these festive chocolate-covered Oreos is a straightforward and enjoyable process that yields impressively beautiful and delicious results. Follow these simple, step-by-step instructions carefully, and you’ll have a batch of stunning St. Patrick’s Day treats ready to enjoy in no time!
- Step 1: Prepare Your Workspace. Begin by lining a large baking sheet with either parchment paper or wax paper. This crucial preparatory step creates a non-stick surface, which prevents the chocolate-covered Oreos from adhering to the pan as they cool and set. It also makes for incredibly easy cleanup once your delicious treats are finished. A clean, properly lined surface is absolutely key to achieving perfectly formed and easily removable cookies.
- Step 2: Melt the Candy Melts. Carefully place your white candy melts into one microwave-safe bowl and the green candy melts into another separate microwave-safe bowl. Heat each bowl of candy melts in short, controlled intervals, starting with 30-second increments. After each interval, remove the bowl from the microwave and stir the melts thoroughly with a spoon or rubber spatula, even if they don’t appear fully melted. Continue heating and stirring until the candy melts are completely smooth, fluid, and free of any lumps. It is absolutely vital not to overheat them, as this can cause the candy to seize (become thick and lumpy) or even burn, rendering it unusable. Patience and gentle heating are key here.
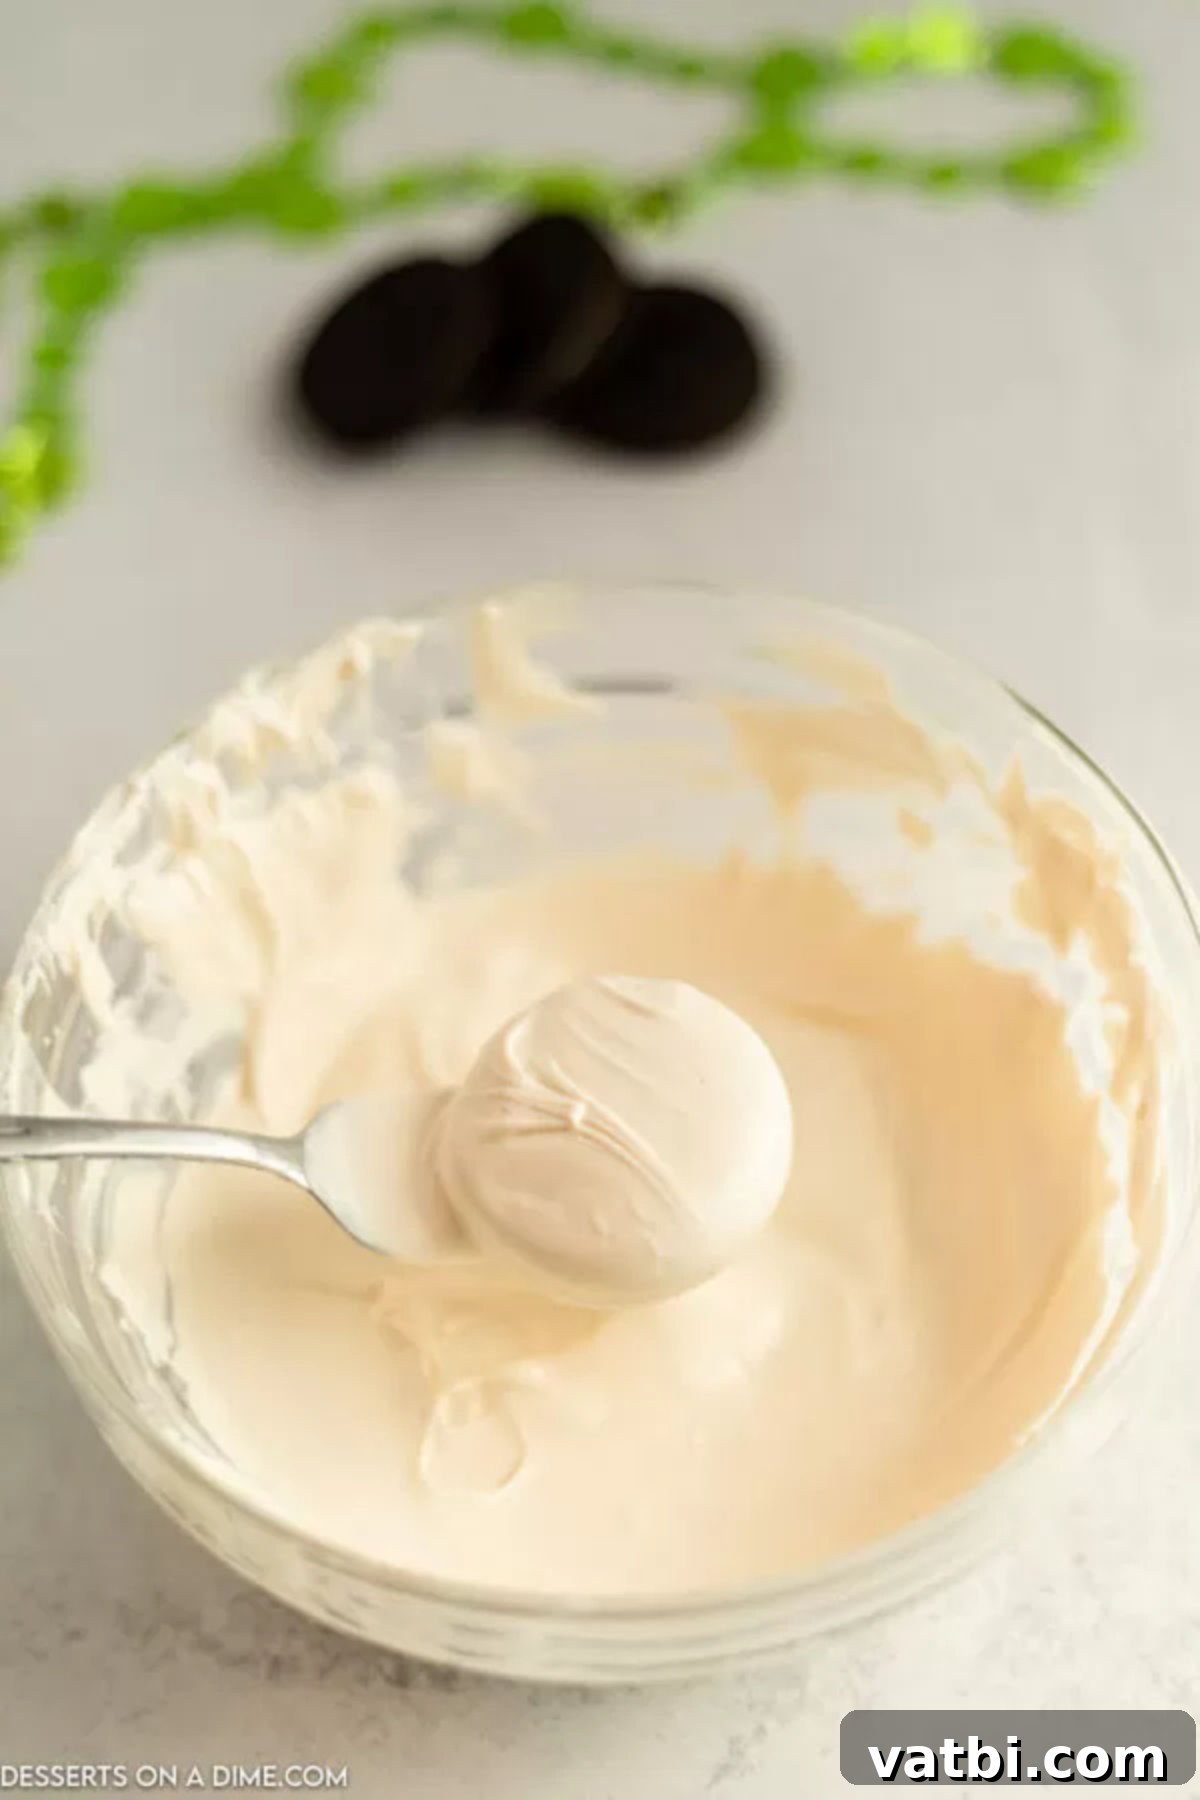
Step 3: Dip the Oreos into Candy. Carefully pick up an Oreo cookie (a toothpick gently inserted into the cream filling can help here, though a fork works perfectly too) and fully immerse it into one of your bowls of melted candy (choose either white or green for this cookie). You may find it helpful to use a spoon to gently pour some of the melted candy over the top of the cookie to ensure it’s entirely and evenly covered. Once fully coated, use a fork to carefully lift the Oreo out of the candy. Gently tap the side of the fork against the edge of the bowl a few times to allow any excess candy coating to drip off. This crucial step helps ensure a smooth, even coating without thick puddles forming at the bottom of the cookie when it sets. For a truly festive and varied look, consider dipping some cookies in the vibrant green chocolate and others in the crisp white chocolate.

Step 4: Decorate with Sprinkles and Allow to Set. Immediately after placing each dipped Oreo on your prepared baking sheet, generously add your chosen festive sprinkles. It is absolutely crucial to do this while the candy coating is still wet and tacky, as it begins to set very quickly. If you wait too long, the candy will dry, and the sprinkles will not adhere properly. If you are making a large batch, you might want to work in smaller batches of dipping and sprinkling to ensure each cookie gets its fair share of decoration while the coating is fresh. Once decorated, allow the cookies to sit at room temperature for approximately 1 hour, or until the candy coating is completely set, hard, and non-sticky to the touch. For a quicker set, especially if you’re in a hurry, you can place them in the refrigerator for about 15-20 minutes, though room temperature setting often yields a smoother finish with less chance of condensation.
Once fully set and hardened, your beautiful and delicious St. Patrick’s Day Chocolate Covered Oreos are ready to be served, shared, and most importantly, enjoyed! These simple steps ensure a delightful and picture-perfect treat every time.
Storage Tips for Freshness and Longevity
Proper storage is absolutely key to keeping your festive St. Patrick’s Day Chocolate Covered Oreos fresh, delicious, and looking their very best for an extended period. These treats are fantastic for making ahead, and with the right storage methods, they can remain delightful for weeks, making your holiday preparations much easier.
To store your finished chocolate-covered Oreos, the most effective method is to place them inside an airtight container with a tightly fitting lid. This prevents air from reaching the cookies, which can cause them to go stale or the chocolate to bloom (develop a whitish film). A gallon-sized Ziploc bag can also work very well as an alternative, just ensure that all the air is squeezed out and the bag is sealed completely to prevent any exposure to moisture or air.
The most important rule before storing is that the cookies must be completely set and dry. Attempting to store them while the chocolate coating is still soft or tacky will result in a sticky, messy situation, as the cookies will stick together and likely ruin their beautiful appearance and decorations. Make sure the chocolate is firm to the touch.
If you’ve used a generous amount of sprinkles, or if you plan on stacking multiple layers of cookies within your container, it’s a highly recommended practice to place a sheet of wax paper or parchment paper in between each layer. This extra step is invaluable as it prevents the cookies from sticking to each other, protects the delicate sprinkle decorations from being rubbed off or damaged, and ensures they remain pristine and picture-perfect until they are ready to serve.
When stored correctly in an airtight container at cool room temperature (away from direct sunlight or heat), these delightful chocolate-covered cookies will last a good 2 to 3 weeks. This impressive shelf life makes them an excellent candidate for making well in advance of St. Patrick’s Day, saving you valuable time and stress when you need them for a party, a special family gathering, or a thoughtful homemade gift. Just imagine the convenience of having these vibrant, ready-to-go treats when the holiday festivities begin!
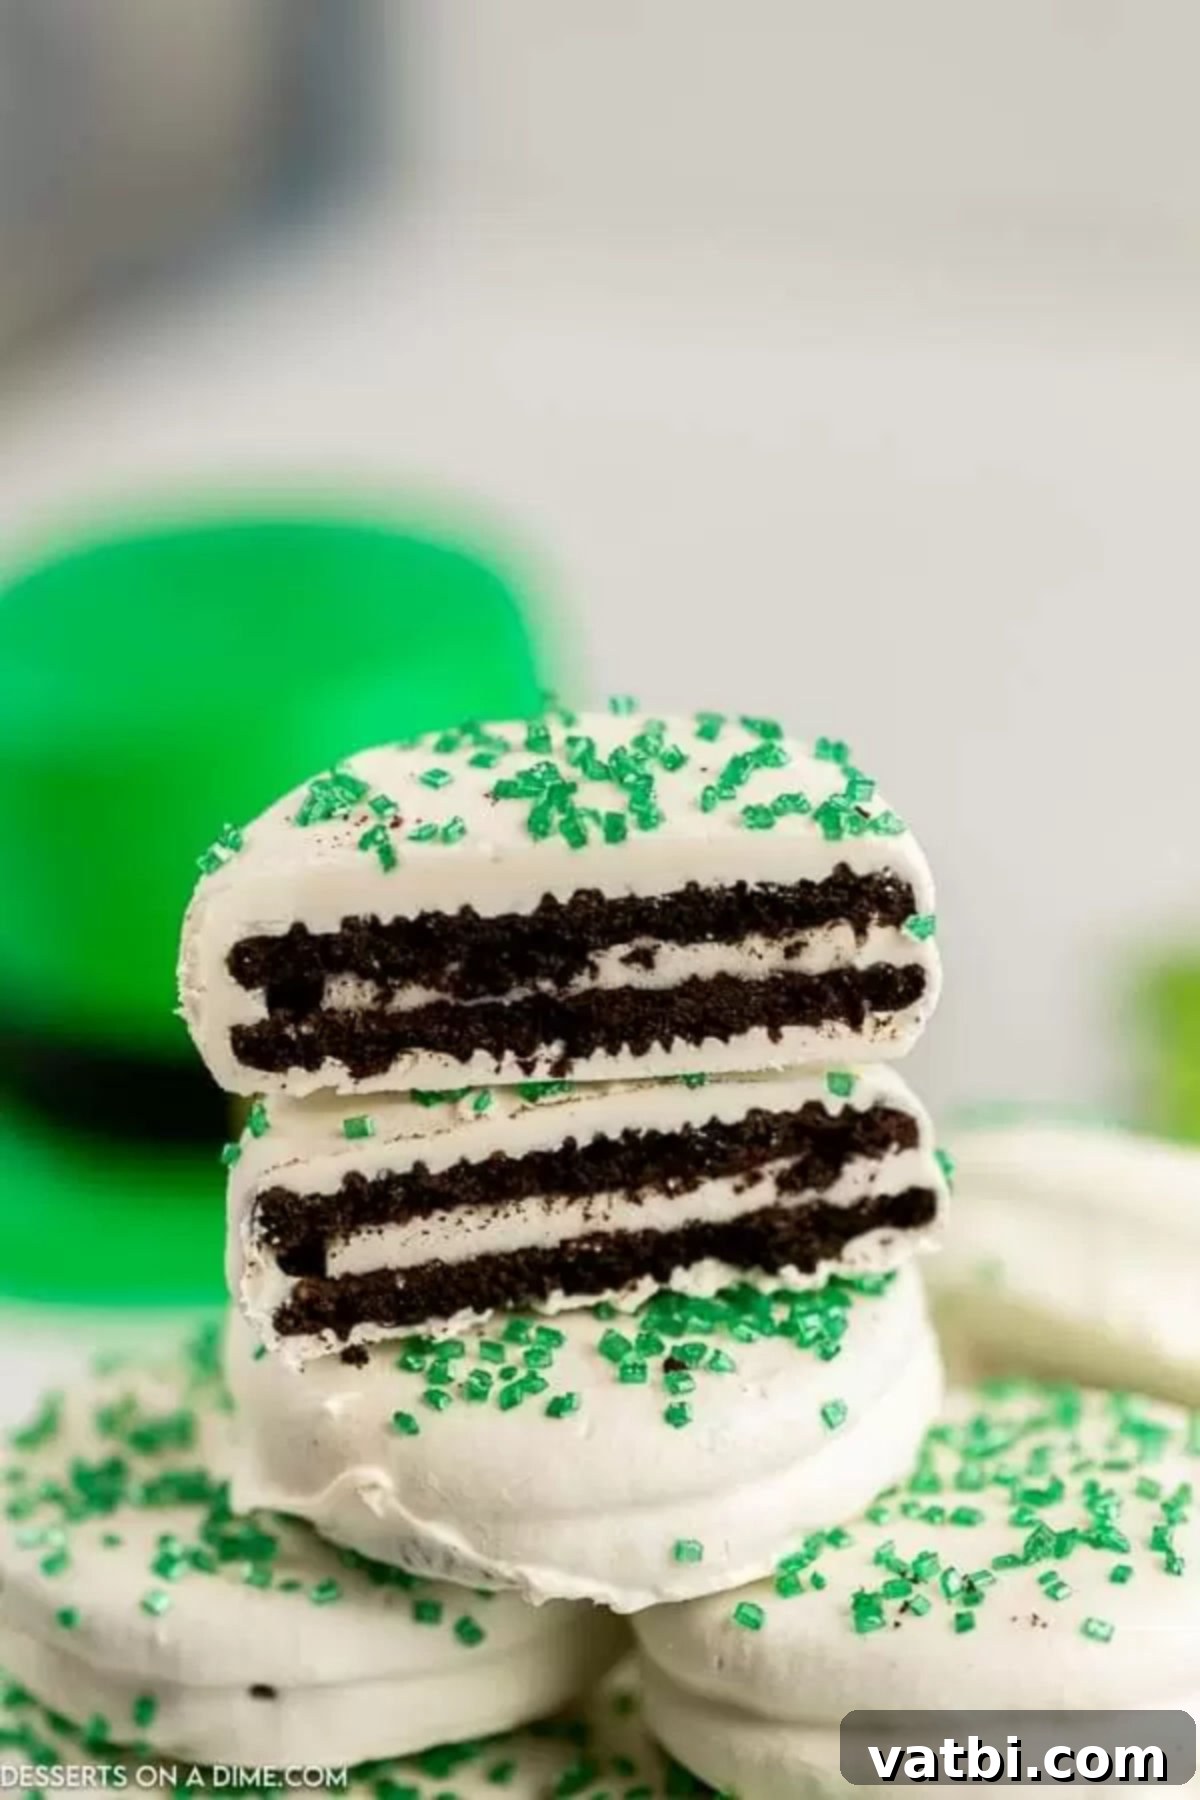
Pro Tips for Perfect Chocolate Covered Oreos Every Time
Achieving perfectly coated and beautifully decorated St. Patrick’s Day Oreos is surprisingly easy with a few expert tips and tricks. These suggestions will help you avoid common pitfalls, streamline your process, and ensure your treats are a resounding success, looking professionally made and tasting absolutely delicious:
- Melt Candy in Short Increments: This is arguably the most crucial tip for working with candy melts or chocolate. When microwaving, always do so in short, 30-second bursts. After each interval, remove the bowl and stir the melts thoroughly with a spoon or spatula, even if they don’t look fully melted. The residual heat will continue to melt the candy. Overheating candy melts (or chocolate) can cause them to seize – becoming thick, lumpy, and difficult, if not impossible, to work with. Patience and gentle heating are key for a smooth, dippable consistency.
- Top with Sprinkles Immediately: Once you dip an Oreo and gently place it on your parchment-lined baking sheet, do not delay in adding the sprinkles. The candy coating begins to set very quickly, especially in cooler environments. If you wait even a minute, the surface may dry and harden, and the sprinkles will not adhere properly. If you’re making a large batch, consider working in smaller batches of dipping and sprinkling (e.g., dip 3-4 cookies, then sprinkle, then repeat) so you have ample time to decorate each cookie while its coating is still wet and tacky.
- Allow Ample Setting Time: For the best and most durable results, allow your chocolate-covered Oreos to set completely for at least an hour at room temperature. While refrigerating can speed up the process, a slower set at room temperature often results in a smoother, more stable finish and reduces the chance of condensation forming on the chocolate when brought out into a warmer environment. Ensure they are rock-hard and non-sticky before attempting to stack, package, or serve them.
- Always Line Your Baking Sheet: As mentioned in the step-by-step instructions, always, always line your baking sheets with parchment paper or wax paper. This non-stick surface is invaluable; it prevents the chocolate from sticking to the pan, making it incredibly easy to remove the finished cookies without damage and simplifying cleanup significantly. Don’t skip this step!
- Confirm Microwave-Safe Bowls: It might seem like an obvious point, but always double-check that the bowls you are using for melting your candy melts are explicitly labeled “microwave safe.” Using non-microwave-safe containers can lead to uneven heating, potential damage to your bowls, or, worse, safety hazards.
- Adjust Coating Consistency if Needed: If, after melting, your candy melts seem a bit too thick for smooth dipping, you can add a tiny amount (about ½ to 1 teaspoon) of vegetable shortening (like Crisco) or coconut oil (not water or milk, which will cause seizing!) to thin them out. Stir it in thoroughly until you reach the desired smooth and flowing consistency. This is especially helpful if you’re working in a cooler environment where melts might thicken faster.
- Utilize the Right Tools: A simple dinner fork is excellent for dipping Oreos and gently tapping off excess chocolate. For adding finer details, creating drizzles, or more precise decorating, a small spoon, a piping bag with a tiny hole snipped off the corner, or even a ziploc bag with a corner cut off, works wonders.
By diligently following these pro tips, you’ll be well on your way to creating stunning, festive, and incredibly delicious St. Patrick’s Day Chocolate Covered Oreos that look like they came straight from a gourmet bakery!
More Festive St. Patrick’s Day Desserts to Explore
If you’ve enjoyed making these vibrant chocolate-covered Oreos and are looking for even more festive and delightful treats to celebrate St. Patrick’s Day, you’re in luck! We have plenty of other delicious recipes that will bring a touch of Irish charm, fun, and flavor to your table and help you celebrate the holiday in style:
- St. Patrick’s Day Cake Mix Cookies: These cookies are incredibly easy to make, wonderfully colorful, and perfect for a quick festive bake when time is short.
- Easy Rainbow Cookies: A vibrant, joyful, and visually stunning treat that perfectly captures the “pot of gold at the end of the rainbow” theme, making them a festive favorite.
- St. Patrick’s Day Puppy Chow: This snackable, sweet, and highly addictive treat is fantastic for all ages and perfect for munching on during your St. Patrick’s Day festivities.
- Edible Gold Oreos: For a truly luxurious, glamorous, and eye-catching St. Patrick’s Day celebration, these golden Oreos are an absolute must-try that will impress everyone.
- Green Velvet Cake Recipe: A delightful and festive twist on a classic, offering rich, moist flavor and a stunning green hue that’s perfect for a special holiday dessert.
We sincerely encourage you to try this incredibly easy, fun, and rewarding recipe for Saint Patrick’s Day. Your family and friends will absolutely love these festive treats, and you’ll love how simple they are to create. Please leave a comment below after you make them, and don’t forget to give this recipe a well-deserved star rating!
Pin
St. Patrick’s Day Chocolate Covered Oreos
Ingredients
- 1 package Oreos 14 oz, regular work best
- 1 White Candy Melts 6 oz, or white melting chocolate
- 1 Green Candy Melts 6 oz, or green melting chocolate
- Sprinkles festive St. Patrick’s Day theme
Instructions
-
Line a baking sheet with parchment paper or wax paper. This prevents sticking and makes cleanup easy.
-
Place the white candy melts in one microwave-safe bowl and the green candy melts in another. Heat in 30-second intervals, stirring thoroughly after each, until fully melted and smooth. Avoid overheating.
-
Dip an Oreo into the melted candy. Use a spoon to ensure full coverage if needed, then carefully lift it out with a fork.
-
While the Oreo is on the fork, gently tap the fork against the side of the bowl to remove any excess candy coating, ensuring a smooth finish.
-
Place the dipped Oreos on the prepared baking sheet. Immediately top with your chosen sprinkles (e.g., green sprinkles on white-dipped Oreos, rainbow sprinkles on green-dipped Oreos). Ensure sprinkles are added before the candy dries.
-
Allow the cookies to sit at room temperature for approximately 1 hour to fully set. Once hardened, they are ready to be served and enjoyed!
Nutrition Facts
Pin This Now to Remember It Later
Pin Recipe
