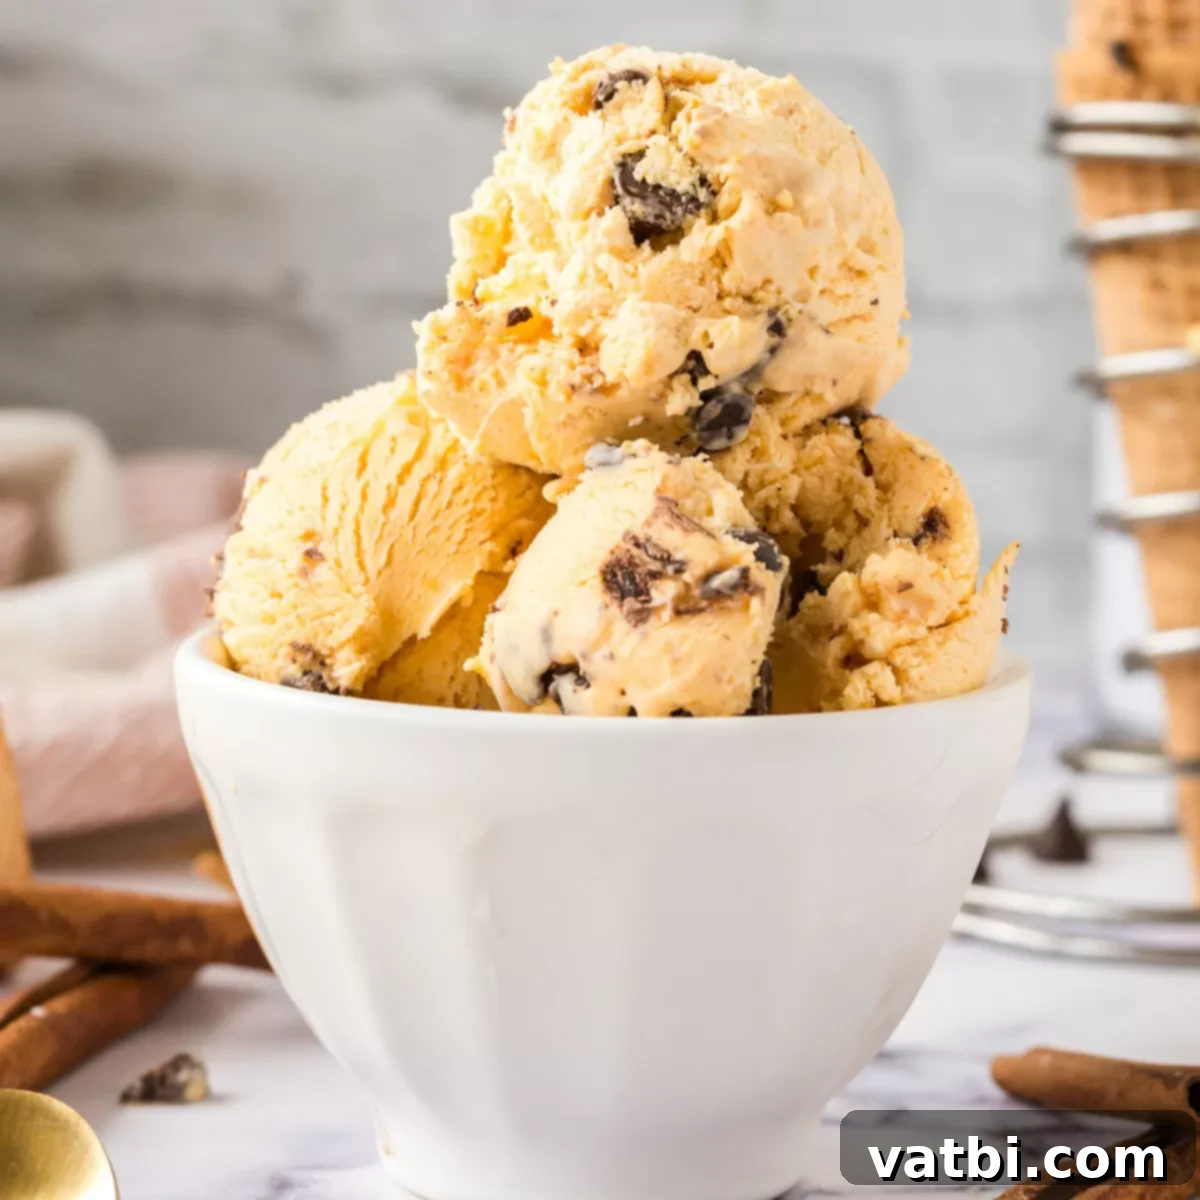
Homemade No-Churn Pumpkin Chocolate Chip Ice Cream: The Ultimate Fall Dessert Recipe
Prepare to delight your taste buds with the ultimate autumn indulgence: **Pumpkin Chocolate Chip Ice Cream**. This delightful homemade dessert captures the essence of fall in every spoonful, blending the warm, comforting flavors of pumpkin and pumpkin pie spice with the irresistible sweetness of chocolate chips. Best of all, this recipe is incredibly simple to make, requiring no special ice cream maker!
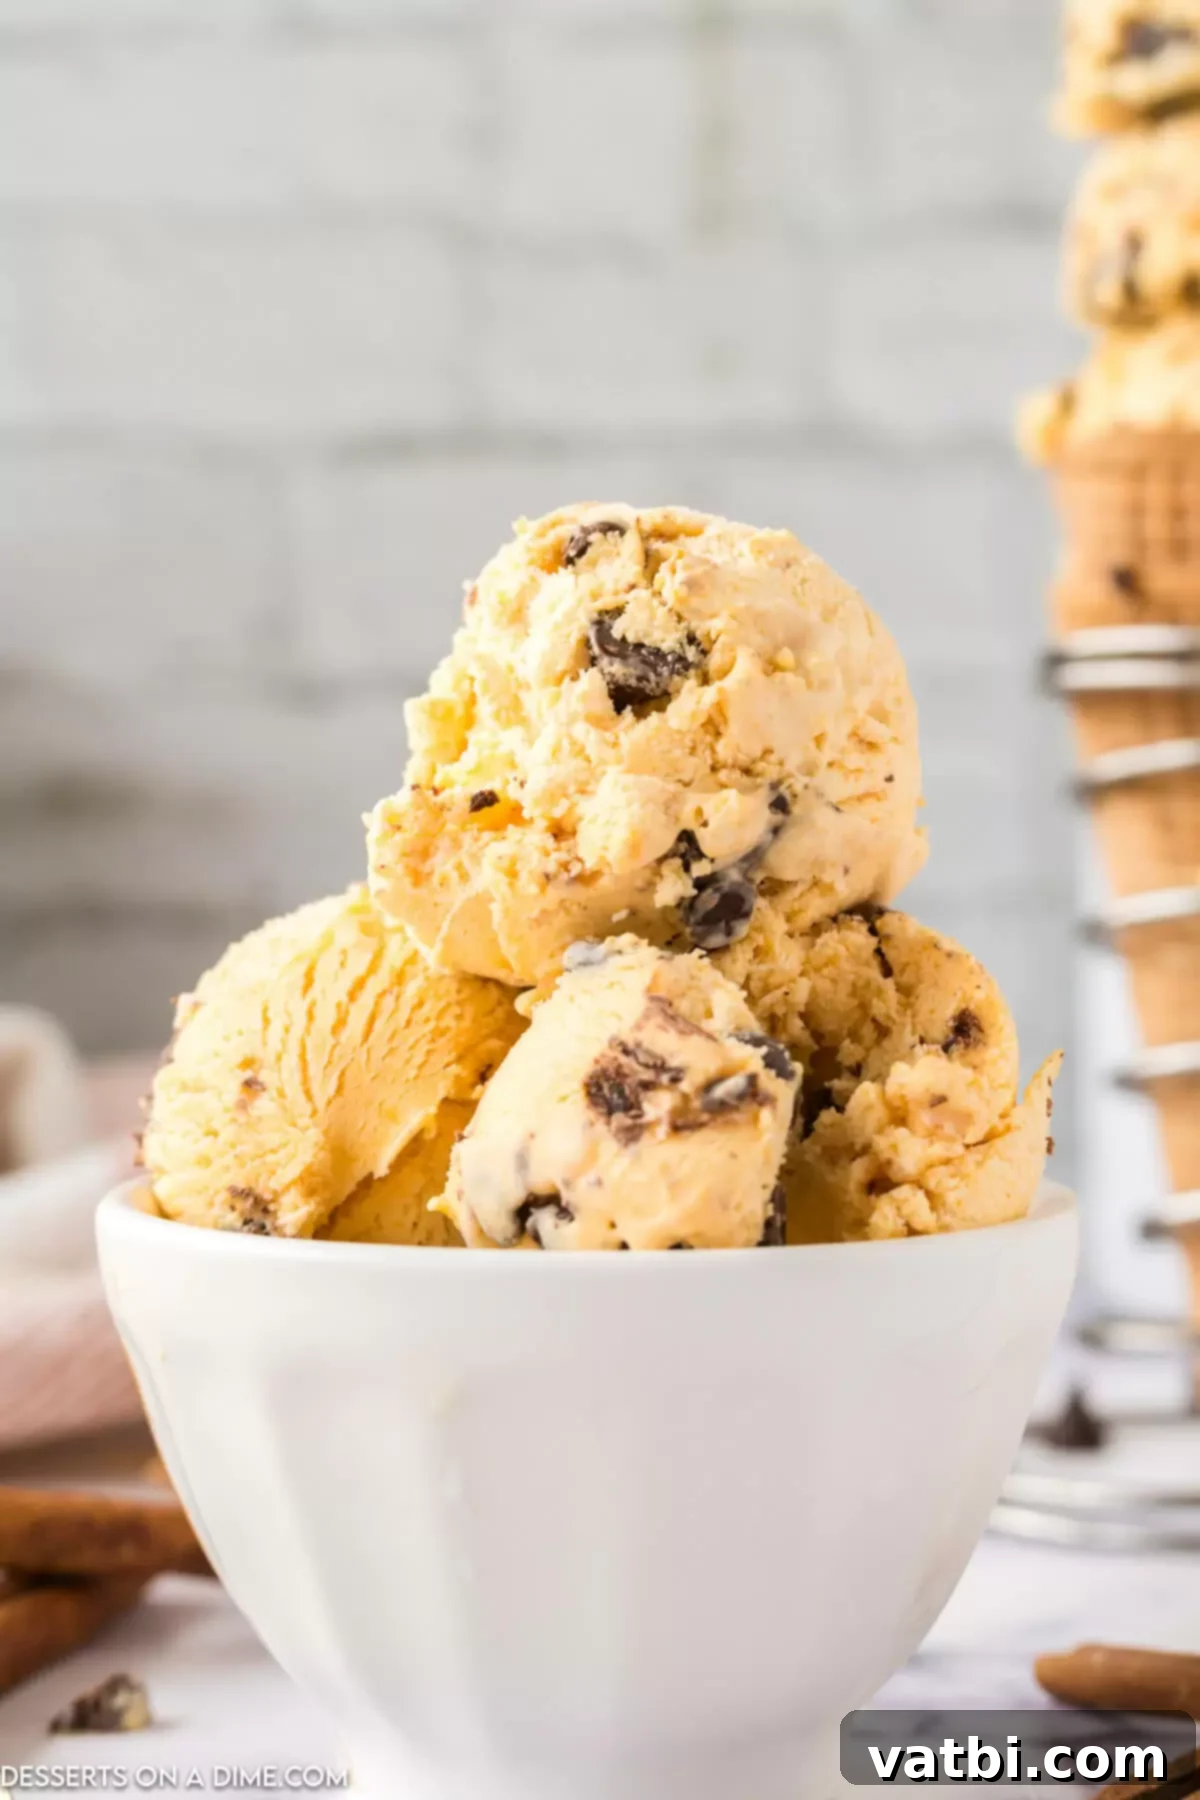
If you’re a fan of pumpkin-flavored treats, you’re in for a real sensation with this Pumpkin Chocolate Chip Ice Cream. While we adore classic Pumpkin Ice Cream, this updated recipe introduces the joyous addition of chocolate, elevating a beloved fall dessert to new heights. It’s the perfect way to embrace the cozy vibes of the season, offering a rich and creamy texture that melts in your mouth.
Imagine savoring a scoop of this luxurious ice cream on a crisp autumn evening or as the grand finale to your Thanksgiving feast. It’s not just a dessert; it’s an experience. This easy-to-make, no-churn pumpkin ice cream is so smooth and flavorful, it rivals any store-bought variety. For those who love exploring homemade frozen delights, I also highly recommend trying our Homemade Salted Caramel Ice Cream and the indulgent Snickers Ice Cream Recipe.
Looking for more ways to enjoy the iconic taste of pumpkin? Don’t miss out on our delightful Pumpkin Whoopie Pies – another fantastic fall treat that pairs wonderfully with a scoop of this ice cream!
Table of contents
- Why You’ll Love This Pumpkin Chocolate Chip Ice Cream
- Do I Need to Use an Ice Cream Maker?
- Simple Ingredients for Pumpkin Chocolate Chip Ice Cream
- Variation Ideas to Customize Your Ice Cream
- How to Make Pumpkin Chocolate Chip Ice Cream
- Equipment Needed for No-Churn Ice Cream
- Expert Tips for the Best Homemade Ice Cream
- How to Serve Pumpkin Chocolate Chip Ice Cream
- Storage Tips for Pumpkin Chocolate Chip Ice Cream
- More Easy Homemade Ice Cream Recipes
Why You’ll Love This Pumpkin Chocolate Chip Ice Cream
This recipe isn’t just another dessert; it’s a celebration of fall in frozen form. Here’s why this Pumpkin Chocolate Chip Ice Cream will become your new favorite:
- **Effortlessly Easy:** Say goodbye to complicated recipes! This no-churn method simplifies the process, making homemade ice cream accessible to everyone, regardless of kitchen experience.
- **No Ice Cream Maker Required:** You don’t need any fancy gadgets. A hand mixer and a loaf pan are all it takes to create this creamy treat.
- **Rich Fall Flavors:** The perfect balance of sweet pumpkin, aromatic pumpkin pie spice, and decadent chocolate chips creates a flavor profile that truly screams autumn.
- **Velvety Smooth Texture:** Thanks to the heavy whipping cream and sweetened condensed milk, this ice cream boasts an incredibly smooth, melt-in-your-mouth consistency without any ice crystals.
- **Versatile and Customizable:** Easily adapt the recipe with different chocolate types, additional spices, or fun mix-ins to suit your personal preferences.
- **Perfect for Entertaining:** Impress your guests with a unique, homemade dessert that’s ideal for Thanksgiving gatherings, Halloween parties, or any fall celebration.
Do I Need to Use an Ice Cream Maker?
Absolutely not! One of the most fantastic features of this recipe is that it’s a **no-churn ice cream recipe**. This means you can achieve wonderfully creamy, rich pumpkin ice cream without the need for an expensive ice cream maker or any churning. The magic lies in the combination of whipped heavy cream and sweetened condensed milk, which creates a stable, airy base that freezes beautifully without turning icy.
The process is incredibly straightforward: simply combine the ingredients in a bowl, transfer the mixture to a loaf pan, and let your freezer do the rest. There’s no need for any egg mixture or tempering egg yolks, making this a much quicker and easier homemade ice cream option that delivers exceptional results every time. It’s perfect for busy holidays or when you crave a delicious dessert without the fuss.
Simple Ingredients for Pumpkin Chocolate Chip Ice Cream
You’ll be amazed at how few ingredients are needed to create such a flavorful and luxurious dessert. Each component plays a vital role in achieving that perfect pumpkin chocolate chip ice cream experience.
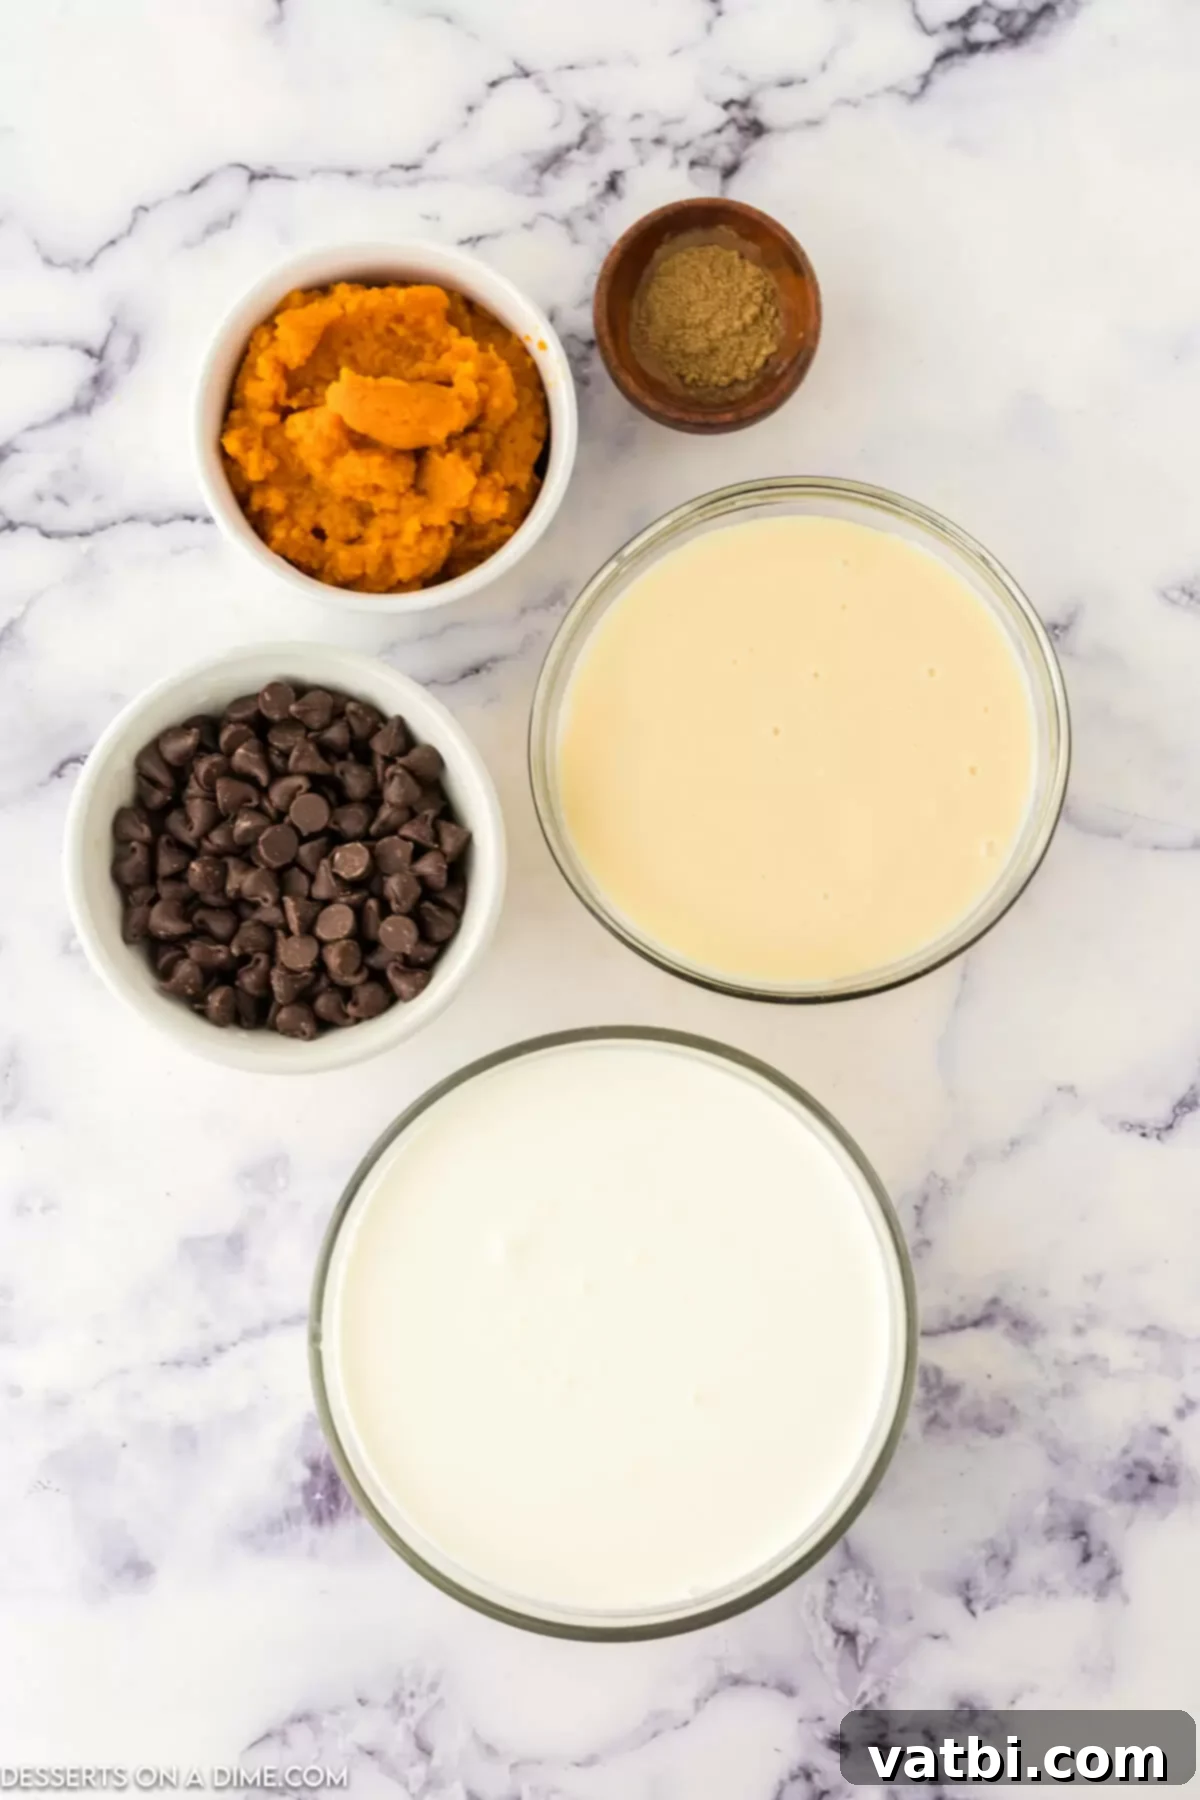
- Heavy Whipping Cream: This is the foundation of our no-churn ice cream. When whipped to stiff peaks, it incorporates air, which is crucial for a light and creamy texture, mimicking the churning process.
- Sweetened Condensed Milk: The star ingredient for both sweetness and texture. It provides the bulk of the sugar needed and also prevents ice crystals from forming, ensuring a smooth, velvety consistency.
- Pumpkin Puree: The heart of our pumpkin flavor! Make sure to use 100% pumpkin puree, not pumpkin pie filling, which contains added spices and sugar.
- Pumpkin Pie Spice: This blend of warm spices (cinnamon, nutmeg, ginger, cloves) perfectly complements the pumpkin, giving the ice cream its signature fall taste.
- Semi-sweet Chocolate Chips: These little morsels provide bursts of rich chocolate flavor and a delightful textural contrast. Semi-sweet is a great balance, but feel free to experiment with other types.
Variation Ideas to Customize Your Ice Cream
While this Pumpkin Chocolate Chip Ice Cream recipe is perfect as is, it’s also incredibly versatile! Don’t hesitate to get creative and personalize it to your taste. Here are some delicious variation ideas:
- Homemade Pumpkin Pie Spice: If you don’t have pumpkin pie spice on hand or prefer to custom blend, it’s easy to make your own. Combine equal parts ground cinnamon, ground cloves, ground nutmeg, and ground ginger. You can adjust the ratios to find your perfect spice blend.
- Chocolate Chip Choices: For a deeper, more intense chocolate experience, consider using dark chocolate chips instead of semi-sweet. Milk chocolate chips would add a sweeter, creamier note, while white chocolate chips would create a beautiful contrast of color and flavor. You could also try mini chocolate chips for more even distribution or larger chocolate chunks for bigger bites of chocolate.
- Add Pumpkin Chocolate Chip Cookies: Take this ice cream to the next level by crumbling in some soft pumpkin chocolate chip cookies or even plain pumpkin cookies after mixing in the chocolate chips. This adds incredible texture and another layer of pumpkin goodness.
- Enhanced Seasoning: While pumpkin pie spice provides a great base, you can further enhance the fall flavors. A teaspoon of vanilla extract can deepen the overall sweetness, while an extra dash of ground cinnamon or nutmeg will make the spice notes pop. For a touch of molasses-like sweetness, a tablespoon or two of brown sugar can be whisked in with the condensed milk.
- Nutty Additions: For a delightful crunch and earthy flavor, fold in chopped pecans, walnuts, or candied almonds along with the chocolate chips. These nuts pair beautifully with pumpkin and chocolate.
- Caramel Swirl: After pouring the ice cream mixture into the loaf pan, drizzle some homemade caramel sauce or a store-bought version on top and gently swirl it with a knife for a beautiful and delicious caramel ripple.
How to Make Pumpkin Chocolate Chip Ice Cream
Creating this rich and creamy Pumpkin Chocolate Chip Ice Cream is surprisingly simple. Follow these steps for a perfect fall treat that everyone will adore:
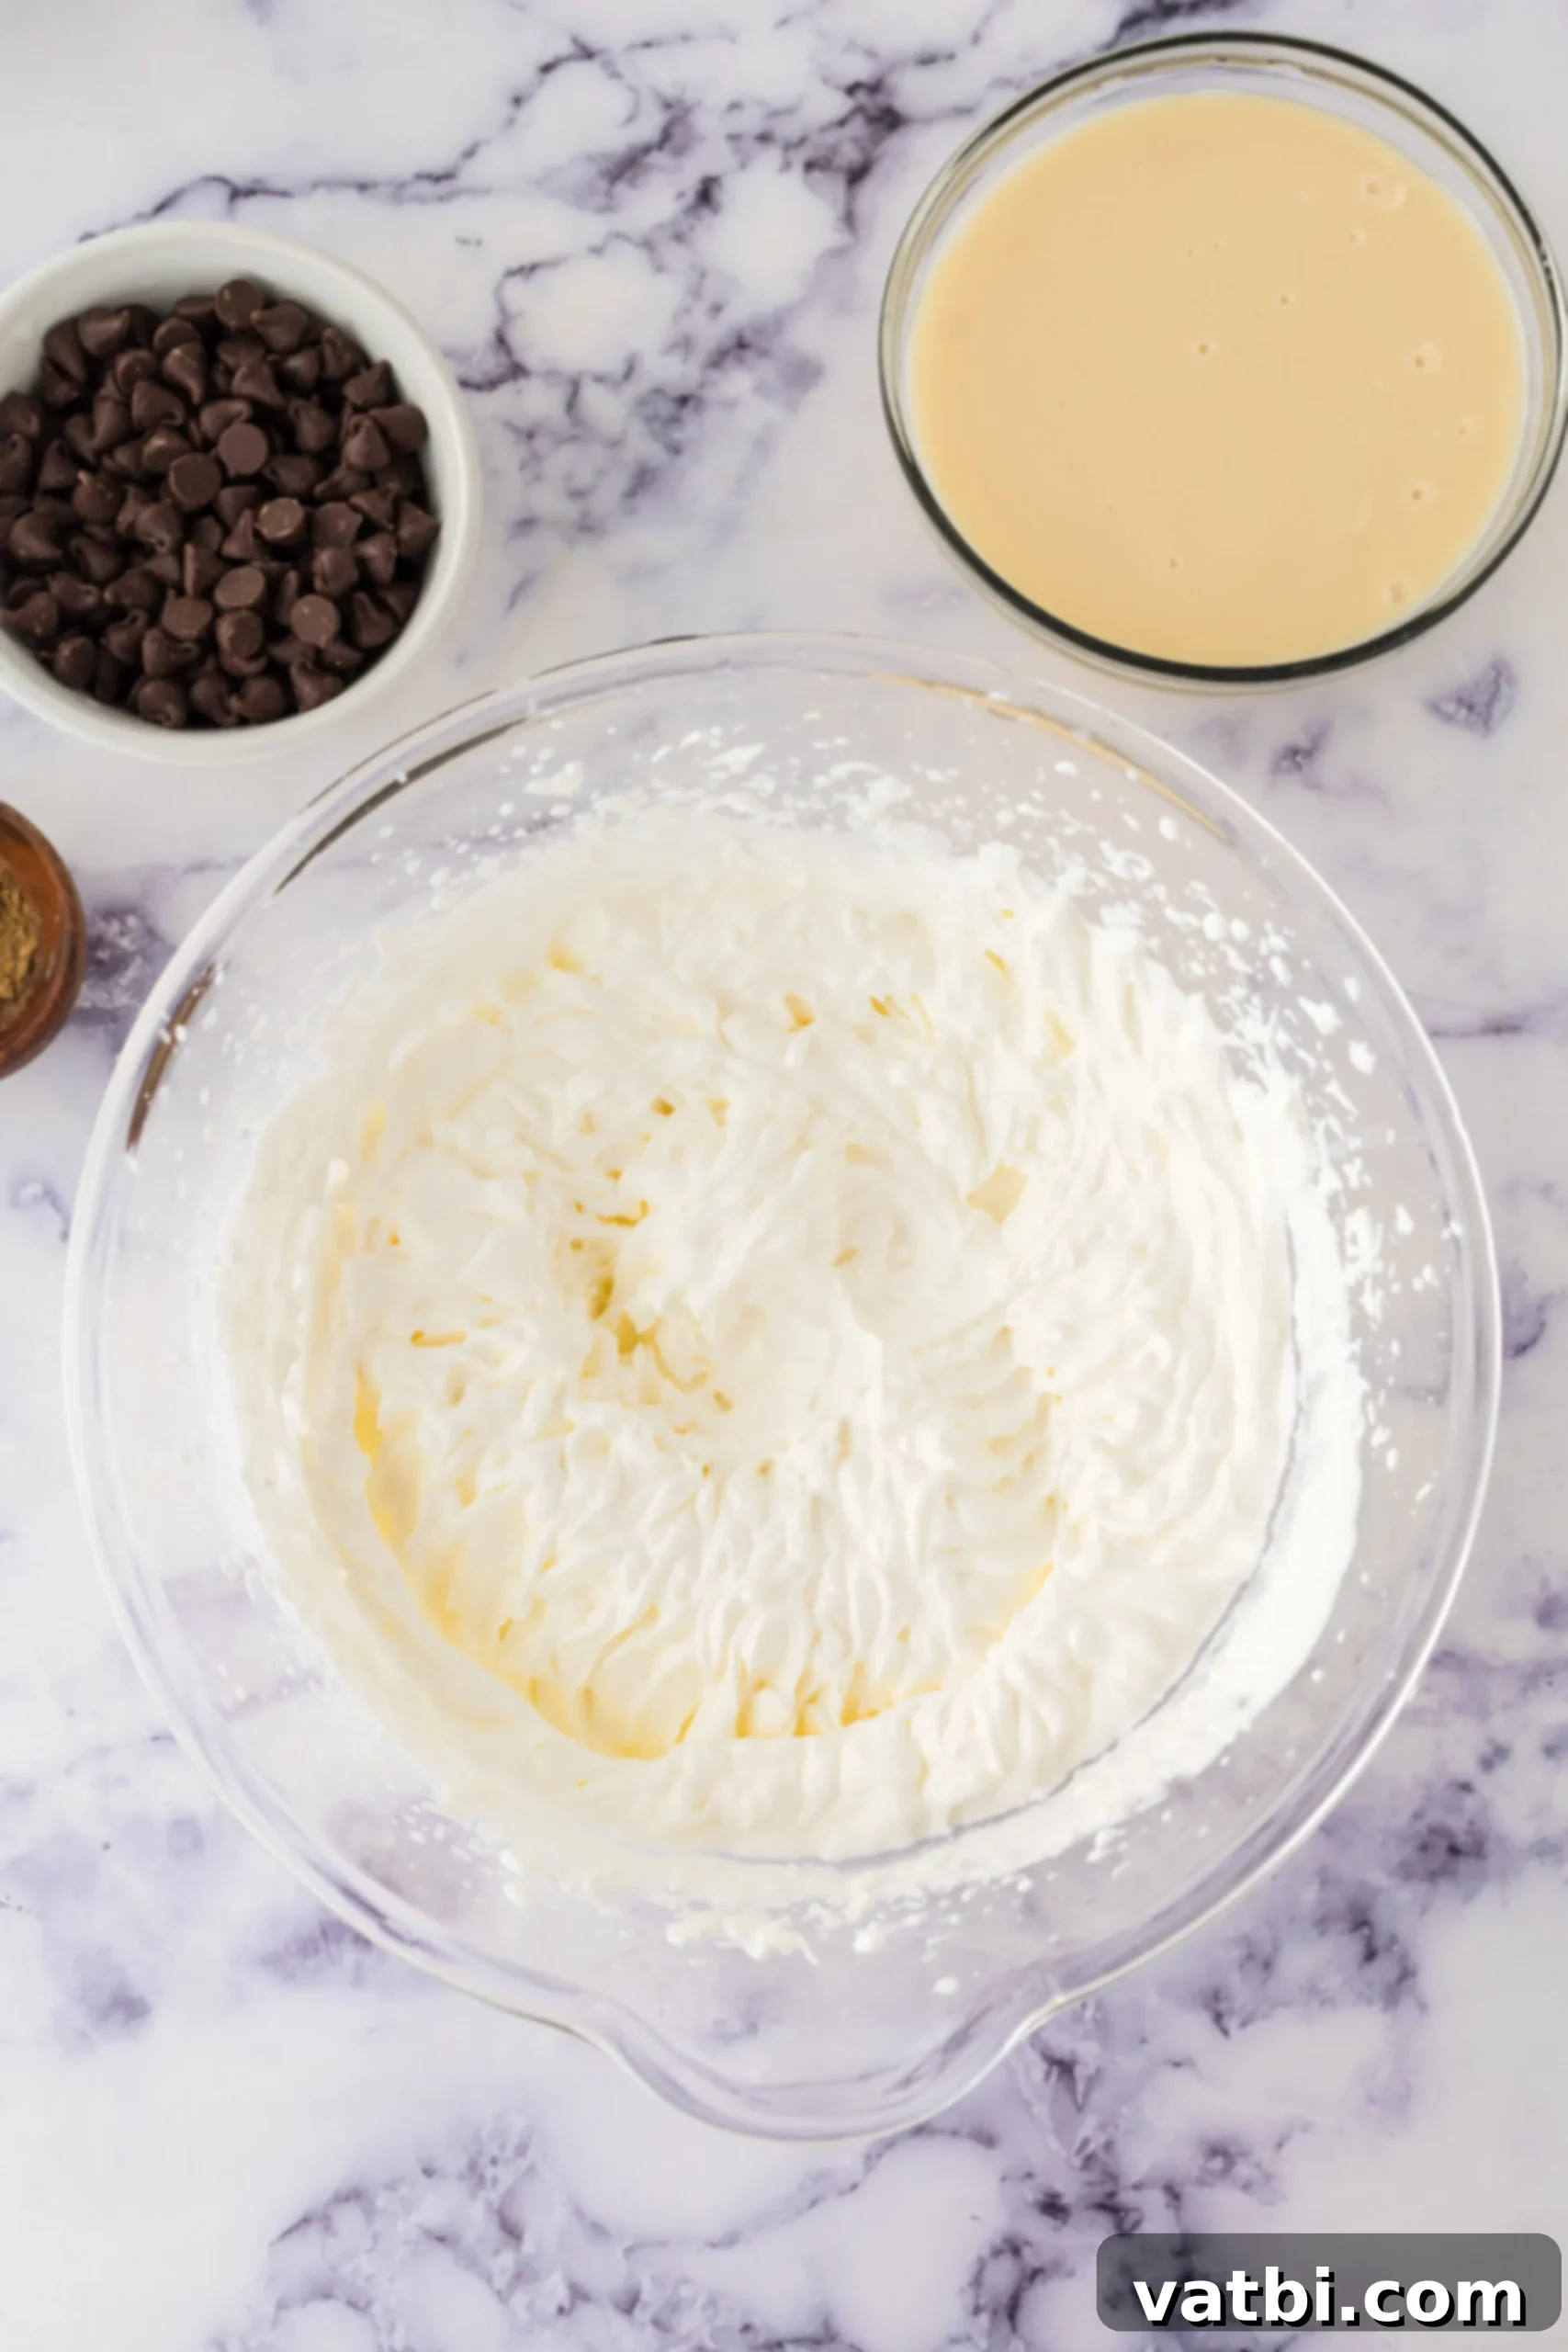
Step 1. Whip the Heavy Cream: Begin by pouring the cold heavy whipping cream into a large mixing bowl. Using an electric hand mixer (or a stand mixer with a whisk attachment), whip the cream on medium-high speed until it forms stiff peaks. This means that when you lift the beaters, the cream stands up firmly without collapsing. Be careful not to overmix, as it can turn into butter.
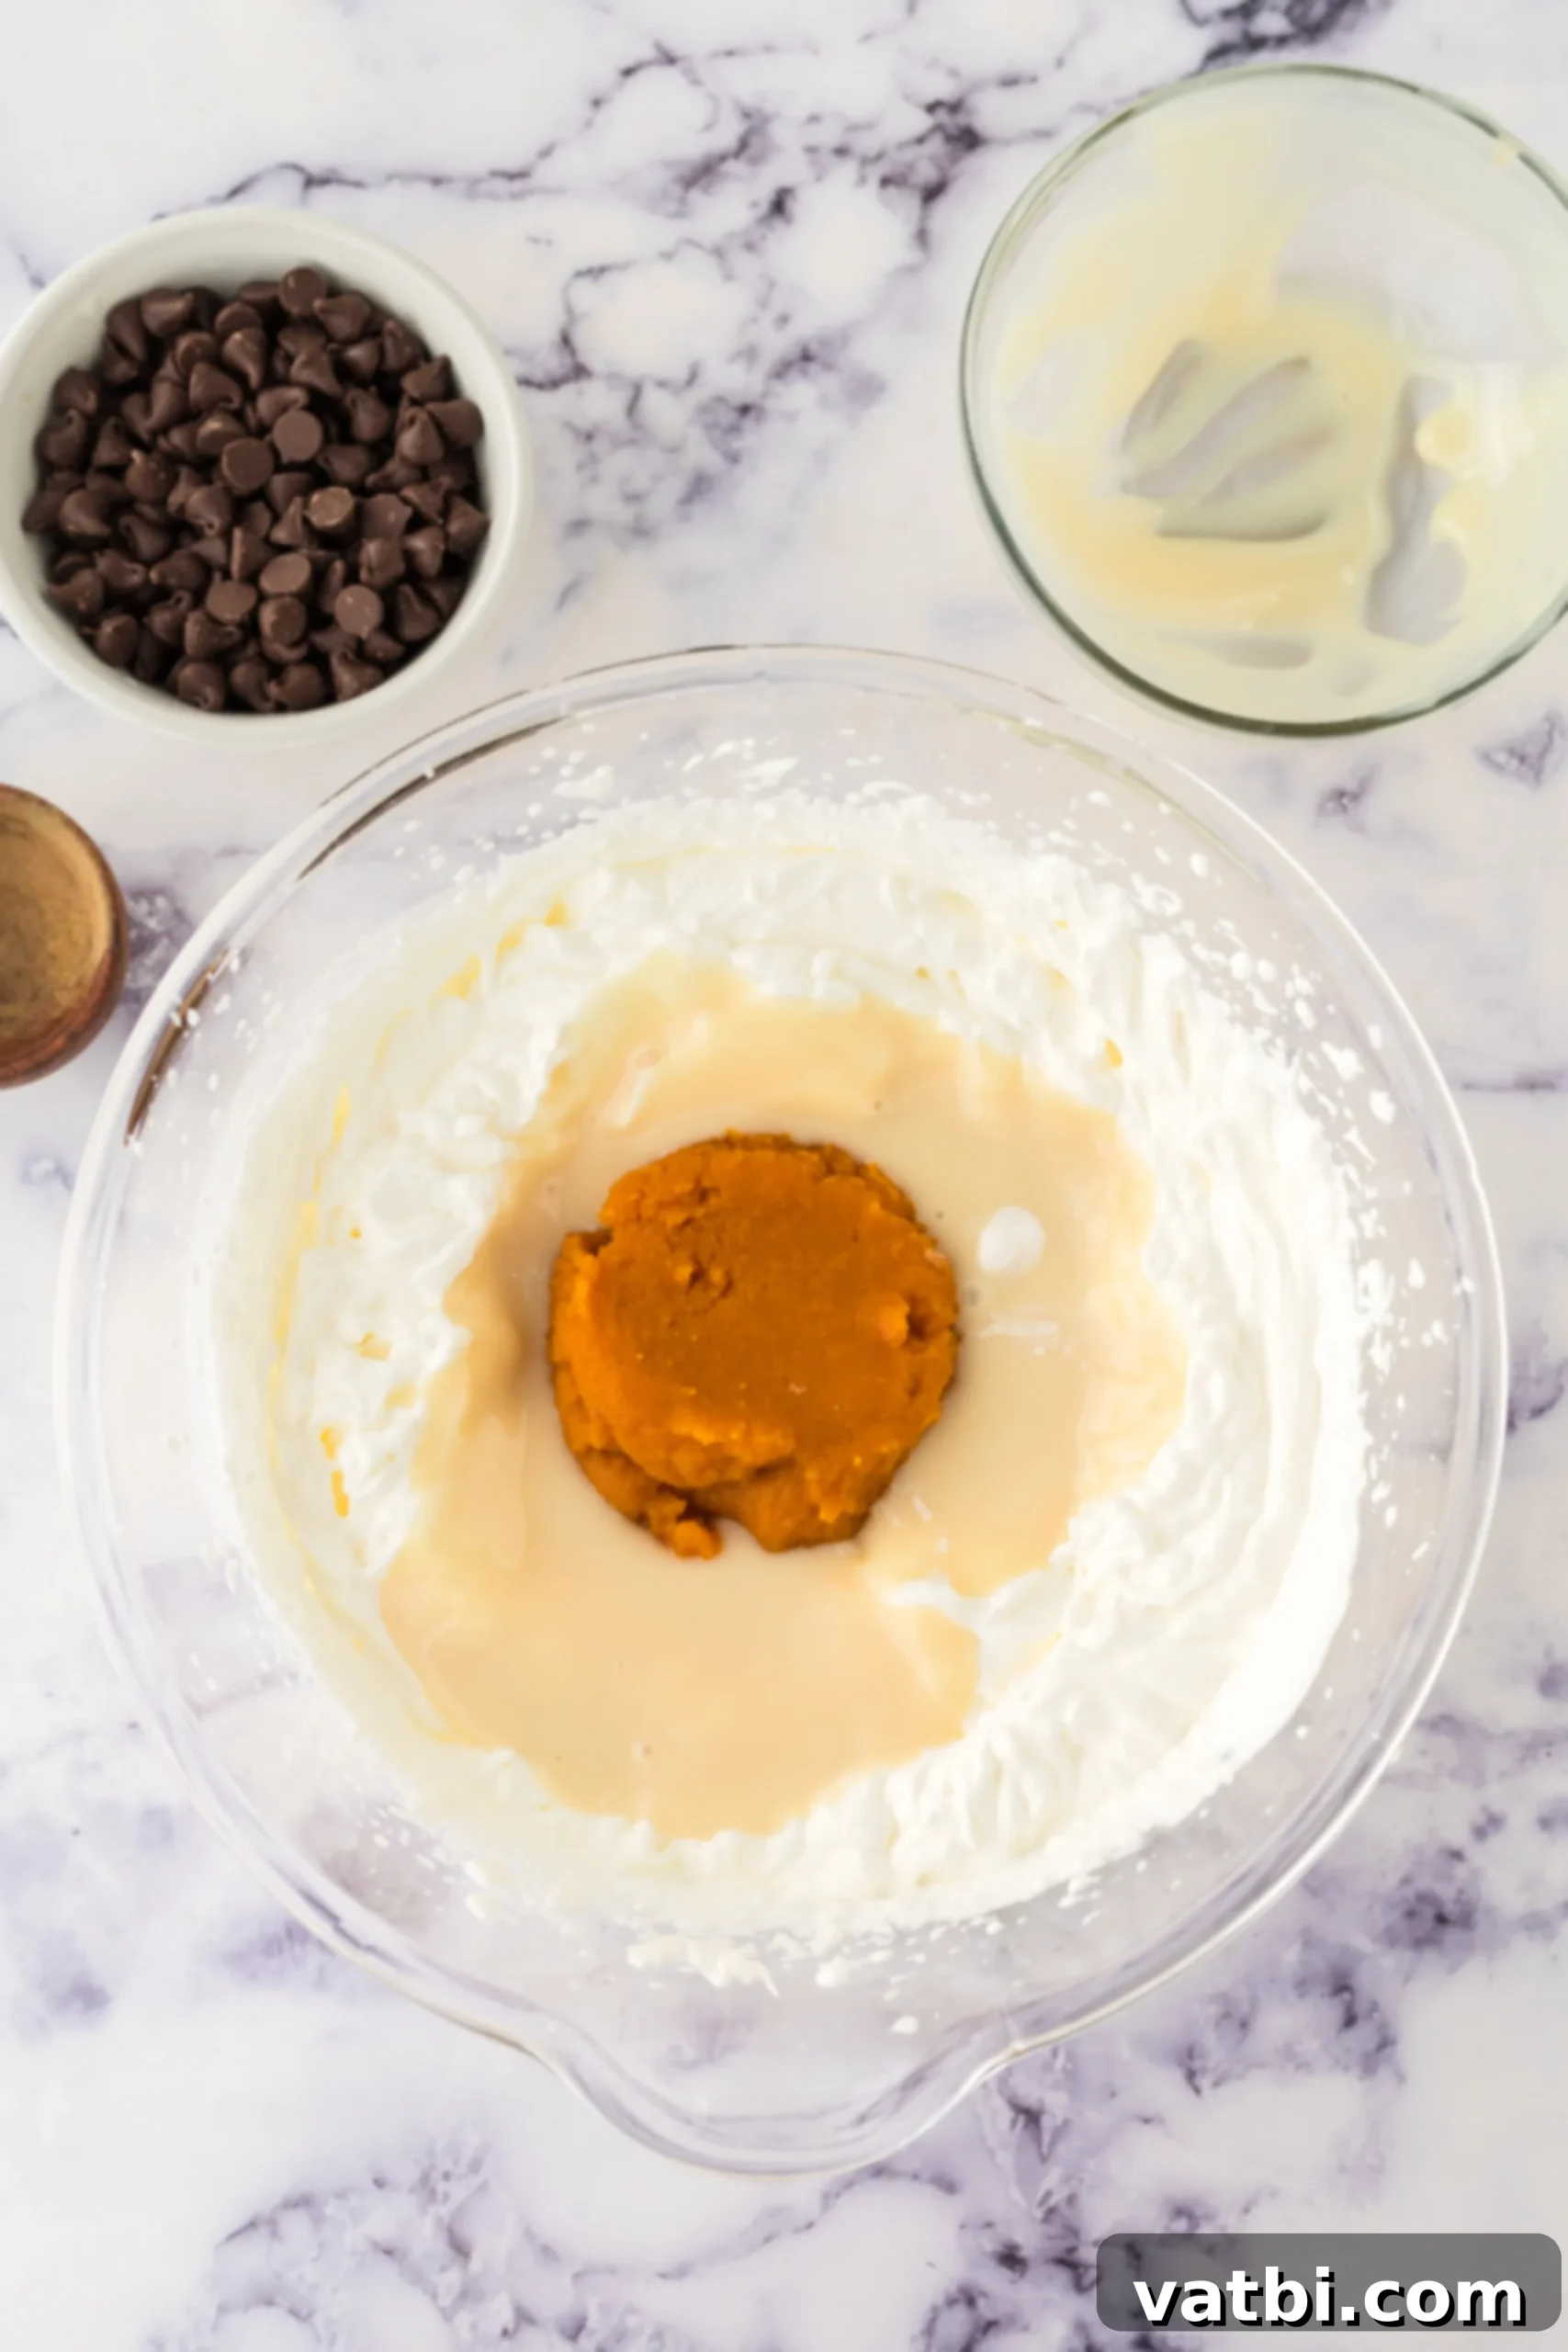
Step 2. Fold in Pumpkin and Sweetened Condensed Milk: Once your heavy cream has reached stiff peaks, gently add the pumpkin pie spice, pumpkin puree, and sweetened condensed milk to the bowl. Using a whisk or a large spatula, carefully fold these ingredients into the whipped cream until they are *just combined*. It’s crucial not to overmix at this stage, as you want to preserve as much air in the whipped cream as possible to maintain the ice cream’s light and fluffy texture.
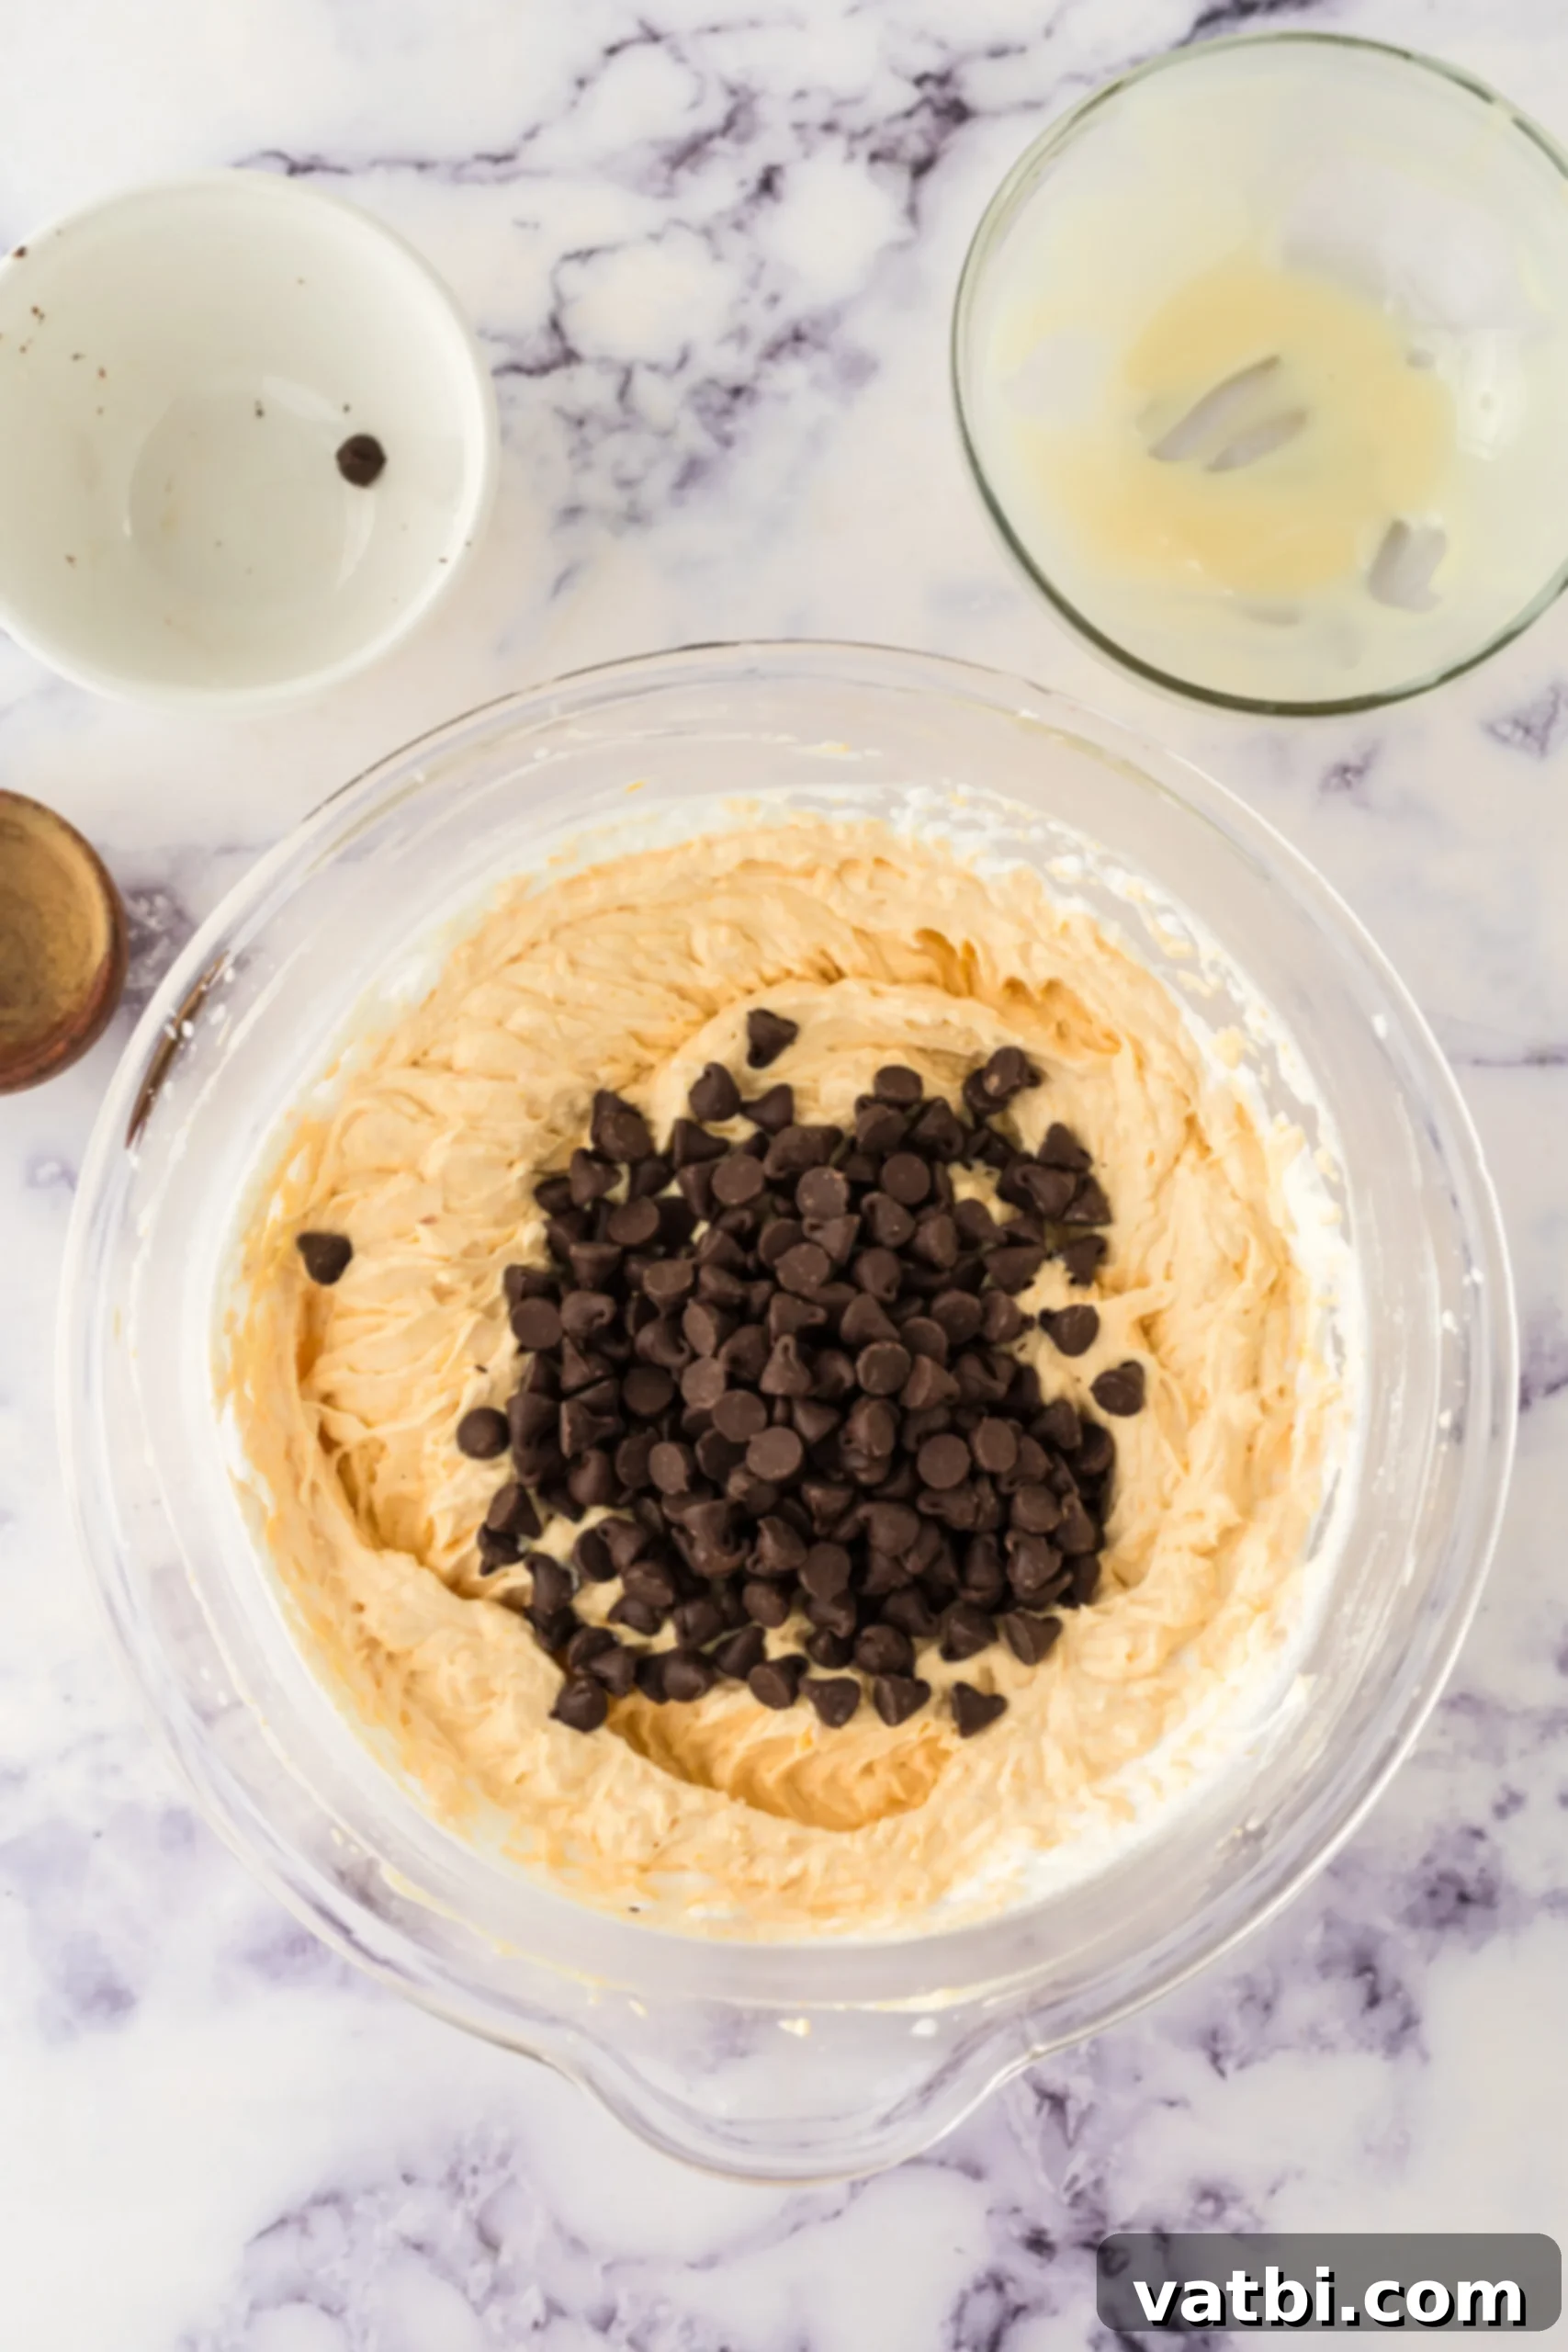
Step 3. Mix in the Chocolate Chips: Now for the delicious addition! Add your semi-sweet chocolate chips to the pumpkin cream mixture. Using a large spatula or spoon, gently fold them in until they are evenly distributed throughout the ice cream base. Ensure they are well incorporated but again, avoid aggressive mixing to keep the texture light.
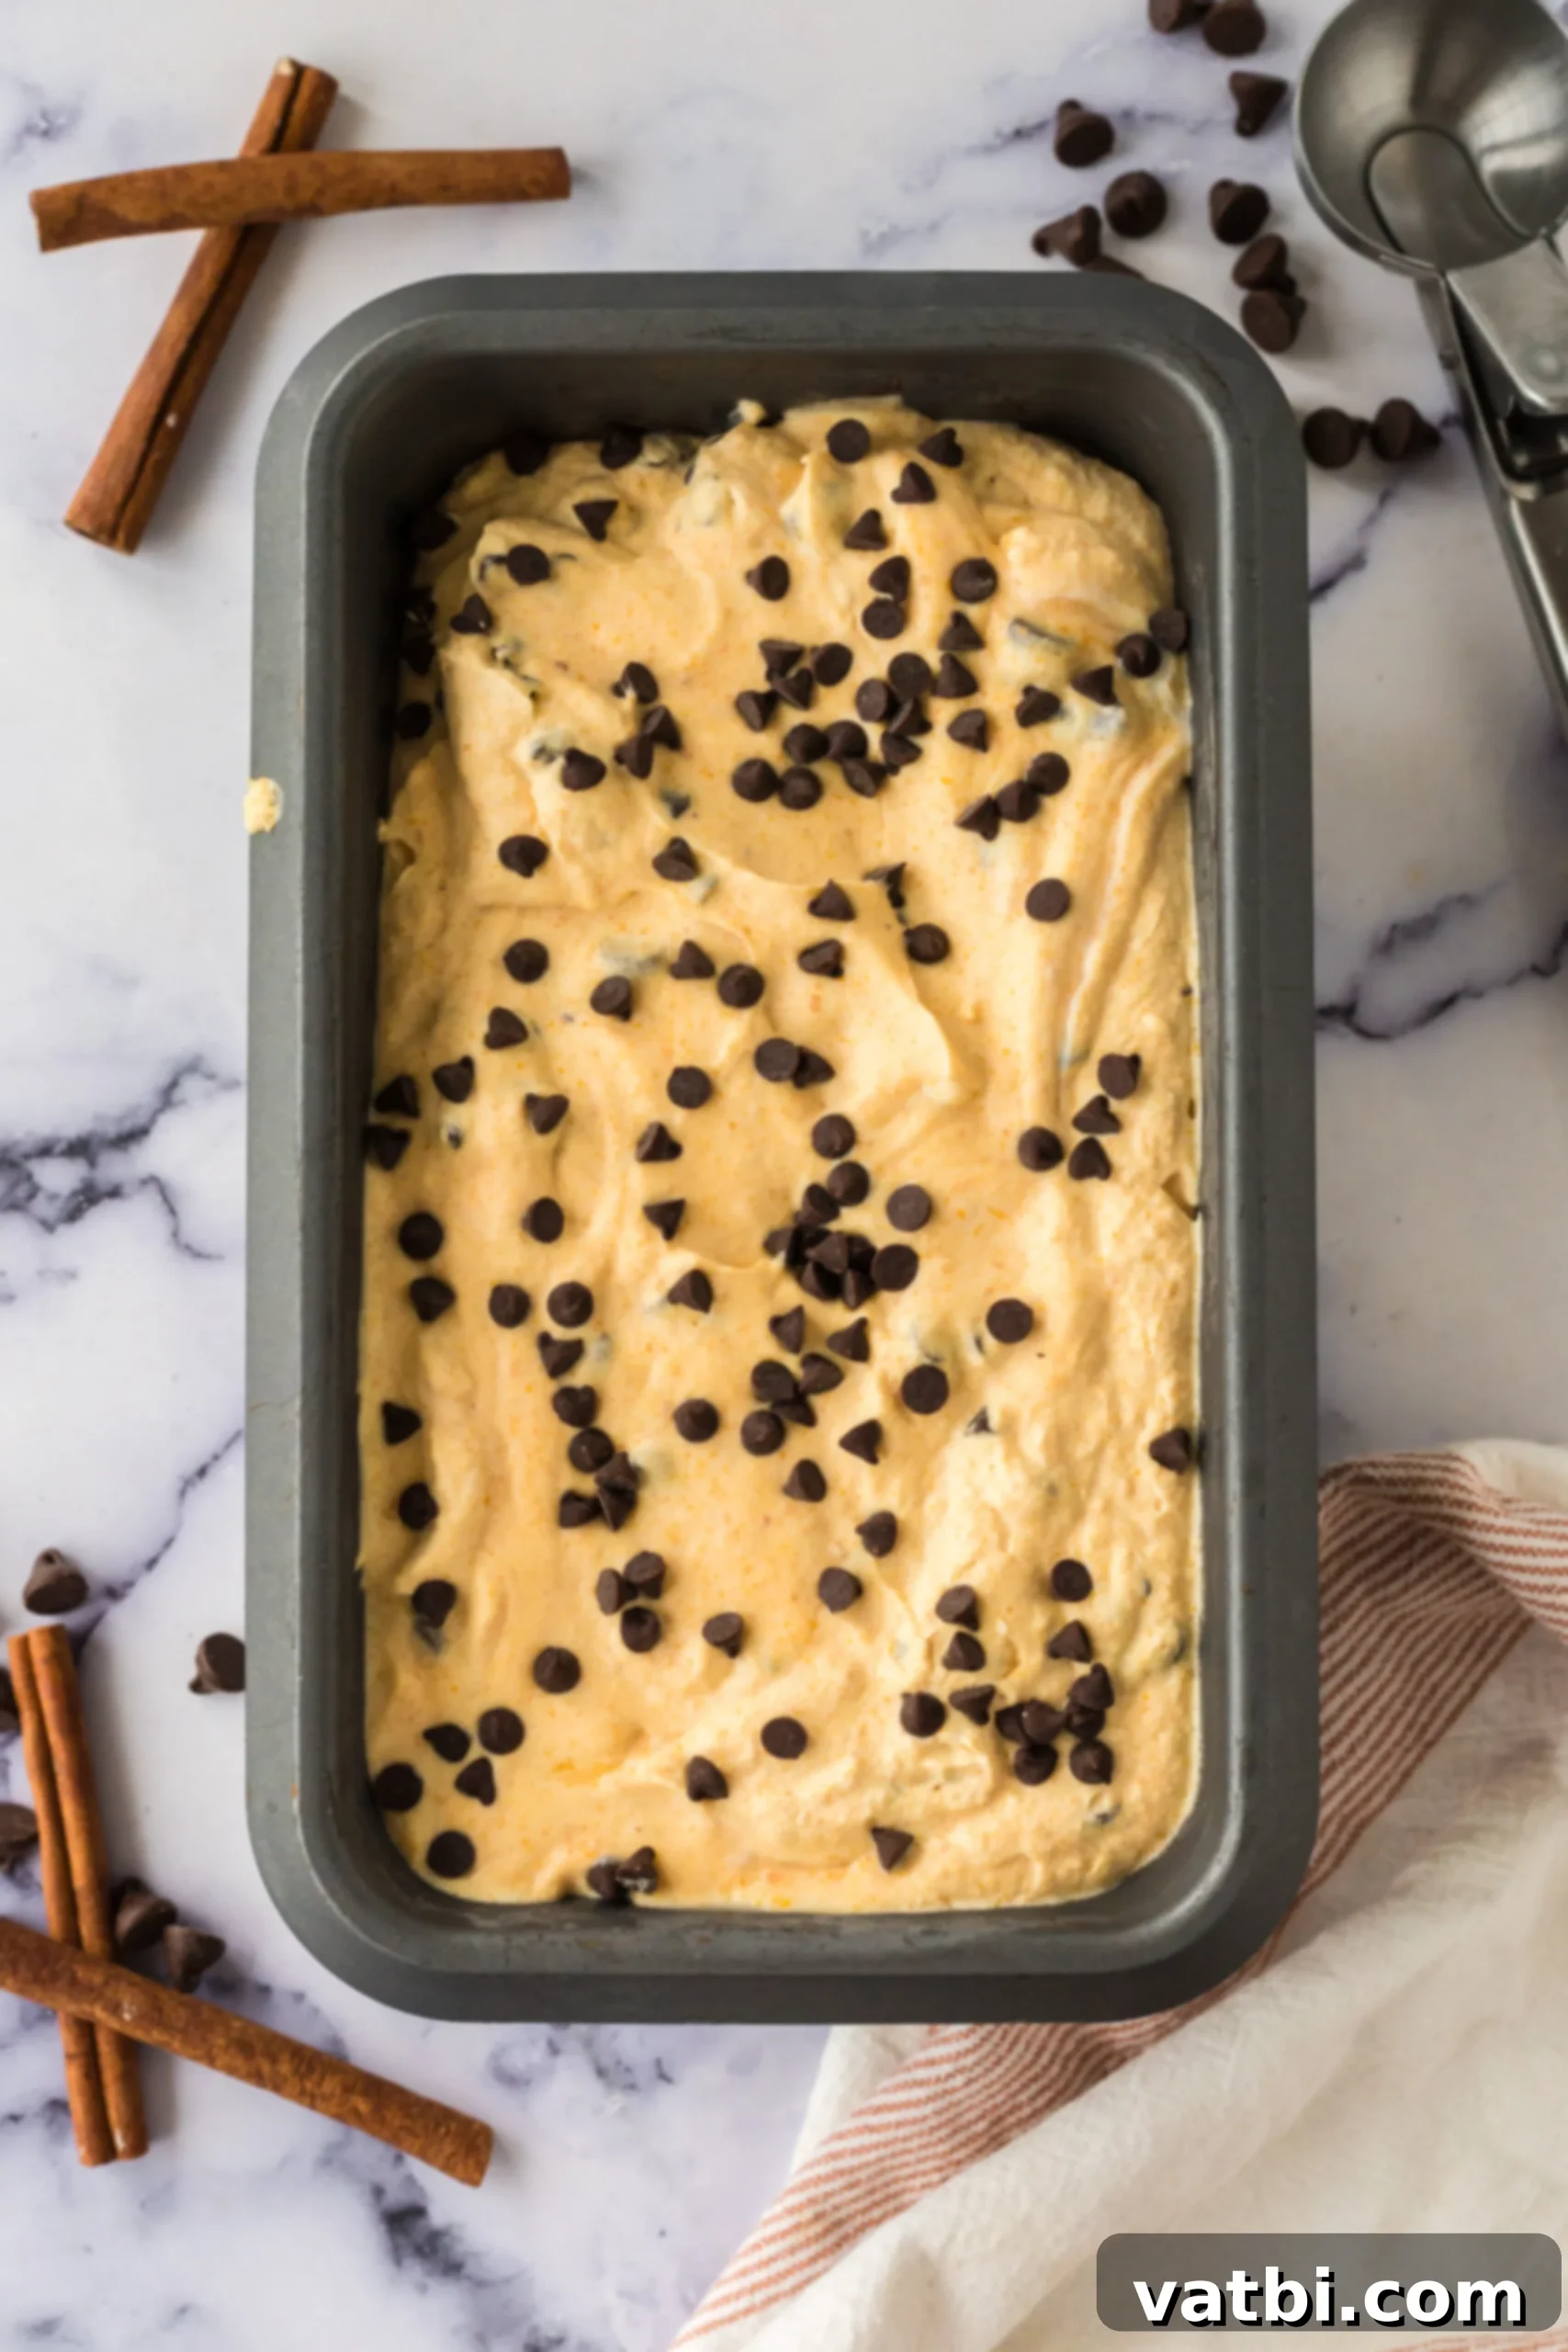
Step 4. Freeze and Enjoy: Carefully pour the ice cream mixture into a 9×5 inch loaf pan or a similar-sized glass dish. Smooth the top with your spatula. Cover the pan tightly with plastic wrap, ensuring the wrap touches the surface of the ice cream to prevent ice crystals. Place it in the freezer for a minimum of 5 hours, or until thoroughly set. Once firm, scoop, serve, and savor your homemade Pumpkin Chocolate Chip Ice Cream!
Equipment Needed for No-Churn Ice Cream
Making this delightful Pumpkin Chocolate Chip Ice Cream requires only a few basic kitchen tools. You likely already have everything you need, making this recipe even more convenient.
- Large mixing bowl: Essential for whipping the heavy cream and combining all the ingredients without spills. Choose one that gives you plenty of room to work.
- Electric hand mixer: This is key for efficiently whipping the heavy cream to stiff peaks. A stand mixer with a whisk attachment works equally well and can save your arm a workout!
- 9×5 inch loaf pan: The perfect size for freezing your ice cream. A glass dish of a similar capacity would also work. Its shape makes scooping easy once the ice cream is frozen.
- Plastic wrap: Crucial for covering the ice cream tightly during freezing. This prevents ice crystals from forming on the surface, ensuring a smooth texture.
- Ice cream scoop: For serving your delicious homemade creation. A sturdy scoop will make serving easier, especially if the ice cream is very firm.
- Large spoon or spatula: Ideal for gently folding in the pumpkin mixture and chocolate chips without deflating the whipped cream.
Expert Tips for the Best Homemade Ice Cream
To ensure your Pumpkin Chocolate Chip Ice Cream turns out perfectly creamy and delicious every time, keep these expert tips in mind:
- Cold Ingredients are Key: For the best results when whipping, ensure your heavy whipping cream and mixing bowl (and even the beaters of your electric mixer) are very cold. You can chill the bowl and beaters in the freezer for 10-15 minutes before starting. Cold cream whips faster and achieves stiffer peaks.
- Achieving Stiff Peaks: When whipping the heavy cream, watch for stiff peaks. This means that when you lift the beaters, the peaks hold their shape firmly and don’t flop over. This aeration is vital for the no-churn method to create a light, creamy texture. Be careful not to over-whip, as it can separate and turn grainy.
- Gentle Folding is Essential: After whipping the cream, when you add the sweetened condensed milk, pumpkin puree, and pumpkin pie spice, use a gentle folding motion with a spatula. The goal is to combine the ingredients without knocking too much air out of the whipped cream. This maintains the volume and ultimately the creamy, airy texture of your ice cream.
- The Role of Sweetened Condensed Milk: Sweetened condensed milk is a powerhouse ingredient in no-churn ice cream. It provides the necessary sweetness, but more importantly, its high sugar content and thick consistency help prevent large ice crystals from forming, leading to that desirable smooth and velvety texture. Do not substitute it with evaporated milk or regular milk.
- Use 100% Pure Pumpkin: Always double-check your canned pumpkin. Ensure you are using 100% pure pumpkin puree, not pumpkin pie filling. Pumpkin pie filling contains added sugars and spices that will alter the flavor and sweetness balance of this recipe.
- Optimal Freezing Time: While 5 hours is the minimum freeze time for this ice cream to set, remember that it will continue to firm up the longer it stays in the freezer. If you plan to freeze it overnight or for an extended period, allow it to sit on the counter for 5-10 minutes before scooping. This brief softening period will make it easier to serve.
- Preventing Ice Crystals: To minimize ice crystal formation and keep your ice cream perfectly smooth, ensure the plastic wrap touches the surface of the ice cream directly before freezing. This creates a barrier against air and moisture. For even better protection, you can also place a layer of parchment paper on top of the ice cream before sealing with plastic wrap.
How to Serve Pumpkin Chocolate Chip Ice Cream
This Pumpkin Chocolate Chip Ice Cream is delicious on its own, but it’s also incredibly versatile and can be served in a variety of creative and delightful ways. Here are some of our favorites to elevate your dessert experience:
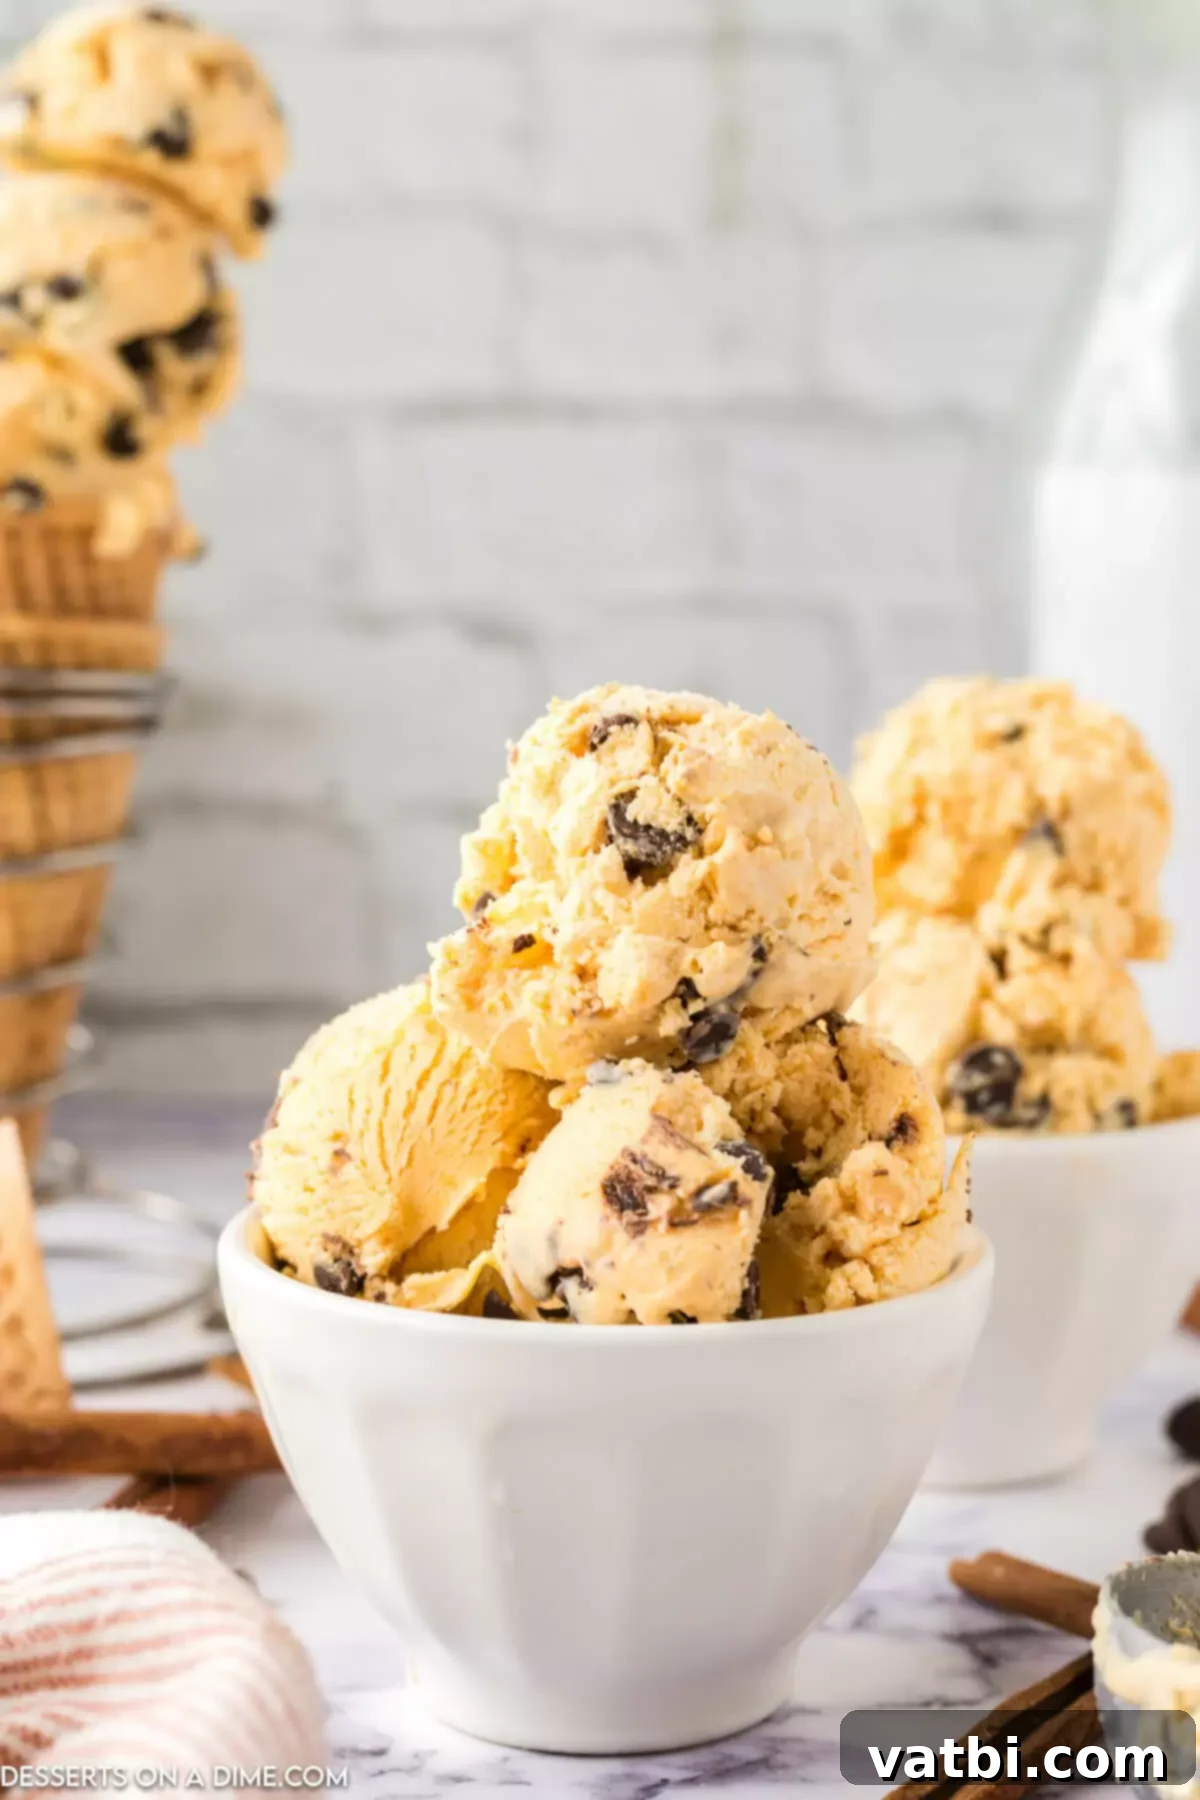
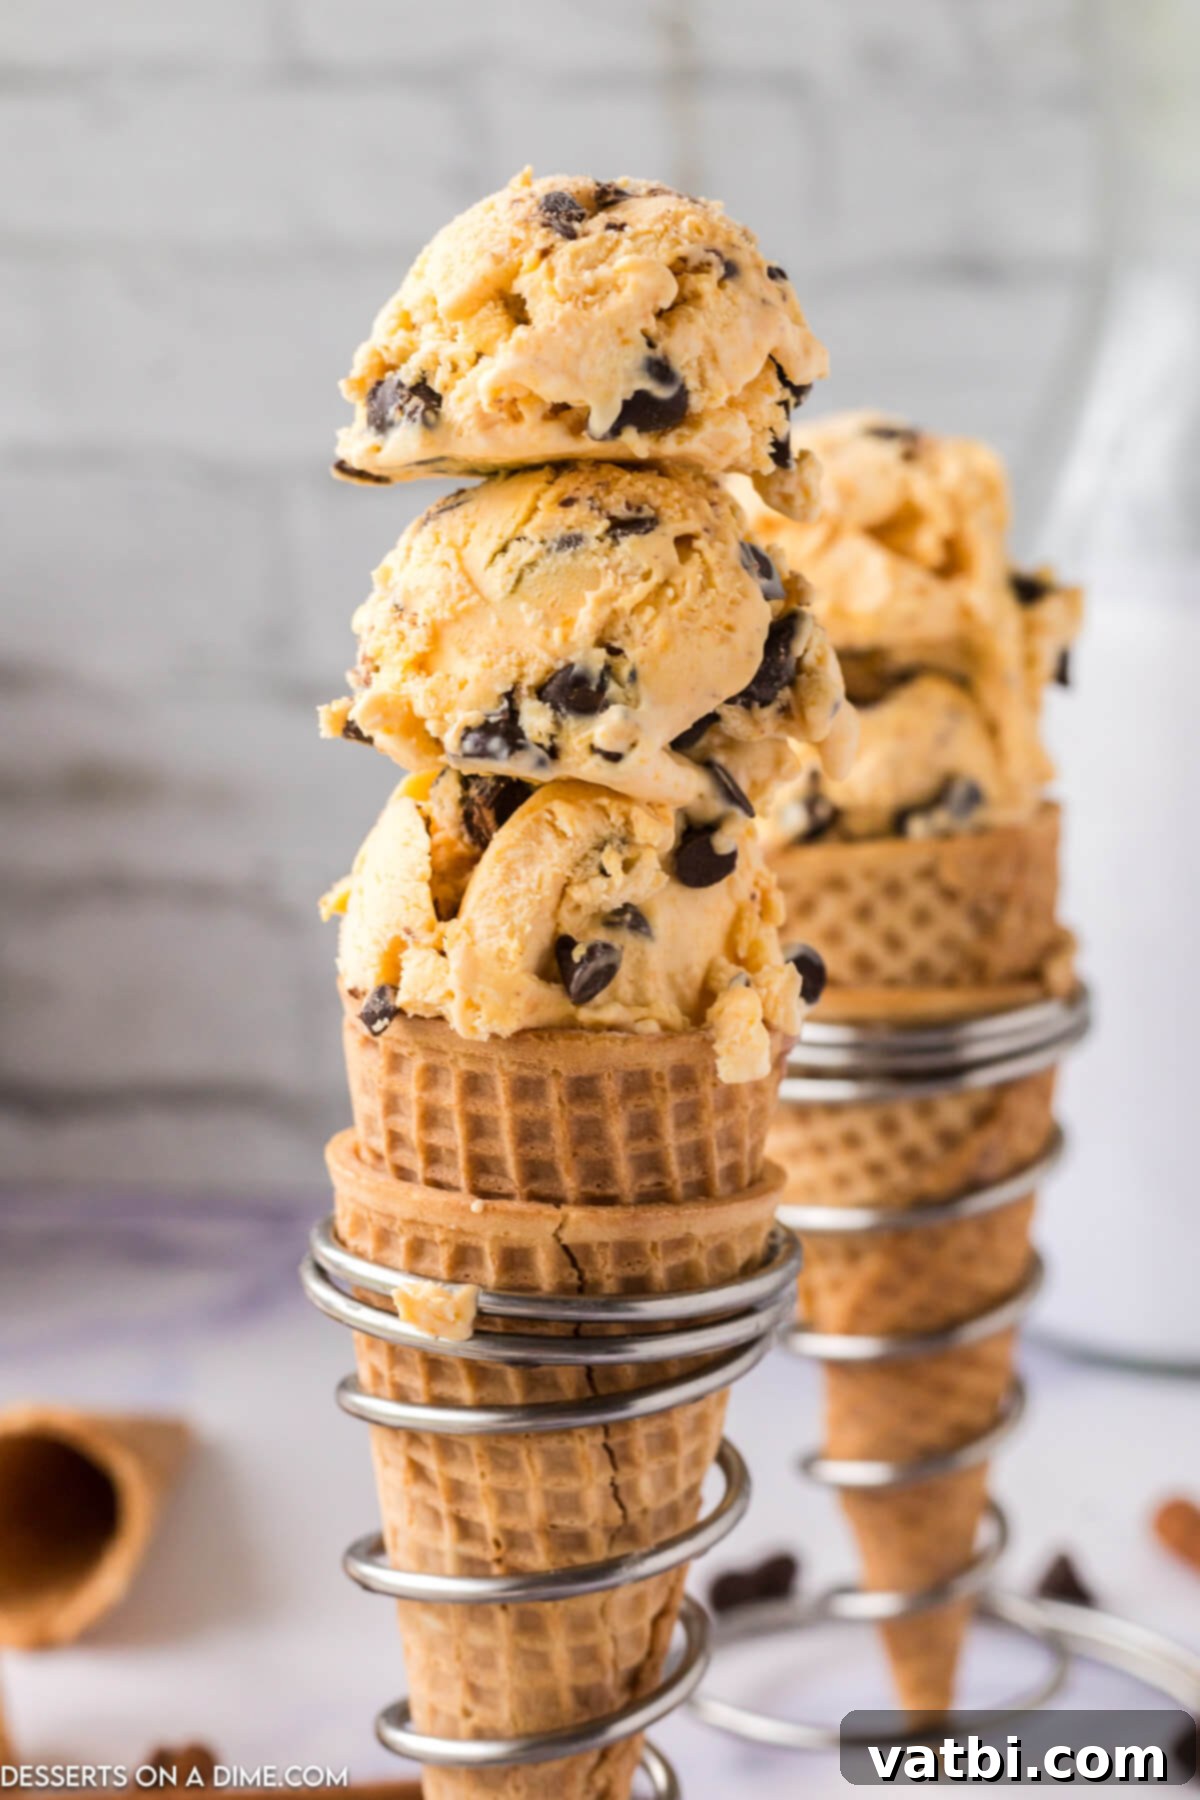
- Classic Cones or Bowls: The simplest and most satisfying way to enjoy this ice cream is scooped directly into a sugar cone, waffle cone, or a dessert bowl. Garnish with a sprinkle of cinnamon or a few extra chocolate chips for a pleasing presentation.
- Ice Cream Sandwiches: Create gourmet ice cream sandwiches by spreading a layer of this pumpkin chocolate chip ice cream between two soft, chewy cookies – think oatmeal cookies, snickerdoodles, or even more pumpkin chocolate chip cookies! Freeze briefly to set before serving.
- Delicious Sundaes: Turn it into a decadent sundae by serving it in a waffle bowl or a glass dish. Top with The BEST Homemade Hot Fudge Sauce, whipped cream, a sprinkle of pumpkin pie spice, and perhaps some chopped pecans or candied walnuts for an irresistible treat.
- Alongside Warm Desserts: This ice cream pairs perfectly with warm fall desserts. Serve a scoop alongside a slice of apple pie, pumpkin pie, a warm brownie, or a crisp fruit cobbler for a delightful contrast of temperatures and textures.
- In Milkshakes: Blend a few scoops with a splash of milk and a dash of cinnamon for a thick and creamy pumpkin chocolate chip milkshake.
Storage Tips for Pumpkin Chocolate Chip Ice Cream
Proper storage is essential to keep your homemade Pumpkin Chocolate Chip Ice Cream fresh, creamy, and free from ice crystals. When stored correctly, this ice cream typically maintains its best quality for about 2 months in the freezer before it might start to dry out or develop a less desirable texture.
To ensure optimal freshness and prevent freezer burn, it is crucial to keep the ice cream covered tightly. After transferring it to your loaf pan or an airtight freezer-safe container, place a layer of plastic wrap directly on the surface of the ice cream, pressing it down gently to remove any air pockets. This direct contact is key to preventing ice crystals from forming. Then, place the lid on the container or add a second layer of plastic wrap over the entire pan.
This homemade ice cream is an ideal make-ahead dessert, perfect for holiday gatherings or when you want to have a sweet treat ready for unexpected guests. Just pull it out of the freezer a few minutes before serving to let it soften slightly for easy scooping.
More Easy Homemade Ice Cream Recipes
If you’ve fallen in love with making your own no-churn ice cream, you’re in luck! We have a fantastic collection of easy homemade ice cream recipes that are just as simple and delicious. Explore these other family favorites for year-round frozen treats:
- Twix Ice Cream Recipe
- No Churn Strawberry Ice Cream Recipe
- Strawberry Cheesecake Ice Cream Recipe
- Hot Chocolate Ice Cream
- Birthday Cake Ice Cream Recipe
We encourage you to try this incredibly easy Pumpkin Chocolate Chip Ice Cream recipe. We’re confident it will become a cherished part of your fall traditions! Leave a comment below once you’ve made it – we can’t wait to hear what you think!
Pin
Pumpkin Chocolate Chip Ice Cream
10 minutes
5 hours
5 hours 10 minutes
6
American
Dessert
671
Carrie Barnard
Equipment
-
Large mixing bowl
-
Electric hand mixer
-
9×5 inch loaf pan
-
Plastic wrap
-
Ice cream scoop
-
Large spoon or spatula
Ingredients
- 2 cups heavy whipping cream
- 14 ounce sweetened condensed milk
- 1 cup pumpkin puree
- ½ tablespoon pumpkin pie spice
- 1 cup semi-sweet chocolate chips
Instructions
-
Use an electric hand mixer to whip the heavy cream into stiff peaks in a large mixing bowl. Ensure your cream and bowl are very cold for best results.
-
Once the cream forms stiff, free-standing peaks, gently add the pumpkin pie spice, pumpkin puree, and sweetened condensed milk. Whisk or fold the ingredients into the whipped cream until just combined, being careful not to deflate the cream.
-
Using a large spatula or spoon, carefully fold in the semi-sweet chocolate chips until they are evenly distributed throughout the mixture.
-
Pour your ice cream mixture into a 9×5 inch loaf pan or a similar-sized glass dish. Cover the ice cream tightly with plastic wrap, ensuring the wrap touches the surface to prevent ice crystals. Place it in the freezer for a minimum of 5 hours.
-
Scoop, serve, and enjoy this delightful homemade pumpkin chocolate chip ice cream!
Recipe Notes
The minimum freeze time is 5 hours, but for a firmer consistency, you can freeze it overnight. If frozen for a longer period, let it sit on the counter for a few minutes before scooping to soften slightly.
Remember to gently fold the pumpkin puree, pumpkin pie spice, and sweetened condensed milk into the whipped cream to keep as much air as possible in the mixture. A stiff, airy whipped cream is crucial for the classic no-churn ice cream texture.
You can easily create your own pumpkin pie spice by combining equal parts cinnamon, cloves, nutmeg, and ginger. For an even richer chocolate flavor, consider using dark chocolate chips instead of semi-sweet.
Sweetened condensed milk is key for both sweetness and its ability to create a smooth, velvety texture, preventing ice formation. Always use 100% pure pumpkin puree, not pie filling.
Nutrition Facts
Carbohydrates 58g,
Protein 10g,
Fat 46g,
Saturated Fat 29g,
Polyunsaturated Fat 2g,
Monounsaturated Fat 12g,
Trans Fat 0.02g,
Cholesterol 114mg,
Sodium 111mg,
Potassium 578mg,
Fiber 4g,
Sugar 51g,
Vitamin A 7714IU,
Vitamin C 4mg,
Calcium 273mg,
Iron 3mg
Pin This Now to Remember It Later
Pin Recipe
