Irresistibly Cute & Easy Reindeer Peanut Butter Cookies: The Ultimate Christmas Treat!
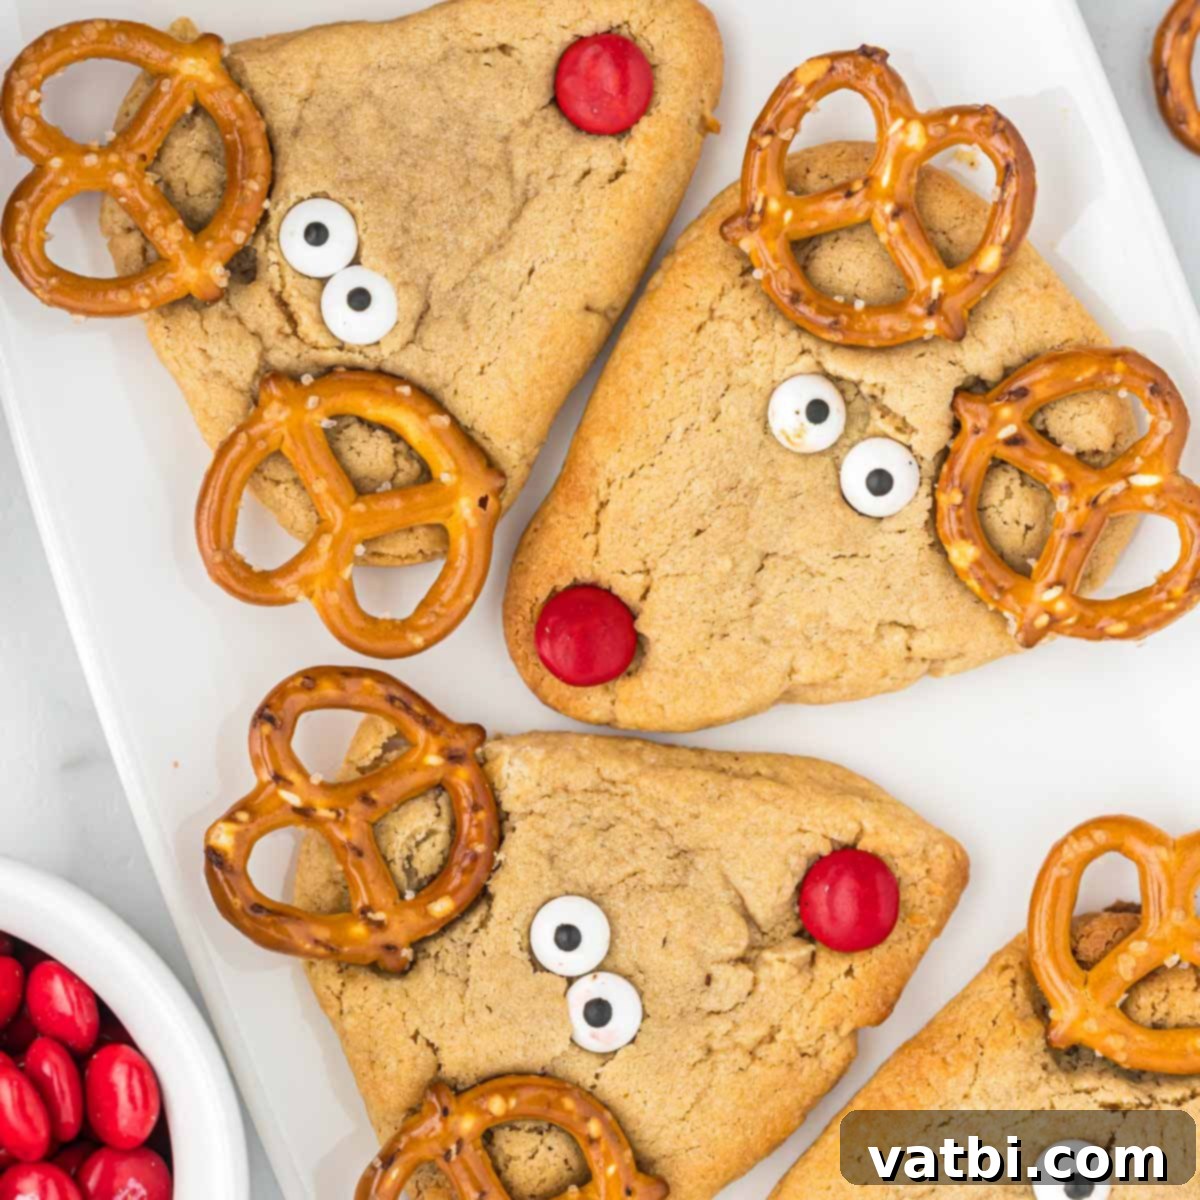
Get ready to spread some serious holiday cheer with these incredibly adorable and utterly delicious Reindeer Peanut Butter Cookies! Our easy-to-follow Christmas cookie recipe transforms classic peanut butter cookies into festive Rudolph faces, complete with pretzel antlers and bright red noses. This recipe is an absolute delight for both kids and adults, making it the perfect addition to your holiday baking list, a charming treat for Christmas parties, or a wonderful homemade gift.

These charming cookies are a must-have for any holiday cookie tray, bringing smiles and festive spirit to every gathering. Everyone adores a good peanut butter cookie, and this version takes it to a new level of cuteness. If you’re looking for more fun holiday treats, consider adding Nutter Butter Reindeer, Reindeer Brownies, or Reindeer Pretzels to your dessert table. The Nutter Butter reindeer cookie recipe, in particular, is a fantastic no-bake option for busy holiday seasons!
What’s in this post: Reindeer Cookies
- Why this recipe works
- Ingredients
- Substitutions and Additions
- How to make Reindeer Cookies
- Pro Tips
- FAQ’s
- More Festive Christmas Cookies to try
- Reindeer Cookies Recipe
Why this recipe works
These Reindeer Cookies are more than just a sweet treat; they’re a delightful experience that embodies the spirit of Christmas. Here’s why this recipe is a winner for your holiday season:
- Festive Treat for Christmas. From Christmas Eve dessert spreads to lively holiday parties and thoughtful homemade gifts, these cookies are absolutely darling. Their charming Rudolph faces instantly bring a smile to anyone who sees them, making them a standout on any platter. They are perfect for school events, office potlucks, or simply enjoying with family by the fireplace.
- Make the dough ahead. One of the best features of this recipe is the flexibility it offers. You can easily prepare the cookie dough in advance, saving you precious time during the busy holiday rush. Simply mix the dough, wrap it tightly, and refrigerate it for up to 2-3 days, or freeze it for longer. This means less stress and more enjoyment when it’s time to bake and decorate for your Christmas party.
- Delicious cookie recipe. Beyond their undeniable cuteness, these peanut butter cookies are incredibly tasty. They boast a perfectly soft, chewy texture and that classic, comforting peanut butter flavor everyone loves. The sweetness is balanced, making them enjoyable for all ages. It’s a tried-and-true base recipe that truly shines, even before the adorable decorations are added.
- Fun and Engaging for All Ages. Decorating these cookies is a fantastic activity to involve the whole family, especially younger children. Little hands can help place the pretzel antlers, candy eyes, and red M&M noses, fostering creativity and making wonderful holiday memories together. It’s an easy project that yields impressive and photo-worthy results!
Ingredients
Crafting these charming reindeer cookies requires a few basic baking staples and some fun decorative elements. Each ingredient plays a crucial role in achieving the perfect balance of flavor and texture, as well as the delightful visual appeal.
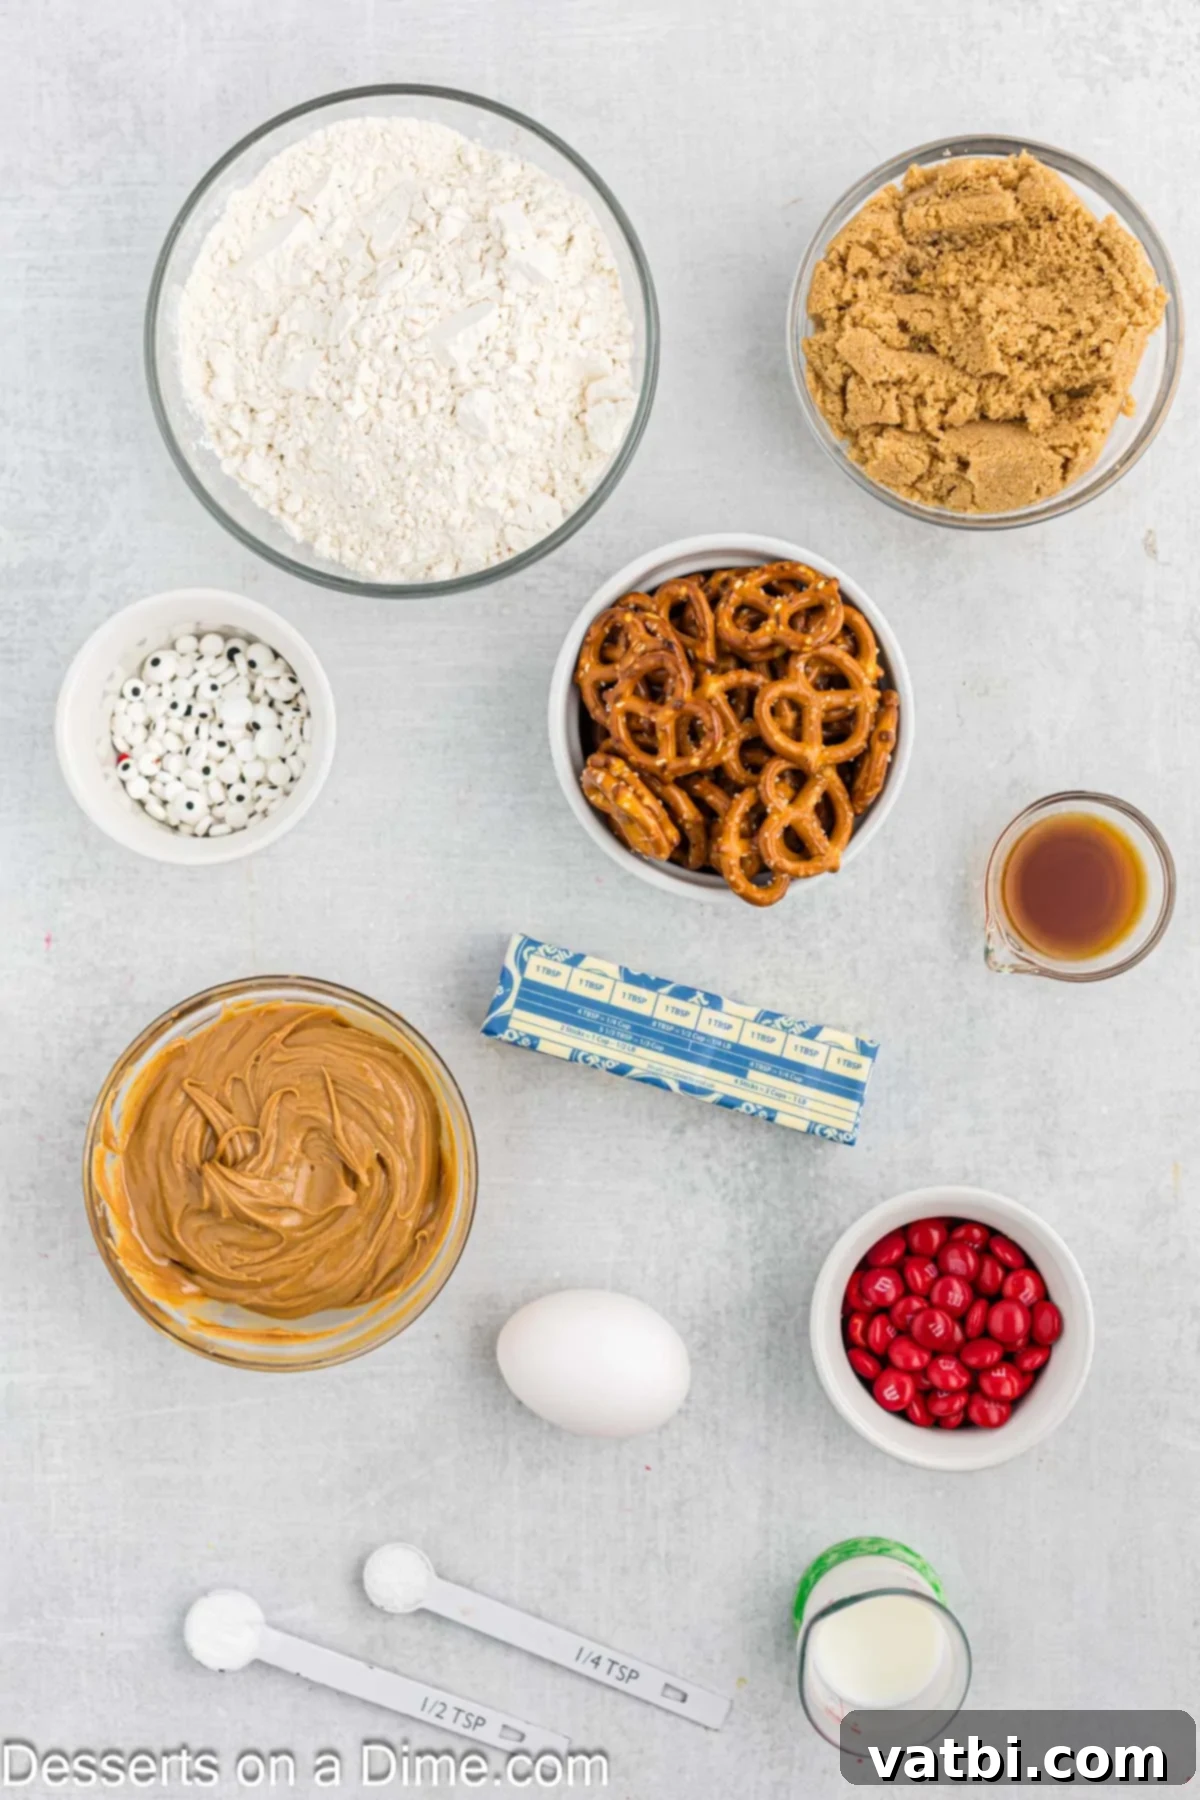
- Light Brown Sugar: This provides a deeper, caramel-like sweetness and helps keep the cookies wonderfully moist and chewy.
- Creamy Peanut Butter: The star of the show! Creamy peanut butter ensures a smooth, consistent cookie texture and rich flavor.
- Vanilla Extract: Essential for enhancing all the other flavors, adding a warm and inviting aroma.
- All Purpose Flour: The structural base of our cookies, giving them their shape and tender crumb.
- Mini Pretzel Twists: These clever little pretzels are perfect for forming the iconic reindeer antlers. Their salty crunch also adds a delightful contrast to the sweet cookie.
- Candy Eyes: These edible eyeballs instantly bring the reindeer to life, adding personality and fun.
- Red M&M’s: The classic choice for Rudolph’s bright red nose, adding a pop of color and chocolatey goodness.
For the precise measurements and the full, detailed ingredient list, please scroll down to the very bottom of this post and consult the complete recipe card.
Substitutions and Additions
While the classic Reindeer Peanut Butter Cookie recipe is perfect as is, feel free to get creative with these delicious substitutions and additions to customize your festive treats:
- Chocolate chips for the eyes. If you don’t have candy eyes on hand, or prefer a different look, you can easily swap them for mini chocolate chips. Simply press two mini chocolate chips point-down into the warm cookie for a more subtle, yet equally charming, eye effect. Dark, milk, or even white chocolate chips would work!
- Gingerbread Cookies. The decorating method for these reindeer is incredibly versatile! Instead of a peanut butter base, you can use your favorite Gingerbread Cookie dough. This offers a different, warmly spiced flavor profile that is quintessentially Christmas, and the decorations will look just as fantastic.
- Red Hots for the nose. For a unique twist on Rudolph’s nose, consider using red hot candies instead of M&M’s. These fiery little candies will add a spicy kick and a vibrant red color, perfect for a different flavor experience. Just be aware of the heat level for younger palates!
- Sugar Cookies. Another excellent variation to try is using sugar cookies as your base instead of peanut butter cookies. A classic, tender sugar cookie provides a blank canvas for the reindeer decorations, appealing to those who prefer a more traditional cookie flavor.
- Melted Chocolate. For a homemade touch on the eyes, you can melt a tiny bit of chocolate (dark, milk, or white) and use a toothpick or a small piping bag to dot it onto the cookies for eyes. This allows for more control over the size and expression of your reindeer’s gaze. A dab of melted chocolate also works as “glue” to secure candy eyes.
- Frosting. Take your decorating a step further by outlining and filling the cookies with chocolate frosting before adding the features. This creates a richer, more decadent cookie. You can even use a small star tip to pipe a fluffy “mane” or “ears” around the reindeer’s face for added detail.
- White Chocolate Drizzle. After the cookies have cooled and the decorations are set, drizzle a little melted white chocolate over the tops for a snowy effect. You could also tint the white chocolate with food coloring for extra festive flair.
- Sprinkle Magic. Before the cookies fully set, add a few festive sprinkles around the reindeer faces. Gold, silver, or multi-colored sprinkles can add an extra touch of sparkle and joy to your holiday treats.
How to make Reindeer Cookies
Creating these delightful Reindeer Peanut Butter Cookies is a straightforward and enjoyable process. Follow these step-by-step instructions to bring your festive treats to life:
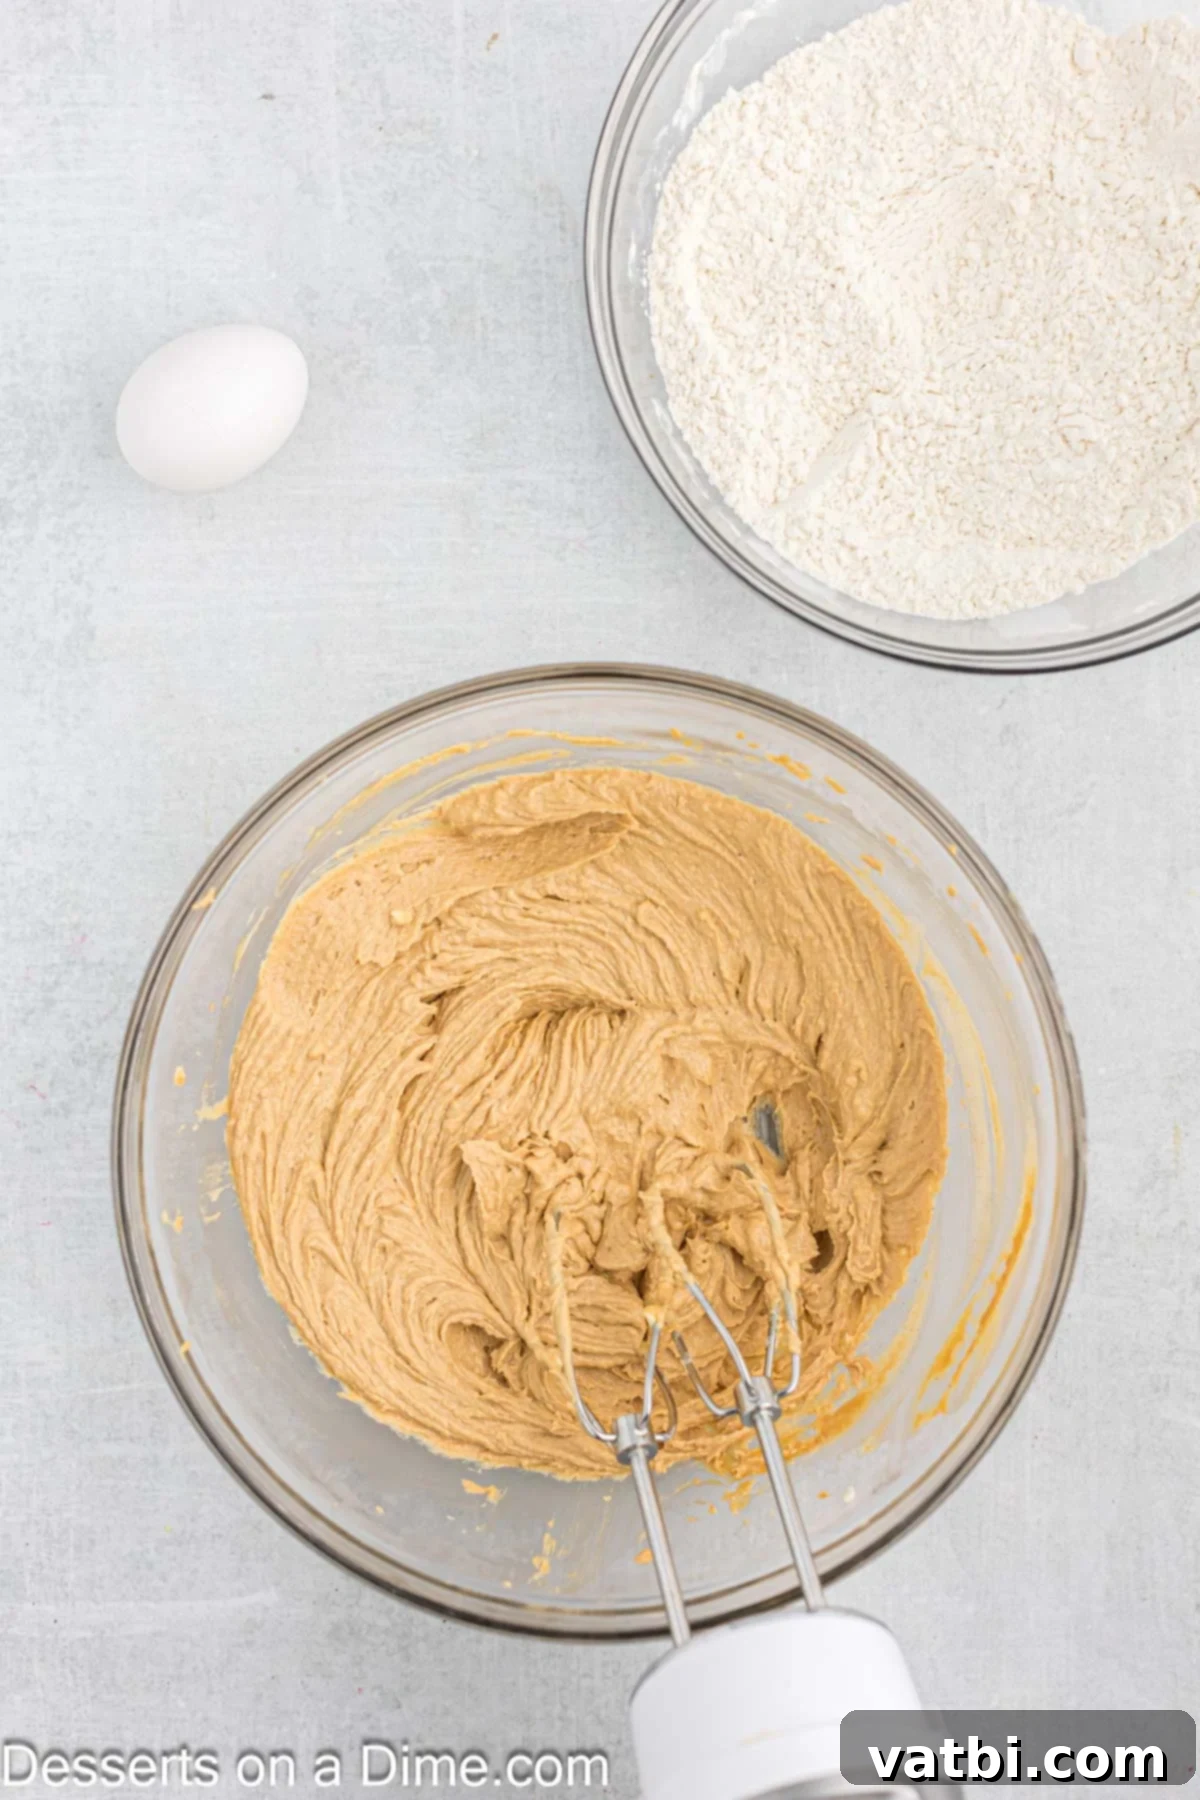
Step 1. Prepare Wet Ingredients: Begin by preheating your oven to 375 degrees Fahrenheit (190°C). In a large mixing bowl, preferably using a stand mixer with the paddle attachment, cream together the softened butter, brown sugar, creamy peanut butter, milk, and vanilla extract. Mix on medium speed until the mixture is light, fluffy, and well combined, ensuring there are no lumps of butter or sugar. Then, crack in the egg and continue to mix until it is fully incorporated into the batter, creating a smooth and cohesive mixture.
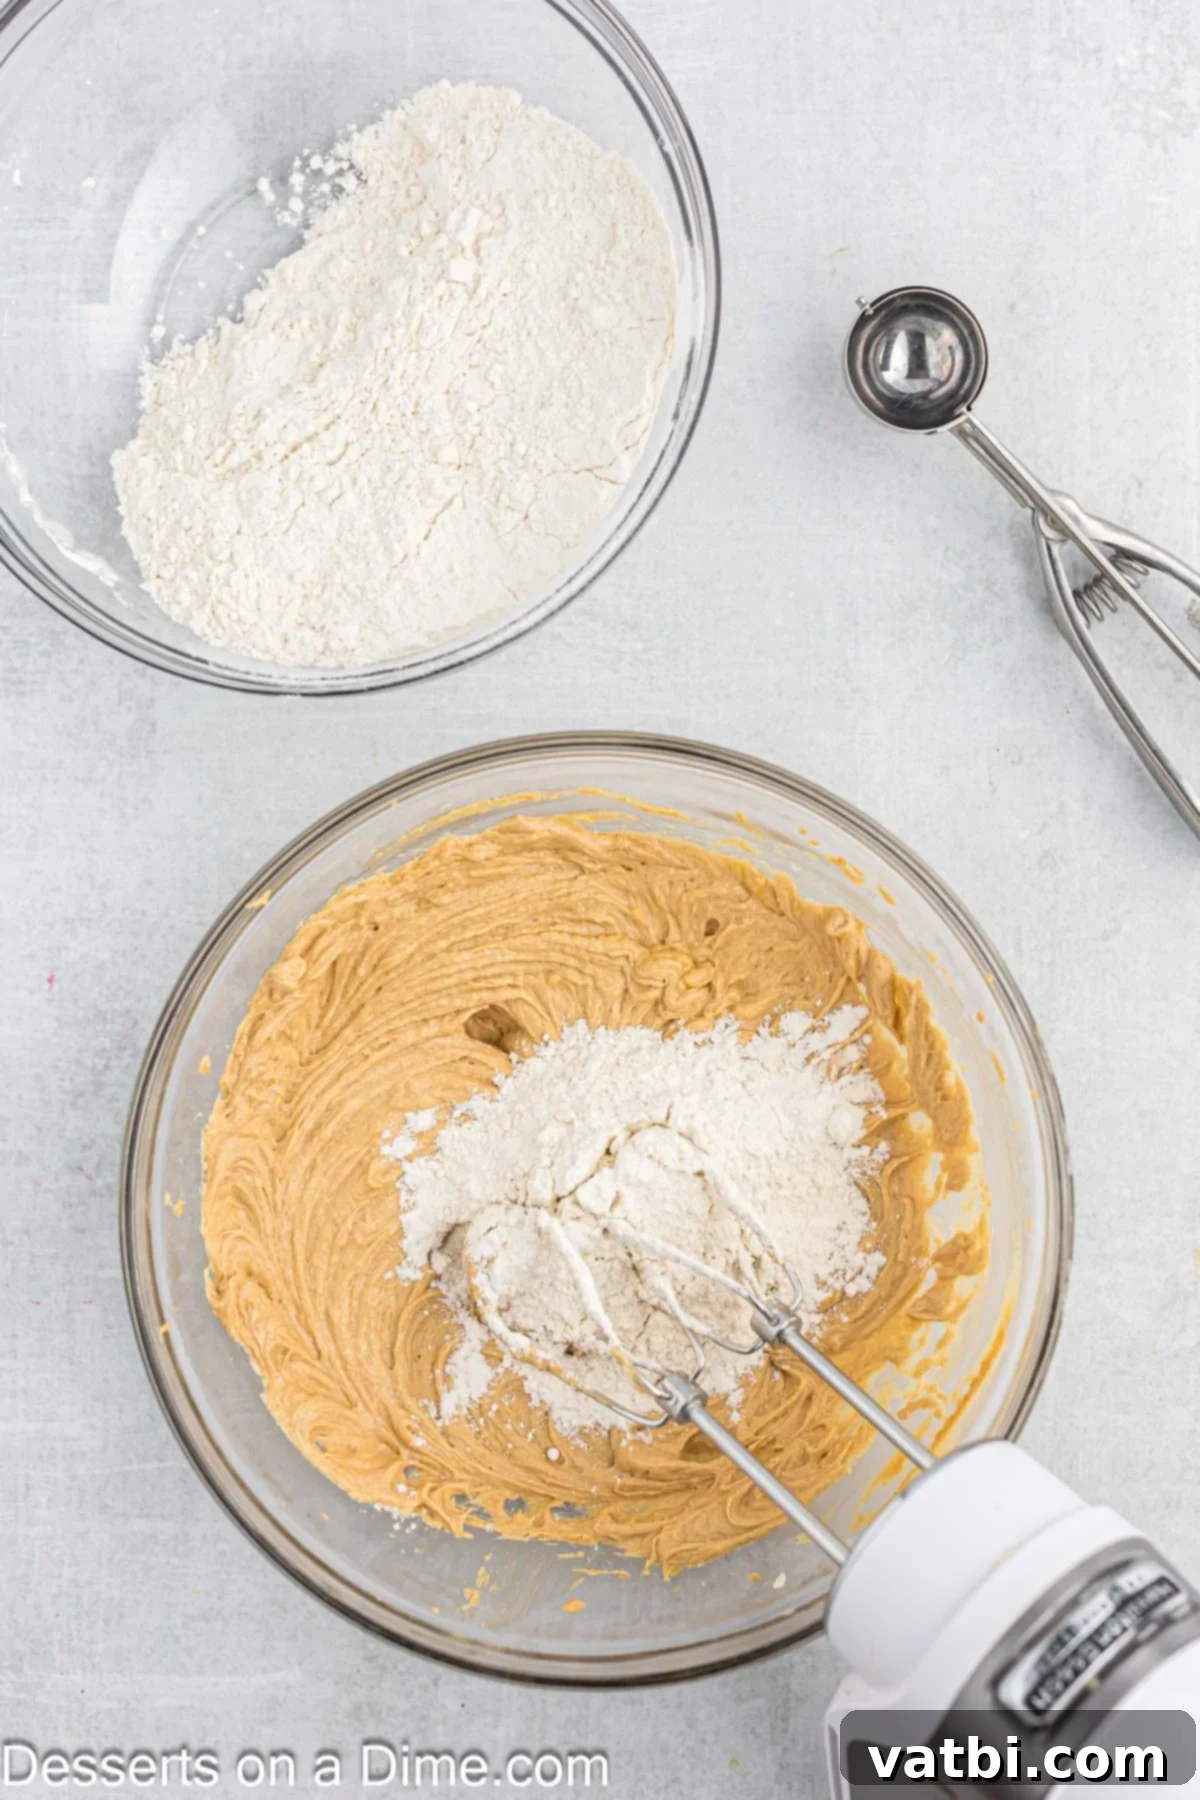
Step 2. Combine Dry and Wet Ingredients: In a separate, medium-sized bowl, whisk together all of your dry ingredients: the all-purpose flour, baking soda, and salt. This ensures they are evenly distributed. Once thoroughly mixed, gradually add this dry ingredient mixture to your wet ingredients in the stand mixer. Reduce the mixer speed to low to prevent flour from flying out of the bowl, adding the dry ingredients a little at a time until just combined.
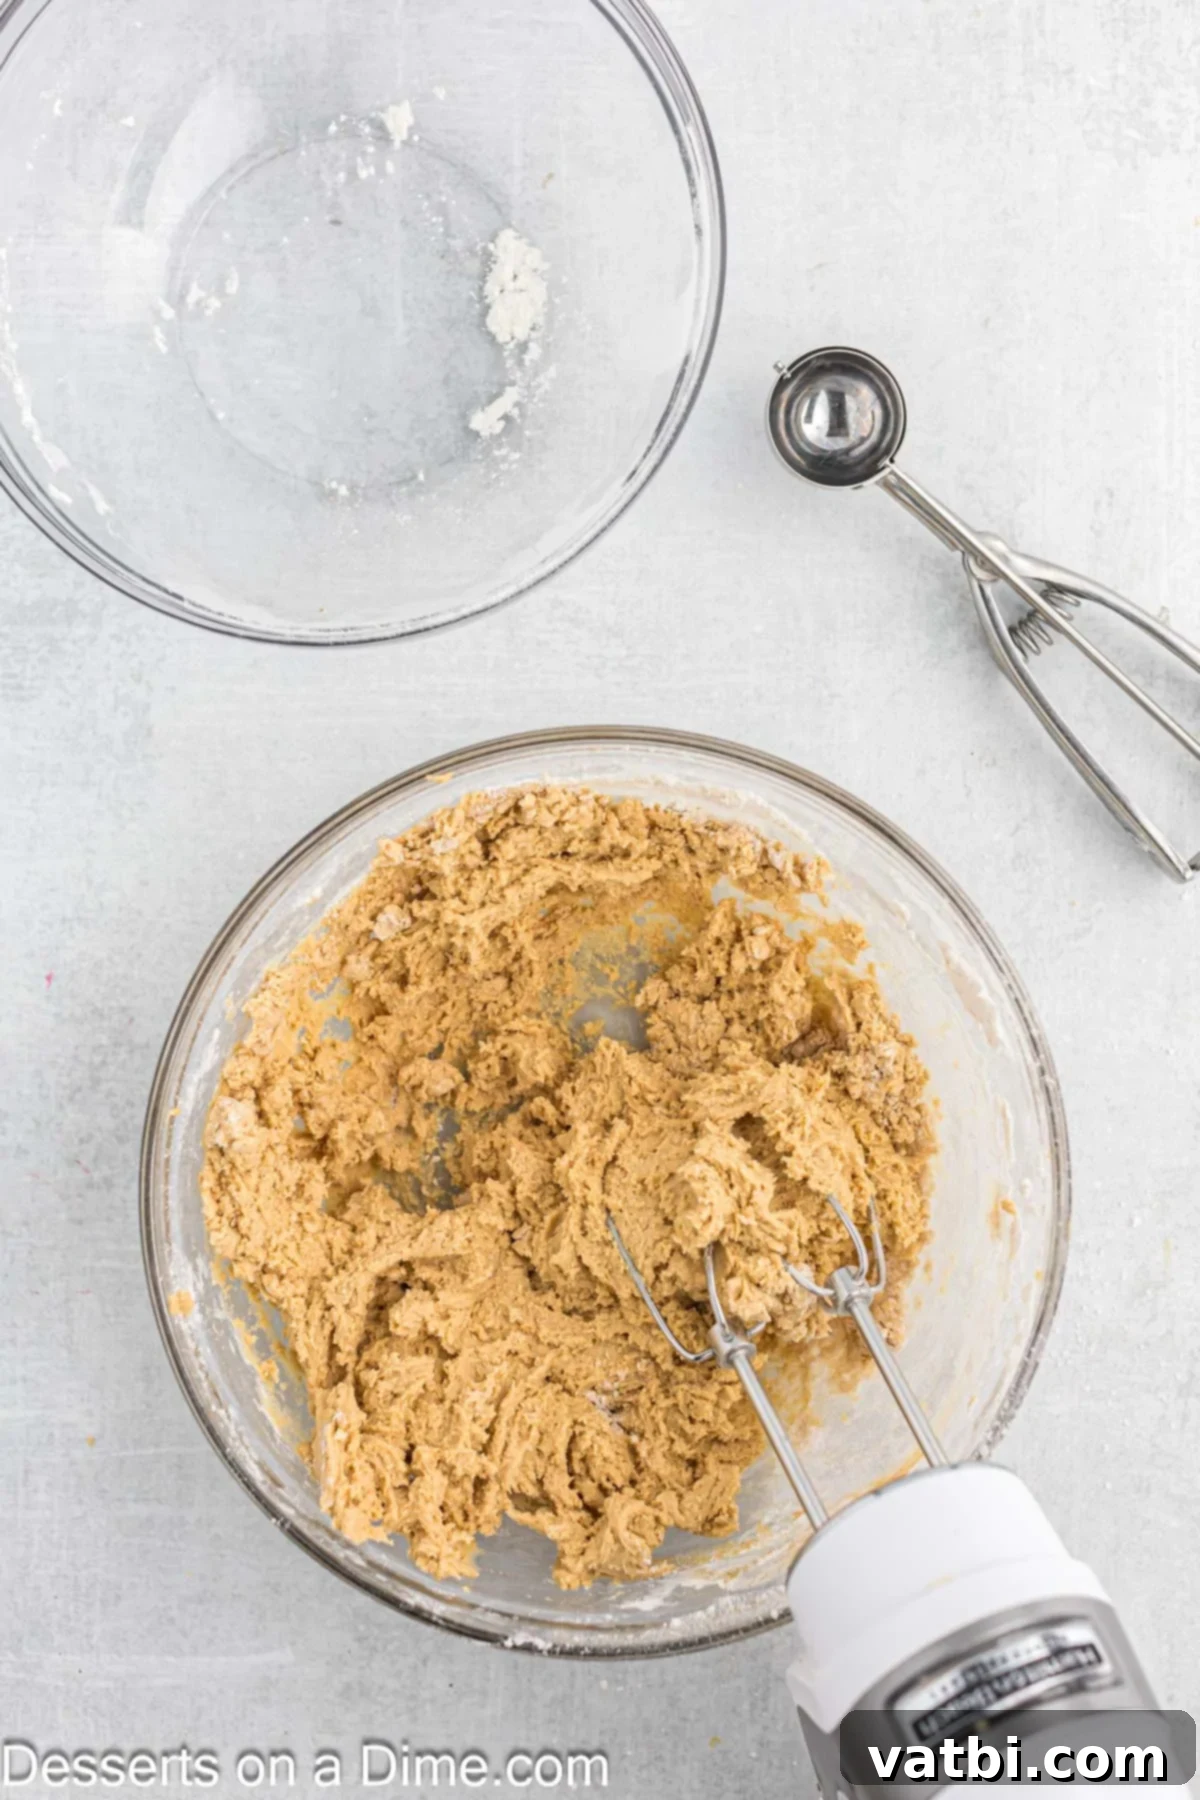
Step 3. Avoid Overmixing: Continue to mix the cookie dough on low speed only until all of the dry ingredients are fully incorporated into the wet mixture. It’s crucial not to overmix the batter at this stage, as overmixing can lead to tough, dense cookies. Stop mixing as soon as you no longer see streaks of dry flour, even if a few small lumps remain.
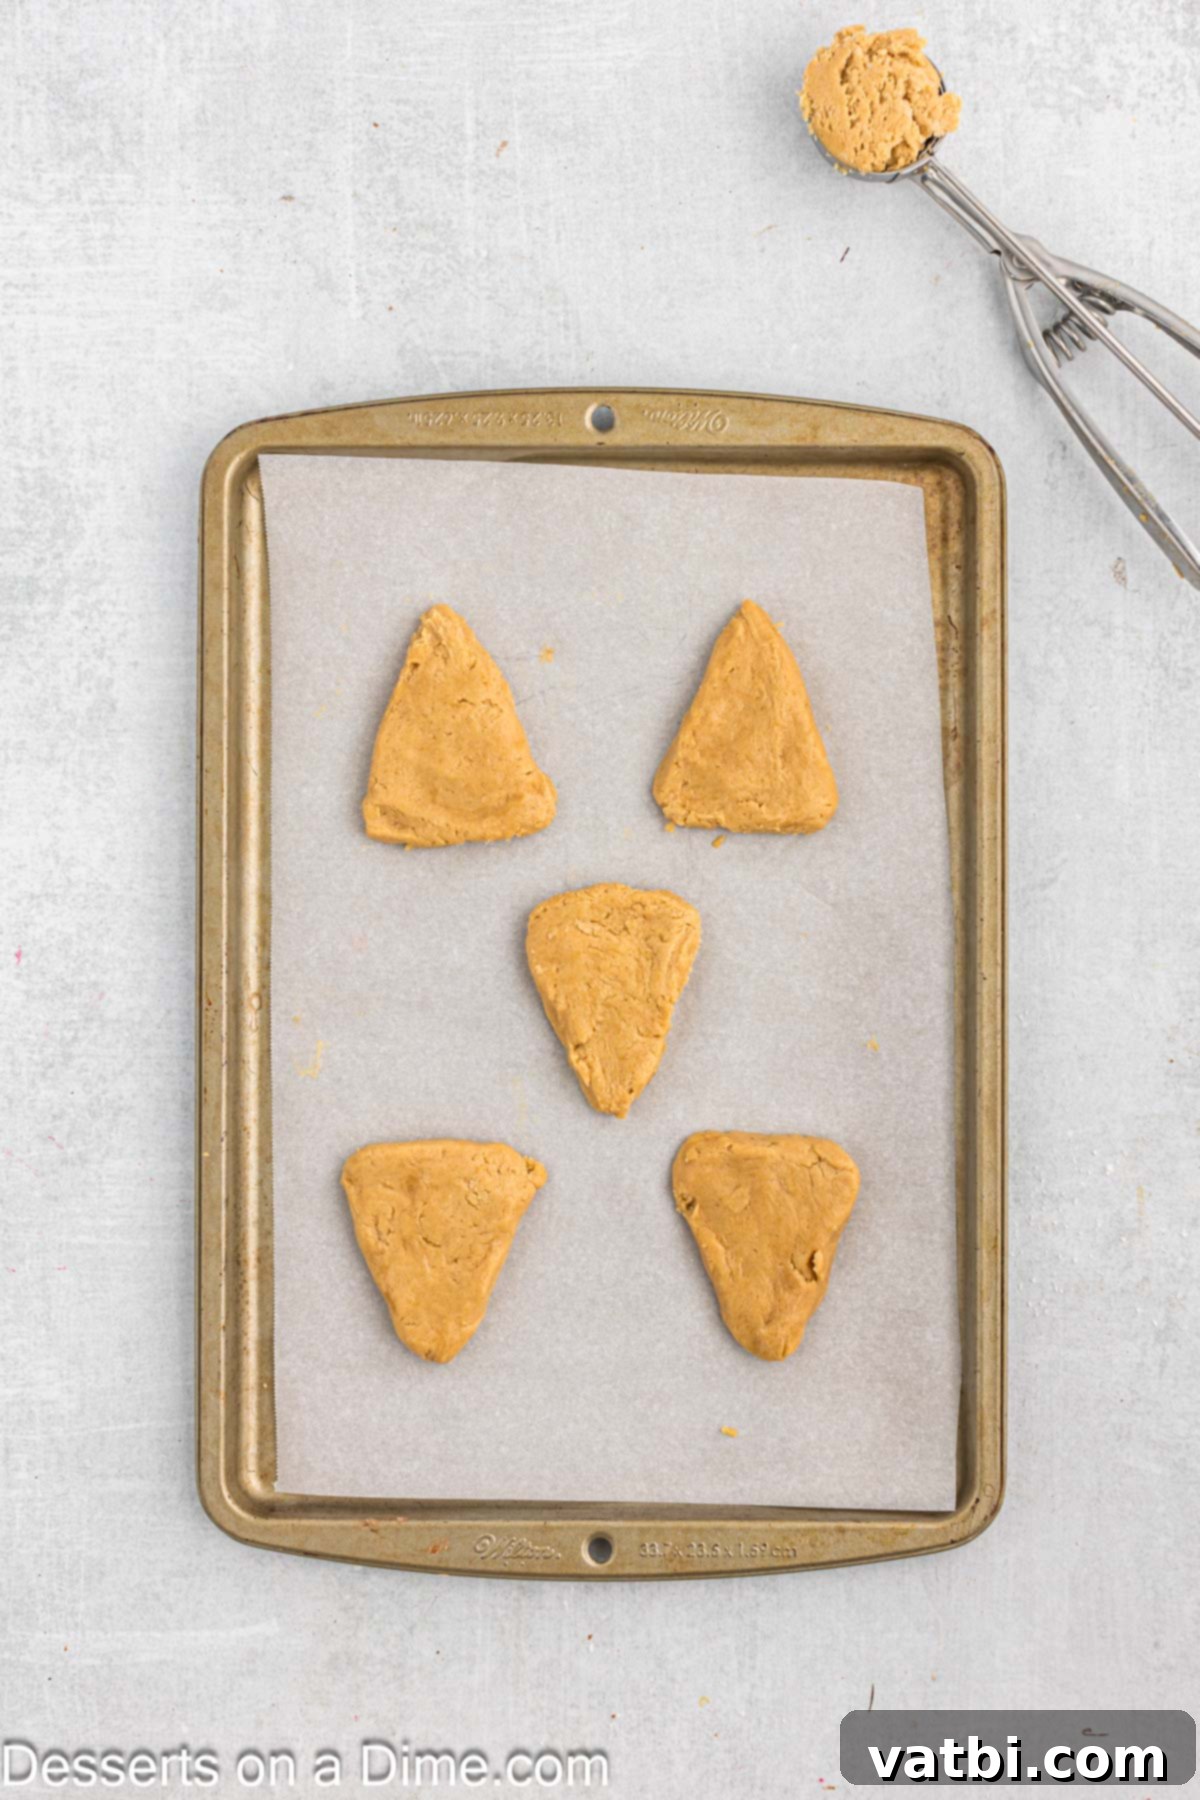
Step 4. Form and Shape Cookies: Line your baking sheets with parchment paper or silicone baking mats to prevent sticking and ensure even baking. I find using a cookie scoop (approximately 2 tablespoons in size) makes it easy to portion the batter evenly. Roll each scoop of batter into a smooth ball. Then, gently shape each ball into a triangle, forming the basic head shape of our reindeer. Place these triangle-shaped dough portions onto the prepared baking sheet, leaving enough space between them for spreading.

Step 5. Bake and Decorate Immediately: Bake the cookies in your preheated oven for 8-10 minutes, or until the edges are lightly golden and the centers are just set. As soon as the cookies come out of the oven, while they are still warm and soft, it’s time for the fun part: decorating! This warmth helps the toppings adhere perfectly. Gently press two mini pretzel twists into the top, wider part of each triangle cookie to create the antlers. Then, place two candy eyes below the antlers and a single red M&M just below the eyes for Rudolph’s iconic red nose. Work quickly as the cookies cool.
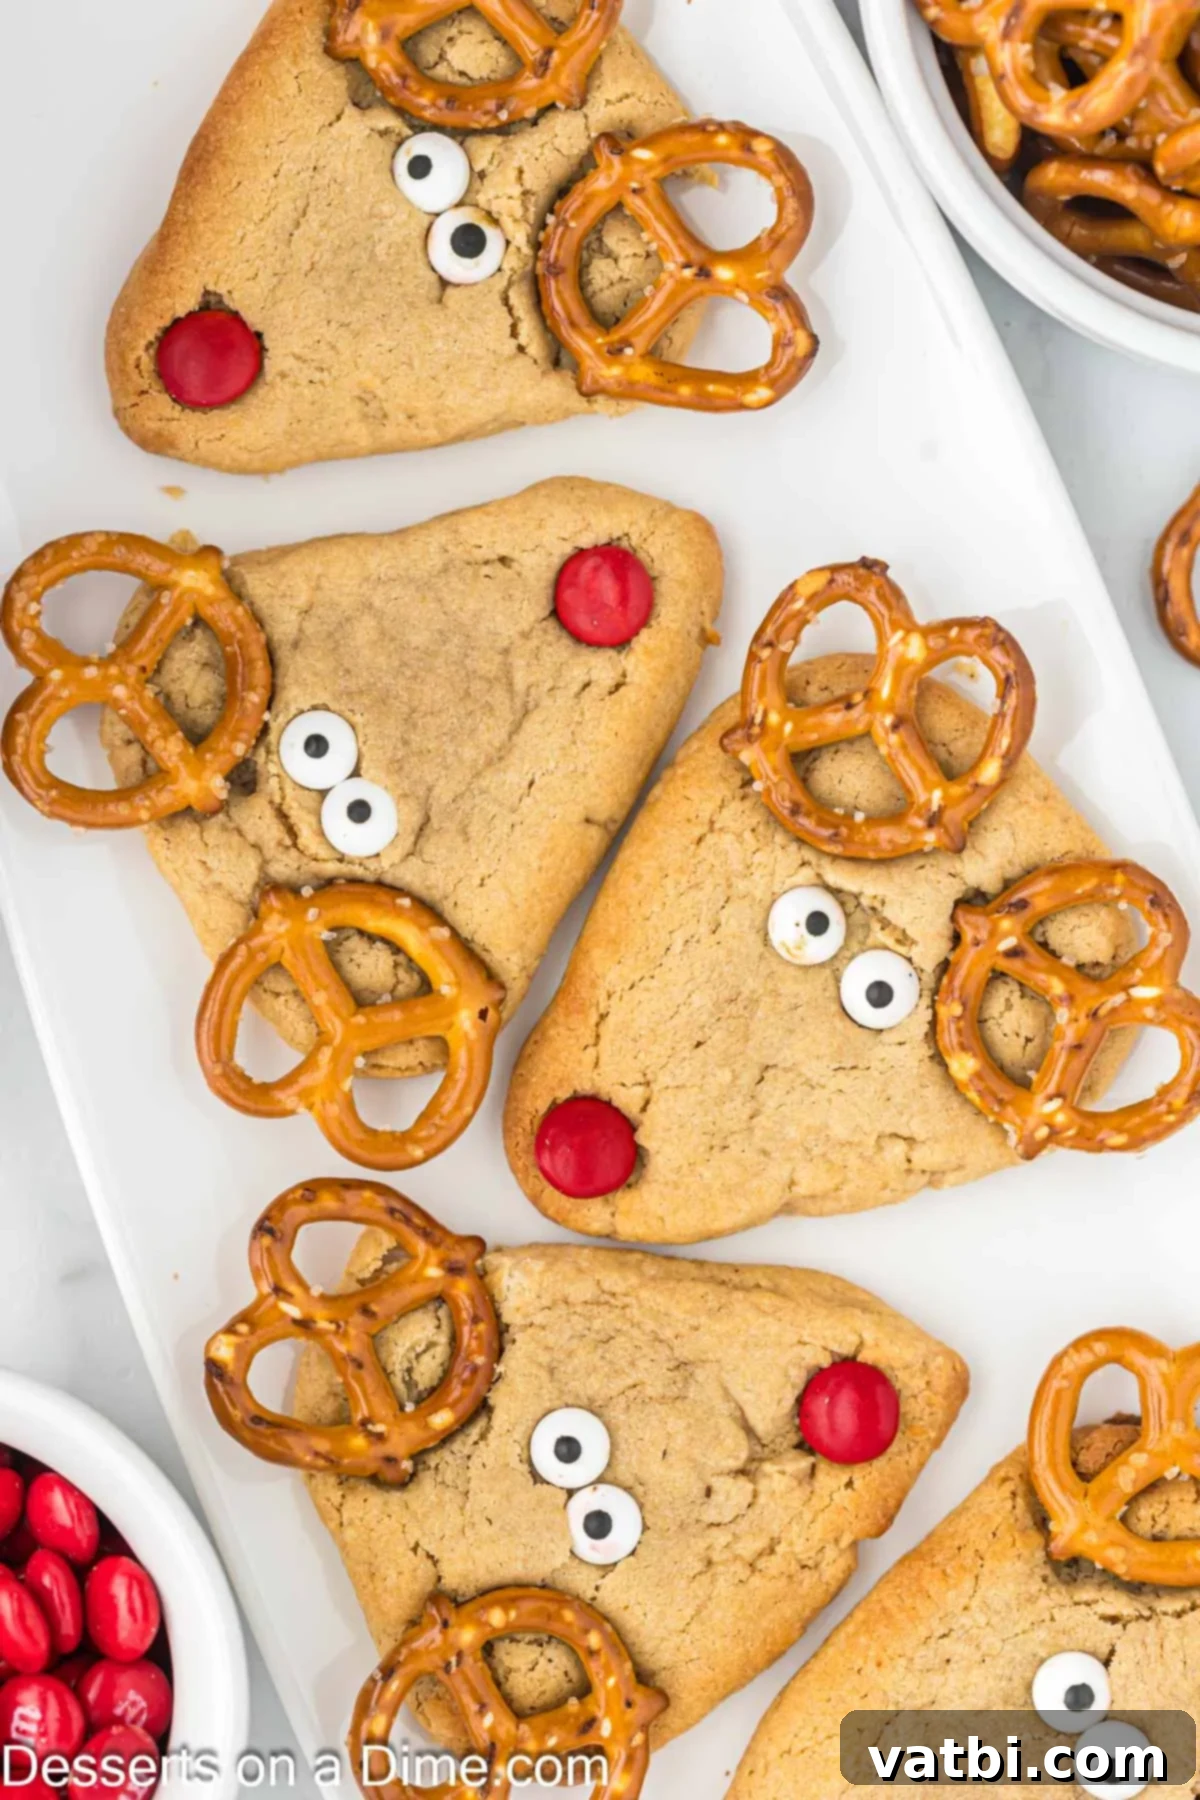
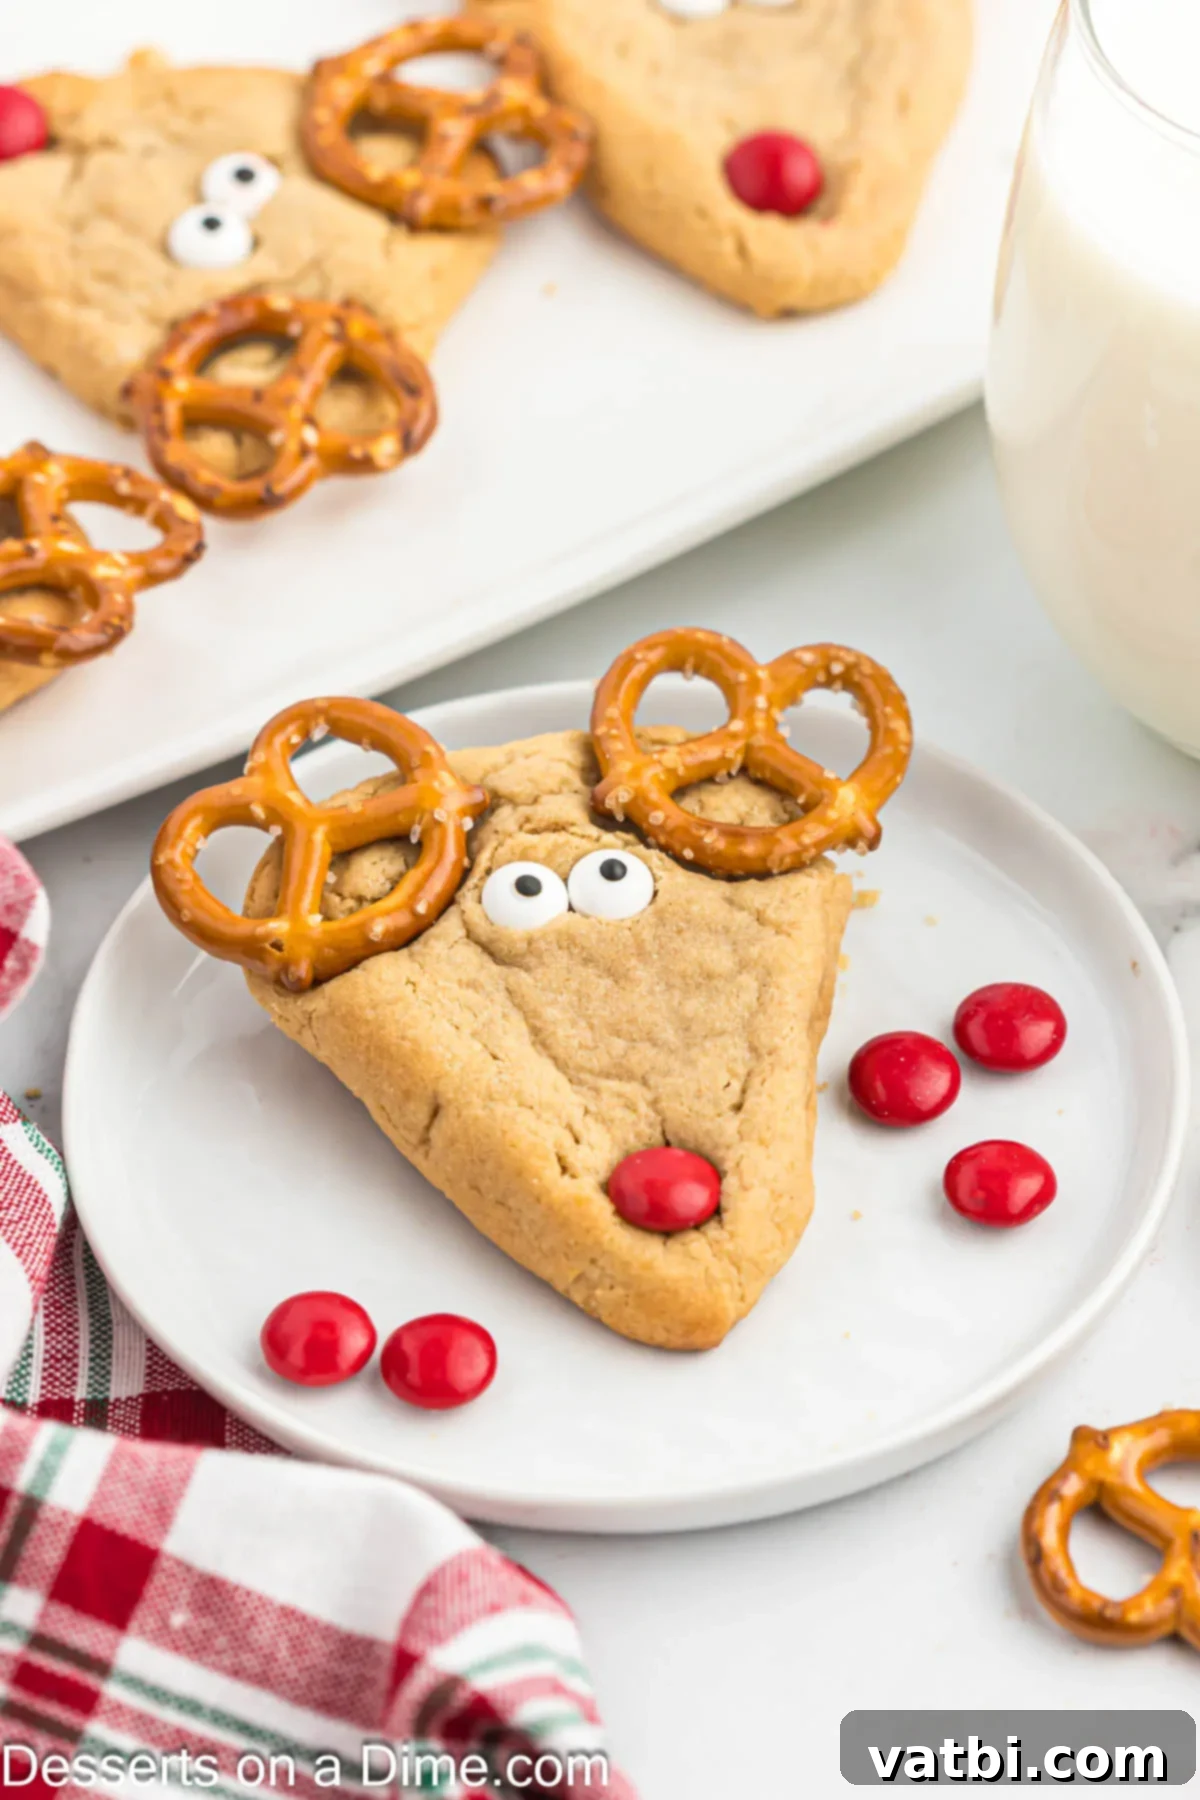
Step 6. Cool and Serve: Allow the decorated peanut butter reindeer cookies to sit on the baking sheets for about 5 minutes. This brief cooling period helps them firm up and ensures the decorations are properly set before moving. After 5 minutes, carefully transfer the cookies to a wire rack to cool completely. Once fully cooled, the toppings will be firmly in place, and the cookies will be ready to serve on a festive platter and enjoy! These are truly a delight for holiday gatherings.
Pro Tips
Achieving the best results with your Reindeer Cookies is easy with a few expert tips. These suggestions will help ensure your cookies are perfectly baked, beautifully decorated, and utterly delicious every time:
- Prepare the baking sheets. Always line your cookie sheets with parchment paper or a silicone baking mat. This is a game-changer! It not only prevents the cookies from sticking but also promotes more even baking and makes cleanup a breeze. Without it, cookies might spread too much or brown unevenly.
- Cool on a wire rack. Once your cookies have had a few minutes to set on the hot baking sheet, it’s crucial to transfer them to a wire rack to cool completely. Cooling on a wire rack allows air to circulate around all sides of the cookies, preventing them from becoming soggy on the bottom and ensuring they maintain a crisp-chewy texture.
- Room temperature ingredients. For the best results, always use room temperature ingredients, especially butter and eggs. Room temperature butter creams together more smoothly with sugar, incorporating more air and leading to a lighter, softer cookie. Cold ingredients can cause the batter to curdle and affect the final texture.
- Creamy Peanut Butter is best. Stick to creamy peanut butter for this recipe. Its smooth consistency ensures a uniform dough that’s easy to shape and results in a consistently tender cookie. Chunky peanut butter would alter the texture and make shaping the reindeer faces more challenging.
- Don’t Overcrowd the Baking Sheet. Give your cookies space to breathe! Place them about 2 inches apart on the baking sheet. Overcrowding can lead to uneven baking and prevent the cookies from spreading properly, potentially resulting in cookies that meld together.
- Test Your Oven Temperature. Ovens can vary significantly. Consider using an oven thermometer to ensure your oven is truly at 375°F (190°C). An accurate temperature is vital for achieving the correct bake time and texture for your cookies.
- Chill the Dough (Optional but Recommended). If your kitchen is warm or if you find the dough too soft to handle, chilling it for 15-30 minutes before shaping can make a big difference. This helps to firm up the butter, resulting in cookies that spread less and hold their shape better during baking.
FAQ’s
Here are some frequently asked questions to help you master your Reindeer Cookies:
To maintain their freshness and delightful texture, store any leftover Reindeer Cookies in an airtight container at room temperature. They will stay fresh and delicious for up to 4-5 days. For an extra tip to keep them exceptionally soft and moist, place a slice of plain white bread in the container with the cookies. The cookies will absorb moisture from the bread, keeping them tender.
Yes, these Reindeer Cookies freeze beautifully! Once the cookies are completely cooled and the decorations are fully set, you can place them in a single layer in a freezer-safe bag or an airtight container, separated by parchment paper to prevent sticking. They can be frozen for up to 3 months. When you’re ready to enjoy them, simply thaw at room temperature. You can also freeze the raw cookie dough balls (without shaping into triangles) for later baking; just add a few extra minutes to the baking time.
While creamy, regular peanut butter (like Jif or Skippy) is recommended for its consistent texture and fat content, you can use natural creamy peanut butter. However, be aware that natural peanut butter can be oilier and may cause the cookies to spread more. If using natural peanut butter, make sure to stir it very well before measuring, and consider chilling the dough for at least 30 minutes before shaping and baking to help prevent excessive spreading.
More Festive Christmas Cookies to try
If you’ve enjoyed making and eating these delightful Reindeer Cookies, you’ll love exploring these other festive holiday cookie recipes. Each one is perfect for adding more variety and joy to your Christmas baking:
- Snowman Cookies
- Christmas Sprinkle Cookies
- Easy Christmas Cut Out Sugar Cookies
- Santa Cookies
- Lofthouse Cookies Recipe
We hope you have a fantastic time making these adorable Reindeer Cookies and creating lasting memories this holiday season. Don’t forget to let us know what you think by leaving a comment below. Your feedback truly makes our day!
Now, let’s get to the full recipe details so you can start baking these festive treats right away!
Pin
Reindeer Cookies
Ingredients
For the Cookies:
- 1/2 cup Butter softened
- 1 cup Brown Sugar
- 3/4 cup Creamy Peanut Butter
- 2 Tablespoons Milk
- 1 teaspoon Vanilla Extract
- 1 Large Egg
- 1 3/4 cup All Purpose Flour
- 1/2 teaspoon Baking Soda
- 1/4 teaspoon Salt
For the Decorations:
- 48 Pretzel Twists
- 48 Candy Eyes
- 24 Red M&Ms
Instructions
-
Preheat the oven to 375 degrees Fahrenheit (190°C). Line baking sheets with parchment paper or silicone mats.
-
In a medium size mixing bowl, whisk together the flour, baking soda, and salt. Set aside.
-
In a separate large bowl, use an electric mixer or stand mixer to combine the softened butter, brown sugar, creamy peanut butter, milk, and vanilla extract. Mix at medium speed until light and fluffy.
-
Add in the large egg and mix until fully incorporated into the batter.
-
Reduce the mixer speed to low and slowly add the dry ingredients to the wet ingredients until just combined. Be careful not to overmix the batter.
-
Use a cookie scoop to roll the batter into approximately 2-tablespoon-sized balls. Then, shape each ball into a triangle and place them on the prepared baking sheet.
-
Bake the cookies for 8-10 minutes, until the edges are lightly golden and the cookies are just set.
-
Remove the cookies from the oven and decorate them quickly while they are still warm to ensure toppings stick.
-
Insert two pretzel twists at the top, wider end of each triangle cookie to form antlers. Place two candy eyes below the antlers and a red M&M directly below for the nose.
-
Let the decorated cookies sit on the baking sheets for 5 minutes to firm up.
-
Carefully transfer them to wire racks to cool completely.
-
Serve these adorable Reindeer Cookies and enjoy the festive delight!
Recipe Notes
Store any leftover cookies in an airtight container at room temperature for up to 4-5 days. To keep them extra soft and moist, place a slice of bread in the container; the cookies will absorb moisture from it.
These cookies can also be frozen for up to 3 months. Once completely cooled and decorated, arrange them in a single layer in a freezer-safe container, separated by parchment paper, then thaw at room temperature before serving.
Nutrition Facts
Pin This Now to Remember It Later
Pin Recipe
