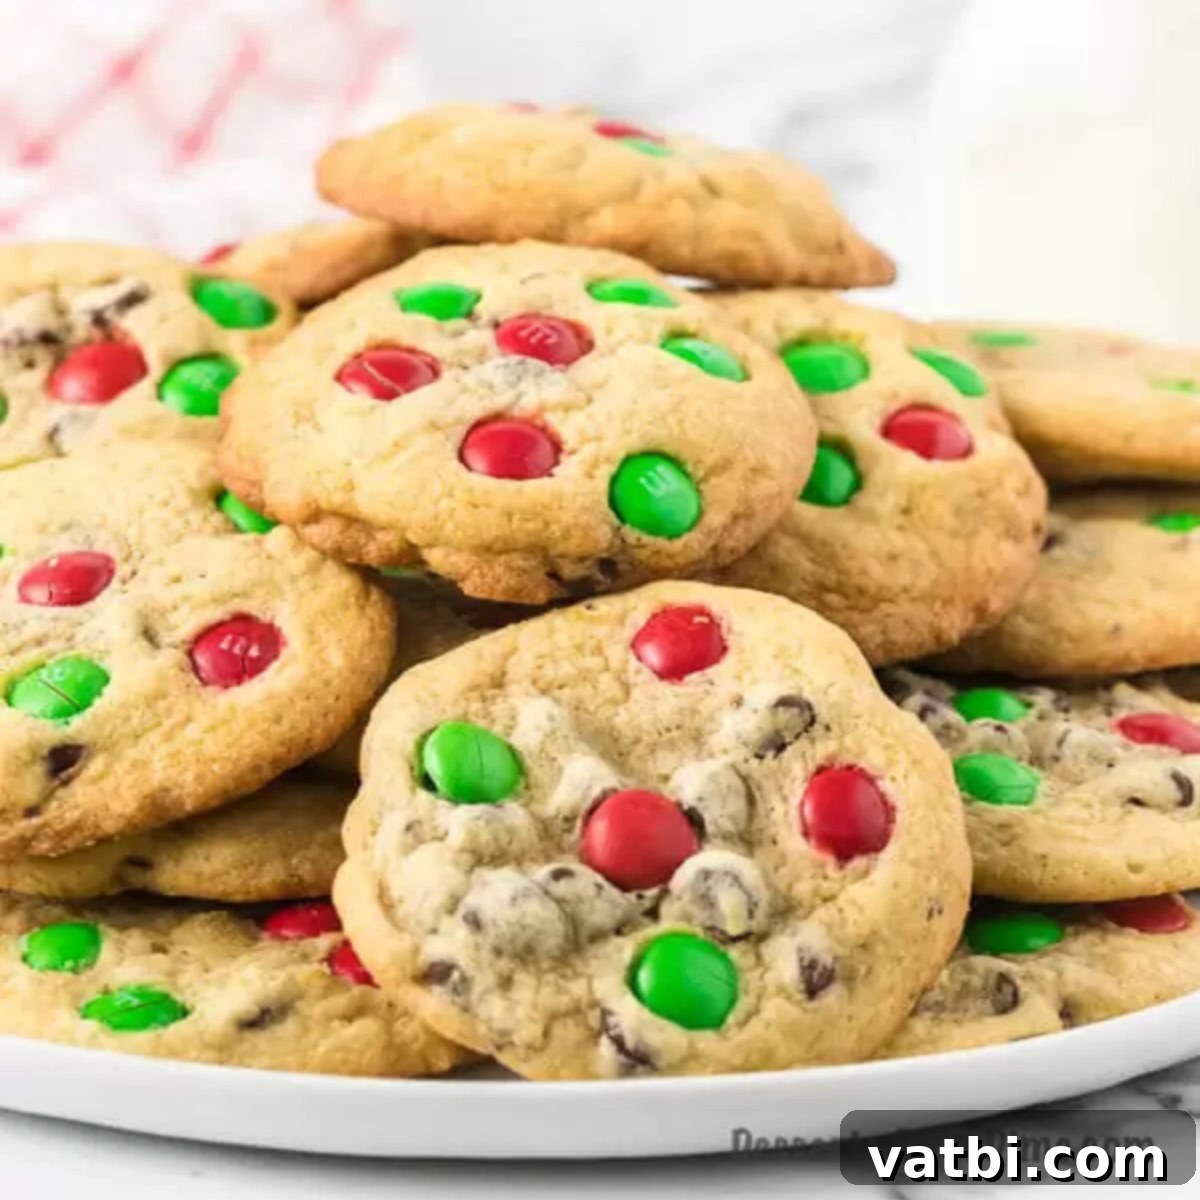
The Ultimate Santa Cookies Recipe: Easy, Chewy & Loaded with Christmas Cheer!
Get ready to bake the most enchanting and utterly delicious Santa cookies recipe that will make your Christmas Eve truly magical! If you’re searching for the best cookies to leave for Santa’s plate, look no further. This recipe is designed to be a festive favorite, packed with an abundance of chocolate and vibrant holiday M&M’s, ensuring every bite is a delightful surprise. These delightful treats are not just for Santa; they’re perfect for sharing with family, friends, and spreading holiday cheer throughout the season.
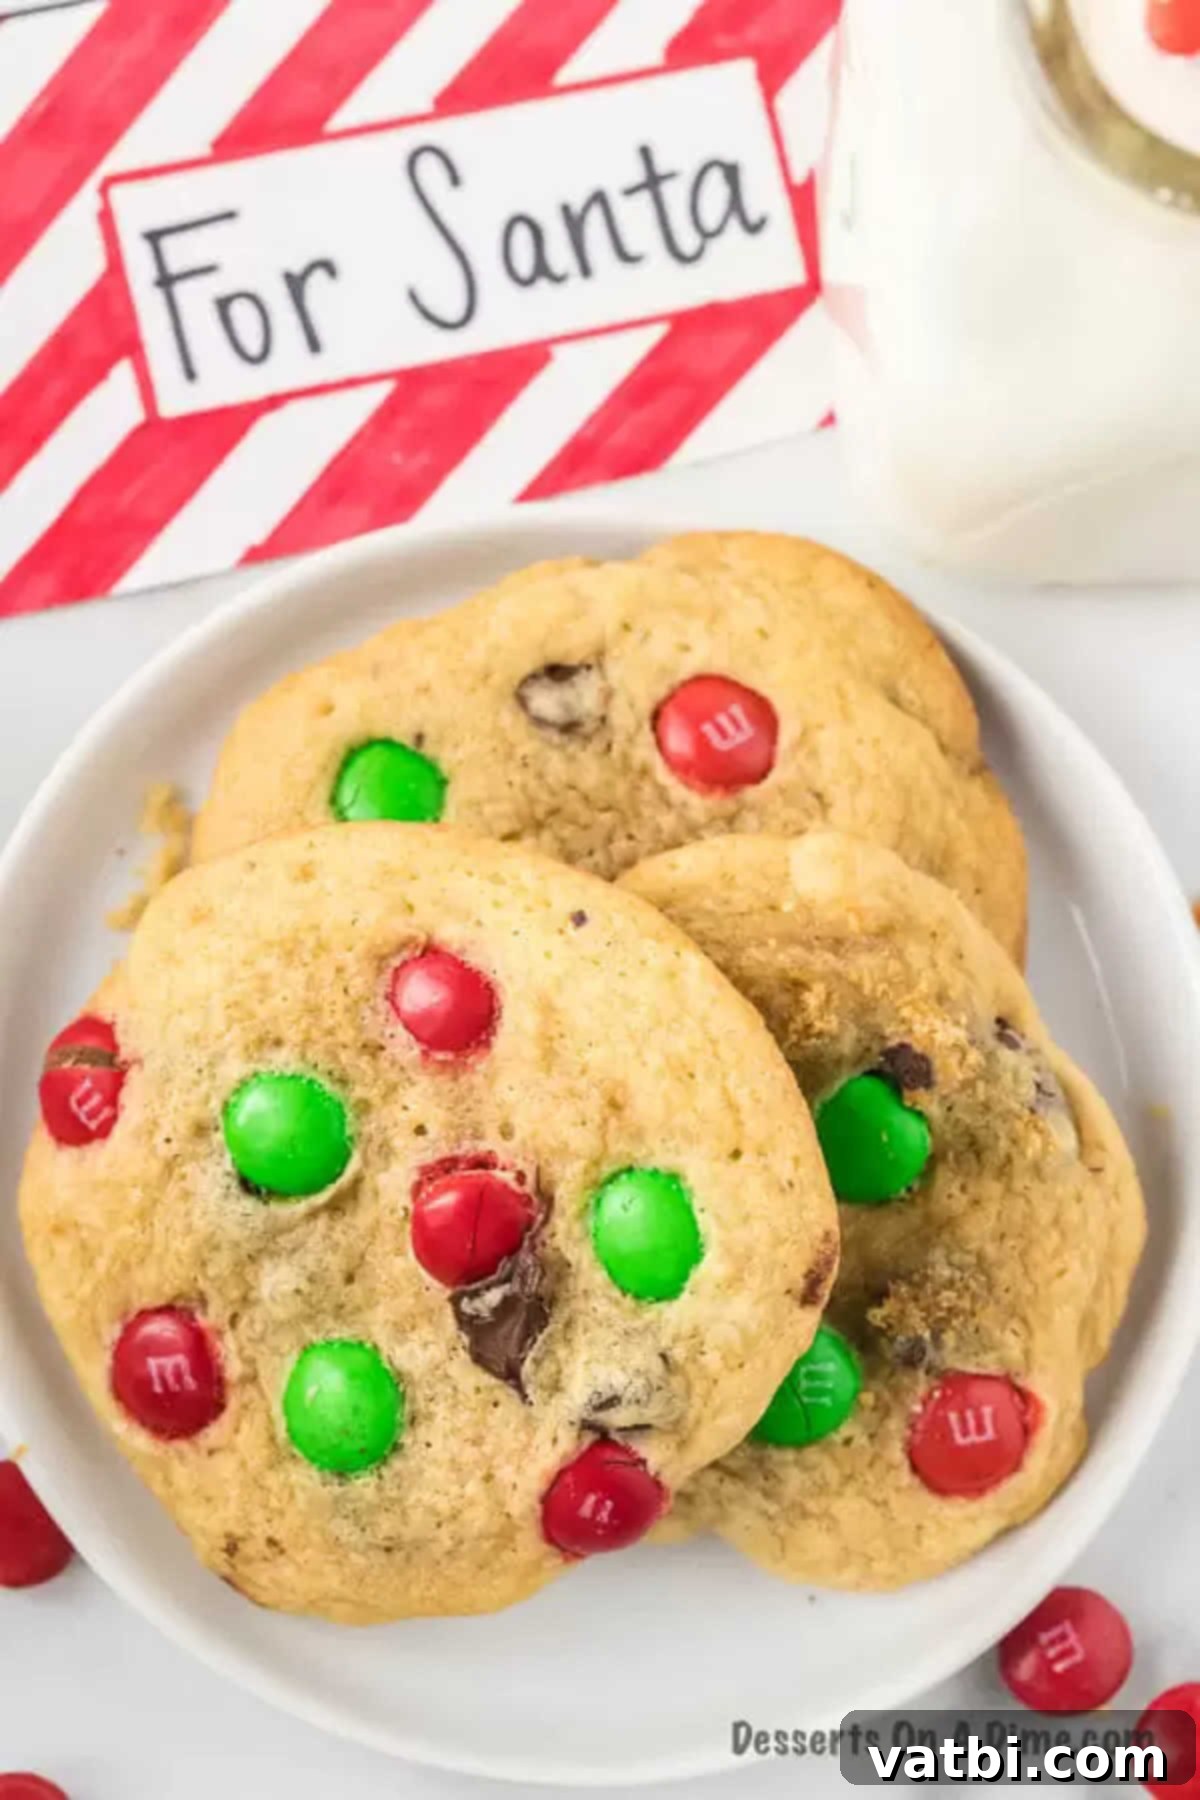
There’s a special tradition in many homes: preparing a plate of exquisite Christmas cookies for Santa Claus. These aren’t just any cookies; they need to be extra special, incredibly festive, and undeniably delicious to fuel Santa on his long journey around the world. So, what type of cookie truly fits the bill? Our answer is a jazzed-up chocolate chip cookie – but only the very best kind, brimming with seasonal spirit!
Imagine these vibrant, M&M-studded Santa cookies proudly displayed on a festive platter, perhaps nestled alongside adorable Reindeer Cookies or decadent Christmas Chocolate Covered Strawberries. The joy and excitement on the children’s faces as they meticulously arrange these treats on Christmas Eve is truly priceless. It’s a tradition that creates lasting memories, building anticipation for the big morning.
And here’s a pro tip: if you find yourself with a surplus of festive M&M’s after baking, don’t let them go to waste! You can easily transform them into a delightful M&M Cookie Cake, extending the holiday treat fun beyond just cookies. This recipe is designed not only for its incredible taste but also for its flexibility, allowing you to get creative with your holiday baking.
What’s in this post: Easy Santa Cookies Recipe
- Why These Santa Cookies Are Irresistible:
- Essential Santa Cookies Ingredients:
- Substitutions and Additions for Custom Santa Cookies
- How to Make the Best Cookies for Santa:
- Expert Tips for Perfect Santa’s Cookies:
- Frequently Asked Questions About Santa Cookies
- More Easy Christmas Cookie Ideas:
- Santa Cookies Recipe
Why These Santa Cookies Are Irresistible:
This particular Santa cookies recipe is a true standout, earning its spot as a holiday favorite year after year. What makes them so special? It’s all about the perfect balance of flavors and textures, making them incredibly delicious and visually appealing for the festive season.
First, these cookies are generously loaded with an abundance of chocolate. We combine classic chocolate chips with festive red and green M&M’s, creating a double dose of chocolaty goodness. This combination not only adds an incredible depth of flavor but also gives the cookies a wonderfully cheerful and Christmas-ready appearance that kids and adults alike will adore.
Each bite promises an indulgent experience, with ooey-gooey pockets of melted chocolate that perfectly complement the cookie’s texture. We strive for that ideal cookie structure: a delightful crispy edge that gives way to a wonderfully soft and chewy center. This contrast ensures a satisfying mouthfeel with every single bite.
Beyond their amazing taste, these cookies are remarkably easy to make. You’ll find that the ingredients are simple, everyday pantry staples, meaning you can whip up a batch (or two!) without any last-minute grocery runs. This simplicity makes them a fantastic baking project for families, allowing even the youngest chefs to get involved in the holiday preparation. They are truly the perfect treat to bring joy and festive flavor to your holiday table!
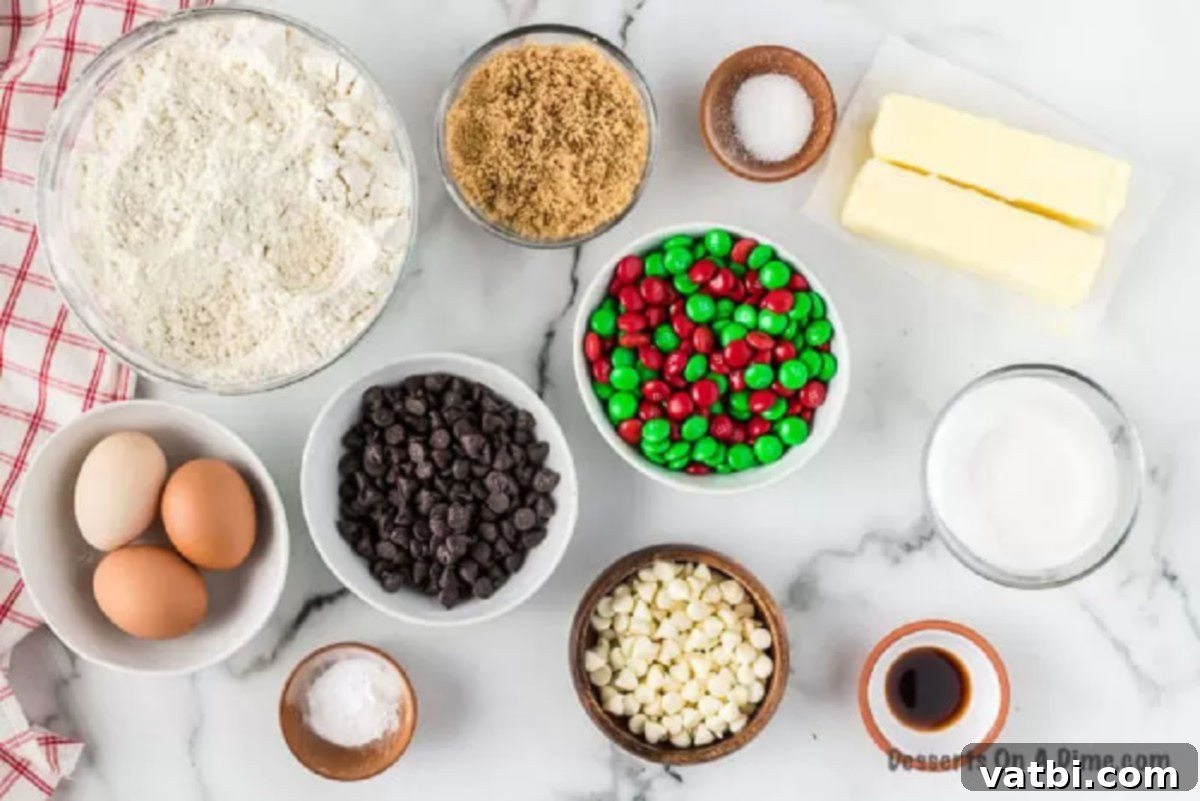
Essential Santa Cookies Ingredients:
Crafting these perfect Santa cookies requires a handful of common baking ingredients, most of which you likely already have on hand. Each plays a crucial role in achieving the irresistible flavor and texture that makes these cookies a holiday favorite:
- All-Purpose Flour: The foundational dry ingredient, providing structure to the cookies. Make sure to measure it correctly, either by weight or by the spoon-and-level method, to prevent dense cookies.
- Unsalted Butter, Room Temperature: Softened butter is key for creaming with the sugars, creating a light and airy base for your dough. Unsalted butter gives you control over the overall saltiness of the cookie.
- Brown Sugar: This provides moisture and contributes to the chewy texture and rich, caramel-like flavor that makes chocolate chip cookies so comforting. Using packed brown sugar is important for accurate measurement.
- Granulated Sugar: Works alongside brown sugar to achieve the perfect balance of sweetness and helps create those slightly crispy edges.
- Vanilla Extract: A staple in almost any cookie recipe, vanilla extract enhances all the other flavors, adding a warm and inviting aroma. Good quality vanilla makes a noticeable difference.
- Eggs (and an extra yolk): Eggs bind the ingredients together, add moisture, and contribute to the rich flavor. The addition of an extra egg yolk helps create an even chewier cookie texture, a characteristic many adore in their Santa cookies.
- Chocolate Chips: We recommend semi-sweet chocolate chips for a classic flavor, but feel free to choose your favorite. They melt beautifully, creating delightful pools of chocolate throughout the cookie.
- Christmas M&Ms: These are essential for adding that festive touch with their vibrant red and green colors, and of course, extra bursts of chocolate candy goodness. They make the cookies visually appealing and add a fun crunch.
- Baking Soda & Salt: These leavening agents ensure the cookies rise correctly and spread just enough. Salt balances the sweetness and enhances the overall flavor profile of the chocolate and sugars.
Substitutions and Additions for Custom Santa Cookies
One of the best things about baking during the holidays is the freedom to customize your treats! While our core Santa cookies recipe is fantastic as is, here are some ideas for substitutions and additions to make them uniquely yours, or to cater to different preferences:
- Chocolate Chips: Don’t limit yourself to just semi-sweet! Experiment with various chocolate chip types. Swap the traditional ones for rich white chocolate chips, intense dark chocolate chips, or even a delightful combination of milk and semi-sweet for a multi-layered chocolate experience. You could also use chopped chocolate bars for larger, more irregular pockets of melted chocolate.
- Nuts: For those who appreciate a nutty crunch, chopped nuts are a wonderful addition. Walnuts and pecans taste particularly great in this recipe, offering a complementary earthy flavor and texture. Toasting the nuts lightly before adding them can enhance their flavor even further.
- Sprinkles: To elevate the festive look, a generous sprinkle of Christmas-themed sprinkles (like red, green, and white jimmies or nonpareils) can be added to the dough or pressed gently on top of the cookie balls before baking. This makes them even more appealing, especially for little ones.
- Holiday Extracts: Beyond vanilla, consider adding a touch of peppermint extract (start with ¼ teaspoon and adjust to taste) for a festive mint-chocolate twist, or almond extract for a subtle, sophisticated flavor.
- Dried Fruits: For a touch of fruity sweetness and chewiness, add dried cranberries or chopped dried cherries. These pair wonderfully with chocolate and fit the holiday theme perfectly.
- Spices: A pinch of cinnamon, nutmeg, or even a tiny amount of ground ginger can add a warm, cozy dimension to your Santa cookies, evoking classic holiday flavors.
- Different Candies: Instead of just M&M’s, try chopped Rolo candies for a caramel surprise, or crushed candy canes for a refreshing peppermint kick.
How to Make the Best Cookies for Santa:
Baking these delightful Santa cookies is a straightforward and enjoyable process. Follow these simple steps for perfectly baked, festive treats:
- Step 1 – Prepare Your Baking Station: First, preheat your oven to 350 degrees Fahrenheit (175°C). This ensures your oven is at the correct temperature before the cookies go in, promoting even baking. Next, prepare your baking sheets by lining them with parchment paper or silicone mats. This prevents sticking and makes for easy cleanup.
- Step 2 – Combine Dry Ingredients: In a medium mixing bowl, whisk together the all-purpose flour, salt, and baking soda until they are well combined. Whisking ensures that the leavening agents are evenly distributed throughout the flour, leading to a consistent rise in your cookies. Set this mixture aside for now.
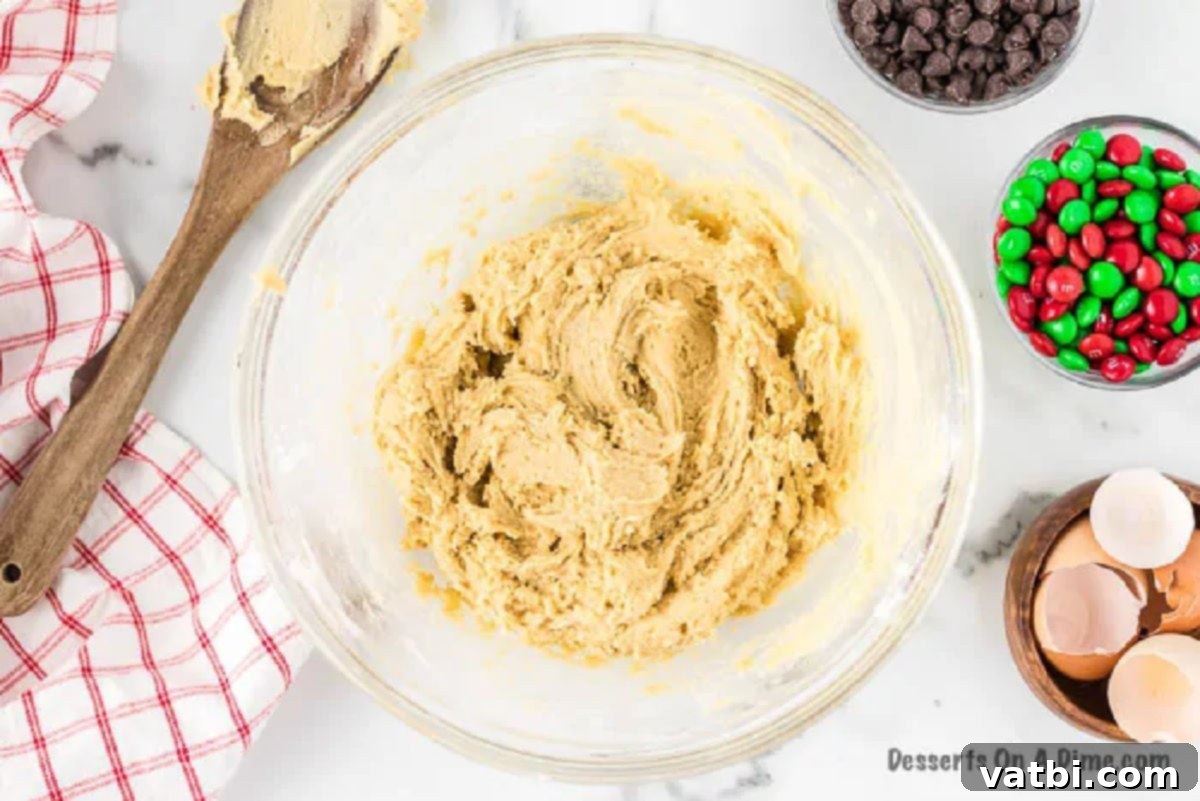
Step 3 – Cream Wet Ingredients: In a large mixing bowl, using an electric mixer (either a stand mixer with the paddle attachment or a hand-held mixer), cream together the softened unsalted butter, brown sugar, and granulated sugar. Beat on medium speed until the mixture is light, fluffy, and pale in color. This process incorporates air into the butter, which is crucial for a tender cookie texture. Once creamed, add the eggs and vanilla extract, beating until just combined. Scrape down the sides of the bowl to ensure everything is incorporated.
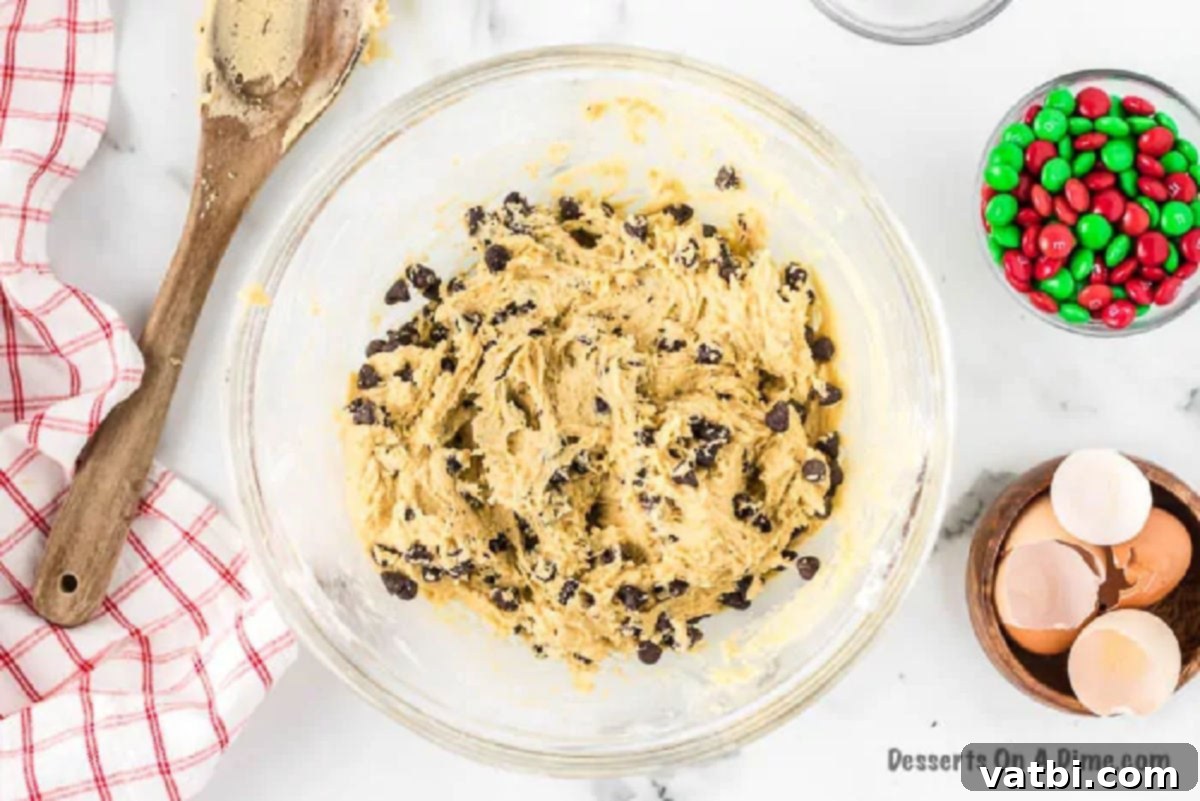
Step 4 – Combine Wet and Dry & Add Chocolate Chips: Gradually add the whisked flour mixture to the wet ingredients, stirring by hand with a spatula or wooden spoon until just combined. Be careful not to overmix, as this can lead to tough cookies. Once the dry ingredients are mostly incorporated, gently fold in the chocolate chips. Save the M&M’s for the next step.
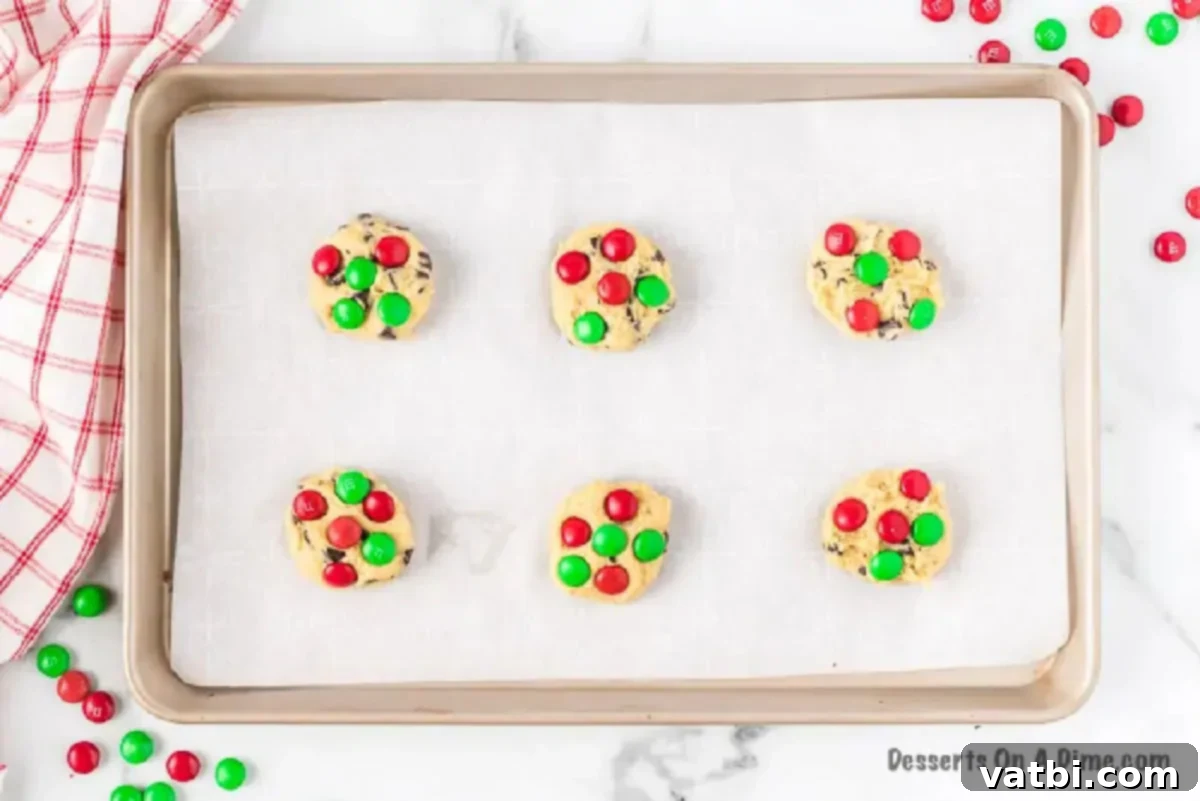
Step 5 – Form and Decorate Cookies: Using a cookie scoop (highly recommended for uniform size!), form balls of cookie dough and place them a few inches apart on your prepared baking sheets. For an extra festive touch and to ensure the M&M’s are visible, press several Christmas M&M’s gently onto the top of each cookie dough ball before baking. This ensures a beautiful presentation.
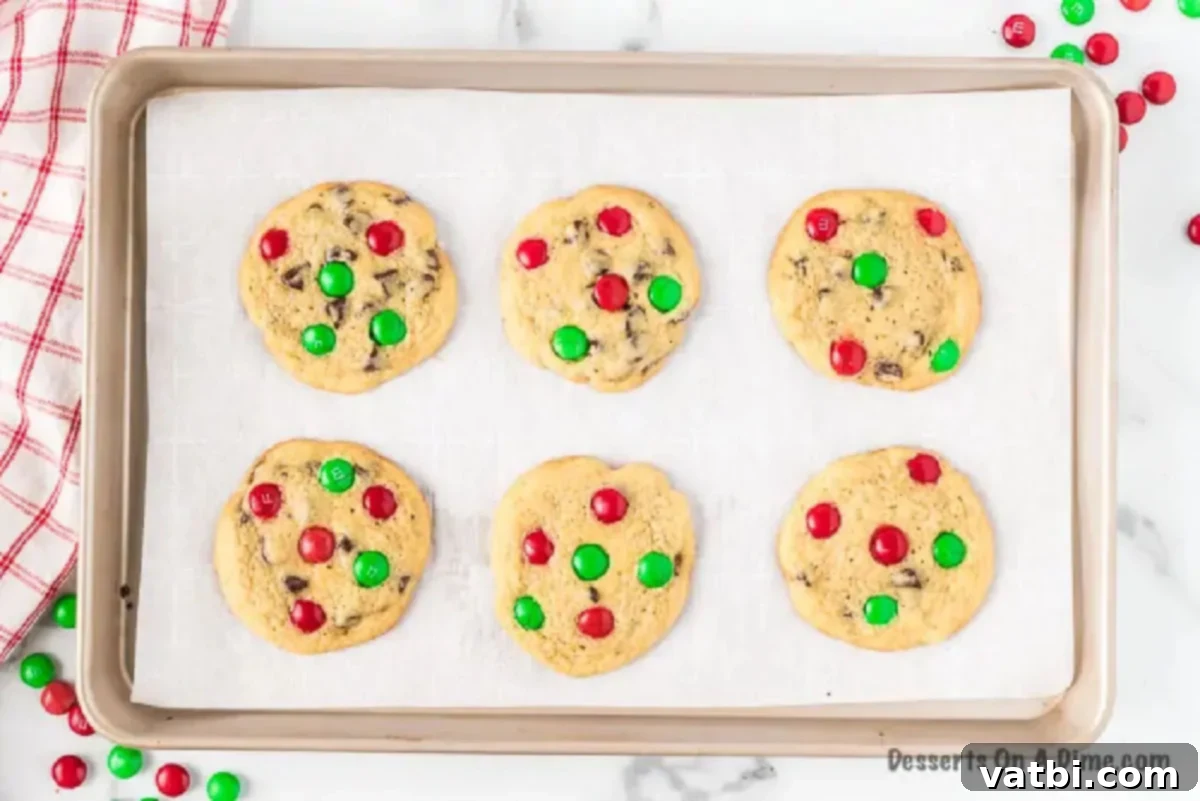
Step 6 – Bake and Cool: Bake for 8-10 minutes, or until the edges are lightly golden brown and the centers are still slightly soft. Do not overbake! Remove from the oven and allow the cookies to set on the baking sheet for about 5 minutes. This crucial step helps them firm up and prevents them from breaking. After 5 minutes, carefully transfer them to a wire rack to cool completely. Enjoy your homemade Santa cookies!
Expert Tips for Perfect Santa’s Cookies:
Achieving bakery-quality Santa cookies is easier than you think with these expert tips:
- Room Temperature Ingredients are a Must: Ensure your butter and eggs are at room temperature. Softened butter creams more easily with sugar, creating a smooth, airy base for your dough, which results in a lighter, chewier cookie. Cold ingredients don’t emulsify properly, leading to a denser texture. Plan ahead and take them out of the fridge at least 30-60 minutes before you start baking.
- Mixing Ingredients for Success: For optimal results, you’ll want to use either a reliable stand mixer with the paddle attachment or a hand-held electric mixer. Both work wonderfully, but a stand mixer offers convenience. Mix your wet ingredients on medium speed until light and fluffy, then switch to low speed when gradually adding dry ingredients. Overmixing the dough once flour is added can develop the gluten too much, leading to tough, cake-like cookies instead of soft and chewy ones.
- The Art of Baking Sheets and Cooling: Resist the urge to immediately transfer your freshly baked cookies from the hot baking sheet to a wire rack. Let them cool on the baking sheet for about 5 minutes first. This allows the cookies to continue cooking slightly, firm up, and set properly, preventing them from falling apart when you move them. After this initial cooling, gently transfer them to a wire rack to cool completely, ensuring they don’t get soggy on the bottom.
- Invest in a Cookie Scoop: A cookie scoop is truly a game-changer for consistent cookie size and shape. You will thank yourself later! It saves an immense amount of time compared to spooning out individual cookies and ensures that all your cookies bake evenly at the same rate. This simple tool is worth every penny for any regular baker.
- Gradual Addition of Dry Ingredients: When incorporating the dry ingredients into the wet mixture, do so gradually. I recommend adding about a cup at a time, mixing gently until just combined before adding the next portion. This technique helps to prevent a cloud of flour from forming and ensures everything is thoroughly incorporated without overmixing the dough. Stop mixing as soon as no streaks of flour remain.
- Don’t Overbake: For that perfect soft and chewy center, pull your cookies out of the oven when the edges are set and lightly golden, but the centers still look slightly underbaked. They will continue to set as they cool on the baking sheet.
Frequently Asked Questions
Hands down, chocolate chip cookies are the reigning champion when it comes to Santa’s favorite treat. There’s just something universally appealing about their comforting flavor and texture. However, we’ve taken the classic chocolate chip cookie and given it a festive makeover for Santa! By adding vibrant red and green M&M’s, we’ve created a cookie that’s not only incredibly tasty but also perfectly aligned with the holiday spirit. Santa will undoubtedly adore these soft, chewy, fun, and festive cookies. They’re the perfect energy boost to help him get through his busiest night! Don’t forget to pair them with a tall, cold glass of milk for the complete experience.
The secret to maintaining that desirable soft, chewy texture in your chocolate chip cookies lies primarily in proper storage. The best way to keep them soft for days is to store them in an airtight container immediately after they have cooled completely. This prevents air from drying them out. If you opt to store them in a traditional cookie jar, ensure the lid forms a tight seal. A loose lid will allow air to circulate, causing the cookies to harden much faster. If you’re displaying them on a cookie tray for a party, make sure to cover them well with plastic wrap or foil to preserve their freshness and prevent them from drying out.
To ensure your delicious Santa cookies remain wonderfully soft and chewy, proper storage is paramount. Once they have completely cooled to room temperature, transfer them to an airtight container. This method will keep them fresh and soft for approximately 3-4 days at room temperature. If you use a cookie jar, always double-check that the lid seals tightly to prevent any air from getting in and making them stale. For longer storage, consider freezing them, as detailed in the next question!
Yes, absolutely! Freezing cookie dough is a fantastic way to prepare ahead of time, especially during the busy holiday season. This recipe is perfect for make-ahead baking. Here’s how to do it:
First, prepare the cookie dough as instructed in the recipe. Once the dough is ready, roll it into individual balls using your cookie scoop. Place these dough balls onto a baking sheet lined with parchment paper, ensuring they don’t touch each other. Flash freeze them in the freezer for about 30-60 minutes, or until they are solid. This step prevents them from sticking together.
Once flash-frozen, transfer the solid cookie balls into a freezer-safe bag or an airtight container. They can be stored in the freezer for up to 3 months. When you’re ready to bake a fresh batch, simply remove the desired number of frozen cookie balls, place them on a prepared baking sheet, and bake as usual (you might need to add an extra minute or two to the baking time). This way, you can have warm, freshly baked Santa cookies ready for Santa (or your family!) on the big day, or any time you crave a homemade treat!
Yes, you can adapt this Santa cookies recipe to be gluten-free! Simply substitute the all-purpose flour with a 1:1 gluten-free baking flour blend. Ensure that your chosen blend contains xanthan gum, or add about ½ teaspoon per cup of flour if it doesn’t. Some brands work better than others, so you might need to experiment to find your favorite. The rest of the ingredients should generally be naturally gluten-free, but always double-check labels on chocolate chips and M&M’s to be sure.
If stored correctly in an airtight container at room temperature, these Santa cookies will stay fresh and soft for up to 3-4 days. For longer enjoyment, you can bake them, let them cool completely, and then freeze them in an airtight freezer-safe container for up to 2-3 months. Thaw them at room temperature when you’re ready to serve, or warm them slightly in the oven for that “freshly baked” feel.
More Easy Christmas Cookie Ideas:
If you’re in the mood for even more festive baking, or simply want to offer Santa a wider variety, explore these other fantastic and easy Christmas cookie recipes:
- Candy Cane Kiss Cookies: These delightful cookies feature a tender sugar cookie base topped with a Hershey’s Candy Cane Kiss, offering a burst of peppermint flavor and a lovely melt-in-your-mouth texture. They’re visually striking and perfect for a holiday cookie exchange.
- How to make Snowman Cookies: Transform simple sugar cookies into adorable snowman creations with easy decorating tips. These are a fun activity for kids and result in a charming holiday treat that everyone will love.
- Christmas Cookies in a Jar: A wonderful gift idea! Layer all the dry ingredients for delicious Christmas cookies in a decorative jar. Recipients just need to add the wet ingredients, making it an easy and thoughtful present for friends, family, or teachers.
- Soft and Chewy Gingerbread Cookies: Move beyond crispy gingerbread with this recipe for perfectly soft and chewy gingerbread cookies. Spiced with warm ginger, cinnamon, and cloves, these are a classic holiday comfort food, ideal for decorating or simply enjoying with a cup of tea.
We encourage you to try this incredibly delicious Santa Cookies recipe for Santa Clause and your loved ones this holiday season. Once you make them, please come back and leave a star recipe rating and a comment to share your experience! Happy baking!
Pin
Santa Cookies
Ingredients
- 2 ¼ cups all-purpose flour
- 1 teaspoon salt
- 1 teaspoon baking soda
- 2 sticks unsalted butter softened at room temperature
- ¾ cup brown sugar packed
- ¼ cup granulated sugar
- 1 teaspoon vanilla extract
- 2 large eggs
- 1 large egg yolk
- 1 cup chocolate chips
- 1 cup Christmas M&Ms
Instructions
-
Preheat oven to 350 degrees. Line baking sheets with silicone mats or parchment paper.
-
In a medium bowl, combine flour, salt and baking soda. Set aside.
-
In a large bowl, cream together butter, brown sugar, granulated sugar and vanilla extract until light and fluffy.
-
Beat in eggs.
-
Gradually stir in flour mixture by hand until smooth.
-
Then fold in the chocolate chips.
-
Using a cookie dough scoop, divide dough and roll into balls.
-
Place on baking sheet and slightly press down the top.
-
Place the M&Ms on top of the cookie dough on the cookie sheets and light press them down into the dough.
-
Bake 8-10 minutes or until lightly golden brown.
-
Allow the cookies to set on the baking sheet for 5 minutes and then transfer to a wire rack to cool completely.
-
Store in airtight container and enjoy!
Nutrition Facts
Pin This Now to Remember It Later
Pin Recipe
