Irresistible Twix Thumbprint Cookies: Your Guide to Homemade Caramel-Chocolate Perfection
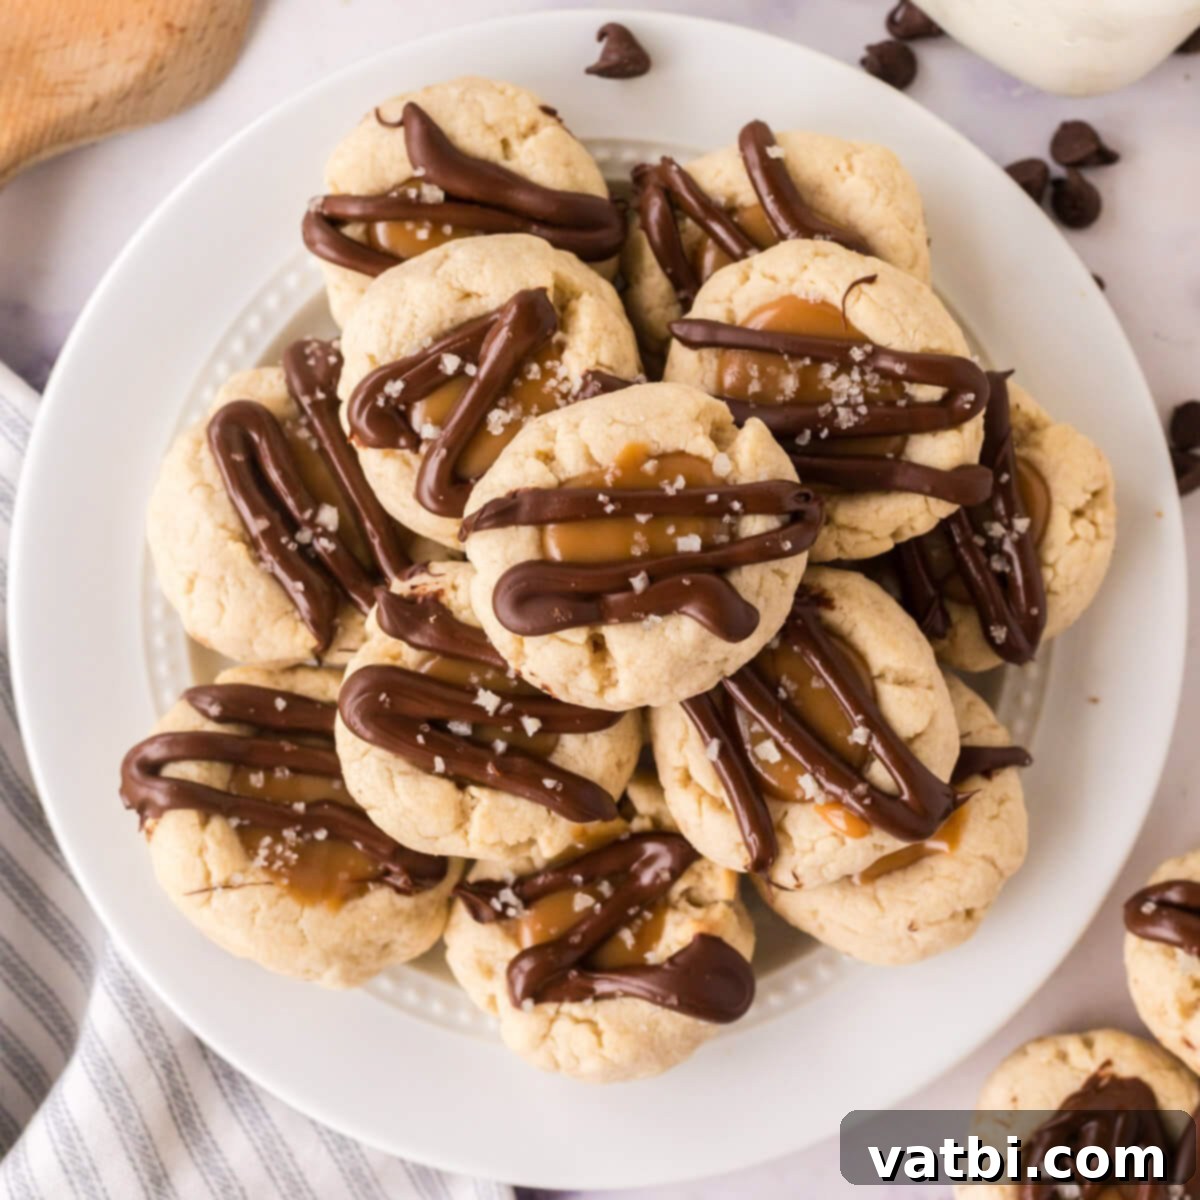
Prepare to embark on a delightful culinary journey with these incredible Twix Thumbprint Cookies. Imagine the rich, buttery goodness of classic shortbread, expertly crafted into a perfect bite-sized form, then generously filled with luscious, gooey caramel sauce. A decadent layer of smooth, melted chocolate cascades over the caramel, and finally, a delicate sprinkle of coarse sea salt adds that signature sweet and salty balance. These aren’t just cookies; they’re an experience, a miniature recreation of your favorite Twix candy bar, designed to melt in your mouth with every single bite. The best part? They are surprisingly easy to make, making them a fantastic project for bakers of all skill levels, perfect for sharing with family and friends or simply indulging yourself.

If you’re a devoted fan of the iconic Twix candy bar, with its distinct layers of crisp biscuit, creamy caramel, and smooth chocolate, then this recipe for Twix Thumbprint Cookies is an absolute must-try. We’ve spent years perfecting Twix-inspired treats, and this cookie rendition stands out as a true family favorite. Our kitchen has seen many successful batches of Homemade Twix Bars and even the refreshing indulgence of Twix Ice Cream, but these thumbprint cookies offer a unique, delightful twist that’s perfect for any occasion. They combine all the beloved elements of a Twix bar into a charming, fun-to-eat cookie format, making them ideal for dessert platters, bake sales, or a special treat.
Each individual cookie captures the unmistakable flavor profile of a Twix, presenting it in a wonderfully satisfying and approachable dessert. The buttery shortbread base provides that essential “biscuit” crunch, which beautifully complements the gooey caramel and rich chocolate. This makes them a more elegant, yet equally delicious, alternative to the traditional candy bar. From holiday gatherings to casual weeknight treats, these cookies are guaranteed to impress with their intricate flavor layers and adorable presentation. Don’t hesitate to add this recipe to your esteemed collection of favorite cookie recipes; it’s destined to become a staple in your baking repertoire. Prepare to be amazed by how easily you can bring this beloved candy bar flavor into your homemade cookie creations, providing a gourmet touch to a classic favorite.
What’s in this post: Twix Thumbprint Cookies
- What are Twix Thumbprint Cookies?
- Ingredients for Perfect Twix Thumbprint Cookies
- Substitutions and Creative Variations
- How to Make Twix Thumbprint Cookies: Step-by-Step Guide
- Expert Pro Tips for Baking Success
- Frequently Asked Questions (FAQ’s)
- More Easy and Delicious Cookie Recipes
- Twix Thumbprint Cookies Recipe Card
What are Twix Thumbprint Cookies?
Twix Thumbprint Cookies are a clever and delectable twist on the classic thumbprint cookie, specifically designed to emulate the beloved flavors and textures of a Twix candy bar. At their core, these are rich, tender shortbread cookies – a perfect crumbly yet firm base that melts in your mouth. Unlike a traditional sugar cookie, shortbread has a higher butter content and no leavening agents, resulting in a denser, more buttery texture that perfectly mimics the biscuit layer of a Twix. The signature “thumbprint” indentation in the center of each cookie is not just for aesthetics; it’s a strategically crafted reservoir for pure indulgence. This crater is then generously filled with a smooth, gooey caramel sauce, providing that iconic chewy and sweet caramel layer. Finally, a luxurious drizzle of melted chocolate crowns the caramel, replicating the outer chocolate coating of a Twix bar. A final, crucial sprinkle of coarse sea salt on top elevates the entire experience, enhancing both the sweet and savory notes, much like the subtle saltiness found in a traditional Twix. It’s the ultimate homage to a candy bar in cookie form, offering all the joy of a Twix with the undeniable charm and satisfaction of homemade baking. These cookies offer a delightful textural contrast with every bite, from the crisp shortbread to the soft caramel and firm chocolate.
Ingredients for Perfect Twix Thumbprint Cookies
Crafting the perfect batch of Twix Thumbprint Cookies starts with selecting high-quality ingredients and ensuring they are prepared correctly. Each component plays a vital role in achieving that signature buttery shortbread, rich caramel, and smooth chocolate combination that makes these cookies so irresistible. Here’s a detailed look at what you’ll need and why:
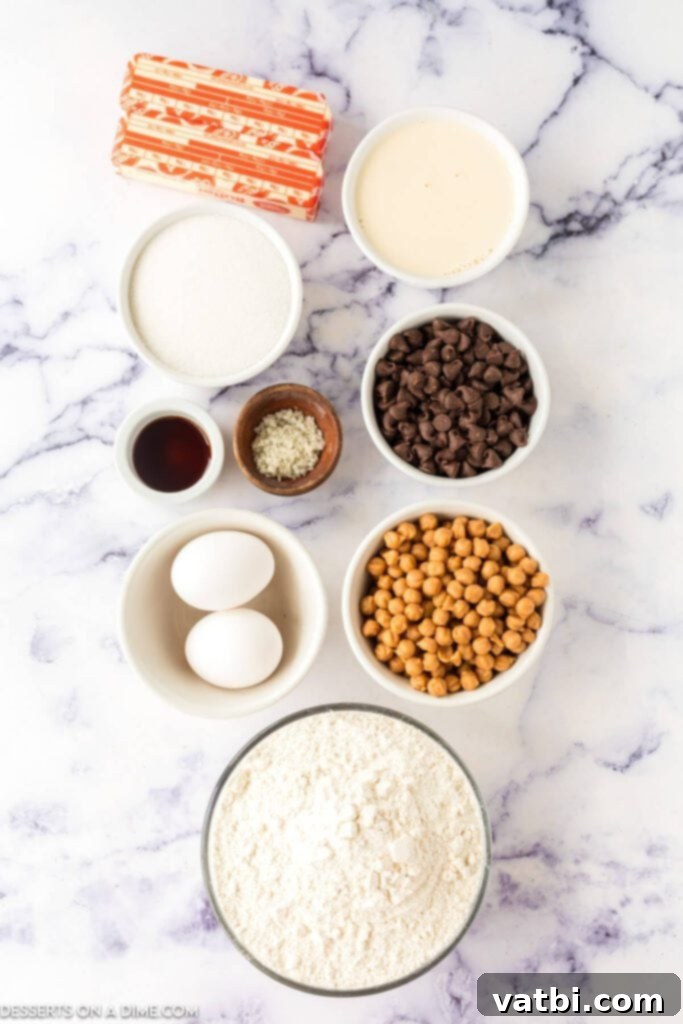
- Salted butter. It is absolutely essential for the butter to be at room temperature. Softened butter creams beautifully with sugar, incorporating air that leads to a tender, melt-in-your-mouth shortbread texture. Cold butter won’t cream properly, and melted butter will lead to greasy, flat cookies. The salt in the butter also subtly enhances the cookie’s flavor and helps to balance the sweetness of the caramel and chocolate, making the overall taste more complex and appealing.
- Granulated sugar. Regular white granulated sugar provides the necessary sweetness and contributes to the crisp-tender texture of the shortbread. It dissolves smoothly into the softened butter during the creaming process, creating a light and fluffy base that is key to shortbread’s crumb.
- Vanilla extract. Always opt for pure vanilla extract. It adds a warm, aromatic depth that is fundamental to the overall flavor profile of the cookies, complementing the rich butter and sweet caramel. A good quality vanilla can truly elevate the taste of your baked goods, making a noticeable difference compared to artificial alternatives.
- Large eggs. Just like butter, eggs should be at room temperature. This allows them to emulsify more effectively with the butter and sugar, resulting in a smoother, more uniform cookie dough. Eggs bind the ingredients together, add a touch of richness, and contribute to the cookie’s structure without making it tough.
- Coarse sea salt. This is a non-negotiable ingredient for achieving the true Twix experience. Sprinkled over the finished cookies, the coarse sea salt provides a delightful textural contrast – a satisfying crunch – and a crucial salty counterpoint to the intensely sweet caramel and chocolate. This creates a sophisticated sweet-and-salty flavor explosion that makes the cookies truly addictive.
- All-purpose flour. Use plain all-purpose flour, not self-rising. The flour provides the primary structure for the cookies. Properly measured flour (spooned into the measuring cup and leveled off with a straight edge) is key to preventing dry, tough, or overly crumbly cookies. Too much flour can make the dough difficult to work with and prone to cracking, while too little can lead to excessive spreading.
- Caramel bits. These are the secret to an incredibly easy and delicious caramel filling. Caramel bits are designed to melt down beautifully and smoothly, creating that perfect gooey, chewy caramel layer without the hassle and precision required for making caramel from scratch. They truly make the cookies taste amazing and authentic, delivering a consistent texture.
- Evaporated milk. When combined with the caramel bits, evaporated milk adds a creamy richness and helps create a perfectly pourable, luscious caramel sauce. It prevents the caramel from becoming too thick or hardening too quickly, ensuring that delightful gooey texture persists even after the cookies have cooled. It’s vital for the right caramel consistency.
- Semi-sweet chocolate chips. Always use a good quality semi-sweet chocolate for the topping. Semi-sweet chocolate offers a balanced cocoa flavor that pairs wonderfully with the sweet caramel, preventing the cookies from being overwhelmingly sweet. High-quality chocolate melts more smoothly and provides a superior, glossy finish, enhancing the visual appeal as well as the taste.
For the precise measurements and full instructions, please refer to the complete recipe card located at the bottom of this post. Gathering all your ingredients and having them at the correct temperature before you begin will ensure a smooth and enjoyable baking process, leading to the most delicious Twix Thumbprint Cookies!
Substitutions and Creative Variations
While the classic Twix Thumbprint Cookie recipe is a masterpiece in itself, don’t be afraid to experiment with these simple substitutions and exciting variations to tailor them to your taste or what you have on hand. Cookies are a fantastic canvas for culinary creativity, and these ideas can help you customize your batch.
- Milk or Dark Chocolate Chips. The recipe calls for semi-sweet chocolate chips, which offer a balanced flavor that appeals to most. However, if you prefer a sweeter, creamier profile that closely matches a traditional Twix, substitute with milk chocolate chips. For those who enjoy a richer, slightly bitter contrast to the sweet caramel, dark chocolate chips (preferably 60-70% cacao) would be an excellent choice, adding a sophisticated depth. You could even use white chocolate for a different aesthetic and a sweeter, vanilla-like flavor profile.
- Store-Bought Caramel Sauce. If time is of the essence or you prefer the convenience, using a good quality store-bought caramel sauce is perfectly acceptable. Look for a thick, rich caramel topping that is specifically designed for desserts, rather than a thin ice cream topping. While it might be slightly thinner than the caramel made from bits and evaporated milk, it will still deliver that essential sweet, gooey caramel flavor. You may need to slightly reduce the amount of evaporated milk (or omit it entirely, depending on the sauce’s thickness) if using a pre-made sauce to maintain the desired consistency, ensuring it doesn’t run off the cookie.
- Nutty Additions: For an extra layer of flavor, texture, and a delightful crunch, consider finely chopping toasted pecans, walnuts, or almonds. These can be either gently mixed into the shortbread dough before chilling or, even better, sprinkled generously over the chocolate topping immediately after drizzling. This adds an earthy, satisfying element that complements the caramel and chocolate beautifully.
- Spice it Up: A pinch of warm spices can transform these cookies. A dash of cinnamon or a tiny hint of nutmeg in the shortbread dough can add a subtle warmth, particularly appealing during the fall and winter months. For a bolder flavor, a pinch of cardamom could also be a unique addition.
- Different Extracts: Beyond vanilla, a few drops of almond extract can provide a delicate nutty undertone to the cookie dough. Alternatively, a hint of espresso extract (coffee extract) can deepen the chocolate flavor, making it even more intense and luxurious. Remember that extracts are potent, so start with a small amount and adjust to taste.
- Caramel Swirl Effect: Instead of fully covering the caramel with chocolate, try creating an artistic swirl. After filling the thumbprint with caramel, add a small dollop of melted chocolate and then use a toothpick or small skewer to gently swirl the two fillings together for a marbled effect that is both beautiful and delicious.
- Add Toffee Bits: For an additional layer of buttery, crunchy goodness, mix some crushed toffee bits into the melted chocolate before drizzling, or sprinkle them on top of the caramel and chocolate. The texture and flavor of toffee bits marry wonderfully with caramel and chocolate.
Feel free to get creative and make these Twix Thumbprint Cookies uniquely your own. No matter which variations you choose, the core combination of shortbread, caramel, and chocolate will ensure a delightful treat!
How to Make Twix Thumbprint Cookies: Step-by-Step Guide
Follow these detailed steps to create your own batch of delightful Twix Thumbprint Cookies. Precision in baking ensures the best results, and taking your time with each stage will guarantee a perfect outcome.
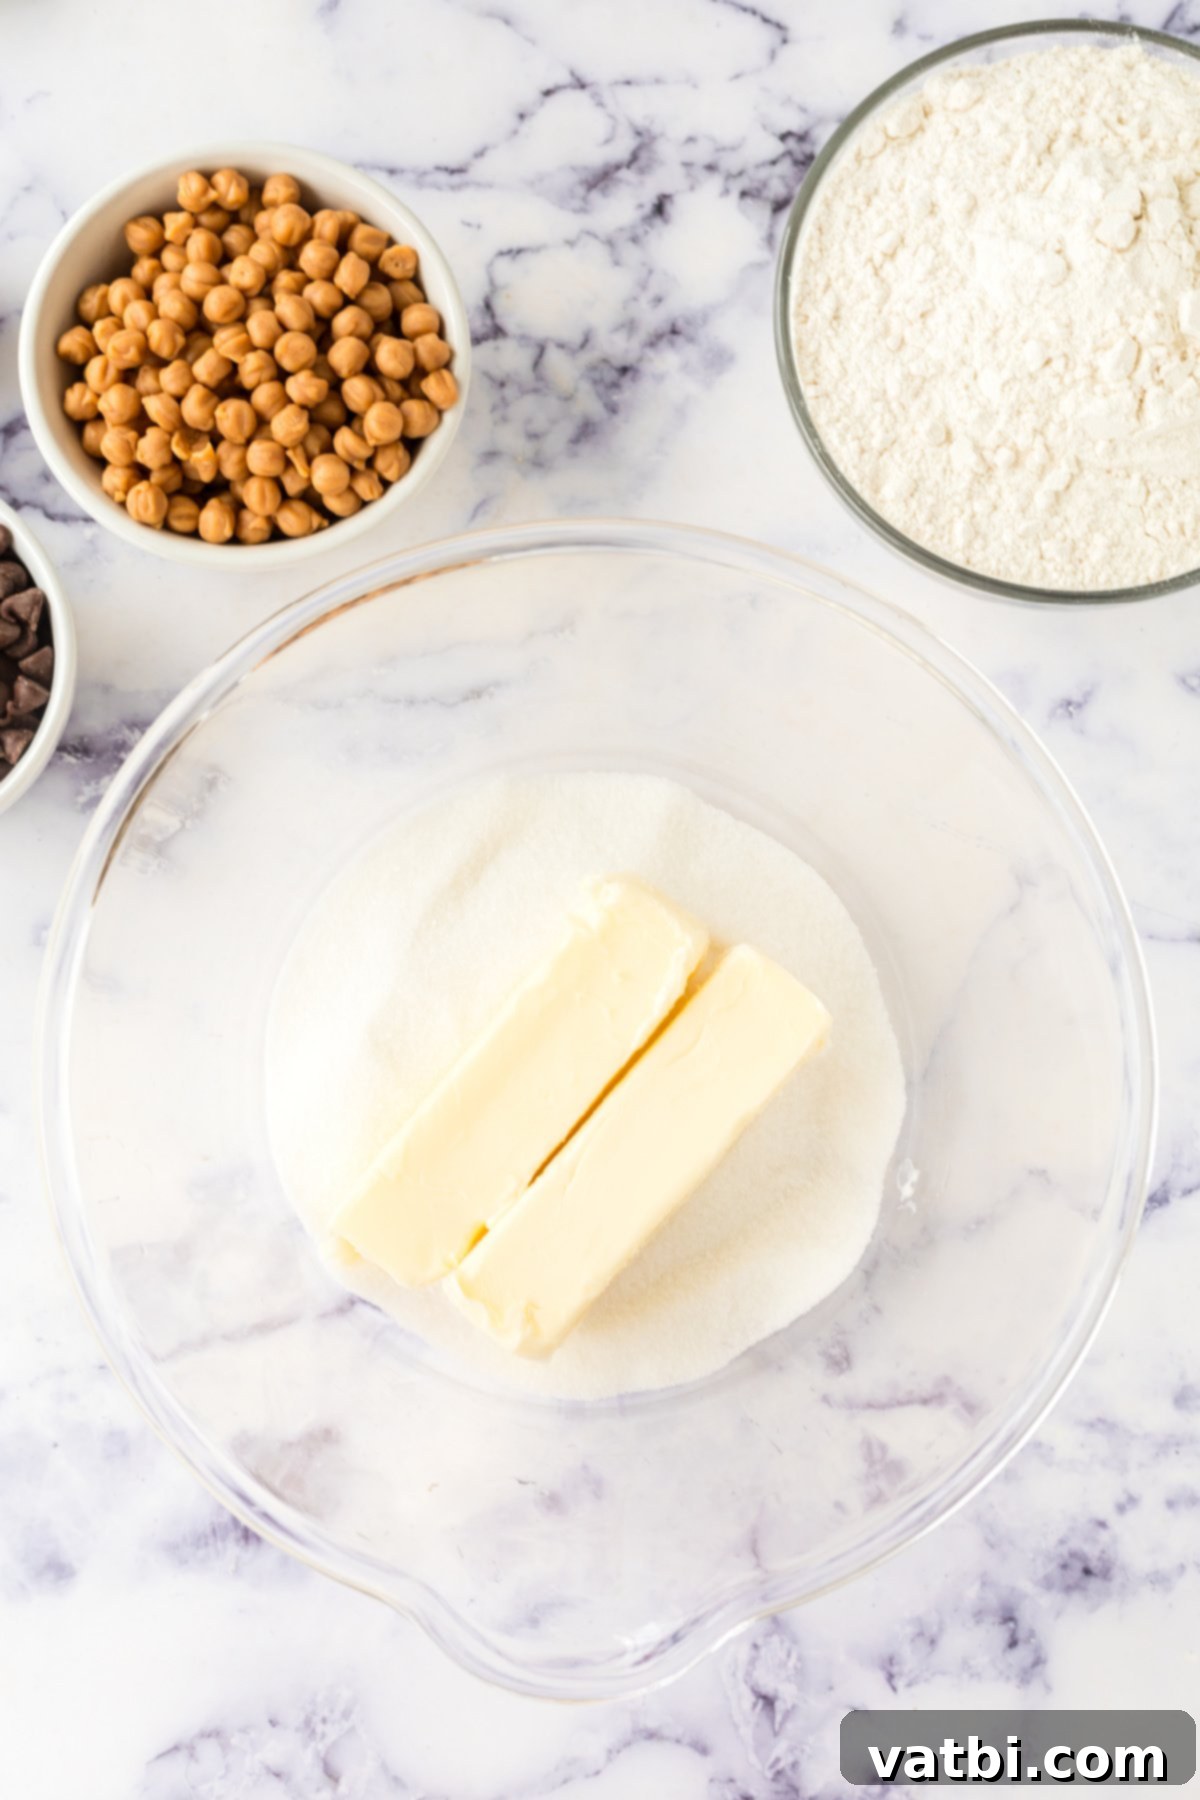
Step 1: Prepare the Oven and Cream the Butter and Sugar. Begin by preheating your oven to 350°F (175°C). This ensures the oven is at the correct temperature when your cookies are ready to bake, promoting even cooking and preventing cookies from spreading due to a cool oven. In a large mixing bowl, preferably of a stand mixer fitted with a paddle attachment, or using a good electric hand mixer, cream together the softened salted butter and granulated sugar. Beat on medium speed for 2-3 minutes until the mixture is light, fluffy, and noticeably pale in color. This creaming process incorporates essential air, which is crucial for achieving a tender, melt-in-your-mouth shortbread texture.
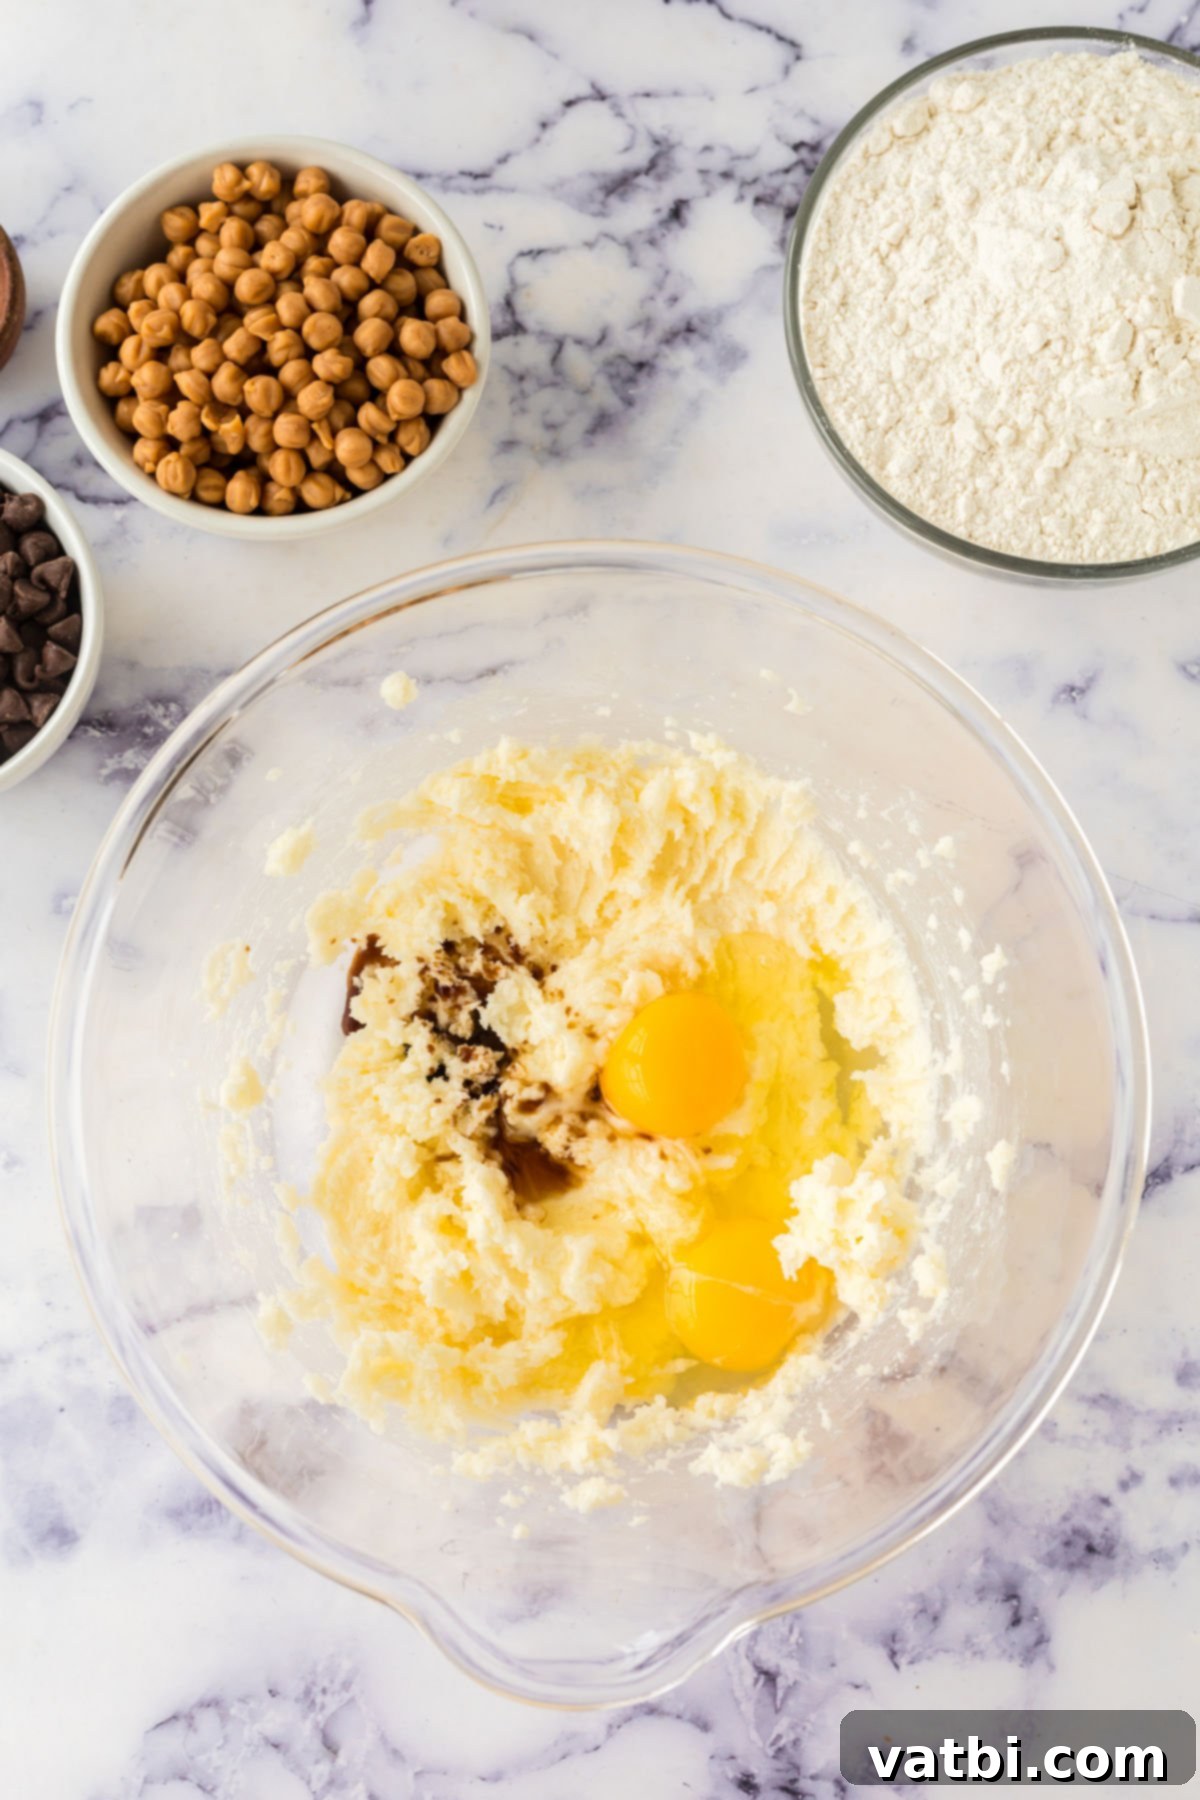
Step 2: Incorporate Eggs and Vanilla. Once the butter and sugar are perfectly creamed, add the room temperature large eggs and vanilla extract to the bowl. Mix on low speed, just until all ingredients are smoothly combined. It’s important to scrape down the sides of the bowl once or twice during this step to ensure everything is evenly incorporated. Be careful not to overmix at this stage; you want everything smoothly integrated without developing too much gluten, which can lead to tough cookies rather than the desired delicate shortbread.
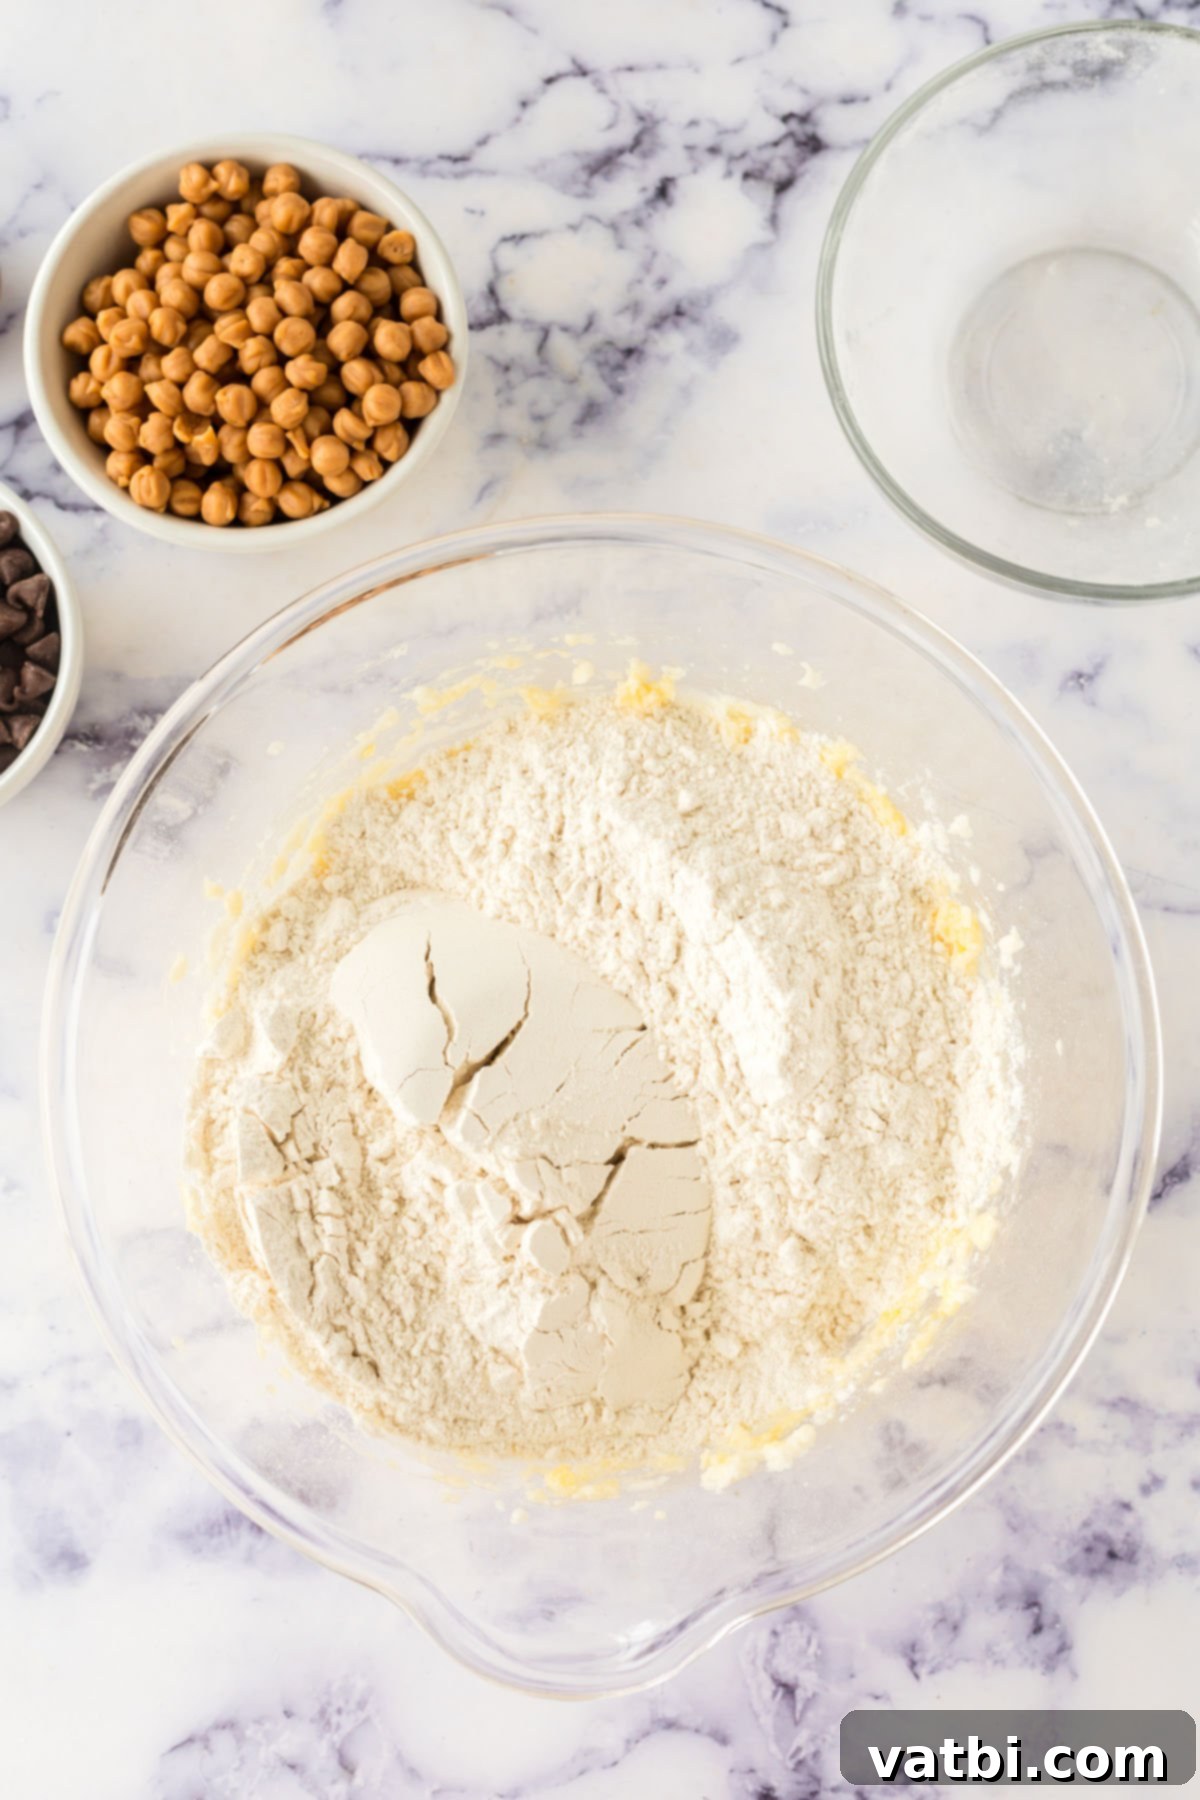
Step 3: Add the Dry Ingredients. Gradually add the all-purpose flour and one teaspoon of coarse sea salt to the wet ingredients in the mixing bowl. Mix on low speed until the flour is just fully incorporated and a soft, cohesive dough forms. It’s crucial to mix until just combined; overmixing will develop gluten, leading to tougher cookies, which is not what we want for a tender shortbread. As before, scrape down the sides and bottom of the bowl thoroughly to ensure no dry streaks of flour remain, creating a uniform dough for best results.
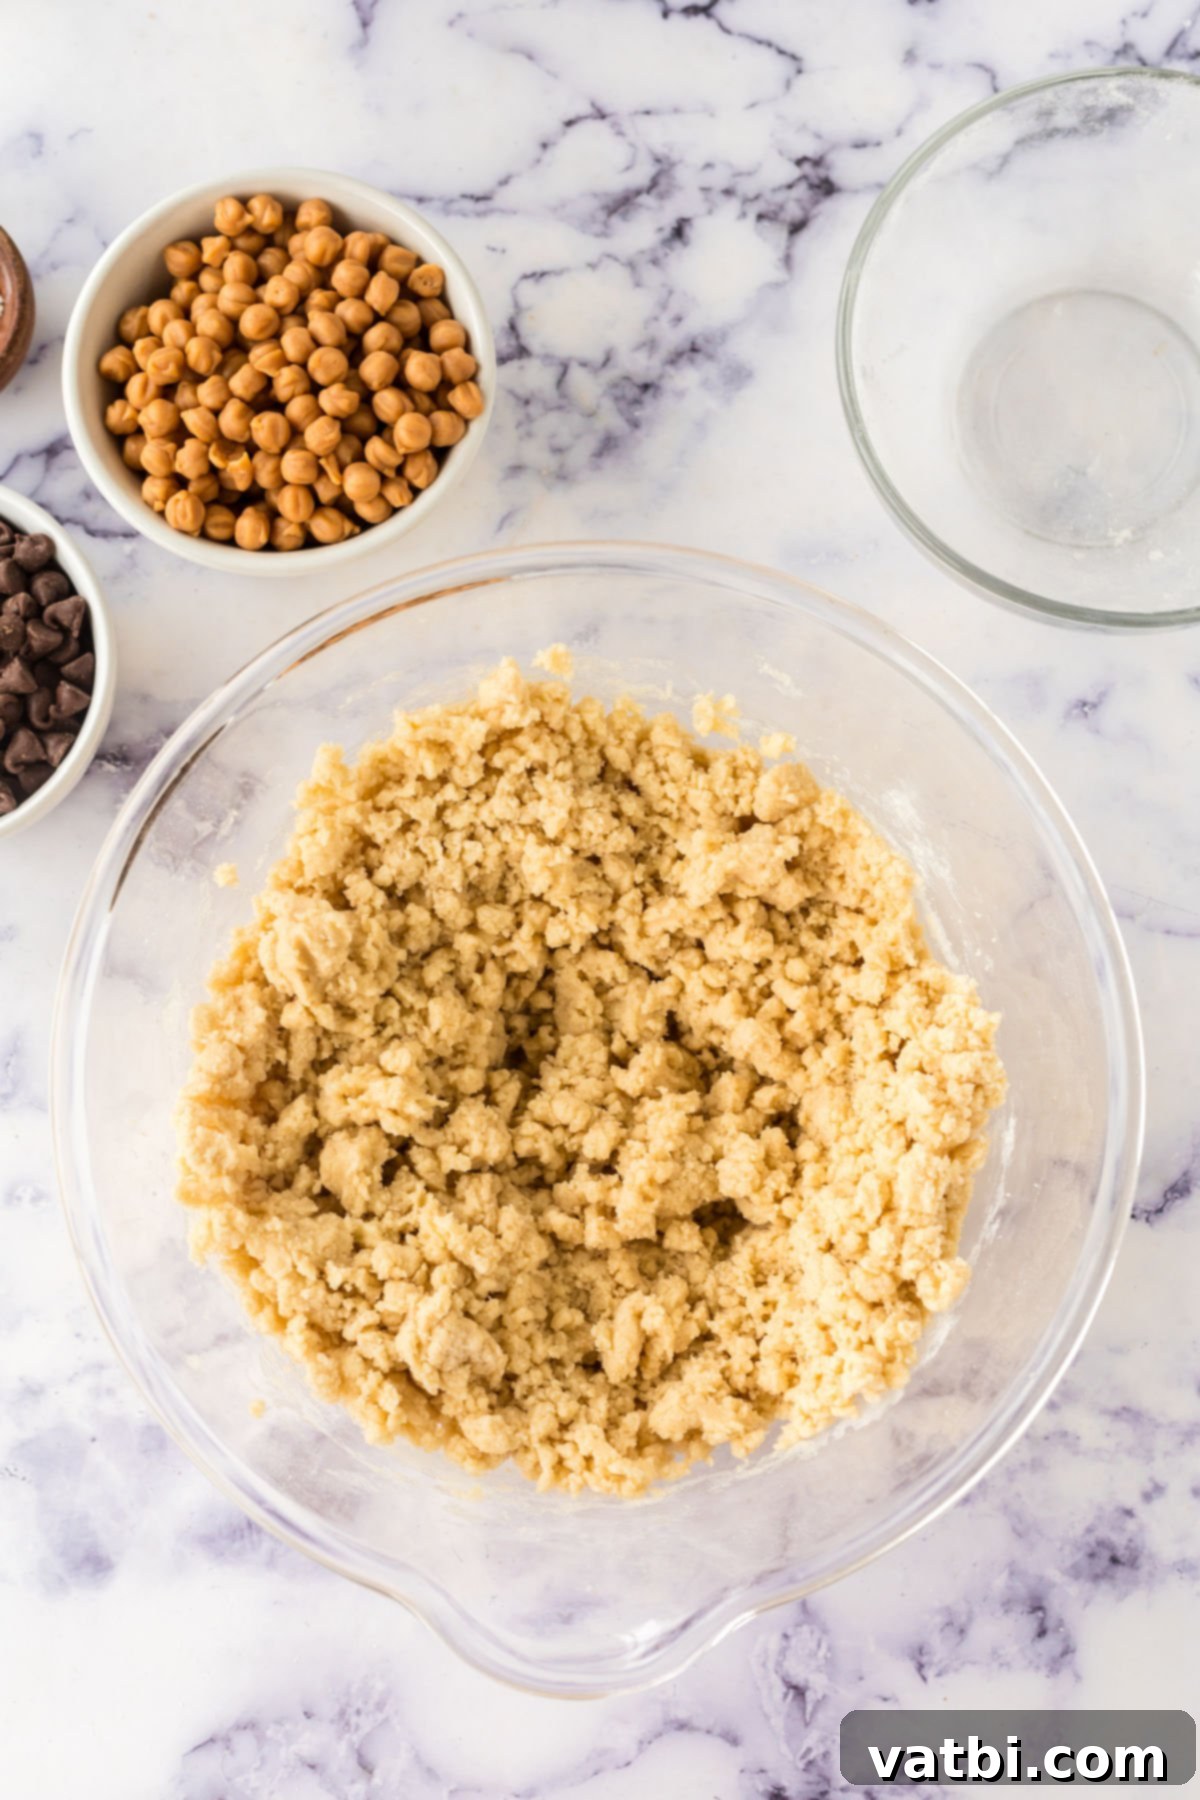
Step 4: Chill the Cookie Dough. Once your soft cookie dough is ready, cover the bowl tightly with plastic wrap, pressing it directly onto the surface of the dough to prevent a skin from forming. Place it in the refrigerator and allow it to chill for at least 30 minutes. This chilling step is absolutely vital: it solidifies the butter, which prevents the cookies from spreading too much during baking, and it allows the flavors to meld, resulting in a richer, more structured, and perfectly tender cookie. Do not skip this step for optimal results.
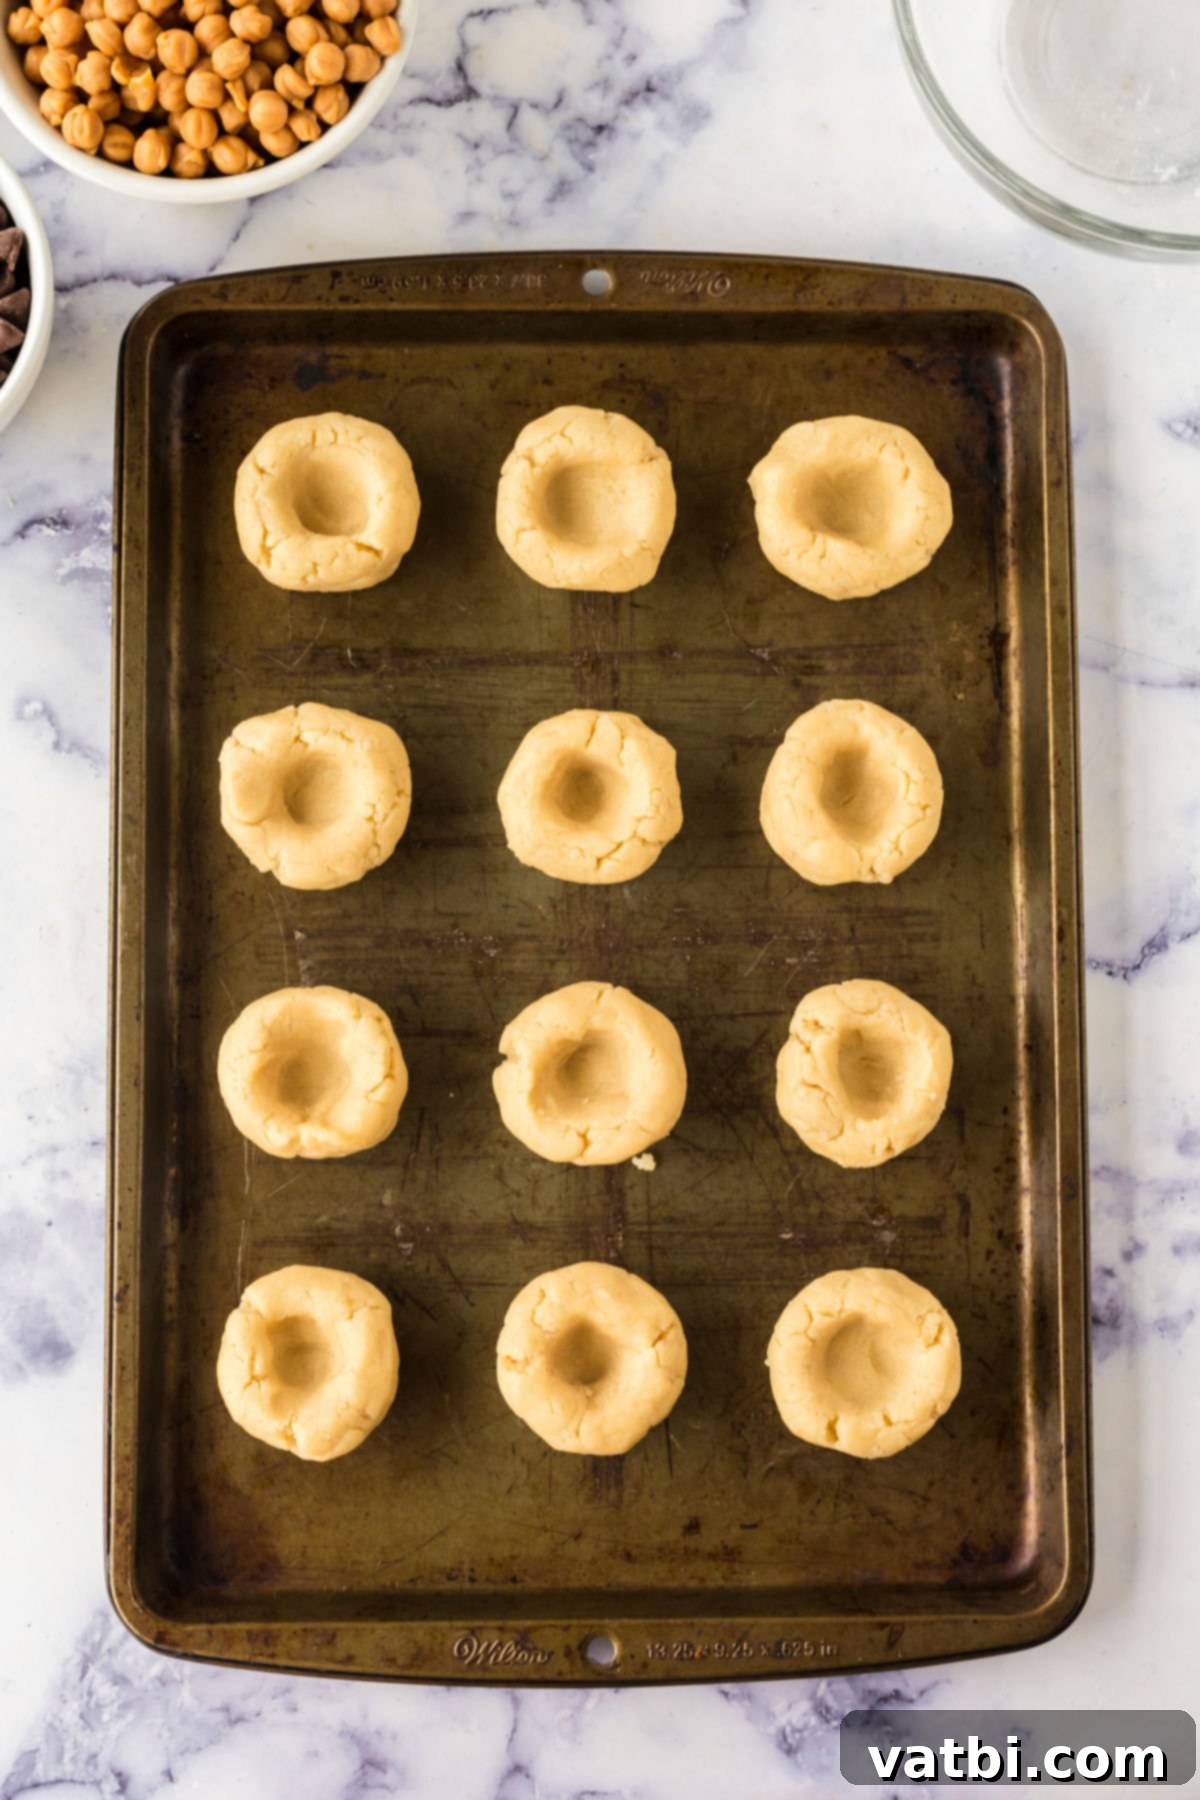
Step 5: Form the Cookie Dough Balls and Thumbprints. After chilling, remove the dough from the fridge. Divide the cookie dough into uniform balls, each roughly 1 ½ tablespoons in size. Rolling them smoothly between your palms helps create a neat, round shape. Place them on your prepared baking sheets. Then, using your thumb or the back of a small round spoon (like a ½ teaspoon measuring spoon for a cleaner indentation), gently create a distinct indentation or “crater” in the center of each cookie. Be careful not to press all the way through the dough, as this will create a hole. This indentation will be the perfect nest for your delicious caramel filling.
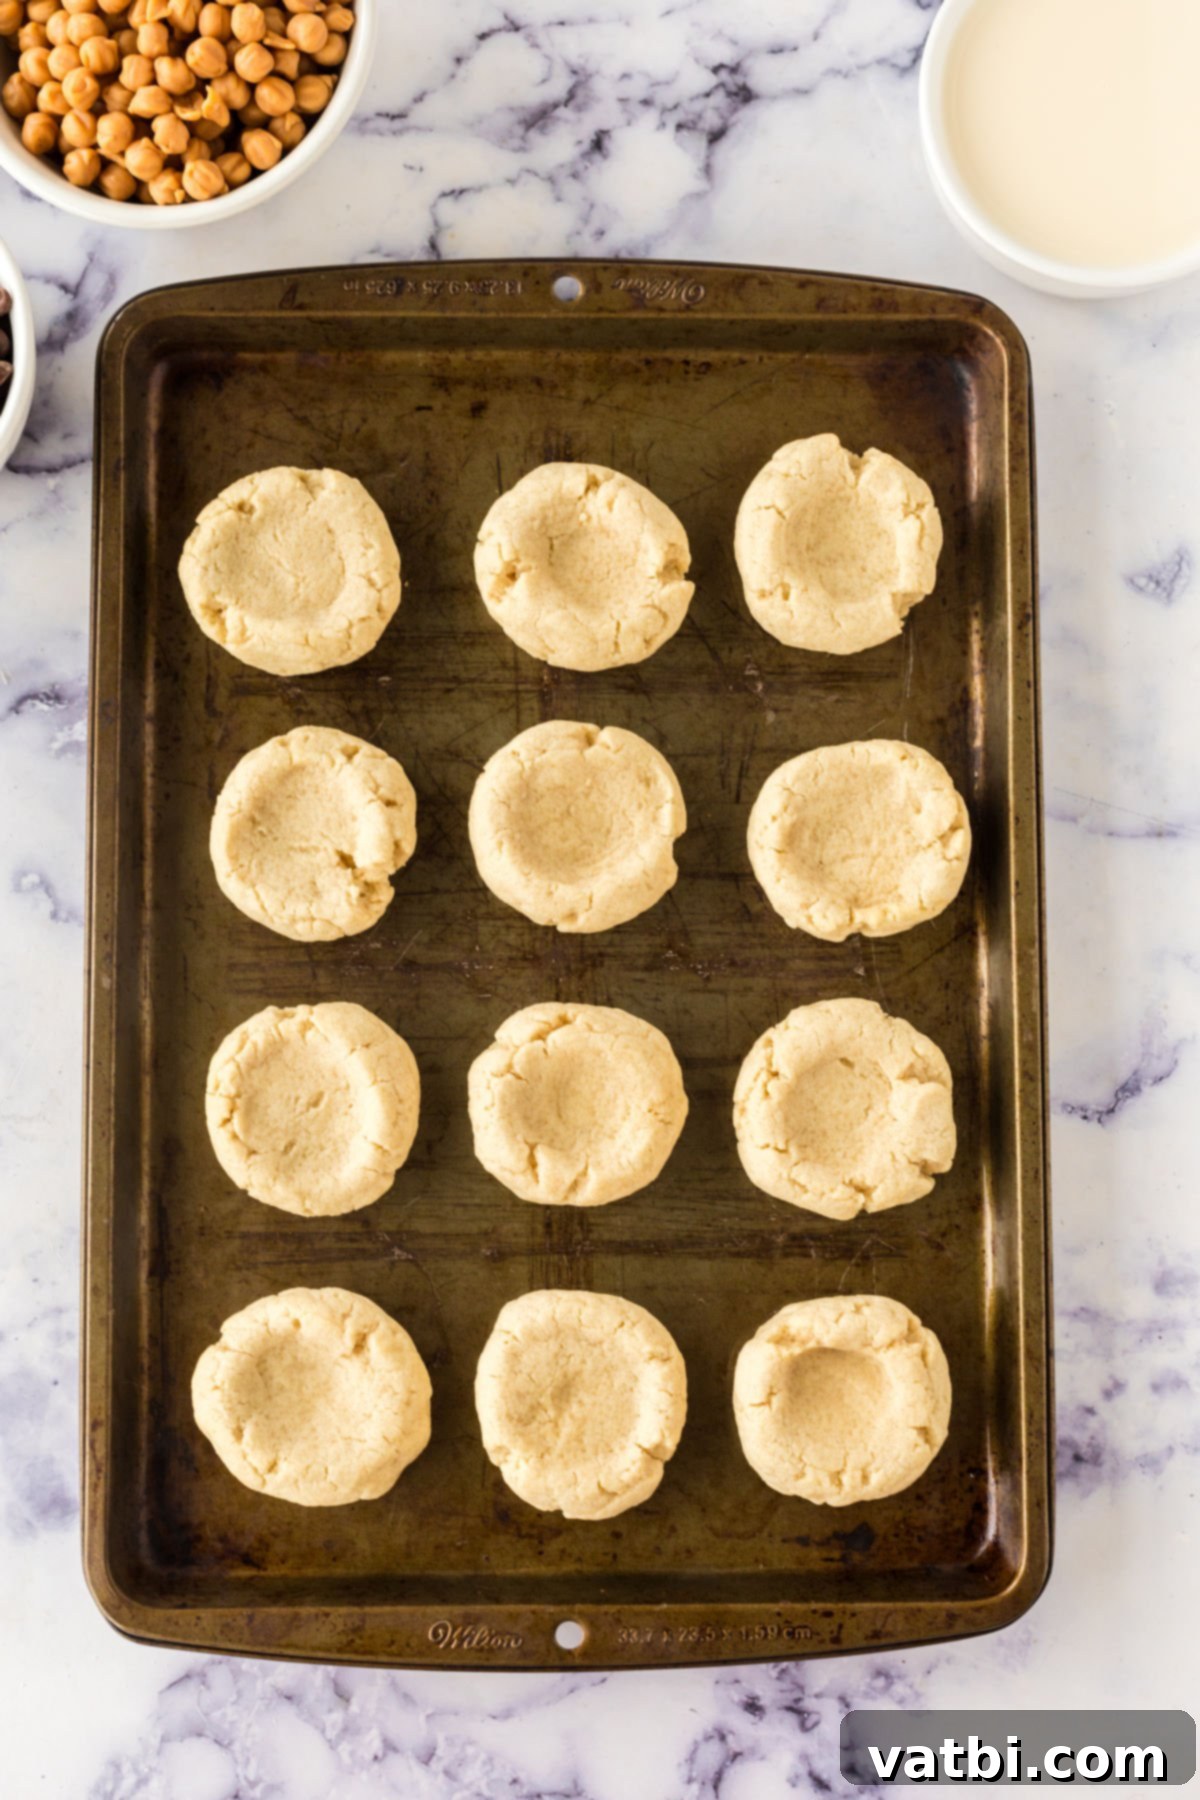
Step 6: Bake the Cookies. Line your baking sheets with parchment paper for easy removal, to prevent sticking, and to encourage even baking. Arrange the formed cookie dough balls on the prepared sheets, ensuring you leave adequate space (about 2 inches) between them as they will spread slightly during baking. Bake in the preheated oven for approximately 13-15 minutes, or until the edges are lightly golden and the centers are set. The cookies should still appear pale in the middle, indicating that classic shortbread tenderness. Remove from the oven and let them cool slightly on the baking sheets for about 5 minutes before carefully transferring them to a wire rack to cool completely.
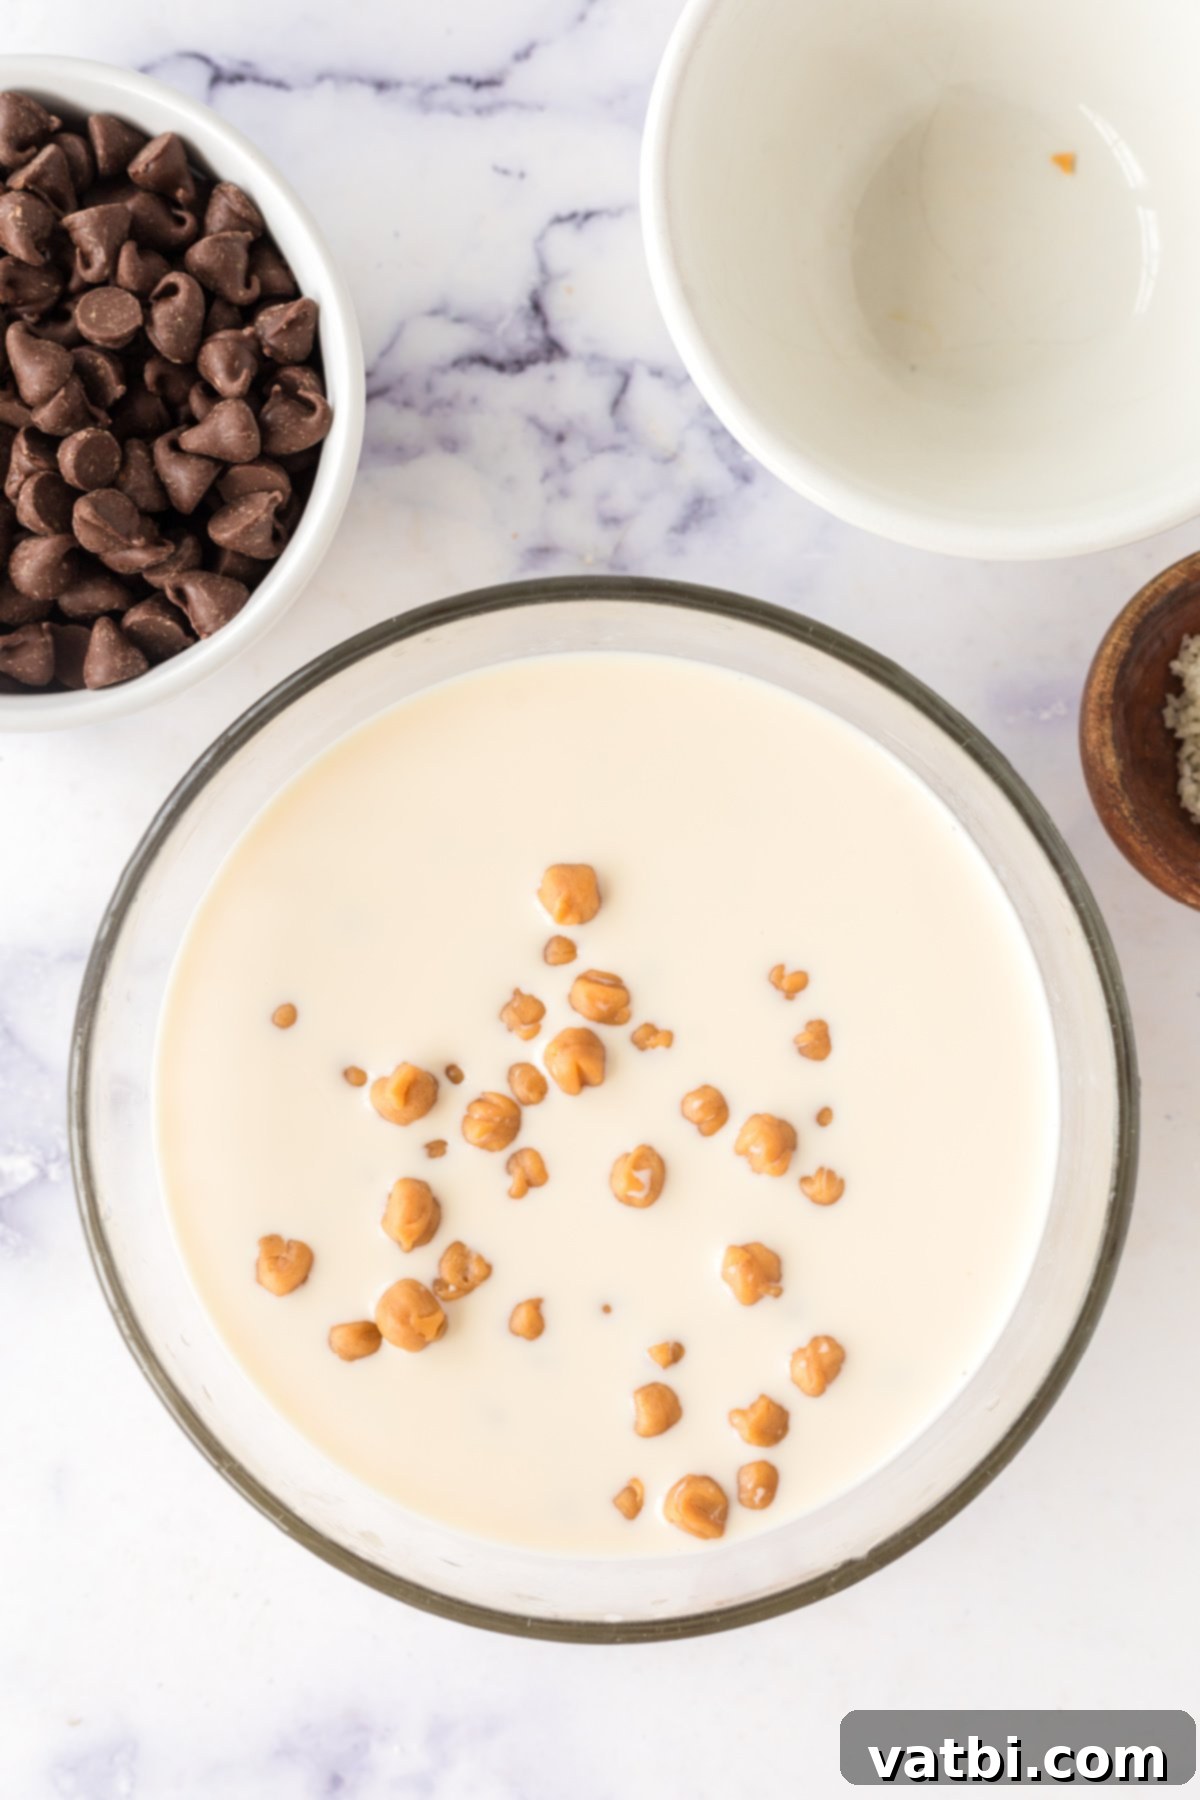
Step 7: Prepare the Caramel and Chocolate. While your cookies are baking and beginning to cool, prepare the delicious toppings. In a microwave-safe bowl, combine the caramel bits and evaporated milk. Microwave on 30-second intervals, stirring well after each interval, until the mixture is completely melted and smooth, achieving a creamy, pourable caramel sauce. This gentle heating ensures the caramel doesn’t burn. In a separate microwave-safe bowl, melt the semi-sweet chocolate chips using the same 30-second interval method, stirring until smooth and glossy. Be extra careful not to overheat the chocolate to prevent it from seizing or becoming clumpy.

Step 8: Assemble and Finish the Cookies. Allow the baked cookies to cool completely on a wire rack before filling. This is important as it prevents the caramel and chocolate from melting or running off the warm cookies. Once cool, carefully fill the crater of each cookie with a generous spoonful of the warm, gooey caramel filling. Then, with a small spoon or a piping bag with a fine tip, drizzle the melted chocolate over the tops of the caramel-filled cookies, creating an appealing visual and flavor layer. Finally, immediately sprinkle the remaining coarse sea salt over the wet chocolate and caramel. This final touch is essential for that perfect salted caramel taste that echoes the classic Twix candy bar. Let the chocolate and caramel set at room temperature or, for a quicker set, chill them briefly in the refrigerator before serving. Enjoy your homemade Twix masterpieces!
Expert Pro Tips for Baking Success
Achieving bakery-quality Twix Thumbprint Cookies is easier than you think with these expert tips, designed to help you avoid common pitfalls and enhance your baking experience:
- Serving Suggestions. These cookies offer flexibility in how you enjoy them! You can either serve them warm right after filling them with caramel and chocolate for a truly gooey, melt-in-your-mouth experience, especially delightful when paired with a scoop of vanilla ice cream. Alternatively, for a firmer, more set caramel and chocolate, allow the cookies to chill in the fridge for 30 minutes to an hour. This makes them easier to handle, stack, and transport, and they are still absolutely delicious with a chewier texture.
- Don’t skip the coarse sea salt. Seriously, this step is not merely for aesthetics; it’s absolutely crucial for the authentic Twix flavor and a balanced taste profile. The coarse sea salt isn’t just a garnish; it’s a flavor enhancer. It provides a delightful textural crunch and, more importantly, cuts through the sweetness of the caramel and chocolate, creating that highly addictive sweet-and-salty balance that elevates the entire cookie from good to unforgettable. Without it, the cookies might taste overwhelmingly sweet.
- Chill the dough thoroughly. This is perhaps the most important tip for shortbread cookies and other butter-rich doughs. If your dough is too warm, the butter will melt too quickly in the oven, causing the cookies to spread excessively and lose their distinct thumbprint shape. A well-chilled dough holds its form better, resulting in perfectly shaped, tender cookies. If you’re pressed for time, you can accelerate the chilling by placing the dough in the freezer for about 15 minutes. Even better, form the cookie balls and make the indentations first, then chill them on the baking sheet for 20-30 minutes. Smaller portions chill faster and more effectively!
- Measure Flour Correctly: For shortbread, precise flour measurement is paramount. The “spoon and level” method is recommended: spoon the flour lightly into your dry measuring cup until it overflows, then level it off with a straight edge (like the back of a knife). Scooping flour directly from the bag can compact it, leading to too much flour and a dry, crumbly dough that is prone to cracking.
- Perfect Thumbprint Technique: If your thumb tends to create cracks in the dough when making the indentations, try using the rounded back of a ½ teaspoon measuring spoon, a small wooden dowel, or even the end of a wine cork. You can also lightly flour your chosen tool or your thumb to prevent sticking. Aim for a generous but not too deep indentation, leaving enough cookie base to securely hold the fillings without breaking through.
- Cooling Rack is Your Friend: Once baked, it’s essential to transfer the cookies to a wire rack after a few minutes of cooling on the baking sheet. Cooling completely on the hot baking sheet can continue to bake the cookies (carry-over cooking), making them too firm or potentially soggy on the bottom. A wire rack allows air to circulate around all sides of the cookies, ensuring even cooling and preventing any undesirable textures.
- Microwave Chocolate Carefully: When melting chocolate chips, do so in short bursts (15-30 seconds) and stir thoroughly between each interval. Chocolate can seize (become thick and clumpy) if overheated. If it does seize, you can sometimes rescue it by stirring in a tiny bit of vegetable oil or shortening (about ½ teaspoon per cup of chocolate chips) to smooth it out.
Frequently Asked Questions (FAQ’s)
Here are some common questions and detailed answers to help you troubleshoot and perfect your Twix Thumbprint Cookies, ensuring a delightful baking experience every time:
Cookie spreading is a common issue, especially with butter-based doughs like shortbread. The primary culprit is often butter that is too warm. When butter melts too quickly in the oven, it causes the cookies to flatten out and lose their distinct shape, sometimes even merging together on the baking sheet. To prevent this, ensure your softened butter for the dough is truly at “room temperature” – pliable but still cool to the touch, not greasy or oily. More importantly, always allow the prepared dough to chill thoroughly in the fridge for at least 30 minutes (or 15 minutes in the freezer) before baking. This solidifies the butter, making the cookies hold their shape much better during baking. Other contributing factors can include too little flour in the dough (always measure precisely!), an oven that isn’t fully preheated (a slow rise to temperature allows butter to melt before the flour sets), or using baking sheets that are too hot when placing new dough. Ensure your baking sheets are cool before placing new cookie dough on them.
Shortbread cookies, by nature, have less moisture and a higher fat content compared to many other cookie types, which makes them inherently more prone to cracking as they bake. This is often a sign of a perfectly tender, melt-in-your-mouth shortbread that will crumble delightfully! However, excessive or unsightly cracking can indicate a few things. Firstly, ensure you are not using too much flour. Accurately measuring flour is crucial: instead of scooping flour directly with your measuring cup (which compacts it and results in more flour than needed), spoon the flour lightly into your measuring cup and then level it off with a straight edge. Secondly, ensure all flour is thoroughly incorporated into the wet ingredients without overmixing. Dry pockets of flour can lead to inconsistencies and cracks in the final product. Always scrape along the bottom and sides of your mixing bowl diligently to ensure a uniform dough. Finally, if the dough is too cold or dry, it can be less pliable and more likely to crack when handled or baked. A slight crack or two around the edges is perfectly normal for shortbread and actually adds to its rustic, homemade charm.
Proper storage will help maintain the delightful texture and flavor of your homemade Twix Thumbprint Cookies for several days. You can store these cookies on the counter in an airtight container for up to 4 days. The caramel and chocolate will remain softer at room temperature. If you prefer them to last a bit longer or enjoy a firmer caramel and chocolate topping (which can prevent stickiness if stacking), they can be stored in the refrigerator for up to 5 days. When storing, it’s best practice to place a layer of parchment paper or wax paper between each layer of cookies. This prevents them from sticking together and helps preserve their beautiful appearance. For longer storage, these cookies freeze beautifully. Once the caramel and chocolate have fully set, place the cookies in a single layer on a baking sheet to freeze solid (about 1-2 hours), then transfer them to an airtight freezer-safe container or bag for up to 2-3 months. Thaw at room temperature or in the refrigerator before enjoying, allowing them to come to optimal temperature before serving.
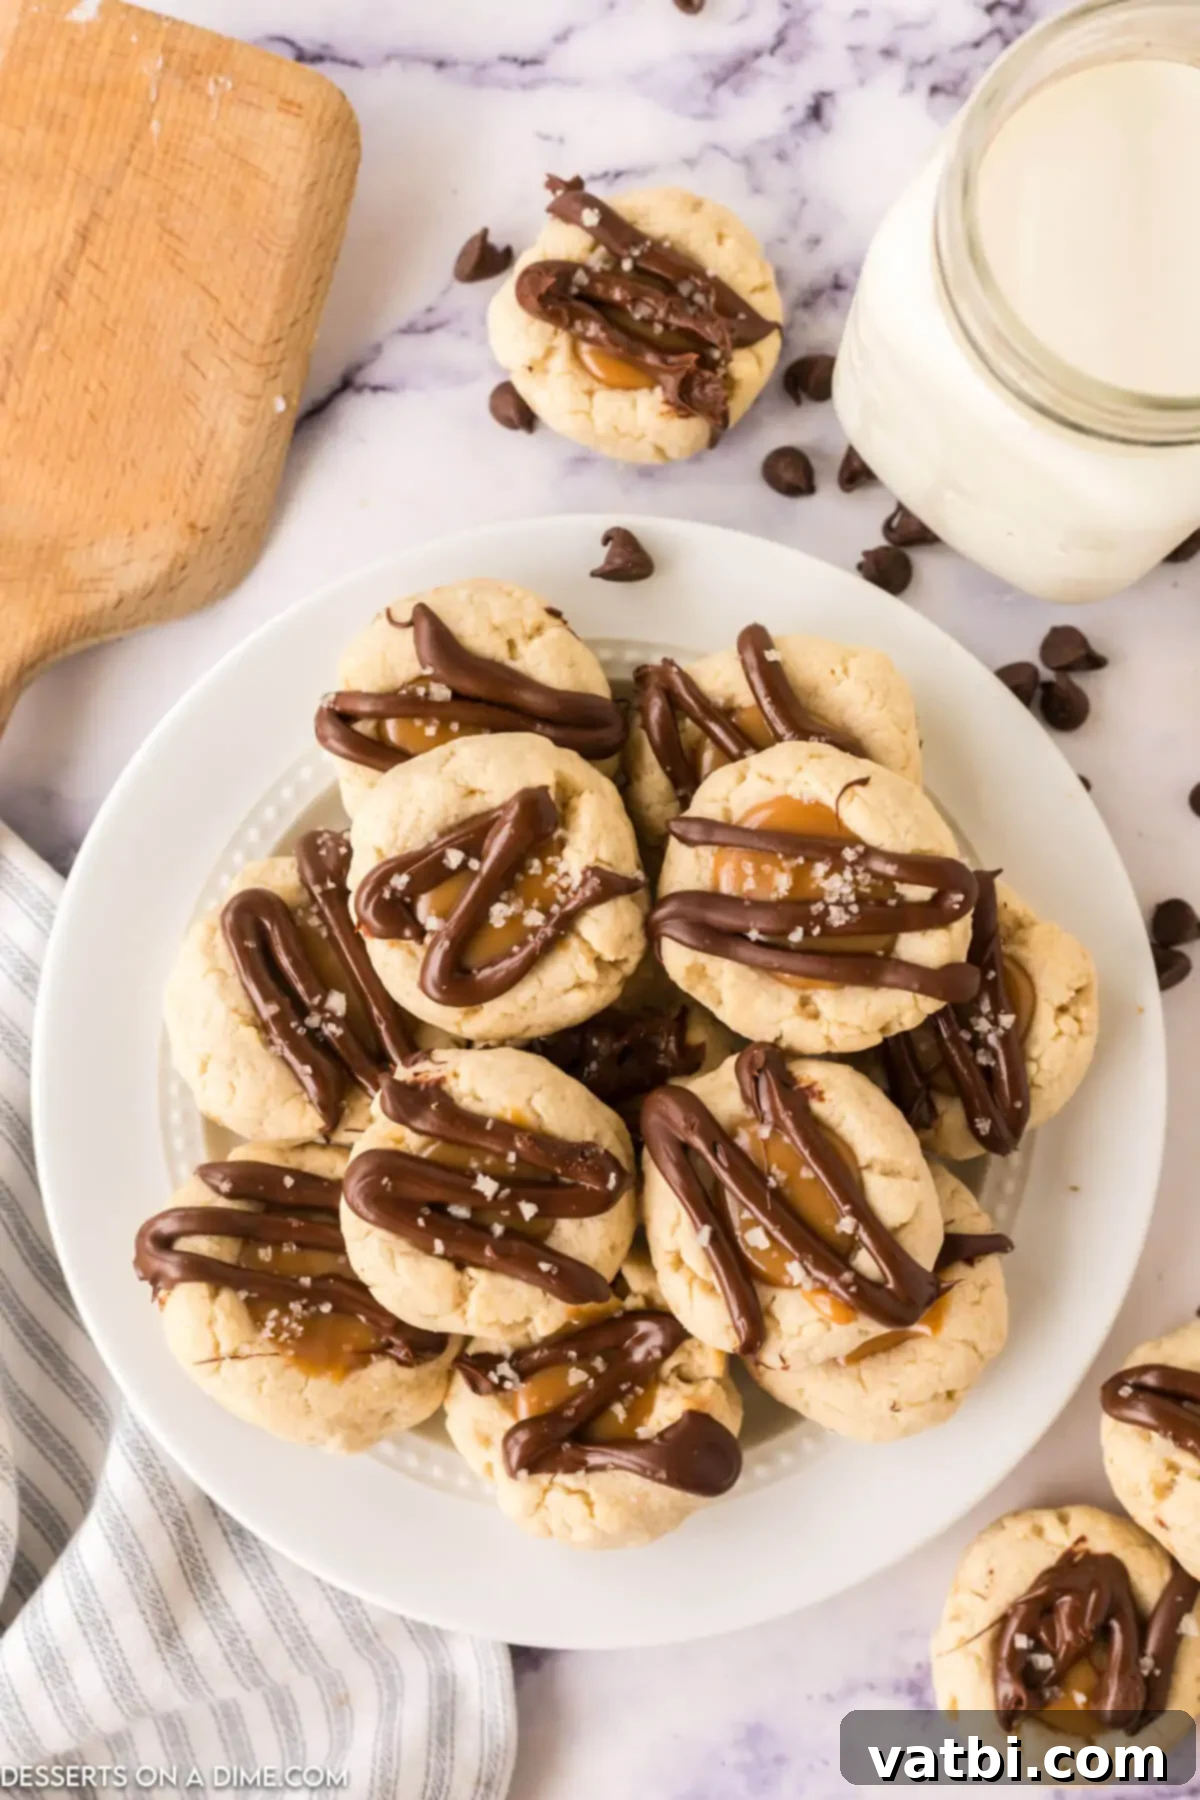
These Twix Thumbprint Cookies are more than just a dessert; they are a celebration of beloved flavors and textures, all wrapped up in a charming, homemade package. The combination of tender shortbread, chewy caramel, rich chocolate, and a hint of sea salt creates an unforgettable treat that will have everyone reaching for more. Whether you’re baking for a special occasion, preparing a holiday cookie platter, or simply looking to satisfy a sweet craving with a touch of elegance, this recipe is guaranteed to bring joy to your kitchen and your taste buds. Go ahead, gather your ingredients and make these cookies today for a truly tasty and satisfying treat that brilliantly mimics the classic candy bar experience.
Then, please leave a star recipe rating and a comment below to share your experience and tips – we love hearing from you and seeing your delicious creations!
More Easy and Delicious Cookie Recipes
If you loved making these Twix Thumbprint Cookies and are looking for more delightful baking adventures, explore some of our other easy and highly-rated cookie recipes. Each one is designed to bring joy and deliciousness to your home with minimal fuss and maximum flavor!
- Classic Jam Thumbprint Cookies: A timeless favorite, perfect for fruit lovers and a colorful addition to any cookie platter.
- Irresistible Gluten-Free Shortbread Cookies: Enjoy the same buttery goodness of shortbread, thoughtfully adapted for a gluten-free diet without compromising on taste or texture.
- Peanut Butter Hershey Kiss Cookies: A nostalgic and beloved combination of soft peanut butter cookies topped with a melty Hershey’s Kiss.
- Decadent Milky Way Cookies: Another candy bar inspired cookie, featuring the rich, nougat, caramel, and chocolate flavors of a Milky Way bar in a chewy cookie form.
- The Best Easy Chocolate Chip Cookies: A classic for a reason, this recipe promises perfect, chewy chocolate chip cookies every time, a fundamental for any baker.
Pin
Twix Thumbprint Cookies
Ingredients
- 1 cup salted butter softened
- 1 cup granulated sugar
- 1 teaspoon vanilla extract
- 2 large eggs
- 3 teaspoons coarse sea salt
- 3 cups all-purpose flour
- 1 cup caramel bits
- 1 cup evaporated milk about ¾ cup
- 1 cup semi-sweet chocolate chips
Instructions
-
Preheat the oven to 350°F (175°C).
-
In a large mixing bowl, using an electric hand mixer or a stand mixer with a paddle attachment, cream together the softened salted butter and granulated sugar until light and fluffy. This should take 2-3 minutes on medium speed.
-
Add the room temperature eggs and vanilla extract. Whisk the ingredients together until just combined, being careful not to overmix, and scrape down the sides of the bowl as needed to ensure even incorporation.
-
Gradually whisk in the all-purpose flour and one teaspoon of coarse sea salt. Mix on low speed until the flour is fully incorporated with the wet ingredients, creating a soft and cohesive dough. Overmixing can lead to tough cookies.
-
Cover the cookie dough with plastic wrap, pressing it directly onto the dough’s surface, and allow it to chill in the refrigerator for at least 30 minutes. This step is crucial for preventing the cookies from spreading too much during baking.
-
Once chilled, divide the cookie dough into uniform balls, each approximately 1 ½ tablespoons in size. Roll them smoothly between your palms. Place the dough balls on baking sheets lined with parchment paper, leaving about 2 inches between them. Use your thumb or the back of a small rounded spoon to gently create a distinct crater in the center of each cookie. Bake for 13-15 minutes, or until the edges are lightly golden and the centers are set.
-
While the cookies are baking, prepare the caramel and chocolate toppings. In a microwave-safe bowl, combine the caramel bits and evaporated milk. Microwave on 30-second intervals, stirring well after each, until the mixture is smooth and creamy. In a separate microwave-safe bowl, melt the semi-sweet chocolate chips using the same method, stirring until glossy and smooth, being careful not to overheat.
-
Once the cookies are finished baking, let them cool completely on a wire rack. Then, carefully fill the crater of each cookie with a spoonful of the warm caramel sauce. Drizzle the tops with the melted chocolate using a spoon or piping bag. Immediately sprinkle the remaining coarse sea salt over the wet chocolate and caramel for the best salted caramel flavor.
-
Allow the chocolate and caramel to set, either at room temperature or by chilling briefly in the refrigerator, before serving and enjoying!
Recipe Notes
The coarse sea salt is not just for decoration; it’s a vital flavor component! It helps to balance out the intense sweetness of the caramel and chocolate, creating that irresistible sweet-and-salty combination that defines a true Twix-inspired dessert. Don’t skip it!
The harmonious blend of the soft, buttery shortbread cookie base, the rich and chewy caramel, and the smooth semi-sweet chocolate topping creates a flavor profile that is remarkably similar to the iconic Twix candy bars. It’s a delightful homemade homage!
For optimal freshness, store these delectable cookies in an airtight container. They will remain fresh on the counter for up to 4 days. If you prefer a longer shelf life or a firmer set, store them in the refrigerator for up to 5 days. To prevent sticking and maintain their beautiful appearance, place a layer of parchment paper or wax paper between each layer of cookies.
Chilling your cookie dough is a non-negotiable step for perfectly shaped thumbprint cookies. If the dough is too warm, the butter will melt too rapidly in the oven, causing the cookies to spread out and lose their distinctive crater. This chilling process allows the butter to firm up, ensuring the cookies hold their shape and remain tender. If you’re slightly short on time, you can accelerate the chilling by placing your dough in the freezer for about 15 minutes. Alternatively, after forming your thumbprint cookies into individual balls, you can chill them for 20 minutes in the fridge. Because the dough is already divided into smaller portions, the butter will firm up more quickly, preventing excessive spreading.
While we recommend making your caramel sauce from caramel bits and evaporated milk for the best texture and flavor, using a high-quality store-bought caramel sauce is a convenient alternative. Keep in mind that pre-made caramel sauces can sometimes be a bit more runny than a homemade version, so you might want to slightly reduce the amount of evaporated milk if you’re adapting the recipe to ensure your filling isn’t too thin.
Our recipe specifies semi-sweet chocolate chips for a well-balanced sweetness that beautifully complements the caramel. However, feel free to customize! If you have a preference for a sweeter cookie, milk chocolate chips work wonderfully. For those who enjoy a deeper, slightly more intense cocoa flavor, dark chocolate chips (around 60-70% cacao) provide a fantastic contrast.
