The Ultimate No-Churn Cookie Monster Ice Cream Recipe: Easy Homemade Fun for All Ages
Get ready to unleash your inner Cookie Monster with this incredibly simple and absolutely delicious no-churn Cookie Monster Ice Cream recipe! Forget the hassle of an ice cream maker; this homemade treat comes together with minimal effort and delivers maximum flavor. Combining the best of two beloved cookies – classic chocolate chip and iconic Oreos – this vibrant blue ice cream is guaranteed to be a sensational hit with everyone, from the youngest family members to adults who are young at heart. It’s the perfect dessert for parties, movie nights, or simply a sweet everyday indulgence that brings a smile to every face.

You truly don’t need to be a devoted Sesame Street fan to fall head over heels for the delightful charm and scrumptious taste of Cookie Monster Ice Cream. This exceptionally easy-to-make ice cream recipe starts with a rich and creamy vanilla base, which is then magically transformed into a brilliant blue hue, reminiscent of everyone’s favorite cookie-loving character. We then load it up with generous chunks of your favorite cookies, creating an irresistible texture and flavor combination that makes for a truly tasty and satisfying treat. This recipe is all about creating joyful memories in the kitchen and at the table, proving that homemade ice cream doesn’t have to be complicated to be utterly amazing.
Our family has a deep affection for homemade ice cream, and the “no-churn” method is a particular favorite for its convenience. Beyond this vibrant Cookie Monster delight, we frequently enjoy making classics like Mint Chocolate Chip Ice Cream Cake, creamy No Churn Vanilla Ice Cream, festive Peppermint Ice Cream, and decadent No Churn Cheesecake Ice Cream. You’ll quickly discover the joy and simplicity of these effortless recipes that don’t require any specialized equipment like an ice cream maker or an ice cream machine. Even in the cooler months, we find ourselves scooping up seasonal favorites like our comforting Pumpkin Ice Cream Recipe in the Fall. This Cookie Monster version is another fantastic addition to our collection of simple, delicious, and fun frozen desserts.
Table of contents
- What is Cookie Monster Ice Cream?
- Why You Will Love This Easy No-Churn Recipe
- Ingredients
- Variation Ideas & Customizations
- How to Make Cookie Monster Ice Cream: Step-by-Step Guide
- Storage Tips for Homemade Ice Cream
- Pro Tips for Perfect No-Churn Ice Cream
- More No-Churn Ice Cream Recipes to Try
What is Cookie Monster Ice Cream?
For those unfamiliar with this whimsical dessert, Cookie Monster Ice Cream is a playful and vibrant ice cream flavor inspired by the beloved character from Sesame Street. It’s instantly recognizable by its striking bright blue color, which evokes Cookie Monster’s fur. This delicious ice cream is predominantly vanilla-flavored but gets its signature taste and texture from an abundance of crushed cookies. Typically, it features a delightful combination of both chocolate chip cookies and Oreo cookies, creating a diverse and exciting cookie experience in every spoonful. The base is rich, creamy, and wonderfully sweet, making it a favorite among children and adults alike. It’s a celebratory dessert, perfect for birthdays, themed parties, or any occasion that calls for a fun and indulgent treat. The simplicity of our no-churn recipe makes it accessible for anyone to create this iconic flavor at home, proving that you don’t need fancy equipment to make extraordinary desserts.
If you’re looking for more intensely loaded ice cream treats, you might also enjoy making our Homemade Butterfinger Ice Cream, another fantastic option for cookie and candy lovers seeking a delightful crunch and rich flavor.
Why You Will Love This Easy No-Churn Recipe
There are countless reasons why this Cookie Monster Ice Cream recipe will quickly become a go-to in your dessert repertoire. Firstly, its sheer simplicity is a game-changer. The “no-churn” method means you can skip the bulky and often expensive ice cream machine, making it accessible to any home cook. All you need are a few basic ingredients and a mixer, and you’re well on your way to homemade frozen perfection. Secondly, the flavor profile is incredibly crowd-pleasing. The combination of creamy vanilla, crunchy chocolate chip cookies, and classic Oreo pieces creates a textural wonderland that appeals to almost everyone. The vibrant blue color also adds an element of fun and excitement, especially for kids, making it an ideal dessert for family gatherings or children’s parties. Finally, this recipe is incredibly versatile. You can easily customize it with different cookie types, candies, or even edible cookie dough, allowing you to tailor it to your personal preferences every time. It’s a foolproof way to enjoy rich, creamy, and flavorful homemade ice cream without any fuss.
Ingredients for Cookie Monster Ice Cream
Crafting this delightful Cookie Monster Ice Cream requires just a few basic ingredients, each playing a crucial role in achieving its signature creamy texture and irresistible flavor. The beauty of this recipe lies in its simplicity and the readily available nature of its components. Here’s what you’ll need to gather:
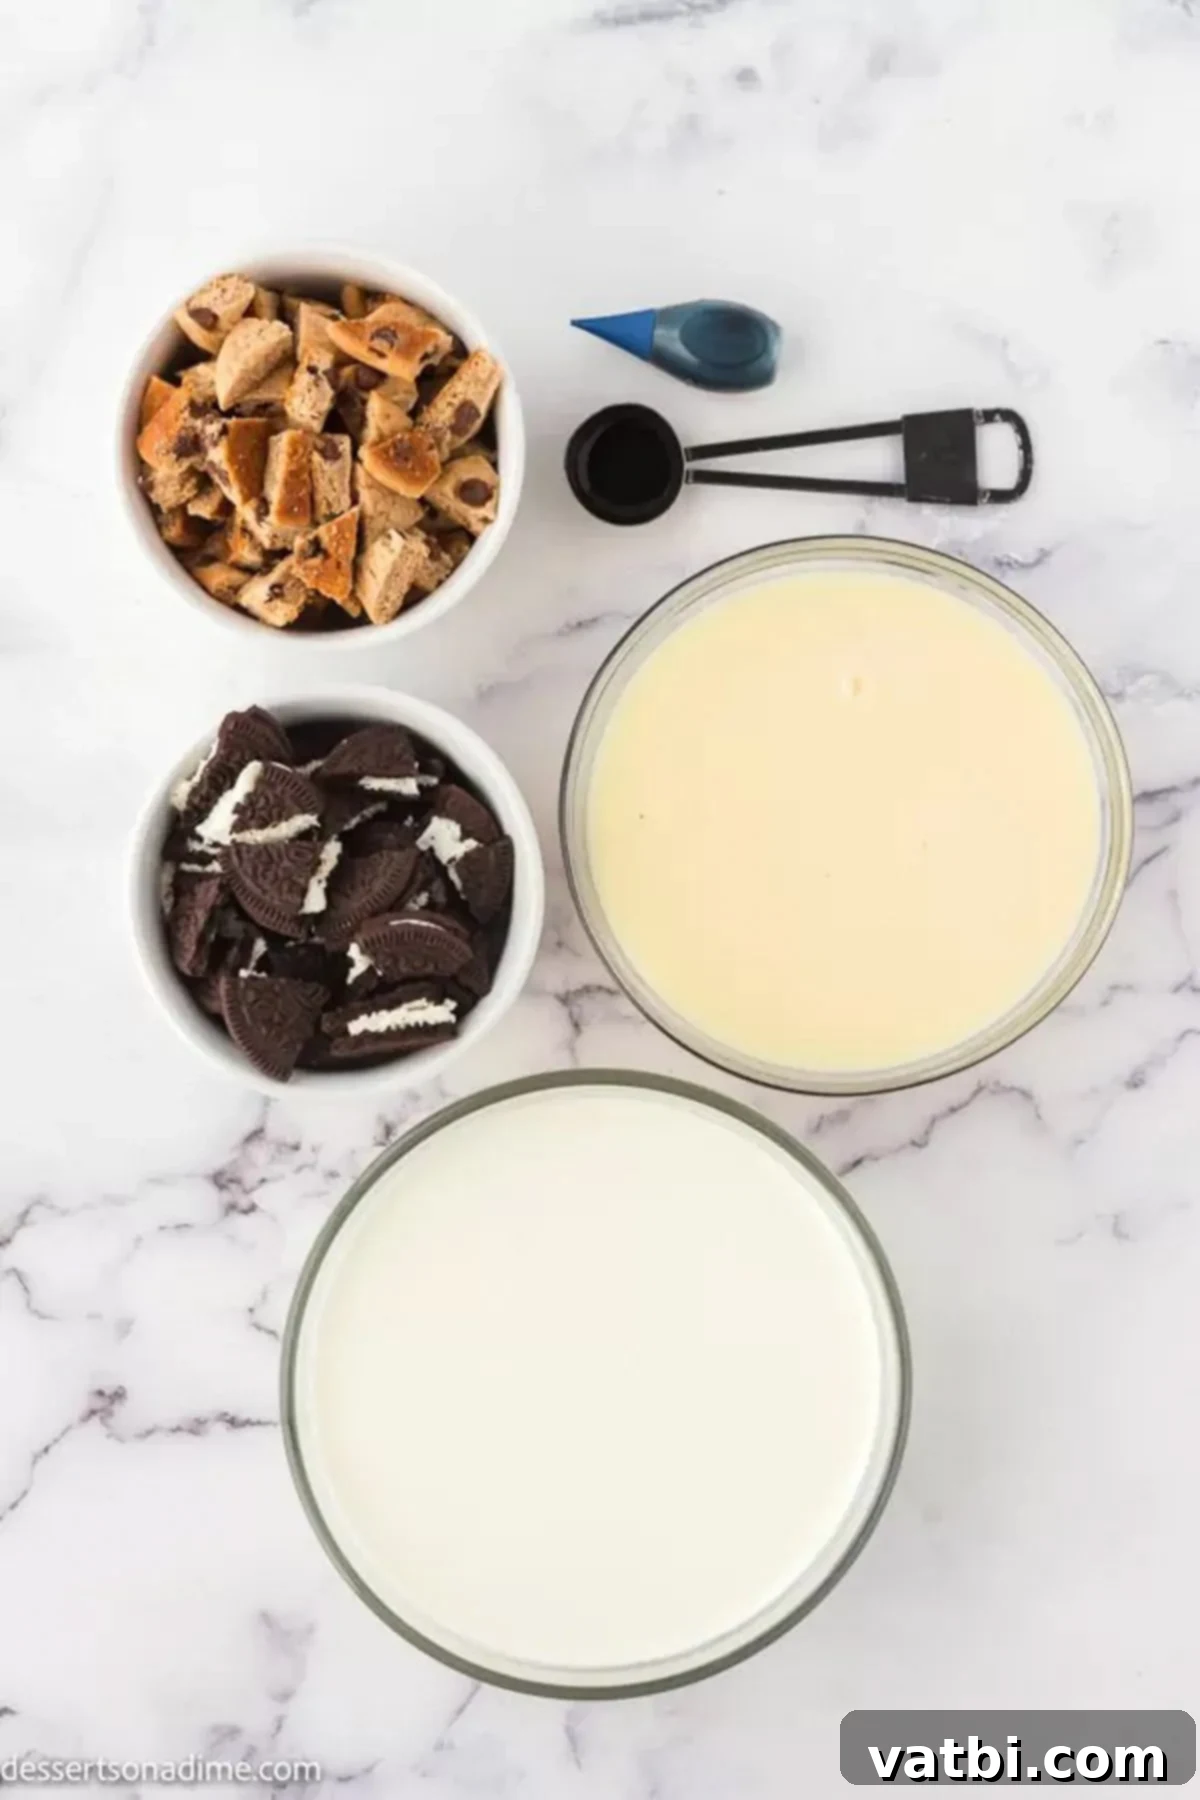
- Heavy Whipping Cream: This is the foundation of our no-churn ice cream, whipped to stiff peaks to create a light and airy base. It provides the essential richness and creamy texture.
- Vanilla Extract: A crucial flavor enhancer that complements the cookies and provides that classic sweet ice cream taste. Use a good quality pure vanilla extract for the best results.
- Sweetened Condensed Milk: This magical ingredient not only sweetens the ice cream but also prevents ice crystal formation, resulting in an incredibly smooth and luscious texture without an ice cream machine.
- Oreos: Chopped into chunks, these iconic chocolate sandwich cookies add a delightful crunch and distinct chocolatey flavor to the mix. We recommend standard Oreos for their classic appeal.
- Chocolate Chip Cookies: For that extra cookie goodness, we incorporate chocolate chip cookies. We often use popular brands like Chips Ahoy Cookies for their consistent texture and flavor, but your favorite brand will work perfectly.
- Blue Food Coloring: This is what gives our ice cream its characteristic Cookie Monster hue! You’ll want to use enough to achieve a bright, playful blue.
You can find the precise measurements and the full, detailed recipe instructions in the comprehensive recipe card located at the very bottom of this article. This list provides a quick overview, ensuring you have all the necessary ingredients on hand before you begin your delicious ice cream adventure.
Variation Ideas & Customizations
One of the most exciting aspects of making homemade ice cream, especially a fun flavor like Cookie Monster, is the endless possibilities for customization. Don’t be afraid to get creative and experiment with different additions and substitutions to make this recipe uniquely yours. Here are some fantastic variation ideas to inspire you:
- Add Edible Cookie Dough to the Batter: Elevate the cookie experience by folding in pieces of edible cookie dough. This adds another layer of texture and a burst of raw cookie flavor that is simply divine. For a truly indulgent batch, I recommend adding about 1 cup of edible cookie dough pieces to the mixture, ensuring there are plenty of delightful dough chunks in every bite. You can use store-bought edible cookie dough or easily make your own.
- Try Different Types of Oreo Cookies: The world of Oreos is vast and wonderful! Instead of just classic Oreos, experiment with different flavors to introduce new twists. Some exciting ideas include peanut butter Oreos for a nutty kick, birthday cake Oreos for added sprinkles and fun, mint Oreos for a refreshing touch, or even golden Oreos for a different vanilla profile. Each variation brings its own unique character to the ice cream.
- Substitute Different Types of Chocolate Chip Cookies: While classic chocolate chip cookies are a staple, feel free to swap them out or combine them with other varieties. The kids in our family particularly enjoy when I use Chips Ahoy cookies that come with M&M candy pieces already baked into them, adding a colorful and chocolatey crunch. You could also try double chocolate chip cookies, white chocolate chip cookies, or even homemade soft-baked cookies for an extra special touch.
- Try Other Colors for a Themed Treat: While bright blue is the traditional color for Cookie Monster Ice Cream, you are by no means limited to it. You can use any food coloring you prefer to match a party theme, holiday, or simply your favorite shade! Green for St. Patrick’s Day, red for Valentine’s Day, or even swirls of multiple colors for a rainbow effect would be fantastic and visually appealing variations.
- Make Ice Cream Sandwiches: Transform your Cookie Monster Ice Cream into another delightful dessert by making ice cream sandwiches. Simply save a few of your whole chocolate chip cookies (or even use large sugar cookies), allow the ice cream to soften slightly, then scoop a generous amount in the middle of two cookies and press them together. Freeze until firm for a truly nostalgic and delicious treat.
- Try Only Using One Type of Cookie: If you have a strong preference or simply want to simplify the recipe, there’s no rule saying you must use both Oreo cookies and chocolate chip cookies. Feel free to use just one type of cookie – a double Oreo ice cream or an extra-chocolaty chocolate chip version would be equally delicious and satisfy specific cravings.
- Add Sprinkles to the Ice Cream: For an even more festive and colorful dessert, jazz up the recipe by adding a generous amount of sprinkles. You can fold them into the ice cream mixture along with the cookies, or simply sprinkle them on top before freezing or serving. Rainbow sprinkles, blue sprinkles, or even chocolate sprinkles would add a delightful visual and textural element.
- If You Love Chocolate, Add Mini Chocolate Chips: For the ultimate chocolate lover, mini chocolate chips are a must-add! Just toss in a handful (or two!) of mini chocolate chips into the ice cream mixture along with the crushed cookies. They melt slightly in your mouth, providing pockets of smooth chocolate flavor that perfectly complement the crunchy cookies. Dark chocolate, milk chocolate, or a mix of both would be excellent choices.
How to Make Cookie Monster Ice Cream: Step-by-Step Guide
Making this incredible no-churn Cookie Monster Ice Cream is surprisingly straightforward and incredibly rewarding. Follow these simple steps to create your own batch of creamy, cookie-loaded goodness that will have everyone asking for more. No special equipment is needed, just a few bowls and a mixer!
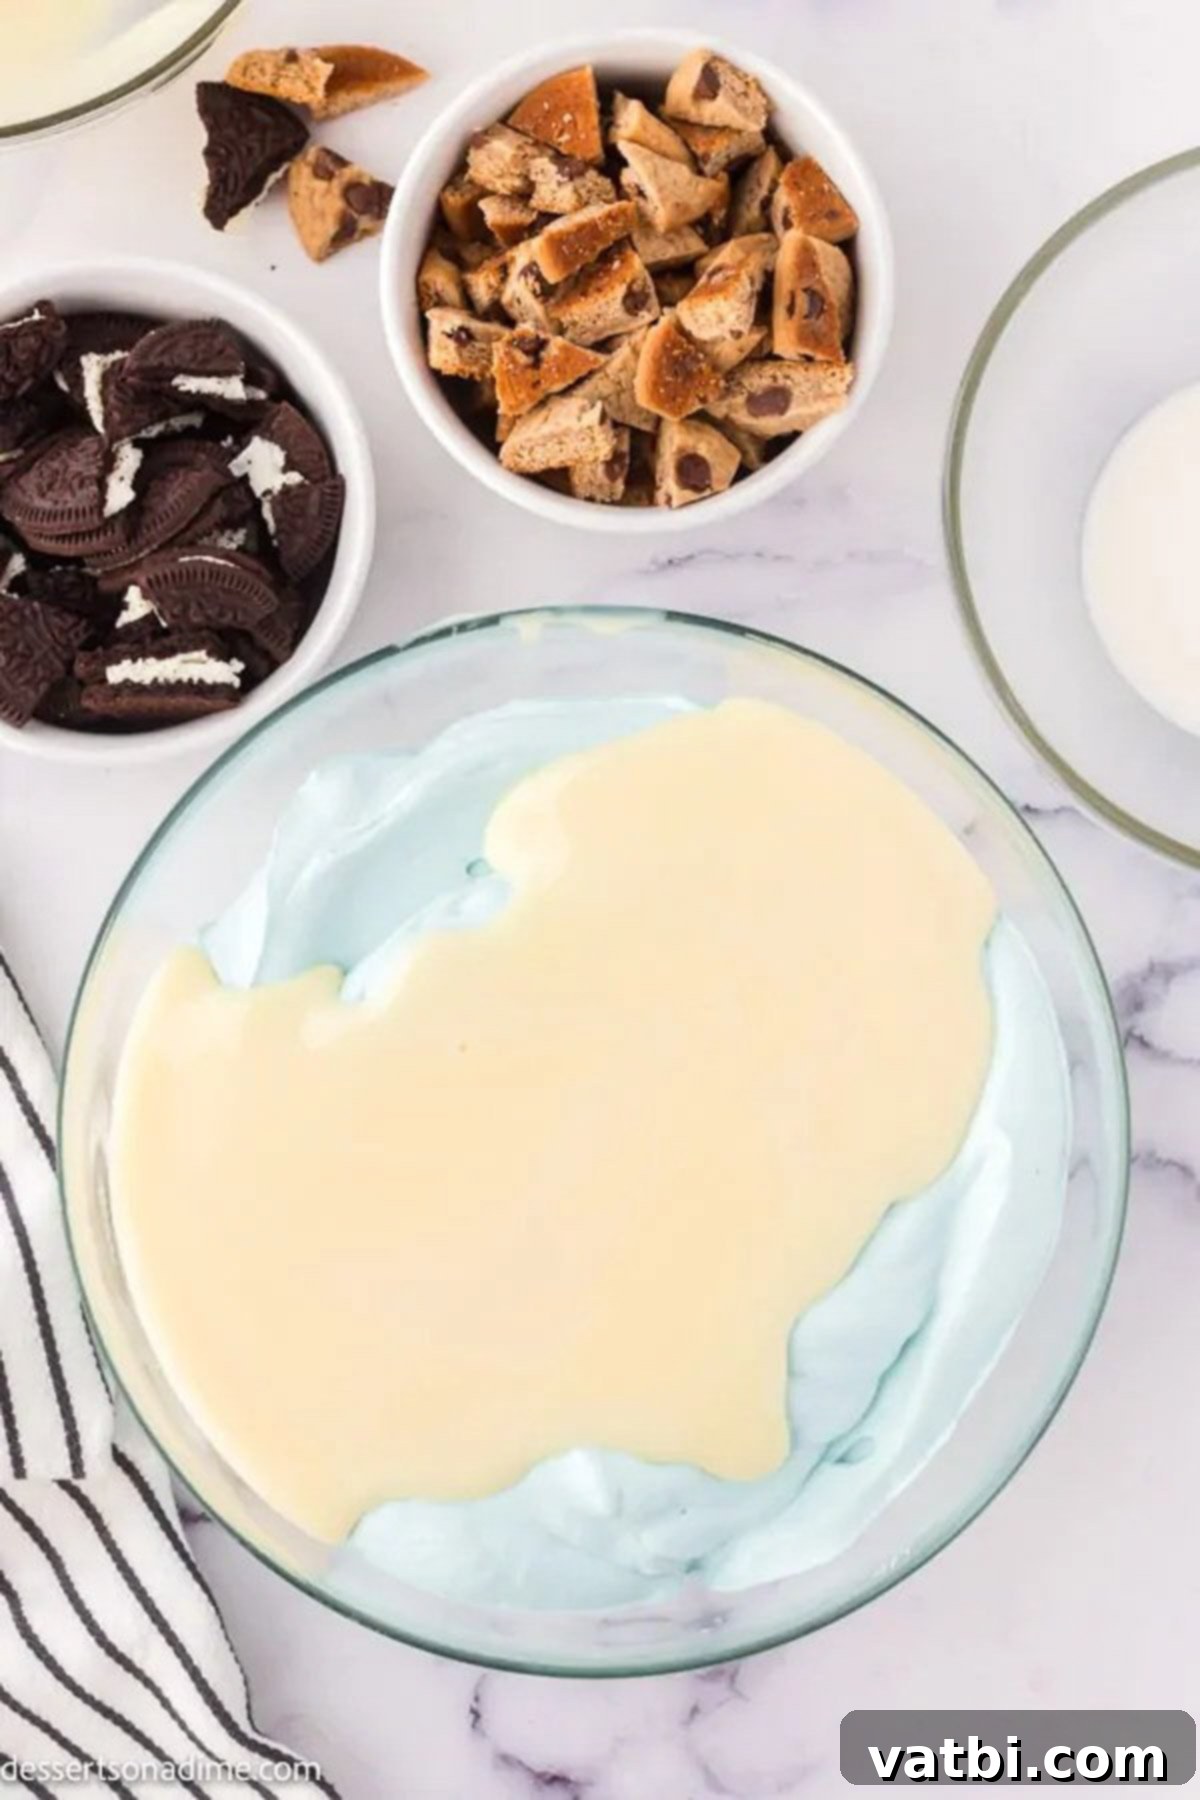
Step 1: Prepare the Cream Base. Begin by pouring the heavy whipping cream into a large mixing bowl. Add the vanilla extract and a few drops of blue food coloring. Using either a stand mixer fitted with a whisk attachment or a handheld electric mixer, beat the mixture on medium-high speed. Continue mixing until the cream forms stiff peaks. This means that when you lift the whisk, the cream holds its shape firmly. This whipping process incorporates air, giving the ice cream its light texture. Next, gently fold in the sweetened condensed milk until it is just combined. Be careful not to deflate the whipped cream too much.
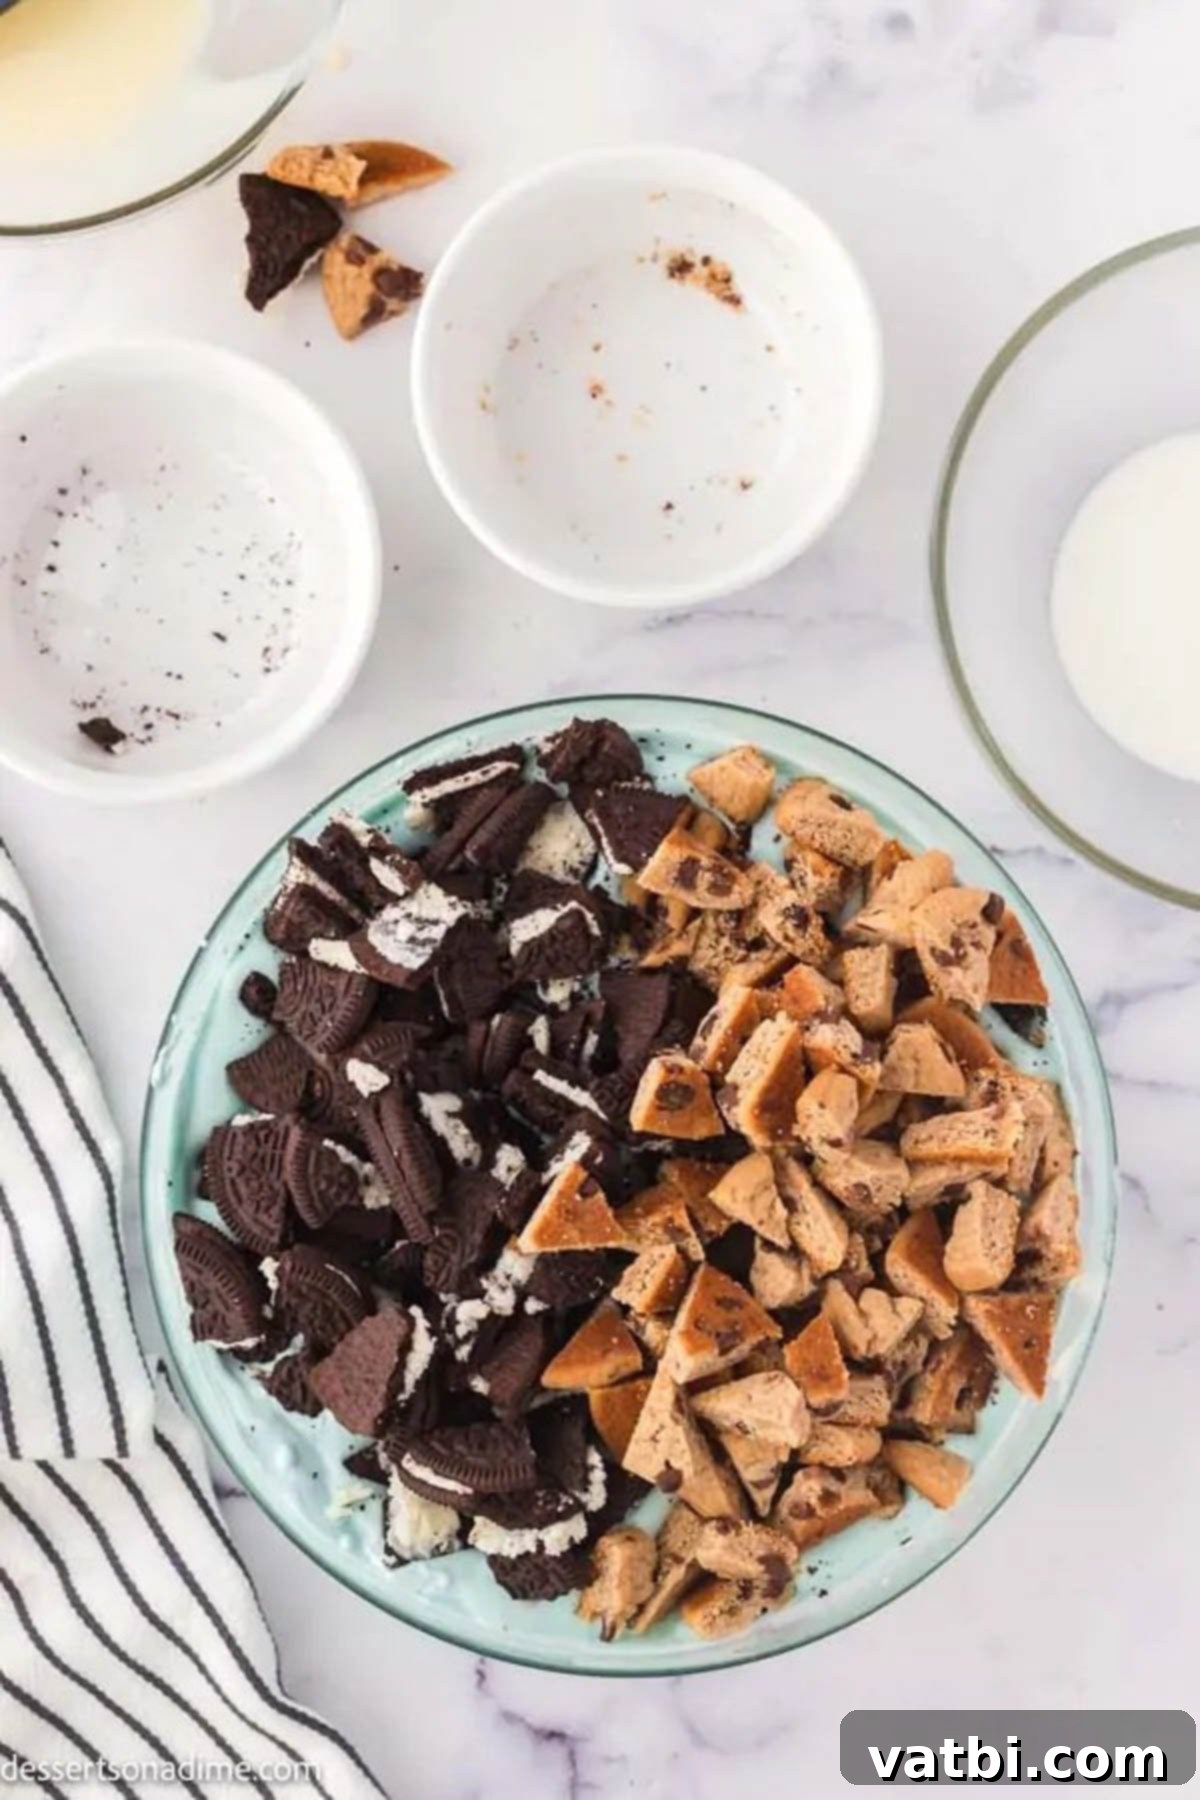
Step 2: Incorporate the Cookies. While your cream base is being prepared, roughly chop your Oreos and chocolate chip cookies into small, manageable pieces. You want a mix of fine crumbs and larger chunks for the best texture in your ice cream. Once chopped, gently fold the majority of these cookie pieces into the blue ice cream mixture using a spatula. Mix just until they are evenly distributed. Remember to save a handful of the chopped cookies to garnish the top of the ice cream later, adding an appealing visual touch and extra crunch.
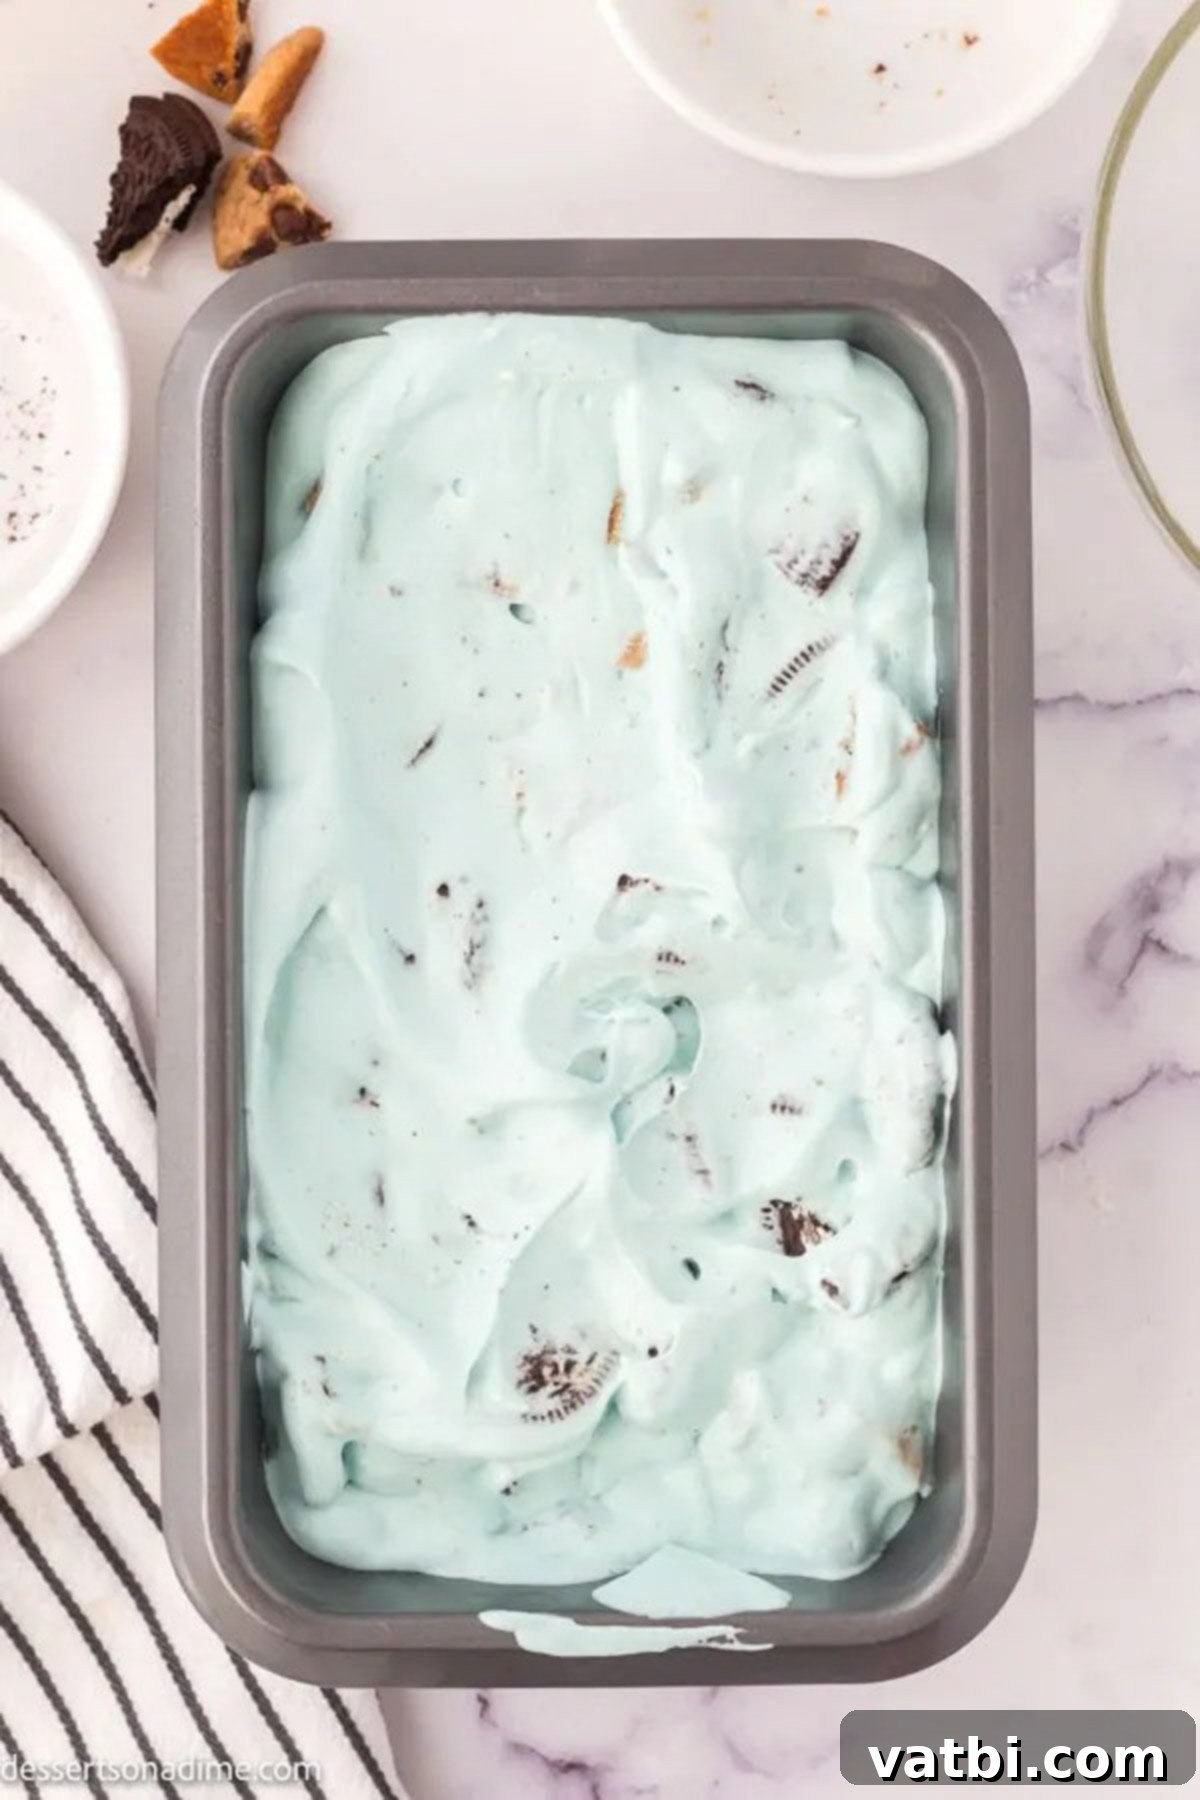
Step 3: Transfer and Garnish. Carefully spoon the entire ice cream mixture into a standard bread pan or any other similar freezer-safe container. Gently spread it out evenly to ensure consistent freezing. Once the mixture is smoothly settled in the pan, take the remaining chopped cookies that you set aside earlier and generously sprinkle them over the top. This not only makes the ice cream look more appealing but also provides a lovely crunchy topping.
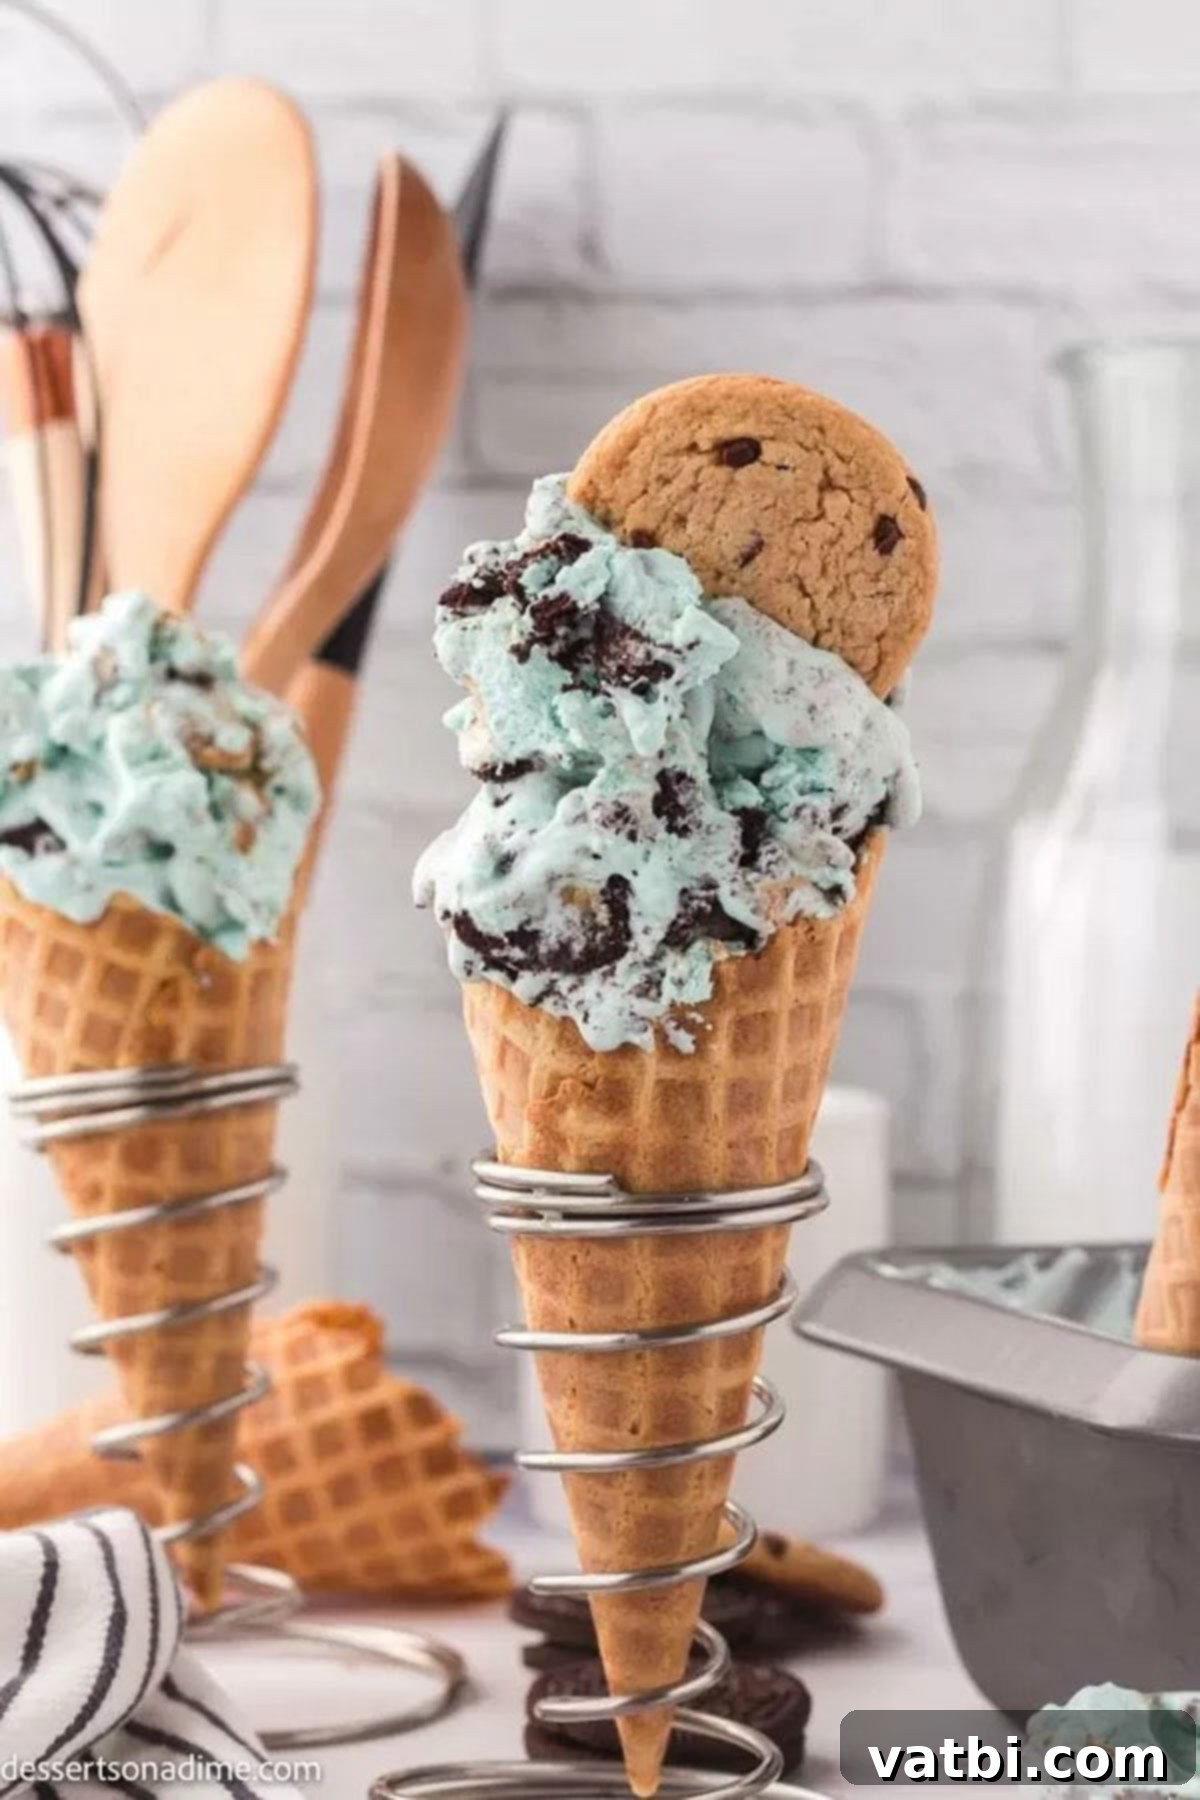
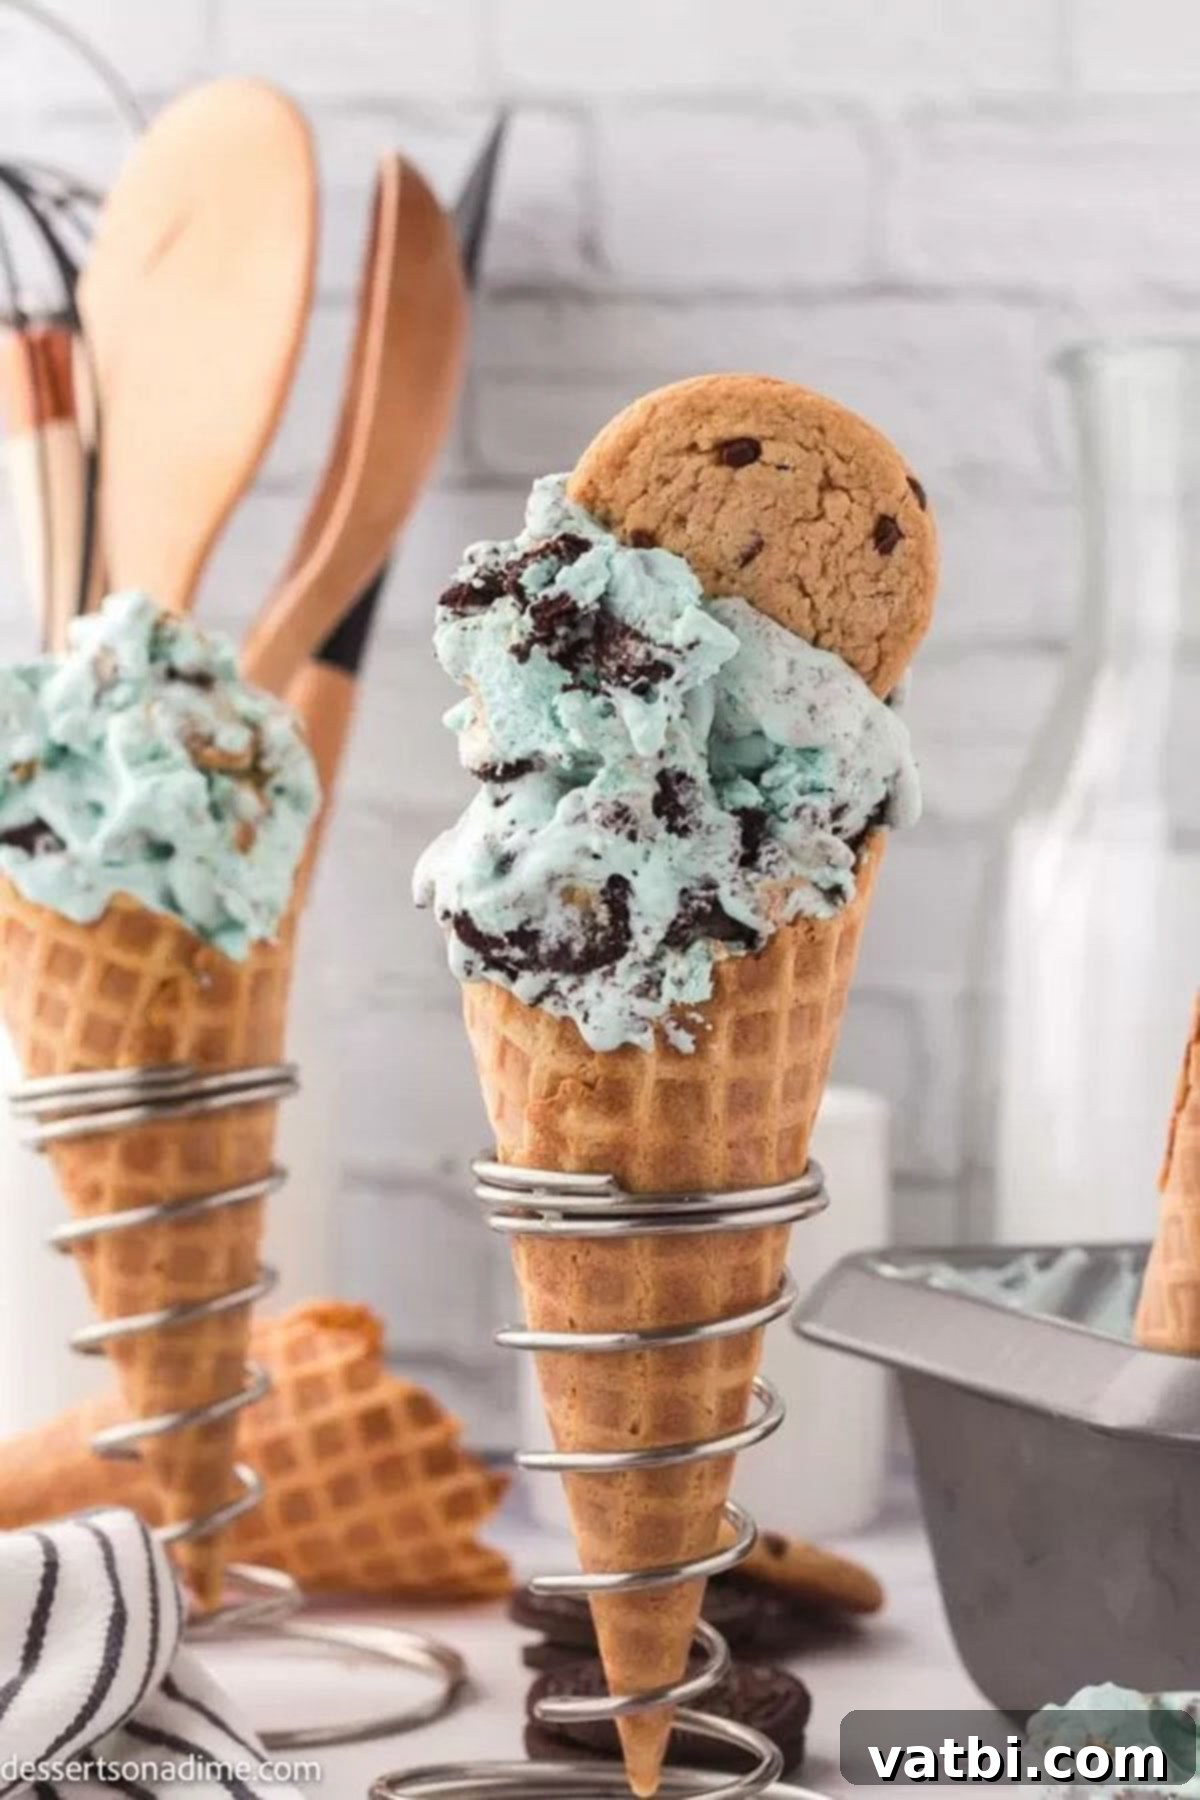
Step 4: Freeze and Serve. Cover the loaf pan tightly with plastic wrap or an airtight lid to prevent ice crystals from forming. Place the pan in the freezer for a minimum of 6 hours, or ideally, overnight. This extended freezing time ensures the ice cream sets properly and achieves that perfectly scoopable consistency. Once fully frozen, scoop this wonderfully creamy ice cream into your favorite ice cream cones, dessert cups, or even serve it in a bowl with additional toppings like whipped cream or extra cookie crumbles. Enjoy your homemade Cookie Monster masterpiece!
Storage Tips for Homemade Ice Cream
Proper storage is essential to maintain the delicious creamy texture and fresh flavor of your homemade Cookie Monster Ice Cream. Nobody wants icy, freezer-burnt ice cream! Here’s how to best preserve your delightful creation:
Once your ice cream has fully set, securely cover the loaf pan (or chosen freezer-safe container) with a layer of plastic wrap. To provide an extra layer of protection and significantly help prevent ice crystals from forming on the surface, I highly recommend placing a sheet of parchment paper or wax paper directly onto the surface of the ice cream itself, ensuring it touches the entire surface. Then, cover it tightly again with the plastic wrap or an airtight lid.
For optimal freshness and to further combat freezer burn, always transfer your ice cream to an airtight container. A bread pan covered with plastic wrap is good for initial freezing, but a dedicated freezer-safe container with a tight-fitting lid is best for long-term storage. Store the ice cream at the back of your freezer, where the temperature is most consistent and less prone to fluctuations from opening and closing the freezer door. When stored properly, your homemade Cookie Monster Ice Cream will remain wonderfully fresh and enjoyable for up to one month. While it might still be safe to eat after this period, its texture and flavor might begin to degrade.
Pro Tips for Perfect No-Churn Ice Cream
Achieving perfectly creamy, delicious no-churn ice cream consistently involves a few simple tricks. Keep these professional tips in mind to ensure your Cookie Monster Ice Cream turns out flawlessly every time:
- Ensure Cookies Are Crunchy, Not Soft: The texture of your cookies makes a big difference. For the best mouthfeel and to prevent them from becoming soggy, make sure the cookies you use (both Oreos and chocolate chip cookies) are crunchy and not soft. Crunchy cookies will hold up much better in the ice cream, providing that delightful textural contrast you want. If using homemade cookies, ensure they are completely cooled and firm.
- Freeze Your Mixing Bowl for Optimal Volume: This is a game-changer for whipping cream. Before you even start, place your large mixing bowl (and even your whisk attachment, if using a stand mixer) in the freezer for 10-15 minutes. Chilling your equipment helps the heavy whipping cream get significantly colder, which in turn allows it to whip up faster and achieve the best possible volume and stiff peaks. This extra bit of air results in a lighter, creamier final ice cream.
- Store in an Airtight Container to Ensure Freshness and Avoid Freezer Burn: While a loaf pan is great for initial setting, for longer-term storage, transfer your ice cream to a high-quality airtight container. This specialized container minimizes exposure to air, which is the primary cause of ice crystal formation and freezer burn. When stored properly in an airtight container, your homemade ice cream will maintain its smooth texture and fresh flavor for up to a month.
- Instead of Chopping, Consider Using Mini Cookies for Convenience: If you’re looking to save a step and reduce prep time, mini cookies are your secret weapon! Instead of manually chopping regular-sized Oreos and chocolate chip cookies, simply use mini chocolate chip cookies and mini Oreo cookies. They come pre-portioned to the perfect size for folding into ice cream, providing that great cookie-to-ice-cream ratio without any extra effort.
More No-Churn Ice Cream Recipes to Try
The beauty of no-churn ice cream is its effortless creation, opening up a world of delightful frozen possibilities without the need for specialized equipment. If you loved making this Cookie Monster Ice Cream, you’ll be thrilled to discover how many other fantastic flavors you can create using the same simple method. Here are a few more popular no-churn ice cream recipes that are perfect for satisfying any craving:
- Homemade Salted Caramel Ice Cream
- Mint Chocolate Chip Ice Cream Recipe
- Pistachio Ice Cream Recipe
- Homemade Cookies and Cream Ice Cream
- Chocolate Ice Cream
- S’mores Ice Cream Recipe
Don’t hesitate to whip up this easy and fun Cookie Monster Ice Cream recipe today, and please come back to leave a comment with your experience. I truly love hearing from you and seeing your delicious creations!
Pin
Cookie Monster Ice Cream
Ingredients
- 2 cup heavy whipping cream
- 1 tablespoon pure vanilla extract
- 10 oz sweetened condensed milk
- 10-15 Oreos roughly chopped into chunks
- 10-15 chocolate chip cookies roughly chopped
- blue food coloring
Instructions
-
In a large mixing bowl, combine the heavy whipping cream, vanilla extract, and blue food coloring. Using a stand mixer or a hand mixer, beat the mixture on medium-high speed until firm, stiff peaks form. Ensure the color is a vibrant blue, adding more food coloring if necessary.
-
Gently fold in the sweetened condensed milk with a spatula until it is just well-combined into the whipped cream base. Be careful not to overmix and deflate the airy texture.
-
Carefully fold in the roughly chopped Oreos and chocolate chip cookies. Reserve a small handful of the chopped cookies to use as a garnish later.
-
Pour the creamy ice cream mixture into a standard bread pan or another suitable freezer-safe container. Spread the mixture evenly with a spatula.
-
Sprinkle the reserved chopped cookies over the top of the ice cream for an attractive and crunchy finish.
-
Cover the pan tightly with plastic wrap and place it in the freezer for at least 6 hours, or ideally, overnight, until it is completely firm.
Nutrition Facts
Pin This Now to Remember It Later
Pin Recipe
