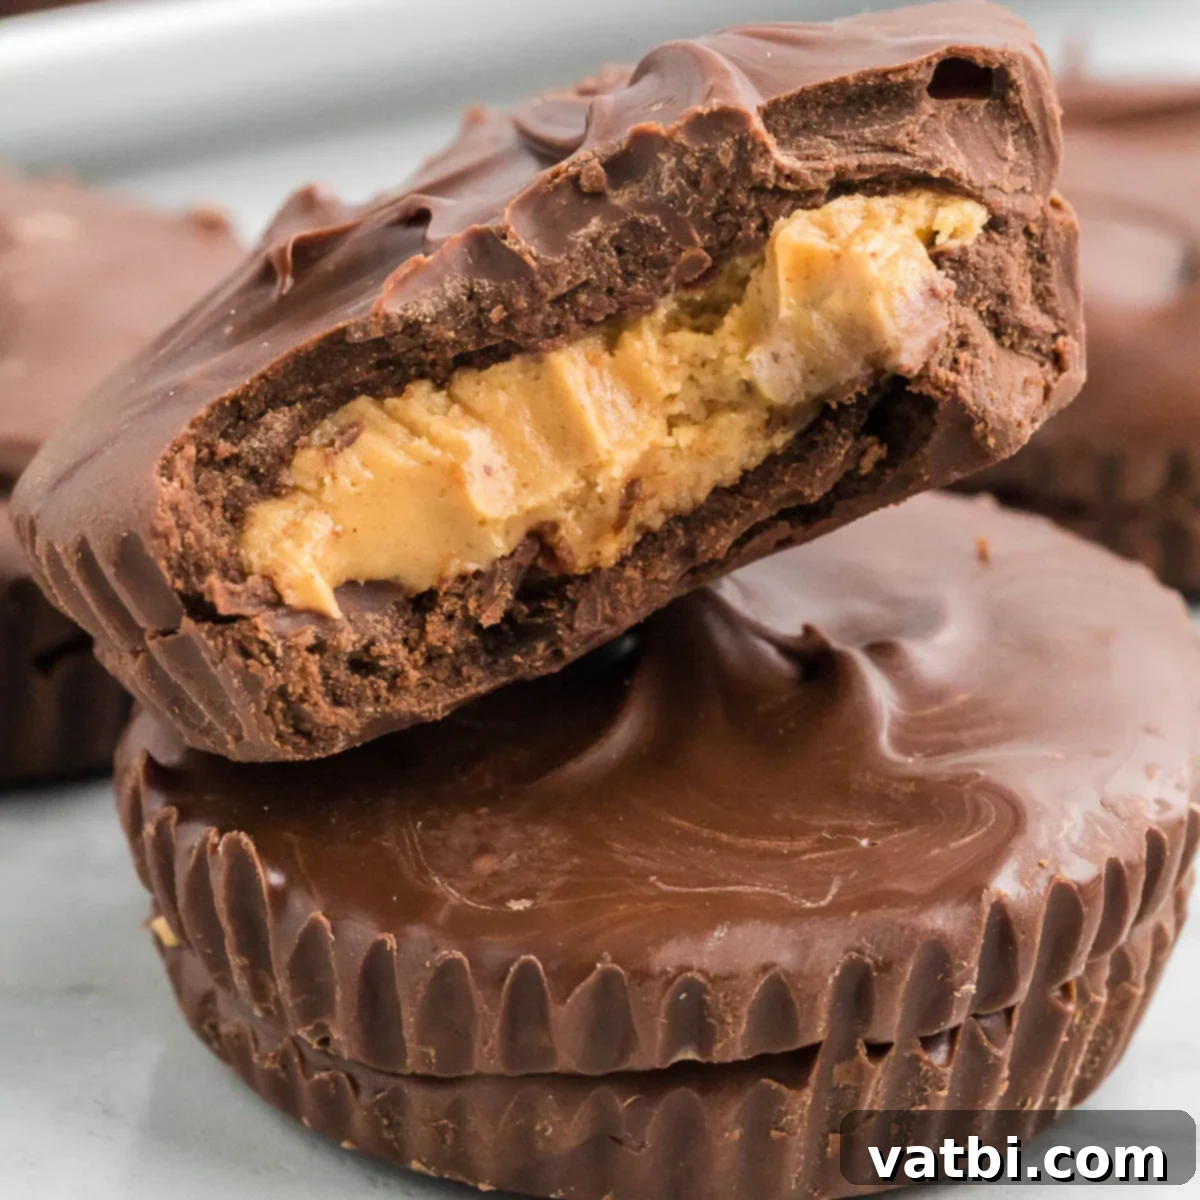
The Ultimate Guide to Homemade Chocolate Peanut Butter Cups: Easy, Decadent, and No-Bake!
There’s something truly magical about the timeless combination of rich chocolate and creamy peanut butter. It’s a classic pairing that has delighted taste buds for generations, and now you can recreate that iconic flavor at home with this incredibly simple recipe for **Homemade Chocolate Peanut Butter Cups**. Forget store-bought versions; these melt-in-your-mouth treats are a must-try for any peanut butter enthusiast seeking a decadent, easy-to-make dessert that requires no oven.
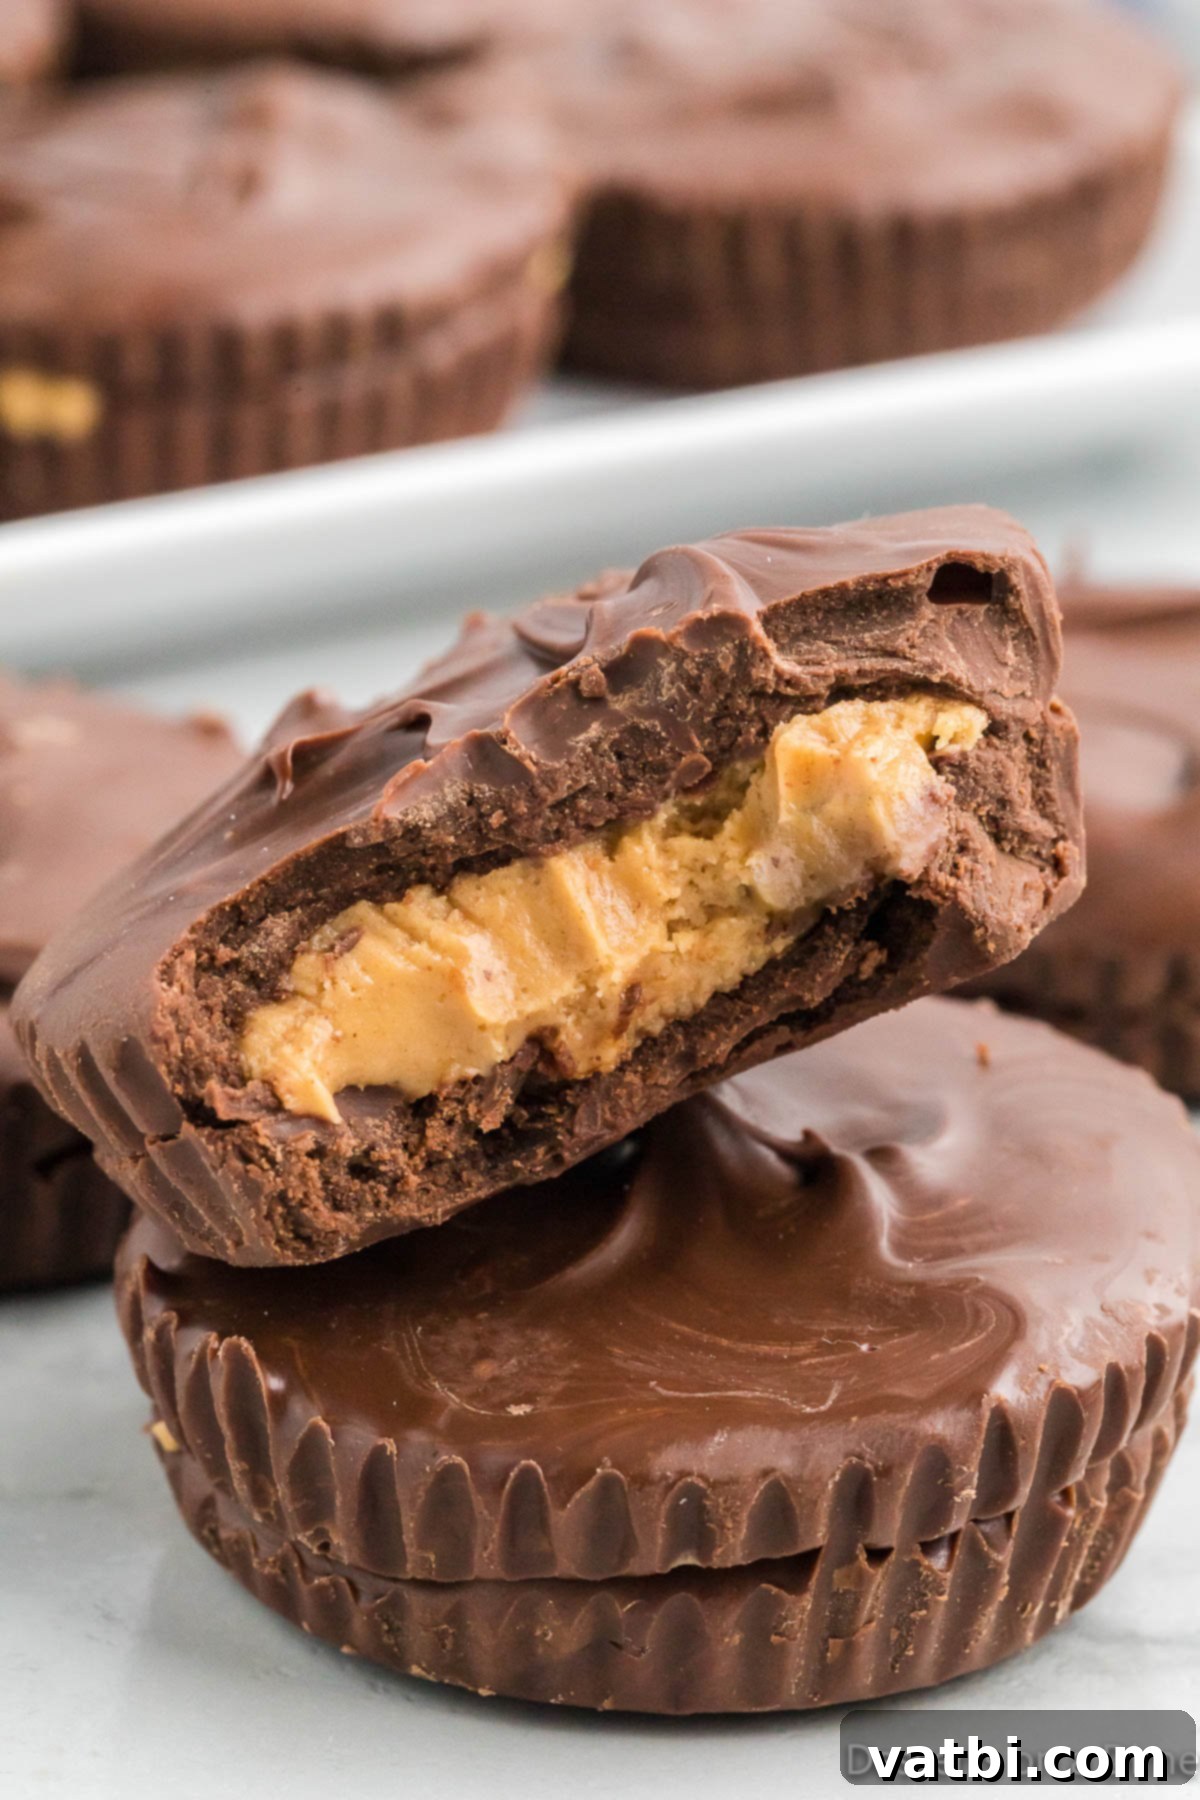
Each glorious bite of these homemade chocolate peanut butter cups promises to literally melt in your mouth, delivering a blissful explosion of sweet and salty goodness. You’ll be amazed at how incredibly simple this no-bake recipe is, and we promise it’s genuinely easy to master. It’s perfect for satisfying those spontaneous dessert cravings, preparing a stunning sweet treat for any occasion, or simply enjoying a moment of pure indulgence without the fuss of baking.
If you find yourself utterly captivated by the irresistible chocolate and peanut butter combination, then you’re in for a treat! Don’t stop here – you absolutely must explore other delightful creations that feature this beloved duo. We highly recommend trying our Chocolate Covered Ritz Crackers for a sweet-and-salty crunch, our fun Chocolate Peanut Butter Popcorn, and our amazingly quick 2-Ingredient Chocolate Peanut Butter Fudge. These recipes are sure to become new favorites in your dessert repertoire, proving that deliciousness doesn’t have to be complicated.
What You’ll Discover in This Guide: Homemade Chocolate Peanut Butter Cups Recipe
- Why You’ll Absolutely Love This Recipe
- Essential Ingredients for Perfection
- Exciting Recipe Variations to Try
- Step-by-Step: How to Make Chocolate Peanut Butter Cups
- Frequently Asked Questions (FAQs)
- Pro Tips for Flawless Results
- More Irresistible Easy Candy Recipes
- Full Chocolate Peanut Butter Cups Recipe Card
Why You’ll Absolutely Love This Easy Chocolate Peanut Butter Cup Recipe
Making your own chocolate peanut butter cups is a truly rewarding experience, offering a significant upgrade from store-bought alternatives. Not only do they taste infinitely better, but the process itself is surprisingly stress-free and enjoyable. Here’s why this recipe deserves a prime spot in your dessert collection:
- Crafted with Simple, Accessible Ingredients: You don’t need a gourmet pantry to create these sensational treats. Our recipe calls for easy-to-find, common kitchen staples that you likely already have on hand. This makes it an ideal choice for a last-minute dessert, a spontaneous craving, or a fun cooking project that doesn’t require a special trip to the grocery store. The straightforward nature of the ingredients also contributes to their authentic, wholesome homemade flavor.
- Indulgently Creamy Texture: The hallmark of an exceptional peanut butter cup is its texture. This recipe excels at delivering an exquisitely creamy peanut butter filling that provides a perfect counterpoint to the smooth, rich chocolate shell. Each bite is a harmonious blend of luxurious textures that will leave your taste buds completely satisfied. It’s a decadent mouthfeel that makes these treats feel incredibly indulgent and utterly irresistible.
- Effortlessly Easy for Everyone to Make: Whether you’re a seasoned chef or a complete beginner in the kitchen, this recipe is designed for foolproof success. There’s no complicated baking, intricate techniques, or advanced equipment required – just simple melting and mixing. Anyone can follow these clear, straightforward steps to create professional-looking and tasting Reese’s-style peanut butter cups right in their own home. It’s a fantastic entry point into the world of confectionery, perfect for introducing children to the joy of cooking or for whipping up an impressive dessert without any culinary stress.
Essential Ingredients for Homemade Chocolate Peanut Butter Cup Perfection
The journey to crafting the perfect homemade chocolate peanut butter cup begins with a careful selection of ingredients. While the list is delightfully short, each component plays a crucial role in achieving that beloved flavor and satisfying texture. Understanding the purpose of each ingredient will help you make the best choices and even explore variations.
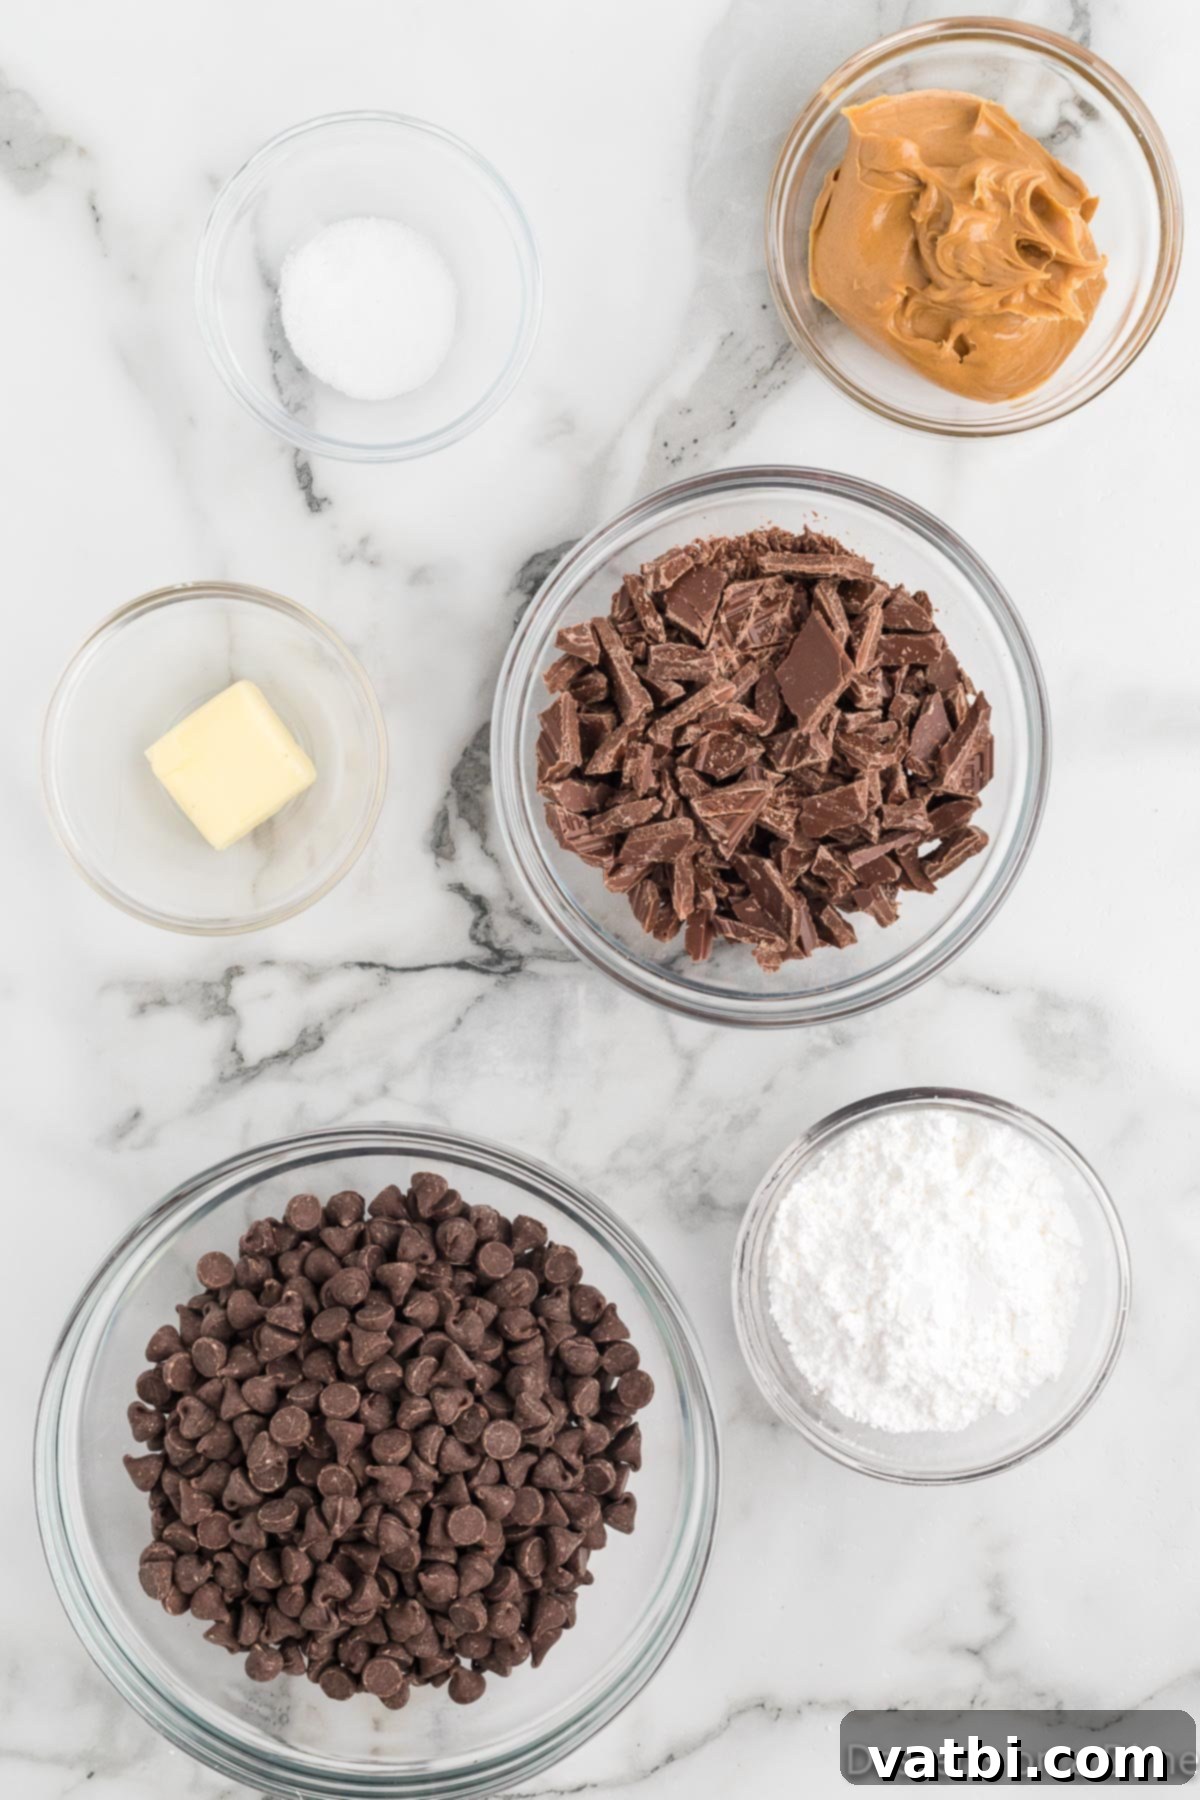
- Peanut Butter: For the signature smooth and luscious filling, creamy peanut butter is the top recommendation. Its consistent texture blends beautifully and holds its shape once chilled. While natural peanut butter can be used, ensure it’s thoroughly stirred to reincorpor any separated oils. You might also need to adjust the amount of powdered sugar slightly to achieve the desired firm consistency, as natural brands often have less sugar and stabilizers.
- Butter: We specify unsalted butter to give you complete control over the saltiness of your final product. It’s vital that the butter is softened to room temperature before mixing. This ensures it creams seamlessly with the peanut butter and powdered sugar, resulting in a lump-free and wonderfully silky-smooth filling.
- Powdered Sugar: Also known as confectioners’ sugar or icing sugar, powdered sugar is an indispensable component for the peanut butter filling. Its fine texture dissolves effortlessly, providing the perfect sweetness and contributing to the incredibly smooth, melt-in-your-mouth consistency without any grittiness. For the silkiest filling possible, we highly recommend sifting your powdered sugar to remove any potential lumps before incorporating it.
- Salt: A small but mighty ingredient, a pinch of salt is crucial. It acts as a flavor enhancer, balancing the sweetness of the chocolate and peanut butter and making all the flavors pop. Don’t skip it, as it elevates the overall taste profile.
- Chocolate Chips: The type of chocolate chips you choose allows for delightful customization. Semi-sweet chocolate chips offer a balanced level of sweetness that is widely popular, while milk chocolate chips will give you a sweeter, more classic, and nostalgic taste akin to traditional store-bought peanut butter cups. Feel free to use your personal favorite or a blend of both!
- Milk Chocolate Candy Bars: Coarsely chopped milk chocolate candy bars are added to the chocolate chip mixture. The addition of a solid chocolate bar helps to create an even smoother, more fluid melted chocolate that is easier to pour and results in a perfectly glossy, snappable chocolate shell when set.
For precise measurements and quantities for each ingredient, please refer to the comprehensive recipe card conveniently located at the very bottom of this post.
Unleash Your Creativity: Exciting Chocolate Peanut Butter Cup Recipe Variations
While the classic chocolate peanut butter cup is undeniably perfect, this recipe is remarkably versatile, inviting you to experiment with different flavors, textures, and presentations. Don’t be afraid to personalize your batch and discover new favorites! Here are some fantastic variations to inspire your next culinary adventure:
- Dark Chocolate Peanut Butter Cups: For those who appreciate a deeper, more intense chocolate flavor with less sweetness, simply substitute dark chocolate chips or a high-quality dark chocolate bar for the milk or semi-sweet varieties. The slight bitterness of dark chocolate provides a sophisticated contrast to the sweet and salty peanut butter filling, creating a truly gourmet experience.
- White Chocolate Indulgence: If you’re looking for a delightful visual and taste departure, use white chocolate chips for your cups. The creamy, rich vanilla notes of white chocolate pair wonderfully with peanut butter, offering a lighter, sweeter, and incredibly decadent alternative.
- Elegant Chocolate Drizzle: Elevate the visual appeal of your peanut butter cups with a decorative chocolate drizzle. Once your main chocolate layer has set, melt a small amount of contrasting chocolate (e.g., white chocolate drizzled over milk chocolate, or dark chocolate over white) and artfully zigzag it over the tops. This simple touch adds a gourmet flair, making them perfect for gifting or special occasions.
- A Hint of Powdered Sugar: For a quick and charming finish, lightly dust the set chocolate peanut butter cups with a delicate sprinkle of powdered sugar. This adds a touch of rustic elegance and an extra kiss of sweetness that appeals to the eye and the palate.
- Explore Different Peanut Butters: The world of peanut butter is vast! While creamy peanut butter is standard, feel free to experiment. You could try making homemade peanut butter for an incredibly fresh and natural taste. Or, opt for a natural peanut butter (ensure it’s thoroughly stirred to prevent oil separation) for a less processed option, though you may need to adjust powdered sugar for consistency.
- Crunchy Peanut Butter Cups: If you crave a delightful textural contrast, crunchy peanut butter is an excellent choice. The small pieces of roasted peanuts embedded in the filling add a satisfying crunch to the soft center. Alternatively, finely chop some pretzels or rice krispies and mix them into your creamy peanut butter filling for an extra layer of delightful texture.
- Nut Butter Alternatives: For those with peanut allergies or simply desiring a different flavor profile, almond butter or cashew butter work beautifully as substitutes. Both offer a rich, nutty flavor that complements chocolate exquisitely. Nutella is also a fantastic and popular option, providing a luscious hazelnut-chocolate twist to your “peanut” butter cups.
- Perfect for Dessert Trays & Gifting: These homemade peanut butter cups are incredibly versatile for holiday platters, party dessert trays, or thoughtful edible gifts. Create an eye-catching assortment using milk chocolate, dark chocolate, and white chocolate variations. Their vibrant appearance and irresistible taste consistently make them a crowd-pleaser, and guests will undoubtedly be asking for your “secret” recipe – they simply won’t believe how easy they are to make!
- Mini Muffins for Bite-Sized Delights: For perfectly portioned, bite-sized treats, consider using mini muffin tins and mini cupcake liners. These smaller versions are ideal for portion control, children’s parties, or when you wish to offer a wider variety of tiny indulgences on a dessert spread.
- Fruity or Coconut Infusion: For a unique and unexpected flavor twist, consider mixing finely chopped dried fruit (such as cranberries, cherries, or apricots) or shredded coconut into your peanut butter filling. This adds a subtle chewiness, a burst of fruity brightness, or tropical notes that beautifully complement the chocolate and nut butter.
Step-by-Step Guide: How to Make Irresistible Homemade Chocolate Peanut Butter Cups
Creating these delightful no-bake chocolate peanut butter cups is a straightforward and enjoyable process, broken down into a few simple steps. By following these instructions carefully, you’ll achieve perfectly layered, decadent treats every single time. Remember, a little bit of preparation and patience during the chilling phases will yield the best results!
- Step 1 – Prepare Your Muffin Pan: To begin, line a standard 12-cup muffin pan with paper cupcake liners. These liners are crucial not only for the aesthetic appeal but also for easily removing your finished peanut butter cups without sticking. Once all the cavities are lined, set the pan aside, ready for the delicious layers to come.
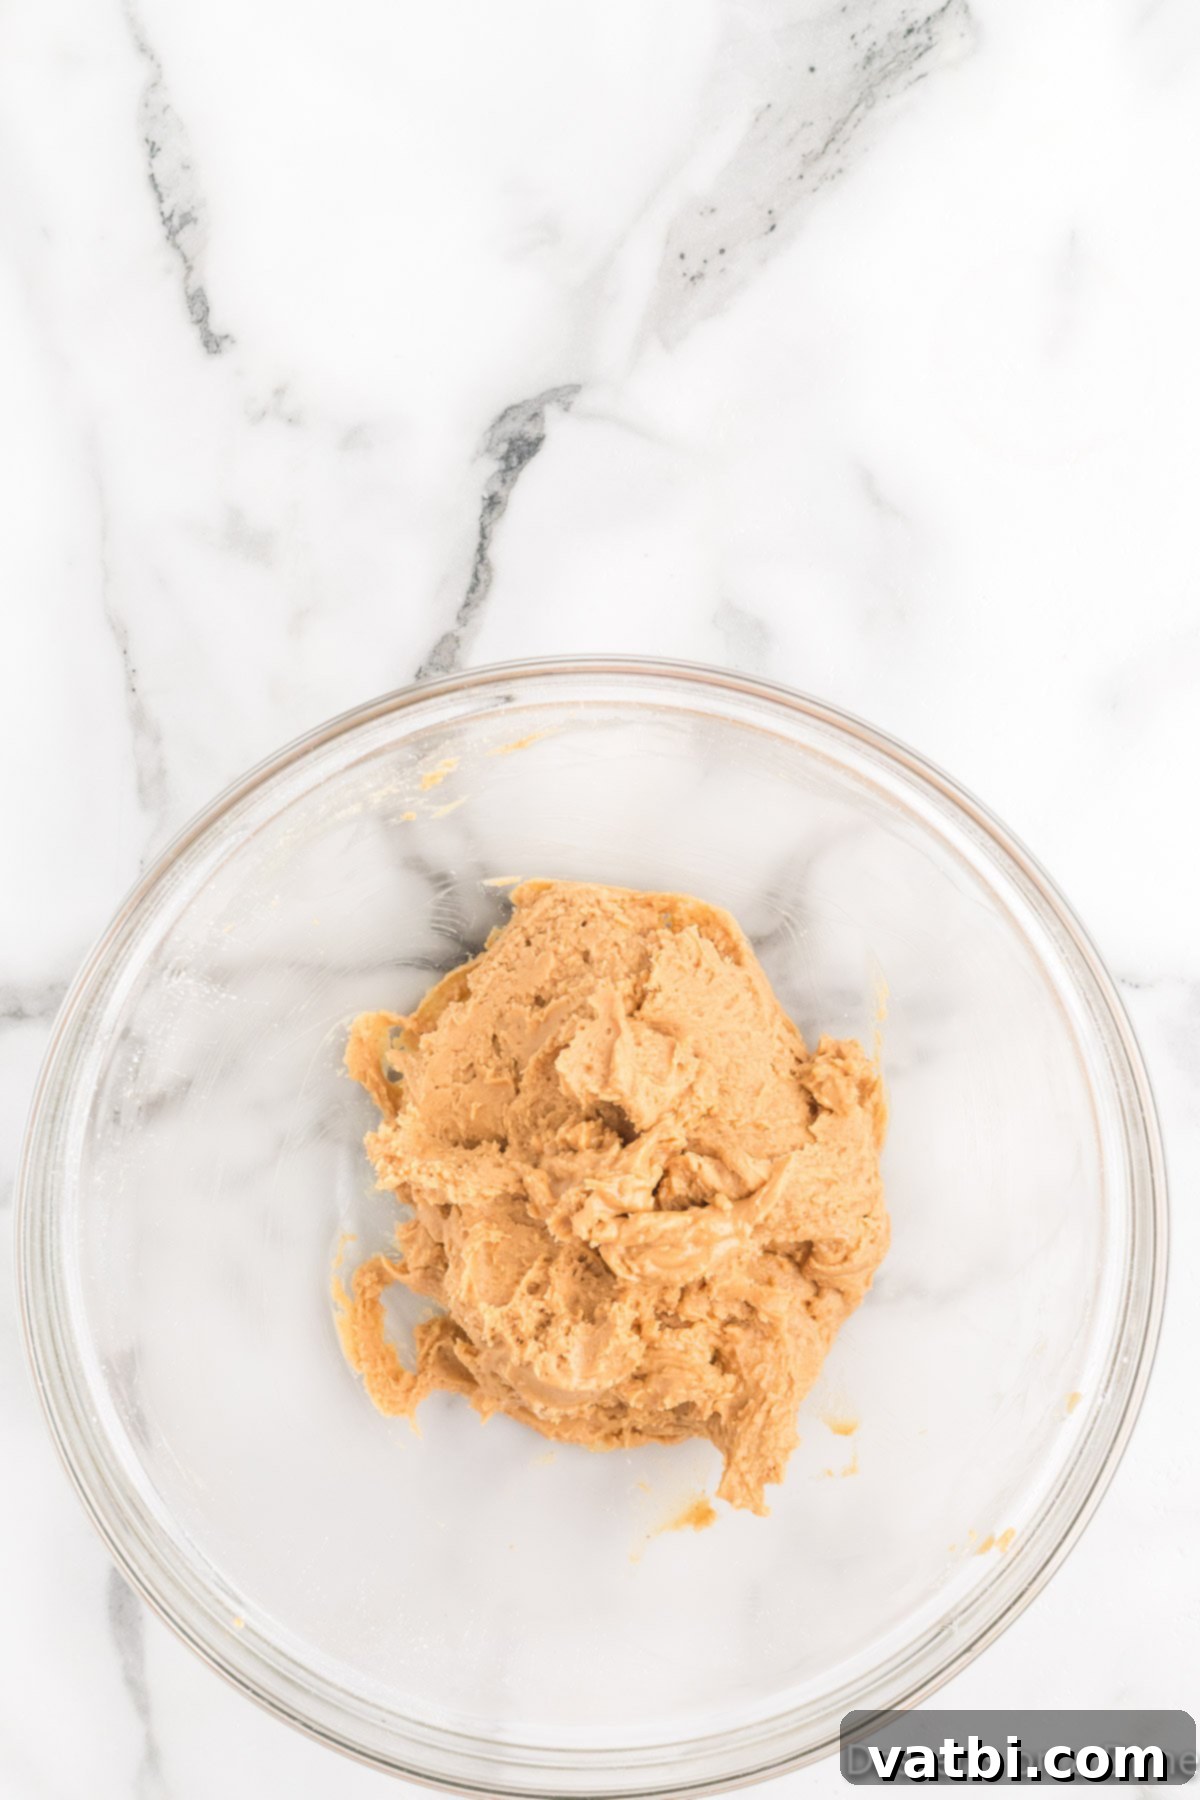
Step 2. Craft the Creamy Peanut Butter Filling: Get out a medium-sized mixing bowl. Into this bowl, add about half of your creamy peanut butter (as specified in the recipe card), the softened unsalted butter, powdered sugar, and a small amount of salt. Using either a hand mixer on low speed or a sturdy spoon, blend these ingredients together. Mix until the mixture is completely smooth, light, and appears well combined. Ensure there are no visible lumps of powdered sugar for the best, silkiest filling texture.
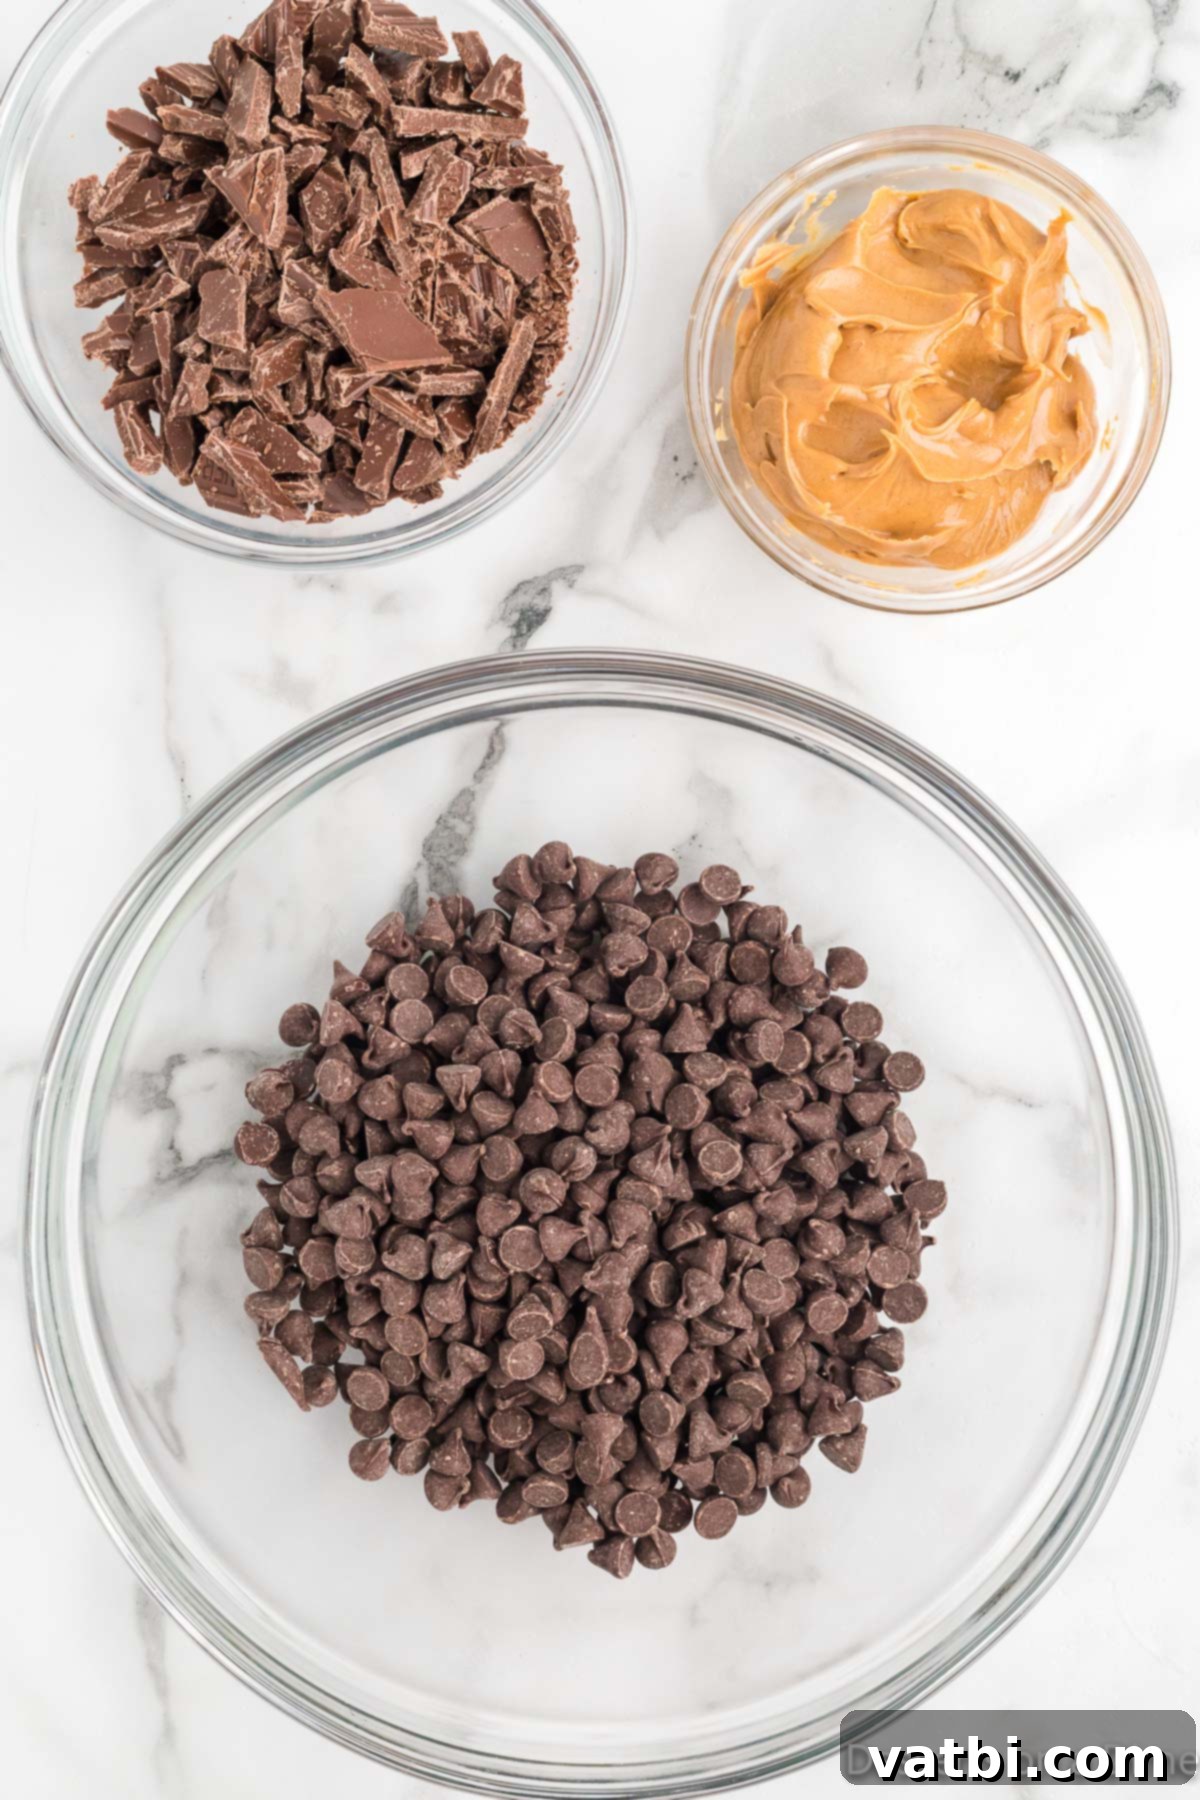
Step 3. Prepare the Decadent Chocolate Layer: In a separate, microwave-safe bowl, combine your chosen chocolate chips, the coarsely chopped milk chocolate bar pieces, and the remaining portion of creamy peanut butter. This thoughtful addition of a small amount of peanut butter to the chocolate mixture is a little secret that helps to achieve a smoother, more manageable consistency for pouring and adds a subtle, delightful flavor to the chocolate shell.
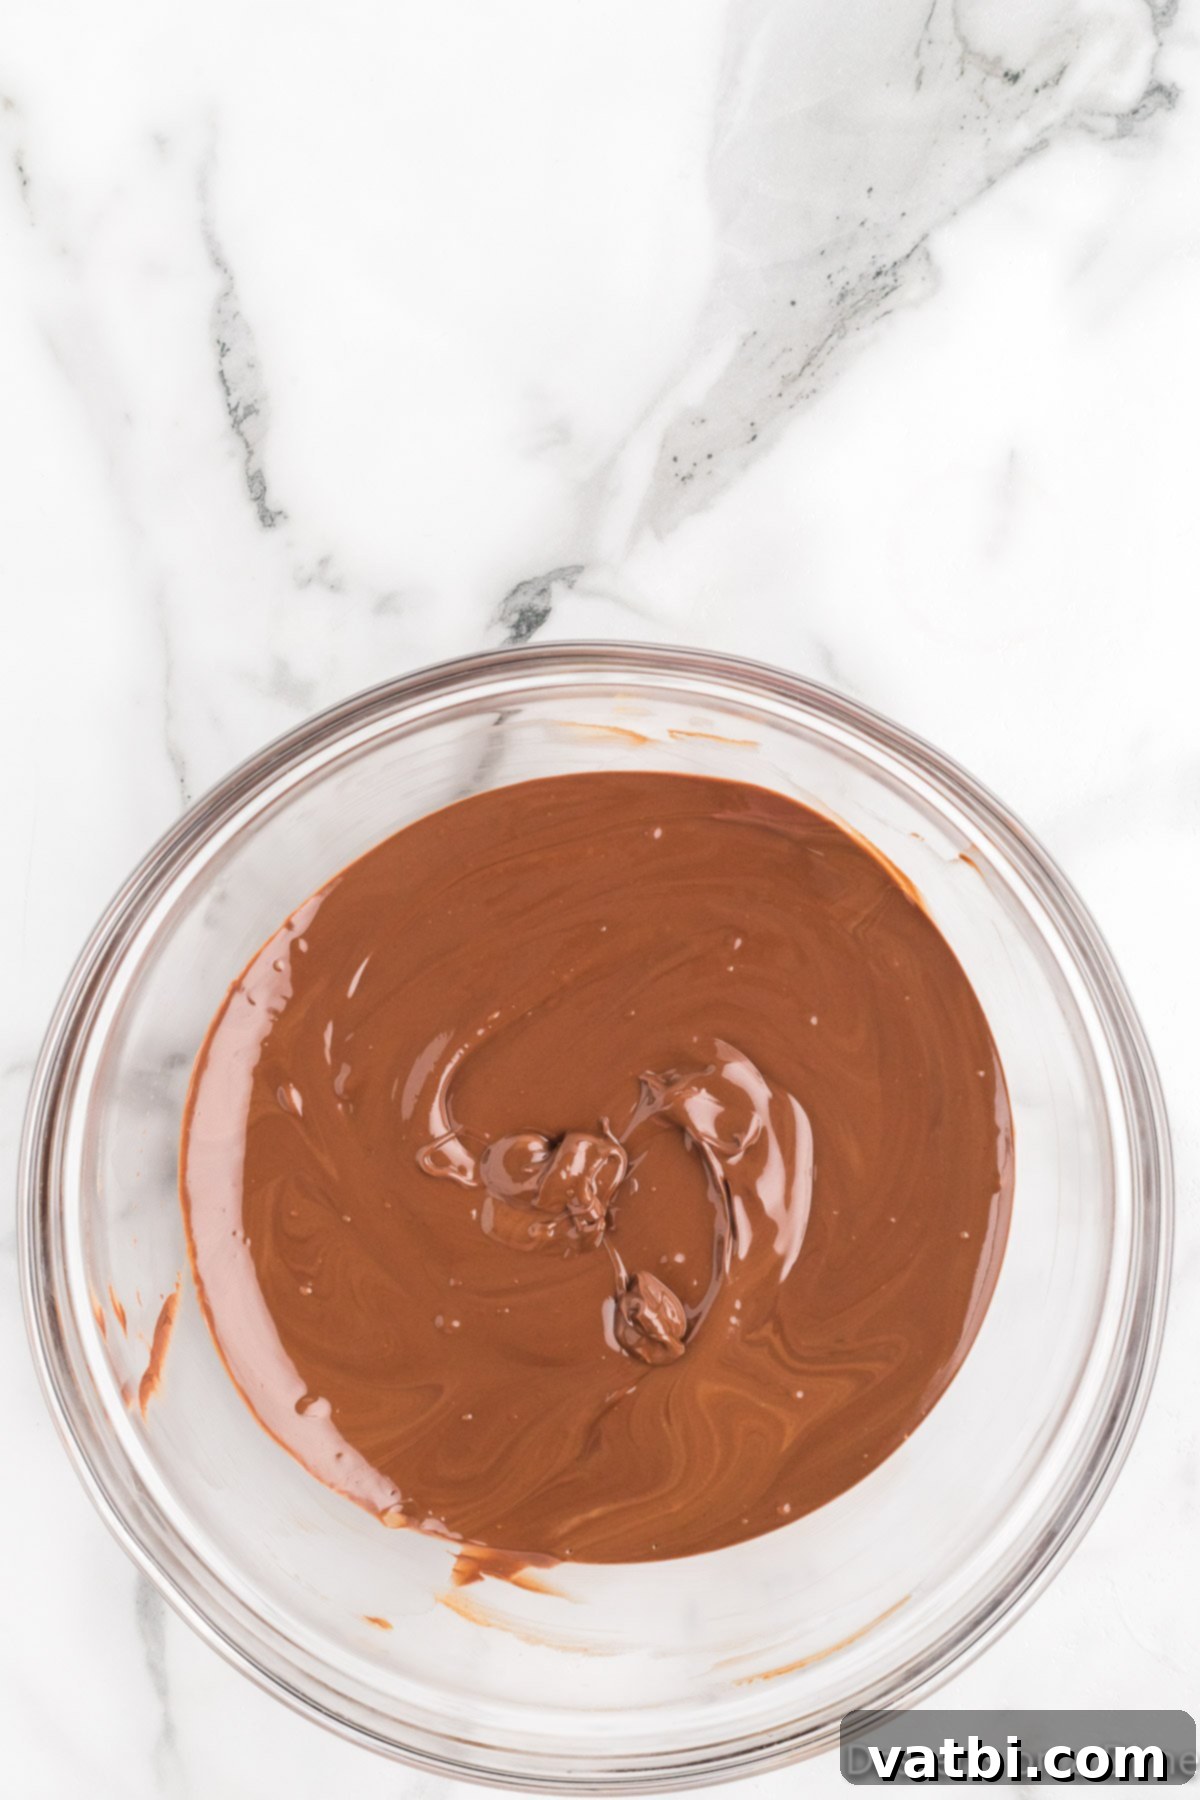
Step 4. Melt the Chocolate Carefully: Heat the chocolate mixture in the microwave using short, controlled intervals – typically 30 seconds at a time. After each interval, remove the bowl and stir the chocolate thoroughly with a spatula. Continue this process, heating and stirring, until the chocolate is almost entirely melted, with just a few small lumps remaining. The residual heat from the bowl and the already melted chocolate will then melt these remaining lumps as you continue to stir, preventing the chocolate from burning or seizing (becoming thick and grainy). If you prefer, a double boiler method can also be employed for an even more gentle and controlled melting process.
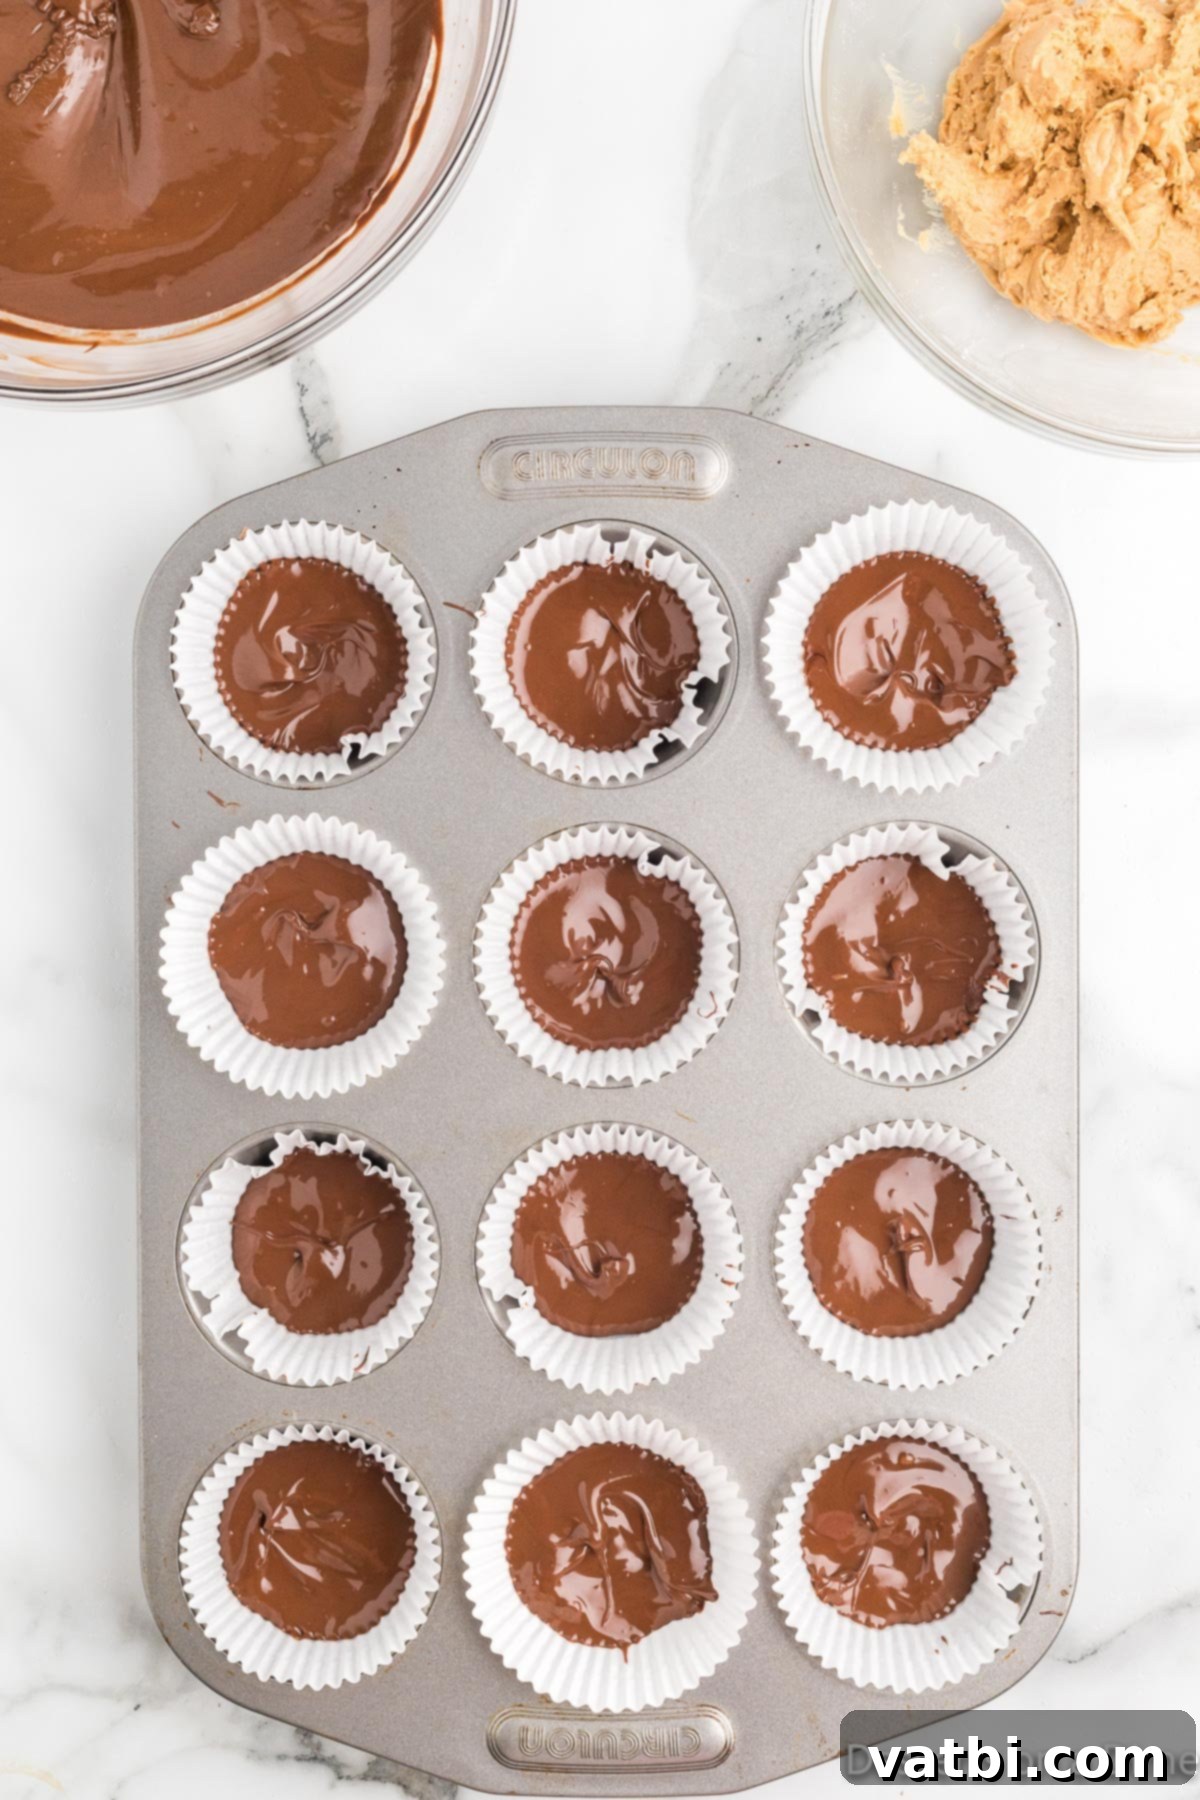
Step 5. Layer the First Chocolate Base: Now it’s time to build your cups! Using a small spoon or a cookie scoop, carefully divide about half of your melted chocolate mixture among the prepared cupcake liners. Aim to create an even, thin layer at the bottom of each liner. This will form the sturdy and delicious chocolate base of your peanut butter cups. Once the chocolate is distributed, you can gently tap the muffin pan on the counter a few times to help settle the chocolate and release any trapped air bubbles, ensuring a smooth surface.
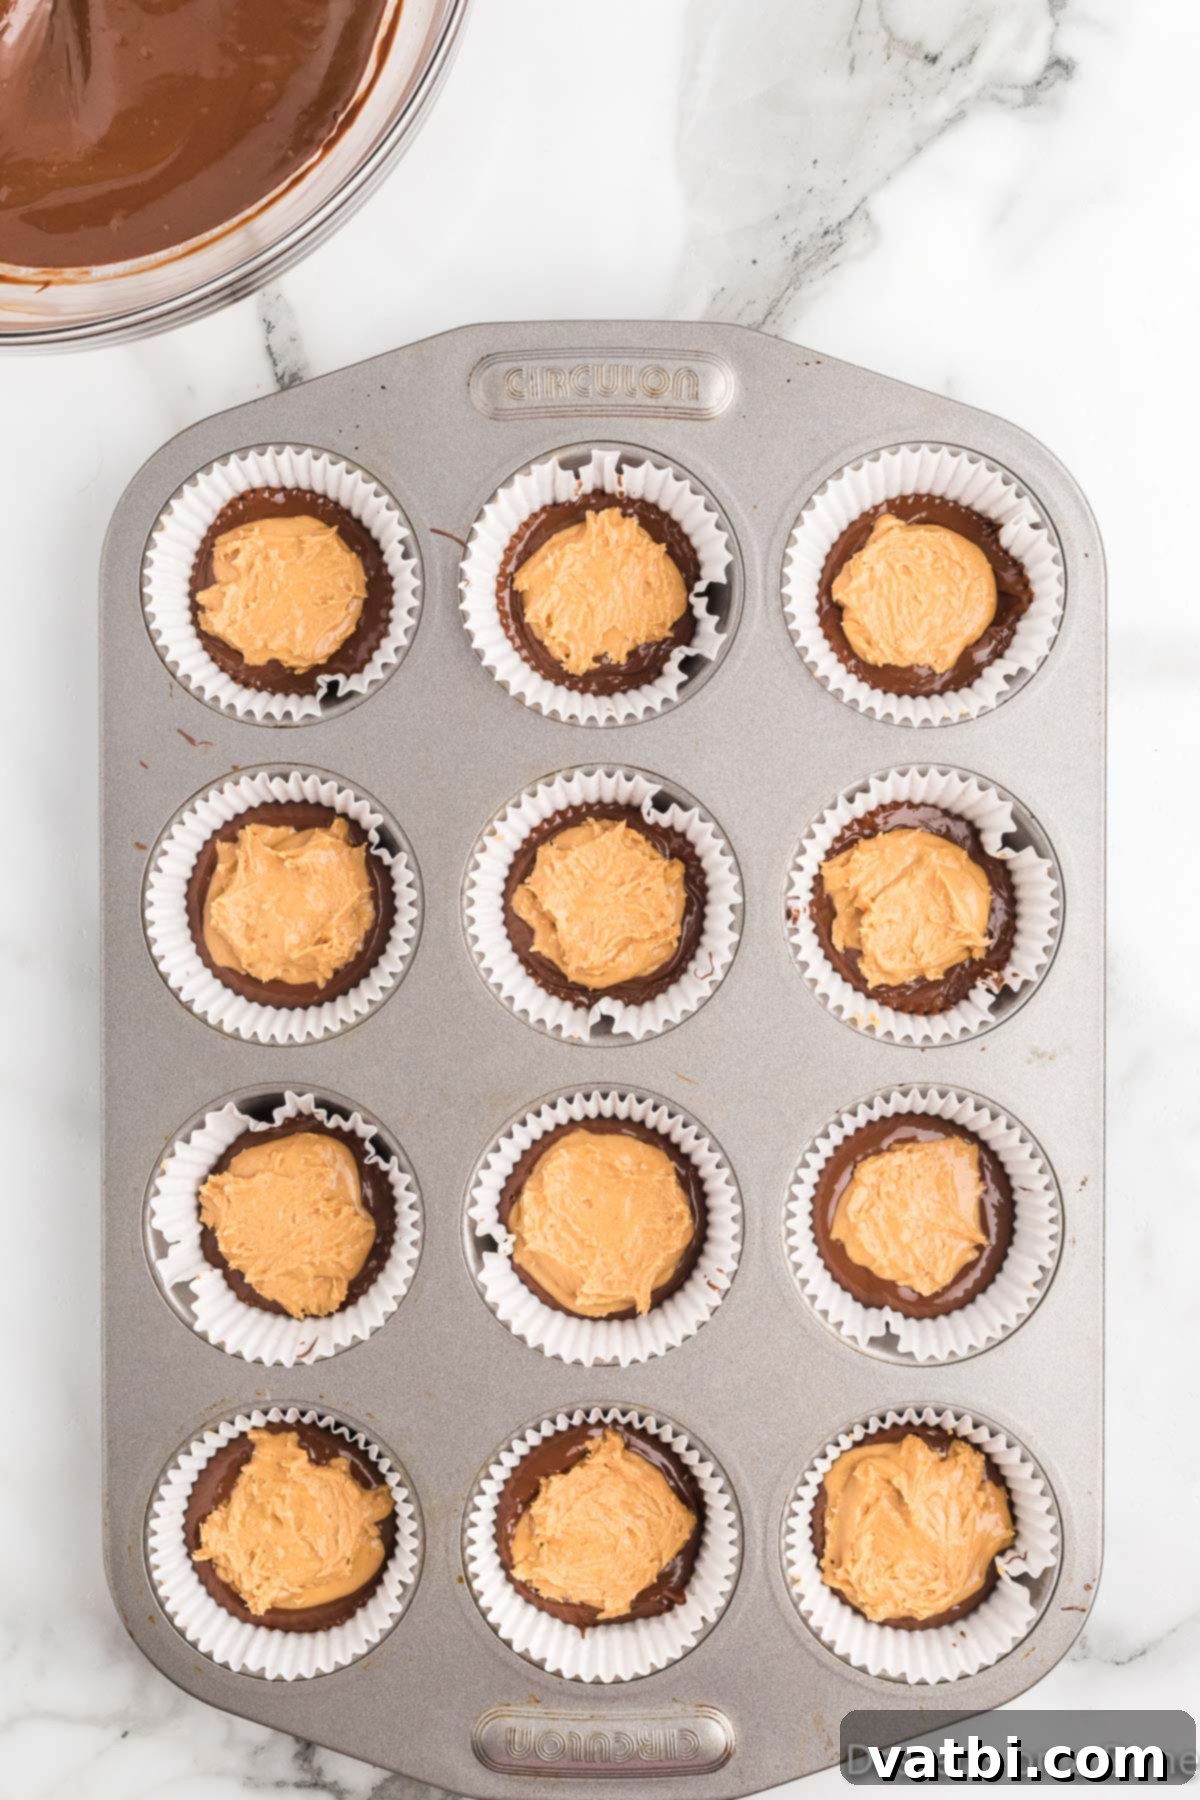
Step 6. Add the Irresistible Peanut Butter Filling: This is where the magic truly happens! Gently place a small dollop (approximately 1 teaspoon, or a small, flattened ball) of your creamy peanut butter filling on top of the chocolate base in each liner. Be careful not to press too hard, as you don’t want to break through the bottom chocolate layer. Just let it rest lightly on the chocolate. If your peanut butter mixture feels too soft or sticky to handle easily, a brief chill in the refrigerator for 10-15 minutes can make it much more manageable.
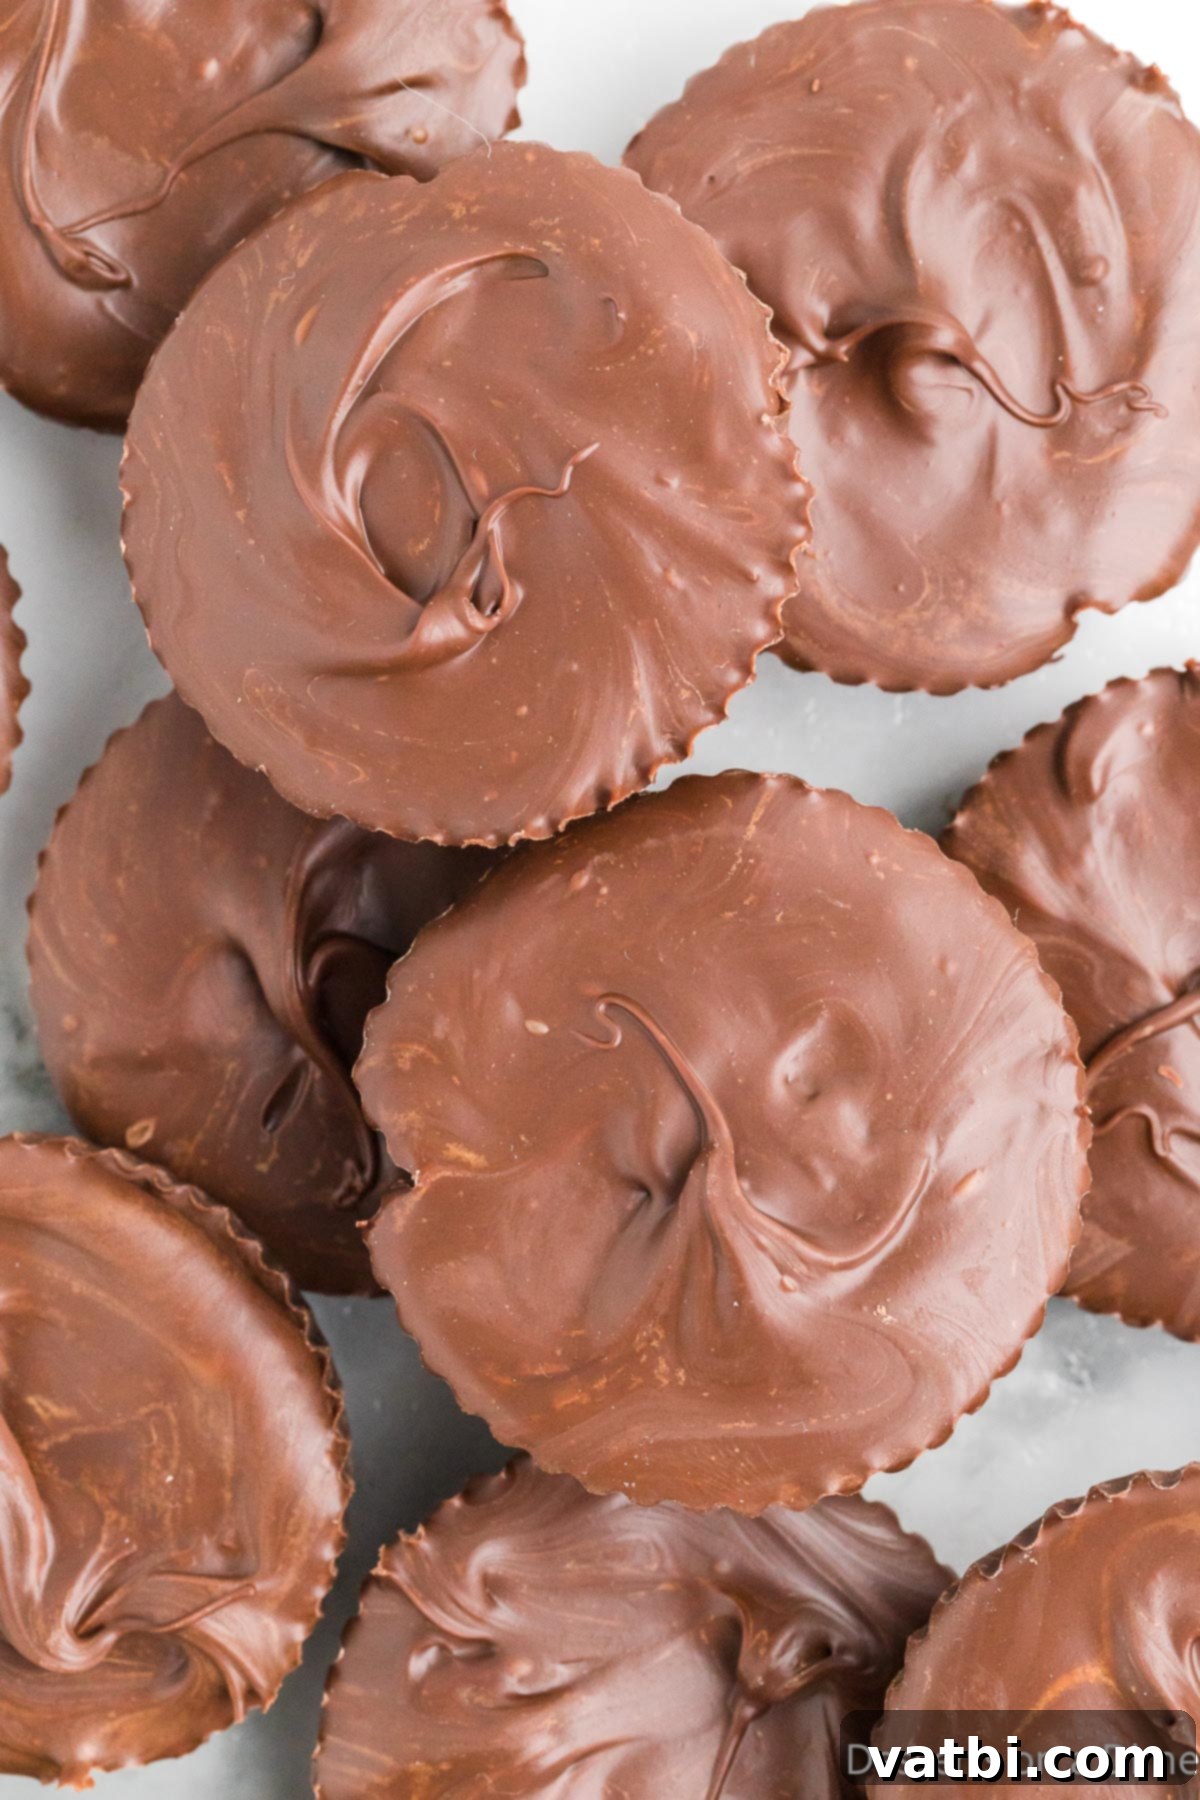
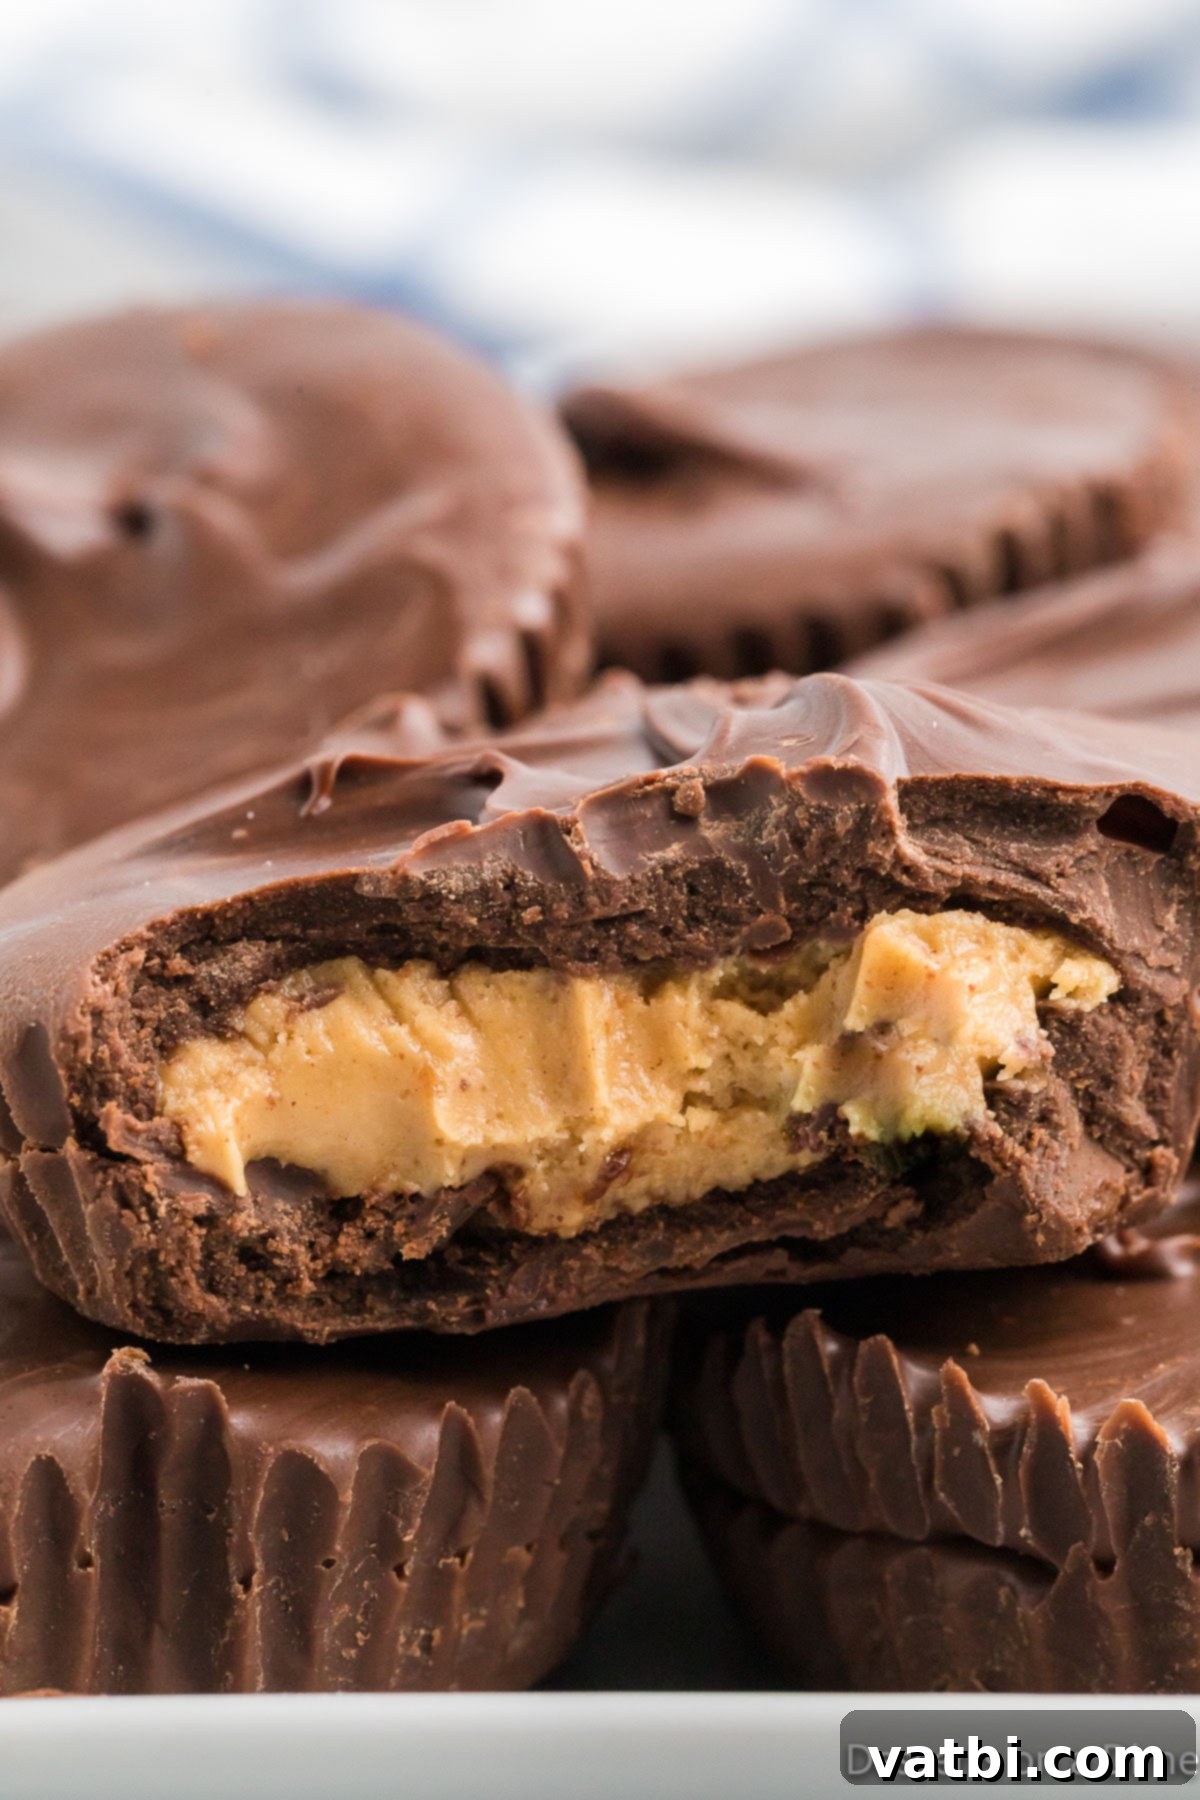
Step 7. Cap with More Chocolate and Chill: To complete your decadent treats, carefully spoon the remaining melted chocolate mixture over the peanut butter filling in each liner. Ensure that the chocolate completely covers the peanut butter layer and extends to the edges of the liner for a seamless finish. Once all the cups are topped, transfer the entire muffin pan to the refrigerator. Allow them to chill for at least 30 minutes to 1 hour, or until the chocolate is fully set and firm to the touch. Once firm, they are ready to be peeled from their liners, served, and thoroughly enjoyed!
Frequently Asked Questions About Homemade Chocolate Peanut Butter Cups
Curious about how to best store, freeze, or even customize your homemade chocolate peanut butter cups? Here are answers to some of the most common questions to help you master this delicious treat:
For optimal freshness and to maintain their delightful firm texture, these chocolate peanut butter cups are best kept in an airtight container in the refrigerator. Storing them in the fridge is crucial as it prevents the chocolate from becoming too soft or melting, especially in warmer environments or during hot weather. They are truly the perfect chocolate treat any time of the year, but particularly refreshing when chilled. When stored properly this way, they will last wonderfully for up to two weeks, making them an excellent make-ahead dessert for parties or to enjoy throughout the week.
It’s important to remember that these homemade delights can get quite melty if left out at room temperature for an extended period. To ensure the best experience and prevent any mess, I highly recommend keeping them in the refrigerator right up until you’re ready to serve them. If you’ve taken some out and don’t finish them, promptly place any remaining cups back into the refrigerator to preserve their quality.
Yes, absolutely! Homemade Peanut Butter Cups can be frozen very successfully. Once your peanut butter cups have fully set in the refrigerator and are firm to the touch, they are perfectly ready for freezing. To freeze them, first arrange them in a single layer on a baking sheet lined with parchment paper and place them in the freezer for about an hour, or until they are completely solid. This flash-freezing step prevents them from sticking together. After they are solid, transfer the frozen cups to a freezer-safe airtight container or a heavy-duty freezer bag. They can be stored in the freezer for up to 3 months without losing quality.
One of the most surprising and delightful aspects of freezing them is that this chocolate candy is incredibly delicious straight from the freezer! The texture becomes a bit firmer and chewier, offering a wonderful new eating experience, while the rich flavors remain just as satisfying. If you prefer a slightly softer bite, simply allow them to thaw slightly at room temperature for 10-15 minutes before enjoying.
When stored correctly in an airtight container in the refrigerator, these delicious Homemade Chocolate Peanut Butter Cups will maintain their quality and freshness for up to two weeks. This extended shelf life makes them an ideal candidate for preparing well in advance for various special occasions, holidays, or simply to have a delightful treat ready whenever a craving strikes.
I frequently make a large batch of this candy ahead of time, especially when planning for holidays, gatherings, or during busy periods. It’s wonderfully convenient to have a ready supply of these delectable treats on hand. During festive seasons, when there’s often a flurry of holiday baking and cooking to manage, these no-bake cups stand out as one of my favorite and most convenient candies to prepare. They save valuable time while still delivering an exceptional, homemade flavor that everyone adores.
Yes, you absolutely can use natural peanut butter, but it’s important to be aware of a few key considerations. Natural peanut butter typically has a runnier consistency due to oil separation. Before measuring, be sure to stir it very thoroughly until the oil is fully reincorporated and the peanut butter is uniformly smooth. You might also find that you need to add a little extra powdered sugar (perhaps an additional 1-2 tablespoons) to the peanut butter filling to achieve the desired firm, moldable consistency, as natural peanut butter contains fewer stabilizers and less sugar than conventional brands. The goal is a filling that can hold its shape well without being overly stiff or crumbly.
Achieving a professional, polished look for your homemade peanut butter cups is simpler than you might think! Here are a few expert tips: 1) For perfectly uniform cups, use a small cookie scoop to portion out both the bottom chocolate layer and the top chocolate layer, as well as the peanut butter filling. 2) After pouring each chocolate layer, gently tap the muffin tin a few times on your counter. This helps to release any trapped air bubbles and creates a beautifully smooth surface. 3) When melting your chocolate, ensure it’s truly smooth and free of any lumps before pouring; melt slowly and stir diligently. You can also use the back of a spoon to carefully spread the top chocolate layer evenly over the peanut butter filling. 4) For an added touch of elegance, consider using decorative paper cupcake liners – they instantly elevate the presentation.
Pro Tips for Achieving Perfect Homemade Chocolate Peanut Butter Cups Every Time
To ensure your homemade chocolate peanut butter cups turn out flawlessly delicious and beautifully presented with every batch, here are some invaluable tips and tricks gleaned from experienced home cooks. These insights will guide you in achieving the ideal texture, rich flavor, and appealing appearance for your decadent treats.
- Mastering the Peanut Butter Layer: You have a couple of flexible options for incorporating the peanut butter filling. You can either roll the peanut butter mixture into small, uniformly sized flattened balls (approximately 1 teaspoon each) before carefully placing them onto the initial chocolate base. This method often results in a neater, more defined peanut butter disc within the cup. Alternatively, you can simply spoon the mixture directly onto the chocolate base. Choose whichever method you find easier and which produces the look and feel you prefer. If the peanut butter mixture is too soft or sticky to roll, chilling it in the refrigerator for 10-15 minutes beforehand will make it much more manageable.
- The Art of Melting Chocolate: When it comes to melting your chocolate, patience is undoubtedly a virtue. Always use a clean, dry, microwave-safe bowl and heat the chocolate in short, controlled bursts – typically 30-second intervals. After each interval, remove the bowl and stir the chocolate thoroughly with a spatula. This gentle heating process is critical as it prevents the chocolate from overheating, burning, or seizing (where it becomes thick, grainy, and unusable). Continue this heat-and-stir cycle until the chocolate is mostly melted, with just a few tiny lumps remaining. The residual heat from the bowl and the already melted chocolate will then gently dissolve these final lumps as you continue to stir, resulting in a perfectly smooth, glossy, and fluid consistency. For an even more controlled and gentle melt, particularly with delicate or high-quality chocolates, employing a double boiler setup is an excellent alternative. Additionally, incorporating a tiny amount of neutral oil, like ½ teaspoon of coconut oil per cup of chocolate chips, can help create a smoother, more fluid melted chocolate that is easier to spread, though this isn’t strictly necessary.
- Precision with a Cookie Scoop: For consistently sized, professional-looking peanut butter cups and to streamline the assembly process, a small to medium cookie scoop (depending on your desired cup size) is an indispensable tool. Use it to portion out both the bottom chocolate layer and the top chocolate layer into the prepared muffin tin liners. This not only guarantees uniform cups, which are visually appealing, but also makes the entire process quicker, more efficient, and significantly less messy.
- Keep Them Chilled: The structural integrity and the delightful melt-in-your-mouth texture of these homemade peanut butter cups are intrinsically linked to them being kept cold. It is absolutely essential to store your finished treats in an airtight container in the refrigerator. If left at room temperature for too long, especially on a warm day or in a warm kitchen, the chocolate can soften considerably, and the cups may begin to lose their perfectly defined shape. For the ultimate enjoyment and to preserve their firmness, plan to take them out of the fridge just a few minutes before you intend to serve them.
- Quality of Ingredients Matters: While this recipe relies on simple, everyday ingredients, the quality of those ingredients can significantly impact the final taste. Opting for good quality chocolate chips or your favorite brand of chocolate bars will undeniably result in a richer, more profound, and more satisfying chocolate flavor. Similarly, using a creamy, good-tasting peanut butter that you genuinely enjoy is paramount for creating a filling that is both flavorful and perfectly textured.
- Prevent Sticking with Liners: To ensure easy removal and a clean presentation, always use paper cupcake liners in your muffin tin. These liners act as a barrier, preventing the chocolate from adhering to the pan and making the peanut butter cups effortless to handle and serve without any mess.
More Irresistible Easy Candy Recipes to Try
If you’ve thoroughly enjoyed the simplicity and deliciousness of making these homemade chocolate peanut butter cups, you’ll be thrilled to discover that there are many more easy candy recipes that deliver incredible results with minimal fuss. Expand your homemade confectionery repertoire and delight your family and friends with these fantastic, approachable options:
- Homemade Twix Bars Recipe
- Homemade Butterfinger Recipe
- Crock Pot Chocolate Peanut Clusters
- Homemade Snickers
- Peanut Butter Popcorn Recipe
There’s no need to hesitate any longer! Go ahead and embark on this incredibly easy and wonderfully rewarding recipe for homemade chocolate peanut butter cups. We genuinely encourage you to share your experience by leaving a comment and a star recipe rating once you’ve had a chance to whip up and enjoy these magnificent homemade treats. Your valuable feedback not only helps our community but also guides other aspiring home cooks in discovering the pure joy and delicious satisfaction of making them too!
Pin
Chocolate Peanut Butter Cups
Ingredients
- 1 cup creamy peanut butter divided
- 1 ½ tablespoons unsalted butter softened
- ½ cup powdered sugar
- ½ teaspoon salt
- 1 bag 11.5 oz chocolate chips, semi-sweet or milk
- 4 1.55 oz each milk chocolate candy bars, coarsely chopped
Instructions
-
Add cupcake liners to muffin tin and set aside.
-
In a medium bowl, combine ½ cup peanut butter, butter, powdered sugar and salt until smooth.
-
In a microwave safe bowl, add chocolate chips, chocolate bars and remaining peanut butter.
-
Heat for 1 minute, then stir. Continue heating for 10-20 seconds at a time, stirring after each heating and stopping just before chocolate is completely melted.
-
Stir until chocolate is completely melted and smooth.
-
Using a cookie dough scoop, add approximately half of the melted chocolate into paper liners, forming the base.
-
Top each chocolate base with about 1 teaspoon of peanut butter mixture ** see notes for rolling options.
-
Carefully add the remaining melted chocolate on top, fully covering the peanut butter layer.
-
Place the muffin tin in the refrigerator to chill and set until firm (approx. 30-60 minutes).
-
Store in an airtight container in the refrigerator until ready to serve for best freshness and texture.
Recipe Notes
Nutrition Facts
Pin This Now to Remember It Later
Pin Recipe
