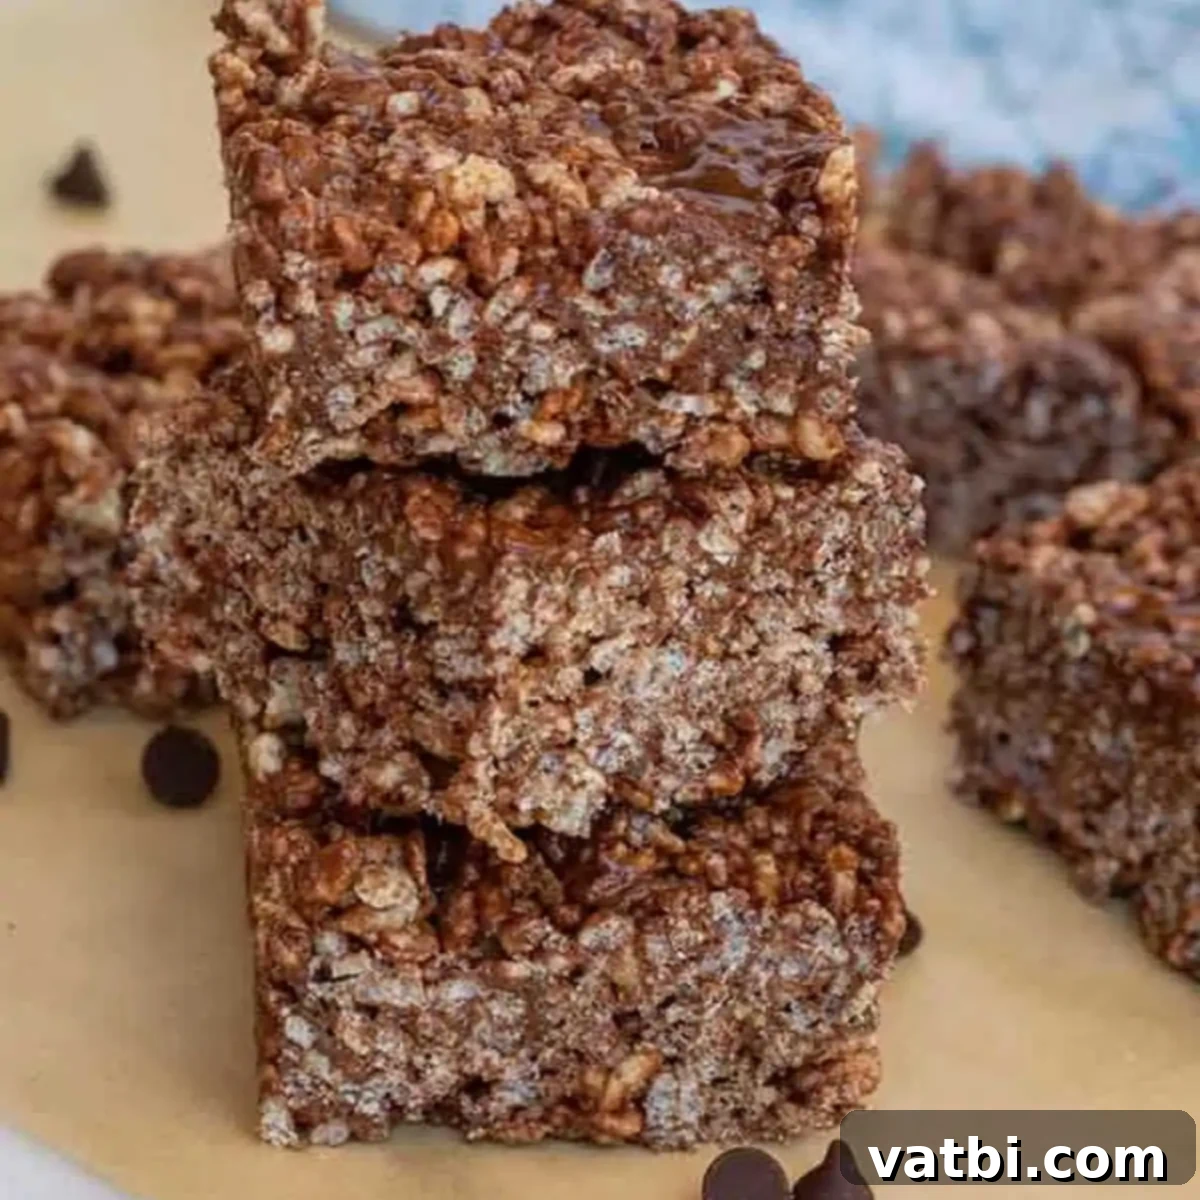
Decadent Homemade Chocolate Rice Krispie Treats: An Easy No-Bake Recipe for Ultimate Indulgence
Transform a classic childhood favorite into an extraordinary chocolate experience with this irresistible recipe for Chocolate Rice Krispie Treats. This incredibly simple and easy no-bake recipe is designed for chocolate enthusiasts, delivering a rich, gooey, and satisfying snack or dessert in mere minutes. Perfect for any occasion, these decadent squares are sure to become a new family favorite.
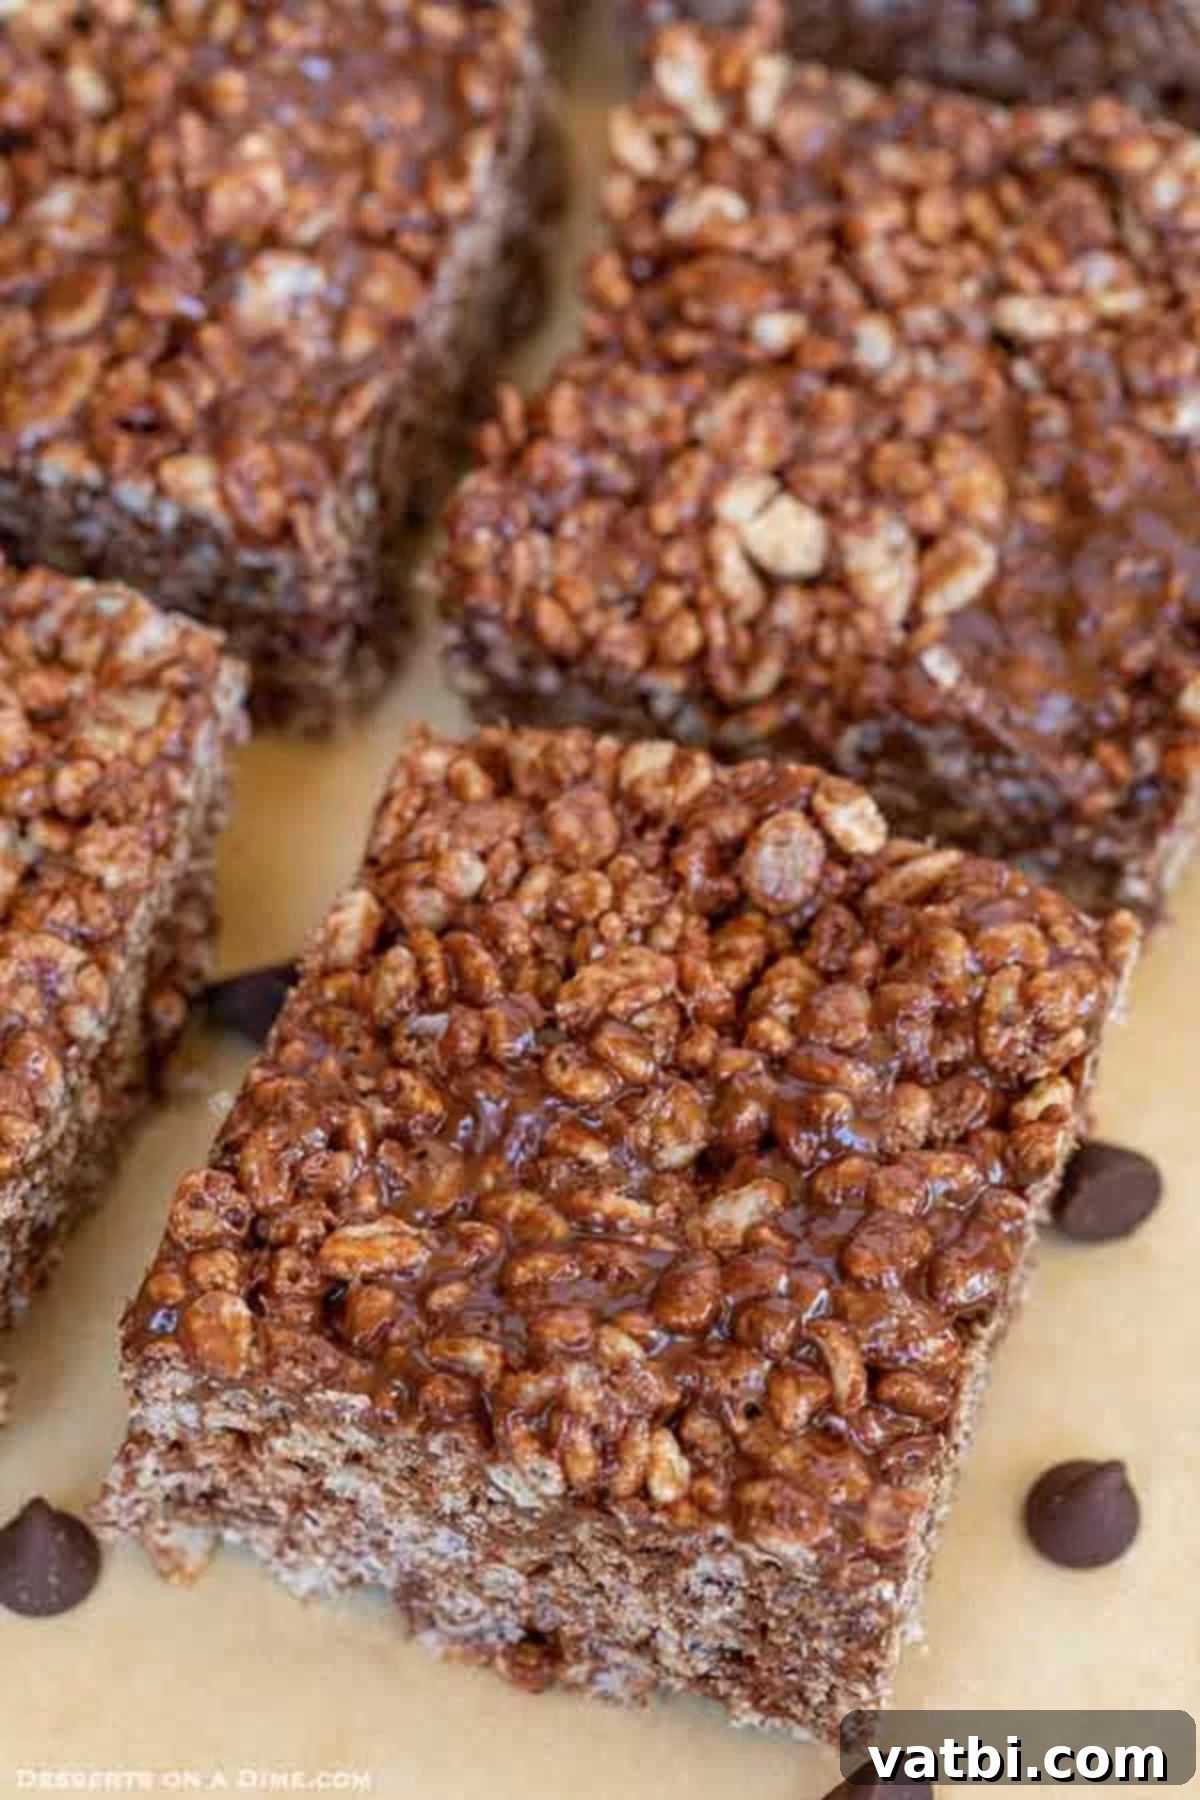
Who doesn’t love the comforting crunch and chewiness of traditional Rice Krispie Treats? Now, imagine that familiar texture infused with a deep, luxurious chocolate flavor. This no-bake dessert recipe delivers precisely that, offering a delightful twist that’s bound to impress. It’s so straightforward, even the kids can join in on the fun, making it an ideal activity for family bonding in the kitchen. If you’re a fan of classic rice krispie treats, prepare to fall in love with this enhanced, chocolate-packed version.
The secret to their incredible taste lies in a generous combination of cocoa powder and melty chocolate chips, creating layers of rich, sweet chocolate goodness. Each bite offers a perfect balance of crispy cereal and soft, chewy marshmallow, elevated by the decadent chocolate. These aren’t just your average treats; they are a truly special indulgence.
Requiring only a handful of common ingredients and minimal effort, this chocolate variant is exceptionally easy to whip up. Whether you need a quick addition to lunchboxes, a satisfying after-school snack, or a sweet treat for movie night, these chocolate rice krispie squares are the perfect solution. They set quickly, meaning you can go from craving to enjoying in under 30 minutes!
Once you master this recipe, you might find yourself exploring other delightful variations. Be sure to check out all the Best Rice Krispie Treats Recipes available on our site. We particularly enjoy creating unique flavors like Salted Caramel Rice Krispie Treats, Chocolate Caramel Rice Krispie Treats, Red White and Blue Rice Krispie Treats, and festive Patriotic Rice Krispie Treats for special occasions.
Table of Contents
- Why We Love This Recipe
- Ingredients You’ll Need
- Easy Step-by-Step Instructions
- Expert Tips for Success
- Creative Substitutions and Additions
- Frequently Asked Questions
- Explore More Rice Krispie Treat Recipes
Why You’ll Adore This Chocolate Rice Krispie Treat Recipe
This Chocolate Rice Krispie Treats recipe is truly a dream come true for any chocolate lover. It’s not just a dessert; it’s an experience that combines convenience with unparalleled flavor. Here’s why we absolutely love it and why it will quickly become a staple in your recipe collection:
- Effortlessly Easy: With simple ingredients and straightforward steps, this recipe is perfect for beginners and seasoned bakers alike. You don’t need any fancy equipment or advanced techniques.
- No-Bake Bliss: Forget heating up your kitchen! This recipe requires no oven, making it ideal for hot summer days or when you simply want a quick dessert without the fuss.
- Rich Chocolate Flavor: Unlike classic Rice Krispie treats, this version is packed with a double dose of chocolate from both cocoa powder and chocolate chips, delivering a deep, satisfying cocoa taste in every bite.
- Quick to Prepare: From start to finish, these treats can be ready in about 15 minutes of active prep time, plus cooling. It’s the perfect last-minute dessert or snack.
- Kid-Friendly & Fun: Kids love helping with this recipe! The simple mixing and pressing are great for little hands, and they’ll be thrilled to eat their delicious creations.
- Versatile for Any Occasion: Whether it’s a birthday party, a potluck, a school lunchbox surprise, or just a sweet craving, these treats fit perfectly into any scenario. They’re universally loved and always a hit.
- Gooey & Chewy Perfection: The carefully balanced ratio of marshmallows and butter ensures a soft, gooey, and chewy texture that melts in your mouth, while the cereal maintains its delightful crispness.
- Nostalgic Comfort: It takes the beloved familiarity of traditional Rice Krispie treats and elevates it with an irresistible chocolate twist, bringing back fond memories with every bite.
Beyond these chocolate delights, I also enjoy making other cereal-based treats like Peanut Butter Balls with Rice Krispies and the colorful Neapolitan Rice Krispie Treats. They’re all equally fun and easy to make!
Essential Ingredients You’ll Need
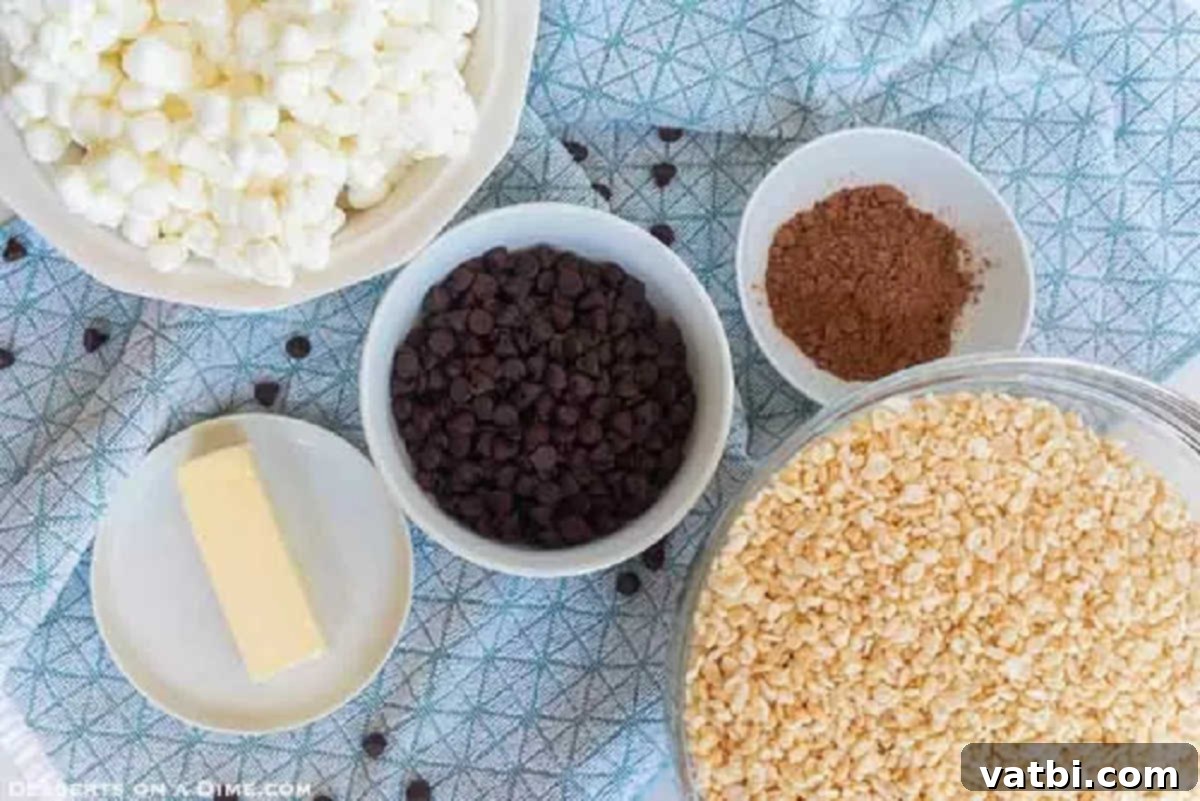
Crafting these delectable chocolate treats requires just a few simple ingredients, most of which you likely already have in your pantry. The quality and freshness of these components truly make a difference in the final taste and texture of your treats.
- Rice Krispie Cereal: This is the foundation of our treats. Ensure your cereal is fresh and crispy, not stale, to achieve that signature crunch. Stale cereal will result in soft, disappointing treats. Any brand of crispy rice cereal will work.
- Unsalted Butter: Using unsalted butter allows you to control the overall saltiness of your dessert. While salted butter can be used, be mindful that it might slightly alter the flavor profile. The butter helps create the rich, gooey binder for the cereal.
- Marshmallows: We prefer using mini marshmallows as they melt more quickly and evenly, ensuring a smoother mixture. However, large marshmallows can also be used; simply cut them into smaller pieces or allow extra melting time. Always use fresh marshmallows for the best gooey texture.
- Chocolate Chips: These add a delightful burst of melty chocolate throughout the treats. Don’t skimp on quality here; a good quality chocolate will significantly enhance the flavor. You have several options:
- Milk Chocolate Chips: For a sweeter, creamier chocolate flavor.
- Dark Chocolate Chips: For a more intense, slightly bitter chocolate kick.
- Semi-Sweet Chocolate Chips: A classic choice that offers a balanced sweetness, perfect for most palates.
- White Chocolate Chips: A delicious alternative or addition, though note that they are technically not “chocolate.”
Feel free to mix and match to find your favorite combination!
- Cocoa Powder: This ingredient is key to infusing a deep, rich chocolate flavor and a beautiful dark color into the treats. We recommend using unsweetened cocoa powder to avoid making the treats overly sweet, as the marshmallows and chocolate chips already provide plenty of sweetness. Dutch-processed cocoa powder can also be used for a darker color and milder flavor.
- A Pinch of Salt (Optional but Recommended): A small amount of fine sea salt can be added to the melted mixture. Salt helps to balance the sweetness and enhances the chocolate flavor, making the treats even more irresistible.
You’ll find the complete list of exact measurements and quantities for each ingredient at the bottom of the page in the detailed recipe card.
Easy Step-by-Step Instructions for Chocolate Rice Krispie Treats
Making these chocolatey delights is incredibly simple! Follow these easy steps to create the perfect batch of gooey, crispy treats.
- Step 1 – Prepare Your Pan: First things first, grab a 9×13-inch baking pan. Lightly spray the entire inside surface with a non-stick cooking spray. You can also line the pan with parchment paper, leaving an overhang on the sides. This makes lifting out and cutting the treats much easier. The non-stick coating or parchment paper prevents the sticky marshmallow mixture from adhering to the pan.
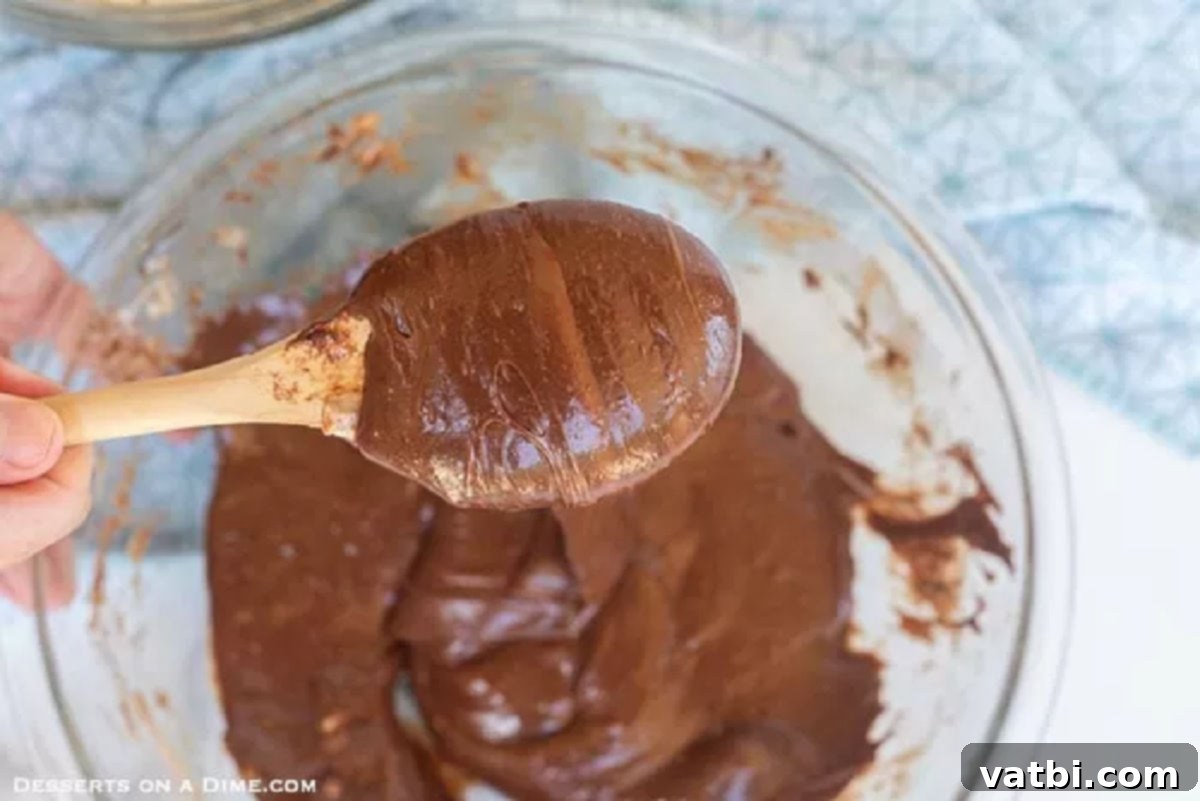
Step 2 – Melt the Gooey Goodness: Next, combine the unsalted butter, marshmallows, chocolate chips, and cocoa powder in a large, microwave-safe bowl. Place the bowl in the microwave and heat in 30-second intervals. After each interval, remove the bowl and stir the mixture thoroughly with a rubber spatula. This prevents the marshmallows from overheating and hardening. Continue this process until all ingredients are completely melted and combined into a smooth, shiny, and thick chocolate mixture. This usually takes about 1.5 to 2.5 minutes in total, depending on your microwave’s power.
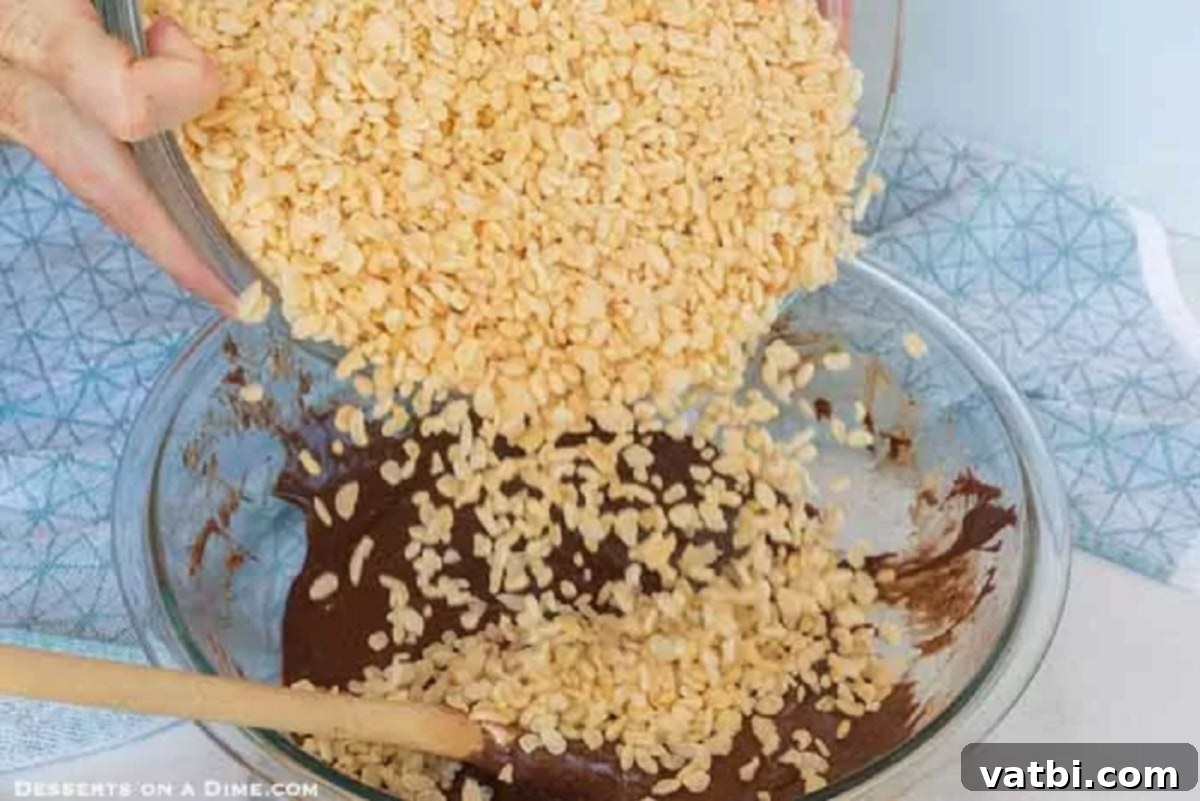
Step 3 – Incorporate the Cereal: Once your chocolate-marshmallow mixture is perfectly smooth, gradually add the Rice Krispies cereal to the bowl. Use a large rubber spatula or a sturdy spoon to gently fold the cereal into the chocolate mixture. Mix carefully until every single piece of cereal is thoroughly coated. Be gentle to avoid crushing the cereal, which can lead to a less desirable texture.
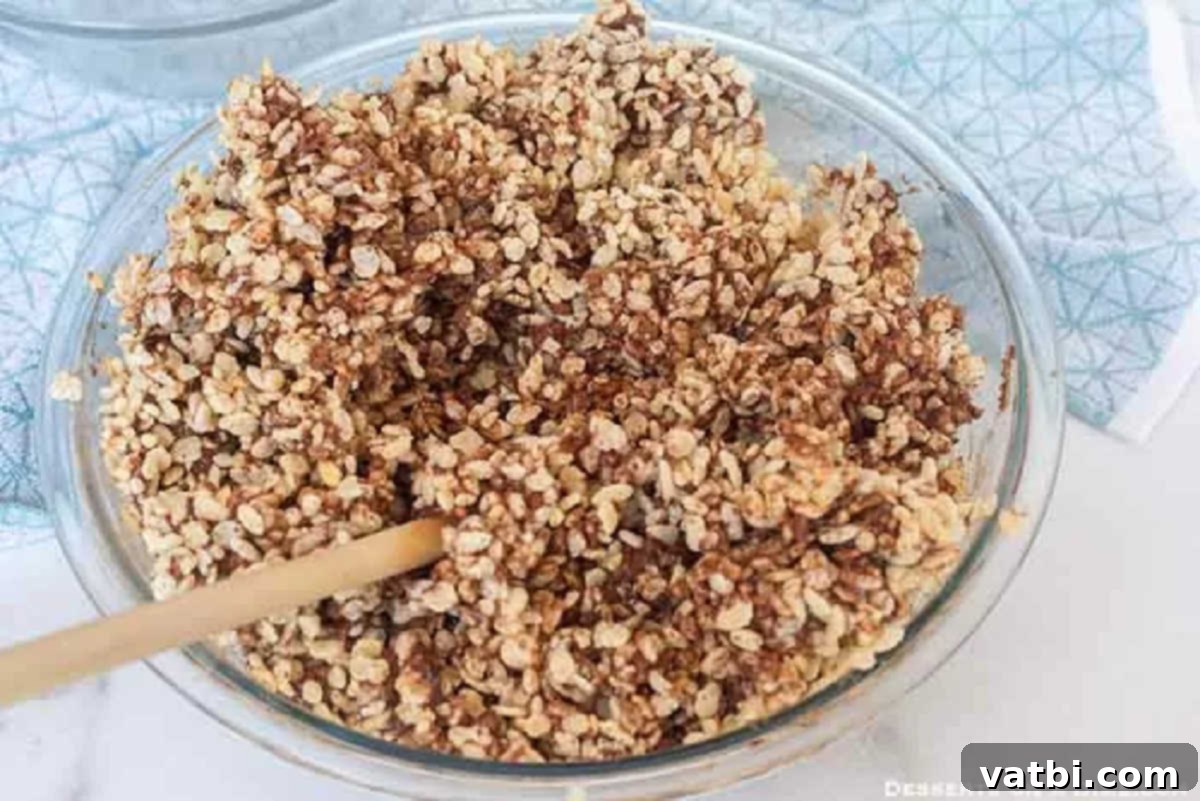
Step 4 – Ensure Even Coating: This step is critical for consistent flavor and texture. Double-check that all the crispy rice cereal is completely enveloped by the melted chocolate and marshmallow mixture. Continue to mix with your rubber spatula, reaching the bottom and sides of the bowl to ensure no dry cereal remains. The mixture should be uniformly chocolatey and sticky.
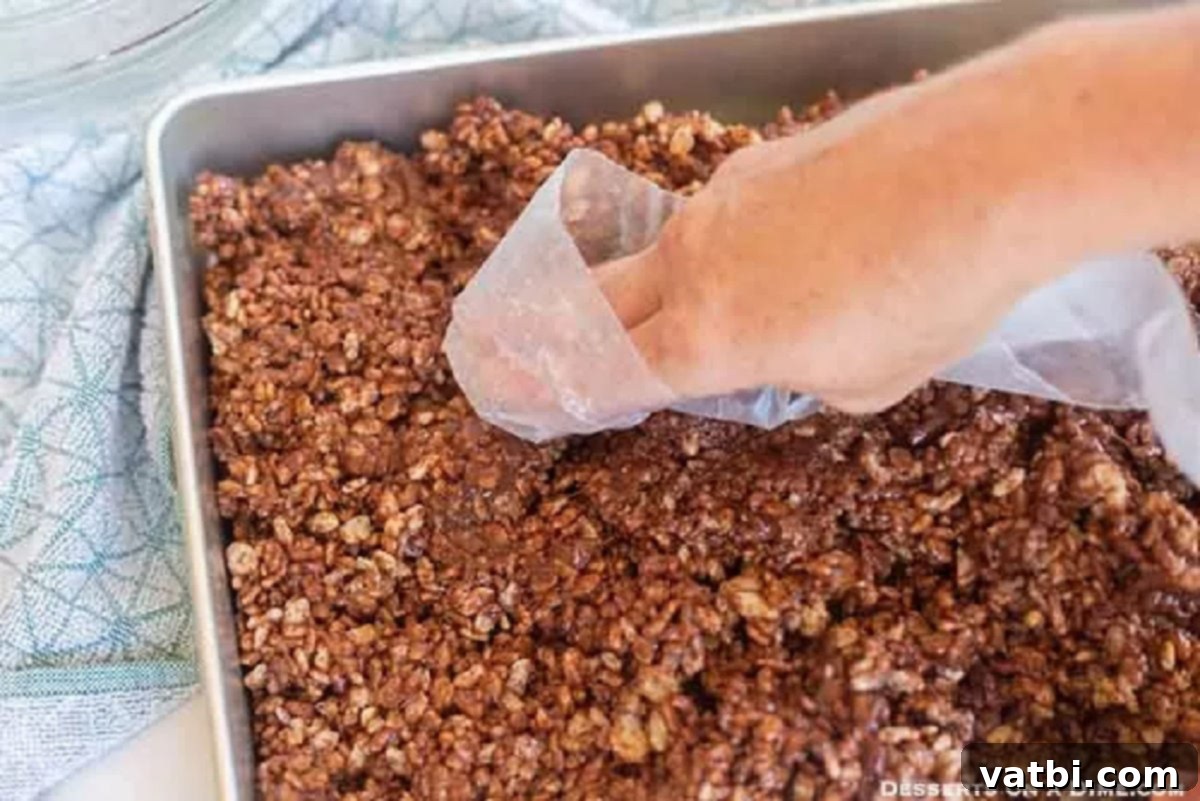
Step 5 – Press and Cool: Transfer the coated cereal mixture into your prepared 9×13-inch pan. Using a piece of wax paper or parchment paper sprayed lightly with non-stick cooking spray, gently press the mixture evenly into the pan. The key here is to press firmly enough to compact the treats but not so hard that you crush the cereal and make them dense and hard. A light, even pressure is best for retaining a pleasant chewiness. Allow the treats to cool completely at room temperature for at least 1-2 hours before cutting into squares with a sharp knife. This ensures they set properly and are easy to slice.
Expert Tips for Perfect Chocolate Rice Krispie Treats
Achieving that ideal balance of crispy, chewy, and gooey requires a few key techniques. Here are some pro tips to ensure your chocolate Rice Krispie treats turn out perfectly every time:
- Slow and Gentle Melting of Marshmallows: Whether you’re using a microwave or a stovetop, always melt the butter and marshmallows slowly and with consistent stirring. Overheating marshmallows can cause them to become too stiff or crystallize, leading to hard treats instead of gooey ones. In the microwave, stick to 30-second intervals; on the stovetop, use low heat and stir continuously.
- The Right Baking Pan: A 9×13-inch pan is standard for this recipe, yielding treats of a medium thickness. For easy removal and clean cuts, always line your baking pan with parchment paper, leaving an overhang on the sides. This acts as a sling, allowing you to lift the entire batch out before slicing. Spraying the parchment paper and the sides of the pan with non-stick spray adds an extra layer of protection.
- Mindful Mixing of Ingredients: Once the melted marshmallow mixture is ready, work quickly but gently when adding the cereal. The mixture will start to set as it cools, so you want to ensure the cereal is fully coated before it becomes too difficult to mix. Use a large rubber spatula and fold the cereal in, rather than stirring vigorously, to prevent crushing the delicate cereal pieces.
- Perfect Thickness: This recipe yields wonderfully thick and satisfying treats. If you prefer thinner rice krispie treats, simply spread the mixture into a larger pan (e.g., an 11×15-inch pan) or halve the recipe and use the standard 9×13-inch pan. Remember, thicker treats offer more chewiness!
- Always Use Fresh Ingredients: This cannot be stressed enough! Fresh marshmallows are crucial for the soft, gooey texture. Older, harder marshmallows will not melt as smoothly and can result in tough treats. Similarly, fresh Rice Krispies cereal ensures maximum crispness, providing a delightful contrast to the sticky marshmallow.
- Don’t Over-Compress: When pressing the mixture into the pan, resist the urge to pack it down too hard. Over-compressing can squeeze out the air pockets, making the treats dense, hard, and less appealingly chewy. Use gentle, even pressure with a piece of greased wax paper or parchment paper.
- Cool Completely at Room Temperature: Patience is a virtue here! Allow your treats to cool completely at room temperature before cutting. Placing them in the refrigerator might speed up the cooling process, but it can also make them firm and lose some of their signature gooey texture. Room temperature cooling helps maintain that perfect balance.
- Clean Cuts: Once fully cooled, use a sharp, non-serrated knife to cut your treats. For cleaner slices, you can lightly spray the knife with non-stick cooking spray or run it under hot water and wipe it clean between cuts.
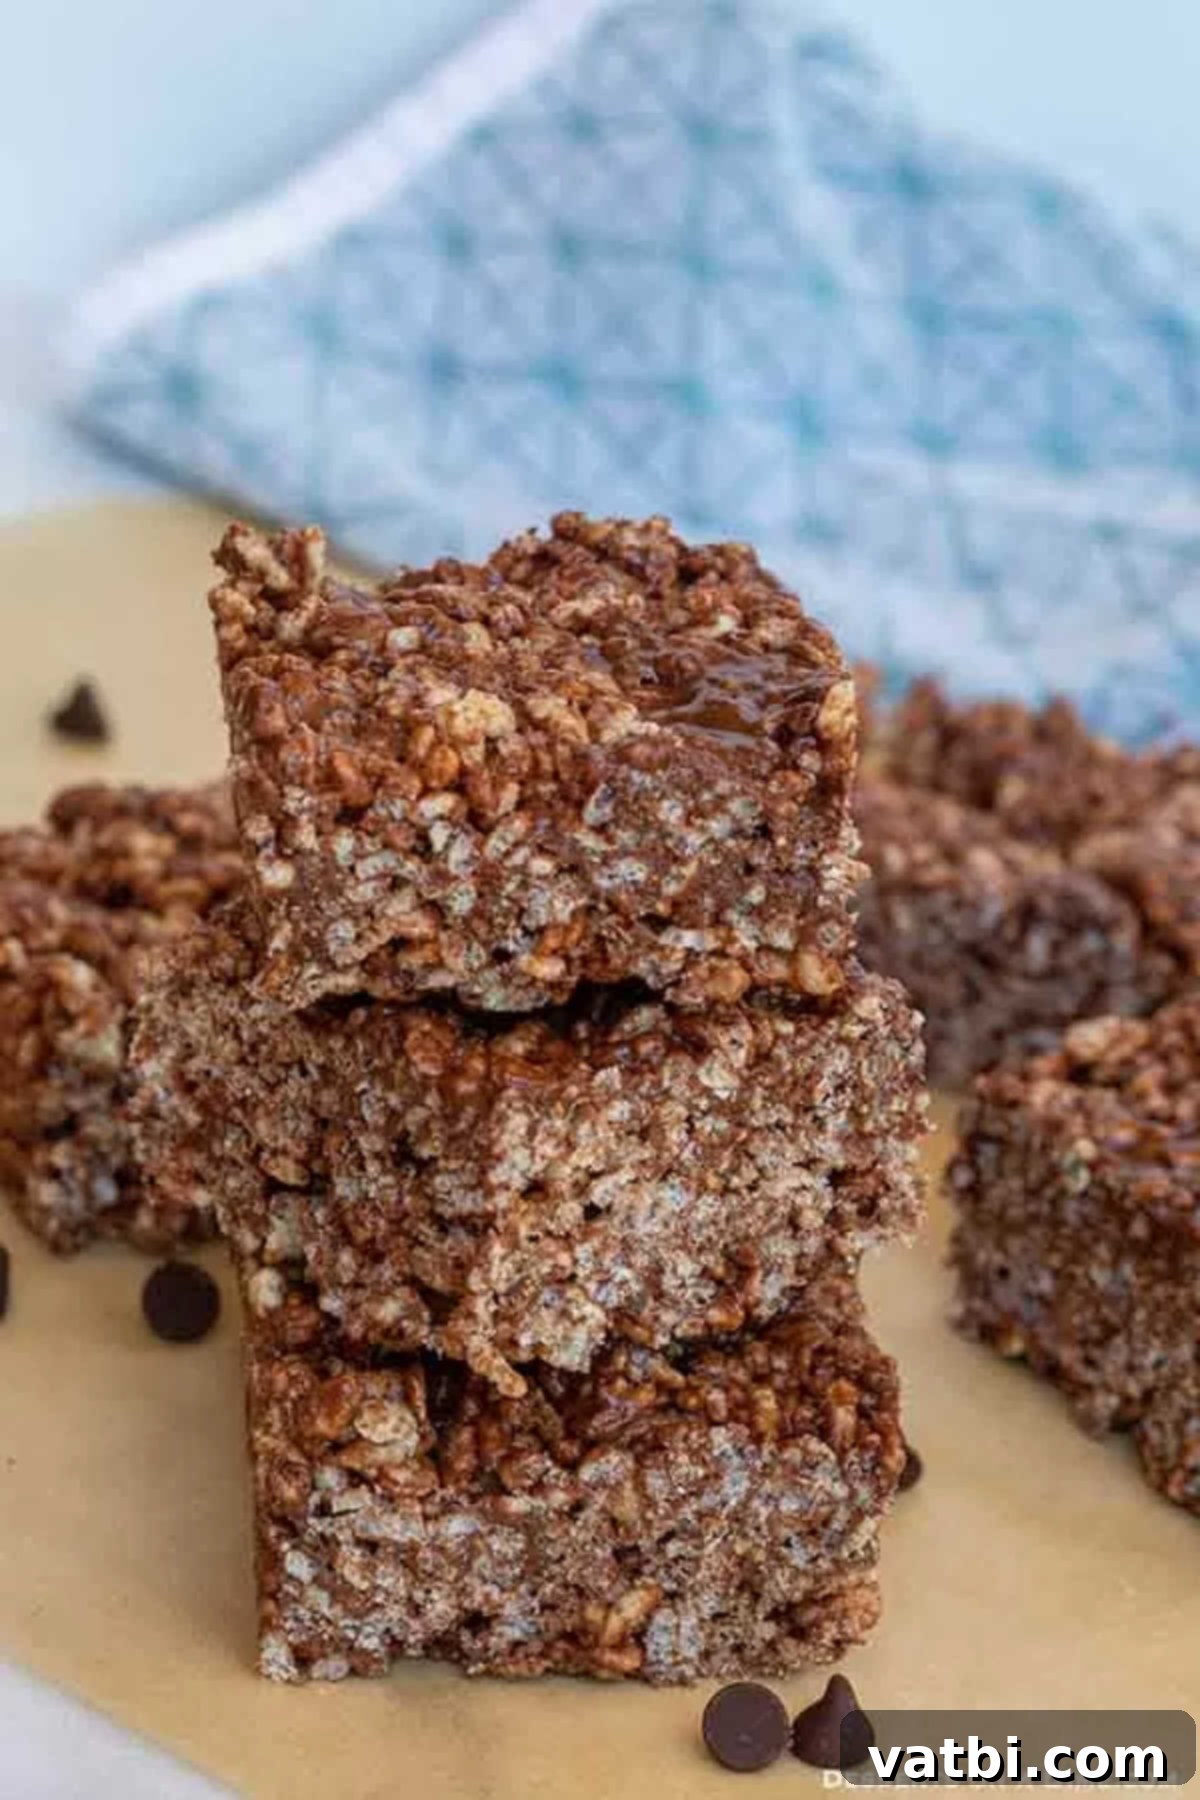
Creative Substitutions and Additions to Elevate Your Treats
While these Chocolate Rice Krispie Treats are delicious as is, they are also incredibly versatile! Don’t be afraid to get creative and customize them with these exciting substitutions and additions to match your taste or the occasion:
- Cocoa Krispies Cereal Treat: For an even more intense chocolate experience, swap out regular Rice Krispie cereal for Cocoa Krispies. This will amplify the chocolate flavor and give your treats a darker, richer hue. It’s a chocolate overload in the best possible way!
- Mini Marshmallows vs. Large: We typically recommend mini marshmallows for their ease of melting, but any size of marshmallow will work. If using larger marshmallows, simply cut them into smaller pieces before melting to help them dissolve more quickly and evenly into the butter mixture.
- A Touch of Sea Salt: Sprinkle a pinch of flaky sea salt over the top of the treats immediately after pressing them into the pan. The subtle saltiness perfectly complements and enhances the sweetness and richness of the chocolate, creating a sophisticated flavor profile.
- Fun Shapes with Cookie Cutters: Once the treats have cooled but are still slightly pliable, use cookie cutters to create fun shapes. This is especially great for holiday parties, themed events, or just for making them more appealing to kids. Think stars, hearts, or seasonal shapes!
- Colorful Sprinkles: Add a festive touch by scattering colorful sprinkles over the top of the treats while they are still warm and sticky. This is a fantastic way to customize them for birthdays, holidays, or school events. Choose sprinkles that match your theme!
- Beyond Chocolate Chips: While chocolate chips are a staple, feel free to experiment with other chip varieties. Mini chocolate chips disperse more evenly, but you can also try:
- Peanut Butter Chips: For a delicious chocolate-peanut butter combination.
- Butterscotch Chips: For a rich, caramel-like flavor.
- White Chocolate Chips: To add a creamy contrast.
- Mint Chocolate Chips: For a refreshing twist, especially around the holidays.
- Decadent Chocolate Drizzle: For an extra layer of indulgence, melt some extra chocolate chips (milk, dark, or white chocolate) and drizzle them artfully over the cooled treats. You can use a spoon or a piping bag with a small tip. For even more color and fun, melt various colored candy melts and create a vibrant design.
- A Hint of Peanut Butter: For peanut butter lovers, add 1/4 to 1/2 cup of creamy peanut butter to the butter and marshmallow mixture while it’s melting. This adds a wonderful nutty flavor and an extra layer of chewiness. Adjust the amount to your preference.
- Vanilla Extract: A teaspoon of vanilla extract added with the marshmallows can deepen and round out the overall flavor profile, enhancing the chocolate.
- Crushed Candy: Fold in crushed candy bars (like Snickers, Reese’s cups, or M&M’s) or other favorite candies into the mixture along with the cereal for an exciting texture and flavor boost.
- Nuts: Toasted chopped nuts like pecans, walnuts, or almonds can add a delightful crunch and nutty flavor.
- Coconut: Shredded coconut (sweetened or unsweetened) can be folded in for a tropical twist.
Frequently Asked Questions About Chocolate Rice Krispie Treats
To maintain their optimal gooey and chewy texture, it’s best to store your Chocolate Rice Krispie Treats at room temperature. Place them in an airtight container immediately after they have fully cooled and been sliced. This prevents them from drying out and becoming hard. They typically stay fresh and delicious for 2-3 days when stored properly. Avoid direct sunlight or warm environments, as this can make them too soft or sticky.
While technically possible, we generally do not recommend freezing this recipe. Freezing can significantly alter the delicate texture of Rice Krispie Treats, causing them to become much harder and lose their signature chewiness and gooeyness when thawed. The marshmallows tend to crystallize, and the cereal can become somewhat soggy or brittle. For more detailed information on why freezing might not be ideal and alternative storage options, you can refer to our article on Can You Freeze Rice Krispie Treats.
There are a few common reasons why your Chocolate Rice Krispie Treats might turn out hard instead of soft and gooey. The most frequent culprit is overheating the marshmallow mixture. When melting the butter and marshmallows, it’s crucial to do so slowly and gently, especially in the microwave. Heating these gooey marshmallows for too long or at too high a temperature without constant stirring can cause the sugar in the marshmallows to crystallize, resulting in a firm, brittle mixture. Always use low heat on the stovetop or short 30-second intervals in the microwave, stirring thoroughly after each. Another reason could be over-compressing the mixture into the pan. Pressing too firmly compacts the cereal and removes air, leading to a denser, harder treat. Remember to use a light, even pressure when pressing.
Explore More Delicious Rice Krispie Treat Recipes
If you’ve enjoyed these chocolatey delights, you’ll love exploring the wide world of Rice Krispie Treat variations. They’re all incredibly easy to make and offer unique flavor profiles to satisfy every palate. Get inspired with these other fantastic recipes:
- Butterscotch Rice Krispie Treats: A sweet and buttery twist that’s full of nostalgic flavor.
- Fruity Pebbles Rice Crispy Treats: Bright, colorful, and bursting with fruity flavor, these are a favorite among kids and adults alike.
- Oreo Rice Krispie Treats: Crushed Oreo cookies mixed into the gooey goodness for an ultimate cookies-and-cream experience.
- M&M Rice Krispie Treats:Packed with colorful chocolate candies, these are fun, festive, and always a crowd-pleaser.
- Pumpkin Rice Krispie Treats: A seasonal delight perfect for autumn, infused with warm pumpkin spice flavors.
- Fun Color Rice Krispie Treats (Neapolitan Rice Krispie Treats): Layers of vanilla, chocolate, and strawberry flavors create a visually stunning and delicious treat.
Once you indulge in the rich, gooey, and crispy perfection of these homemade Chocolate Rice Krispie Treats, you will be absolutely hooked. They are a simple pleasure that brings big smiles and satisfies the deepest chocolate cravings. Don’t forget to leave a comment below and share your experience with a star rating!
Pin
Chocolate Rice Krispie Treats
Ingredients
- 12 cups Fresh Rice Krispie Cereal
- 6 Tablespoons Unsalted Butter
- 2 (10 ounce) packages of Mini Marshmallows
- 1 cup Semi-Sweet Chocolate Chips
- 1/3 cup Unsweetened Cocoa Powder
- Pinch of Sea Salt (optional, for flavor enhancement)
Instructions
-
Prepare your 9×13 inch baking pan by spraying it thoroughly with a non-stick cooking spray. You can also line it with parchment paper for easier removal.
-
In a large, microwave-safe bowl, combine the butter, marshmallows, chocolate chips, and cocoa powder. Microwave the mixture in 30-second intervals, stirring well with a rubber spatula after each interval, until the mixture is thoroughly melted and smooth. Be careful not to overheat the marshmallows.
-
Gradually add the Rice Krispies cereal to the melted chocolate-marshmallow mixture. Gently fold with your spatula until the cereal is completely and evenly coated. Work quickly but avoid crushing the cereal.
-
Transfer the coated cereal mixture into the prepared pan. Using a piece of wax paper or parchment paper lightly sprayed with cooking spray, gently press the mixture evenly into the pan. Do not press too firmly, as this can make the treats hard.
-
Allow the Chocolate Rice Krispie Treats to cool completely at room temperature for at least 1-2 hours before slicing and serving. This ensures they set properly and maintain their gooey texture.
-
*For thinner treats, you can halve the recipe or spread the entire batch into a larger pan. We love our treats thick and chewy!
-
*Do not store these treats in the refrigerator. They are best kept at room temperature in an airtight container to preserve their delicious gooey and chewy consistency!
-
Once cooled and set, slice into squares with a sharp knife and enjoy your yummy, homemade chocolate indulgence!
Nutrition Facts
Pin This Now to Remember It Later
Pin Recipe
