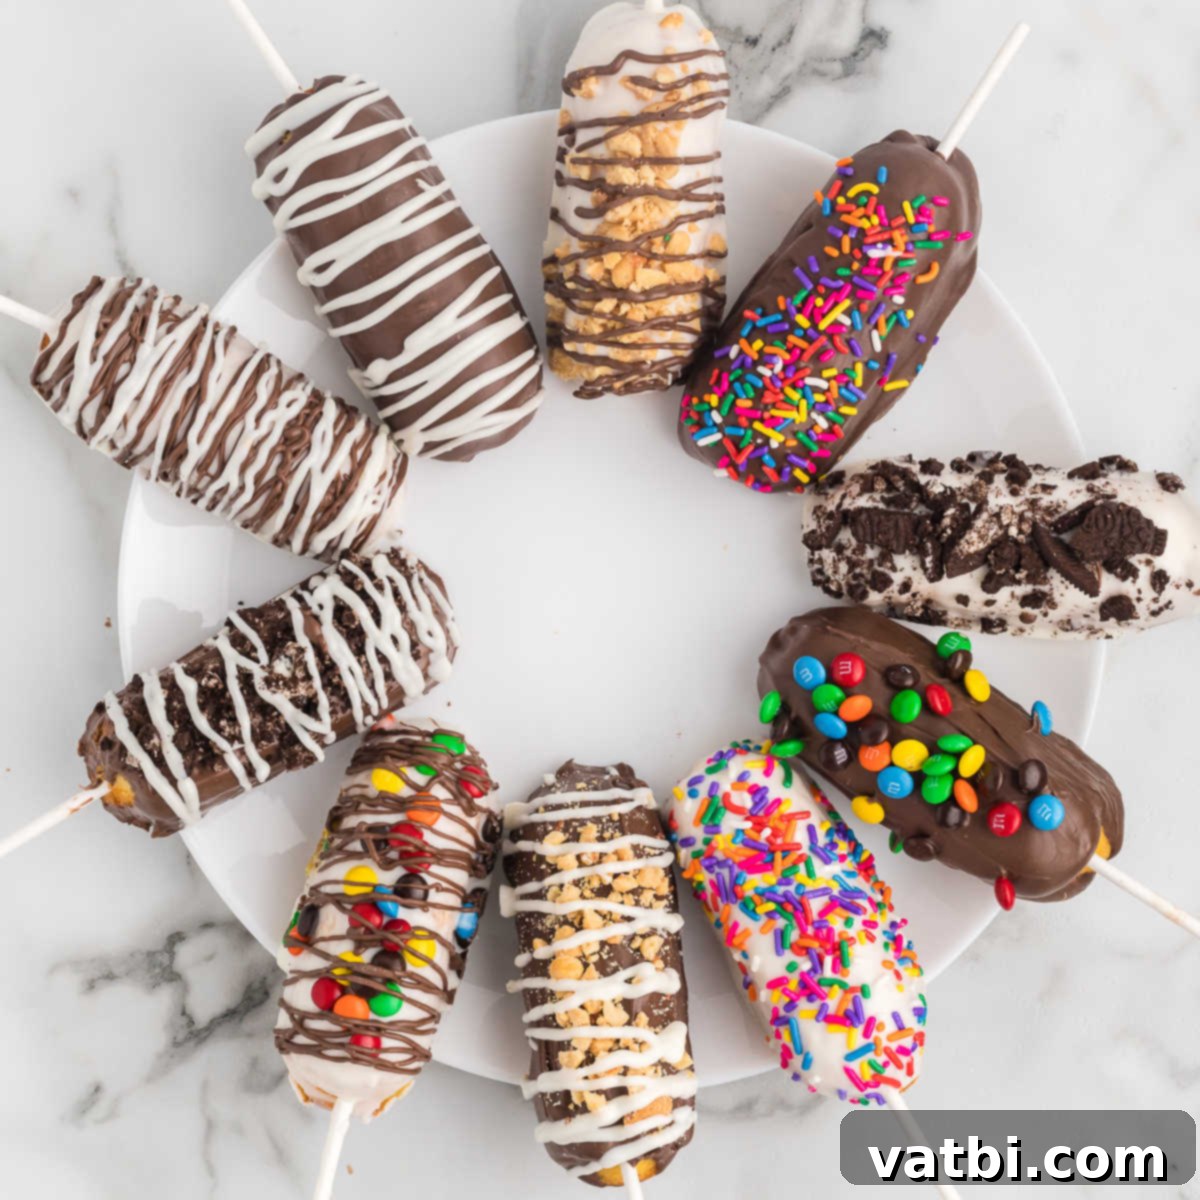
The Ultimate Guide to Easy Homemade Chocolate Covered Twinkies: A Nostalgic No-Bake Treat!
Prepare to elevate a beloved classic with our incredibly simple recipe for Chocolate Covered Twinkies! These iconic snack cakes, already a delightful treat on their own, are transformed into an extraordinary dessert by being generously dipped in luscious melted chocolate and adorned with your favorite festive toppings. This isn’t just an easy, no-bake treat; it’s a nostalgic journey wrapped in a decadent chocolate shell, making it an instant crowd-pleaser for any occasion. Whether you’re planning a lively party, celebrating a holiday, or simply craving a fun and indulgent dessert, these homemade chocolate-dipped Twinkies are guaranteed to bring smiles to every face, young and old.
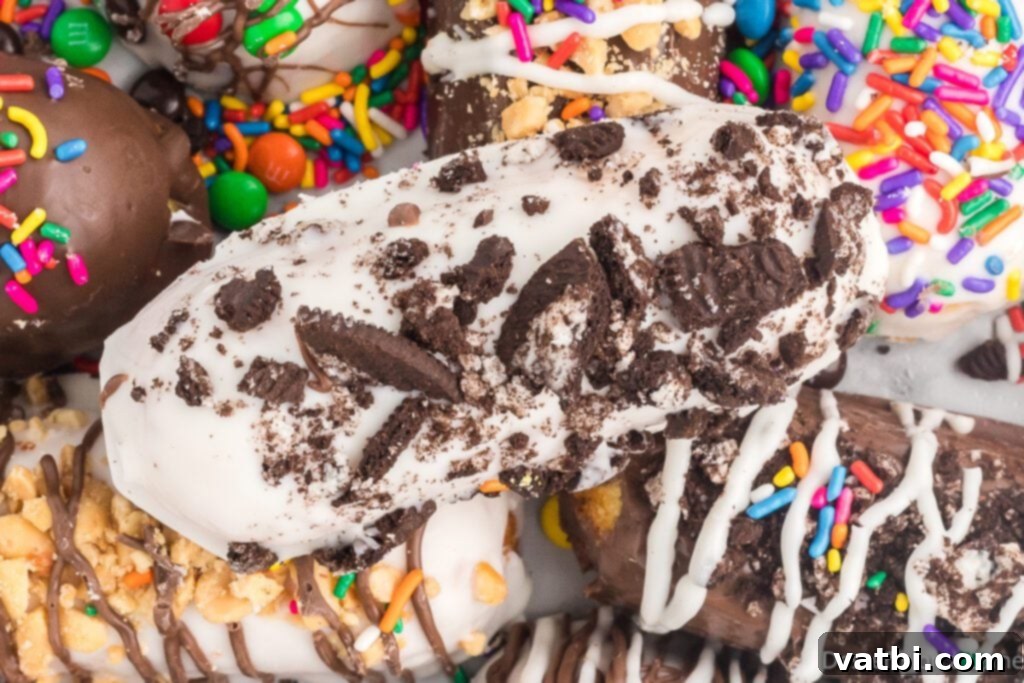
Taking a timeless American favorite, the humble Twinkie, and enrobing it in a rich, smooth chocolate coating creates a harmonious blend of textures and flavors. The fluffy, golden sponge cake and its signature creamy filling are perfectly complemented by the crisp, sweet chocolate shell, offering an unparalleled balance of sweetness. This isn’t merely a recipe; it’s an invitation to craft a show-stopping dessert that looks impressive yet requires minimal effort and only a few basic ingredients. It’s the ultimate hassle-free indulgence that delivers maximum impact.
These customizable treats are fantastic for any celebration, from birthday parties and family gatherings to cozy movie nights at home. Their versatility allows you to personalize them with a myriad of toppings, making each bite a unique experience. Beyond their undeniable deliciousness, they are remarkably fun to make, offering a fantastic activity for kids and adults alike. If you’re looking to explore more creative Twinkie transformations or other easy dessert ideas, be sure to check out our Air Fryer Twinkies, Deep Fried Twinkies, and a collection of 31 Easy Texas Desserts for more inspiration!
Table of contents
- Why You’ll Adore Making These Chocolate Covered Twinkies
- Essential Ingredients for Your Delicious Twinkie Transformation
- Exciting Variations to Customize Your Chocolate Covered Twinkies
- Simple Step-by-Step Instructions to Create Your Chocolate Covered Twinkies
- Creative Topping Ideas to Personalize Your Chocolate Covered Twinkies
- Expert Pro Tips for Flawless Chocolate Covered Twinkies
- Proper Storage for Your Delicious Chocolate Covered Twinkies
- More Chocolate Covered Desserts
Why You’ll Adore Making These Chocolate Covered Twinkies
Nostalgic Flavor with a Decadent Twist: This recipe masterfully marries the beloved, iconic taste of a classic Twinkie – with its unique golden sponge cake and signature sweet, creamy filling – with the luxurious richness of a thick chocolate coating. It elevates a cherished childhood snack into a sophisticated, yet fun, dessert that evokes happy memories while creating new ones.
Effortlessly Easy to Make: Forget complicated baking techniques and lengthy ingredient lists! Our Chocolate Covered Twinkies recipe is designed for ultimate simplicity. With just a handful of readily available ingredients and a few straightforward steps, you can create a truly impressive dessert without any stress, making it perfect for novice cooks and busy families alike.
Infinitely Customizable for Every Palate: One of the greatest joys of this recipe is its incredible versatility. Once dipped in chocolate, the Twinkies become a blank canvas for your creativity. Whether you prefer vibrant sprinkles, crunchy chopped nuts, a contrasting drizzle of white chocolate, or even crushed candies, you can effortlessly tailor these treats to match any theme, holiday, or personal preference.
Ideal for Any Celebration or Simple Snack: From elaborate holiday gatherings and lively birthday parties to intimate family dinners or a casual treat to brighten an ordinary day, these chocolate-dipped Twinkies fit every scenario. They are quick enough to whip up on a whim and elegant enough to serve as a festive centerpiece, making them your go-to dessert for all occasions.
Universally Loved by All Ages: There’s something undeniably captivating about a Chocolate Covered Twinkie that appeals to everyone. Kids are enchanted by the playful colors and sweet taste, while adults appreciate the delightful combination of textures and the touch of nostalgia. It’s a guaranteed hit that will disappear quickly, proving to be a fun and indulgent treat that brings joy to both young and old.
Essential Ingredients for Your Delicious Twinkie Transformation
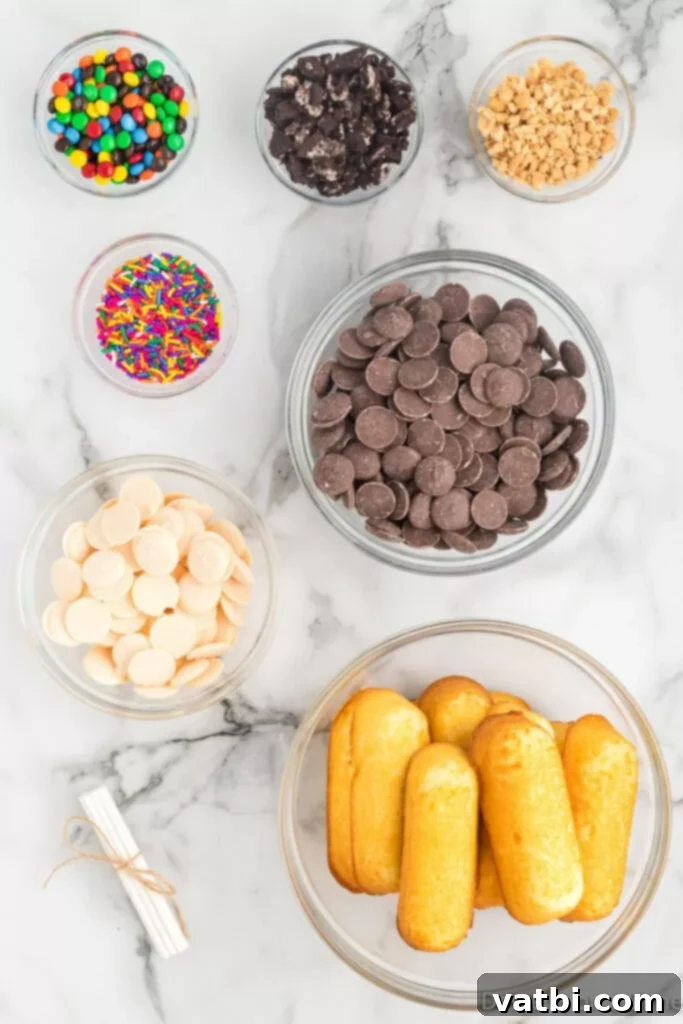
- Hostess Twinkies: The star of our show! These iconic golden sponge cakes with their creamy filling are the perfect base for this decadent treat. Ensure they are fresh and unwrapped before you begin your dipping adventure. You’ll need about 10 of these delightful classics to start.
- Chocolate Melting Wafers: For the smoothest, glossiest, and easiest chocolate coating, high-quality melting wafers (sometimes called candy melts or dipping chocolate) are essential. They are specifically formulated to melt effortlessly and set quickly, providing a beautiful, non-sticky finish without tempering. Milk chocolate or semi-sweet varieties work wonderfully.
- White Chocolate Melting Wafers: While optional, adding white chocolate melting wafers offers a fantastic contrast in both color and flavor. You can use them for an extra layer of dipping, creating a marbled effect, or for decorative drizzles, enhancing the visual appeal of your finished Twinkies.
- Lollipop Sticks: These simple sticks are your best friend for dipping! They provide a sturdy, clean handle to hold each Twinkie as you coat it in melted chocolate, making the process much easier and less messy. They also transform your Twinkies into fun, ready-to-serve dessert pops.
- Toppings: This is where the real fun begins! A variety of toppings can add texture, color, and extra flavor. Consider vibrant sprinkles for a festive look, finely crushed candy pieces, mini M&M’s for a chocolatey crunch, or finely chopped nuts like pecans or almonds for an earthy contrast.
Find the complete, detailed ingredient list with exact measurements at the bottom of the page in our printable recipe card.
Exciting Variations to Customize Your Chocolate Covered Twinkies
- Colorful Candy Coatings: Expand beyond traditional chocolate by using colored candy wafers. These come in a spectrum of vibrant hues, allowing you to perfectly match your Twinkies to any party theme, holiday (think red and green for Christmas, pastels for Easter, or orange and black for Halloween), or special event. They offer a smooth finish and a slightly different flavor profile.
- Rich Chocolate Chip Options: If melting wafers aren’t available or you prefer a specific chocolate flavor, regular chocolate chips are an excellent alternative. You can use milk chocolate for a sweeter, creamier coating, dark chocolate for a more intense, slightly bitter contrast, or even semi-sweet chocolate for a balanced flavor. Just ensure you melt them slowly and carefully to prevent seizing.
- Artistic Chocolate Drizzles: Elevate the visual appeal of your dipped Twinkies by adding an elegant or playful drizzle. Use contrasting colors of melted chocolate – perhaps white chocolate over a dark chocolate coating, or vice versa. You can also use brightly colored candy melts to create intricate patterns or simple lines, adding a professional touch and extra flavor dimension.
- Themed Lollipop Sticks: Don’t overlook the simple detail of the sticks! While basic lollipop sticks work perfectly, you can find a variety of colorful, patterned, or themed sticks that can instantly enhance the presentation of your Chocolate Covered Twinkies. This small addition can tie into your party decor or simply add an extra layer of fun, making them even more appealing to guests.
Simple Step-by-Step Instructions to Create Your Chocolate Covered Twinkies
Crafting these delectable chocolate-dipped Twinkies is a fun and straightforward process. Follow these easy steps to ensure your treats turn out perfectly every time, ready to impress your guests or satisfy your sweet cravings.
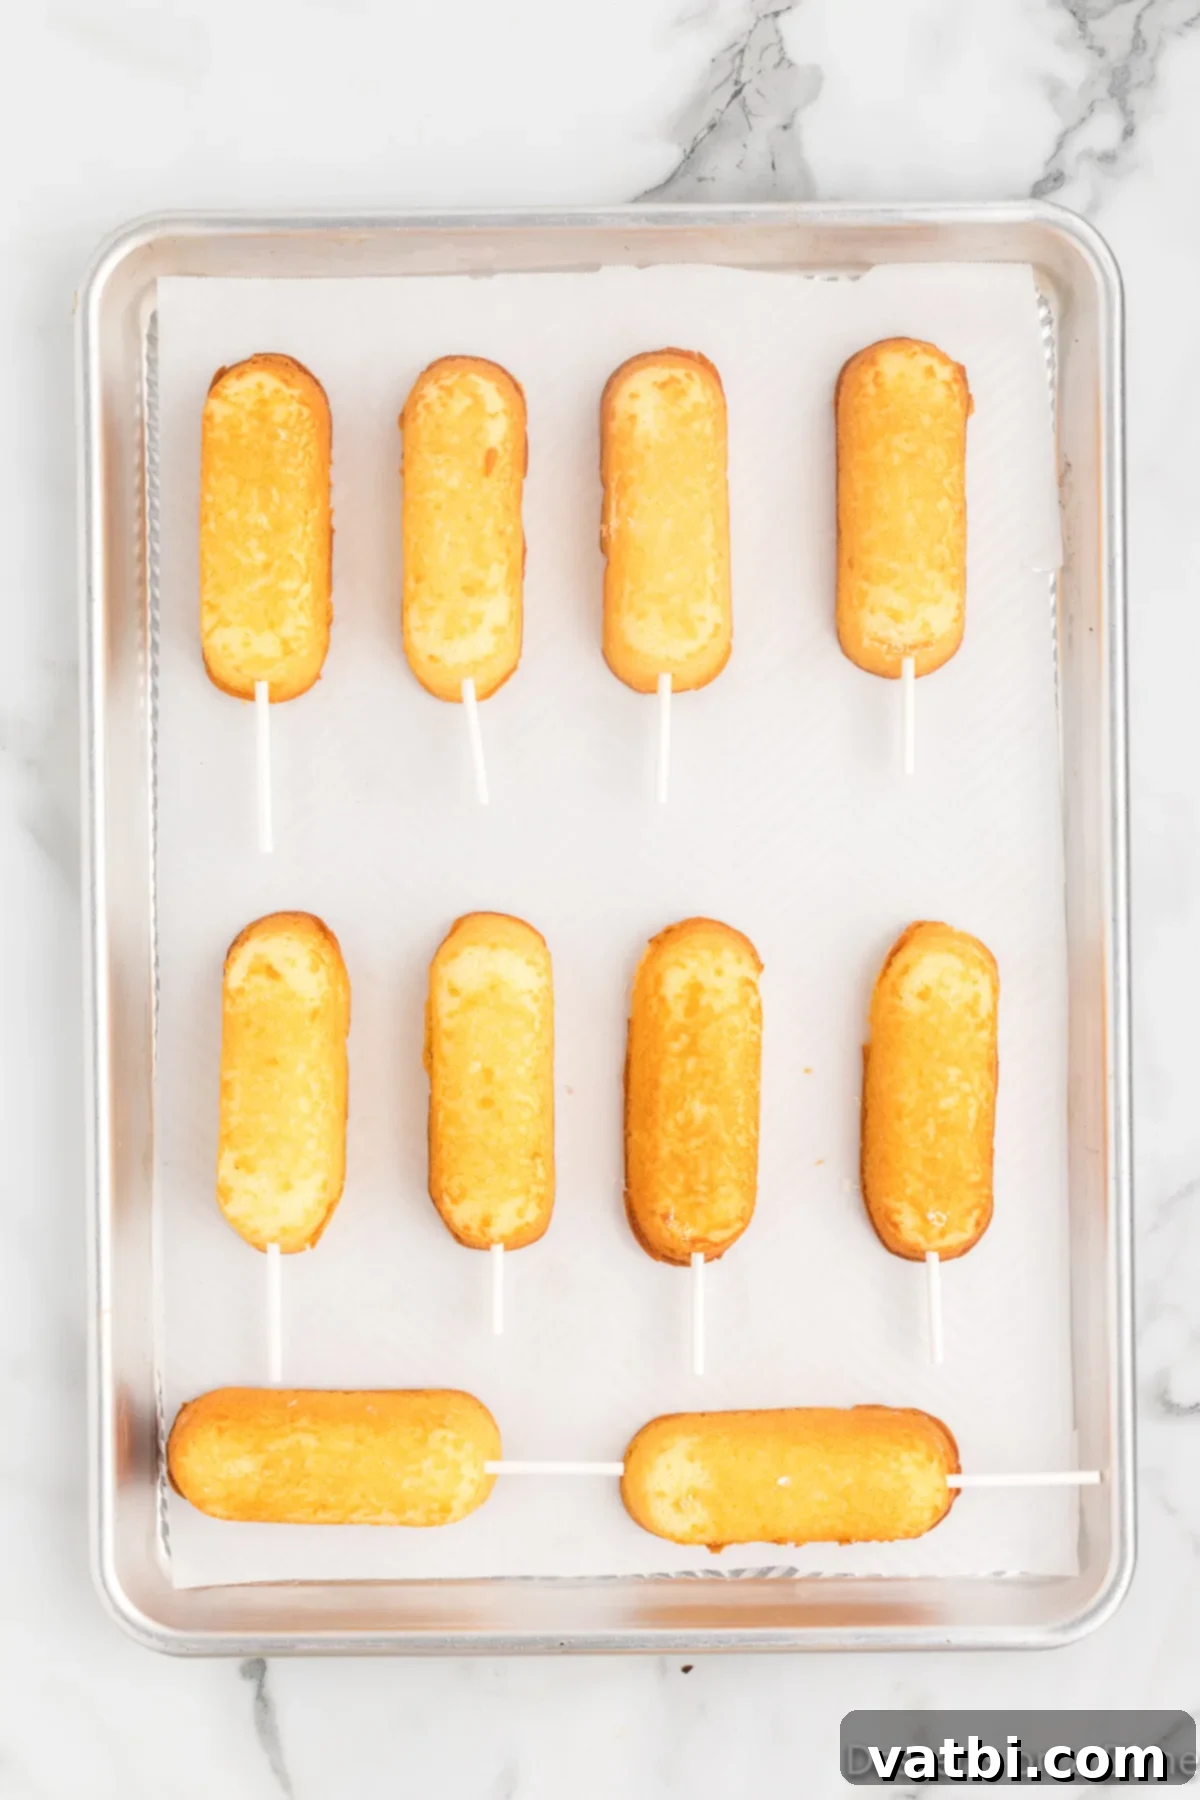
Step 1 – Prepare and Freeze Twinkies: Begin by carefully unwrapping each individual Hostess Twinkie. Gently insert a lollipop stick into one end of each Twinkie, pushing it about halfway through for stability. Arrange the stick-inserted Twinkies on a baking sheet lined with parchment paper or wax paper. This crucial freezing step for at least 3 hours (or until firm) helps the Twinkies maintain their shape during dipping and ensures the chocolate coating sets beautifully and evenly without cracking.
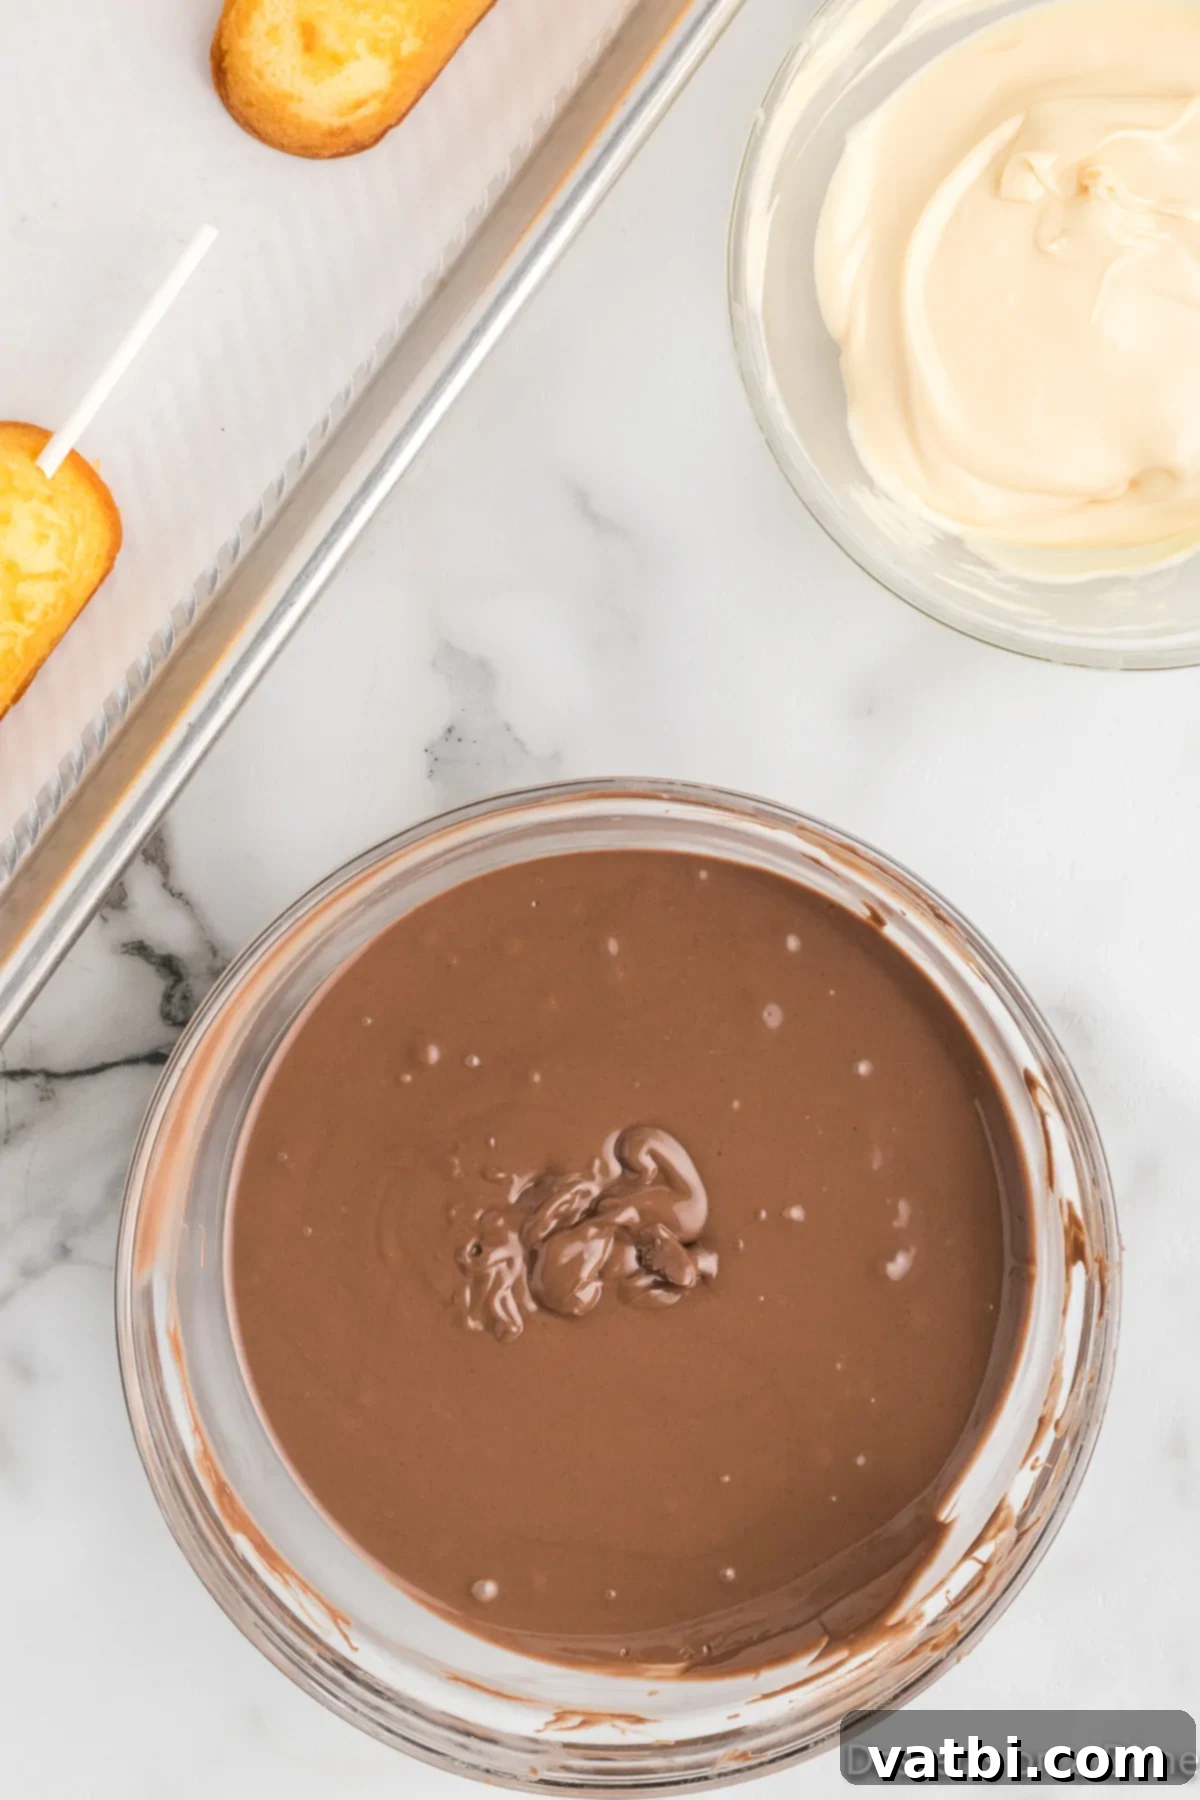
Step 2 – Perfectly Melt the Chocolate: Prepare your chocolate melting wafers according to the specific package instructions. This usually involves using a microwave in short bursts (30-second intervals, stirring in between) or a double boiler method. The key is to melt the chocolate gently until it’s smooth and fluid, avoiding overheating which can cause it to seize or burn. A perfectly melted chocolate ensures a flawless, even coating.
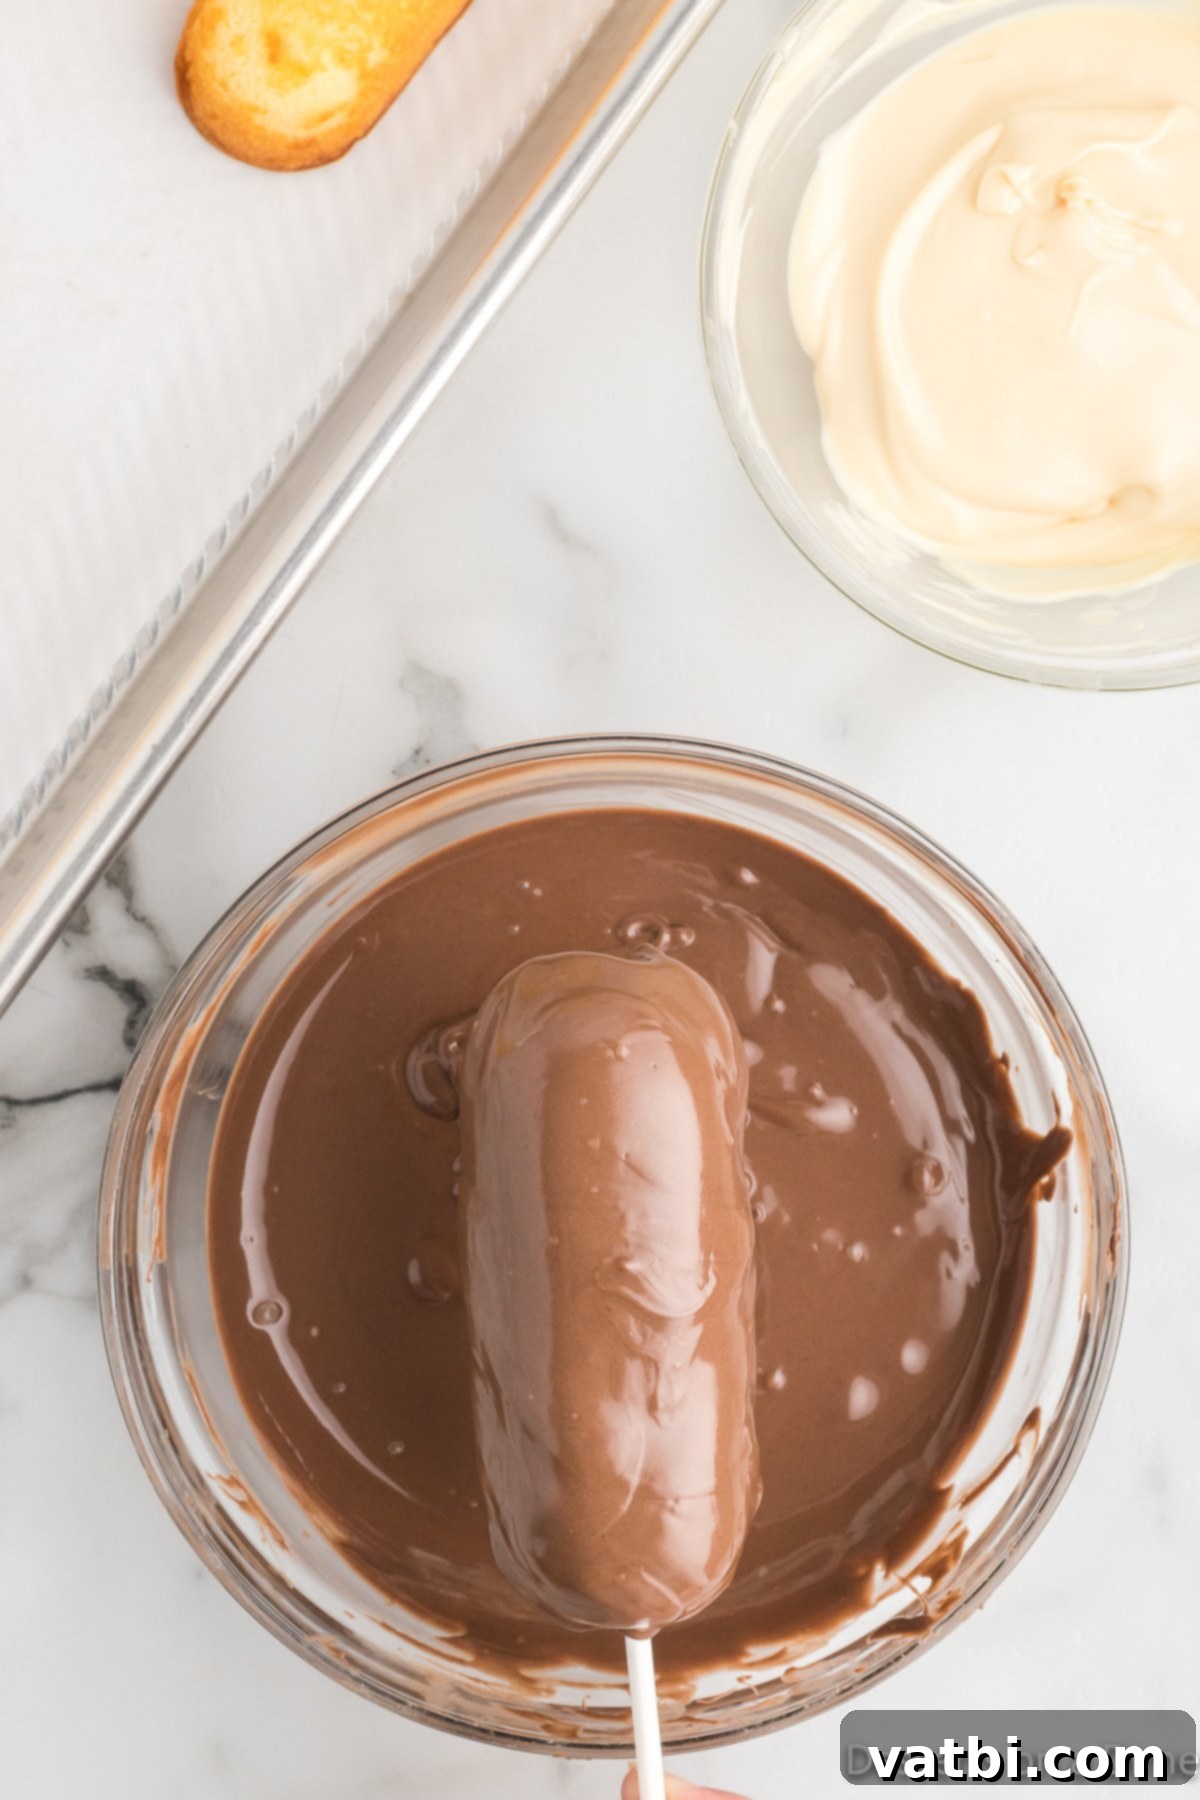
Step 3 – Expertly Coat Each Twinkie: Once your Twinkies are firm from the freezer and your chocolate is perfectly melted, it’s time to coat them. Remove the Twinkies one by one from the freezer. You have two main options for coating: either fully dip each Twinkie into the bowl of melted chocolate, or use a spoon to generously pour and spread the chocolate over the entire surface. Ensure the Twinkie is thoroughly covered for the best results.
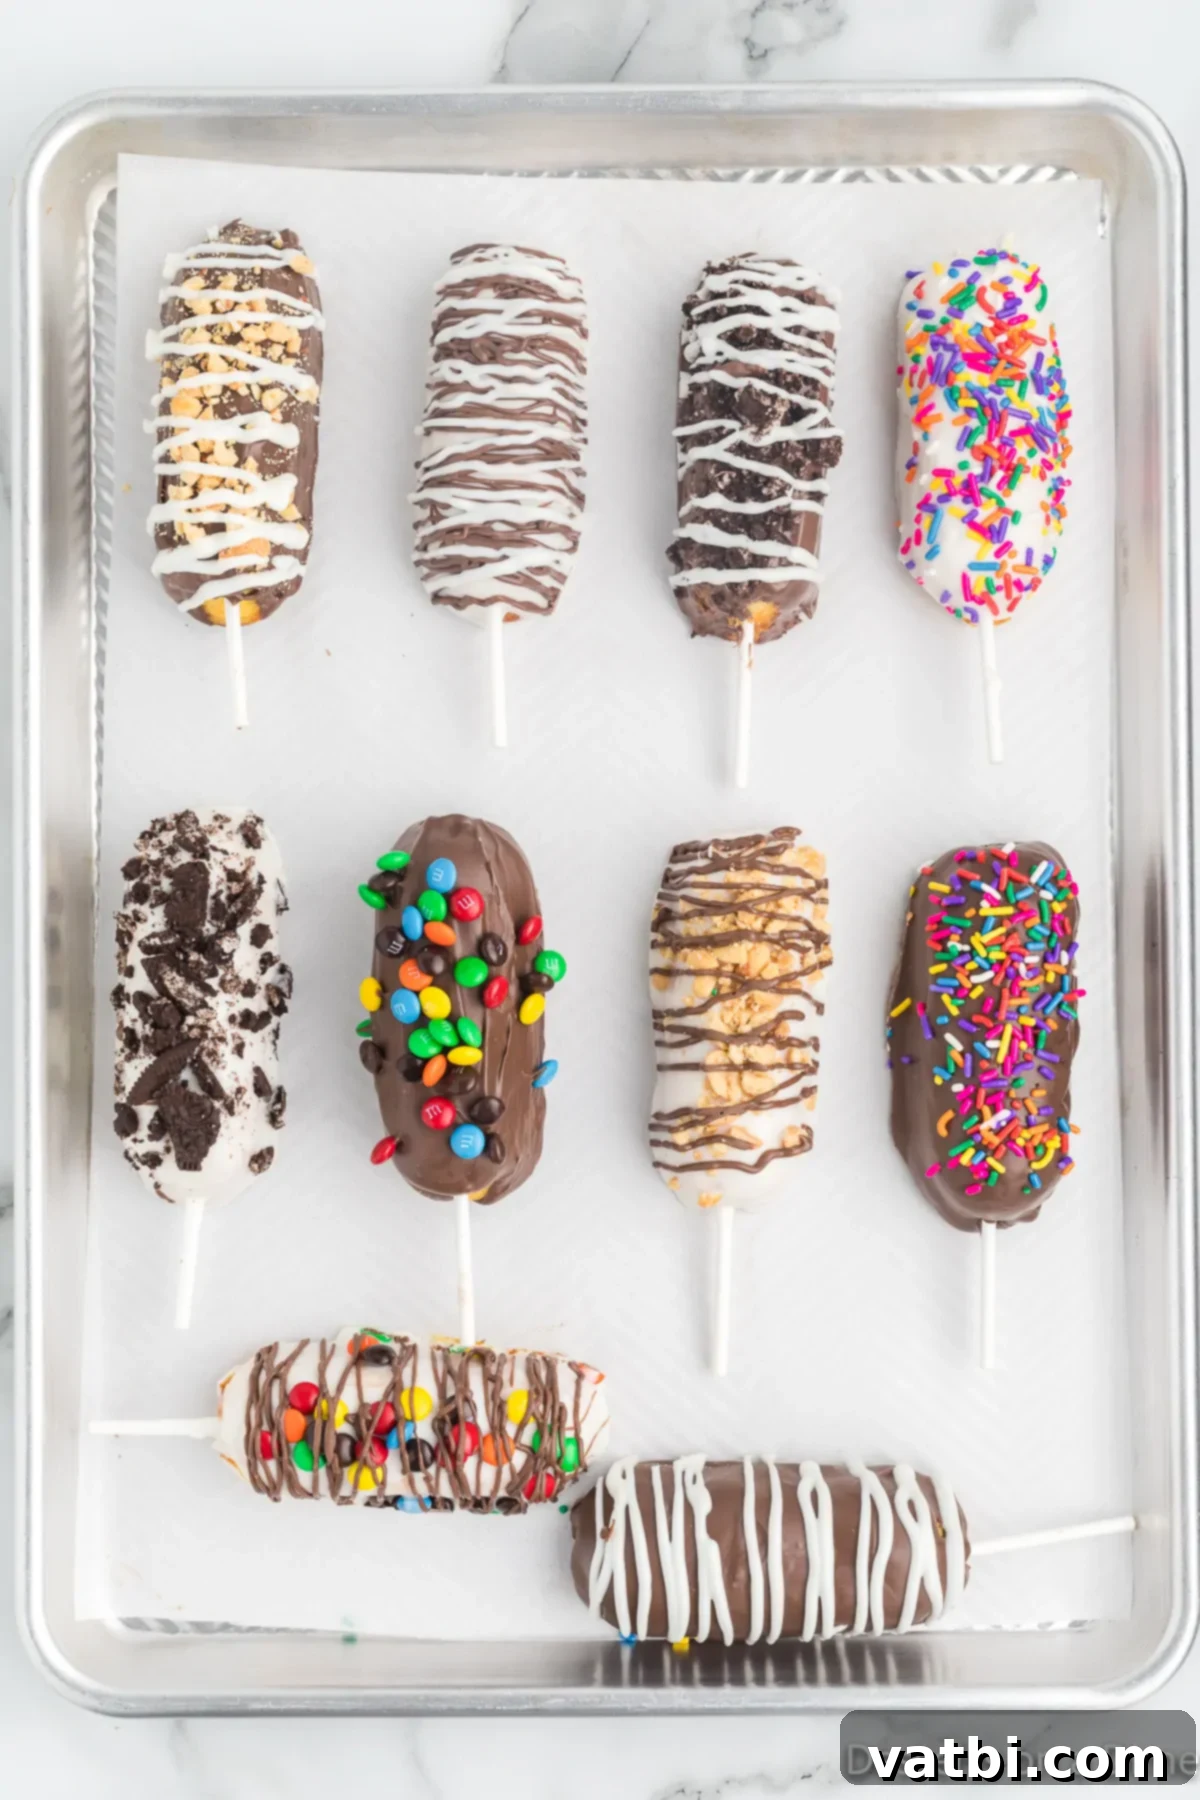
Step 4 – Adorn with Delicious Toppings and Let Set: After coating each Twinkie, gently tap it against the side of the bowl to remove any excess chocolate, ensuring a smooth finish. Immediately place the coated Twinkie back onto your prepared baking sheet and swiftly add your desired toppings. The chocolate will start to set quickly, so speed is key here! Once topped, allow the chocolate to harden completely at room temperature or in the refrigerator before serving. This ensures a firm, delicious shell and prevents any messy handling.
Creative Topping Ideas to Personalize Your Chocolate Covered Twinkies
The beauty of Chocolate Covered Twinkies lies in their adaptability, especially when it comes to toppings. Here are some fantastic ideas to elevate your treats, adding both visual appeal and exciting flavor dimensions:
- Vibrant Sprinkles: A classic choice for a reason! Whether you opt for a rainbow mix, elegant nonpareils, seasonal shapes, or themed colors, sprinkles instantly add a festive pop and a delightful hint of crunch. They are perfect for birthdays, holidays, or simply making your treats more playful.
- Delicious Crushed Candies: For an extra layer of flavor and satisfying texture, consider crushed candies. Think crushed peppermint for a holiday twist, crunchy toffee bits for a rich caramel note, or crushed candy canes for a refreshing minty kick. Break them down into small pieces for easy application.
- Mini M&M’s: These tiny chocolate candies bring a burst of color and a familiar, irresistible chocolatey crunch. Their small size makes them ideal for sprinkling, ensuring every bite of your Twinkie is studded with delightful chocolate mini-gems.
- Flavorful Chopped Nuts: For those who appreciate a nutty counterpoint to sweetness, finely chopped nuts are an excellent choice. Almonds, pecans, walnuts, or peanuts can add a wonderful earthy flavor and a satisfying crunch that beautifully complements the soft Twinkie and rich chocolate.
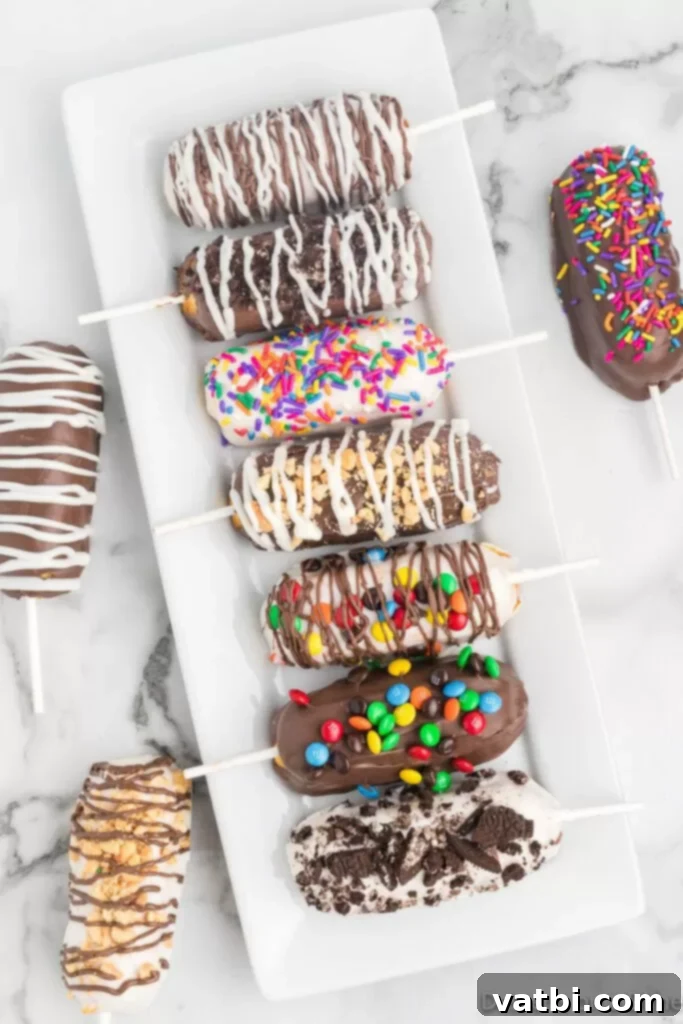
- Elegant Drizzled Chocolate: Create intricate patterns and add an extra layer of chocolatey goodness by drizzling contrasting melted chocolate over your dipped Twinkies. White chocolate drizzled over dark chocolate, or dark chocolate over white-dipped Twinkies, makes for a sophisticated and appealing presentation.
- Tropical Shredded Coconut: If you’re looking for a tropical twist, toasted or untoasted shredded coconut adds a fantastic texture and a subtle, sweet flavor. It’s a simple way to give your Twinkies an exotic flair that’s surprisingly delicious.
- Sparkling Edible Glitter: For truly special occasions, edible glitter or dust can transform your Chocolate Covered Twinkies into dazzling, shimmering confections. A little sprinkle goes a long way in adding a magical touch and making them sparkle under the lights.
- Gourmet Flaky Sea Salt: A small pinch of flaky sea salt sprinkled over the freshly dipped chocolate creates an incredible sweet-and-salty flavor combination that sophisticated palates will adore. It enhances the chocolate’s depth and provides a delightful contrast.
Expert Pro Tips for Flawless Chocolate Covered Twinkies
Achieving perfectly coated and beautifully presented Chocolate Covered Twinkies is easy with a few insider tips. These simple tricks will help you avoid common pitfalls and ensure your homemade treats are a resounding success every time.
- Don’t Skip Freezing the Twinkies: This is arguably the most crucial step for perfect results. After unwrapping your Twinkies and inserting the lollipop sticks, arrange them on a parchment-lined baking sheet and freeze them for a minimum of 3 hours, or until they are completely firm. A frozen Twinkie is much sturdier and less likely to fall apart during dipping, allowing the chocolate to set almost instantly upon contact, creating a smooth, even, and durable coating.
- Master the Art of Melting Chocolate: Whether you’re using candy wafers or chocolate chips, proper melting is key. Use a microwave in 20-30 second increments, stirring well after each, or a double boiler over simmering water. Stir frequently and avoid high heat to prevent the chocolate from burning, becoming grainy, or “seizing” (becoming thick and unworkable). Aim for a smooth, pourable consistency.
- Efficient Dipping Technique: For a clean, full coating, immerse each frozen Twinkie completely into the melted chocolate. Once fully coated, gently tap the stick against the edge of your bowl to allow any excess chocolate to drip off. This prevents puddles and ensures a uniform layer, giving your Twinkies a professional finish. Work quickly, as the chocolate will start to set almost immediately on the cold Twinkie.
- Patience for Perfect Setting: After dipping and adding toppings, place the Twinkies back on the parchment-lined baking sheet. It’s essential to allow the chocolate coating to harden completely before handling or serving. This can be done at room temperature in a cool place, or you can speed up the process by placing them in the refrigerator for 15-30 minutes. A fully set chocolate shell ensures the best texture and prevents sticky fingers.
- Maintain Chocolate Consistency: If you’re dipping a large batch, you might notice your melted chocolate starting to thicken as it cools. Don’t worry! Simply rewarm it gently using your chosen method (short microwave bursts or over the double boiler) for a few seconds. Stir thoroughly to bring it back to a smooth, dippable consistency. This ensures consistent results across all your treats.
Proper Storage for Your Delicious Chocolate Covered Twinkies
Knowing how to properly store your Chocolate Covered Twinkies is key to keeping them fresh and delicious for as long as possible. Here are the best ways to ensure your treats maintain their perfect texture and flavor:
Room Temperature Storage:
For immediate enjoyment or short-term storage, you can keep your chocolate-covered Twinkies at room temperature. Simply place them in an airtight container to prevent them from drying out or absorbing external odors. They will stay fresh and delightful for up to 3 days. Ensure they are stored in a cool, dry place away from direct sunlight or heat, which could cause the chocolate to melt or become sticky.
Refrigeration for Extended Freshness:
If you live in a warm or humid climate, or if you prefer a firmer chocolate shell, refrigeration is an excellent option. Store the Twinkies in a single layer in an airtight container in the refrigerator. This will prevent the chocolate from softening or melting. For the optimal taste and texture, especially for the Twinkie’s sponge cake, it’s best to allow them to come back to room temperature for about 15-20 minutes before serving. This softens the cake slightly and enhances the overall eating experience.
Freezing for Long-Term Enjoyment:
Yes, you can freeze Chocolate Covered Twinkies! This is perfect if you’ve made a large batch or want to enjoy them at a later date. First, arrange the completely hardened, coated Twinkies in a single layer on a baking sheet and place them in the freezer until solid (this prevents them from sticking together). Once individually frozen, transfer them to a freezer-safe, airtight container or a heavy-duty freezer bag. They can be stored in the freezer for up to 1 month. To serve, thaw them in the refrigerator overnight or at room temperature for a couple of hours until soft enough to enjoy. The chocolate might develop a slight bloom (white film) from freezing, but it’s still perfectly safe and delicious to eat.
More Chocolate Covered Desserts
- Football Chocolate Covered Pretzels Recipe
- Easy Chocolate Covered Strawberries Recipe
- Chocolate Covered Peanut Butter Balls Recipe
- Chocolate Covered Ritz Crackers
- Chocolate Covered Pretzel Rods
We hope you enjoy this fun and incredibly easy Chocolate Covered Twinkies Recipe. Please leave a comment and let us know your favorite topping once you make it! We love hearing from you.
Pin
Chocolate Covered Twinkies Recipe
Ingredients
- 10 Twinkies
- 16 ounces Chocolate Melting Wafers
- 8 ounces White Chocolate Melting Wafers
- 10 Lollipop Sticks
- Toppings: Sprinkles Crushed Candy, M&M, nuts, etc
Instructions
-
Carefully unwrap each of your Hostess Twinkies. Gently insert a lollipop stick into one end of each Twinkie, pushing it in about halfway to ensure it’s secure.
-
Arrange the stick-inserted Twinkies on a baking sheet that has been lined with parchment paper or waxed paper. Place the baking sheet in the freezer for at least 3 hours to ensure the Twinkies are firm and well-chilled.
-
Melt your chosen chocolate melting wafers according to the specific instructions provided on the package. Typically, this involves using a microwave in short bursts, stirring frequently, or a double boiler until perfectly smooth and fluid.
-
Once your Twinkies are frozen and chocolate is melted, remove the Twinkies from the freezer. Generously coat each Twinkie in the melted chocolate. You can either fully dip them for a complete coating or use a spoon to pour the chocolate over them, ensuring full coverage.
-
Gently tap the Twinkie stick against the rim of your bowl to allow any excess chocolate to drip back into the bowl. This helps create a cleaner, smoother finish and prevents pooling on your baking sheet.
-
Immediately after coating, place the chocolate-dipped Twinkie back on the prepared baking sheet. While the chocolate is still wet, quickly add your desired toppings, such as sprinkles, crushed candy, or nuts, ensuring they adhere well.
-
Allow the coated Twinkies to sit undisturbed until the chocolate coating has fully hardened. You can leave them at room temperature or place them in the refrigerator to speed up setting. Once firm, they are ready to serve and indulge!
Nutrition Facts
Pin This Now to Remember It Later
Pin Recipe
