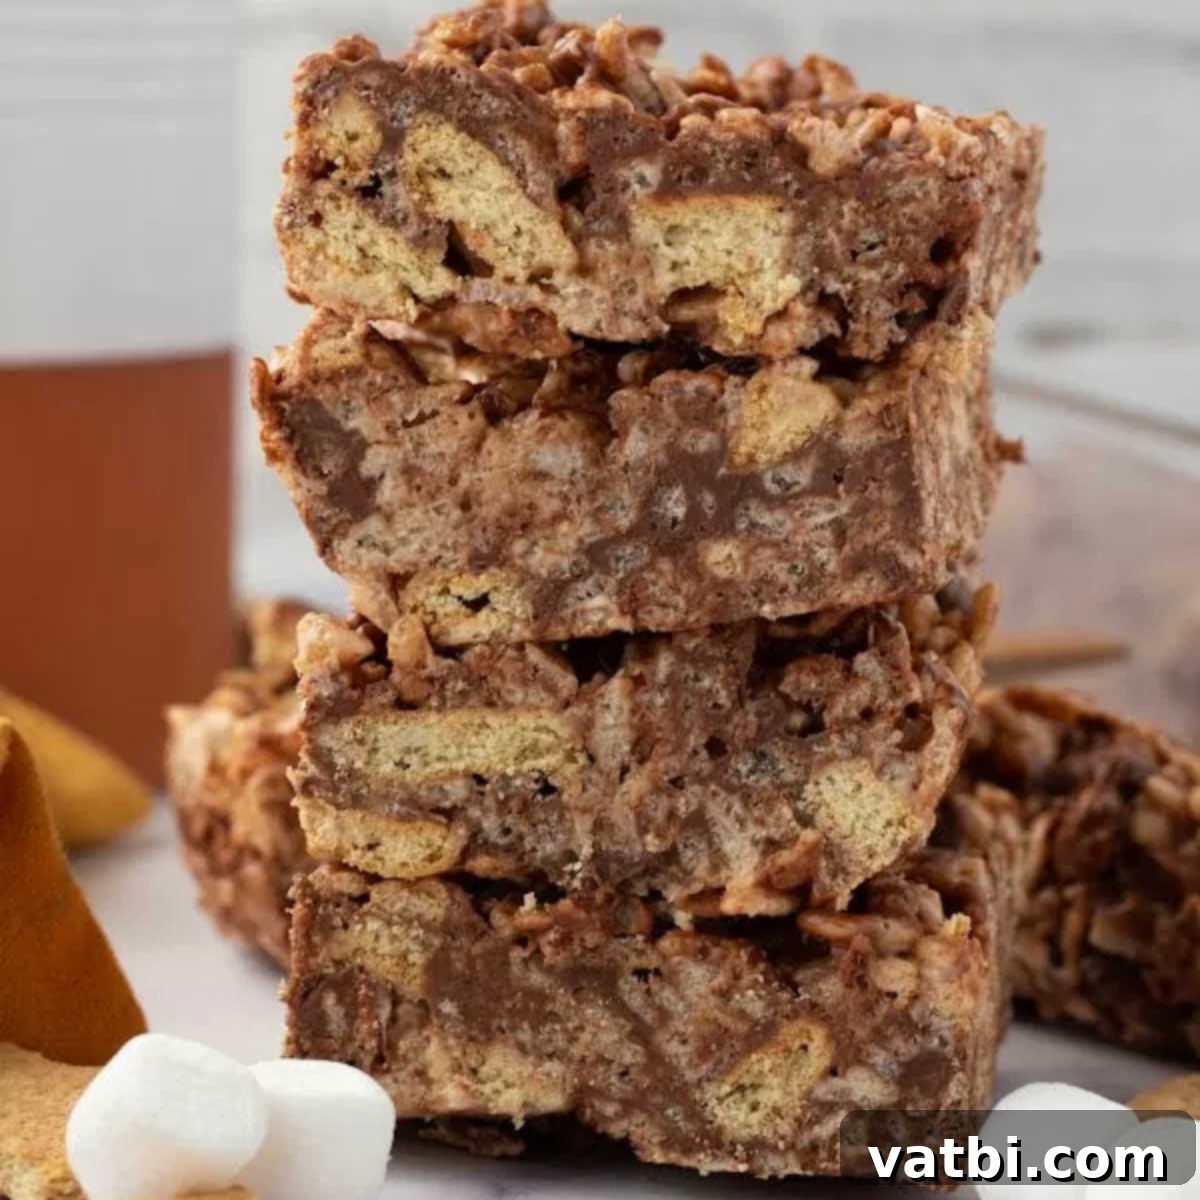
Irresistible S’mores Rice Krispie Treats: Your Ultimate No-Bake Indulgence
There’s nothing quite like the classic campfire treat: s’mores. The delightful combination of gooey, toasted marshmallow, rich melting chocolate, and crunchy graham crackers creates a symphony of textures and flavors that evokes nostalgia and pure joy. Now, imagine capturing all that magic in an incredibly easy, no-bake dessert you can whip up right in your kitchen! This recipe for S’mores Rice Krispie Treats does exactly that, transforming traditional s’mores into a convenient, lusciously sweet, and utterly irresistible confection. It’s truly the best dessert for any occasion, offering all the beloved s’mores components without the need for a roaring fire or a messy campfire setup.
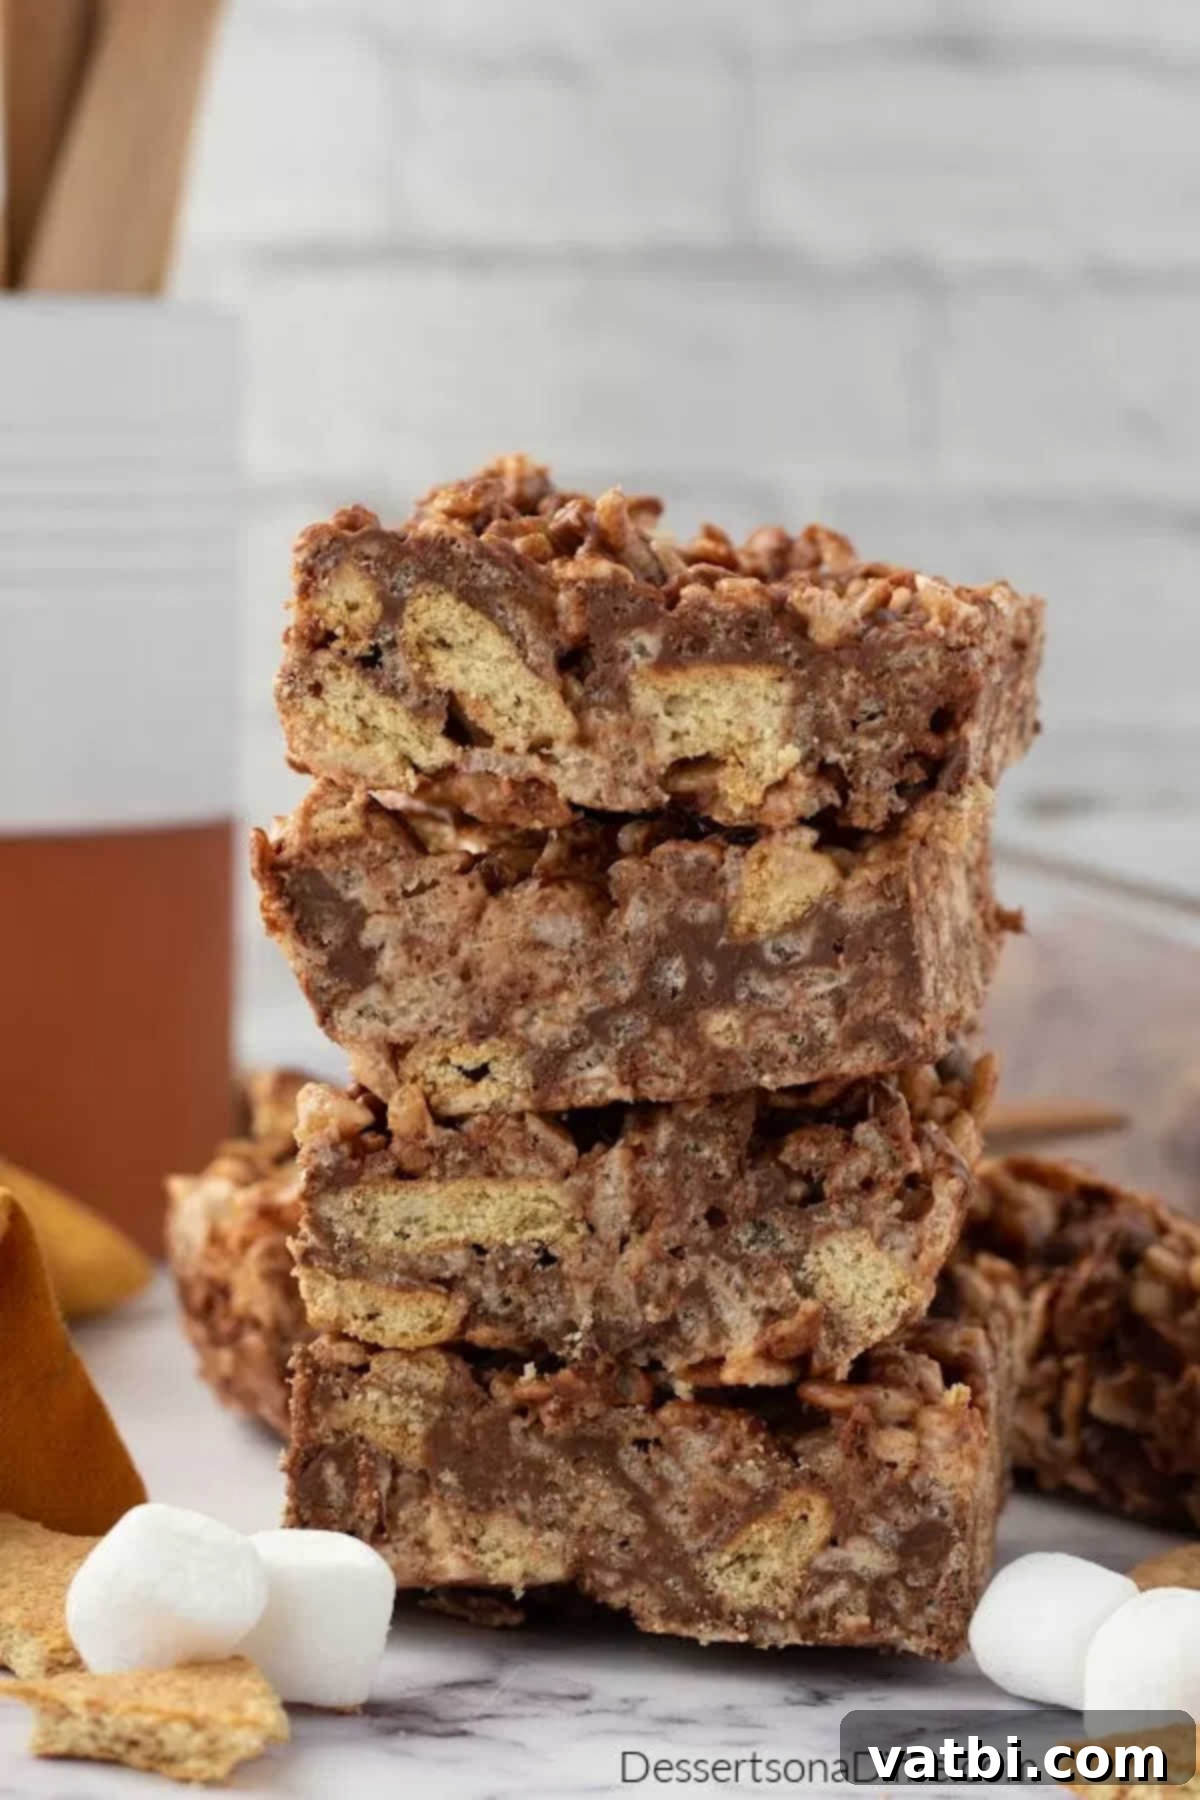
We’ve meticulously packed every amazing s’mores flavor into a simple rice krispie treat, creating a delightful and easy no-bake dessert recipe that everyone will adore. Forget the sticky mess of campfires; these treats deliver big on flavor with minimal effort, making them perfect for parties, potlucks, family gatherings, or just a sweet craving any day of the week. Their gooey texture and perfect balance of sweetness make them an instant crowd-pleaser for both children and adults alike, guaranteeing smiles with every chewy, chocolatey bite.
If you’re a devoted fan of s’mores and are eager to explore more ways to enjoy this iconic flavor, we highly recommend trying our S’mores Poke Cake for a decadent, moist cake experience, or our fun and portable S’mores Cones which bring a playful, individual twist to campfire treats. Each recipe offers a unique take on the classic, ensuring your s’mores cravings are always satisfied in new and exciting ways.
Table of contents
- Why We Absolutely Love This S’mores Rice Krispie Treat Recipe
- Key Ingredients for the Perfect S’mores Rice Krispie Treats
- Creative Variations and Smart Substitutions to Customize Your Treats
- How to Make S’mores Rice Krispie Treats: A Simple Step-by-Step Guide
- Proper Storage for Maintaining Freshness and Texture
- Pro Tips for Achieving Perfect S’mores Rice Krispie Treats
- Frequently Asked Questions (FAQs) About S’mores Rice Krispie Treats
- More S’mores-Inspired Desserts to Explore
- More Delicious Rice Krispie Treats to Try
Why We Absolutely Love This S’mores Rice Krispie Treat Recipe
This recipe isn’t just fabulous; it’s a culinary masterpiece that marries two beloved desserts into one unforgettable experience. Everything you adore about the chewy, sweet simplicity of classic Rice Krispie treats converges with the irresistible campfire charm of s’mores. The resulting combination is undeniably decadent, brimming with flavor, and bursting with delightful textures. Imagine that signature crunch of crispy rice cereal, enveloped in sticky, sweet marshmallow, generously studded with chunks of rich chocolate and the distinct, crumbly goodness of graham crackers. It’s a sensory explosion in every bite, offering comfort and excitement simultaneously.
What makes this treat truly special is its incredible ease of preparation. You don’t need a fiery pit, a barbecue, or even a microwave to achieve that perfect s’mores flavor. It’s a no-bake wonder that comes together in mere minutes, requiring minimal kitchen equipment and delivering maximum satisfaction. This makes it an ideal choice for busy parents, impromptu gatherings, classroom parties, or simply when you need a quick, comforting dessert without any fuss. The blend of sweet, gooey, and crunchy is perfectly balanced, ensuring that each bite is as delightful as the last. If you’ve ever enjoyed classic Rice Krispie Treats with Marshmallow Fluff, you know the gooey potential, and this s’mores version elevates that experience to a whole new level of indulgence. It’s not just a dessert; it’s a shortcut to happiness, a nostalgic trip with a modern, convenient twist. Another party favorite, almost as universally loved, is our Cake Pop Recipe, but for sheer simplicity, speed, and classic comfort with a s’mores twist, these treats truly shine.
Key Ingredients for the Perfect S’mores Rice Krispie Treats
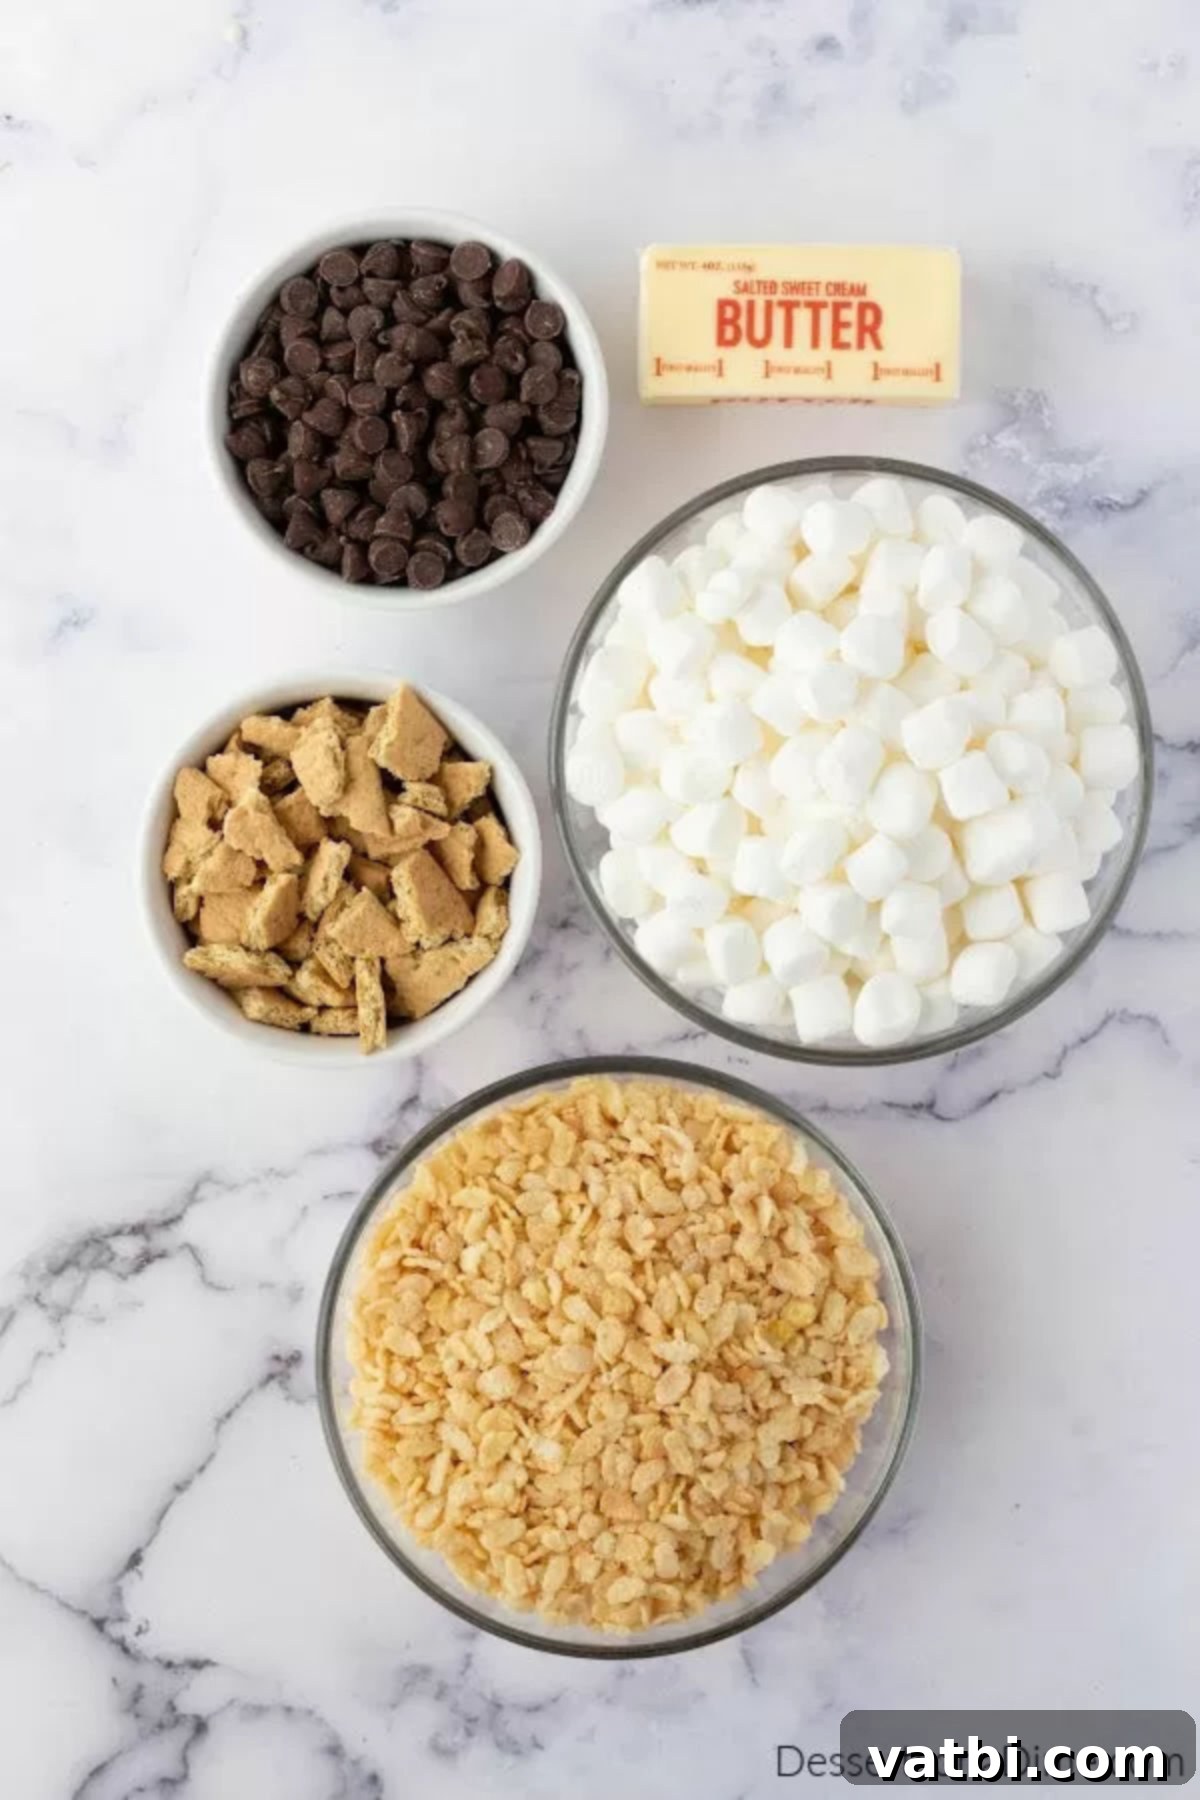
Crafting these delectable treats requires only a handful of readily available ingredients, but the quality and freshness of each component contribute significantly to the overall taste and texture. Here’s a closer look at what you’ll need to create your masterpiece:
- Rice Krispie cereal. This is the essential crunchy base of our treats! For the absolute best crunch and satisfying texture, always ensure your cereal is fresh and crisp. Stale cereal can lead to a less satisfying, chewier, or even slightly soggy end product. While any crispy rice cereal will work, the original Kellogg’s Rice Krispies brand is known for its consistent quality and that unmistakable sound we all love.
- Mini marshmallows. These delightful little puffs are the magical binders that create that signature gooeyness and sweet chew. Miniature marshmallows are highly recommended because they melt much more quickly and evenly than their larger counterparts, ensuring a smooth, consistent marshmallow coating without the risk of overcooking or scorching. However, if you only have large marshmallows on hand, simply cut them into smaller pieces (quarters or even eighths) before melting to achieve a similar efficient melt. For an extra layer of soft, pillowy sweetness, consider reserving a handful of un-melted mini marshmallows to stir in at the very end of the mixing process.
- Salted Butter. Butter is crucial for both flavor and for helping the marshmallows melt smoothly and preventing the entire mixture from sticking excessively to the pan and your hands. Salted butter is specified because it adds a subtle but important balance to the overall sweetness of the treats, enhancing all the other flavors. If you only have unsalted butter, simply add a tiny pinch (about ¼ teaspoon) of fine sea salt during the melting process to achieve a similar flavor profile. High-quality butter can make a noticeable difference in the richness.
- Graham crackers. These indispensable crackers provide the iconic s’mores flavor and a delightful, crumbly texture. The goal is to have coarse chunks, not a fine, dusty powder, so a gentle crush is key. This ensures that you get distinct, flavorful bites of graham cracker goodness throughout the treat, mimicking the layers of a real s’more. You can use classic honey graham crackers for a traditional taste or experiment with cinnamon-flavored ones for an extra layer of warmth and spice.
- Semi-sweet chocolate chips. Chocolate is, of course, absolutely non-negotiable for s’mores! Semi-sweet chocolate chips are generally ideal as they offer a rich, deep chocolate flavor without making the treats overly sweet, beautifully complementing the marshmallow and graham cracker. However, feel free to adapt to your preference: use milk chocolate chips for a sweeter, creamier profile, or dark chocolate chips for a more intense, less sweet dessert. For a superior melt and flavor, especially if you’re a chocolate connoisseur, consider using high-quality chocolate bars chopped into small pieces.
A detailed, complete list of ingredients with precise measurements can be found in the full recipe card at the bottom of this page. Gather your components, and let’s get ready to create some truly irresistible S’mores Rice Krispie Treats!
Creative Variations and Smart Substitutions to Customize Your Treats
One of the best things about S’mores Rice Krispie Treats is how incredibly adaptable they are. While the classic combination is always a winner, don’t hesitate to get creative with these delicious variations and smart substitutions to tailor them perfectly to your taste, dietary needs, or simply what you have available in your pantry:
- Embrace Even More Chocolate: If you’re a true chocoholic, take these treats to the next level. Instead of plain crispy rice cereal, consider substituting Cocoa Krispies. This immediately infuses the entire treat with a deep, delightful chocolate flavor that amplifies the s’mores experience. For a more subtle chocolate kick, you could use a 50/50 mix of plain and Cocoa Krispies. Another fantastic idea for an impressive presentation and an extra layer of richness is to press fun-size Hershey Bars (or other small chocolate bars like Ghirardelli squares) into the top of the warm rice krispie treats right after spreading them into the pan. As the treats cool, the chocolate will set beautifully, not only looking incredibly appealing but also delivering an extra burst of rich, melting chocolate in every bite.
- Graham Cracker Alternatives: For a slightly different texture or flavor in your graham cracker component, Golden Graham cereal can be used instead of crushed graham crackers. These little squares hold their shape a bit better while still providing that distinct honey-graham flavor and a satisfying crunch. Alternatively, explore different types of graham crackers, such as cinnamon graham crackers, for a subtle spice note that adds warmth to the overall profile. You could even try chocolate graham crackers for a triple chocolate explosion!
- Beyond Semi-Sweet Chocolate Chips: While semi-sweet chocolate chips are a fantastic staple, feel free to get adventurous with your chocolate choices. Cut up your favorite chocolate bars (milk chocolate, dark chocolate, even white chocolate or a combination) into small chunks to use instead of chips. This allows for a more artisanal touch and diverse flavor profiles. Mini chocolate candies like M&M’s or Reese’s Pieces can also add a delightful pop of color, extra sweetness, and a fun textural contrast. For an elevated gourmet flavor, try high-quality chocolate squares from a specialty brand.
- Nutty Additions for Extra Crunch: For those who love a nutty crunch and flavor, stir in a handful of finely chopped pecans, walnuts, or even roasted peanuts along with the cereal and graham crackers. This introduces another layer of texture and a savory note that beautifully complements the sweetness. Always be mindful of nut allergies when serving to others.
- Enhanced Gooeyness: To make your treats even gooier and more marshmallow-laden, gently fold in an extra half-cup to a full cup of mini marshmallows *after* removing the marshmallow-butter mixture from the heat but *before* adding the cereal. These additional marshmallows will soften but not fully melt, creating delightful pockets of soft, pillowy marshmallow throughout your finished treats.
- Flavor Extracts and Spices: A dash of pure vanilla extract (about 1 teaspoon) added with the melted marshmallows can deepen the overall flavor and enhance the sweetness. For a festive touch during the holidays, consider a tiny bit of peppermint extract. A pinch of cinnamon or nutmeg can also add a unique twist, particularly if using plain graham crackers.
- Caramel Swirl or Drizzle: For an extra layer of indulgent sweetness, drizzle some warm caramel sauce over the top of the set treats before cutting. This adds a beautiful visual appeal and a rich, buttery flavor that pairs wonderfully with s’mores.
How to Make S’mores Rice Krispie Treats: A Simple Step-by-Step Guide
Creating these delightful no-bake S’mores Rice Krispie Treats is incredibly straightforward, making them a perfect project for any home baker, regardless of experience. Follow these easy, detailed steps for perfect, chewy, and flavorful results every time:

Step 1: Melt Butter and Marshmallows Smoothly. Begin by taking a large, heavy-bottomed saucepan. This helps distribute heat evenly and prevents scorching. Add the specified amount of salted butter to the pan and melt it over medium-low heat. Once the butter is mostly melted and shimmering, add the mini marshmallows. Stir continuously with a sturdy spatula or wooden spoon until the marshmallows are completely melted and form a smooth, gooey liquid. The key here is patience and low heat; avoid high heat which can make the marshmallows tough and brittle once cooled. Remove the saucepan from the heat immediately once a smooth, liquid consistency is achieved – don’t let it boil or brown.
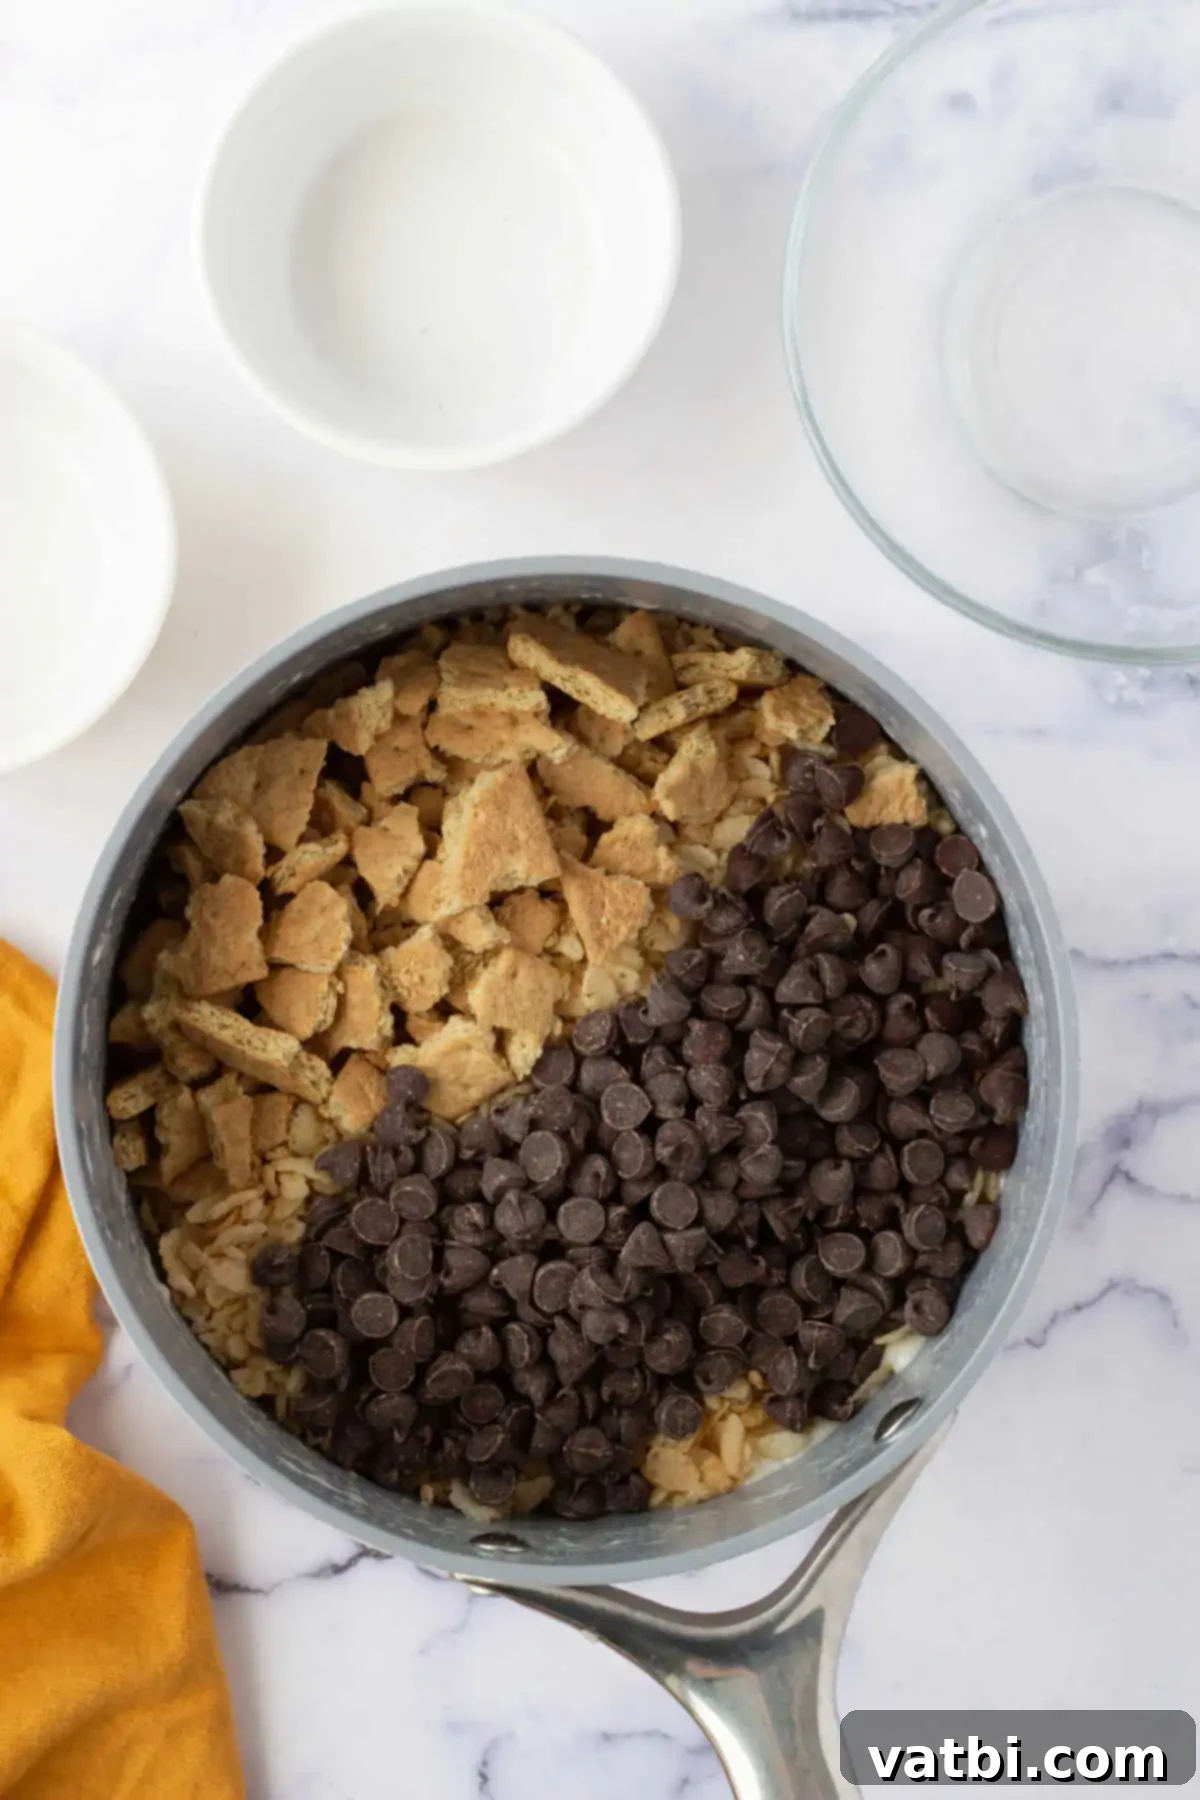
Step 2: Gently Fold in Dry Ingredients for Even Coating. With the marshmallow mixture still warm (but now off the heat to prevent over-melting the chocolate and crushing the cereal), carefully and gently stir in the Rice Krispie cereal, your coarsely crumbled graham crackers, and the semi-sweet chocolate chips. Use a large spatula or spoon to fold the ingredients together until everything is evenly coated in the warm, sticky marshmallow mixture. Work quickly but gently to avoid crushing the cereal and graham crackers too much; you want distinct pieces for texture. The residual heat from the marshmallow will slightly soften and melt the chocolate chips, creating delicious pockets of gooey chocolate throughout the treats.
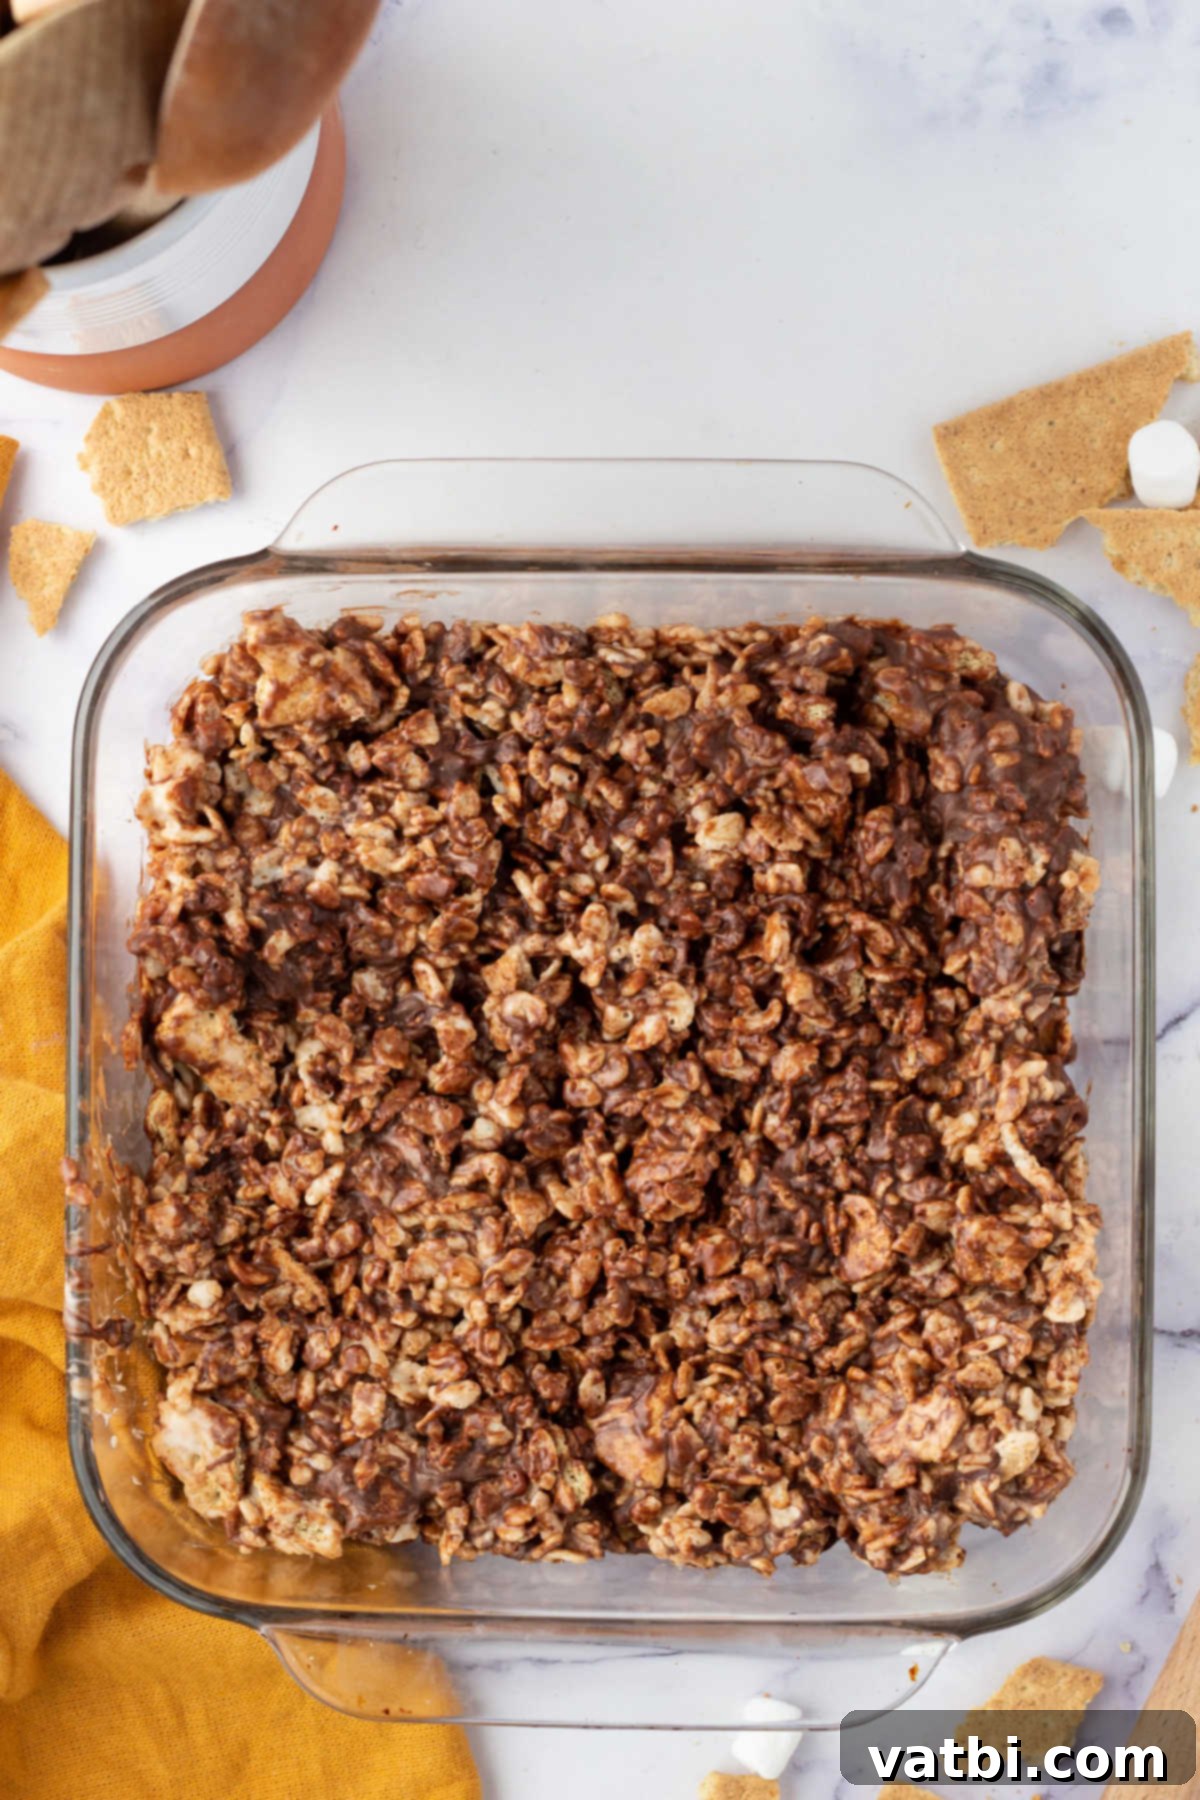
Step 3: Press into Pan and Chill to Set. Prepare an 8×8 inch or 9×13 inch baking dish (depending on how thick you prefer your treats) by lightly greasing it or, preferably, lining it with parchment paper. Leave an overhang of parchment paper on the sides to create “handles” – this makes removing the entire slab of treats much easier later. Transfer the entire sticky mixture into the prepared baking dish. Using a piece of wax paper, a buttered spatula, or even hands lightly greased with butter or cooking spray, gently press the mixture evenly into the pan. Be careful not to press too firmly, as this is a common mistake that can result in hard, dense treats rather than delightfully chewy ones. A light, even pressure is all that’s needed. Once pressed, place the pan in the refrigerator for at least 2 hours to allow the treats to set completely. This chilling time is crucial for firm, easy-to-cut squares and helps the chocolate firm up.
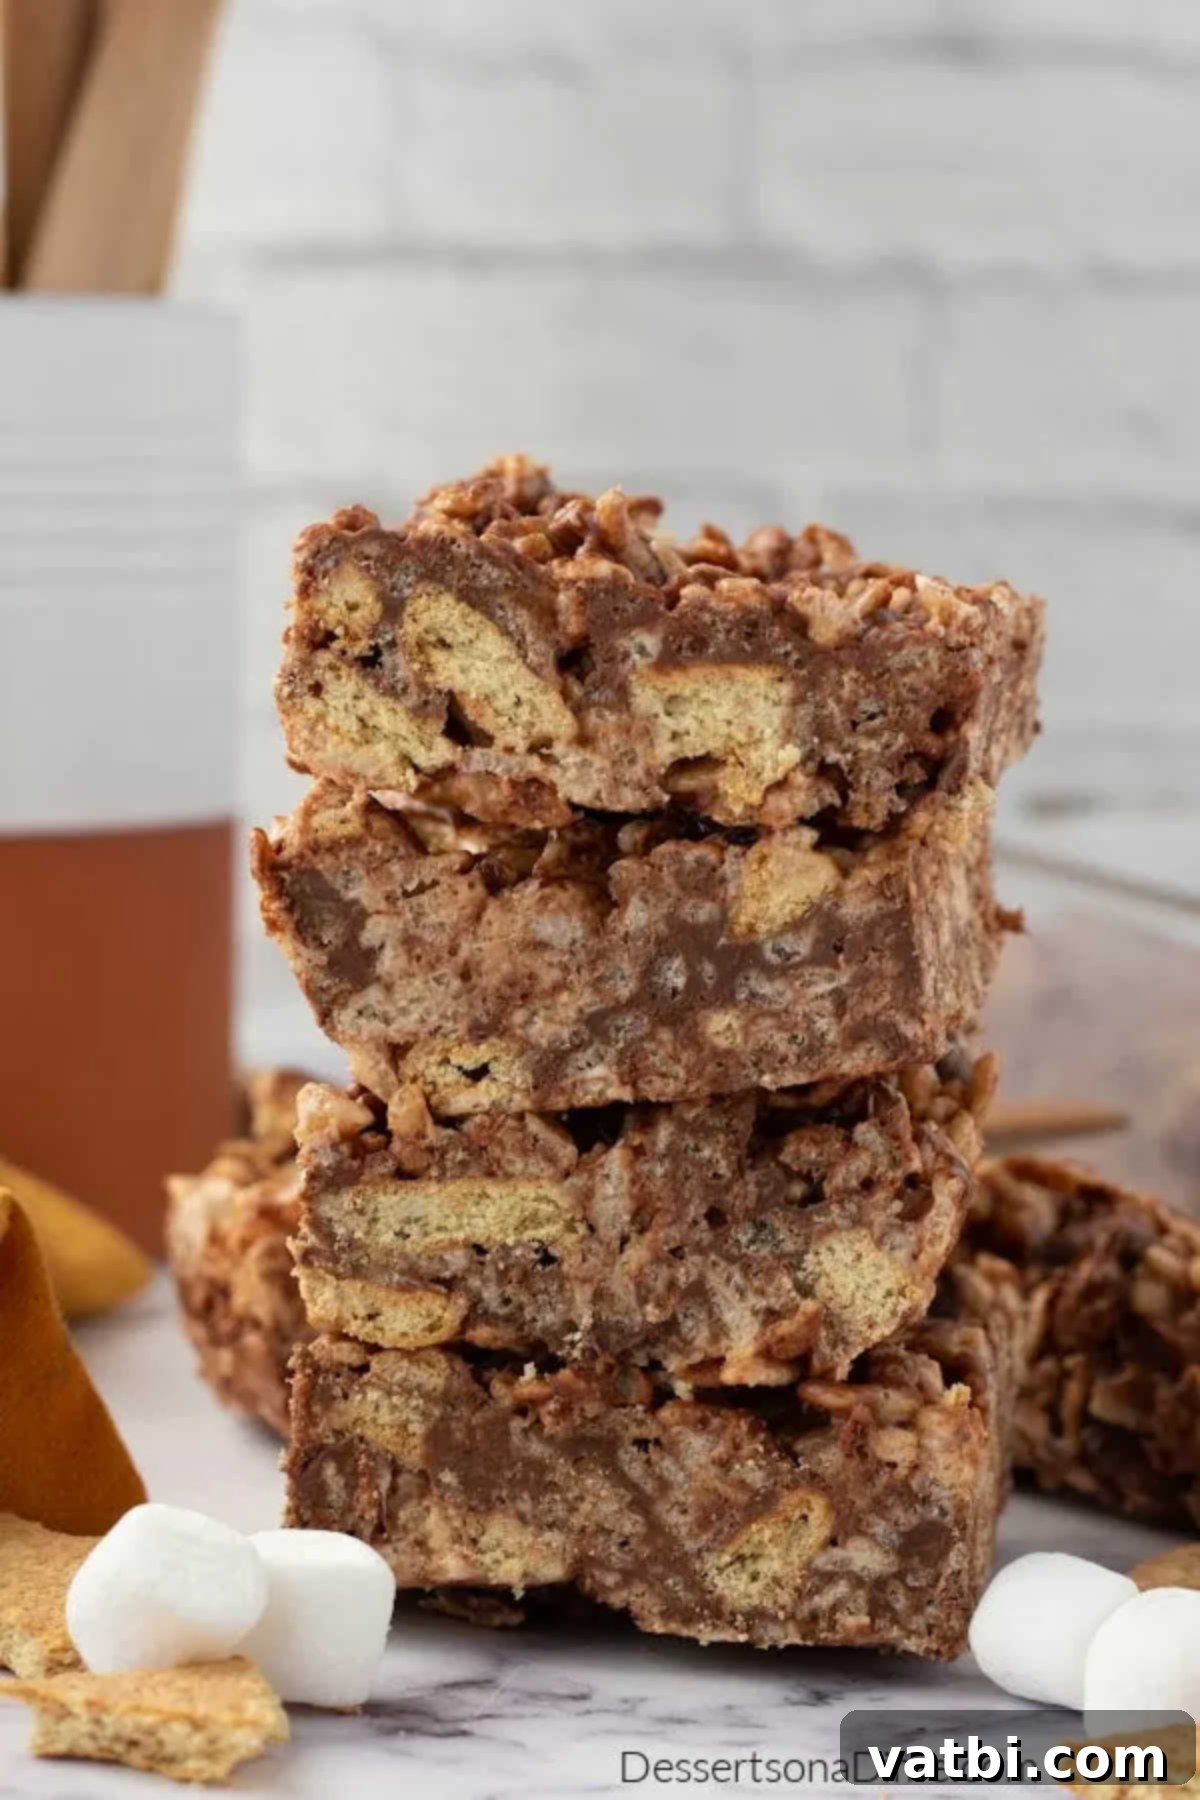
Step 4: Cut into Squares, Serve, and Enjoy! Once the S’mores Rice Krispie Treats are thoroughly chilled and completely set, remove the pan from the refrigerator. If you used parchment paper, simply lift the entire slab out of the pan using the overhangs. For perfectly cut, clean squares or rectangles, a sharp knife is essential. For even better results, dip your knife into warm water before each cut and wipe it clean. The warm blade will slice through the sticky marshmallow and chocolate much more smoothly, preventing tearing and messy edges. Carefully cut the treats into your desired size, whether that’s classic squares or fun rectangles. Serve immediately, or keep them chilled until ready to enjoy. These are best enjoyed at room temperature or slightly chilled, offering that perfect balance of chewiness and s’mores flavor. Enjoy every delicious, nostalgic bite!
Proper Storage for Maintaining Freshness and Texture
Ensuring your S’mores Rice Krispie Treats stay fresh, chewy, and delicious is simple with proper storage techniques. How you choose to store them will depend on how quickly you plan to devour them and your personal preference for texture.
You can store these delightful treats in an airtight container in the fridge for up to 5 days. Refrigeration is highly recommended, especially because of the chocolate chips and the overall gooey nature of the marshmallows. Keeping them chilled helps the chocolate stay set and firm, preventing it from becoming too soft or melty, which can happen if stored at room temperature, particularly in warmer climates. When chilled, the treats will have a slightly firmer, chewier texture, which many people find incredibly appealing and satisfying.
While you *can* store them on the counter in an airtight container for 1-2 days, be aware that they will be a tad bit softer and gooier due to the marshmallows and chocolate reacting to room temperature. If you prefer a super soft, almost melty s’mores experience right out of the pan, then short-term counter storage is an option. However, for maximum freshness, to maintain the integrity of the chocolate, and to keep the graham cracker crunch, the fridge is undoubtedly your best bet.
To store, make sure to cover the baking pan tightly with plastic wrap after cutting, or transfer the cut squares into a well-sealed, airtight container. This prevents them from drying out, becoming stale, or absorbing any unwanted odors from your refrigerator. For even longer storage, you might be wondering, “Can You Freeze Rice Krispie Treats?” Absolutely! You can individually wrap them in plastic wrap, then place them in a freezer-safe bag or container for up to 6 weeks. Learn all the best tips for freezing and thawing to enjoy your homemade s’mores treats even weeks later, ensuring none of your delicious creations go to waste.
How Long Will S’mores Rice Krispie Treats Last?
When stored properly in an airtight container in the refrigerator, these S’mores Rice Krispie Treats will maintain their optimal freshness, chewiness, and flavor for up to 5 days. Beyond this timeframe, they might start to lose their desired crispness, become a bit too hard, or develop a stale texture. However, in all honesty, in most households, these delectable treats don’t usually last that long! Their irresistible taste and universal appeal mean that everyone races to eat them as fast as they can, often disappearing within a day or two. They are truly that amazing – a dessert so delicious and in-demand that it vanishes almost as quickly as it’s made!
Pro Tips for Achieving Perfect S’mores Rice Krispie Treats
Even though this recipe is incredibly easy and straightforward, a few expert tips can elevate your S’mores Rice Krispie Treats from simply good to absolutely phenomenal. Paying attention to these small details will guarantee the best possible results and impress everyone who tries them:
- Graham Cracker Texture is Absolutely Key: When crumbling your graham crackers, you do not want them to be completely crushed into a fine, powdery dust. This will cause them to disappear into the mixture. Instead, aim for coarse chunks – irregular pieces about the size of a pea or slightly larger. This is crucial for giving the treats that extra, delightful texture and ensuring the distinct, sweet, and crumbly graham cracker flavor is well distributed and noticeably present in every single bite. Think of achieving a consistency that mimics the crunchy layer of a real s’more.
- The Art of Gentle Pressing: To make it significantly easier to press the warm, sticky mixture evenly into your baking pan without creating a sticky mess on your hands or tools, try this simple but effective trick: place your hand inside a Ziploc bag, or use a piece of wax paper or parchment paper directly over the mixture in the pan. Then, lightly spray the outside of the bag, the paper, or even a sturdy spatula with cooking spray. This provides a non-stick surface, allowing you to press the mixture into the pan smoothly and efficiently. Remember to press *gently* but firmly enough to ensure the treats hold together when cut, avoiding over-compressing. Over-compressing is a common mistake that can lead to hard, dense, and tough treats instead of delightfully chewy ones.
- Precision Cutting for Perfectly Clean Squares: For perfectly cut, clean squares or rectangles that look professional, a warm knife is your secret weapon. Before each cut, dip a sharp knife into warm or hot water and then quickly wipe it clean with a paper towel. The warm blade will slice through the sticky marshmallow and melted chocolate much more smoothly, preventing tearing, dragging, and messy edges. Make sure to wipe the knife clean after every single cut to remove any excess mixture clinging to the blade, ensuring neat and attractive treats every time.
- Don’t Overcook the Marshmallows: When melting the marshmallows and butter, always use medium-low heat and stir constantly. Marshmallows can scorch easily and, if overcooked, will result in treats that are hard and brittle once cooled, rather than deliciously gooey and chewy. Remove the saucepan from the heat as soon as the mixture is smooth and fully melted – do not let it simmer or boil.
- Freshness Matters Greatly: Always start with fresh Rice Krispie cereal. Stale cereal will result in a less satisfying, chewier, and sometimes even cardboard-like texture in your finished treats. Fresh cereal ensures that iconic crisp snap!
- Optimal Pan Preparation: To guarantee easy removal and minimal cleanup, always line your baking dish with parchment paper. Leave an overhang of parchment paper on all sides; this creates convenient “handles” that make lifting the entire slab of treats out of the pan incredibly easy once set. Lightly greasing the parchment paper itself with a little butter or cooking spray provides extra non-stick insurance.
- Chill Time is Essential: While it might be tempting to cut into them sooner, allowing the treats to chill in the refrigerator for the full recommended 2 hours is crucial. This time allows the marshmallow mixture to fully set and the chocolate to firm up, ensuring clean cuts and a stable, non-sticky finished product.
Frequently Asked Questions (FAQs) About S’mores Rice Krispie Treats
Here are some common questions you might have about making, customizing, and enjoying these delightful s’mores treats:
- Can I use different types of chocolate in this recipe? Yes, absolutely! While semi-sweet chocolate chips are recommended for their balanced flavor, milk chocolate chips will make them sweeter and creamier, and dark chocolate chips will offer a richer, less sweet profile. You can also chop up your favorite chocolate bars or use mini chocolate candies like M&M’s for added fun and flavor.
- What if my treats turn out too hard? This is a common issue and usually happens if the marshmallows were overcooked (cooked at too high a heat or for too long) or if the mixture was pressed too firmly into the pan. To avoid this, ensure you melt marshmallows slowly over medium-low heat, stirring constantly, and only press the mixture lightly into the pan to set it.
- How can I prevent the treats from sticking to the knife when cutting? The best trick is to dip your sharp knife in warm water and wipe it clean before each cut. The warmth helps the blade glide through the sticky mixture more smoothly, yielding cleaner slices. A plastic knife can also work surprisingly well for non-stick cutting.
- Can I make these treats ahead of time for a party? Yes, these S’mores Rice Krispie Treats are perfect for making ahead! Prepare them as directed, chill, cut, and then store them in an airtight container in the refrigerator for up to 5 days. For the best texture, allow them to sit at room temperature for about 10-15 minutes before serving if they have been chilled, to soften slightly.
- Are these treats gluten-free? The Rice Krispies cereal itself is traditionally made from rice, which is gluten-free. However, some brands may contain malt flavoring which can contain gluten, or there might be cross-contamination during processing. Always check the cereal packaging to ensure it is certified gluten-free. Graham crackers are typically not gluten-free, so you would need to use specifically certified gluten-free graham crackers or a suitable alternative (like gluten-free shortbread cookies) to make this recipe truly gluten-free.
- Can I add other mix-ins to the recipe? Definitely! Get creative with additions. Chopped nuts (like pecans or almonds) can add an extra layer of crunch and flavor. Pretzel pieces offer a fantastic salty-sweet crunch, or even a sprinkle of flaky sea salt on top before chilling can enhance the chocolate flavor beautifully. Feel free to experiment with other candies or sprinkles as well!
More S’mores-Inspired Desserts to Explore
If you can’t get enough of that classic s’mores flavor, we’ve got even more delicious recipes that expertly capture the essence of this beloved treat. From delectable baked delights to refreshing frozen sensations, there’s a s’mores dessert for every mood, occasion, and craving:
- S’mores Bars Recipe: Dive into a richer, denser bar that layers a buttery graham cracker crust, a fudgy chocolate center, and perfectly toasted marshmallows on top. A truly indulgent and satisfying baked experience.
- Oven Baked S’mores Recipe: Enjoy the traditional gooey, perfectly toasted s’mores experience without the need for an outdoor campfire! This indoor-friendly version is perfect for any time of year and offers easy cleanup.
- Frozen S’Mores Recipe: A delightful and refreshing twist on the classic, these frozen treats are ideal for hot summer days, offering a cool, creamy, and crunchy s’mores experience that is utterly unique.
More Delicious Rice Krispie Treats to Try
Rice Krispie treats are incredibly versatile, and the possibilities for exciting flavor combinations are truly endless. If you love the simplicity, ease, and deliciousness of our S’mores Rice Krispie Treats, you’ll definitely want to explore these other fantastic variations that put a unique spin on the classic crispy treat:
- Brown Butter Rice Krispie Treats: Elevate the classic with the rich, complex, and nutty flavor of browned butter. This is a sophisticated twist that’s still incredibly easy to make and irresistibly delicious.
- Strawberry Rice Krispie Treats Recipe: Infuse your crispy treats with a vibrant burst of fruity strawberry flavor, making them a perfect, colorful choice for spring and summer celebrations or a lovely pink treat.
- Chocolate Covered Rice Krispie Treats: Take your treats up a notch by dipping them in a smooth, decadent layer of melted chocolate for an extra indulgent and visually appealing experience.
- Salted Caramel Rice Krispie Treats: The perfect combination of sweet and salty, these treats feature a luscious caramel swirl and a hint of sea salt, creating a sophisticated and utterly irresistible snack.
- Cookie Butter Rice Krispie Treats Recipe: Indulge in the unique, spiced, and sweet flavor of cookie butter (like Biscoff) swirled throughout your crispy treats for a truly comforting and delicious twist.
- Peanut Butter Rice Krispie Treats: A timeless and beloved combination, these treats are rich, creamy, and utterly satisfying for any peanut butter lover, offering a hearty and flavorful crunch.
Don’t wait another moment to make these unbelievably yummy S’mores Rice Krispie Treats today! They are the quintessential summertime treat, but their delightful flavors and comforting textures make them perfect for any season or occasion. Whether you’re planning a big party, a cozy family movie night, or simply craving something sweet “just because,” these no-bake treats fit the bill perfectly. Their ease of preparation, irresistible taste, and universal appeal guarantee they’ll be a resounding hit with everyone. Please leave a comment and let us know what you think once you try this recipe – we’d absolutely love to hear about your s’mores experience and how much you enjoyed these fantastic treats!
Pin
Smore’s Rice Krispie Treats
Ingredients
- 3 cups Rice Krispie cereal
- 3 cups mini marshmallows
- ½ cup salted butter
- 1 cup graham crackers coarsely crumbled
- 1 cup semi-sweet chocolate chips
Instructions
-
In a large, heavy-bottomed saucepan, combine the marshmallows and butter. Melt over medium-low heat, stirring continuously until the mixture is completely smooth and melted. Remove from heat immediately.
-
Gently fold in the fresh Rice Krispie cereal, coarsely crumbled graham crackers, and semi-sweet chocolate chips. Continue folding until all ingredients are evenly coated in the warm marshmallow mixture. Avoid overmixing or pressing too hard to maintain the cereal’s crispness and graham cracker chunks.
-
Prepare an 8×8 or 9×13 inch baking dish by lining it with parchment paper (leaving an overhang on the sides for easy removal) or lightly greasing it. Pour the mixture into the prepared dish. Using a buttered spatula or a piece of wax paper, gently press the mixture down evenly into the pan. Do not press too firmly to avoid dense treats. Place the dish in the refrigerator for at least 2 hours to allow the treats to set completely.
-
Once firm, remove the treats from the fridge. Use the parchment paper overhangs to lift the entire slab out of the pan. With a sharp knife, dipped in warm water and wiped clean after each cut, slice the S’mores Rice Krispie Treats into desired squares or bars. Serve and enjoy your homemade, no-bake s’mores dessert!
Recipe Notes
Store these treats in an airtight container in the fridge for up to 5 days to maintain freshness and prevent sticking.
Storing in the refrigerator is recommended to keep the chocolate firm and the treats from becoming overly soft. If stored on the counter, the chocolate may soften and the treats will be gooier.
For easy removal and cleanup, always line your baking pan with parchment paper, allowing some to overhang the sides.
When pressing the mixture into the pan, use a buttered spatula or a piece of wax paper to prevent sticking. Press gently to ensure your treats remain chewy, not dense.
Nutrition Facts
Pin This Now to Remember It Later
Pin Recipe
