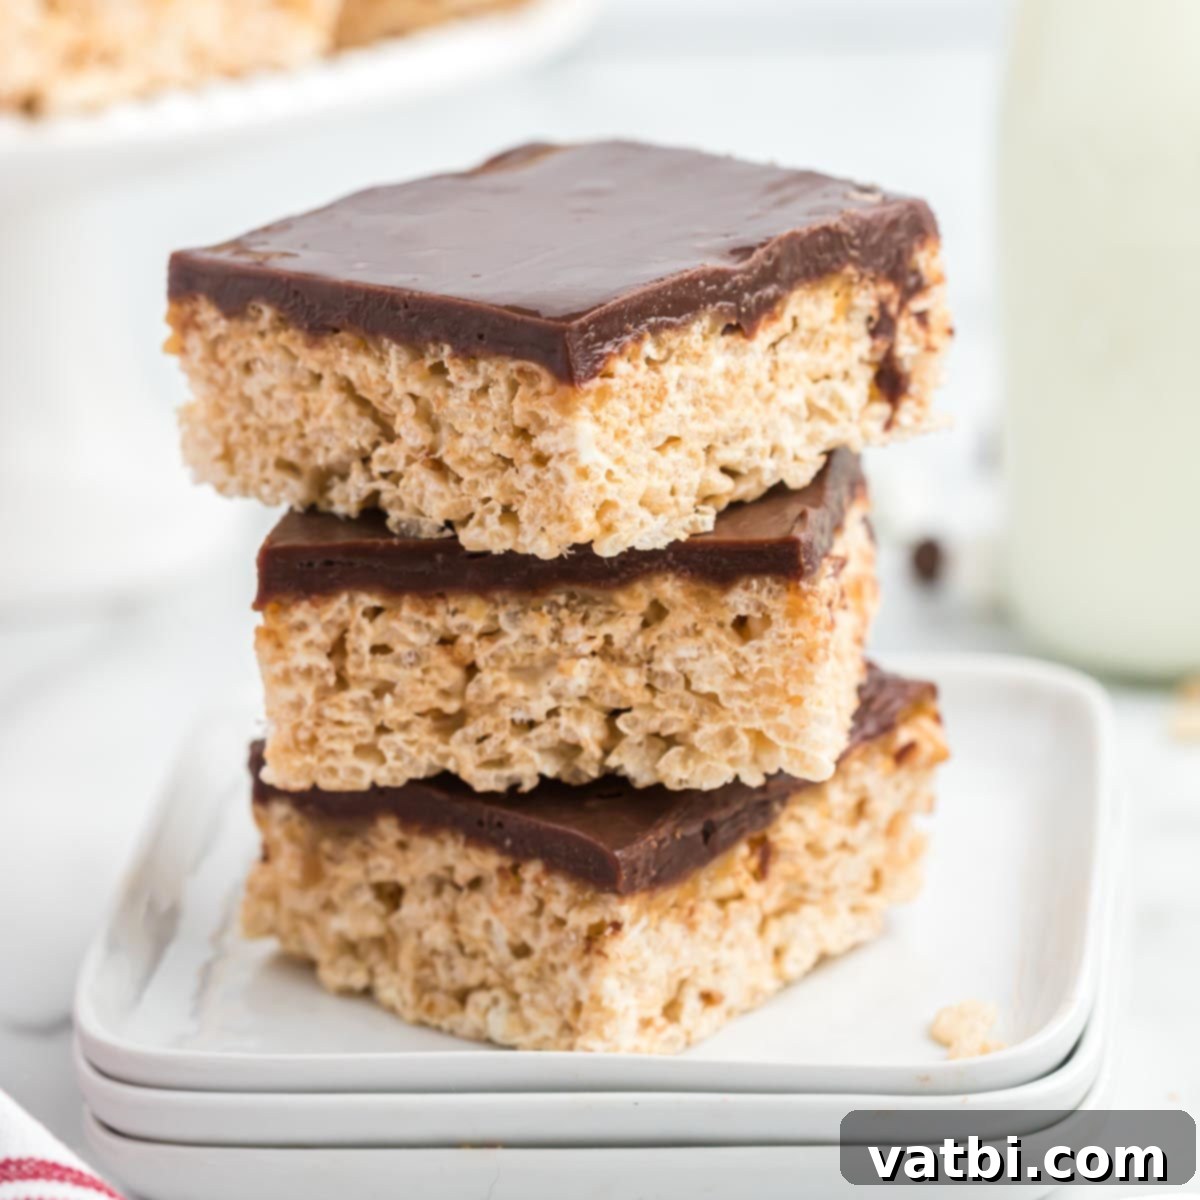
Irresistible Chocolate Caramel Rice Krispie Treats: The Ultimate No-Bake Recipe
Indulge in a truly decadent treat that combines the classic comfort of Rice Krispie Treats with the luxurious flavors of rich caramel and smooth chocolate. These Chocolate Caramel Rice Krispie Treats are a dream come true for anyone who loves the perfect balance of sweet and salty. Forget complicated baking – this no-bake dessert comes together effortlessly, promising a delightful texture and an explosion of flavors in every bite. It’s the ultimate recipe for a crowd-pleasing snack, a party dessert, or simply a sweet moment to yourself, making it a staple for any dessert enthusiast.

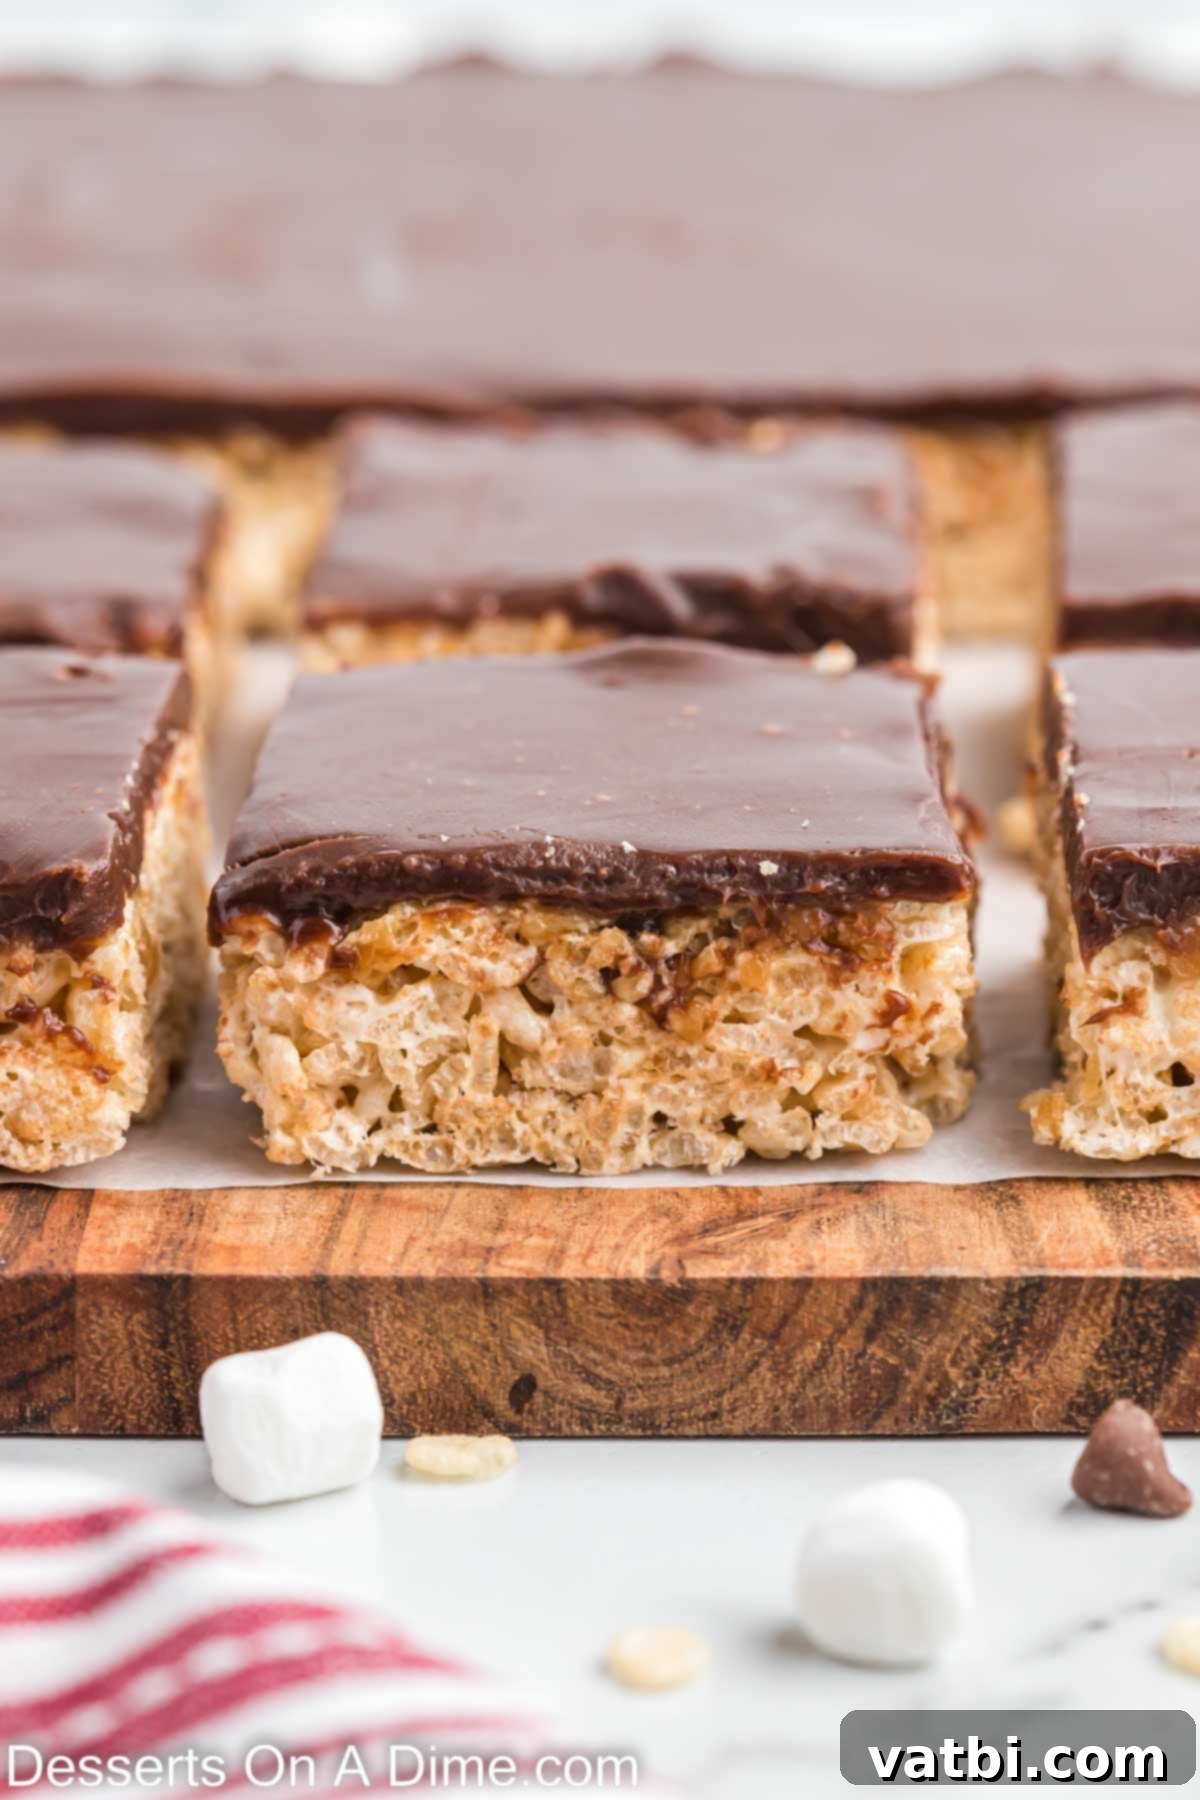
We absolutely adore classic Rice Krispie treats, and there’s immense joy in discovering new and exciting variations. This particular recipe stands out as a true masterpiece for all chocolate and caramel enthusiasts. Each delectable bite offers a harmonious blend of chewy Rice Krispie treats, a luscious layer of homemade caramel sauce, all crowned with a generous coating of rich chocolate. It’s a sensory experience that delivers on both texture and taste, making it an instant favorite for holidays, gatherings, or just a sweet craving.
If you’re a fan of these delightful no-bake creations, you might also enjoy exploring other popular variations such as Chocolate Dipped Rice Krispie Treats, the rich and nutty Chocolate Peanut Butter Rice Krispie Treats and the campfire-inspired S’mores Rice Krispie Treats. Each offers a unique twist on the beloved original, perfect for satisfying any sweet craving.
Table of contents
- Why This Recipe Works So Well
- Ingredients You’ll Need
- For the Crispy Rice Krispie Treats Base
- For the Luscious Homemade Caramel Sauce
- For the Decadent Chocolate Topping
- Kitchen Essentials for Success
- How to Make the Best Chocolate Caramel Rice Krispie Treats
- Storage Tips for Optimal Freshness
- Pro Tips for Achieving Perfect Treats
- Creative Variations to Try
- More Delicious Chocolate Caramel Desserts
Why This Recipe Works So Well
This recipe is a consistent winner for several compelling reasons, making it a go-to for dessert lovers. Firstly, its sheer simplicity and minimal effort make it incredibly appealing. As a classic no-bake treat, it completely eliminates the need for an oven, which is perfect for busy schedules, warm weather, or when you simply prefer not to bake. The hands-on prep time is remarkably quick, allowing you to whip up a batch of these delightful treats in no time at all, making it ideal for last-minute gatherings or impromptu cravings.
Secondly, the ingredients required are basic pantry staples, readily available at any grocery store and easy to work with. There are no exotic or hard-to-find components, ensuring accessibility for every home cook, regardless of their experience level. This makes the recipe not only delicious but also budget-friendly and convenient.
But the true magic lies in the exquisite flavor profile and textural contrasts. The combination of chewy, crispy cereal, a rich, gooey layer of homemade caramel, and a smooth, decadent chocolate topping creates an irresistible symphony of sensations. The addition of coarse salt in the caramel sauce is a pivotal element; it beautifully cuts through the sweetness, enhancing and balancing the overall flavor, elevating the entire dessert to a gourmet level. This harmonious blend of sweet and salty is what truly sets these Chocolate Caramel Rice Krispie Treats apart, transforming a simple childhood favorite into a sophisticated yet approachable indulgence that everyone will adore. It’s a recipe that delivers maximum flavor with minimum fuss, guaranteeing smiles all around and often earning requests for a second helping!
Ingredients You’ll Need
Crafting these amazing Chocolate Caramel Rice Krispie Treats requires a few simple yet essential ingredients. Quality matters here, as each component contributes significantly to the overall success and deliciousness of the final product. Let’s break down what you’ll need for each decadent layer to ensure your treats are nothing short of perfect.
For the Crispy Rice Krispie Treats Base:
- Rice Krispie Cereal: The undisputed star of the foundation! For the absolute best crispy texture, always ensure your cereal is fresh and has not gone stale. Stale cereal can lead to soft or disappointingly chewy treats, which is far from the delightful crunch we’re aiming to achieve.
- Mini Marshmallows: I highly recommend using mini marshmallows for this recipe. They melt much more evenly and quickly than their larger counterparts, which is crucial for creating a smooth, consistent, and perfectly gooey marshmallow binder for your cereal. A standard 10 oz bag is typically the perfect amount for a 9×13 inch pan.
- Unsalted Butter: Using unsalted butter provides you with precise control over the overall salt content in your recipe. This is particularly important because we’ll be intentionally adding coarse salt to the caramel layer to create that delightful salty-sweet balance. Butter adds a foundational richness and contributes significantly to the treat’s irresistible chewiness.
- Pure Vanilla Extract: A generous splash of pure vanilla extract works wonders by enhancing and deepening all the other flavors. It introduces a warm, aromatic note that elevates the classic marshmallow-butter combination from good to extraordinary. For the most authentic and vibrant taste, always opt for pure vanilla extract over imitation varieties.
For the Luscious Homemade Caramel Sauce:
- Packed Brown Sugar: Brown sugar is absolutely essential for achieving that deep, complex, and rich caramel flavor and beautiful golden-brown color. When measuring, make sure to pack it firmly into your measuring cup to ensure you have the correct amount. You can use either light or dark brown sugar, with dark brown sugar providing a slightly more intense molasses flavor for a richer caramel. For alternative options, you can explore The Best Brown Sugar Substitutes.
- Butter: Once again, unsalted butter is preferred here to give you complete control over the salinity of your caramel. It’s a key ingredient that contributes significantly to the sauce’s luxurious creaminess and rich flavor, ensuring a smooth and delectable layer.
- Heavy Whipping Cream: This ingredient is absolutely crucial for achieving a perfectly smooth, pourable, and incredibly rich caramel sauce. It adds vital body and prevents the caramel from becoming too hard or brittle once it cools and sets, ensuring a wonderfully soft and gooey layer.
- Coarse Salt: This is truly the secret ingredient for creating that irresistible salty-sweet dynamic! A good quality coarse salt, such as sea salt or kosher salt, is essential. It brilliantly balances the intense sweetness of both the caramel and the chocolate, making the flavors pop and adding a sophisticated depth to the dessert.
For the Decadent Chocolate Topping:
- Heavy Whipping Cream: Just like in the caramel, heavy whipping cream is used here to create a luscious chocolate ganache. It’s what gives the topping its incredibly smooth texture and a beautiful, glossy finish, making these treats visually appealing and even more irresistible.
- Good Quality Chocolate Chips: The type and quality of chocolate chips you choose will significantly impact the flavor and texture of your chocolate topping. Semi-sweet chocolate chips are a popular and versatile choice, offering a perfectly balanced sweetness that wonderfully complements the rich caramel layer. However, you can also experiment with milk chocolate for a sweeter, creamier ganache, or use dark chocolate for a more intense, sophisticated cocoa flavor. Always opt for good quality chocolate for the best melting consistency and a truly rich, satisfying taste.
Kitchen Essentials for Success
To embark on making these delightful Chocolate Caramel Rice Krispie Treats, you’ll need a few common kitchen tools that will make the process smooth and enjoyable:
- Large Microwave-Safe Bowl: Indispensable for safely and efficiently melting the marshmallows and butter for your Rice Krispie base.
- Large Mixing Bowl: Provides ample space to combine your cereal with the marshmallow mixture, ensuring every piece is perfectly coated.
- 9×13 Inch Baking Pan: The standard size for this recipe, producing a generous batch of treats that are easy to cut into perfect squares.
- Two Medium Saucepans: You’ll need one for preparing the rich homemade caramel sauce and a separate one for heating the cream to create the decadent chocolate topping.
- Whisk: Essential for smoothing out both the caramel sauce and the chocolate ganache, ensuring a lump-free and glossy finish.
- Rubber Spatula or Wooden Spoon: Ideal for gently but thoroughly mixing the cereal treats and for stirring the caramel and ganache.
- Non-Stick Cooking Spray: Crucial for generously coating your baking pan and any tools used for pressing, preventing the sticky mixture from adhering.
- Parchment Paper or Wax Paper: An excellent aid for pressing the Rice Krispie mixture evenly into the pan without getting your hands sticky, and for easy removal later.
How to Make the Best Chocolate Caramel Rice Krispie Treats
Let’s walk through the simple steps to create these layered masterpieces. Each component is straightforward, and when expertly combined, they create an unforgettable dessert that is sure to impress.
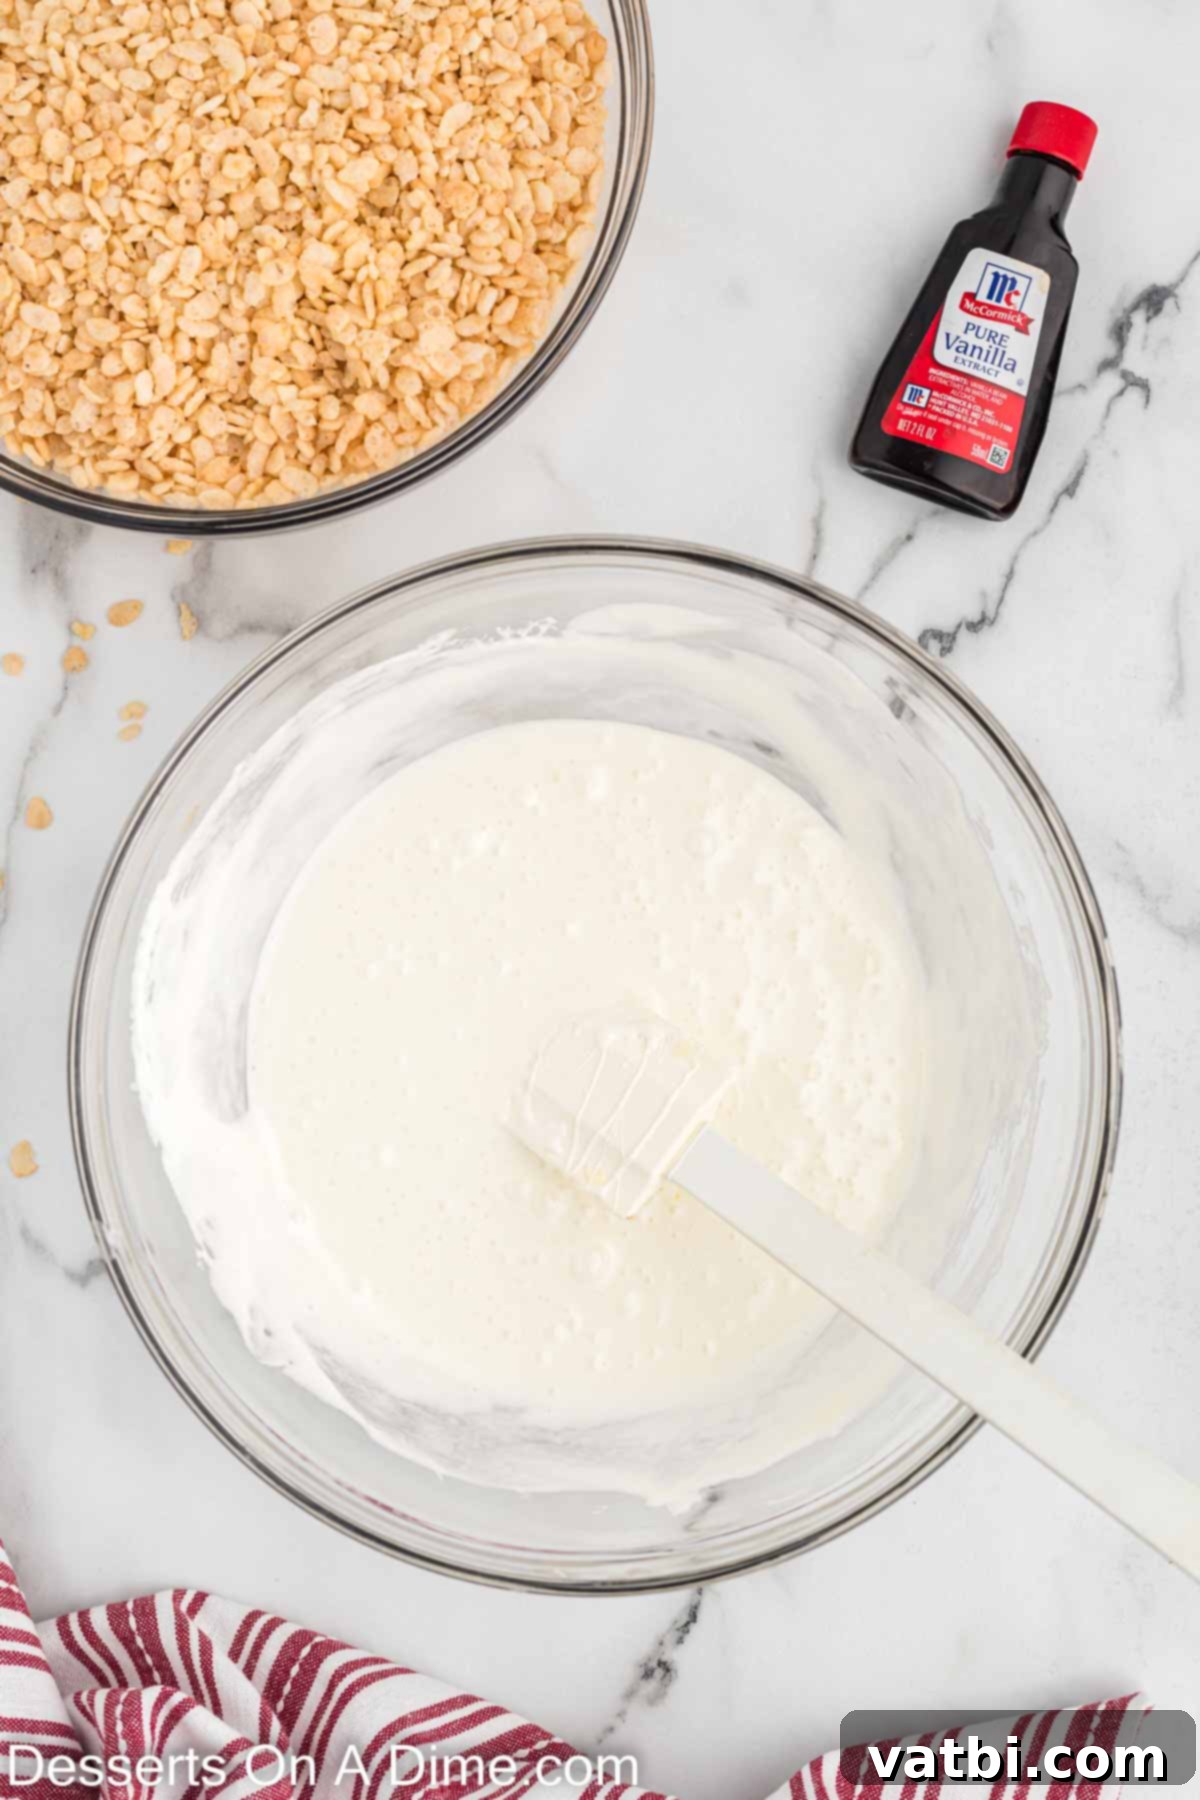
Step 1: Prepare the Rice Krispie Base. In a large, microwave-safe bowl, combine your measured unsalted butter and the entire bag of mini marshmallows. Microwave the mixture in short, controlled 20-second intervals. After each interval, be sure to stir thoroughly with a rubber spatula or spoon. Continue this precise process until the marshmallows are completely melted and the butter is fully incorporated, forming a wonderfully smooth and gooey binder. It’s crucial not to overheat the mixture, as this can lead to hard and less appealing treats.
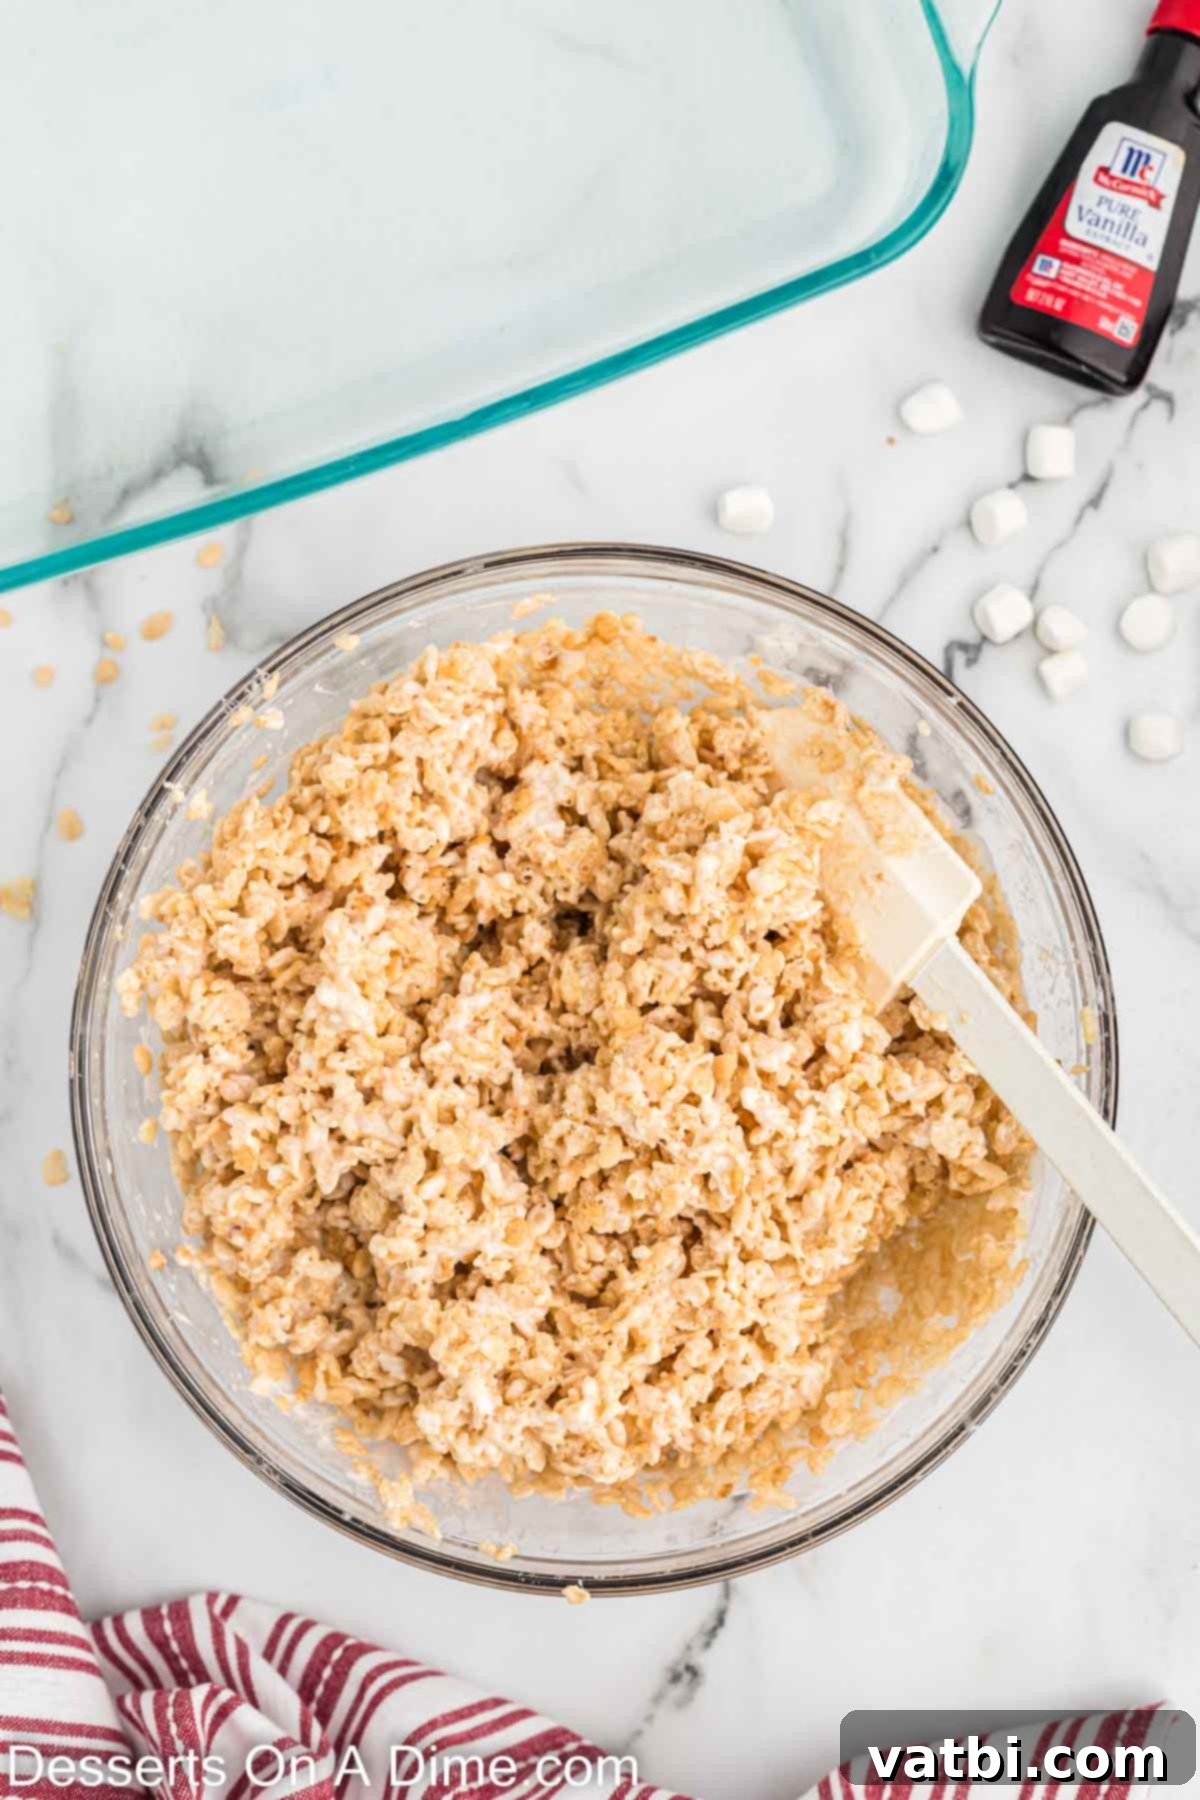
Step 2: Incorporate Cereal and Vanilla. Once your marshmallow mixture is perfectly smooth, gently stir in the pure vanilla extract, ensuring it is well distributed. Next, add the Rice Krispie cereal to the bowl. Using your rubber spatula or wooden spoon, gently yet thoroughly fold the cereal into the marshmallow mixture until every single piece of cereal is evenly coated. Work quickly but carefully, as the mixture will become stickier and harder to manage as it begins to cool.
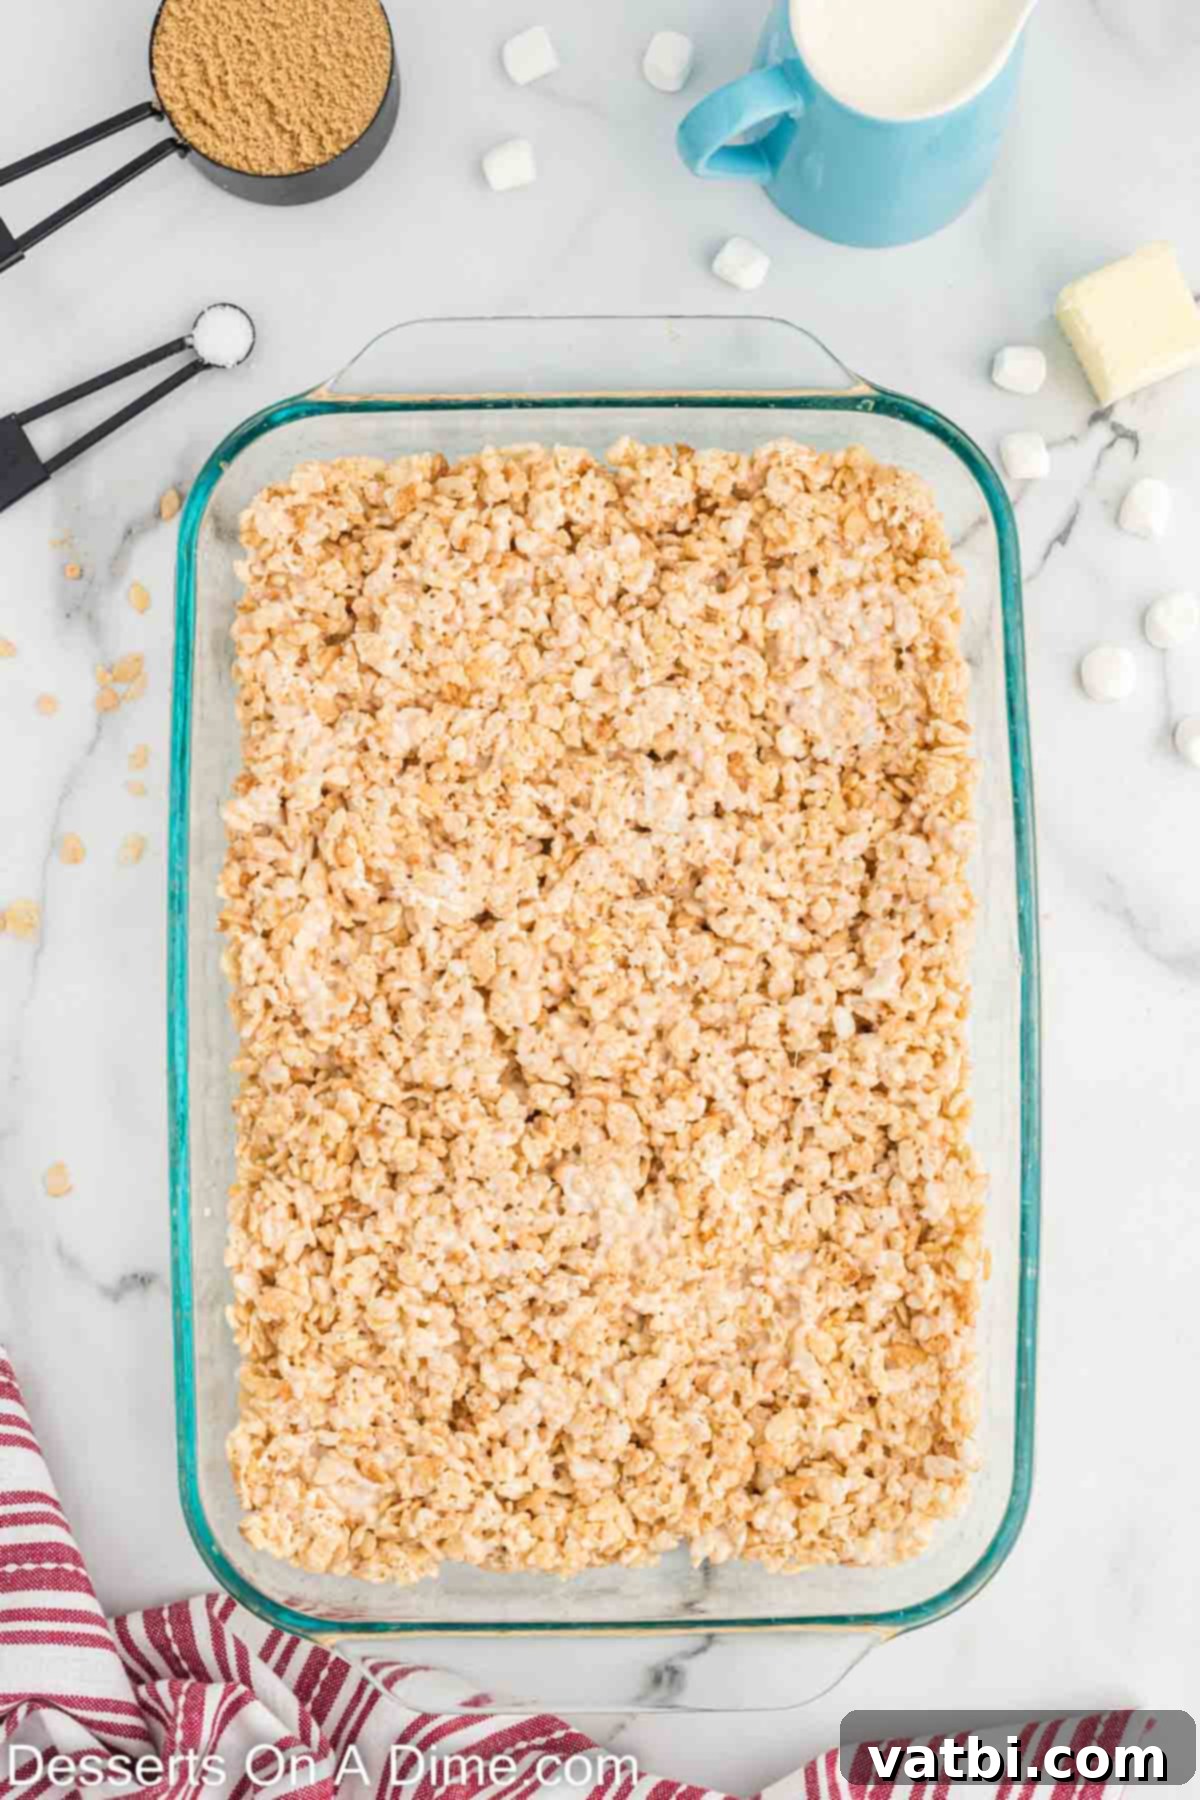
Step 3: Press into Pan and Chill. Prepare a 9×13 inch baking pan by generously spraying it with non-stick cooking spray, ensuring all corners and sides are coated. Transfer the coated Rice Krispie mixture into the prepared pan. To press it down evenly without any sticking, spray one side of a piece of wax paper or parchment paper with cooking spray and use this to firmly, but not overly, press the mixture into a single, compact layer. Once pressed flat, place the pan into the refrigerator to chill for at least 15-20 minutes. This crucial step allows the base to firm up, providing a stable foundation for the next layers while you prepare the caramel.
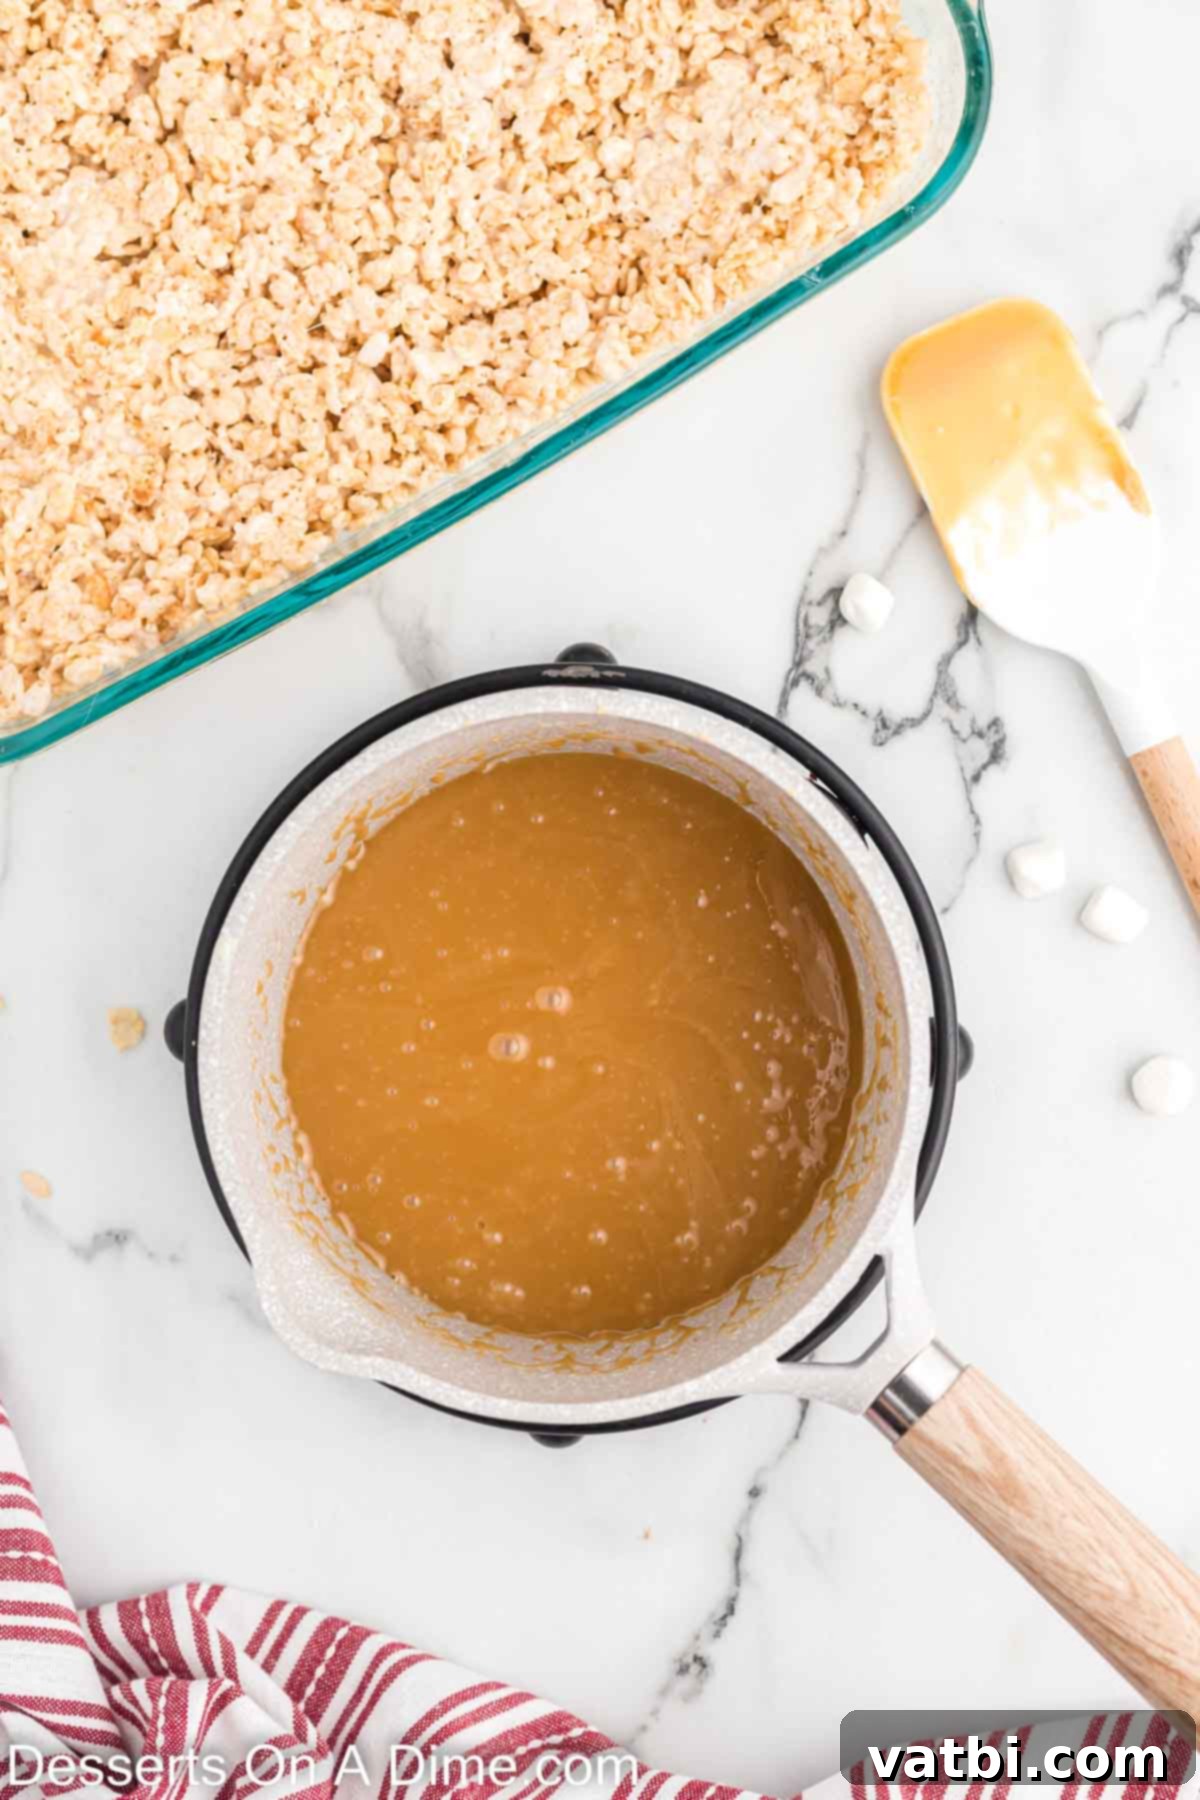
Step 4: Craft the Homemade Caramel Sauce. In a medium-sized saucepan, combine the packed brown sugar, butter, heavy whipping cream, and coarse salt. Place the saucepan over medium heat and bring the mixture to a gentle boil, stirring constantly with a whisk or spoon. Continue to cook and stir consistently for approximately 5-7 minutes. During this time, the caramel will visibly thicken to a rich, syrupy consistency that should easily coat the back of a spoon. Once it reaches this desired thickness, promptly remove the saucepan from the heat and allow it to cool slightly for a few minutes to prevent it from being too hot for the next layer.
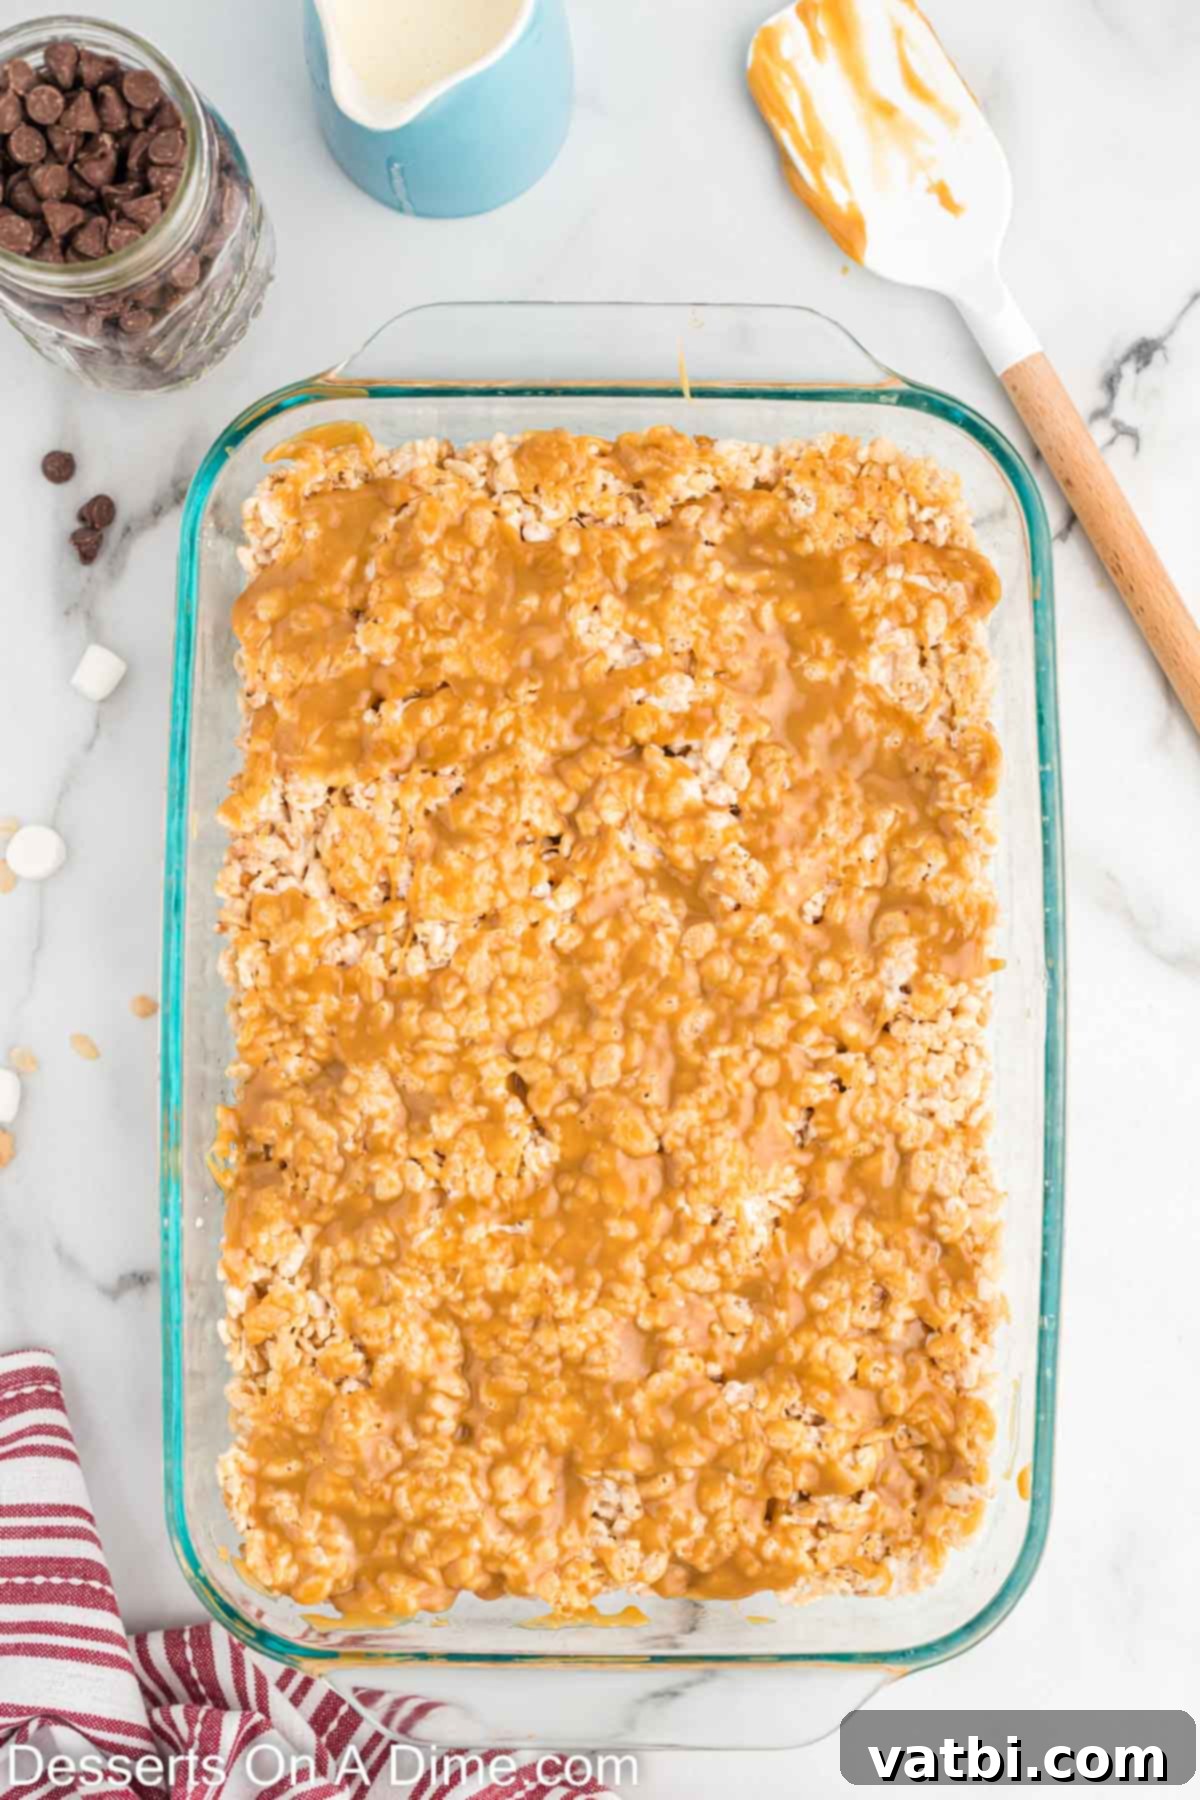
Step 5: Layer the Caramel. Retrieve the chilled Rice Krispie treats from the refrigerator. Carefully pour the slightly cooled caramel sauce evenly over the top of the firm Rice Krispie layer. Using a clean spatula or the back of a spoon, gently spread the caramel as evenly as possible across the entire surface of the treats, ensuring full coverage. Once the caramel layer is uniform and smooth, return the pan to the refrigerator for another chill. This step is crucial for the caramel to set properly, creating a distinct, perfectly gooey, and delicious layer that won’t meld into the chocolate.
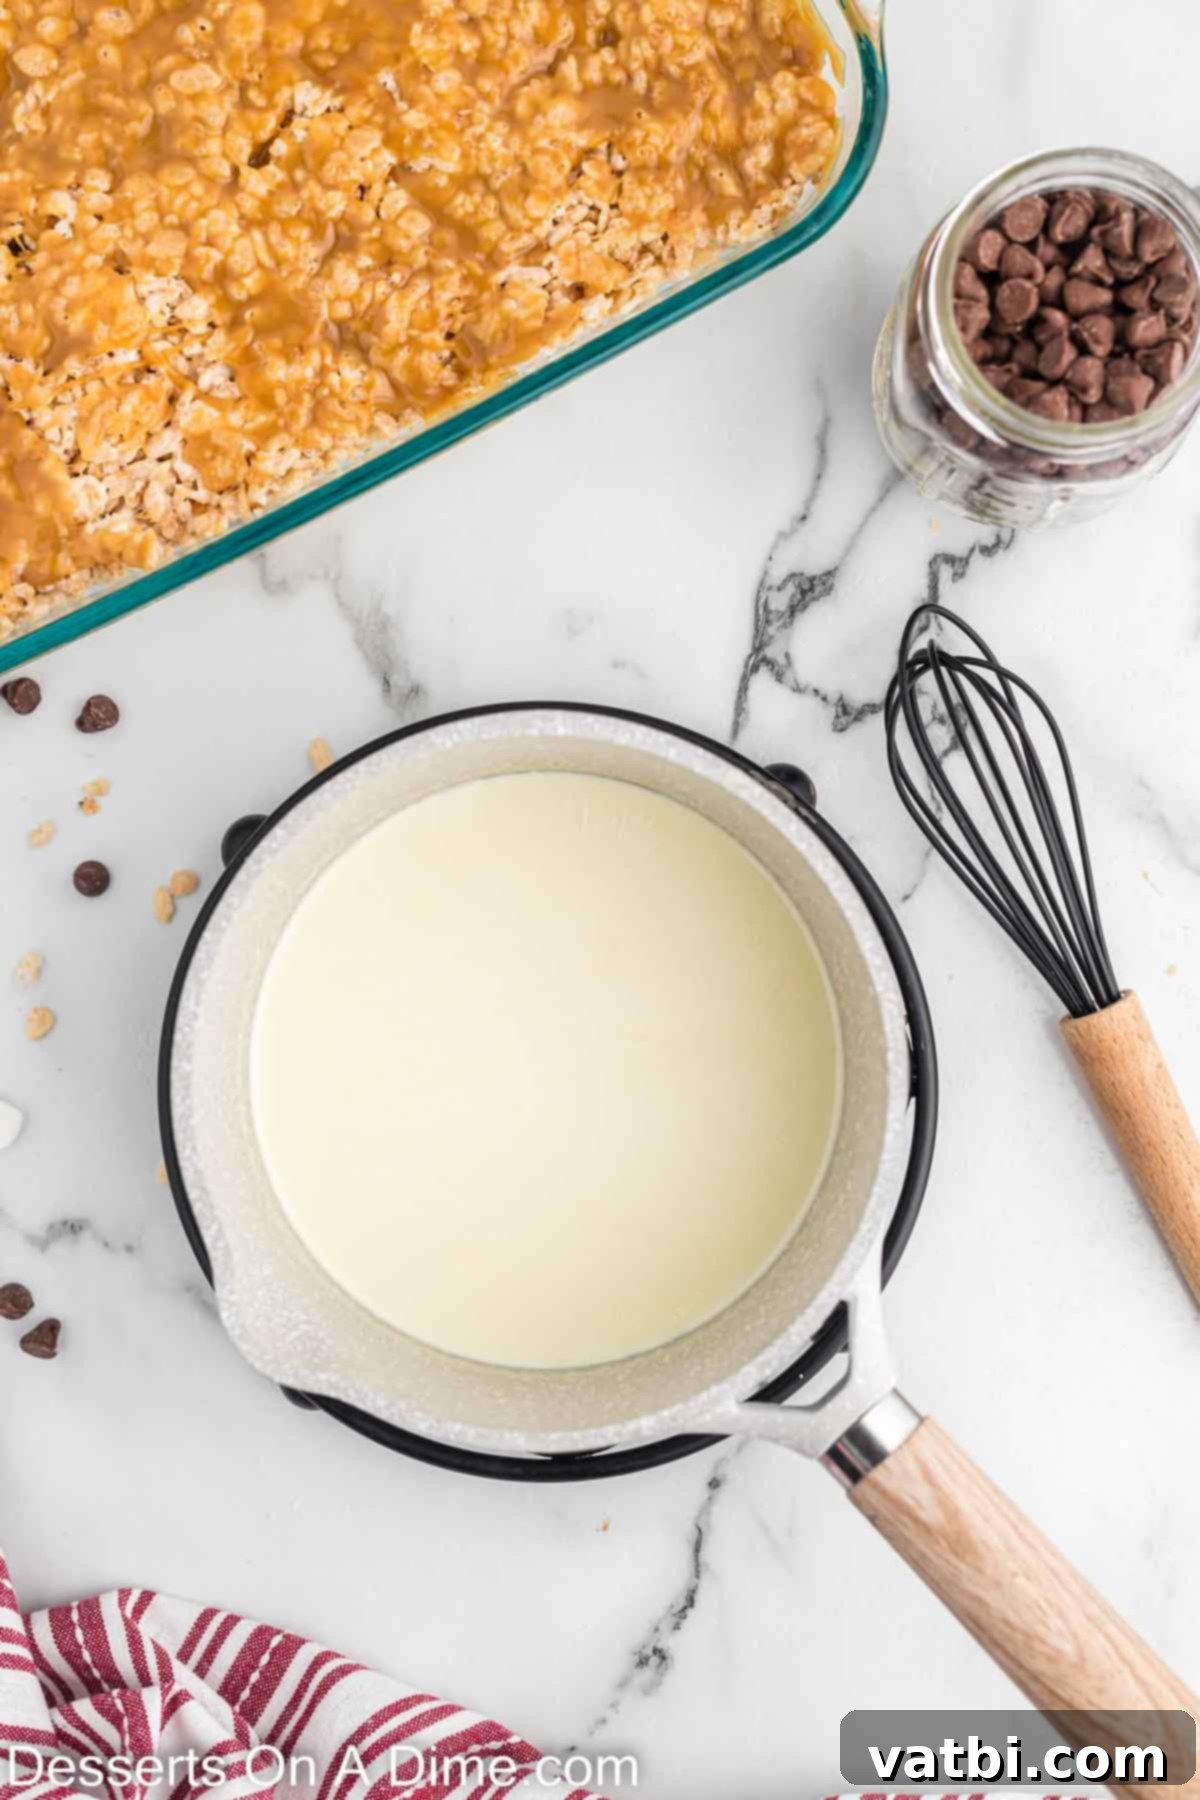
Step 6: Begin the Chocolate Topping. Now, prepare for the final luscious layer! In a separate, clean saucepan, heat the remaining heavy whipping cream over medium heat. Watch it carefully and bring it to a point where it’s just about to boil – you’ll observe small bubbles forming around the edges of the pan, but do not allow it to come to a rolling boil. This precisely heated cream will form the luxurious base for our rich chocolate ganache, ready to envelop your treats.

Step 7: Create the Smooth Chocolate Ganache. As soon as the cream is adequately heated (just before boiling), immediately remove the saucepan from the heat. Add all your good quality chocolate chips directly into the hot cream. Allow them to sit undisturbed for about 1 minute, giving the residual heat ample time to start melting the chocolate. After this brief resting period, whisk vigorously and consistently until all the chocolate chips are completely melted and the mixture transforms into a wonderfully smooth, glossy, and uniform ganache. This ensures a flawless topping.
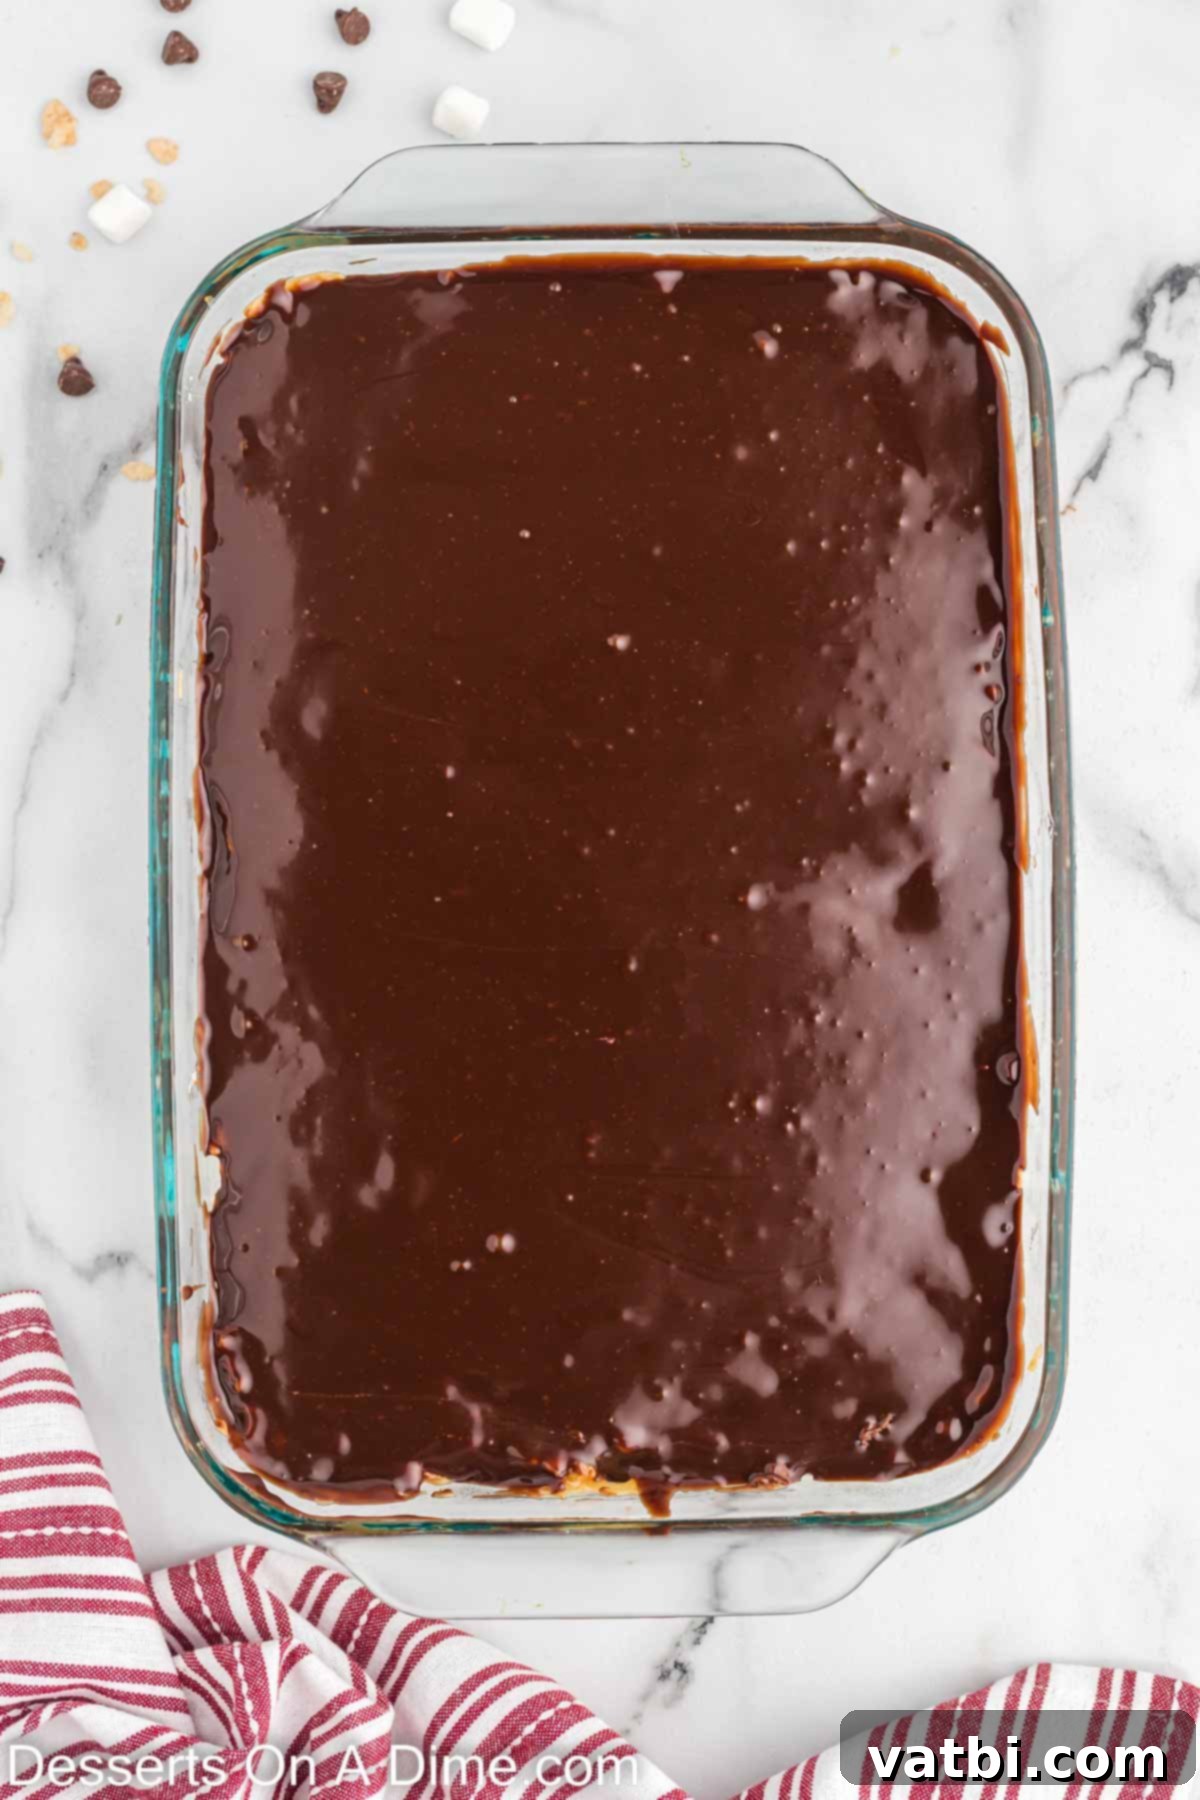
Step 8: Final Layer and Chill. Allow the prepared chocolate ganache mixture to cool slightly at room temperature for approximately 5-10 minutes. This cooling period is important to prevent the warm ganache from melting the delicate caramel layer underneath and ensures a stable topping. Once slightly cooled, pour the chocolate topping evenly over the chilled caramel layer, spreading it out as uniformly as possible with a spatula. Finally, return the pan to the refrigerator for a substantial chill of at least 2 hours. This extended refrigeration time is absolutely essential for all the layers to firm up completely and properly set, making them easy to slice into clean, perfect squares. For the best soft and chewy texture when serving, let the bars sit at room temperature for about 30-60 minutes before cutting and enjoying.
Storage Tips for Optimal Freshness
Proper storage is key to ensuring your delicious Chocolate Caramel Rice Krispie Treats remain fresh, flavorful, and maintain their delightful texture for as long as possible. Store any leftover treats in an airtight container at room temperature for up to 5 days. This method helps to keep them wonderfully soft and chewy, preserving that perfect bite.
However, if you happen to reside in a particularly warm or humid climate, you might find it more beneficial to store them in the refrigerator. Refrigeration will prevent the chocolate topping from becoming too soft or melting, thus preserving the treat’s structural integrity and preventing a messy situation. Do be aware that storing them in the refrigerator can sometimes make the treats a bit firmer than desired. To counteract this, simply allow them to come to room temperature for about 15-30 minutes before serving. This brief wait will restore their ideal soft, chewy consistency for the best eating experience.
For longer-term storage, these versatile treats can also be frozen. To do so effectively, wrap individual bars tightly in plastic wrap, ensuring no air exposure. Then, place the wrapped bars in a freezer-safe airtight container or a heavy-duty freezer bag. They can be stored in the freezer for up to 1-2 months without a significant loss in quality. When you’re ready to indulge, simply transfer them from the freezer to thaw at room temperature for a few hours before unwrapping and serving. This makes them a fantastic make-ahead dessert option!
Pro Tips for Achieving Perfect Treats
While these Chocolate Caramel Rice Krispie Treats are relatively straightforward to make, a few expert tips can elevate your dessert from great to absolutely extraordinary, ensuring every batch is a success:
- Fresh Marshmallows are Non-Negotiable: This cannot be stressed enough for achieving the ideal texture. For the chewiest, most perfectly gooey Rice Krispie treats, always start with fresh, soft mini marshmallows. Old or stale marshmallows tend to become hard, crystallize, and are much more difficult to melt evenly, resulting in a less desirable, stiff texture in your finished treats. Always check the expiration date!
- Avoid Overheating Marshmallows at All Costs: When melting marshmallows in the microwave, strictly adhere to short, controlled 20-second intervals and stir meticulously between each. Overheating the marshmallows can cause the sugar to crystallize and the marshmallow to seize, which will inevitably lead to hard, brittle, and unappealing Rice Krispie treats once cooled. Gentle heat and patience are your best friends in this crucial step.
- Press the Base Just Right: When pressing the cereal mixture into your prepared pan, it’s a common mistake to compact it too much. Instead, press it just enough to form an even, consistent layer without applying excessive force. Over-compressing can make the treats dense and unpleasantly hard instead of delightfully chewy. Using a piece of parchment or wax paper sprayed with non-stick spray is an excellent technique for achieving an even, gentle press without sticking to your hands.
- Patience is a Virtue (Especially with Setting): Allow ample time for all three decadent layers (Rice Krispie base, caramel, and chocolate topping) to set completely in the refrigerator before you even think about cutting them. If you attempt to slice them too soon, the layers will be soft, sticky, and incredibly messy, making clean cuts impossible. A minimum of 2 hours, and ideally even longer (up to 4 hours or overnight), will ensure firm, distinct layers and perfectly clean, sharp slices.
- Warm Slightly Before Serving for the Best Texture: While chilling is absolutely essential for the treats to set firmly, serving them directly from the refrigerator can make them quite hard and less enjoyable. For the best, most satisfying eating experience – a delightfully soft, chewy, and gooey texture – always let the bars sit at room temperature for approximately 30-60 minutes before slicing and serving.
- Quality Ingredients Truly Matter: This applies particularly to the chocolate and the components of your caramel. Using good quality chocolate chips will result in a superior, richer, and smoother ganache. Similarly, fresh butter and heavy cream will make your homemade caramel sauce shine with a deep, complex flavor and perfect consistency.
Creative Variations to Try
While these Chocolate Caramel Rice Krispie Treats are utterly perfect in their classic form, they also serve as a fantastic and versatile canvas for endless creative twists and flavor explorations. Don’t hesitate to experiment and make them your own!
- Sprinkle Fun: For a vibrant and festive touch, generously add colorful sprinkles on top of the melted chocolate layer while it’s still warm and wet. This is perfect for birthdays, holiday celebrations, or any occasion that calls for a pop of color.
- Nutty Crunch: Introduce an extra layer of texture and a rich, earthy flavor by folding in a half cup of finely chopped pecans, walnuts, or peanuts into the Rice Krispie mixture before pressing it into the pan. For an even deeper flavor, lightly toast the nuts beforehand.
- Extra Sea Salt Boost: For those who are truly passionate about the salty-sweet combination, take it up a notch! Sprinkle a pinch of flaky sea salt (like Maldon) over the chocolate topping just before it sets. This adds not only a beautiful visual sparkle but also an exquisite burst of salty flavor that perfectly balances the sweetness.
- Different Chocolate Types: While semi-sweet chocolate is classic, feel free to experiment with other chocolate varieties. Try milk chocolate for a sweeter, creamier profile, or opt for dark chocolate for a more intense, sophisticated ganache. You could even drizzle white chocolate over the finished dark chocolate layer for an elegant visual contrast.
- Candy Bar Mash-up: For an ultimate indulgence, crush up your favorite candy bars (such as Snickers, Twix, or Butterfinger) and sprinkle them generously over either the caramel layer or the chocolate topping for an added burst of flavor and texture.
- Espresso Kick: To deepen and intensify the chocolate flavor without making it overtly taste like coffee, add a tiny pinch (about ¼ to ½ teaspoon) of instant espresso powder to the heavy whipping cream when heating it for the chocolate ganache. It’s a subtle but impactful addition.
More Delicious Chocolate Caramel Desserts
If you find yourself utterly captivated by the magical and irresistible combination of chocolate and caramel, then you’re truly in for a treat! This dynamic duo is a classic for a reason, beloved by many, and there are countless delightful ways to enjoy its rich flavors. Here are a few more recipes that beautifully highlight this fantastic pairing, perfect for satisfying all your cravings and expanding your dessert repertoire:
- Salted Caramel Chocolate Chip Cookies: A truly delightful twist on a timeless classic, these cookies feature enticing pockets of gooey, molten caramel swirled throughout and are finished with a delicate sprinkle of flaky sea salt for that perfect balance.
- Chocolate Caramel Poke Cake: Prepare for a truly indulgent experience with this incredibly moist chocolate cake, which is generously infused with a sweet, luxurious caramel sauce. It’s then crowned with a light whipped cream topping and elegant chocolate shavings.
- Salted Caramel Brownies Recipe: Dive into pure bliss with these irresistibly fudgy and rich brownies, elegantly swirled with decadent, golden salted caramel. Each bite is a harmonious blend of intense chocolate and sweet-and-salty caramel.
- Chocolate Caramel Pretzel Bars: The ultimate sweet and salty bar, expertly combining the satisfying crunch of salty pretzels, the luscious creaminess of sweet caramel, and the deep richness of chocolate for an explosion of flavors and textures.
We sincerely hope you thoroughly enjoy making and devouring these incredible Chocolate Caramel Rice Krispie Treats! They are truly a special dessert that brings immense joy and a burst of flavor with every single bite. If you whip up a batch (or even just one of the variations!), please do come back and leave a comment. We absolutely love hearing from you and seeing all your delicious creations and experiences!
Pin
Chocolate Caramel Rice Krispie Treats
Ingredients
FOR THE RICE KRISPIE TREATS:
- 7 cups Rice Krispie Cereal
- 1 bag Mini Marshmallows 10 oz bag
- 3 Tbsp Butter
- 2 tsp Vanilla Extract
FOR THE CARAMEL SAUCE:
- 1/2 cup Brown Sugar packed
- 2 Tbsp Butter
- 1/4 cup Heavy Whipping Cream
- 1/4 tsp Coarse Salt
FOR THE CHOCOLATE TOPPING:
- 3/4 cup Heavy Whipping Cream
- 2 cups Chocolate Chips
Instructions
FOR THE RICE KRISPIE TREATS:
-
Place the butter and marshmallows in a large microwave-safe bowl. Microwave in 20-second intervals, stirring after each interval until the mixture is completely melted and well combined to a smooth consistency.
-
Then, stir in the vanilla extract, followed by the Rice Krispie Cereal. Gently fold until every piece of cereal is thoroughly coated in the marshmallow mixture.
-
Generously spray a 9×13 inch baking pan with non-stick cooking spray and carefully press the Rice Krispie mixture evenly into the pan.
-
To help press the mixture without sticking, spray one side of a piece of wax paper or parchment paper with non-stick cooking spray and use it to flatten the treats. Place the pan in the refrigerator to chill and set.
FOR THE CARAMEL SAUCE:
-
In a clean saucepan, combine brown sugar, butter, salt, and heavy whipping cream. Bring to a gentle boil over medium heat and cook, stirring constantly for 5-7 minutes or until the sauce visibly thickens.
-
Remove the saucepan from the heat and allow the caramel mixture to cool slightly for a few minutes.
-
Pour the slightly cooled caramel sauce evenly on top of the chilled Rice Krispie treats and spread it out as uniformly as possible using a spatula.
-
Then, place the pan back in the refrigerator to chill further, allowing the caramel layer to firm up.
FOR THE CHOCOLATE TOPPING:
-
In a separate saucepan, heat the heavy whipping cream until it’s almost boiling (small bubbles forming at the edges). Remove the pan from the heat immediately, then add the chocolate chips.
-
Let the chocolate chips sit in the hot cream for a minute, then whisk continuously until the chocolate is fully melted and the mixture is smooth and glossy, forming a ganache.
-
Allow the chocolate ganache mixture to cool at room temperature for 5-10 minutes to prevent it from melting the caramel layer.
-
Then, pour the slightly cooled chocolate topping over the chilled caramel layer on the Rice Krispie treats, spreading it as evenly as possible to create a uniform top.
-
Finally, refrigerate the entire pan for at least 2 hours. This crucial chill time allows all layers to set completely, ensuring clean and easy slicing.
-
When preparing to serve, remove the bars from the refrigerator and let them sit at room temperature for 30-60 minutes to soften slightly for the best chewy texture.
-
Once softened, the bars are ready to be sliced into individual squares, served, and enjoyed!
Recipe Notes
For the best results with your Rice Krispie treats, always use fresh, soft marshmallows. Additionally, be very careful not to overheat the marshmallows when melting them in the microwave, as this can lead to stiff and hard treats once cooled.
Nutrition Facts
Pin This Now to Remember It Later
Pin Recipe
