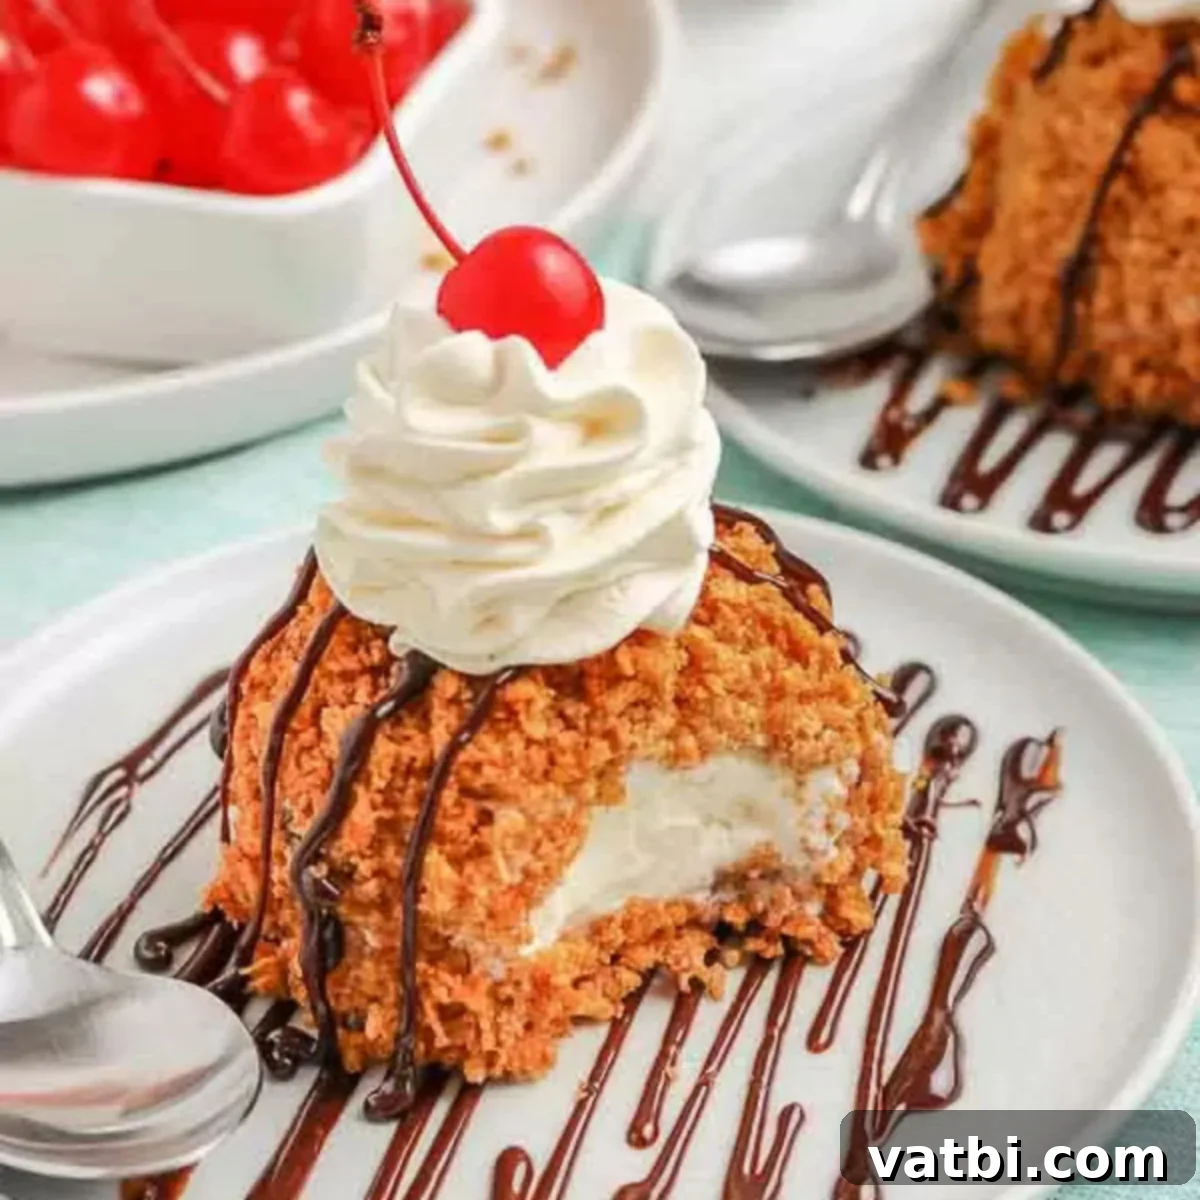
Crispy, Creamy, and Oh-So-Easy: Your Ultimate Guide to Homemade “Deep Fried” Ice Cream
Prepare to delight your taste buds with this incredible homemade “Deep Fried” Ice Cream recipe. Imagine a perfectly crispy, golden-brown shell encasing a core of rich, frozen ice cream – it’s a dessert experience that truly stands out. Often enjoyed as a show-stopping treat at restaurants, particularly in Mexican cuisine, this delightful dessert is surprisingly simple to recreate in your own kitchen. Our method allows you to achieve that coveted crispy exterior and creamy interior, offering all the joy of a restaurant-style dessert for a fraction of the cost and with considerably less fuss than traditional deep frying.
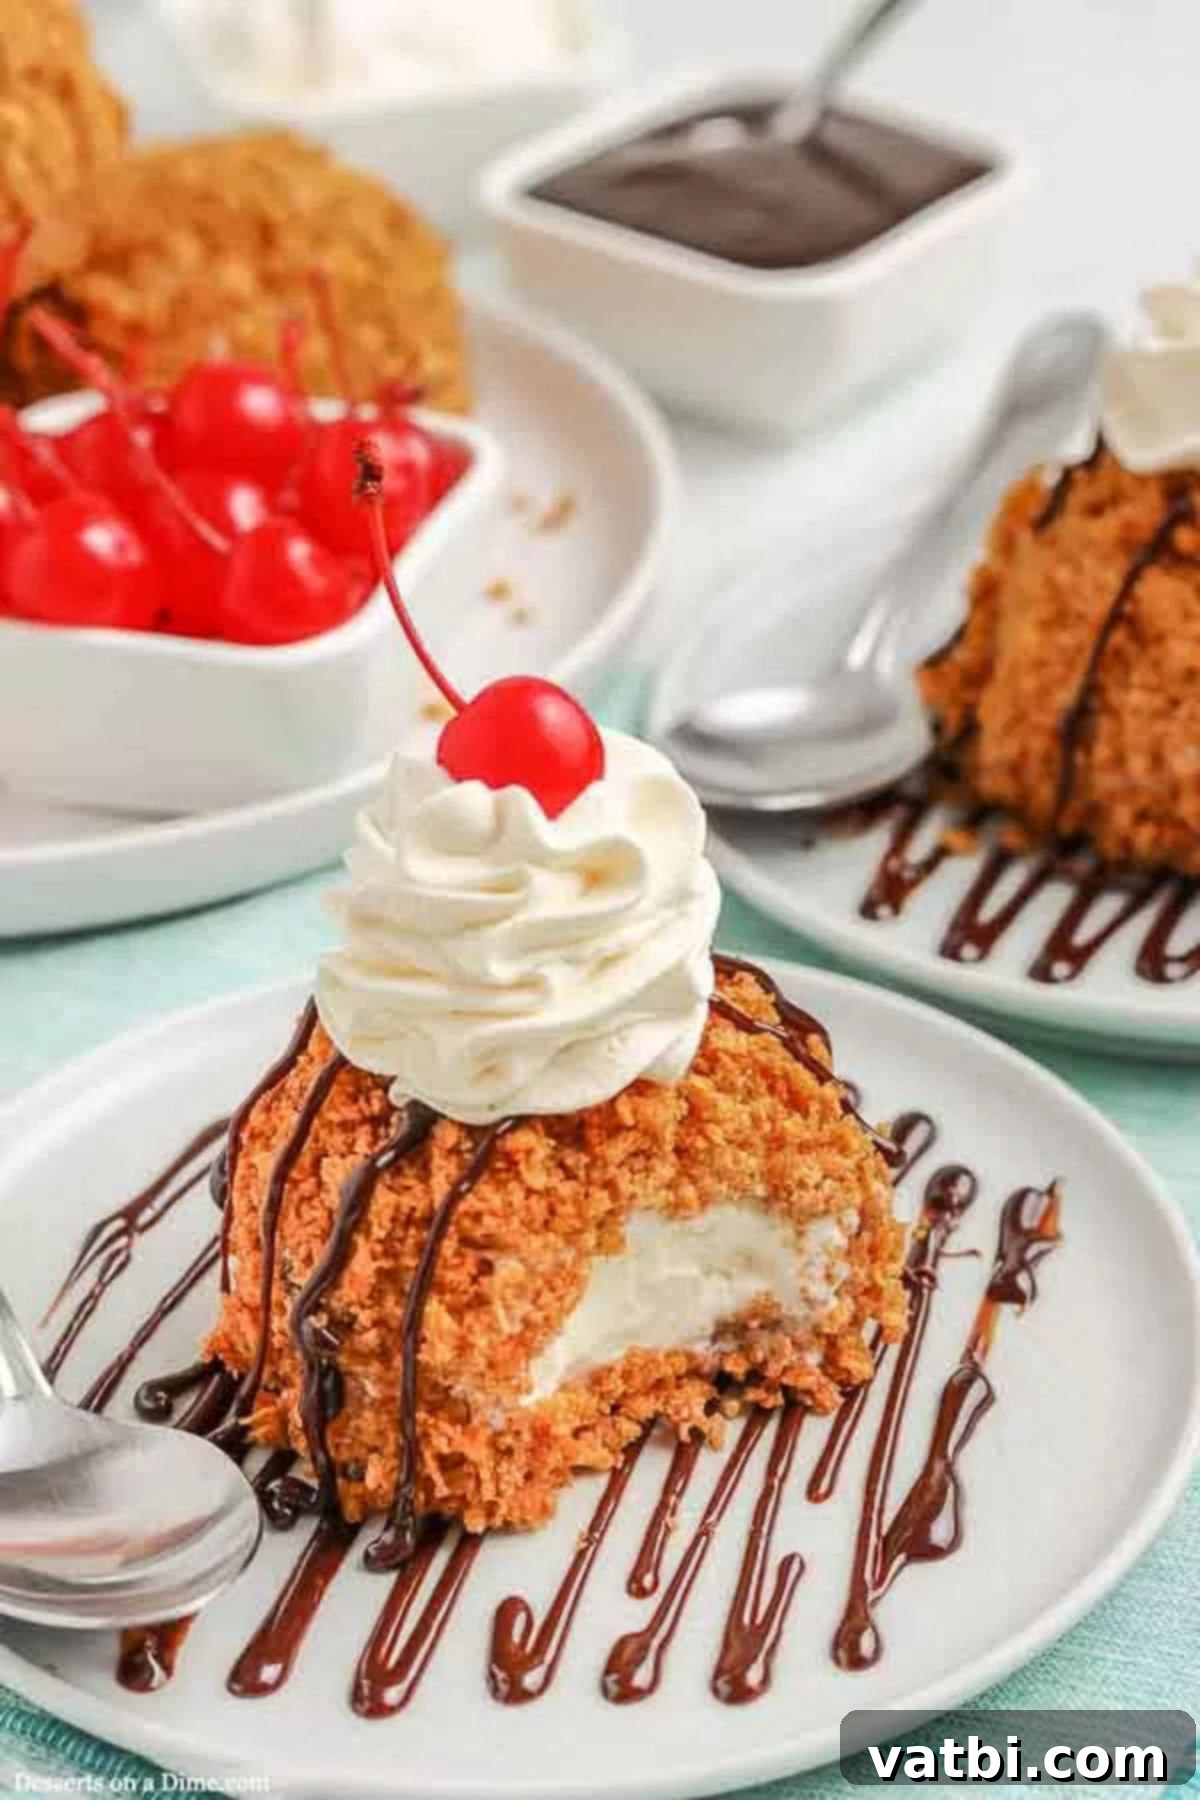
This “deep fried” ice cream recipe offers a unique combination of textures and temperatures that satisfies any sweet craving you might have. It’s truly one of my all-time favorite ice cream recipes because it transforms a simple scoop into an extraordinary dessert. Traditionally, the ice cream is rolled in a crunchy coating, most often corn flakes, and then quickly “fried” to achieve its iconic crispy shell. We’ll show you how to master this technique at home, creating a dessert that’s perfect for any occasion. Garnish with classic toppings like rich chocolate syrup, fluffy whipped cream, and a bright red maraschino cherry for the full experience. While it’s a staple in many Easy Mexican Dessert Recipes, its universal appeal makes it a fantastic choice no matter the meal. If you enjoy unique ice cream creations, you’ll also love our Dulce De Leche Ice Cream for another sweet adventure.
Table of contents
- Why This Recipe Works
- Ingredients
- Recipe Variations
- How to Make Deep Fried Ice Cream (No-Fry Method)
- Serving Ideas
- Can I use a Different Flavor of Ice Cream?
- Can I Make it in Advance?
- Pro Tips for Perfect “Fried” Ice Cream
- More Irresistible Ice Cream Recipes to Try
Why This Recipe Works: The Secret to No-Fry “Deep Fried” Ice Cream
The name “fried ice cream” might conjure images of complicated techniques and dangerous hot oil, making it sound quite fancy and perhaps a little intimidating. However, this recipe is designed to be incredibly simple and accessible, allowing you to recreate this beloved dessert at home without the need for a deep fryer. Yes, you read that right – we’re achieving that signature crispy coating without submerging the ice cream in hot oil! This clever method makes it a fantastic, safe, and fun kitchen project for the whole family, and your kids will absolutely love being able to enjoy this unique treat whenever the mood strikes. For those who do want to explore actual air frying, you can also try Air Fryer Fried Ice Cream.
One of the biggest advantages of making “deep fried” ice cream at home is the significant cost savings. Many of us typically order this delicious dessert at a favorite Mexican restaurant, where the bill can quickly add up, especially for a family. This recipe empowers you to enjoy the same restaurant-quality experience in the comfort of your own home, making it a much more budget-friendly option for satisfying those dessert cravings. It has quickly become one of my go-to Ice Cream Desserts, offering a delightful twist on classic favorites. We also love experimenting with other fun frozen treats like Puppy Chow Ice Cream and the whimsical Cotton Candy Ice Cream.
The beauty of this recipe lies in its ability to deliver a satisfying crunch that beautifully contrasts with the cold, creamy ice cream. Instead of traditional deep-frying, we create a flavorful, toasted coating that adheres perfectly to frozen ice cream balls. This eliminates the need for large quantities of hot oil, making the process safer, cleaner, and less daunting for the home cook. The result is a stunning dessert that looks and tastes like it came from a professional kitchen, but is easily achievable with minimal effort. If you enjoy fair-style treats, you might also want to try these delightful Funnel Cake Recipes.
Essential Ingredients for “Deep Fried” Ice Cream
Crafting this irresistible dessert requires just a few key ingredients. The simplicity of the list belies the incredible flavor and texture explosion you’re about to create!
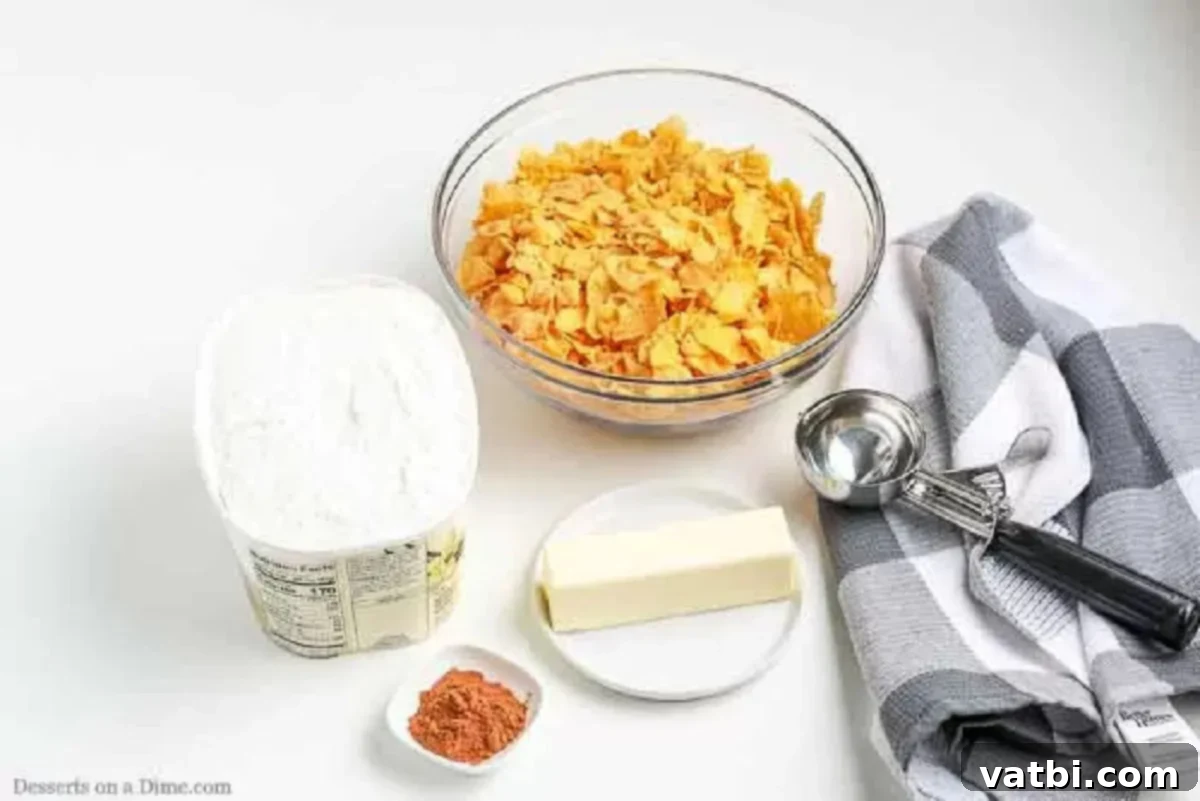
- Vanilla Ice Cream (1 quart). This classic flavor serves as the perfect creamy canvas for our crispy coating. Its mild sweetness allows the cinnamon-infused cereal to shine. You can opt for your favorite store-bought brand, or take it up a notch with a batch of rich No Churn Vanilla Ice Cream for an extra homemade touch.
- Corn Flakes Cereal or Cinnamon Toast Crunch Cereal (6 cups). The star of our crispy coating! Corn flakes provide a wonderfully neutral crunch that absorbs the buttery, cinnamon flavors beautifully. If you’re looking for an extra layer of sweetness and spice, Cinnamon Toast Crunch cereal is an excellent and popular alternative that will give your “fried” ice cream an even bolder flavor profile. Both options are absolutely delicious, so choose based on your preference!
- Unsalted Butter (½ cup or 1 stick). Butter is crucial for toasting the cereal crumbs to a golden perfection, enhancing their flavor and ensuring they adhere well to the ice cream. Using unsalted butter allows you to control the overall saltiness of the coating.
- Ground Cinnamon (2 teaspoons). This warm spice is what truly elevates the cereal coating, giving it that comforting, aromatic “fried” dessert essence. It pairs incredibly well with both vanilla and many other ice cream flavors.
- Toppings (optional, but highly recommended). While the “fried” ice cream is fantastic on its own, a generous array of toppings transforms it into an unforgettable sundae.
- Whipped Cream: A dollop of light, airy whipped cream is almost mandatory. Try our simple Homemade Whipped Cream Recipe for the freshest taste.
- Hot Fudge or Chocolate Topping: A rich, warm chocolate drizzle is a decadent addition. Our Homemade Hot Fudge Sauce Recipe is a game-changer!
- Homemade Caramel Sauce: For a buttery, sweet, and gooey topping, a luscious Homemade Caramel Sauce Recipe is always a good option.
- Maraschino Cherries: The classic bright red cherry adds a pop of color and a touch of fruity sweetness to complete the picture.
You can find the entire ingredient list, including specific measurements, in the detailed recipe card at the bottom of the page.
Exciting “Deep Fried” Ice Cream Recipe Variations
While the classic vanilla and cinnamon combination is undeniably delicious, this recipe is incredibly versatile! Don’t hesitate to get creative with different ice cream flavors and coating additions to customize your “fried” ice cream experience. Here are some fantastic ideas to inspire you:
- Cinnamon Sugar Blast – To amplify that warm, cozy spice, mix an extra tablespoon or two of granulated sugar into your crushed cornflakes along with the cinnamon before toasting. This creates an even sweeter and more aromatic coating, reminiscent of churros, that beautifully complements the creamy ice cream.
- Chocolate Lover’s Dream – Swap out vanilla for your favorite chocolate ice cream. Instead of plain cornflakes, crush chocolate sandwich cookies (like Oreos) and mix them with a touch of cocoa powder for an intensely chocolatey crust. Top with extra chocolate syrup or chocolate chips!
- Coffee Wake-Up Call – For a sophisticated twist, use a rich coffee-flavored ice cream. The bitter notes of coffee pair wonderfully with a sweet crunch. For the coating, blend crushed cornflakes with a tablespoon of instant espresso powder or finely ground coffee. Serve topped with mini chocolate chips or a drizzle of chocolate sauce.
- Strawberry Delight – Bright and fruity strawberry ice cream makes a refreshing base. For the coating, use crushed Cinnamon Toast Crunch cereal, as its warm cinnamon flavor provides a delightful contrast to the sweet berries. Garnish with fresh strawberries and a dollop of whipped cream.
- Elevated Crunch Substitutes – Beyond cornflakes, explore other crunchy options for your coating.
- Shredded Coconut: Toast unsweetened shredded coconut with butter and a pinch of sugar for a tropical flair.
- Chopped Nuts: Finely chopped pecans, walnuts, or almonds, toasted in butter, offer a rich, nutty crunch that’s incredibly satisfying.
- Graham Cracker Crumbs: For a cheesecake-like twist, use graham cracker crumbs for the coating.
How to Make “Deep Fried” Ice Cream (No-Fry Method)
Achieving this impressive dessert at home is easier than you think! Our no-fry method delivers all the flavor and crunch without the hassle or mess of a deep fryer. Follow these simple steps for perfectly “fried” ice cream every time.
- Step 1 – Soften the Ice Cream – First things first, take your carton of vanilla ice cream out of the freezer and let it sit at room temperature to soften. This crucial step usually takes about 20-30 minutes, depending on the temperature of your kitchen. The goal is for the ice cream to be soft enough to easily scoop and form into balls, but not melted. This consistency will ensure smooth, well-formed spheres.
- Step 2 – Prepare Your Freezing Surface – While the ice cream is softening, get ready for the next critical step: freezing! Grab a baking sheet that will comfortably fit in your freezer. Line this baking sheet with parchment paper. The parchment paper is essential to prevent the ice cream balls from sticking to the tray, making them easy to remove later.
- Step 3 – Crush the Cereal for the Coating – Next, it’s time to prepare the crunchy coating. Place the corn flakes (or Cinnamon Toast Crunch) into a large, sturdy ziplock bag. You’ll want to crush these into fine crumbs. A rolling pin works perfectly for this; simply place the bag on a flat surface and roll over the cereal until it reaches a fine, sandy texture. Alternatively, for even faster and more consistent crumbs, you can use a food processor if you have one. Both methods will yield excellent results.
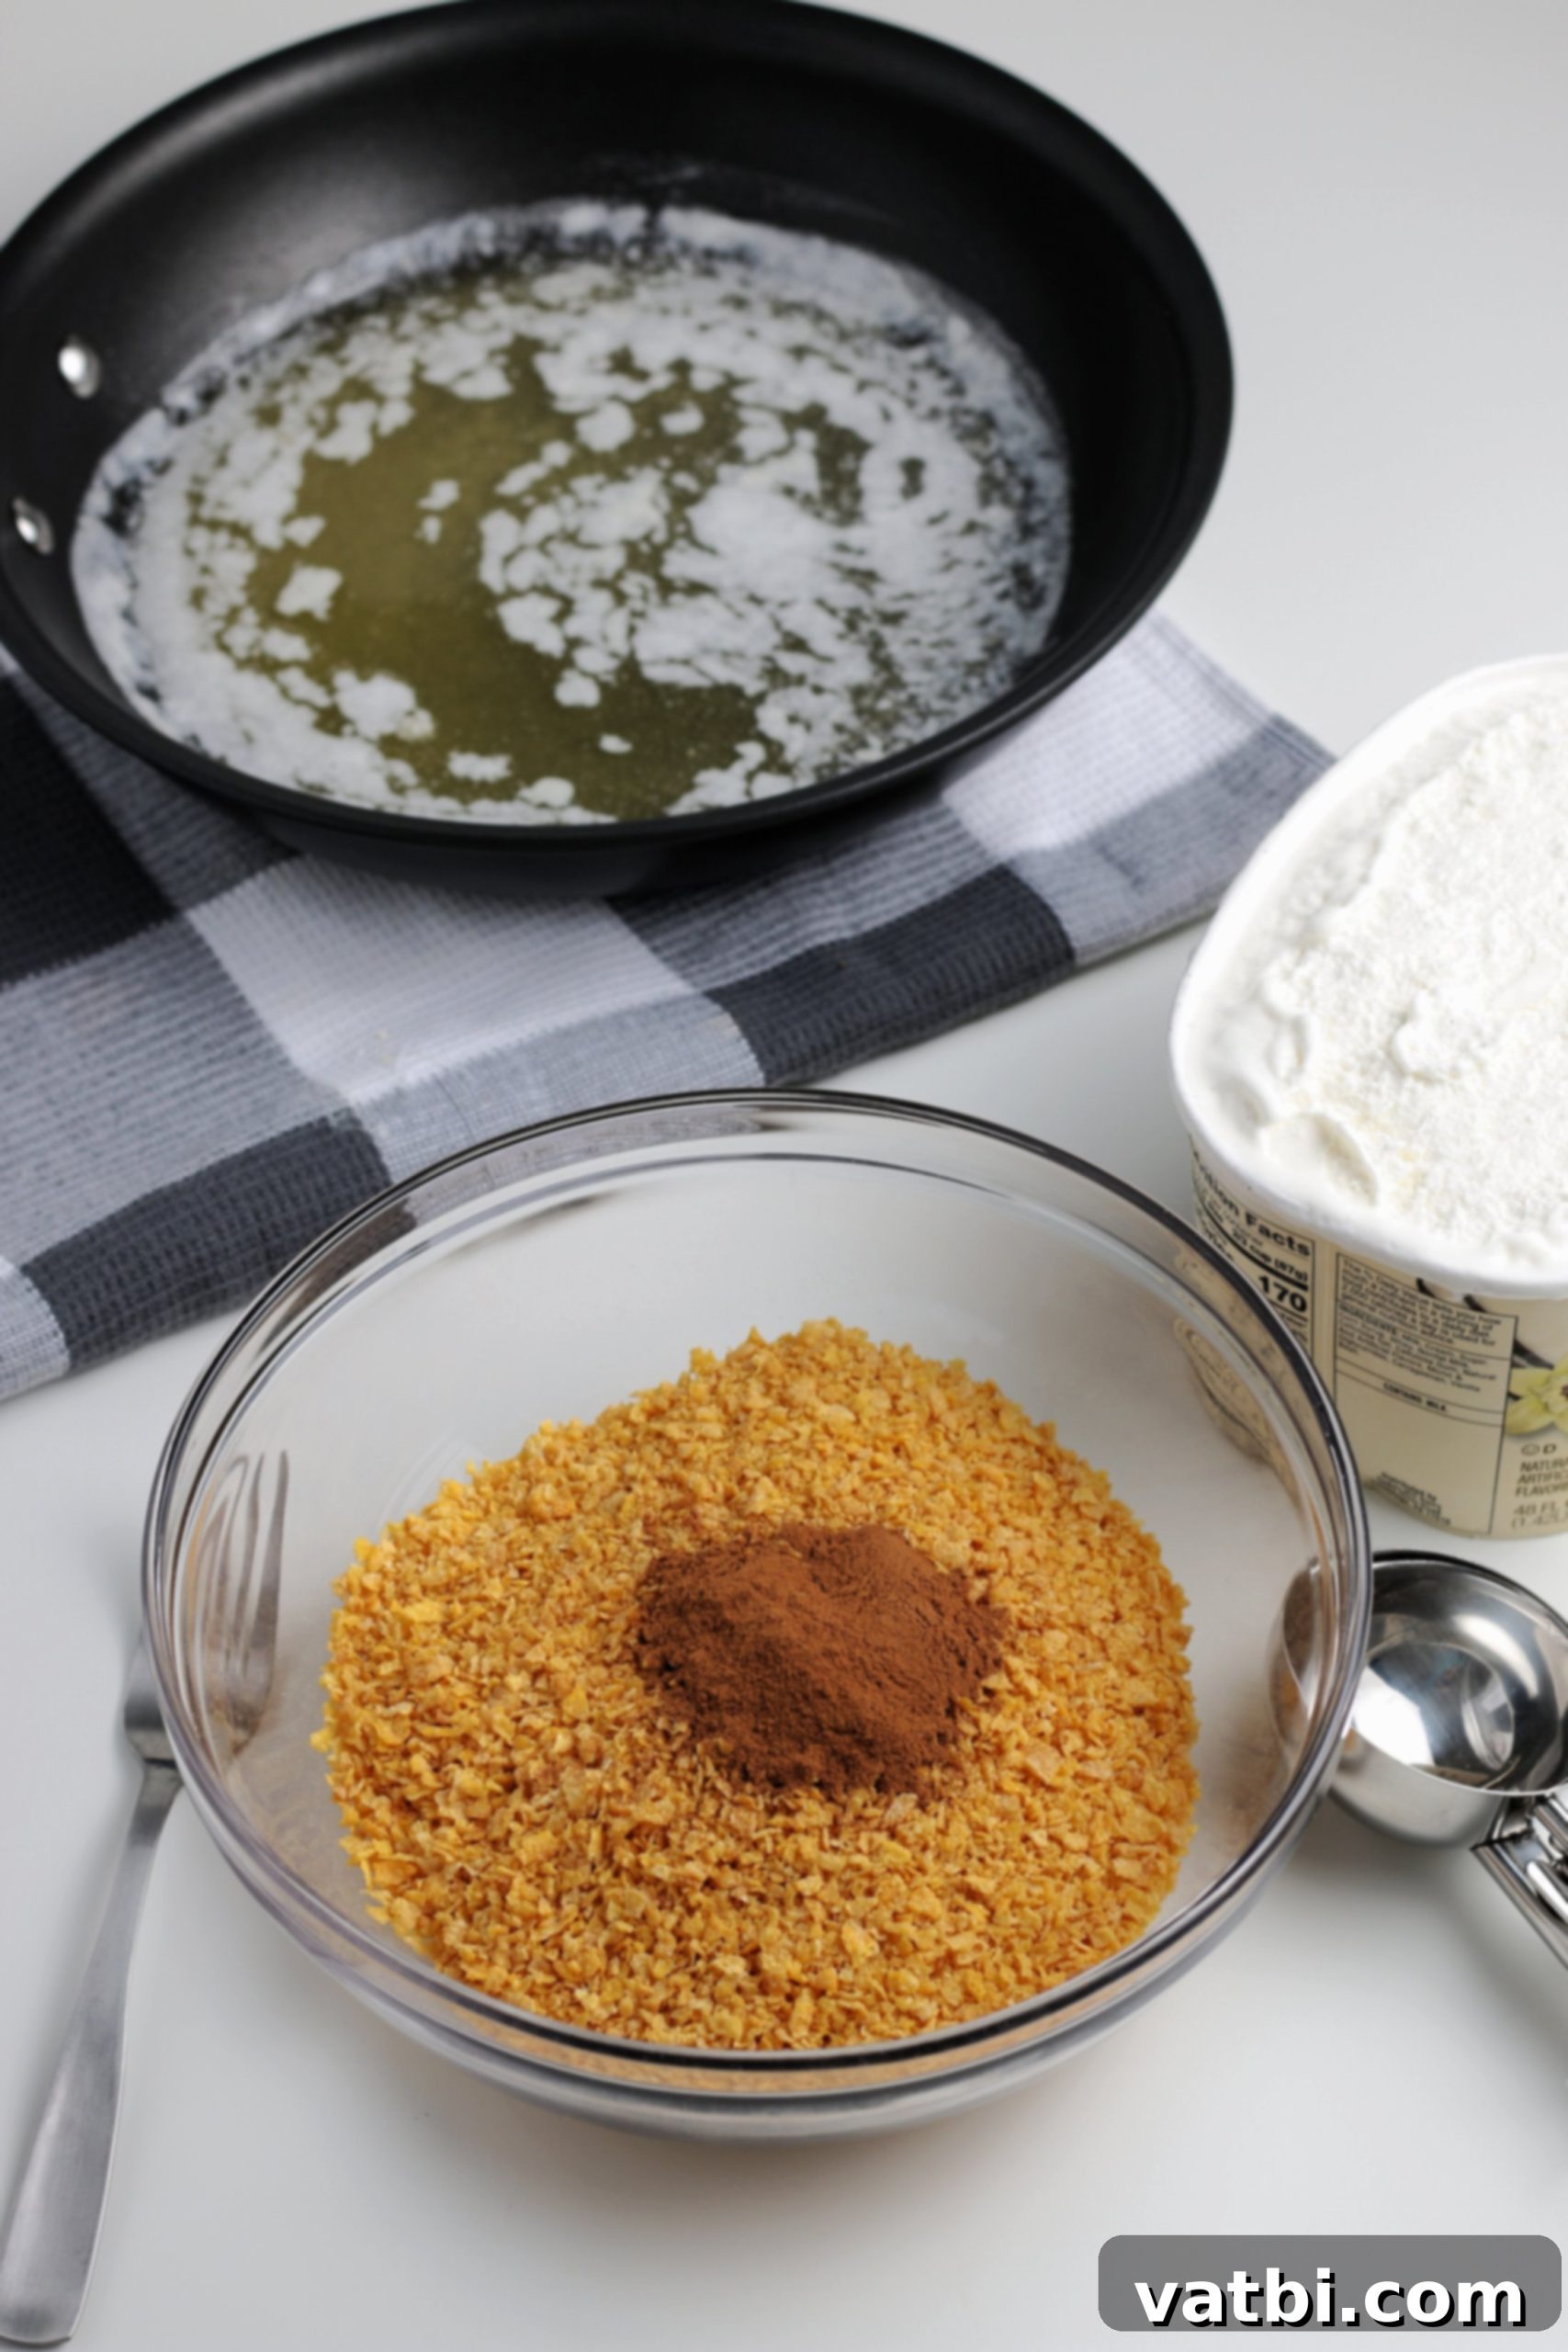
Step 4. Combine Crumbs and Cinnamon. Transfer the finely crushed cereal crumbs into a medium-sized bowl. Add the ground cinnamon to the bowl. Stir everything together thoroughly with a spoon or whisk until the cinnamon is evenly distributed throughout the crumbs. This ensures every bite of your “fried” ice cream will have that delightful warm spice.
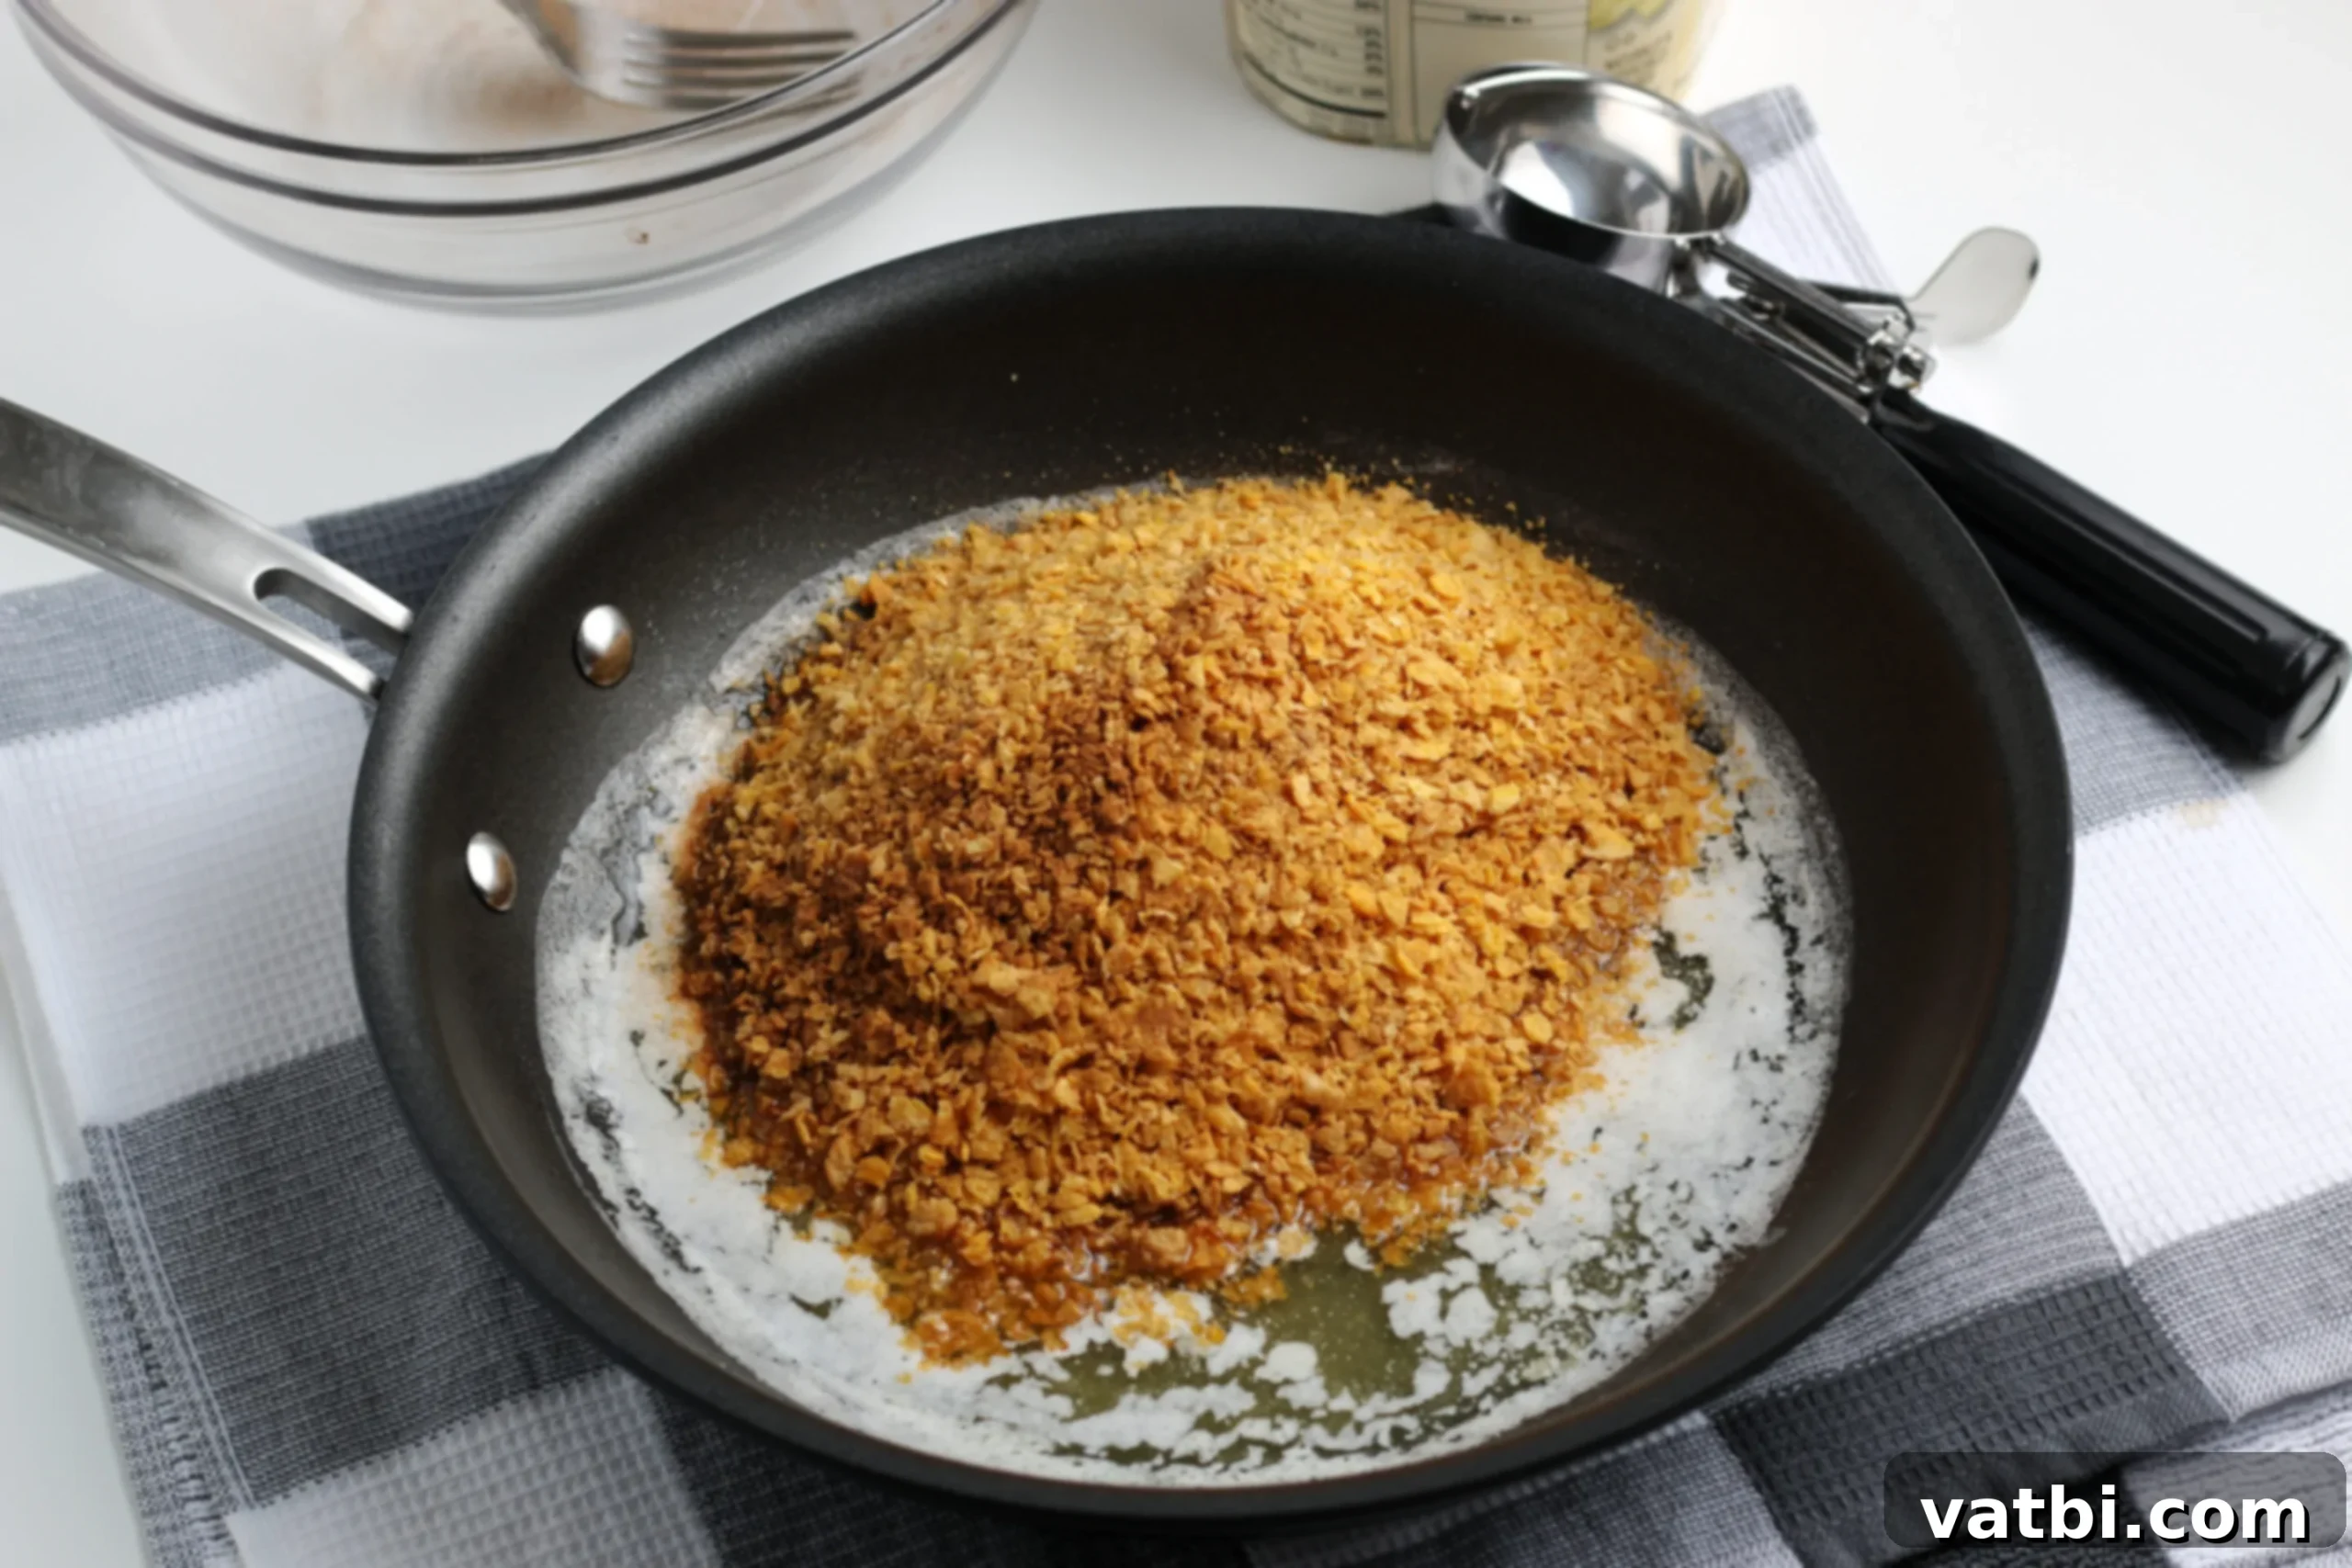
Step 5. Toast the Coating. In a large skillet, melt the unsalted butter over medium heat until it’s fully liquefied and just starting to bubble. Once the butter is melted, add your cinnamon-cereal crumb mixture to the skillet. Stir constantly and cook for approximately 2-3 minutes, or until the crumbs turn a beautiful golden brown and become wonderfully fragrant. This toasting step is key to developing that deep, crispy flavor. Make sure to watch this closely and keep stirring, as the mixture can burn quickly. Once golden, remove from heat and transfer the toasted crumbs to a large bowl to cool completely.
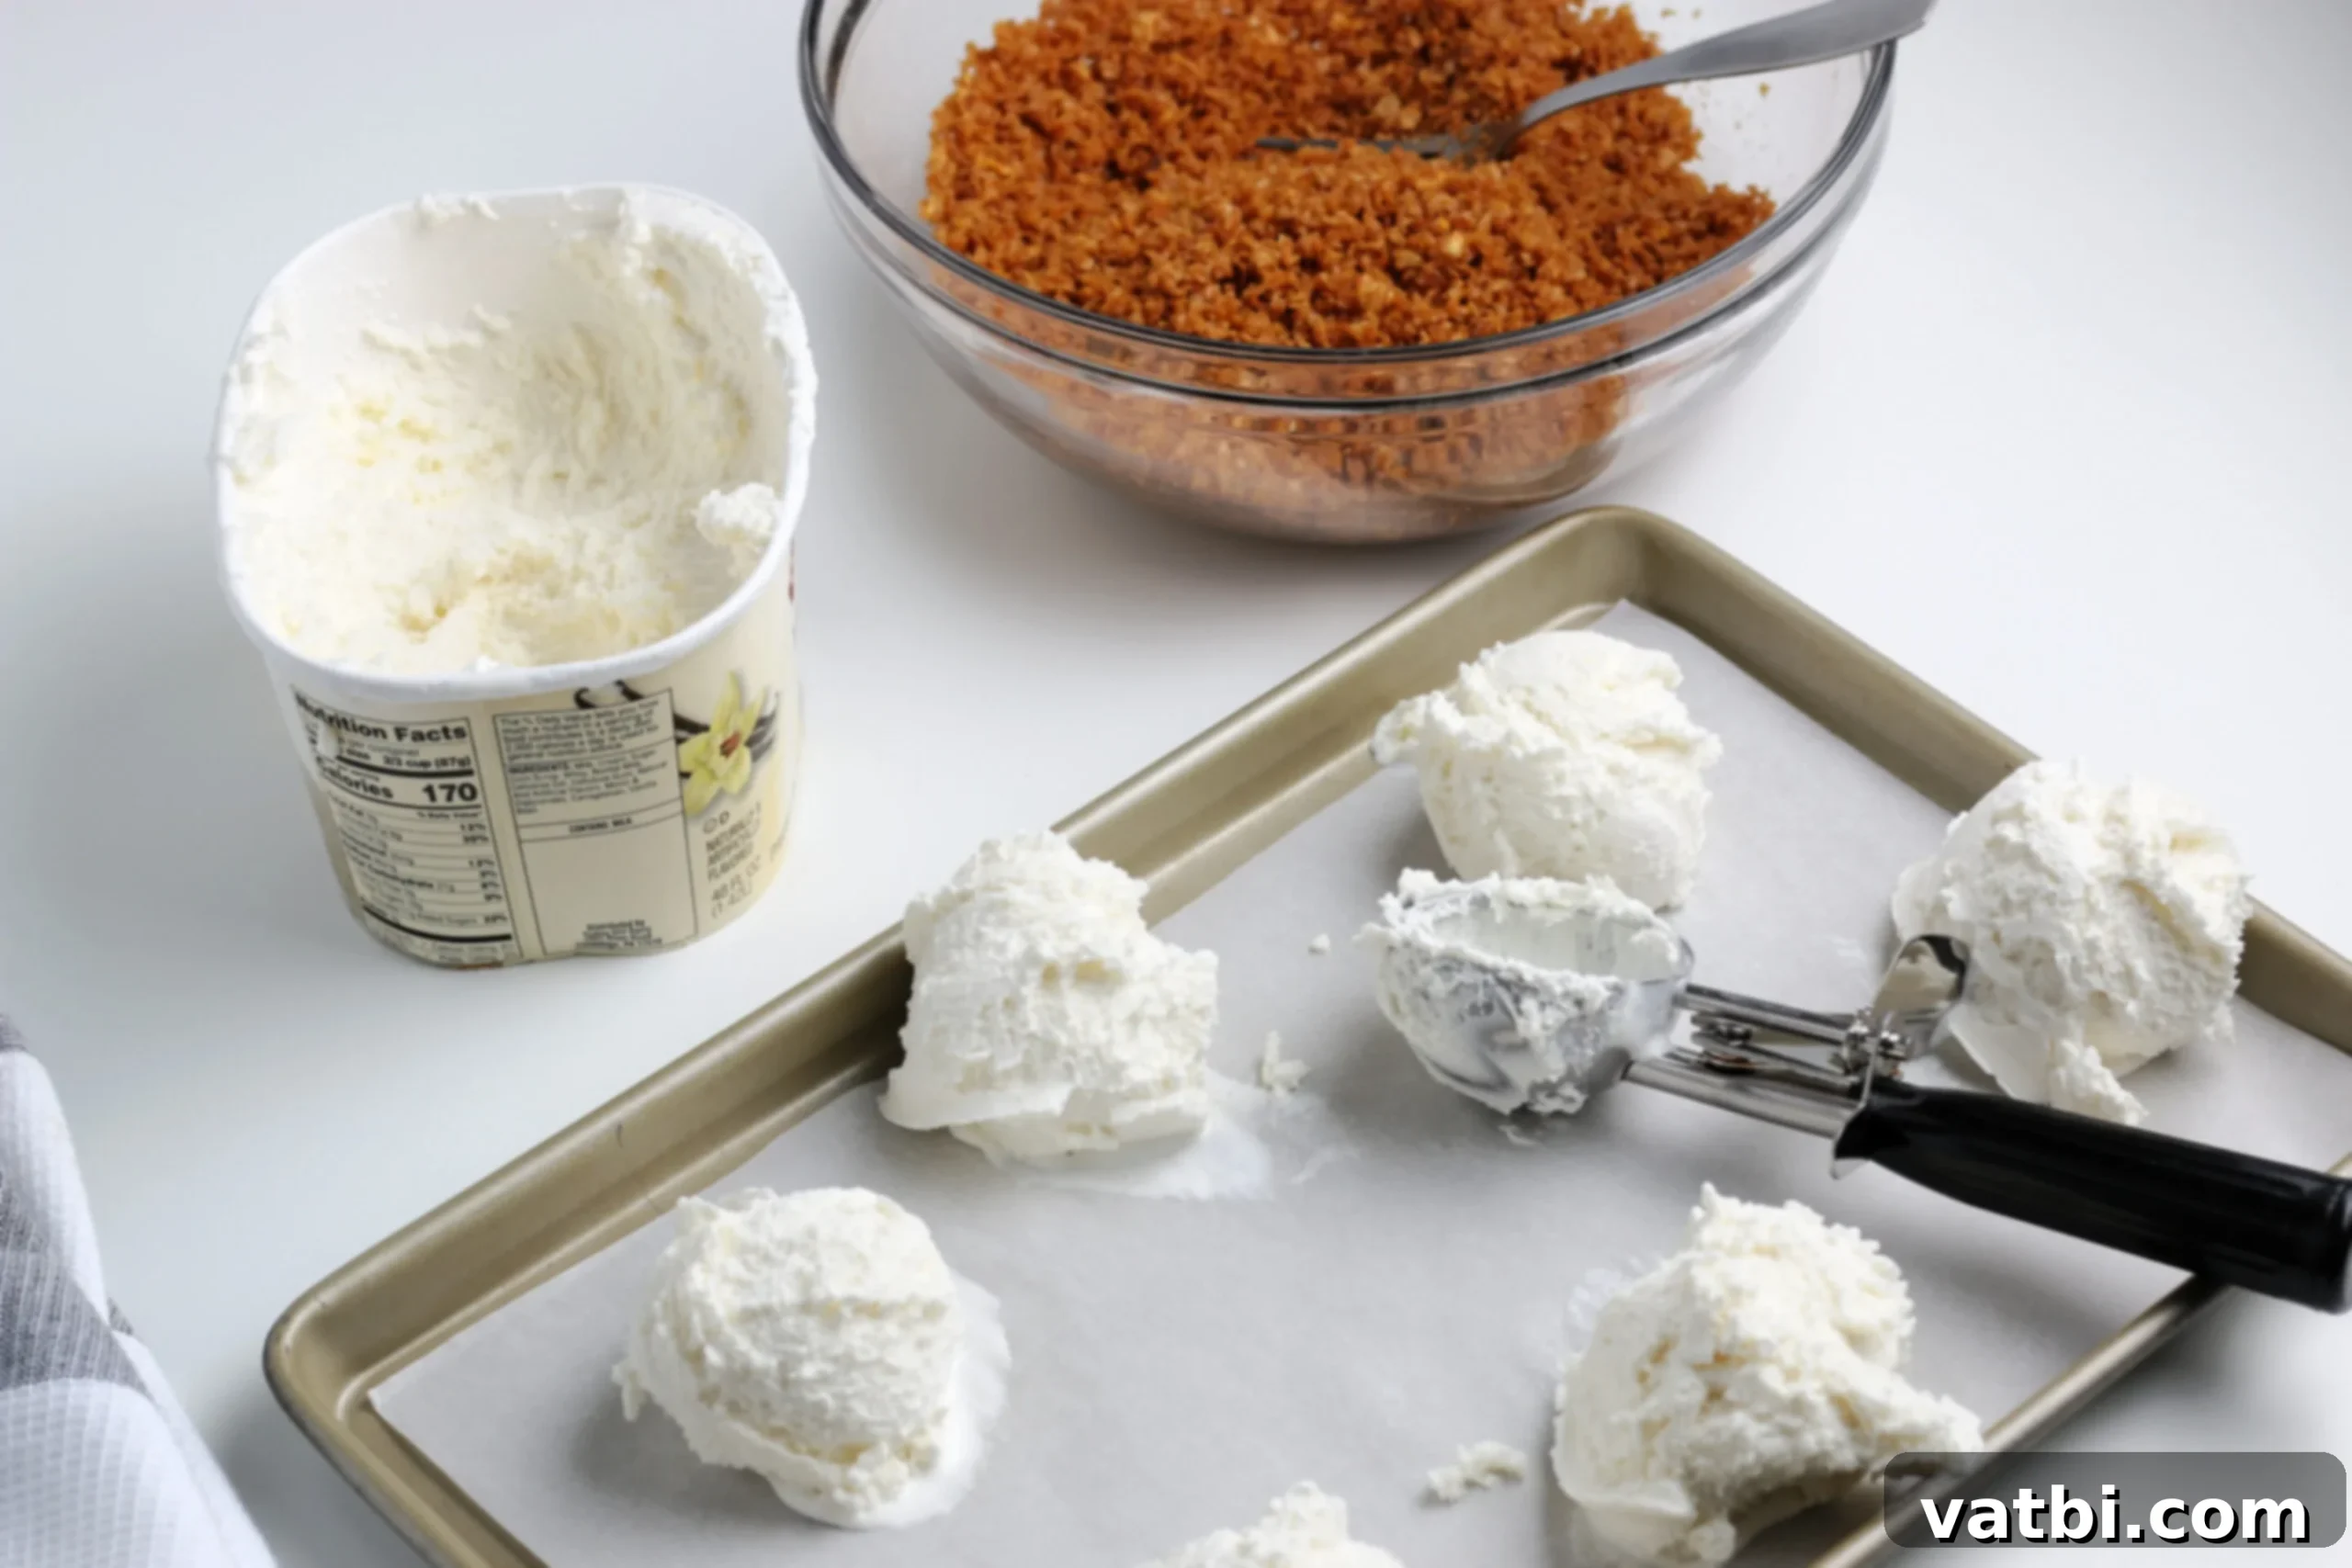
Step 6. Form Ice Cream Balls. By now, your ice cream should be perfectly softened and ready for scooping. Using a standard ice cream scooper, portion out generous scoops of ice cream. Work quickly to gently form these scoops into smooth, round balls using your hands. If your hands get too warm, run them under cold water. Place each formed ice cream ball onto the parchment-lined baking sheet you prepared earlier. Aim for consistency in size for even coating.
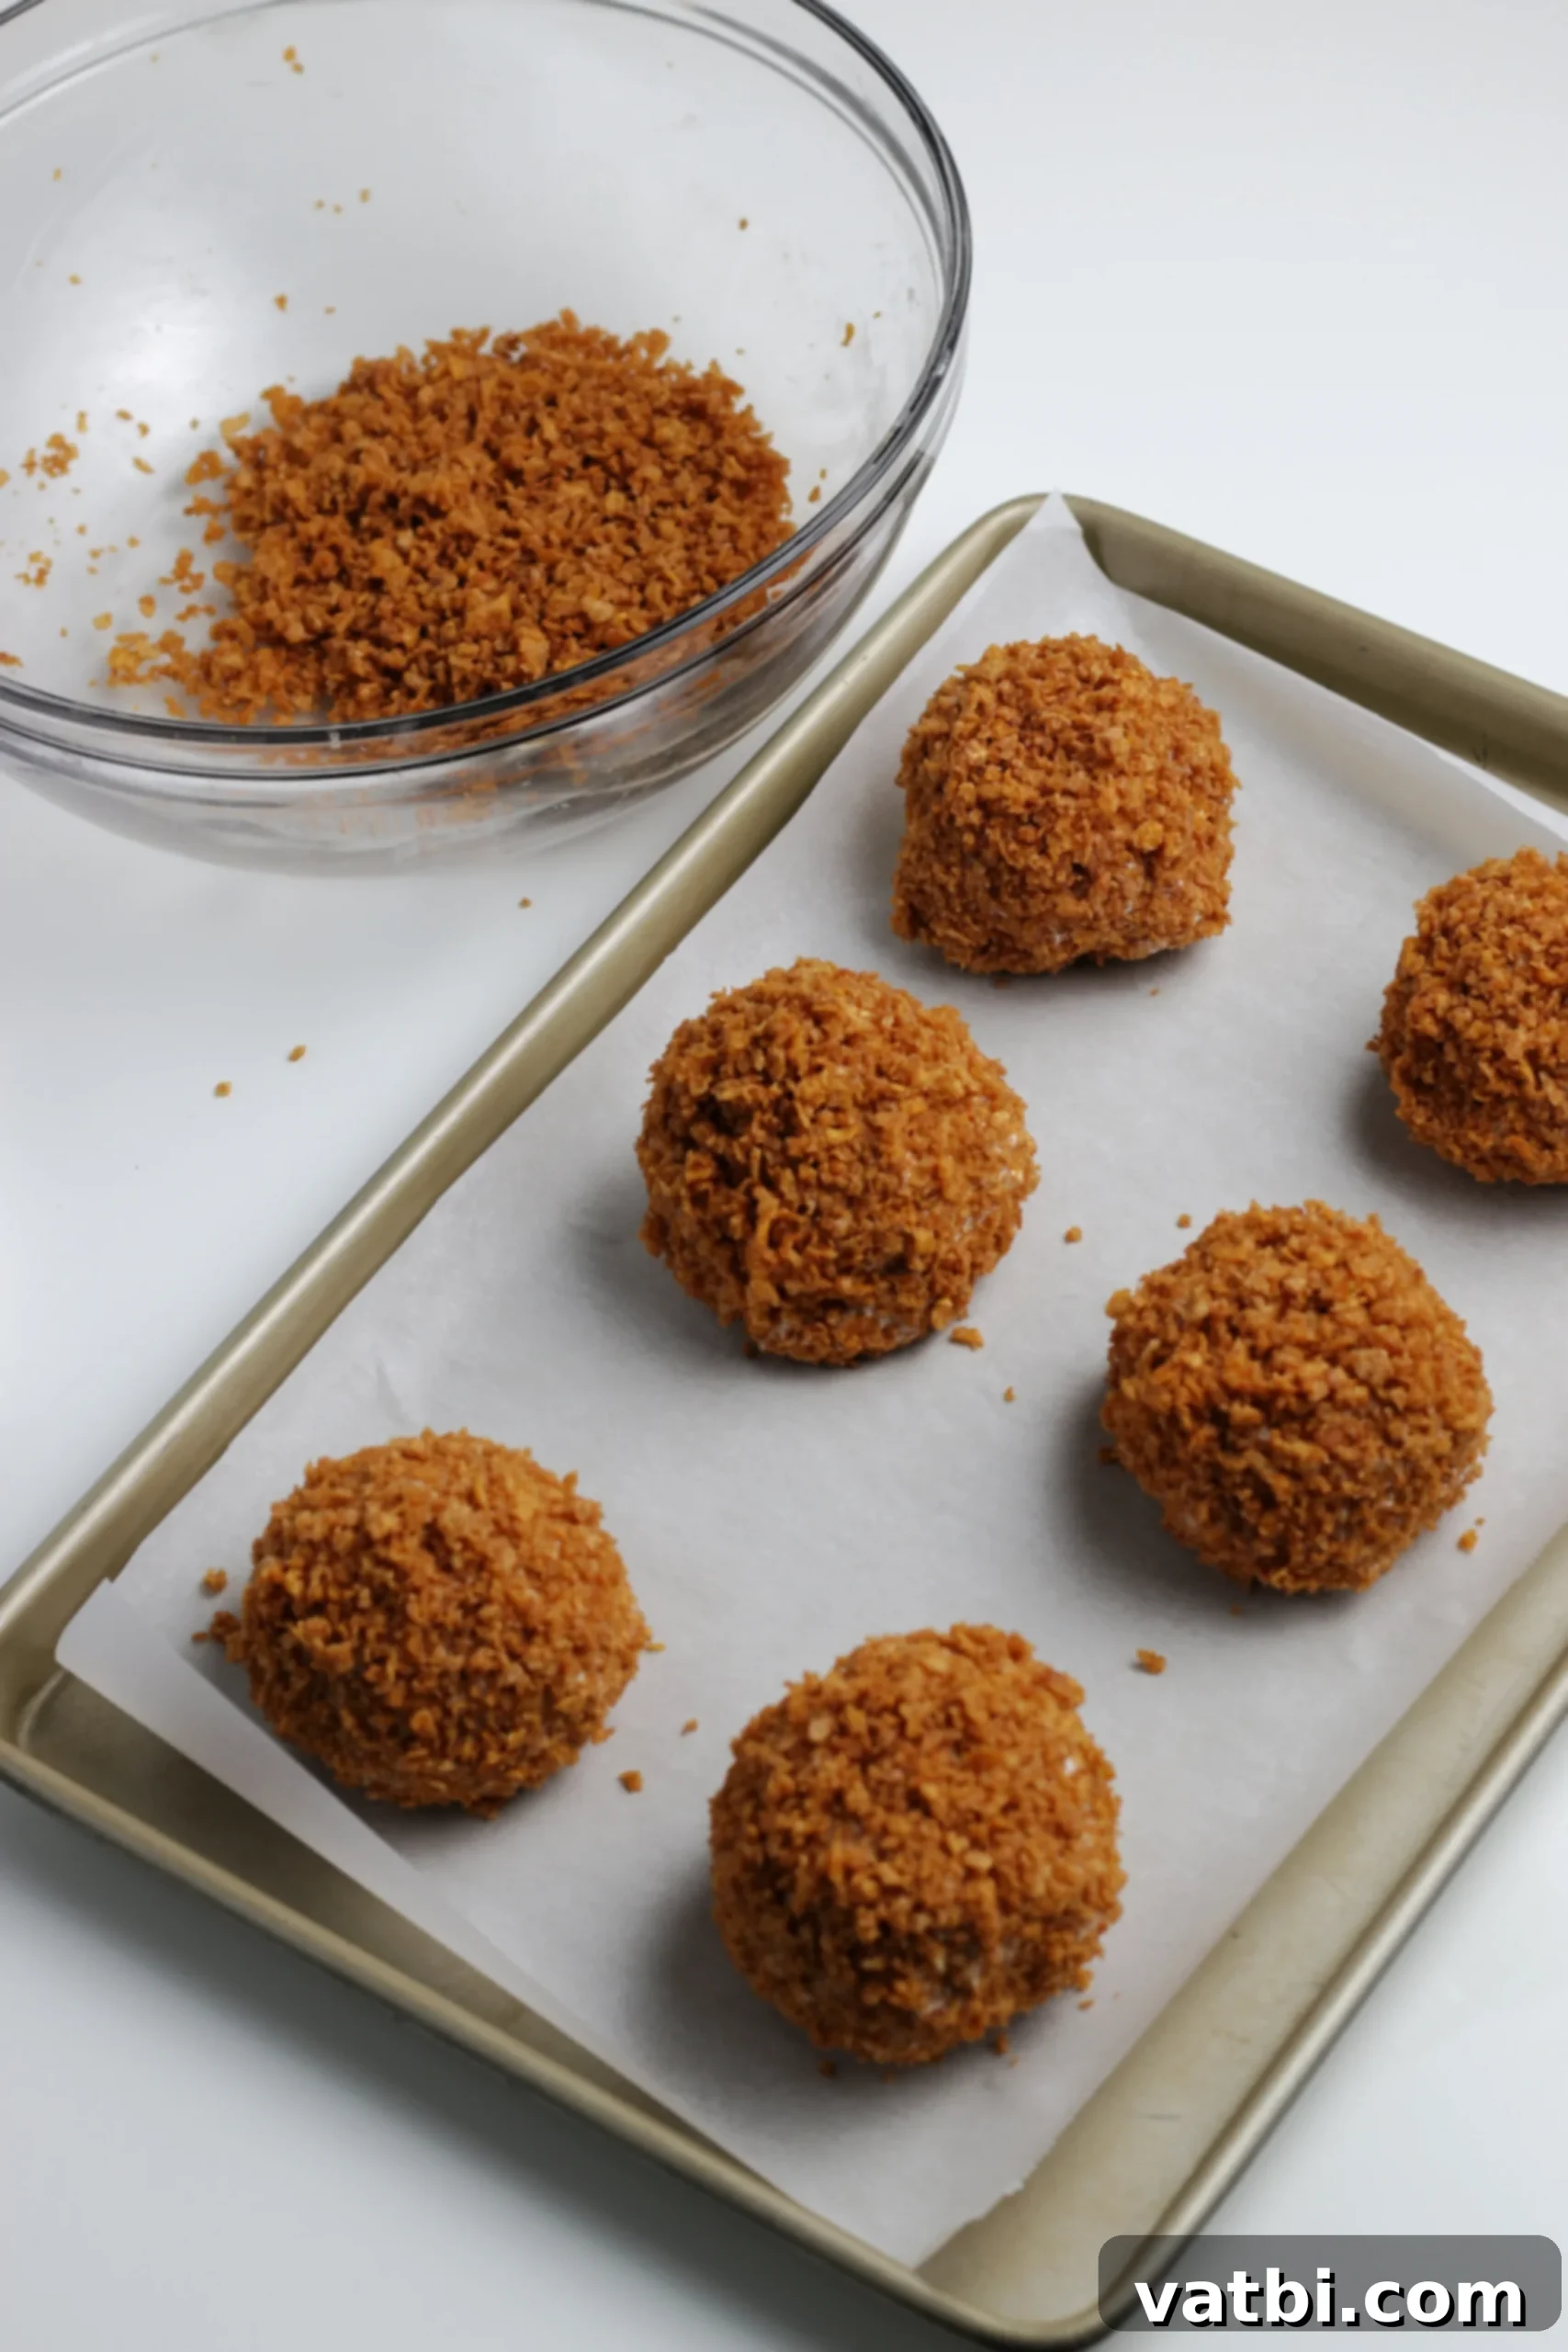
Step 7. Coat and Freeze. Once the toasted cereal mixture has cooled completely, roll each ice cream ball in the delicious crumb coating. Gently press the cornflake coating into the ice cream as you roll, ensuring the entire surface of each ball is thoroughly covered. A complete coating is essential for that signature crispy texture. Place the coated ice cream balls back onto the parchment-lined baking sheet. Once all balls are coated, transfer the baking sheet to the freezer. Freeze the ice cream balls for a minimum of 2-3 hours, or preferably overnight, until they are completely solid. This deep freeze is what allows them to hold their shape and creates the perfect contrast with the crisp, toasted exterior when served. When ready to serve, simply remove from the freezer and add your favorite toppings!
Creative Serving Ideas for “Deep Fried” Ice Cream
Once your homemade “deep fried” ice cream balls are perfectly chilled and ready, the fun continues with an array of delicious serving options. Here are some of my favorite ways to present and enjoy this incredible dessert:
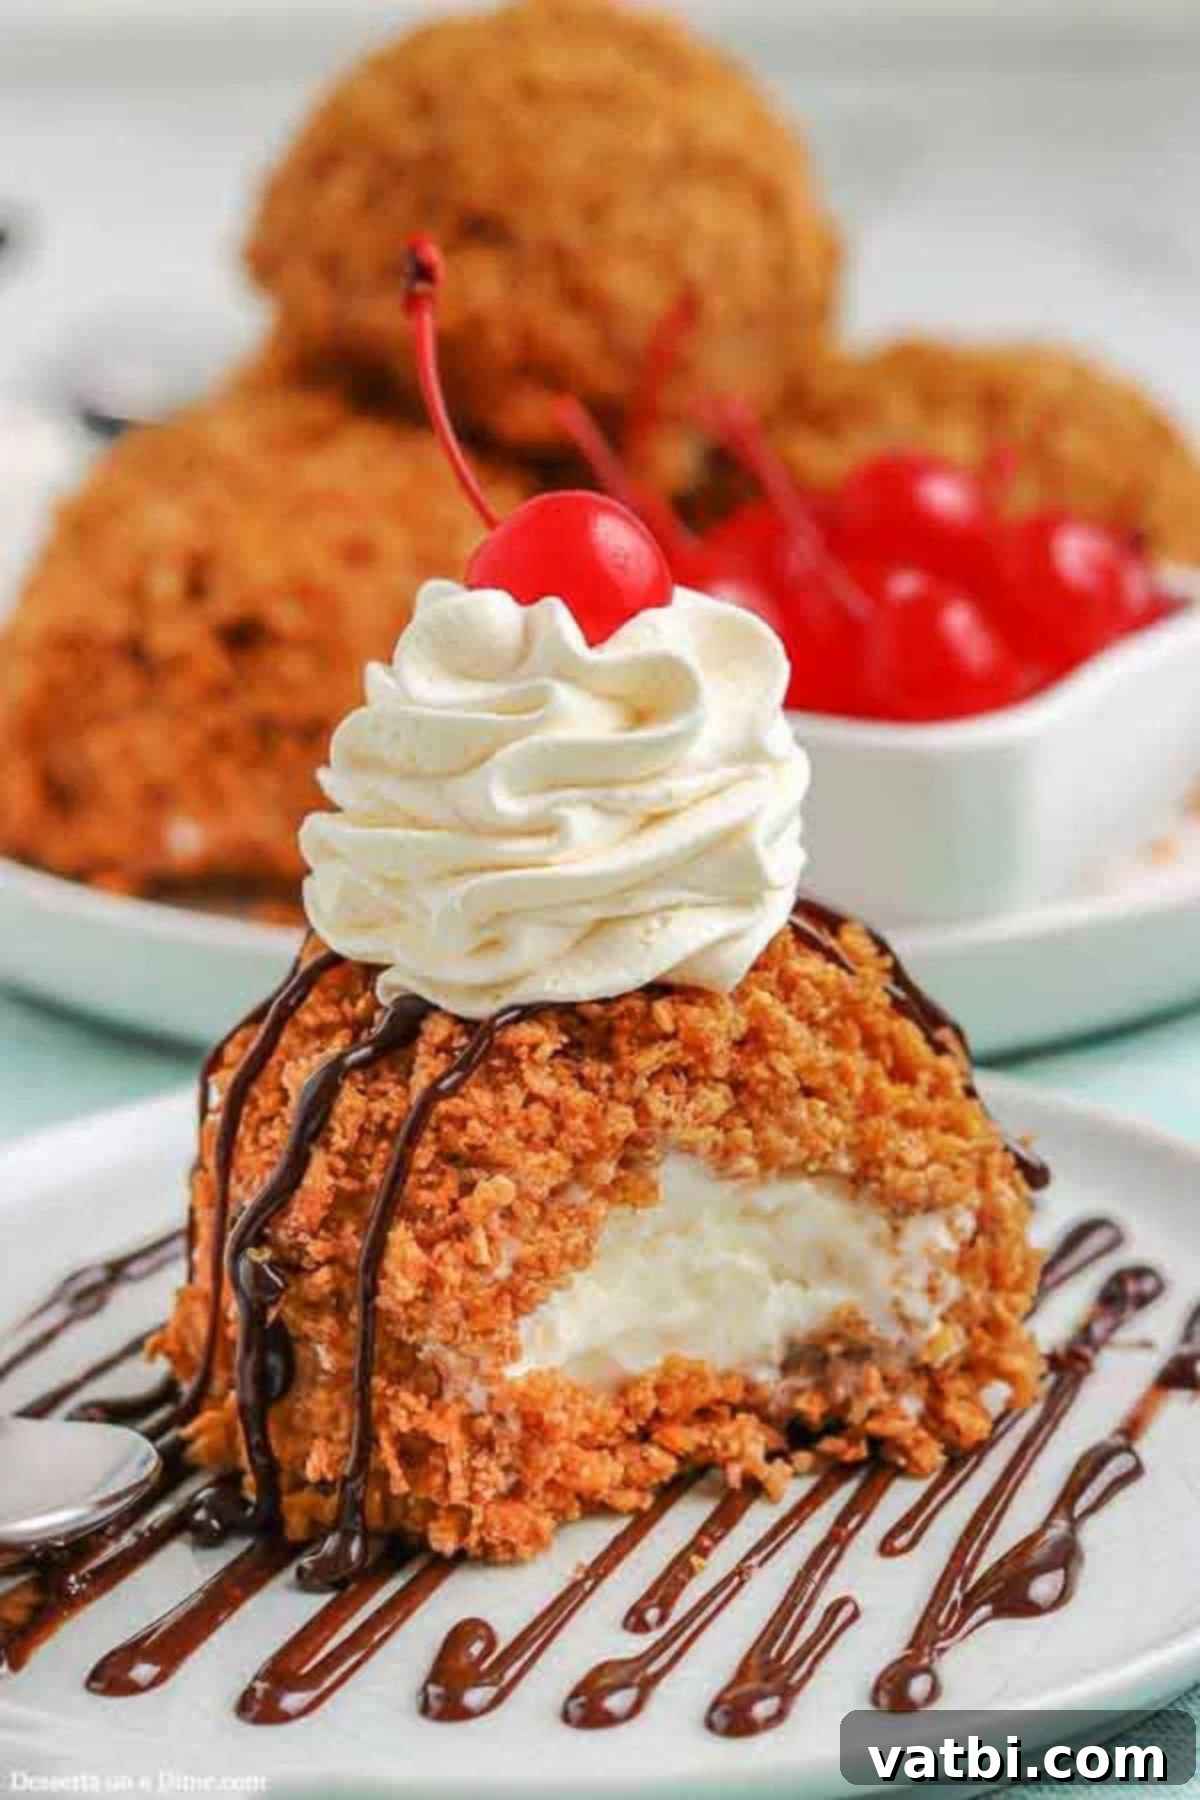
- The Classic Sundae: Top with a generous swirl of fluffy whipped cream, a drizzle of rich chocolate sauce, and a bright red maraschino cherry. This timeless combination never disappoints.
- Nutty Chocolate Dream: For an extra layer of decadence, warm some peanut butter slightly and drizzle it over the “fried” ice cream. Then, sprinkle with crushed chocolate sandwich cookies (like Oreos) for a delightful textural and flavor combination.
- Candy Bar Extravaganza: Elevate your dessert by topping it with crushed candy bars of your choice (Snickers, Butterfinger, Reese’s cups are excellent options!). Alternatively, a sprinkle of miniature chocolate chips adds a simple yet satisfying chocolate boost.
- Caramel Apple Delight: Drizzle warm homemade caramel sauce over the top and add a sprinkle of toasted pecans or candied walnuts for a comforting, autumnal twist.
- Berry Burst: For a fresh and fruity touch, serve your “fried” ice cream with a spoonful of fresh berry compote or a mixture of sliced strawberries and blueberries.
Can I use a Different Flavor of Ice Cream?
Absolutely! While classic vanilla is a wonderful starting point, feel free to experiment with different ice cream flavors to truly customize your “fried” ice cream experience. The key is to choose a flavor that you love and that will complement the buttery, cinnamon-spiced cereal coating. Here are some fantastic options to consider:
- Chocolate Chip: The subtle crunch of chocolate chips adds another layer of texture, while the chocolate flavor harmonizes beautifully with the cinnamon coating.
- Chocolate: For the ultimate chocolate lover, a rich chocolate ice cream base works wonderfully. You can even enhance the coating with a tablespoon of cocoa powder for an extra chocolatey punch.
- Strawberry: The sweet and slightly tart notes of strawberry ice cream provide a refreshing contrast to the warm, crispy coating. This pairing is particularly delightful in the warmer months.
- Coffee: As mentioned in the variations, coffee ice cream brings a sophisticated depth of flavor that’s exquisite with the toasted cereal.
- Mint Chocolate Chip: For a refreshing twist, the cool mint flavor paired with the warm, crispy shell is surprisingly delicious.
Don’t be afraid to think outside the box! Just ensure the ice cream flavor isn’t too overpowering, allowing the distinctive taste and texture of the “fried” coating to still shine through.
Can I Make it in Advance?
Yes, absolutely! One of the fantastic advantages of this “Deep Fried” Ice Cream recipe is that it’s an ideal make-ahead dessert. You can prepare the ice cream balls, coat them in the crispy cereal mixture, and freeze them well in advance of when you plan to serve them. This makes it a perfect dessert for entertaining, as you can do all the prep work beforehand and simply pull them out of the freezer right before serving.
To make them in advance, follow the recipe instructions through step 7 (coating and freezing the ice cream balls). Once they are thoroughly frozen and firm, transfer them from the baking sheet to an airtight, freezer-safe container. This will protect them from freezer burn and prevent them from absorbing any unwanted odors. They can be stored in the freezer for 1 to 2 weeks, ready to be enjoyed at a moment’s notice. When you’re ready to serve, simply remove them from the freezer, add your preferred toppings, and enjoy the perfect crispy-creamy delight!
Pro Tips for Perfect Homemade “Fried” Ice Cream
To ensure your homemade “fried” ice cream turns out perfectly crispy and creamy every time, keep these expert tips in mind:
- Achieve Optimal Ice Cream Firmness – The success of this recipe hinges on the ice cream being extremely cold and firm. After forming and coating the ice cream balls, make sure to freeze them for at least 2-3 hours, or even better, overnight. This deep freeze prevents the ice cream from melting too quickly when it comes into contact with the slightly warm, toasted coating and ensures a delightful contrast in temperatures and textures.
- Understanding “Deep Fry” in This Recipe – It’s important to clarify that **this specific recipe does NOT involve deep-frying the ice cream balls in hot oil.** We achieve the “fried” effect by toasting the cereal coating in butter. This makes the recipe much safer and easier for home cooks. However, if you are familiar with traditional deep-frying and wish to use that method, you would typically dip the coated ice cream balls in an egg white wash before rolling them in the cereal to create an even more robust crust, then quickly deep-fry them in oil heated to about 375°F (190°C) for just 10-15 seconds. Please proceed with caution if attempting traditional deep-frying.
- Ensure Ample Freezer Space – Before you begin, double-check that you have enough flat space in your freezer to accommodate the baking sheet with the ice cream balls. They need to freeze undisturbed without touching anything else to maintain their perfect spherical shape.
- Thoroughly Coat Ice Cream Balls – For the best crispy texture, it’s crucial to completely coat each ice cream ball with the cornflake mixture. Gently press the crumbs onto the surface of the ice cream to ensure no spots are left exposed. This full coverage creates that satisfying crunch in every bite.
- The “Deconstructed” Ice Cream Sundae Alternative – If you’re short on time or prefer a simpler presentation, you can skip the ball-forming and coating process altogether. Instead, scoop regular portions of ice cream into bowls and simply sprinkle the toasted cornflake mixture generously over the top. It still delivers that amazing crispy-creamy contrast, just in a more relaxed, sundae-style format.
- Opt for Quality Ice Cream – Since ice cream is the star of the show, using a high-quality brand with good density and flavor will significantly enhance the overall taste and texture of your homemade “fried” ice cream. Look for ice creams with fewer artificial ingredients for the best results.
- Perfecting the Crumb Texture – When crushing the cornflakes, aim for finely chopped crumbs rather than a coarse texture. Finer crumbs adhere better to the ice cream and create a more uniform, crispy coating. A food processor is ideal for achieving this consistency quickly, but a ziplock bag and a rolling pin work just as well with a bit of effort.
More Irresistible Ice Cream Recipes to Try
If you’ve enjoyed making this “fried” ice cream, you’re sure to love exploring other creative and delicious ice cream-based desserts. Here are a few more recipes to add to your must-try list:
- Ice Cream Cone Cupcake
- Homemade Rolled Ice Cream Recipe
- Easy Ice Cream Sundae Bar
- Ice Cream Bread
- Hula Pie
These recipes offer diverse flavors and techniques, ensuring there’s always a new frozen treat to discover and enjoy!
You are going to absolutely love having this “Fried” Ice Cream as a go-to dessert at home. It’s an incredibly impressive yet simple treat that will wow your family and guests. Try it today and don’t forget to leave a comment with your thoughts and favorite toppings!
Pin
Homemade No-Fry “Deep Fried” Ice Cream
Ingredients
- 1 quart vanilla ice cream
- 6 cups corn flakes cereal or cinnamon toast crunch cereal
- ½ cup 1 stick unsalted butter
- 2 teaspoons ground cinnamon
- Toppings optional
- Whip cream or whipped topping thawed
- Hot fudge or chocolate topping
- Maraschino cherries
Instructions
-
Take the ice cream out of the freezer and let it soften at room temperature for about 20-30 minutes, until it’s pliable but not melted.
-
Line a baking sheet, that will fit in your freezer, with parchment paper. This will prevent sticking.
-
Place the corn flakes (or cinnamon toast crunch) into a large, resealable bag. Crush them into fine crumbs using a rolling pin, or pulse them in a food processor until finely ground.
-
Transfer the cereal crumbs to a medium bowl and add the ground cinnamon. Stir thoroughly to combine the ingredients evenly.
-
In a large skillet, melt the ½ cup of unsalted butter over medium heat. Once melted, stir in the crushed cereal and cinnamon mixture.
-
Cook the mixture for approximately 2-3 minutes, stirring constantly, until it turns a rich golden brown and becomes fragrant. Be careful not to burn the crumbs.
-
Remove the skillet from the heat and transfer the toasted crumbs to a large bowl or shallow dish. Allow the coating mixture to cool completely before proceeding.
-
Using an ice cream scoop, portion out the softened ice cream. Quickly roll each scoop between your hands to form compact, round balls. Place these ice cream balls onto the prepared baking sheet.
-
Roll each ice cream ball in the cooled, toasted cereal mixture, pressing gently to ensure a complete and even coating. Return the coated balls to the parchment-lined baking sheet.
-
Place the baking sheet with the coated ice cream balls back into the freezer. Freeze for a minimum of 2-3 hours, or preferably overnight, until they are completely solid.
-
To serve, remove the hardened “fried” ice cream balls from the freezer. Top with whipped cream, chocolate sauce, and a maraschino cherry, or any other desired toppings. Enjoy immediately!
Recipe Notes
Nutrition Facts
Pin This Now to Remember It Later
Pin Recipe
