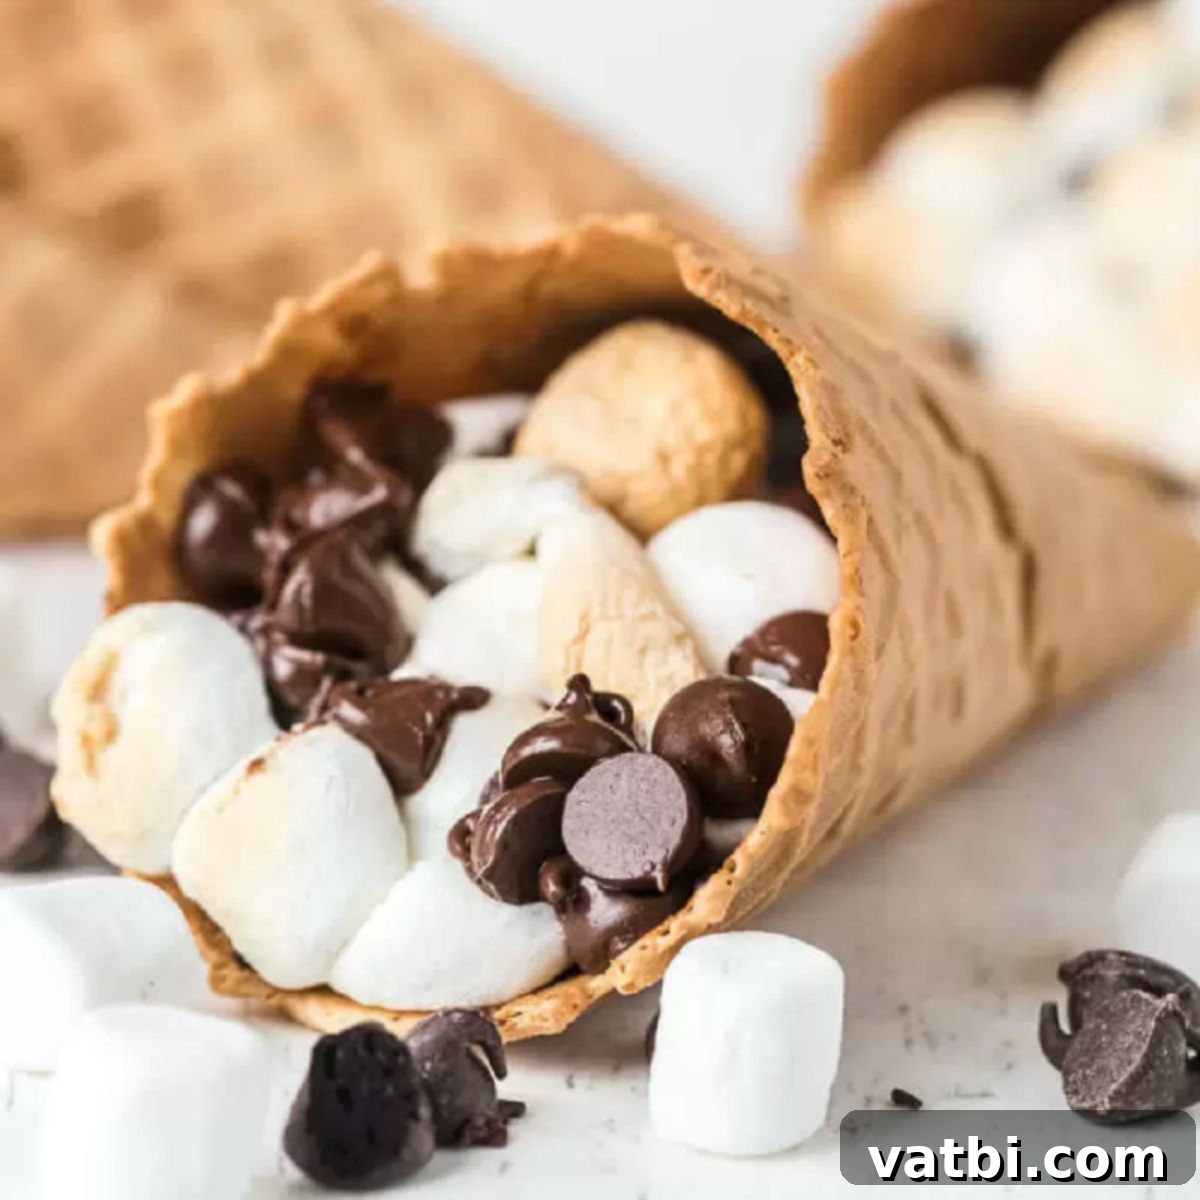
Waffle Cone S’mores: The Ultimate Easy & Mess-Free Campfire, Grill, and Oven Treat
Get ready to experience the beloved classic s’mores in a whole new, incredibly convenient, and utterly delicious way: **Waffle Cone S’mores!** Imagine all the gooey, melty chocolate and toasted marshmallow goodness, perfectly contained within a crisp, sweet waffle cone. This innovative twist transforms a sometimes-messy campfire treat into a handheld dessert that’s easy to make, fun to eat, and perfect for any occasion, whether you’re gathered around a roaring bonfire, firing up the backyard grill, or simply baking indoors.

While we adore traditional s’mores, they can often be inconvenient, leaving you with sticky fingers and crumbly graham cracker bits. That’s where these delightful **Waffle Cone S’mores** truly shine. They offer a fantastic, less-mess alternative, making them an ideal camping dessert, a quick treat after a barbecue, or even a cozy family night delight. No more struggling with assembling individual s’mores over a fire; simply fill, wrap, and heat for a perfectly contained, ooey-gooey experience.
If you’re a fan of our Golden Graham S’mores Bar recipe, then this new recipe for **S’mores Cones** is sure to become a family favorite. Our household is absolutely crazy about anything s’mores-related! We’ve previously created the Easy S’mores Cake Recipe, S’mores Puppy Chow, and even S’mores Cupcakes, all of which were met with rave reviews. These Waffle Cone S’mores join the ranks as another must-try variation of this beloved dessert.
For an extra boost of marshmallowy goodness, consider making Deep Fried Marshmallows as another delightful s’mores-inspired treat or even adding a few fried marshmallows directly into your cones for an unparalleled experience.
Table of Contents
- Why We Love This Recipe
- Key Ingredients for S’mores Cones
- Delicious S’mores Cone Variations
- How to Make Waffle Cone S’mores
- How to Serve Your S’mores Cones
- Can You Make S’mores Cones in Advance?
- Pro Tips for Perfect Waffle Cone S’mores
- More Irresistible S’mores Recipes to Try
Why We Love This Easy S’mores Cone Recipe
There are countless reasons to fall in love with these easy **Waffle Cone S’mores**. The sheer convenience of preparing s’mores in an easy-to-eat cone is simply wonderful. No more sticky fingers from melted marshmallows or crumbs everywhere! They taste absolutely fantastic, capturing all the classic flavors in a delightful, portable package. Kids especially adore these campfire cones, finding the cone shape an exciting and novel way to enjoy their favorite dessert.
Beyond the convenience, the use of crispy waffle cones offers a fun and delicious twist that replaces traditional graham crackers. The subtle sweetness and crunchy texture of the waffle cone perfectly complement the rich chocolate and gooey marshmallows, creating a harmonious bite every time. This method also allows for easy customization, letting everyone create their perfect s’more with various fillings and toppings.
Key Ingredients for S’mores Cones
Crafting the perfect **Waffle Cone S’mores** requires just a few simple ingredients, easily found at any grocery store. The beauty of this recipe lies in its simplicity and the classic flavor combination that always satisfies.
- **Sugar Cone or Waffle Cones:** While sugar cones can work, we highly recommend using **waffle ice cream cones**. Their slightly richer flavor and sturdier build most closely resemble the taste and texture experience of traditional s’mores (think graham cracker notes!). Waffle cones also tend to hold more filling and are less prone to breaking, making for a much better eating experience.
- **Mini Marshmallows:** For optimal melting and ease of filling, mini marshmallows are your best bet. They distribute evenly throughout the cone, ensuring every bite gets that signature gooey marshmallow texture. Plus, their smaller size means you can pack more into each cone, leading to maximum marshmallowy delight!
- **Milk Chocolate Chips:** Milk chocolate chips are a fantastic choice for their creamy texture and classic s’mores flavor. You can use regular size or mini chocolate chips, depending on your preference. Mini chips melt a bit faster and integrate more smoothly, while regular chips offer satisfying pockets of melted chocolate. Feel free to explore other chocolate varieties if milk chocolate isn’t your favorite, as discussed in our variations section!
The complete ingredient list with exact measurements can be found in the detailed recipe card at the bottom of the page, making it easy to prepare for your next sweet adventure.
Delicious S’mores Cone Variations
One of the best things about **Waffle Cone S’mores** is how incredibly versatile they are! Don’t limit yourself to the classic combination. Here are some fantastic ideas to elevate your s’mores cone game and create personalized treats:
- **Peanut Butter Lover’s Dream:** For all the peanut butter fans out there, adding Reese’s peanut butter cups (miniature or chopped regular size) to the cone is an absolute game-changer. The salty-sweet combination of peanut butter and chocolate with gooey marshmallow is simply irresistible.
- **Marshmallow Mix-Up:** While mini marshmallows are recommended for ease, feel free to experiment with different sizes. You can use regular-sized marshmallows, simply cutting them into smaller pieces to fit inside the cones, or even use gourmet flavored marshmallows for a unique twist.
- **Explore Different Morsels:** Don’t stop at milk chocolate!
- **Dark Chocolate Chips:** For a richer, less sweet flavor profile.
- **White Chocolate Chips:** Adds a creamy, sweet contrast.
- **Butterscotch Chips:** Offers a unique, caramel-like sweetness.
- **Peanut Butter Chips:** Doubles down on the peanut butter flavor when combined with Reese’s or used alone.
- **Caramel Chips:** For an extra layer of buttery, sweet indulgence.
- **Mint Chocolate Chips:** A refreshing twist, especially appealing during holidays.
- **Repurpose Leftover Candy Bars:** Have leftover candy bars? Chop them up and use them for the chocolate component! Hershey’s bars are a natural fit, but Rolo candies (for a caramel center), Snickers (for nuts and caramel), or even Kit Kats (for added crunch) can create incredible flavor combinations.
- **Decadent Toppings:** Once your s’mores cones are warm and melty, take them to the next level with delicious toppings:
- Drizzle with Homemade Caramel Sauce.
- Swirl with Hot Fudge Sauce.
- Add a dollop of whipped cream.
- Sprinkle with chopped nuts (pecans, walnuts, peanuts).
- Add a dash of sea salt for a sweet and savory kick.
- **Fruity Freshness:** Introduce a burst of freshness by adding fruit to your cones. Sliced strawberries, blueberries, or bananas are excellent choices that pair wonderfully with chocolate and marshmallow. You can add them before heating or as a fresh topping afterward.
- **Crunchy Additions:** Mix in crushed graham crackers (to bring back the traditional s’mores feel), crushed Oreos, or even crushed pretzels for a salty crunch.
How to Make Waffle Cone S’mores
Making these delicious **S’mores Cones** is incredibly simple, ensuring you spend less time preparing and more time enjoying! Follow these easy steps for a perfect gooey treat every time.

Step 1: Fill Each Cone. Begin by carefully filling each sugar or waffle cone with a generous amount of mini marshmallows and chocolate chips. You can alternate layers of marshmallows and chocolate for an even distribution, or simply mix them together before scooping them in. Be mindful not to overfill, leaving a little space at the top for expansion as the marshmallows puff up when heated.
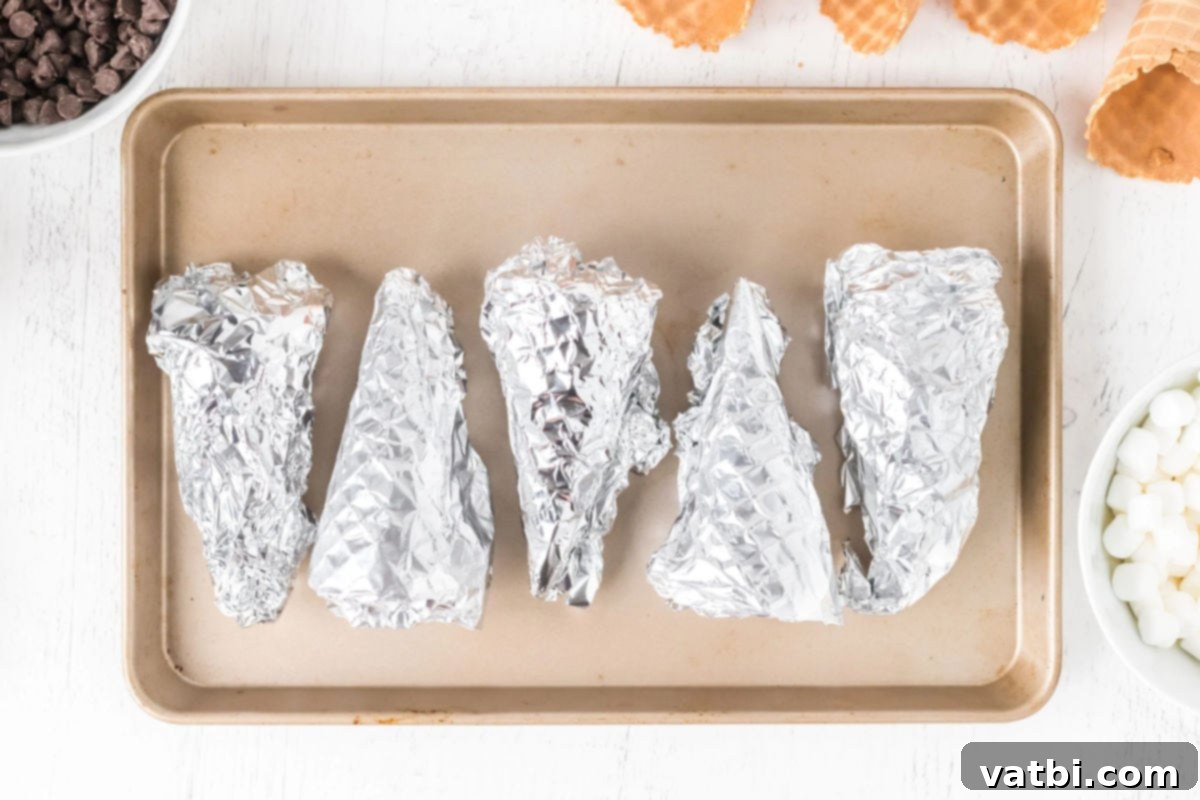
Step 2: Wrap and Heat. Next, take each filled cone and snugly wrap it in aluminum foil. This step is crucial as it helps the ingredients melt evenly without burning the cone or its contents. Once wrapped, place the cones on a baking sheet (if using an oven) or directly onto your grill grates. Heat them over medium heat on the grill, or in a preheated oven at 350°F (175°C), for about 7-10 minutes. The goal is to get the chocolate fully melted and the marshmallows wonderfully gooey and slightly puffed. Keep an eye on them; this doesn’t take long at all! For campfire cooking, place the foil-wrapped cones directly into the embers (not roaring flames) or use a long-handled grill basket, turning occasionally, for 5-7 minutes. Once heated, carefully remove the cones using tongs or oven mitts.
Step 3: Unwrap and Enjoy! Allow the cones to cool for a minute or two before carefully unwrapping the foil. The contents will be hot and gloriously gooey! Serve immediately and savor every warm, chocolatey, marshmallowy bite. Be cautious, as the filling can be very hot.
How to Serve Your S’mores Cones
These delightful **Waffle Cone S’mores** are undoubtedly best served warm, straight from the grill, oven, or campfire. The magic truly happens when the chocolate is perfectly melted and the marshmallows are soft, gooey, and slightly toasted. The warmth creates an irresistible aroma and a wonderfully satisfying texture. For an extra special treat, consider serving your warm s’mores cones with a scoop of creamy vanilla ice cream. The combination of the hot, melty filling with cold, smooth ice cream is absolutely divine, creating a perfect hot-and-cold dessert sensation that everyone will adore. You can also offer a variety of additional toppings on the side, such as extra chocolate sauce, caramel, or fresh berries, allowing guests to further customize their sweet creation.
Can You Make S’mores Cones in Advance?
While the allure of **S’mores Cones** lies in their warm, melty, fresh-from-the-heat goodness, you can do some prep work in advance to make the process even smoother. This s’mores dessert is undeniably best served straight from the heat source (grill, oven, or campfire) when the chocolate is perfectly melty and the marshmallows are at their peak gooiness. However, you can assemble the cones by filling them with marshmallows and chocolate chips, then wrapping them individually in aluminum foil. Store these pre-assembled, wrapped cones in an airtight container at room temperature for up to a day. When you’re ready to enjoy them, simply pop them onto the grill or into the oven as instructed. This allows for quick, on-demand enjoyment without losing much of the fresh appeal, especially if you’re preparing for a larger gathering or a camping trip.
Pro Tips for Perfect Waffle Cone S’mores
To ensure your **Waffle Cone S’mores** are nothing short of spectacular, keep these expert tips in mind:
- **Mastering the Heat:**
- **Campfire:** Place foil-wrapped s’mores cones directly on the embers (not in direct flames) or use a metal campfire grill basket. Turn them occasionally to ensure even heating and prevent burning.
- **Grill:** Place the wrapped cones on indirect medium heat. The warmth will slowly melt the chocolate and toast the marshmallows without scorching the cones.
- **Oven:** Preheat your oven to 350°F (175°C) and place the foil-wrapped cones on a baking sheet. This method offers consistent heat for perfectly gooey results every time.
- **Smart Cone Filling:** Don’t just dump ingredients in! Layering your mini marshmallows and chocolate chips will ensure a better distribution of melted goodness in every bite. Consider putting a few chocolate chips at the bottom, then marshmallows, then more chocolate, and finish with marshmallows on top. This creates an even melt throughout the cone.
- **Always Wrap in Foil:** This is a non-negotiable step! Wrapping the cones snugly in aluminum foil is key to preventing them from burning, distributing heat evenly for perfect melting, and making them easy to handle, especially over a campfire or grill. It also helps contain any potential mess.
- **Don’t Overfill:** While tempting to pack in as much as possible, leaving a little room at the top allows the marshmallows to puff up without overflowing, making for a cleaner eating experience.
- **Cool Slightly Before Unwrapping:** The contents of your s’mores cone will be extremely hot immediately after heating. Allow the wrapped cones to sit for 1-2 minutes before carefully peeling back the foil to avoid burns and enjoy the gooey texture.
- **Customization is Key:** Encourage everyone to personalize their cones! Set out a “s’mores cone bar” with various chocolates, candies, and fruits for a fun, interactive dessert experience.

More Irresistible Smores Recipes to Try
If you can’t get enough of that classic s’mores flavor, explore some of our other fantastic recipes:
- Easy S’mores Cake Recipe
- Easy to Grill S’mores Recipe
- Super Fun S’Mores Parfait Recipe
- S’mores Cookies
- Deep Fried S’mores
- Oreo S’mores
We encourage you to make these incredibly easy and utterly delicious **Waffle Cone S’mores** today for a treat that will delight everyone! After you prepare and savor this delightful dessert, please take a moment to leave a star rating and share your comments. Your feedback helps us and other home cooks discover new favorites!
Pin
Waffle Cone S’mores: The Easy Campfire Treat
Ingredients
- 12 Waffle Cones (or sugar cones for a lighter flavor)
- 1 bag Mini Marshmallows
- 12 oz Milk Chocolate Chips
Instructions
-
Fill each waffle cone with a generous mixture of mini marshmallows and chocolate chips. You can layer them for even distribution.
-
Carefully wrap each filled cone snugly in aluminum foil.
-
Heat the wrapped cones: In a 350°F (175°C) oven, place them on a baking sheet and bake for 7-10 minutes. Alternatively, place on a heated grill over indirect medium heat or directly on campfire embers for 7-10 minutes, turning occasionally.
-
Carefully remove the cones from the heat, unwrap, and serve immediately.
-
Be cautious as the melted chocolate and marshmallows will be very hot.
Recipe Notes
Nutrition Facts
Pin This Now to Remember It Later
Pin Recipe
