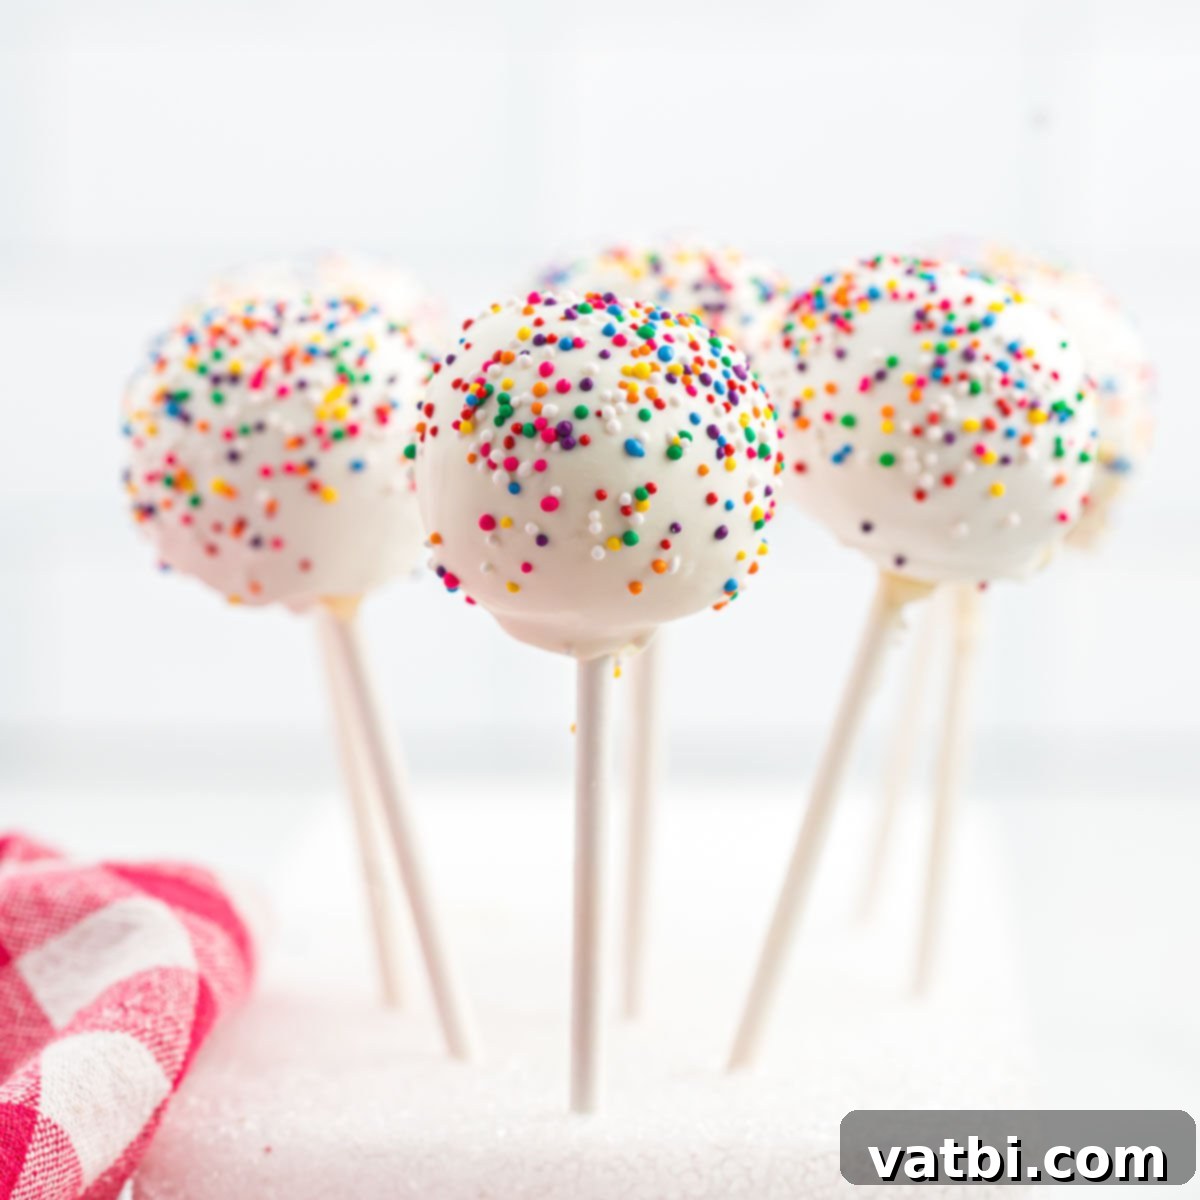
Easy Homemade Cake Pops: The Ultimate Recipe for Perfect Party Treats
Get ready to delight everyone with these incredibly easy homemade cake pops! Whether you’re planning a birthday party, a festive holiday gathering, or just looking for a fun and delicious treat, this recipe is your ticket to success. We’ll show you how to transform a simple cake mix into charming, bite-sized desserts that are as fun to make as they are to eat. Forget expensive bakery prices – you can craft a whole batch of these delightful party favors right in your own kitchen!
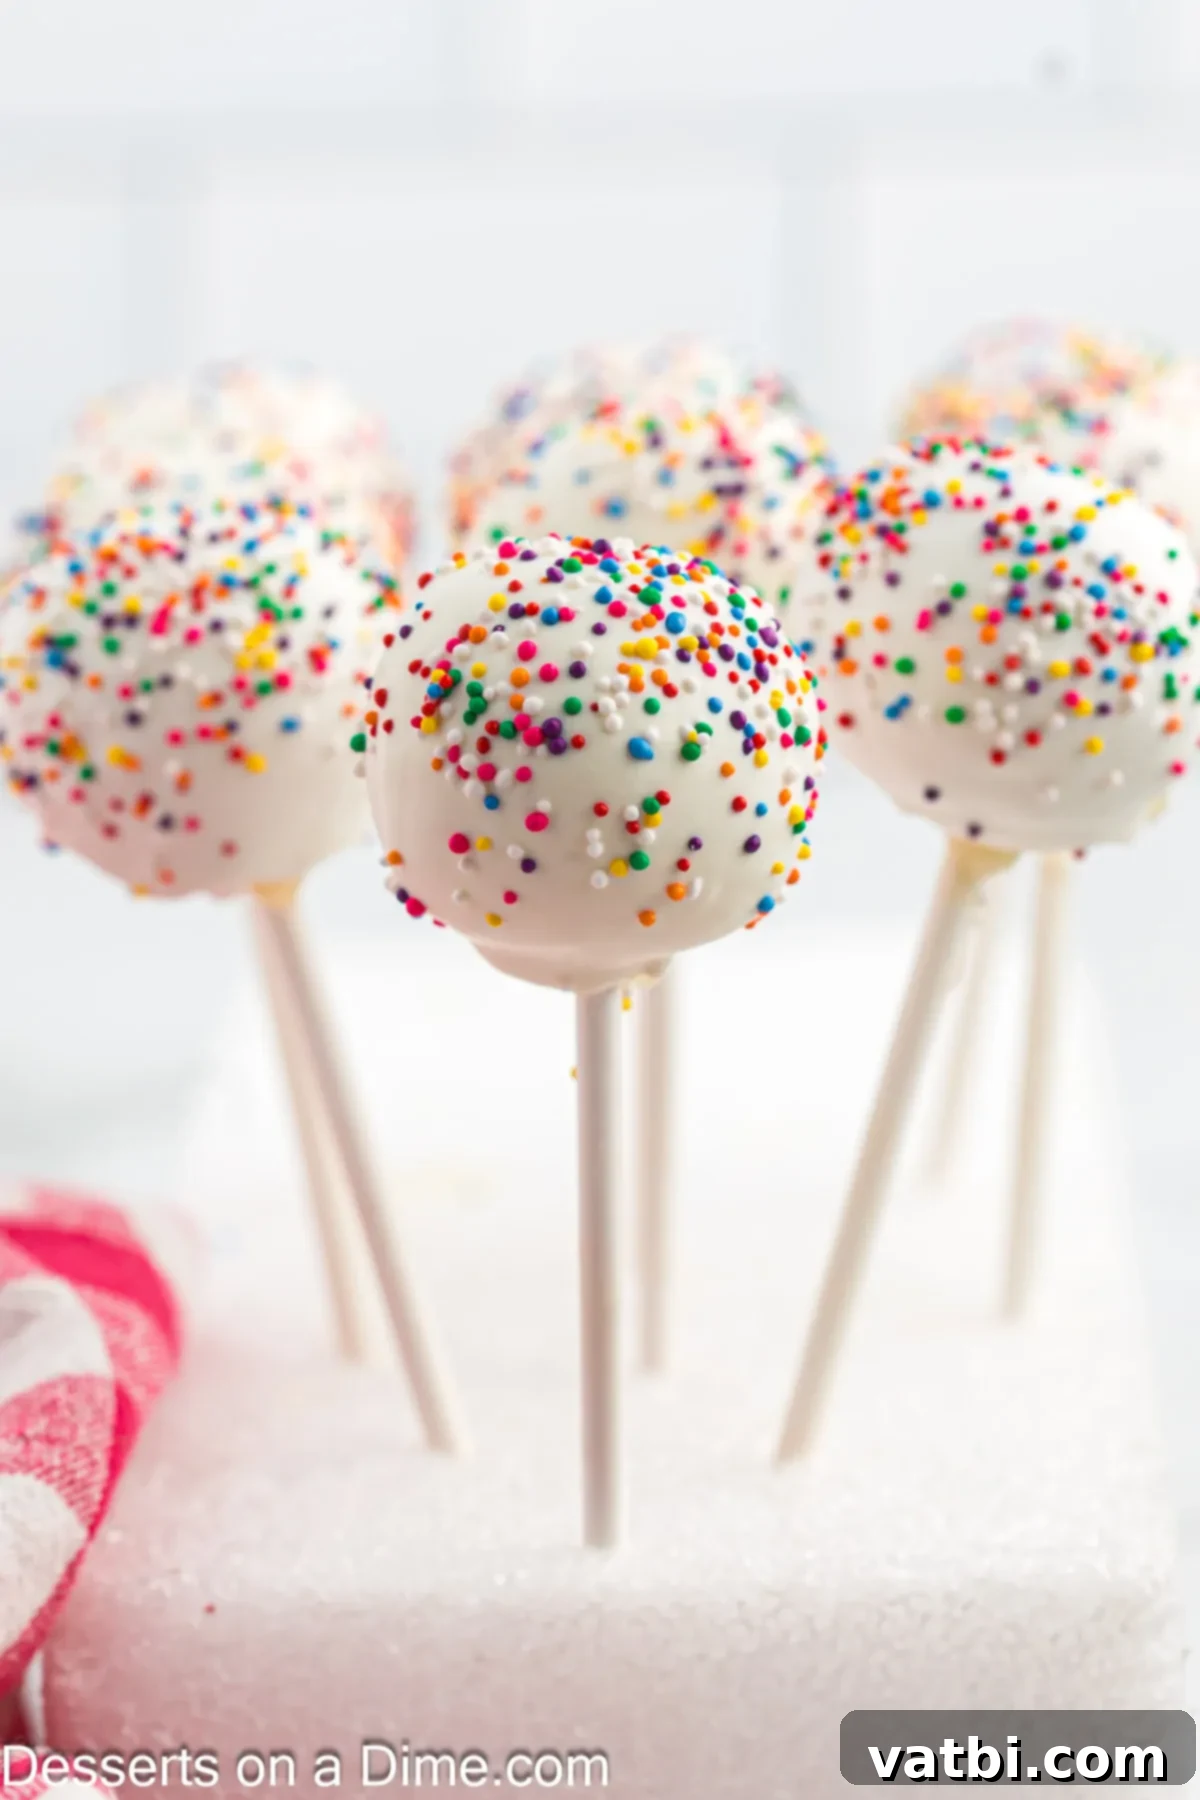
Learning how to make cake pops is a rewarding experience, and this guide provides simple, clear instructions that anyone can follow. They’re not only a fantastic dessert option but also make adorable party favors that guests of all ages adore. Once you master this basic cake recipe, the possibilities for customization are endless. We love experimenting with different flavors and themes, much like our popular Brownie Cake Pops, Oreo Cake Pops, and Cookie Dough Cake Pops, all guaranteed crowd-pleasers. This recipe offers a budget-friendly way to enjoy gourmet-style treats at home, making every occasion a little sweeter.
What’s in this post: Cake Pop Recipe
- Why You Will Love This Easy Cake Pop Recipe
- Essential Ingredients for Perfect Cake Pops
- Creative Variations and Substitutions
- Detailed Step-by-Step Instructions
- Pro Tips for Cake Pop Perfection
- Frequently Asked Questions About Cake Pops
- More Delicious Cake Pop Recipes to Try
- Complete Cake Pop Recipe Card
Why You Will Love This Easy Cake Pop Recipe
There are countless reasons why these homemade cake pops will become your new go-to dessert for any celebration. Their simplicity, versatility, and sheer deliciousness make them an instant favorite:
- It starts with a convenient cake mix. We believe delicious treats shouldn’t be complicated. By beginning with a boxed cake mix, this recipe significantly cuts down on prep time and effort without sacrificing flavor. It’s the perfect shortcut for busy bakers!
- Incredibly budget-friendly. Creating a large batch of homemade cake pops is far more economical than purchasing them from a bakery. You get to enjoy high-quality ingredients and customize them to your heart’s content, all while saving money. This makes them ideal for large parties or events where you need many treats without breaking the bank.
- Kid-friendly and always a hit. Cake pops are inherently fun! Their bite-sized nature and colorful decorations make them irresistible to children and adults alike. They’re mess-free, easy to handle, and guaranteed to bring smiles to every face, making them a consistently popular dessert choice.
- Endless customization possibilities. From various cake flavors to different colored candy melts and a rainbow of sprinkles, you can tailor these cake pops to match any theme or occasion. This adaptability ensures your treats are always unique and special.
- A fun activity for the family. Making cake pops can be a wonderful bonding experience. Kids will love helping with the crumbling, rolling, and decorating, making the process itself a memorable part of the party preparation.
Essential Ingredients for Perfect Cake Pops
Crafting delicious cake pops requires a few key components. Most of these are readily available at your local grocery store, making this an accessible recipe for all skill levels. Here’s what you’ll need:
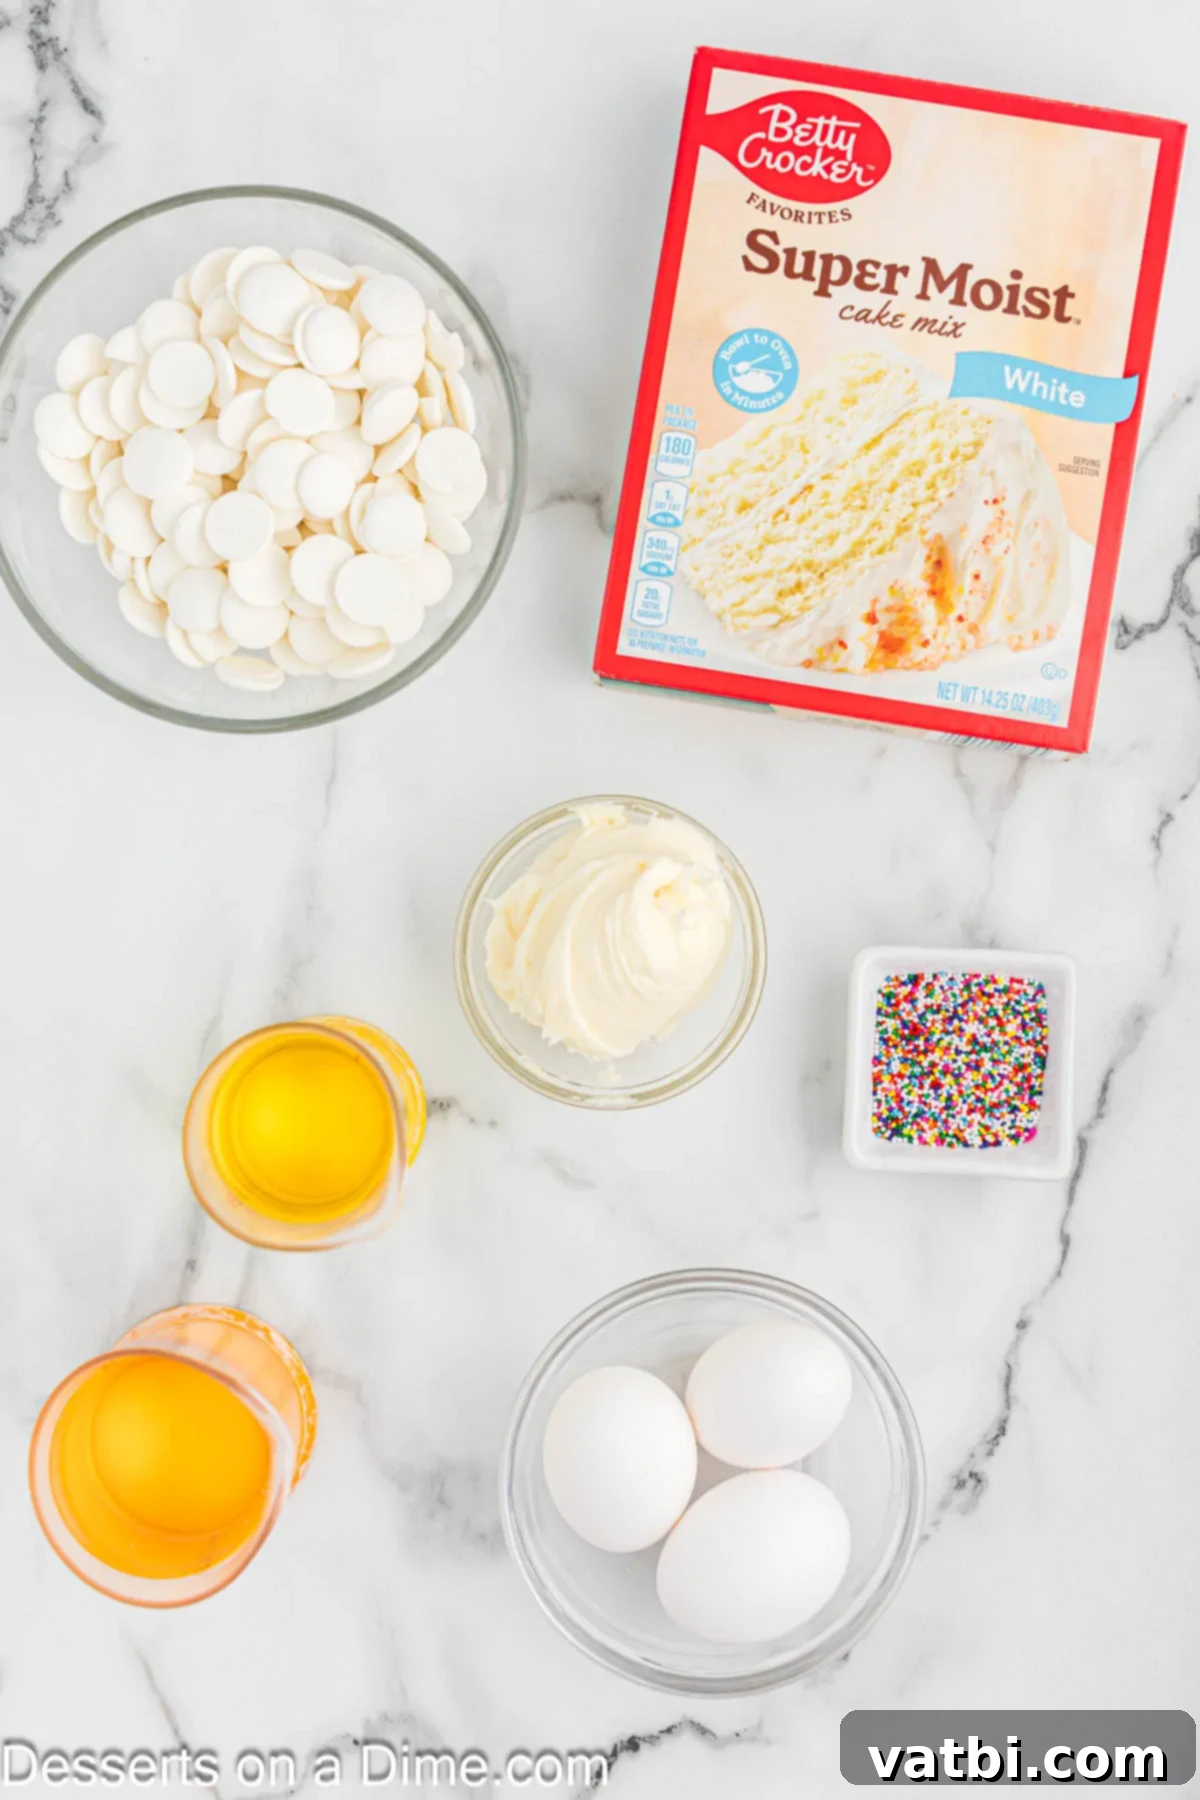
- Classic White Cake Mix: This is our convenient starting point, providing a moist and fluffy base for your cake pops. Any brand will work beautifully.
- Vegetable Oil: Adds moisture to the cake, contributing to that desirable soft texture when baked according to package directions.
- Large Eggs: Essential for structure and richness in your cake batter.
- Vanilla Frosting: The secret ingredient that binds the cake crumbs together, creating the perfect “pop” consistency. Store-bought frosting is perfectly fine for ease, but homemade frosting adds an extra touch of gourmet flavor.
- Lollipop Sticks: These are what transform cake balls into pops, making them easy to hold and dip.
- Candy Melts: The colorful coating that gives cake pops their signature look and delightful outer shell. Choose your favorite colors to match your theme!
- Multi-Colored Sprinkles: The final festive touch! Sprinkles add texture and visual appeal, making your cake pops truly pop.
For the complete list of precise measurements and detailed instructions, scroll down to the bottom of this post for our printable recipe card.
Creative Variations and Substitutions for Your Cake Pops
One of the best things about making cake pops is the incredible flexibility to customize them. Don’t be afraid to get creative and tailor them to your personal taste or specific event theme:
- White Chocolate or Almond Bark. While candy melts are fantastic for vibrant colors, you can easily substitute them with high-quality white chocolate or almond bark for a more classic flavor profile. Ensure you temper white chocolate properly for a smooth finish.
- Explore Different Frosting Flavors. Beyond vanilla, consider using other frosting varieties to complement your cake flavor. Homemade cream cheese frosting, chocolate fudge, or even a lemon buttercream can elevate the taste of your cake pops significantly.
- Switch Up Your Cake Flavors. The possibilities are truly endless! Instead of classic white cake, try strawberry cake for a summery treat, rich chocolate cake (like our Chocolate Cake Pops inspiration), decadent red velvet cake, or zesty lemon cake. Yellow cake mix is also a great option for a classic taste.
- Custom Sprinkles for Every Occasion. Sprinkles are your canvas for creativity! Choose holiday-themed sprinkles for Christmas or Halloween, school colors for graduation parties, metallic sprinkles for elegance, or themed shapes for kids’ parties.
- Add Extracts. A few drops of almond, peppermint, or orange extract in your cake mixture or frosting can add an extra layer of flavor complexity.
- Dip in Dark or Milk Chocolate. For a sophisticated twist, melt down good quality dark or milk chocolate bars for dipping. This creates a richer, more intense chocolate flavor.
- Nutty Crunch. Before the chocolate sets, roll the dipped cake pops in finely chopped nuts like pecans or walnuts for added texture and flavor.
- Coconut Flakes. Toasted or plain coconut flakes offer a tropical twist and a lovely visual appeal.
- Crushed Cookies. After dipping, sprinkle with crushed Oreo cookies, graham crackers, or shortbread for an irresistible crumbly coating.
Detailed Step-by-Step Instructions for Homemade Cake Pops
Making cake pops is a fun and straightforward process, especially when you follow these easy steps. Pay attention to the cooling and chilling times – they are crucial for perfect results!
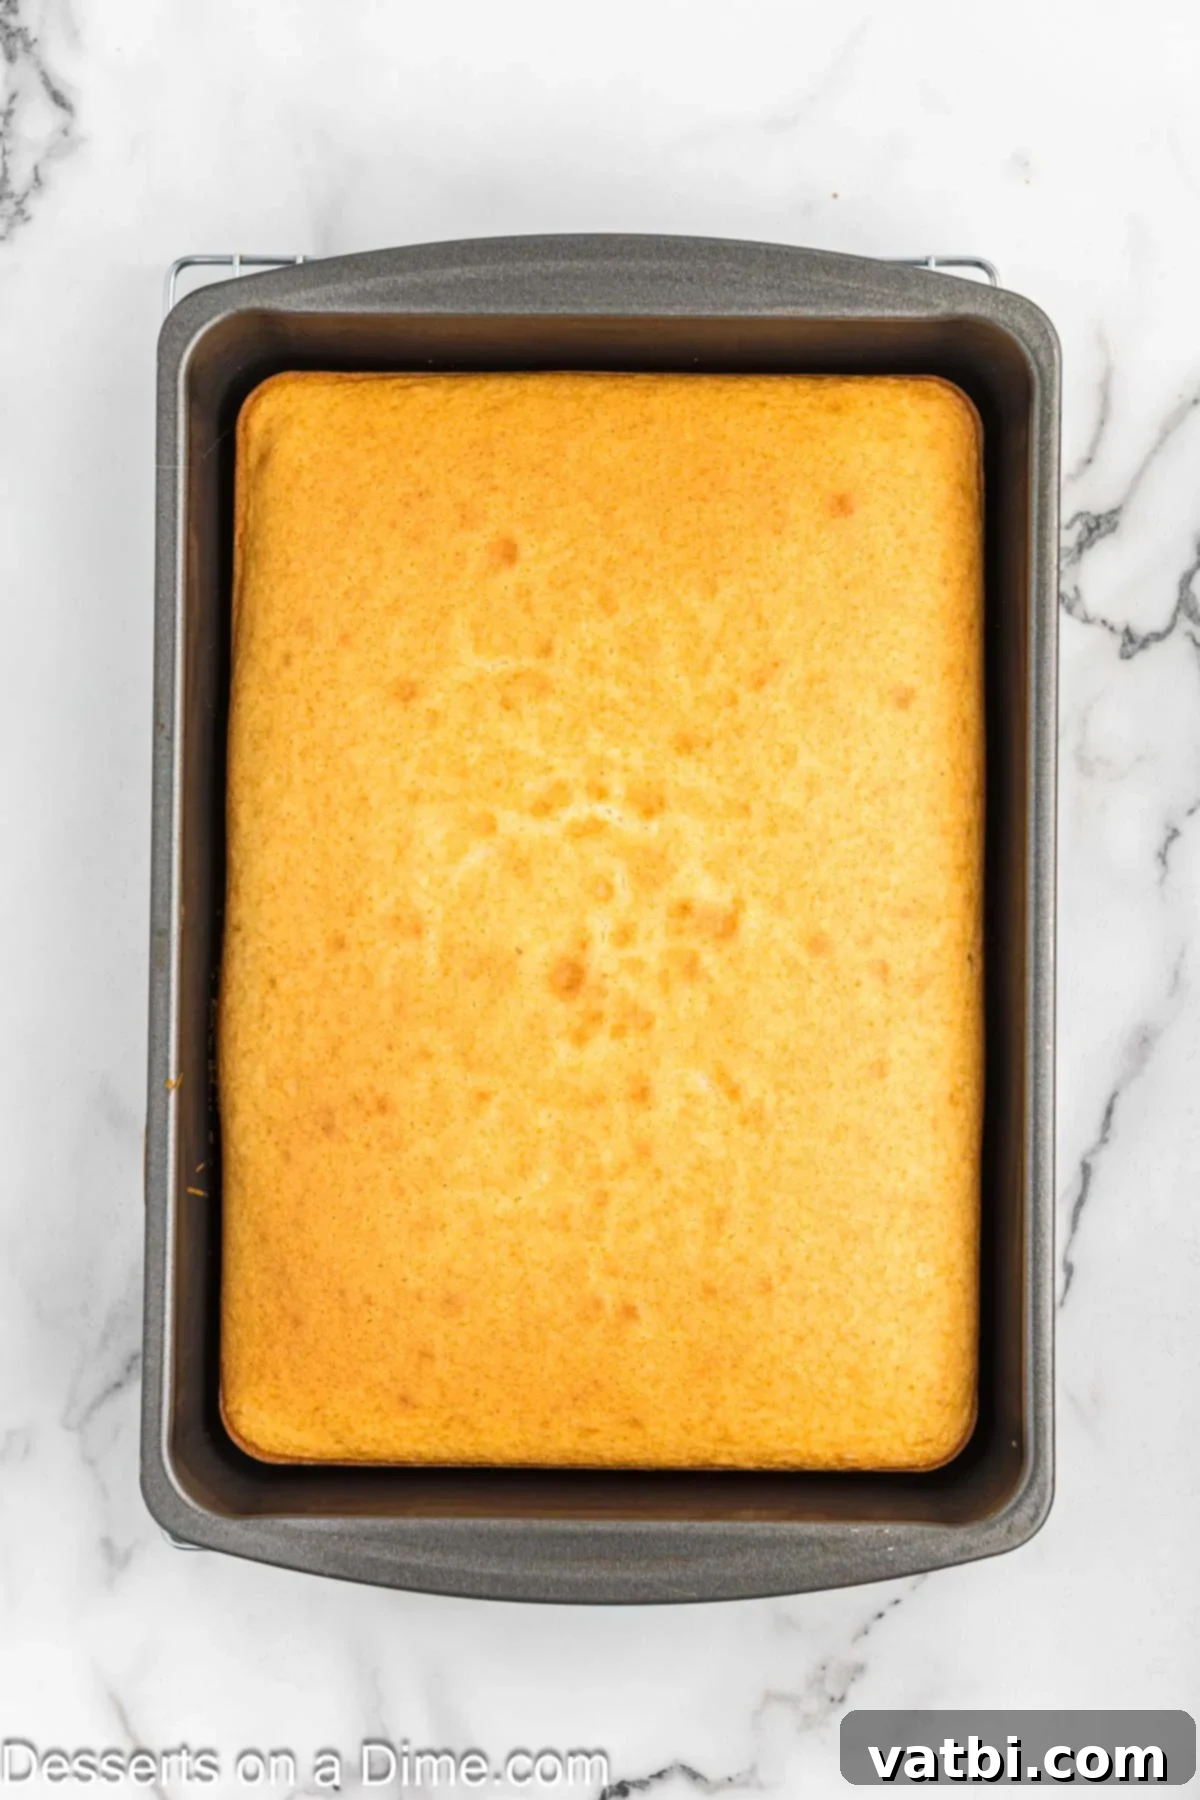
Step 1: Bake Your Cake. Prepare the boxed cake mix according to the package instructions in a 9×13 inch pan. Once baked, allow the cake to cool completely to room temperature. This step is vital; trying to crumble a warm cake will result in a sticky mess.
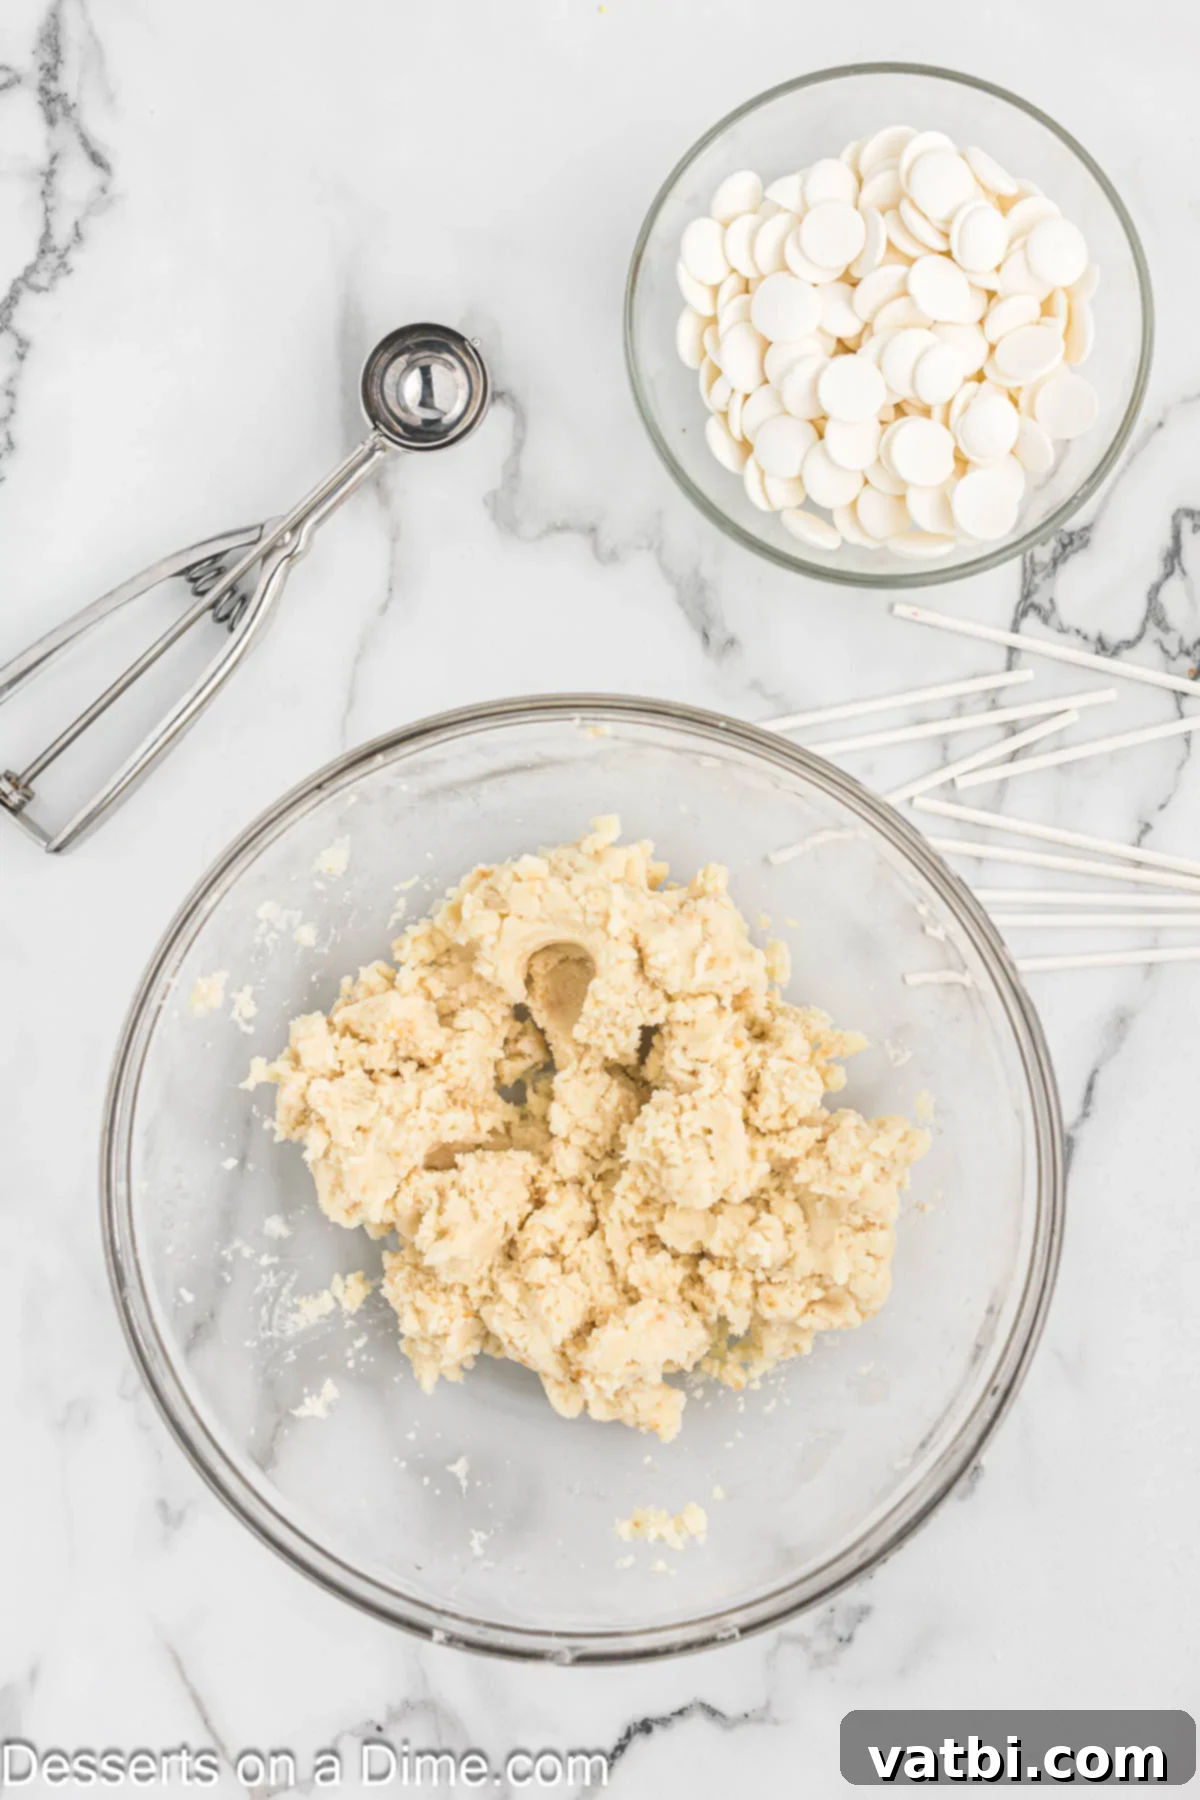
Step 2: Crumble and Combine. Once the cake is fully cooled, crumble it into a large mixing bowl. It’s important to remove all of the browned, crusty outside layers of the cake as these can affect the texture and appearance of your cake pops. Add the vanilla frosting to the crumbled cake and mix until thoroughly combined. The mixture should be moist enough to hold its shape when rolled.
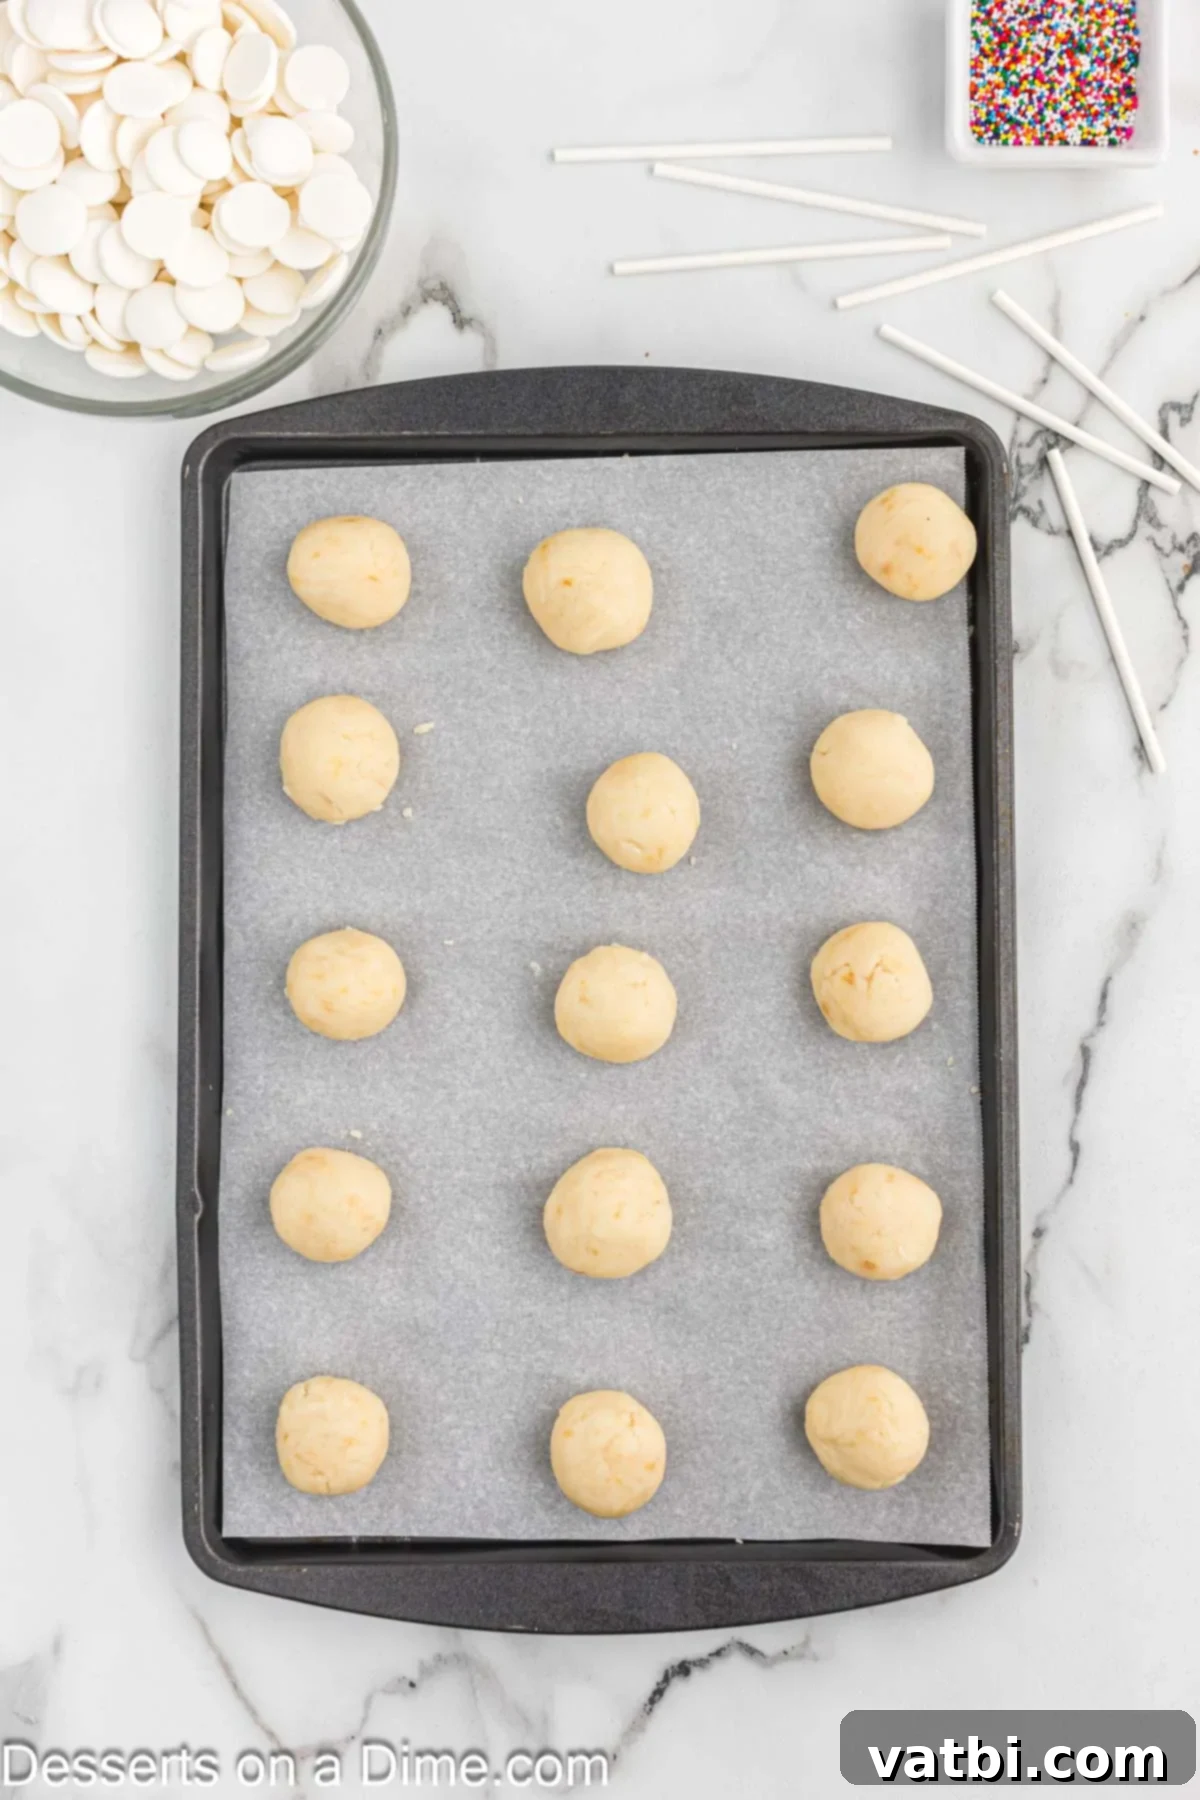
Step 3: Form the Cake Balls. Using a cookie scoop (approximately 1.5 tablespoons for uniform size), roll the cake mixture into smooth, compact cake balls. Place these balls on a baking sheet lined with parchment paper or wax paper. Uniform size ensures even chilling and dipping.
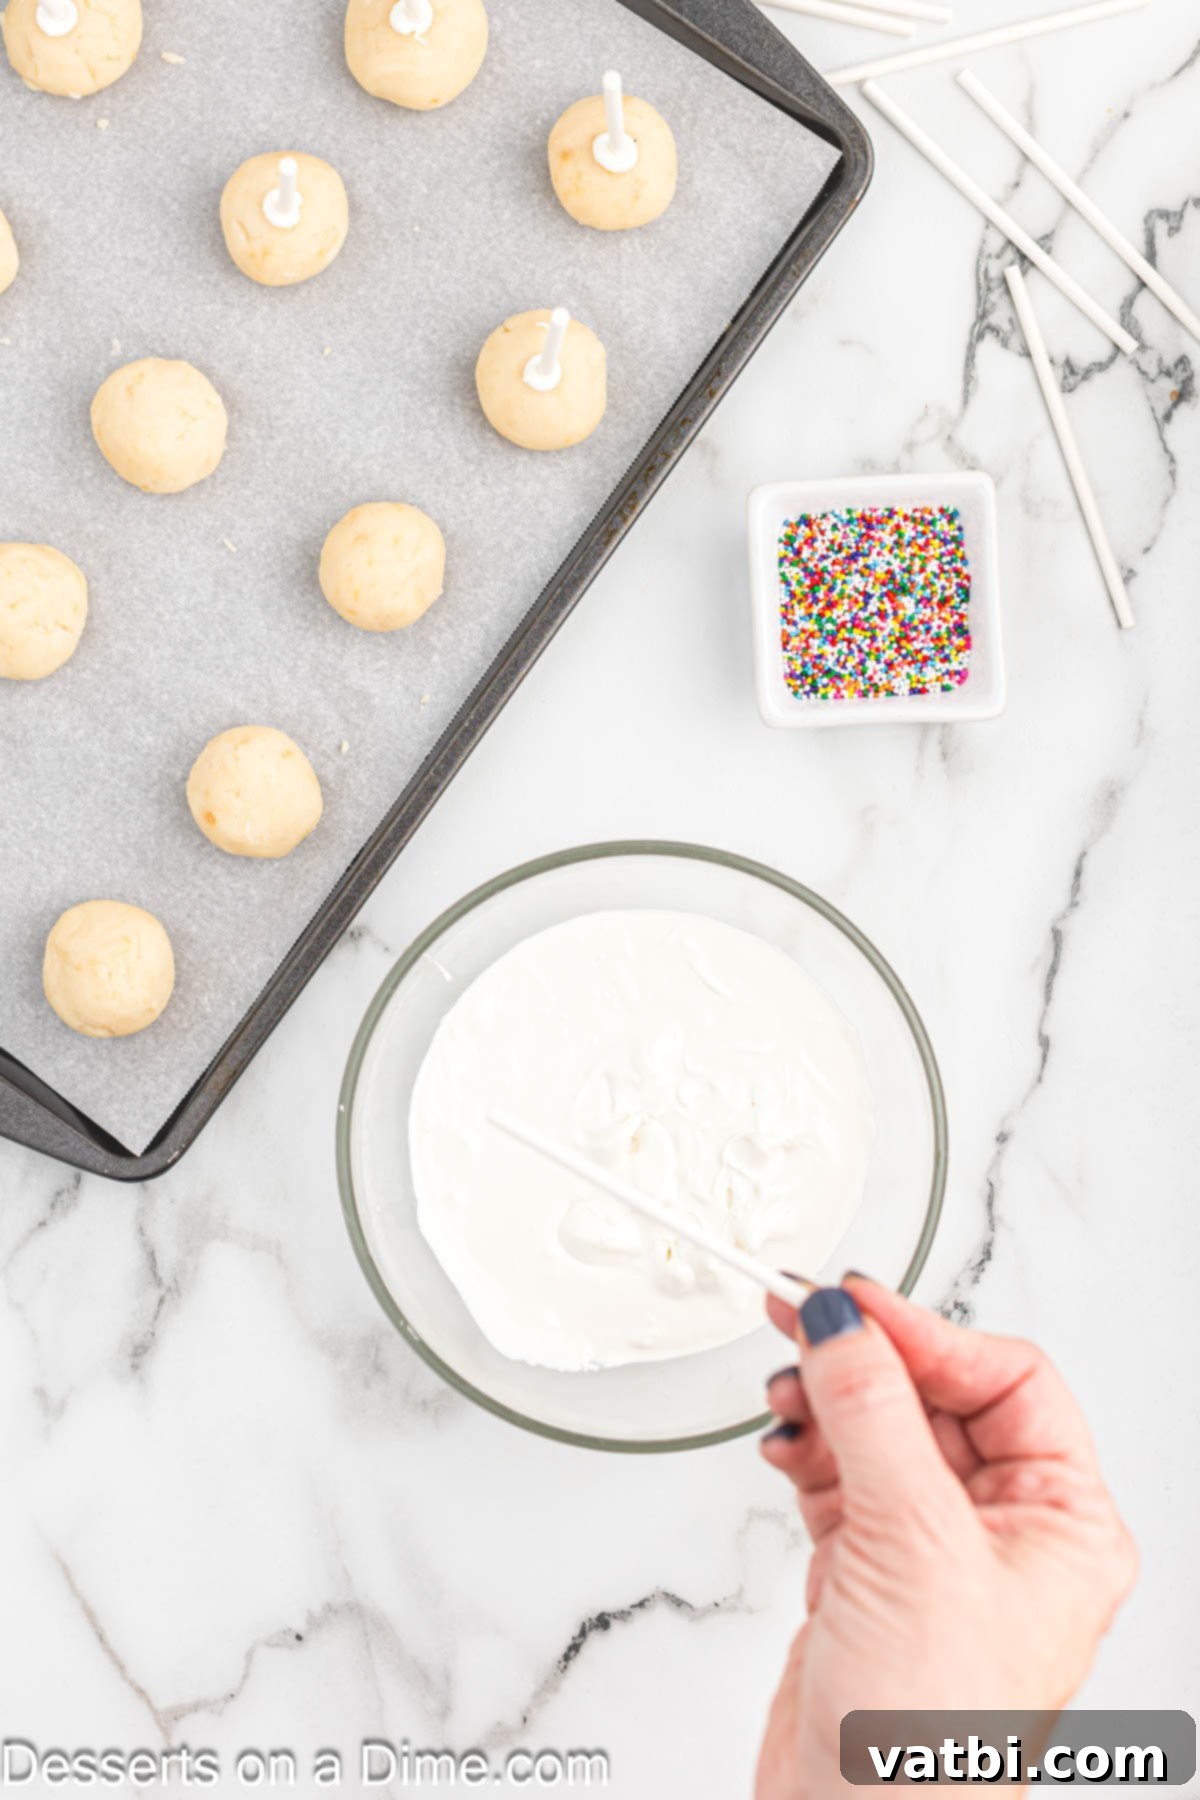
Step 4: Prepare Sticks. In a microwave-safe bowl, melt your candy melts in 30-second increments, stirring well after each interval, until completely smooth. Dip the tip of each lollipop stick into the melted candy, then insert the stick about halfway into a cake ball. This candy acts as “glue” to secure the stick. Return them to the lined baking sheet.
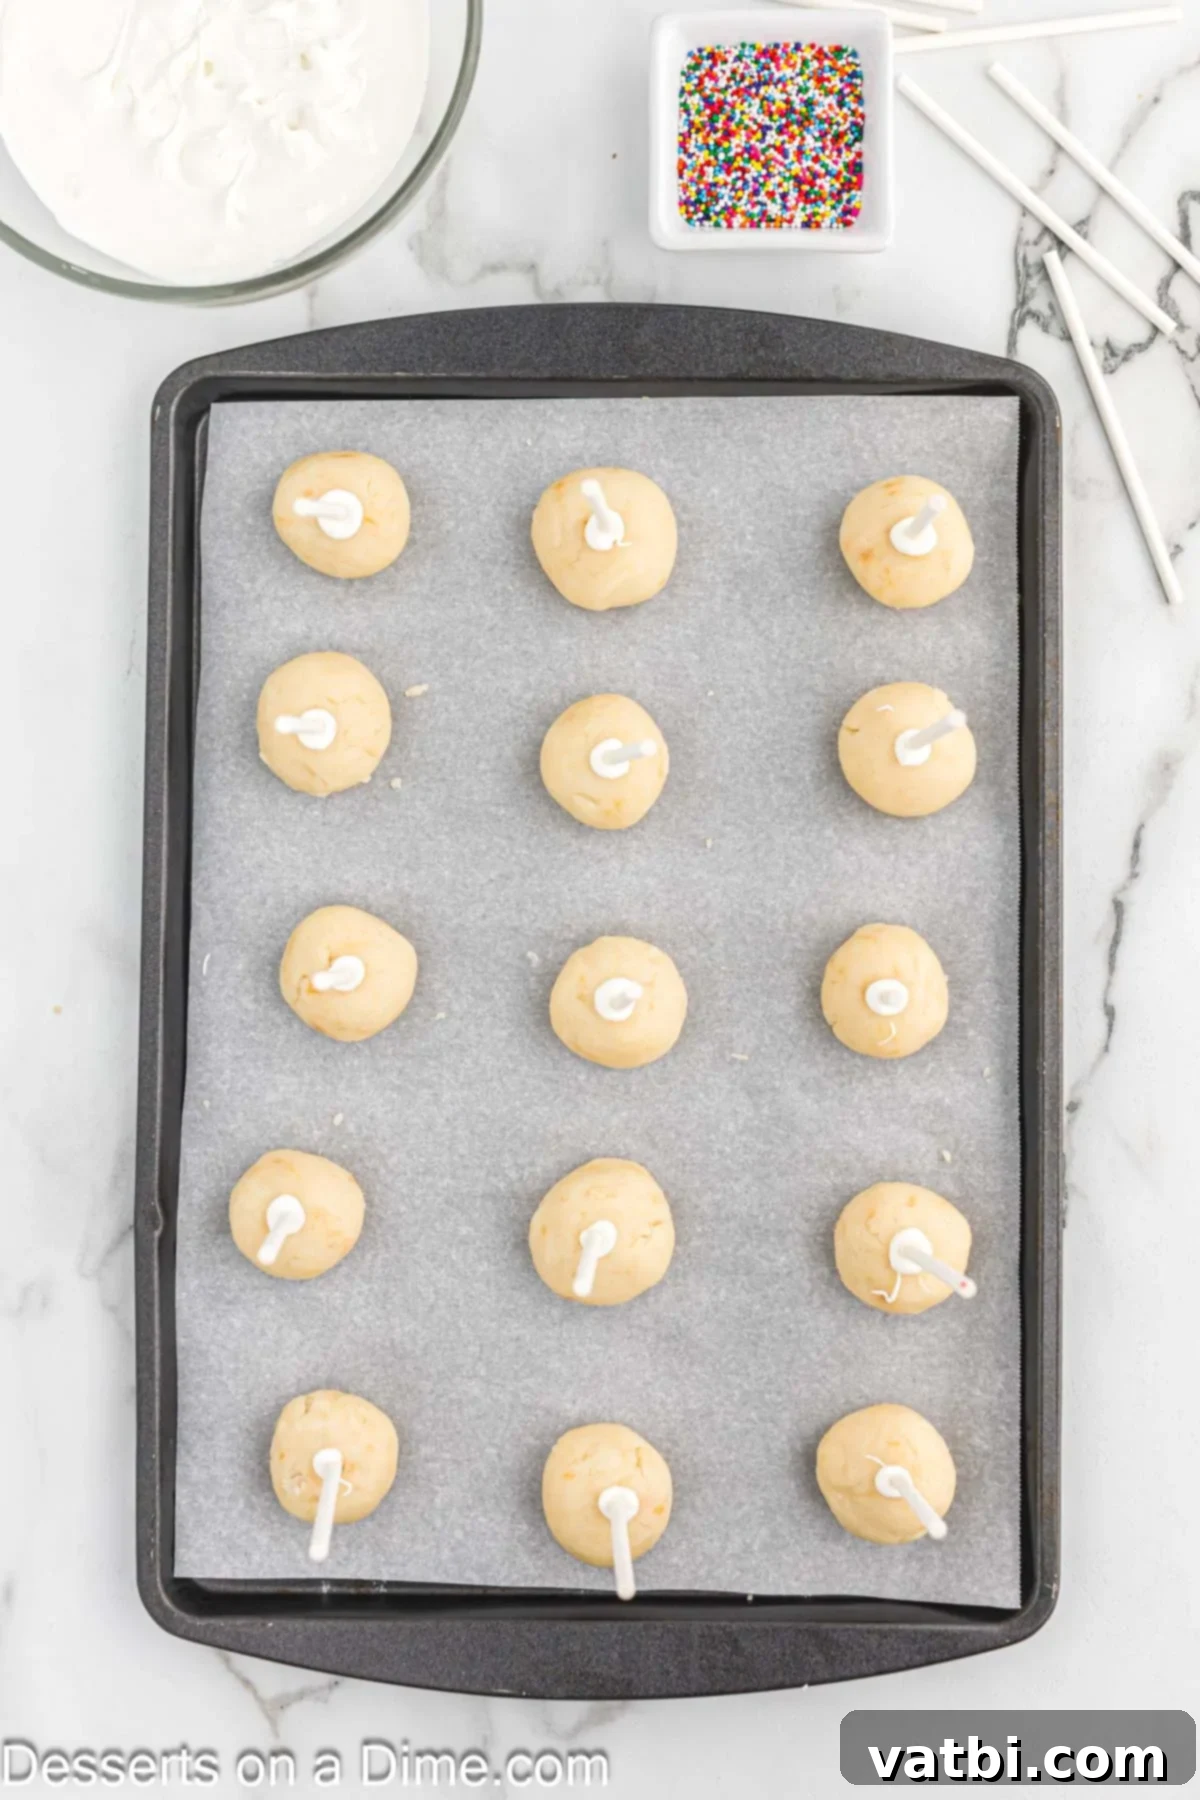
Step 5: Chill for Stability. Place the baking sheet with the cake pops (sticks up) in the freezer for 10 to 15 minutes. This quick chill helps the cake balls firm up and ensures they stay intact during the dipping process. Do not over-freeze, as this can lead to cracking.
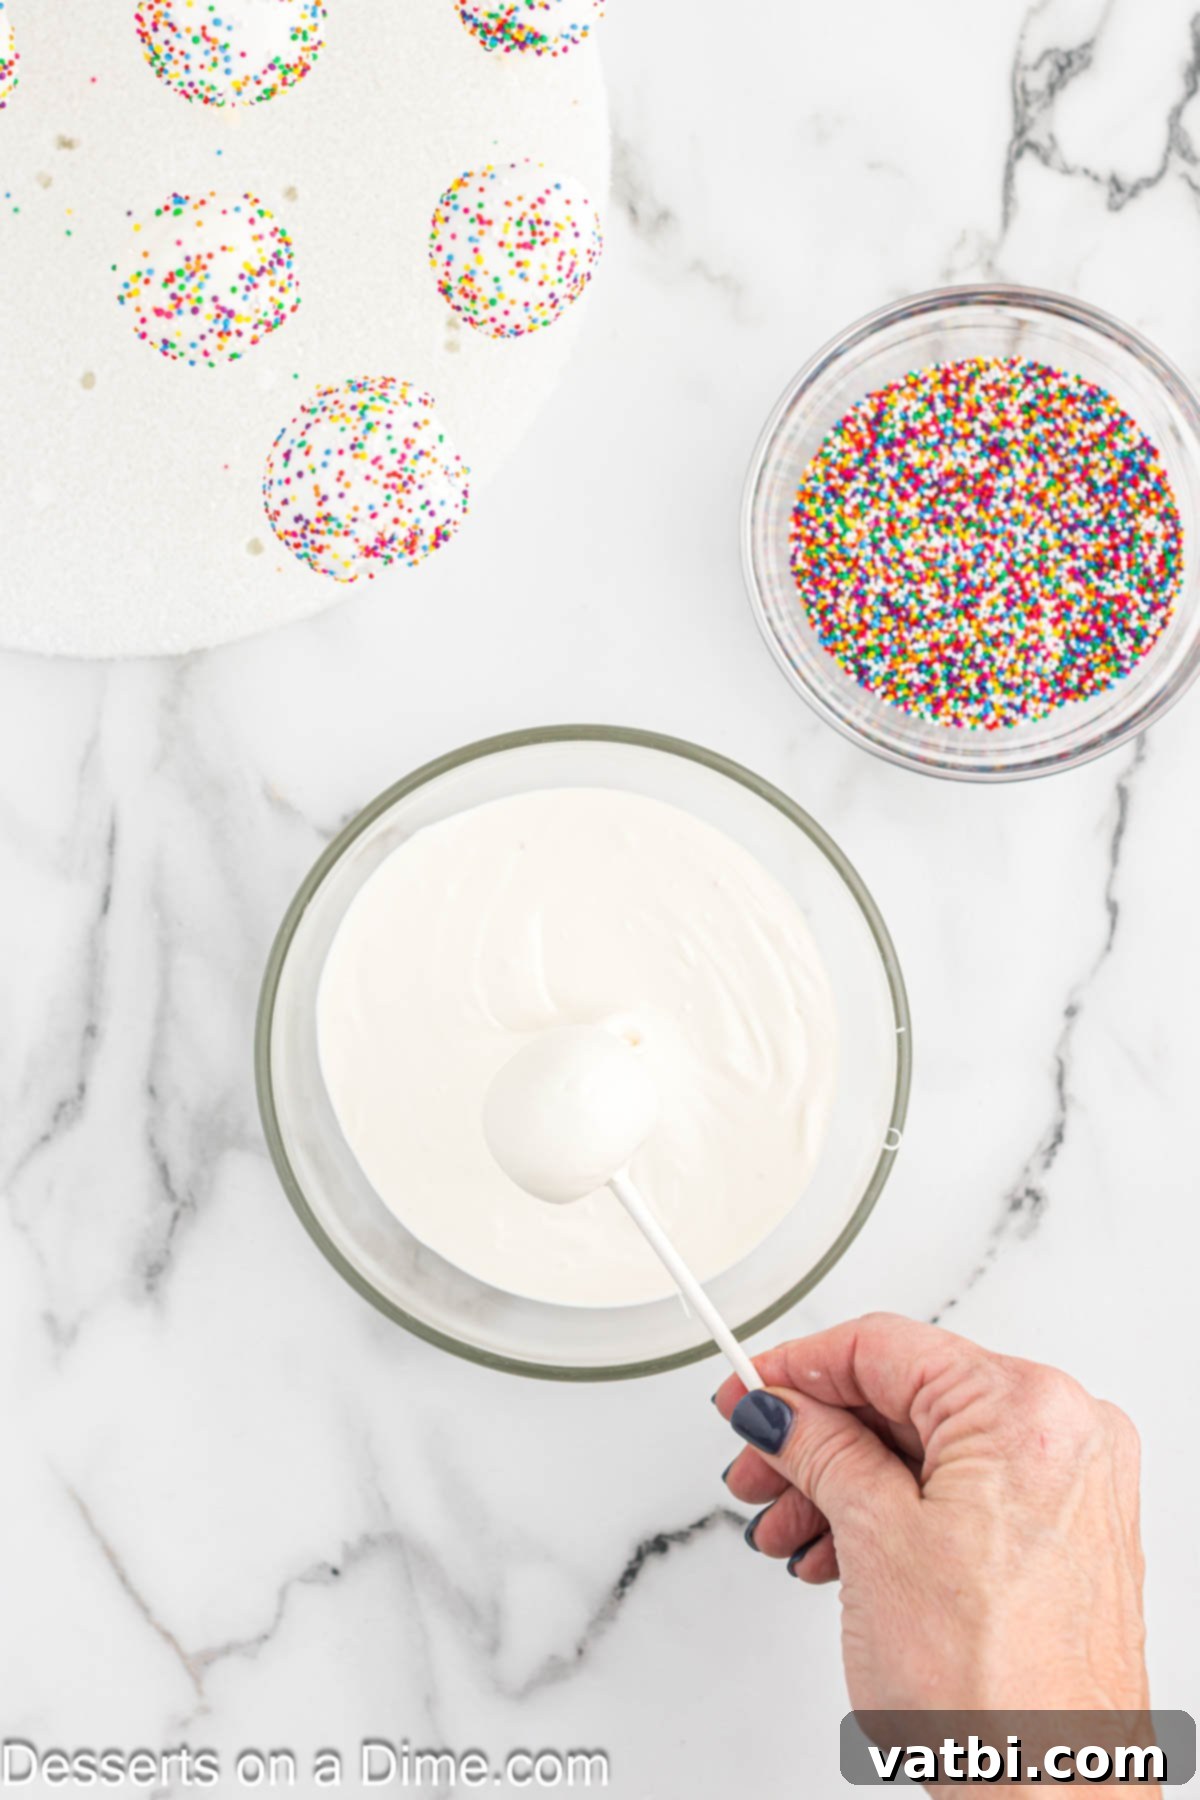
Step 6: Dip and Coat. Remove the cake pops from the freezer. If your candy melts have started to solidify, re-melt them until smooth again. Dip each cake pop into the melted candy, rotating gently to ensure it’s completely covered. Tap off any excess chocolate by gently tapping the stick against the edge of the bowl.
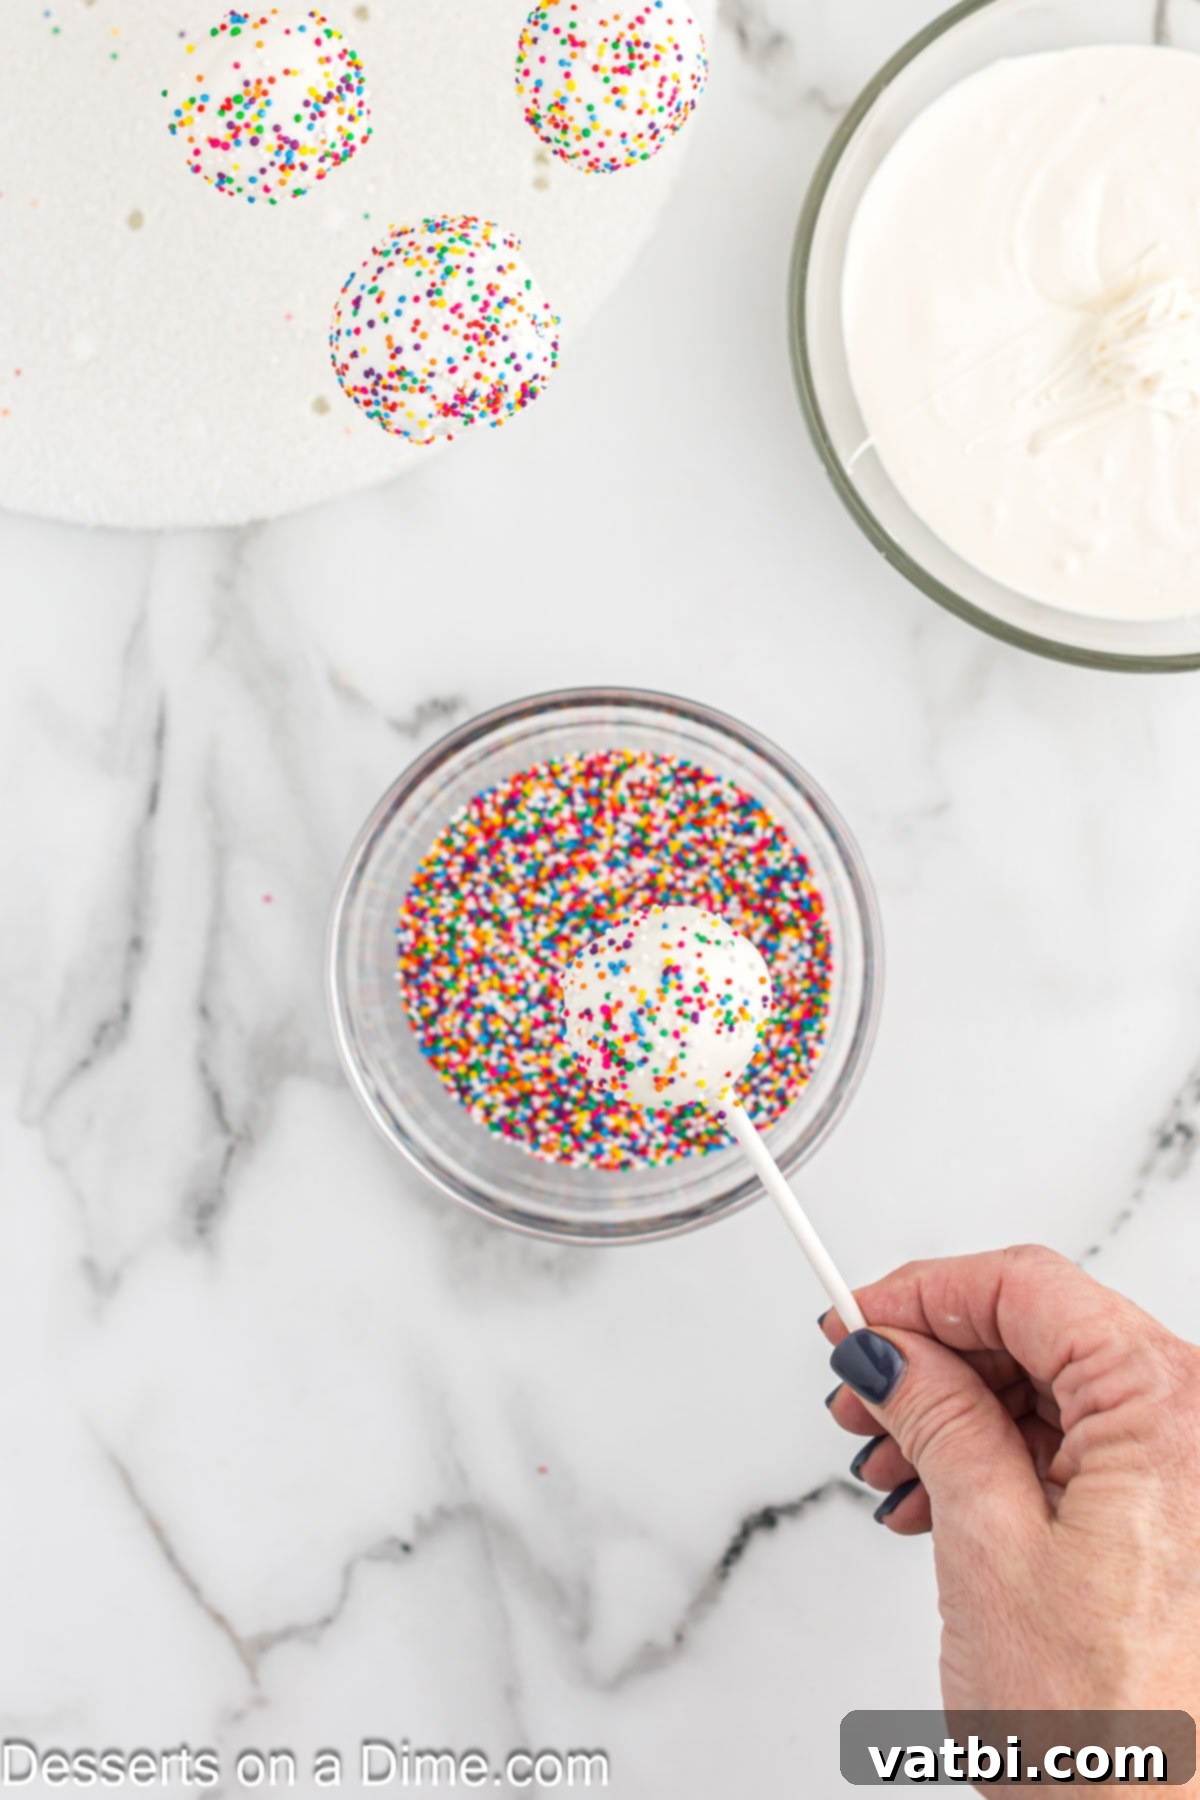
Step 7: Decorate Immediately. While the candy coating is still wet, add your chosen sprinkles. The candy sets quickly, so work efficiently to ensure the sprinkles adhere properly. You can also drizzle contrasting colored candy melts for an artistic touch.
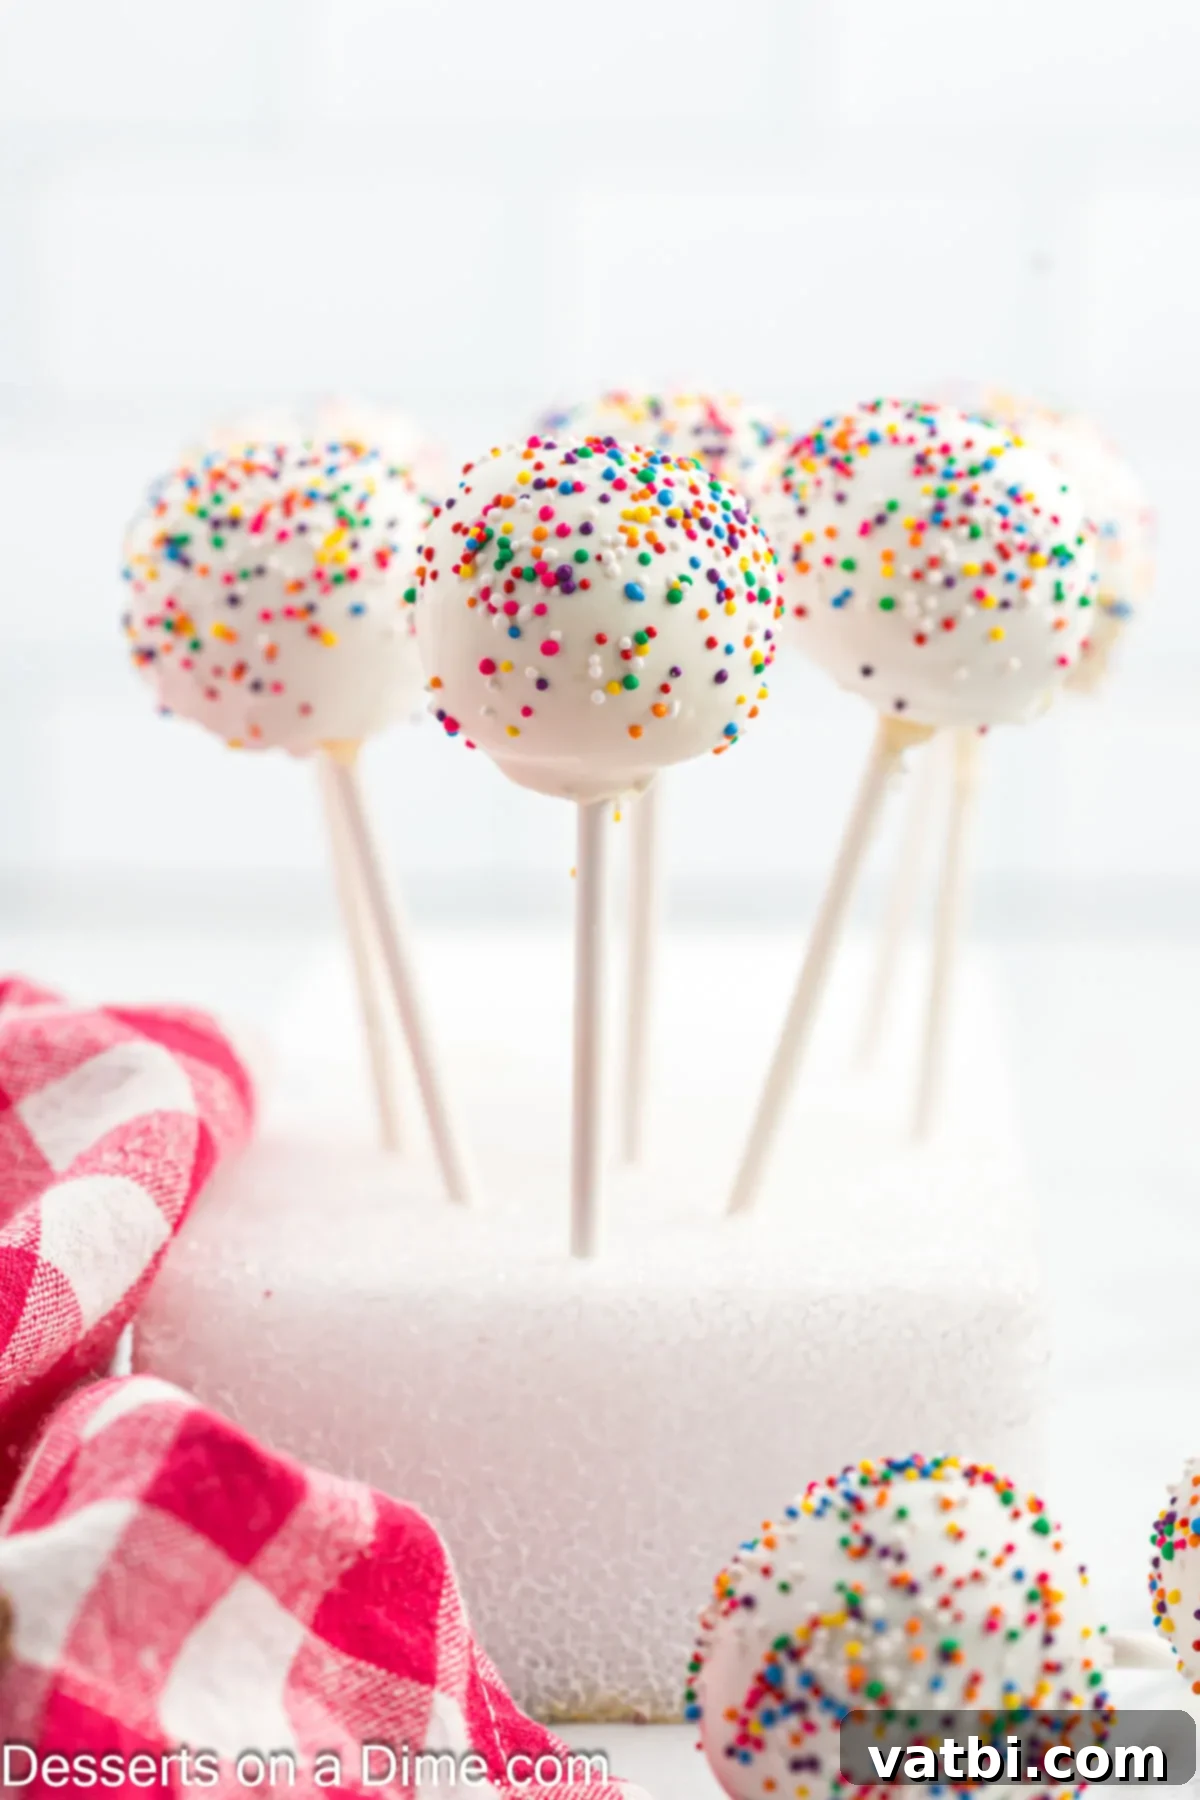
Step 8: Dry and Enjoy. Insert the stick of each coated cake pop into a Styrofoam block (or a tall glass filled with rice) to allow the candy coating to dry and solidify completely. Continue this process until all your delightful treats are finished. Once dry, they are ready to serve and impress!
Pro Tips for Cake Pop Perfection
Achieving bakery-quality cake pops at home is easier than you think with these expert tips and tricks:
- Ensure proper frosting-to-cake ratio. The amount of frosting is critical for the consistency of your cake pop mixture. If there isn’t enough frosting, the cake pops will be too dry and prone to cracking after dipping. If there’s too much, they might be too soft and fall off the stick. Aim for a dough-like consistency that holds its shape.
- Chill, but don’t over-freeze, before dipping. Freezing the cake pops for the recommended 10-15 minutes is crucial for them to stay intact on the stick and prevent crumbling when dipped. However, over-freezing can cause cracks in the candy coating due to the drastic temperature difference. Aim for firm, but not rock-hard.
- Achieve the right consistency for candy melts. If your candy melts are too thick, they won’t coat smoothly. You can thin them out by adding a small amount of vegetable shortening (like Crisco) or paramount crystals. Add a tiny bit at a time and stir until you reach a pourable, smooth consistency.
- Tap and twirl for a smooth coating. After dipping, gently tap the stick against the side of the bowl and slowly twirl the cake pop to allow any excess candy coating to drip off. This helps achieve a smooth, even layer without unsightly drips.
- Use a deep, narrow container for dipping. A deeper, narrower bowl for your melted candy melts allows you to fully submerge the cake pop without needing a huge amount of candy, making the dipping process much easier and cleaner.
- Prevent air bubbles. If you notice small air bubbles after dipping, gently pop them with a toothpick before the candy sets to ensure a perfectly smooth finish.
Frequently Asked Questions About Cake Pops
Here are some common questions about making and storing cake pops, along with helpful answers to ensure your success:
To keep your cake pops fresh, refrigerate any leftovers in an airtight container. They will stay delicious for up to 1 week. For best texture, allow them to come to room temperature for about 15-20 minutes before serving.
Absolutely! If you prefer not to use sticks, simply skip that step and make delightful cake balls. They are equally delicious and perfect for a sweet platter or as a bite-sized dessert, offering the same great flavor in a different presentation.
Cracking is a common issue often caused by a significant temperature difference between the cold cake balls and the warm melted chocolate or candy coating. It’s crucial not to freeze the cake balls for too long – 10 to 15 minutes is usually sufficient to firm them up without making them excessively cold. Also, ensure your melted candy isn’t too hot, as extreme heat can also cause cracks.
Yes, it’s very easy to freeze cake pops! Make sure they are completely dry and the candy coating has fully set before freezing. Place them in a single layer in a freezer-safe airtight container, or layer them with parchment paper in between. They can be frozen for up to 5 to 6 weeks. When you’re ready to serve, thaw them at room temperature until softened.
For easy transportation, you can use a cake pop stand, a Styrofoam block, or even poke holes in an empty shoebox lid to keep them upright. If they need to stay cool, a cooler with ice packs (ensuring they don’t directly touch the pops) can help, especially in warm weather.
Any standard boxed cake mix works well. White, yellow, chocolate, red velvet, or even strawberry cake mixes are popular choices. The key is to follow the package instructions for baking the cake, then allow it to cool completely before crumbling.
More Delicious Cake Pop Recipes to Try
If you’ve fallen in love with making cake pops, here are a few more fantastic recipes to inspire your next baking adventure:
- Copycat Starbucks Cake Pops Recipe
- Red Velvet Cake Pops Recipe
- Birthday Cake Pops Recipe
Don’t wait to try your hand at these fun and utterly delicious cake pops! They’re perfect for any gathering, simple to make, and guaranteed to be a crowd-pleaser. Once you’ve made them, please come back and leave a comment with your star rating – we’d love to hear how your homemade cake pops turned out!
Pin
Classic Easy Cake Pops
Ingredients
- 1 box Classic White Cake Mix
- 1 cup Water
- ½ cup Vegetable Oil
- 3 Large Eggs
- ½ cup Vanilla Frosting pre-made or homemade
- 24 Lollipop Sticks
- 12 ounces Candy Melts
- Multi-Colored Sprinkles
Instructions
-
Preheat your oven to 350 degrees Fahrenheit (175°C) and lightly spray a 9×13 inch baking pan with non-stick cooking spray, ensuring it’s evenly coated.
-
In a large mixing bowl, combine the classic white cake mix with water, vegetable oil, and eggs. Stir well until the batter is smooth and all ingredients are fully incorporated.
-
Pour the prepared cake batter into the greased 9×13 inch pan. Bake according to the specific instructions provided on your cake mix package. Baking times may vary, so keep an eye on it!
-
Once baked, remove the cake from the oven and allow it to cool completely at room temperature. This step is crucial for the perfect cake pop texture.
-
Carefully remove the cooled cake from the pan. Using your hands, gently remove and discard all the slightly browned, crusty outside layers of the cake. You want only the soft, moist interior.
-
Crumble the remaining soft cake into fine crumbs in a large mixing bowl. Add the vanilla frosting to the crumbled cake. Mix thoroughly, either with a sturdy spoon or clean hands, until everything is well combined and forms a dough-like consistency that can be easily rolled.
-
Using a cookie scoop (approximately 1.5 tablespoons), form the cake mixture into 24 uniform cake balls. Place these perfectly round balls onto a baking sheet lined with parchment paper or wax paper.
-
Place the candy melts in a small, microwave-safe bowl. Microwave for 30 seconds, then stir. Continue heating in 30-second intervals, stirring between each, until the candy melts are fully melted and smooth. If too thick, add a tiny bit of vegetable shortening to thin.
-
Dip one end of each lollipop stick into the melted candy, then gently insert it about halfway into a cake ball. This “glue” helps secure the ball to the stick. Place the cake pops (sticks up) back on the lined baking sheet and freeze for 10-15 minutes to firm them up. Do not over-freeze!
-
Remove the chilled cake pops from the freezer. If needed, re-melt your candy. Dip each cake pop into the melted candy melts, ensuring it’s completely covered. Gently tap the stick against the edge of the bowl to remove any excess coating, allowing it to drip back into the bowl.
-
Immediately after dipping, add your chosen multi-colored sprinkles before the candy coating dries. For drying, insert the stick of each cake pop into a Styrofoam block or a tall glass filled with rice to keep them upright until the candy dries and solidifies completely.
-
Continue coating and decorating until all the cake pops are finished. Once the candy coating on all cake pops is completely dry and firm, they are ready to serve and enjoy!
Nutrition Facts
Pin This Now to Remember It Later
Pin Recipe
