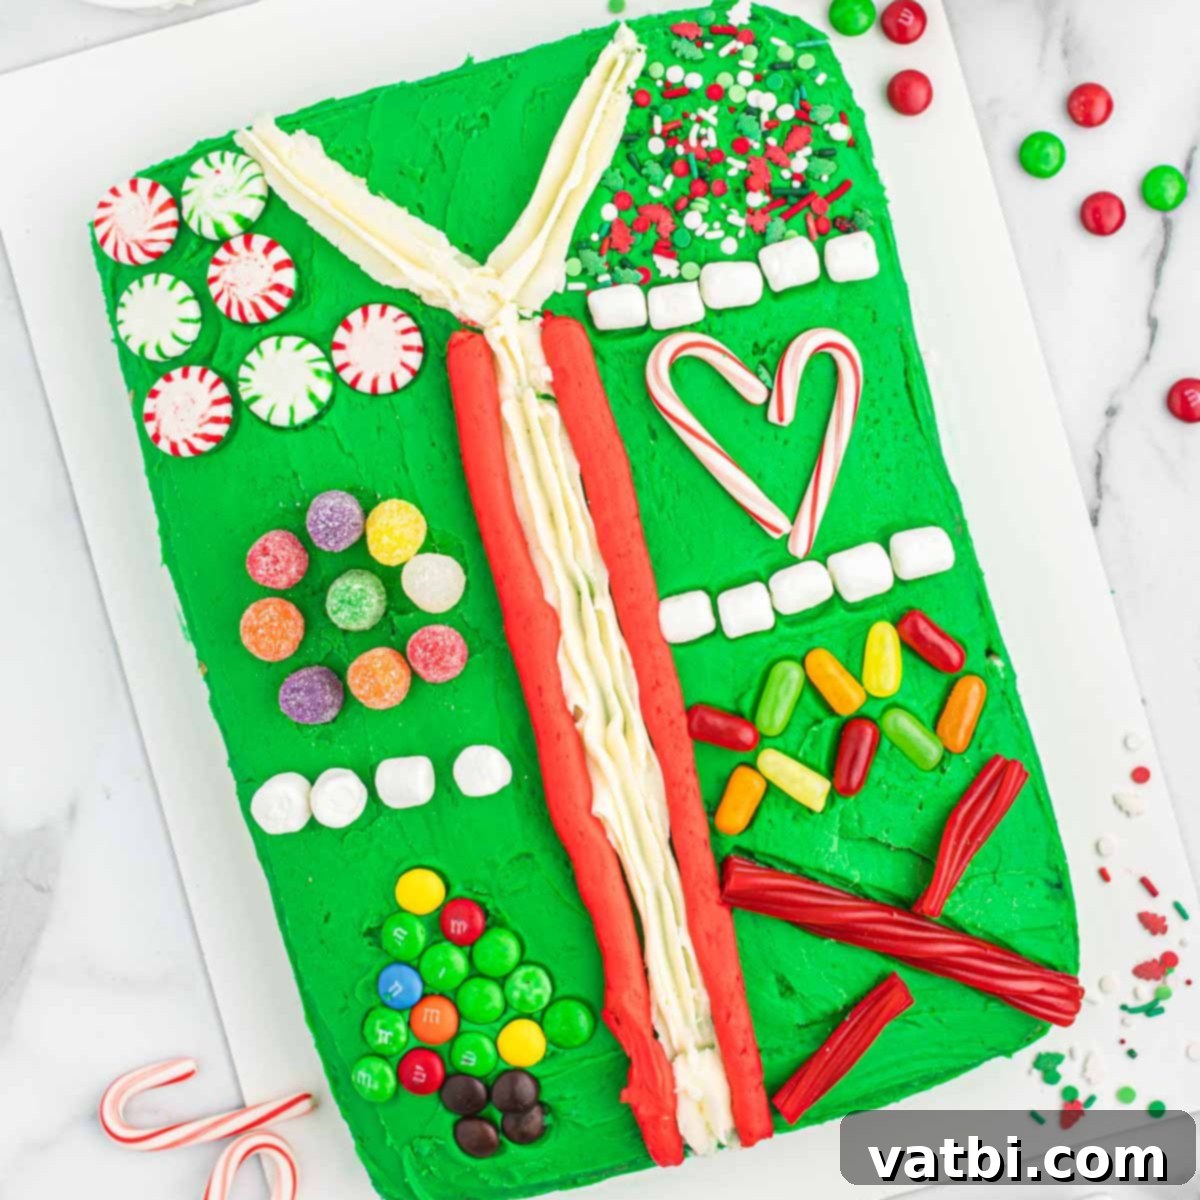
Festive & Fun Ugly Christmas Sweater Cake: Your Easy Guide to a Memorable Holiday Dessert
This Ugly Sweater Cake is more than just a dessert; it’s a vibrant, whimsical, and utterly delightful celebration of holiday spirit. Inspired by the charmingly tacky Christmas sweaters that have become a beloved part of festive traditions, this cake transforms a simple baked good into a canvas for your wildest, most colorful holiday fantasies. Imagine a moist, tender cake adorned with a riot of colorful frosting, playful sprinkles, and an assortment of candies, all meticulously arranged to mimic the eccentric charm of a classic “ugly” Christmas sweater. It’s a guaranteed showstopper and a fantastic centerpiece for any holiday gathering, sure to spark joy and conversation among guests. Whether you’re hosting an ugly sweater party, participating in a cookie exchange, or simply looking for a fun family baking project, this cake offers a creative and easy way to dive headfirst into the joyous chaos of the holiday season.
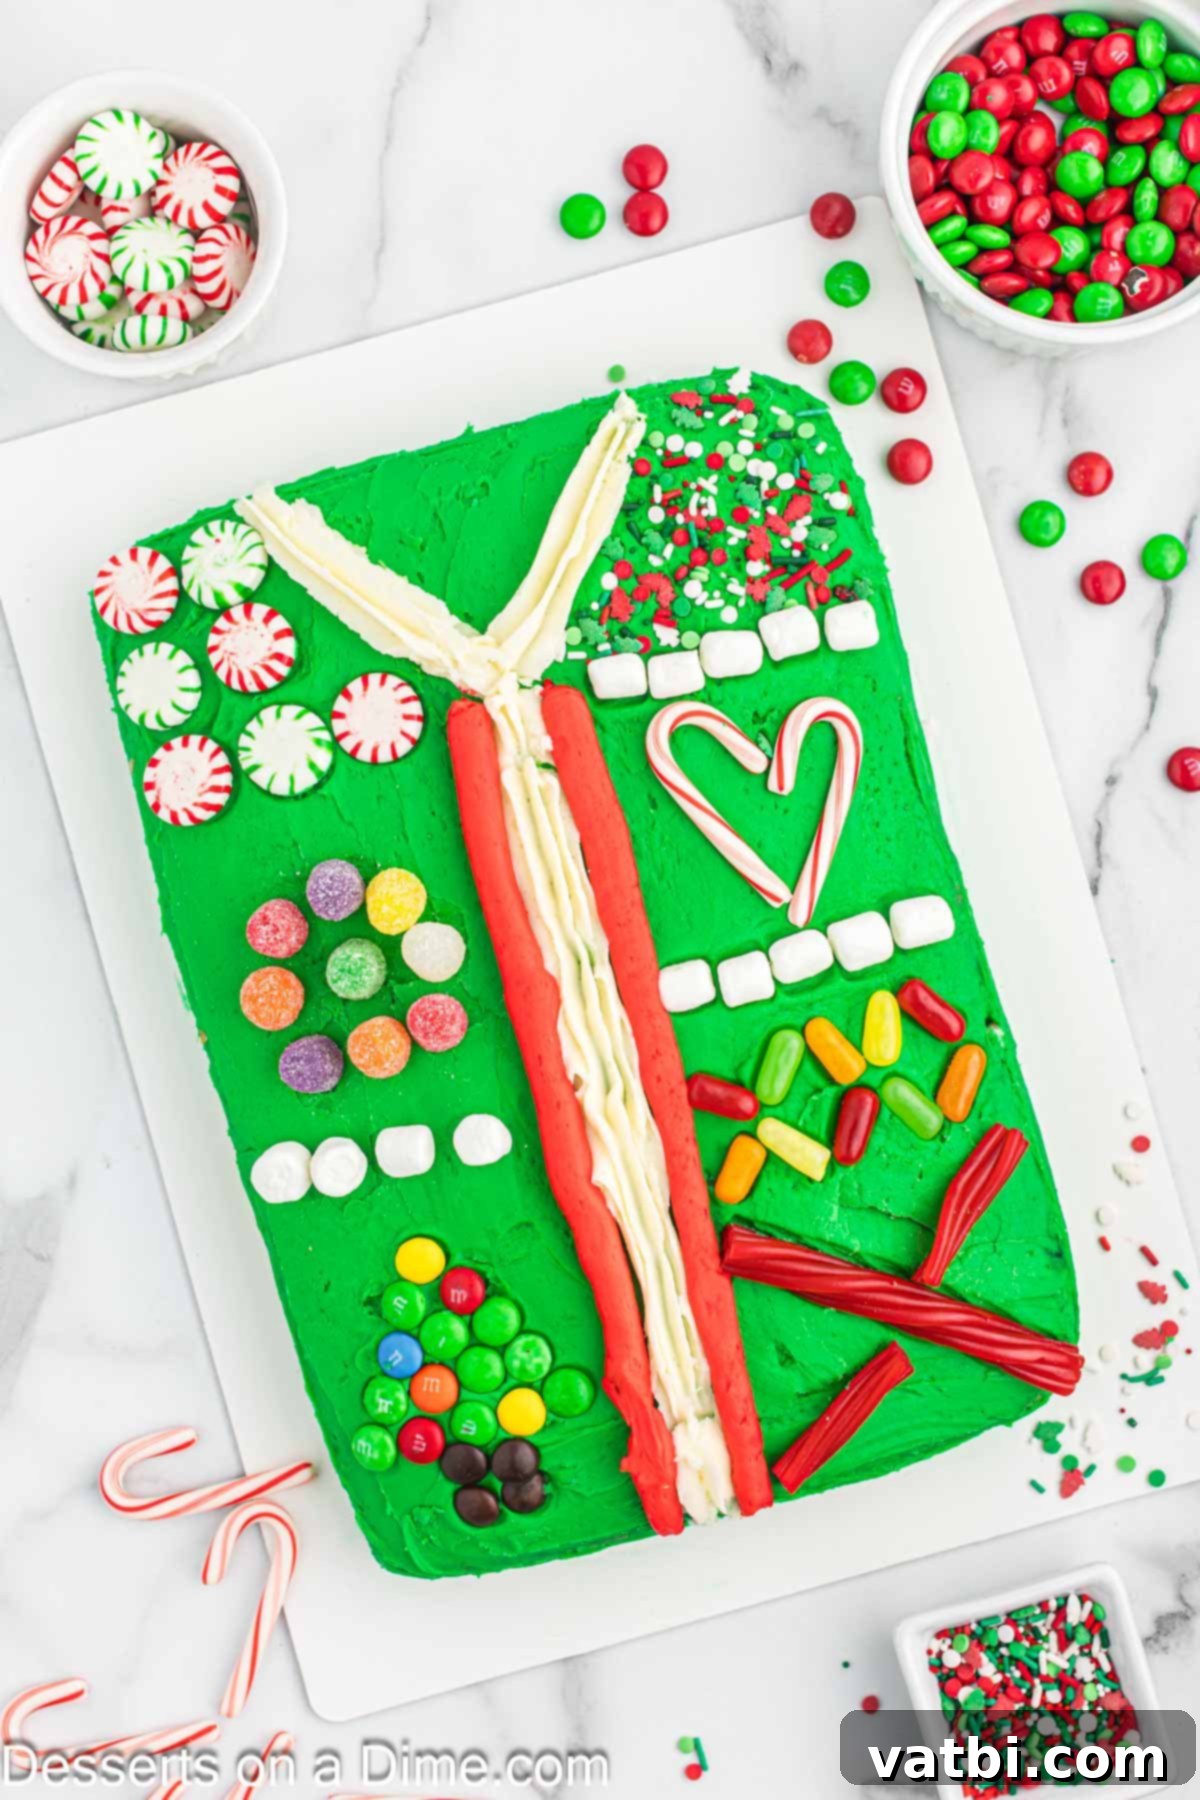
The concept of an Ugly Sweater Cake perfectly encapsulates the playful and lighthearted side of Christmas. It’s an opportunity to embrace imperfection and creativity, turning a traditionally elegant dessert into something wonderfully eccentric. This cake isn’t about culinary perfection, but rather about the joy of expression and the warmth of holiday traditions. From bold stripes and polka dots to miniature candy canes and gumdrop “lights,” the possibilities for decoration are endless. Each cake becomes a unique piece of edible art, reflecting the personality and festive spirit of its creator. It’s a fantastic way to engage both kids and adults in the kitchen, fostering memorable moments and delicious results that everyone will love to admire before digging in. The simplicity of using a boxed cake mix means even novice bakers can achieve impressive results, making it accessible to all who want to add a touch of whimsy to their holiday table.
If you’re looking for other simple yet festive holiday desserts, be sure to explore options like this Christmas Jello Poke Cake for another easy-to-make, crowd-pleasing treat that brings vibrant colors to your celebrations.
What’s in this post: Ugly Sweater Cake
- Why We Love This Ugly Sweater Cake
- Ingredients for Your Festive Cake
- Substitutions and Additions: Creative Cake Ideas
- Step By Step Instructions: Decorating Your Ugly Sweater Cake
- Pro Tips for a Perfect Ugly Sweater Cake
- Storage Tips for Your Ugly Sweater Cake
- More Cute Christmas Desserts to Try
- Ugly Sweater Cake Recipe
Why We Love This Ugly Sweater Cake
There are countless reasons why the Ugly Sweater Cake has become a holiday favorite. It effortlessly combines the joy of baking with the whimsical spirit of Christmas, creating a dessert that is as delightful to make as it is to eat. Here’s a closer look at what makes this festive treat so special and why it’s a must-try for your holiday season:
- Festive and Fun for the Holidays: This cake perfectly captures the quirky charm and lightheartedness of classic holiday sweaters in an entirely edible form. It’s designed to be bold, colorful, and a little over-the-top, just like its fabric inspiration. The vibrant colors and eclectic mix of decorations truly bring the festive atmosphere to life, making it a focal point of any holiday table. It embodies the joyful, slightly chaotic essence of Christmas celebrations.
- A Show-Stopping Centerpiece for Parties: Beyond its delicious taste, the Ugly Sweater Cake serves as an incredible conversation starter. Its unique and playful design naturally draws attention and encourages guests to share their own “ugly sweater” stories or decorating ideas. It’s the ideal centerpiece for a holiday party, a potluck, a school event, or even a casual family dinner, adding an element of interactive fun and visual delight that traditional desserts often lack.
- A Creative Activity for All Ages: Decorating this cake isn’t just a task; it’s a creative outlet and a bonding experience. It’s a hands-on project that can be enjoyed by children and adults alike, fostering teamwork, imagination, and individual artistic expression. Gather your family and friends, lay out an array of candies and sprinkles, and let everyone contribute to creating a truly unique and “ugly-beautiful” masterpiece. It’s a wonderful way to make lasting holiday memories and encourage culinary creativity.
- Infinitely Customizable Designs: One of the best aspects of the Ugly Sweater Cake is its incredible versatility. There are no strict rules for decoration, allowing you to go as wild and extravagant or as simple and elegant as you desire. You can add an abundance of different candies, an explosion of colorful sprinkles, intricate piped patterns, or even edible glitter. Each cake is a blank canvas, inviting endless possibilities for personalization and festive flair that truly makes it your own.
- Remarkably Easy to Make: Despite its impressive and elaborate appearance, this cake is surprisingly simple to put together. You have the flexibility to use a convenient boxed cake mix for the base, saving valuable time and effort without compromising on taste or texture. Alternatively, if you prefer, a homemade cake recipe works just as well. The primary focus is on the fun and creative decoration, making it an accessible and enjoyable project for bakers of all skill levels, from beginners to seasoned pros.
Ingredients for Your Festive Cake
Crafting the perfect Ugly Sweater Cake requires a few simple components for both the cake base and the vibrant buttercream frosting, along with a dazzling array of decorations. Most of these ingredients are readily available at your local grocery store, making this a convenient holiday baking project that you can pull together with ease.
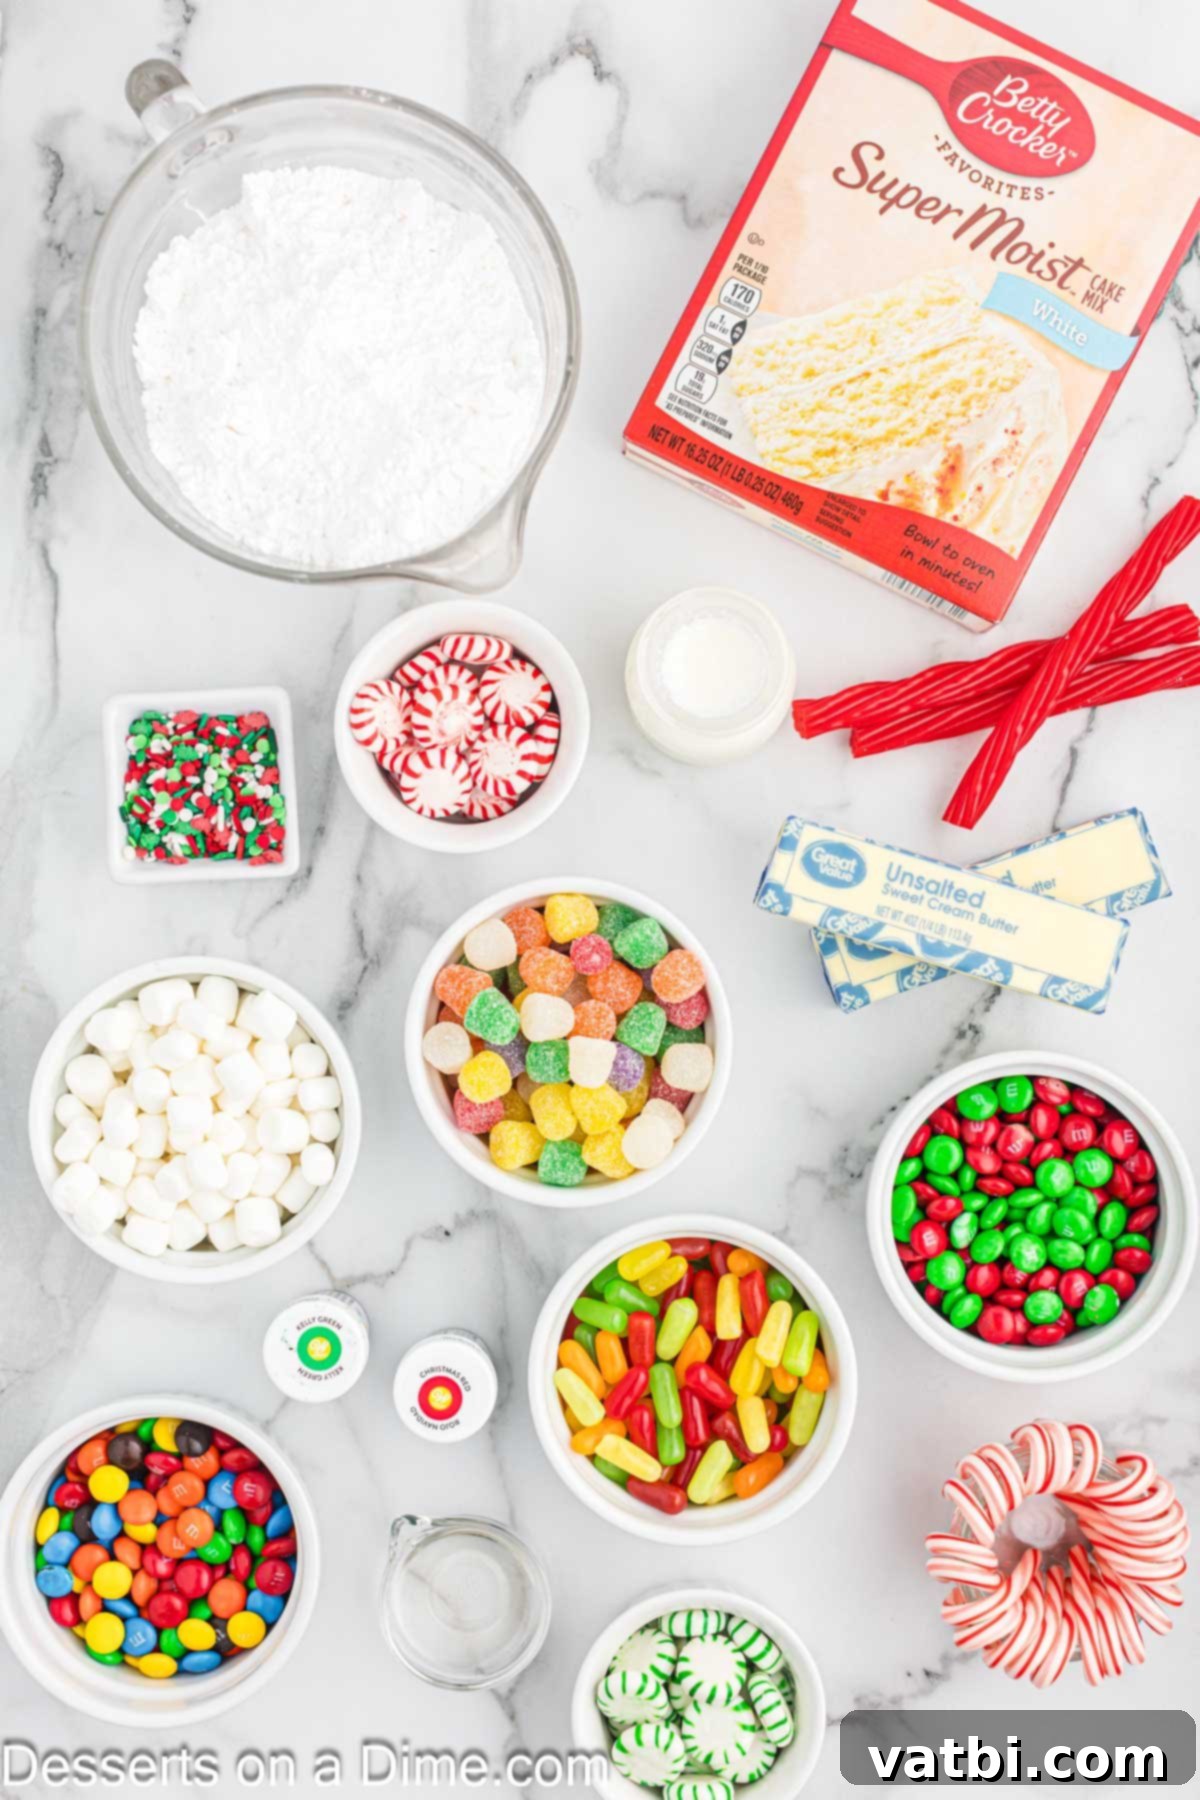
Cake Base
- Boxed white cake mix: This is a straightforward and reliable choice for your cake base. It bakes up consistently light and fluffy, providing a neutral canvas that allows your colorful frosting and elaborate decorations to truly pop. Using a quality boxed mix significantly reduces prep time and ensures a consistent result, letting you focus more on the fun decorating stage. Remember to also have on hand the additional ingredients required by your specific cake mix package instructions (usually eggs, water, and vegetable oil).
Delicious Buttercream Frosting
Our homemade buttercream is the key to achieving that smooth, creamy base and vibrant colors needed for your ugly sweater design. It’s surprisingly easy to make and tastes far better than store-bought options.
- Unsalted butter (room temperature): This is crucial for a smooth, airy buttercream. Ensure your butter is softened to true room temperature (soft enough to indent with a finger but not melted) for optimal creaming and a lump-free, emulsified consistency. It provides the rich flavor and smooth structure for the frosting.
- Powdered sugar: Also known as confectioners’ sugar, this finely milled sugar dissolves easily into the butter, creating a silky-smooth buttercream texture without any grittiness. You’ll need a substantial amount to achieve the right consistency and sweetness, so make sure to sift it if it’s clumpy.
- Clear vanilla extract: While regular vanilla extract adds wonderful flavor, clear vanilla extract is highly recommended if you want to maintain pure, bright white frosting (for snow or other light-colored elements) or ensure your colored frostings aren’t dulled by the slight amber tint of regular vanilla. It adds a lovely, classic aromatic flavor.
- Heavy Cream: This essential ingredient helps achieve the perfect fluffy, creamy, and spreadable consistency for your buttercream. Add it gradually, tablespoon by tablespoon, to reach your desired texture. It also adds richness to the frosting.
- Red food coloring (gel recommended): Gel food colorings are highly concentrated and produce vivid, rich colors with only a small amount, without adding too much liquid to your frosting, which can alter its consistency. This is essential for achieving those bold, classic Christmas red accents.
- Green food coloring (gel recommended): Just like the red, a good quality gel green food coloring will give you that iconic, deep holiday green for the main “sweater” body or additional decorative elements without watering down your frosting.
“Ugly Sweater” Candies & Sprinkles
This is where the real fun begins and your creativity can run wild! Gather an assortment of colorful candies and sprinkles to create your unique, wonderfully “ugly” sweater design. Don’t be afraid to mix and match textures, shapes, and colors!
- Small peppermint candies: These are perfect for creating festive “buttons,” forming decorative borders around sections, or even crushing into a coarse sprinkle-like topping for a minty crunch. Their distinct red and white swirl adds an instant holiday feel and flavor.
- M&Ms: These classic colorful chocolate candies add vibrant pops of color and a delightful, satisfying crunch. Use them to create intricate patterns, outline sections, or generously fill in larger areas of your sweater design.
- Miniature candy canes: Ideal for edging the cake, creating hooks for “ornaments,” or arranging into whimsical shapes like a Christmas tree or a heart. Their iconic festive look is unmistakable and instantly recognizable.
- Christmas sprinkles: A must-have for instant festivity! Opt for mixes with shapes like stars, trees, snowflakes, or simply classic red and green jimmies and nonpareils to add sparkle, texture, and a joyful burst of color.
- Gumdrop candies: These soft, chewy, brightly colored candies can be cut into smaller geometric shapes or used whole to resemble colorful “lights” strung across your sweater, or to create bold, abstract patterns.
- Pull N Peel Twizzlers: Excellent for creating long, thin lines for borders, distinct stripes, cross-stitching effects, or even simulating the “yarn” of a knitted sweater. They are pliable and easy to shape, adding a unique texture.
- Mini marshmallows: Add a cozy, fluffy touch, perfect for creating snow drifts, sweater cuffs, a snowy backdrop for other decorations, or even small “sheep” designs on your sweater for a whimsical touch.
- Mike and Ike candies: These elongated, fruity candies are great for creating neat rows of “lights,” colorful stitches, or other linear patterns and borders, adding a different shape to your design.
A complete list of ingredients with precise measurements and specific links to products can be found in the recipe card at the very bottom of this post, ready for you to print or save for your holiday baking adventure!
Substitutions and Additions: Creative Cake Ideas
One of the beauties of the Ugly Sweater Cake is its incredible adaptability. Feel free to customize this recipe to suit your taste preferences, dietary needs, or simply what you happen to have on hand in your pantry. Don’t be afraid to get creative and make this cake truly your own, allowing your personality to shine through in every decorative element!
- Store-Bought Frosting: If time is of the essence or you simply prefer to simplify the process, good quality store-bought buttercream frosting is a perfectly acceptable substitute for homemade icing. Purchase plain white vanilla frosting and then divide and color it with gel food coloring, just as you would with the homemade version. This cuts down significantly on prep time and still allows for plenty of creative decorating fun, making the project even more accessible.
- Cake Flavor Variations: While a white cake mix provides a neutral and bright base for vibrant decorations, you are by no means limited to it. Feel free to use any cake flavor you absolutely love or that complements your holiday theme!
- Yellow Cake: Offers a slightly richer, more buttery flavor profile that pairs wonderfully with classic buttercream and candies.
- Red Velvet Cake: Provides a stunning, deep red base that creates a beautiful contrast with white or green frosting, especially if you want to highlight red “sweater” elements or a snowy white design.
- Chocolate Cake: A universally loved classic crowd-pleaser that pairs wonderfully with any sweet decoration. Imagine a dark chocolate sweater base with bright green and red accents!
- Spice Cake: Infuses warm, cozy holiday flavors like cinnamon, nutmeg, and cloves, perfect for a truly aromatic and comforting festive dessert.
- Gingerbread Cake: For an even more intensely festive flavor profile, especially delicious with a cream cheese frosting (if you choose to substitute for buttercream) or a simple spiced buttercream.
- Alternative Decoration Ideas: The list of suggested decorations is merely a starting point! The world of candy and sprinkles is vast, so consider adding other festive elements to enhance your “ugly sweater” masterpiece:
- Pretzel Sticks or Mini Pretzels: Can be used for edible “knitting needles,” small logs, reindeer antlers, or even to add a salty-sweet crunch to your design.
- Miniature Cookies: Think tiny gingerbread men, star-shaped sugar cookies, or even store-bought mini shortbread cookies for added texture and detailed scenes.
- Edible Glitter or Dust: To add a shimmering, magical touch to your “sweater,” making it sparkle under the festive lights.
- Chocolate Chips or Mini Chocolate Candies: For creating small, consistent patterns like polka dots, or for adding bursts of chocolatey goodness.
- Cut Fruit Leathers: These pliable strips can be cut into festive shapes like holly leaves, stars, or even tiny ribbons.
- Pre-Made Icing Decorations: Conveniently available in most grocery stores, these edible snowflakes, Santa hats, reindeer, or other holiday shapes can be simply placed on the cake for intricate details without extra piping work.
- Coconut Flakes: To simulate a soft, snowy texture, particularly effective around the base of the cake or for fluffy accents on your sweater.
- Candy Eyeballs: For adding silly faces to gingerbread men or other character designs.
- Gummy Bears or Worms: For unexpected bursts of color and playful shapes, embracing the “ugly” aspect fully.
- Homemade Cake from Scratch: For those who truly enjoy the baking process from the ground up, a simple vanilla or butter cake recipe made from scratch can be used as the base. Just ensure it’s a sturdy enough cake to hold up to the generous frosting and elaborate decorations without crumbling.
- Different Frosting Flavors: While classic vanilla buttercream is incredibly versatile, don’t hesitate to experiment with other frosting flavors like a zesty lemon buttercream, a rich chocolate ganache (if you’re going for a darker sweater look), or even a peppermint buttercream for an extra holiday kick. Just ensure your chosen frosting is stable enough for piping and decorating.
Step By Step Instructions: Decorating Your Ugly Sweater Cake
Creating this festive Ugly Sweater Cake is a fun and rewarding process that combines baking with artistic expression. Follow these detailed steps carefully to bake your cake and then transform it into a holiday masterpiece that’s as unique as it is delicious. Remember, the beauty of an “ugly sweater” is that there’s truly no right or wrong way to decorate, so let your creativity shine and enjoy every moment!
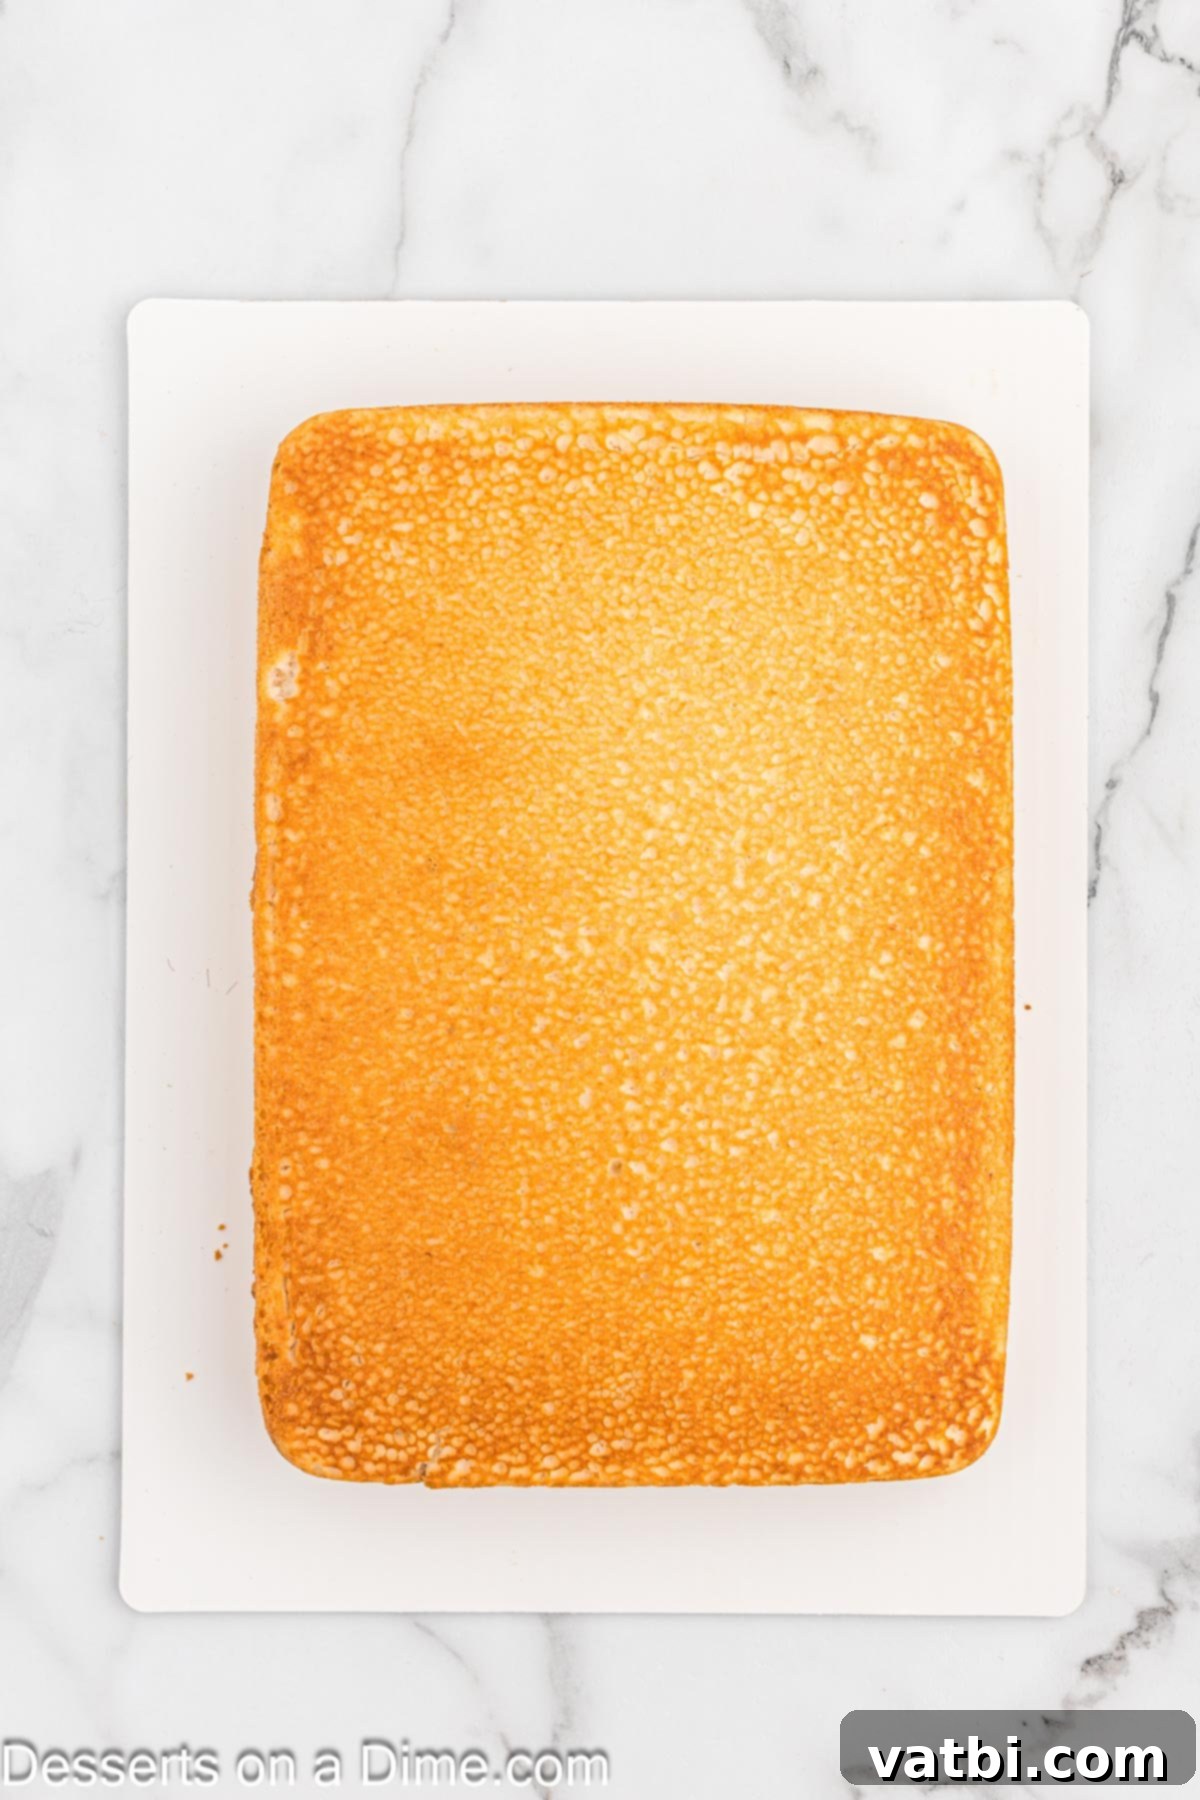
Step 1: Bake and Fully Cool the Cake. Start your festive project by baking your chosen cake according to the precise instructions provided on the boxed mix packaging. For the iconic “sweater” shape, we highly recommend using a 9×13-inch rectangular baking pan. Once the cake is baked through (a toothpick inserted into the center should come out clean), allow it to cool in the pan for at least 10-15 minutes on a wire rack. This initial cooling period is crucial as it helps the cake firm up slightly, making it much easier to handle and preventing it from breaking. After this, carefully place a sturdy cake board, serving platter, or large cutting board on top of the pan and, holding both together, invert the cake onto the board. Now, and this is critical, let the cake cool completely to room temperature. This can take at least 30 minutes, or even longer depending on your kitchen’s temperature. A thoroughly cooled cake is essential to prevent your beautiful frosting from melting, sliding, or becoming a sticky mess.
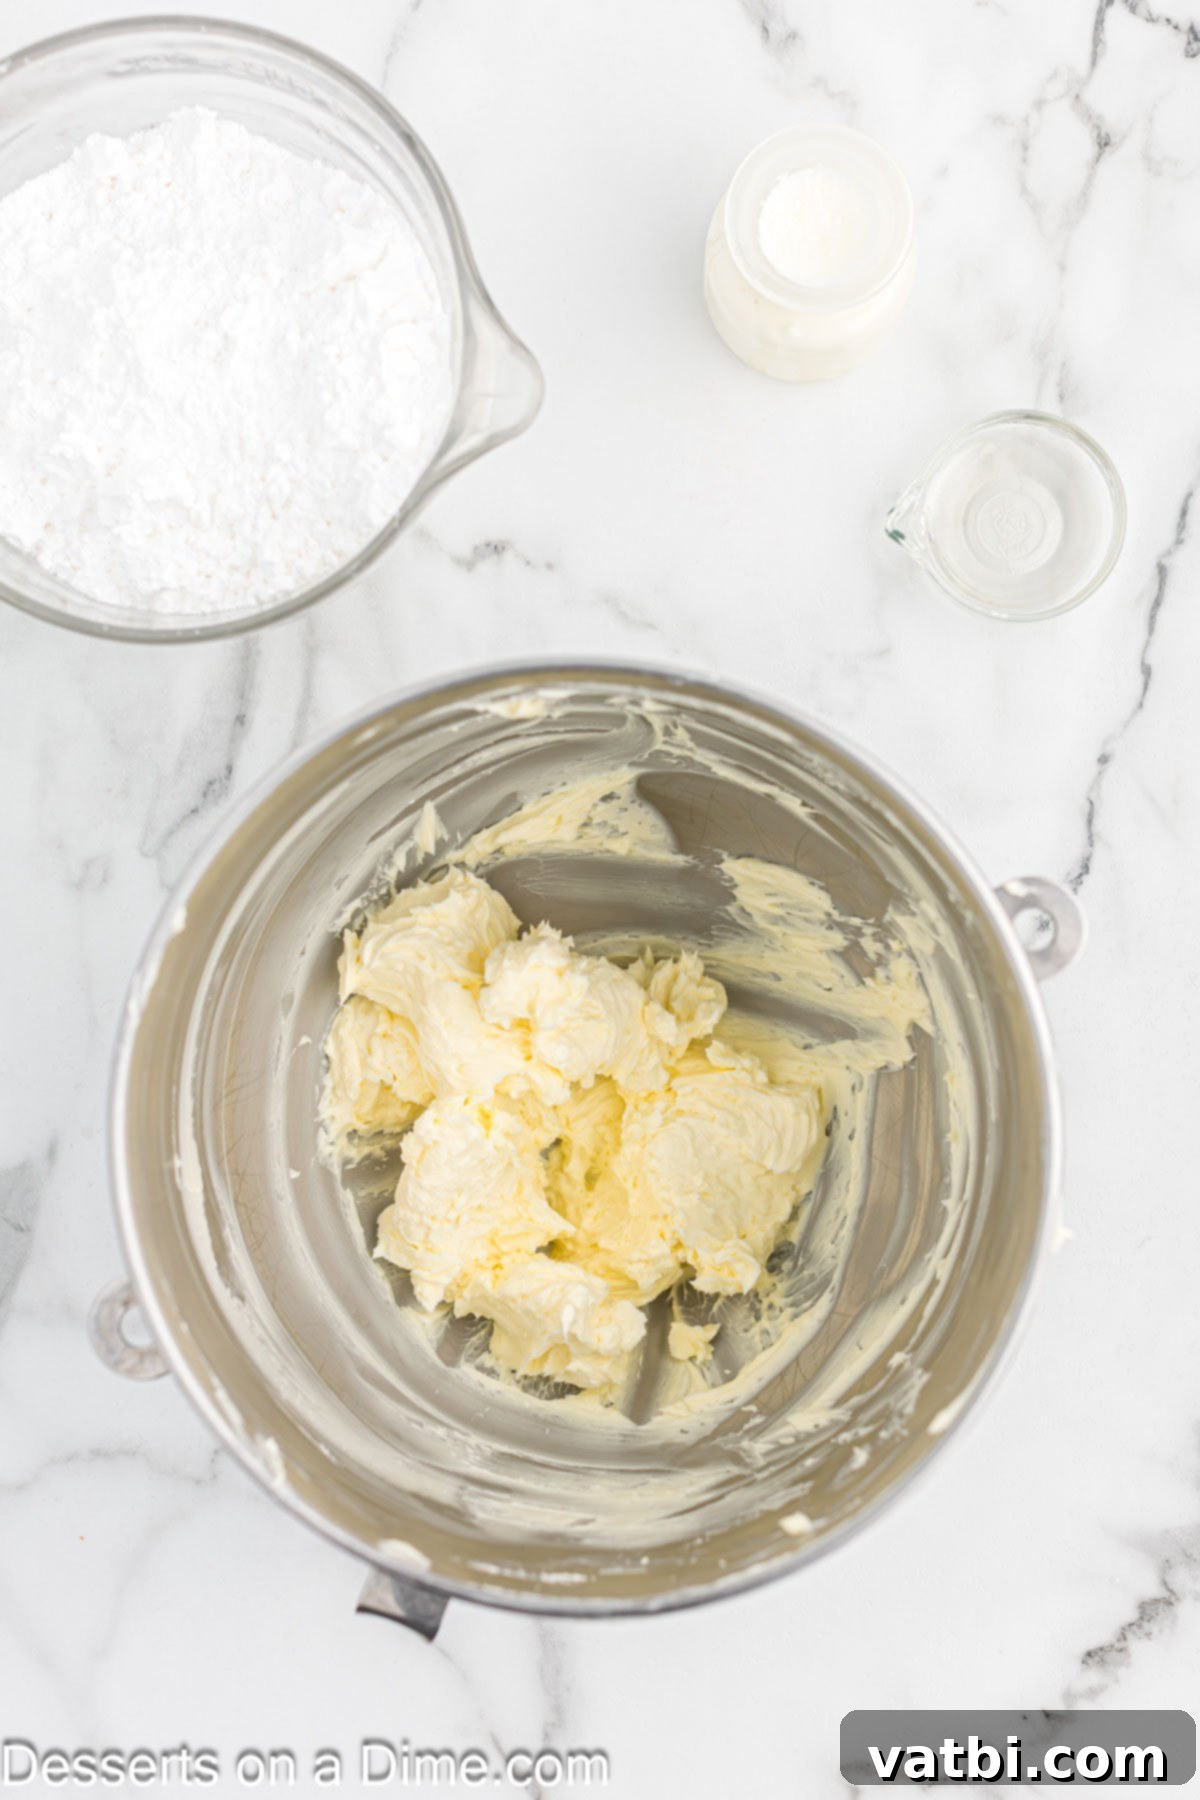
Step 2: Prepare the Homemade Buttercream Base. While your cake is undergoing its essential cooling process, you can begin preparing your rich and creamy homemade buttercream frosting. In a large mixing bowl, using an electric mixer (either a hand mixer or a stand mixer with a paddle attachment), beat the unsalted butter until it becomes incredibly light, fluffy, and notably pale in color. This process, which should take approximately 2-3 minutes on medium-high speed, is key to incorporating enough air into the butter, resulting in a wonderfully airy and smooth frosting texture. Remember to stop and scrape down the sides and bottom of the bowl periodically to ensure even creaming and prevent any unmixed butter from remaining.
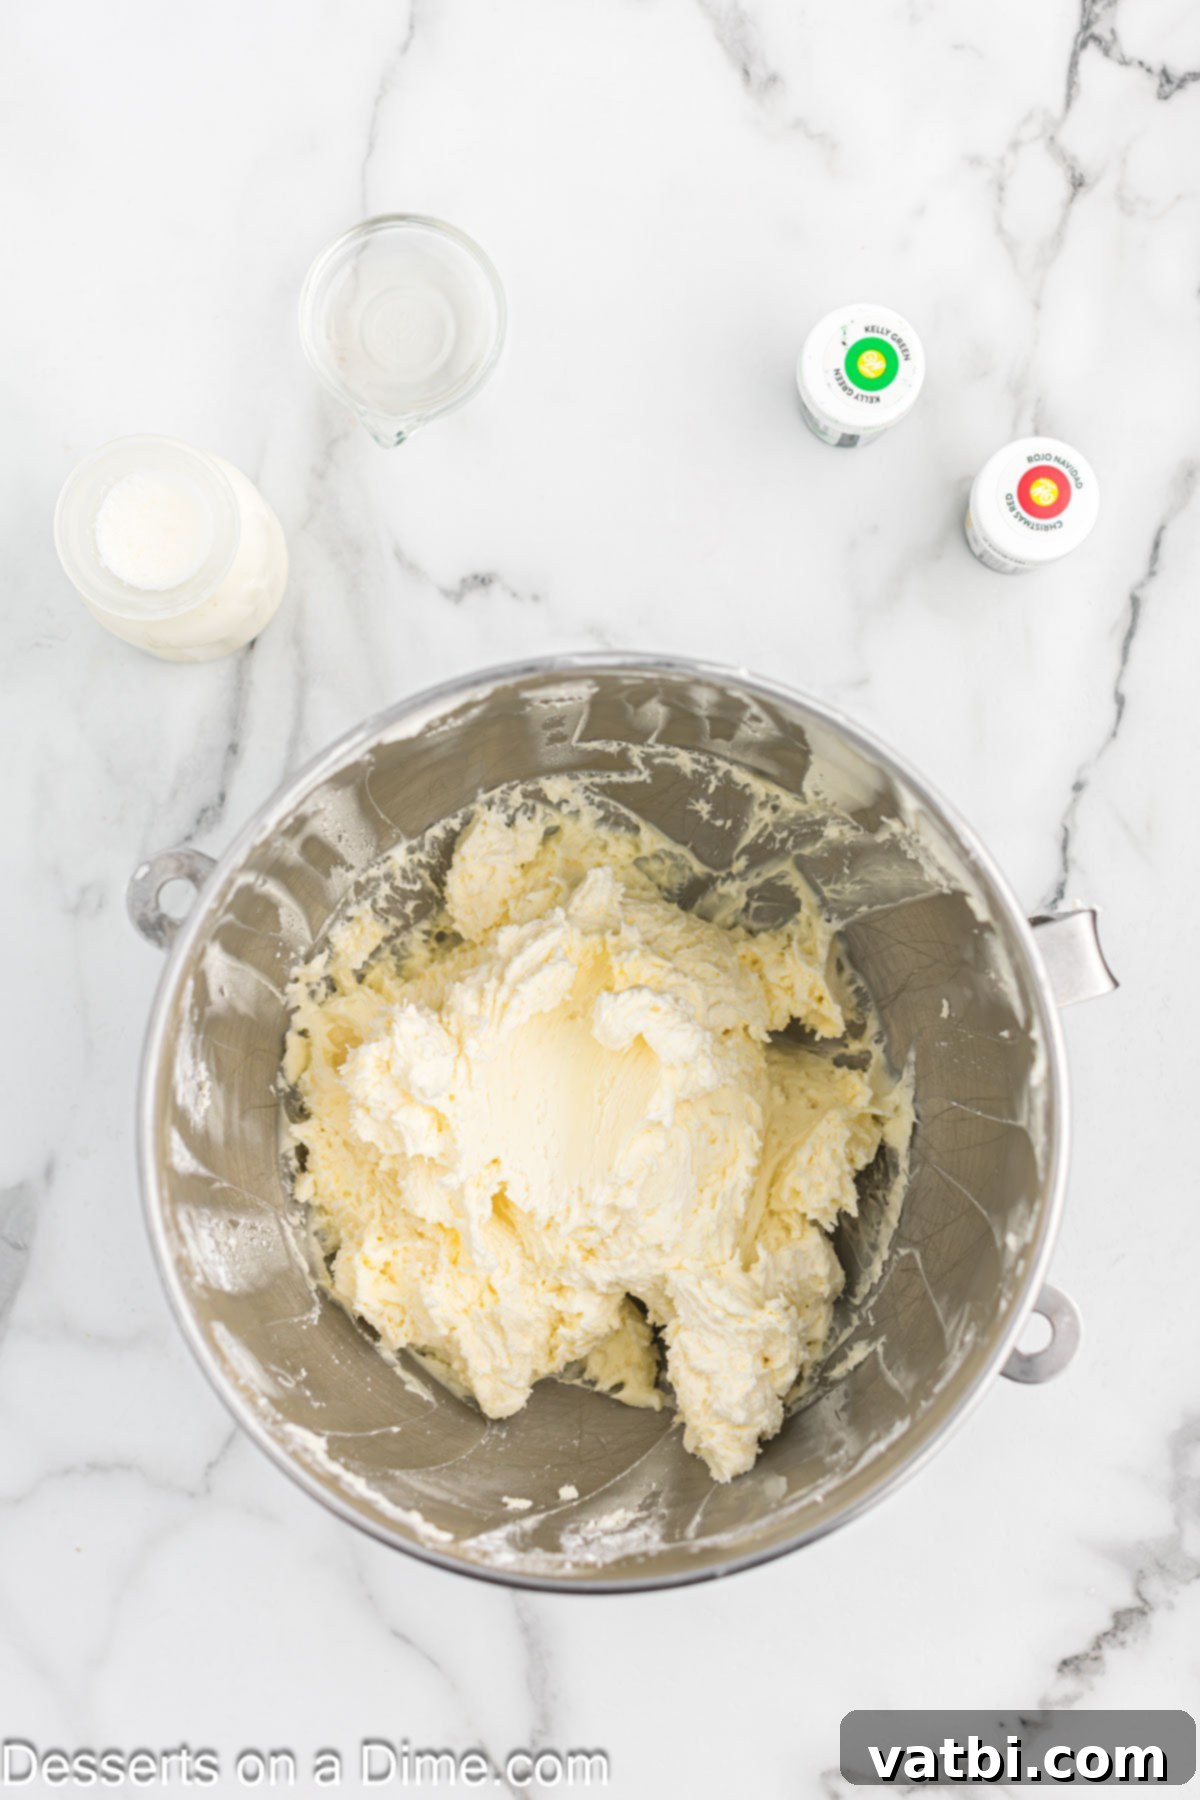
Step 3: Gradually Combine Sugar, Cream, and Vanilla. With your electric mixer still running but set to a low speed, begin slowly adding the powdered sugar to the creamed butter. It’s important to add the sugar gradually, about ½ cup at a time, allowing each addition to be fully incorporated into the butter mixture before adding more. This crucial step prevents a “sugar cloud” from forming in your kitchen and ensures that your frosting remains smooth and lump-free. Once all the powdered sugar has been added and mixed in, pour in the heavy cream and the clear vanilla extract. Increase the mixer speed to medium and continue beating for approximately 30 seconds to 1 minute, or until the frosting is perfectly smooth, wonderfully fluffy, and has a good, spreadable consistency that’s easy to work with. If it appears too thick, you can add a tiny bit more heavy cream; if it’s too thin, a spoonful more powdered sugar will help.
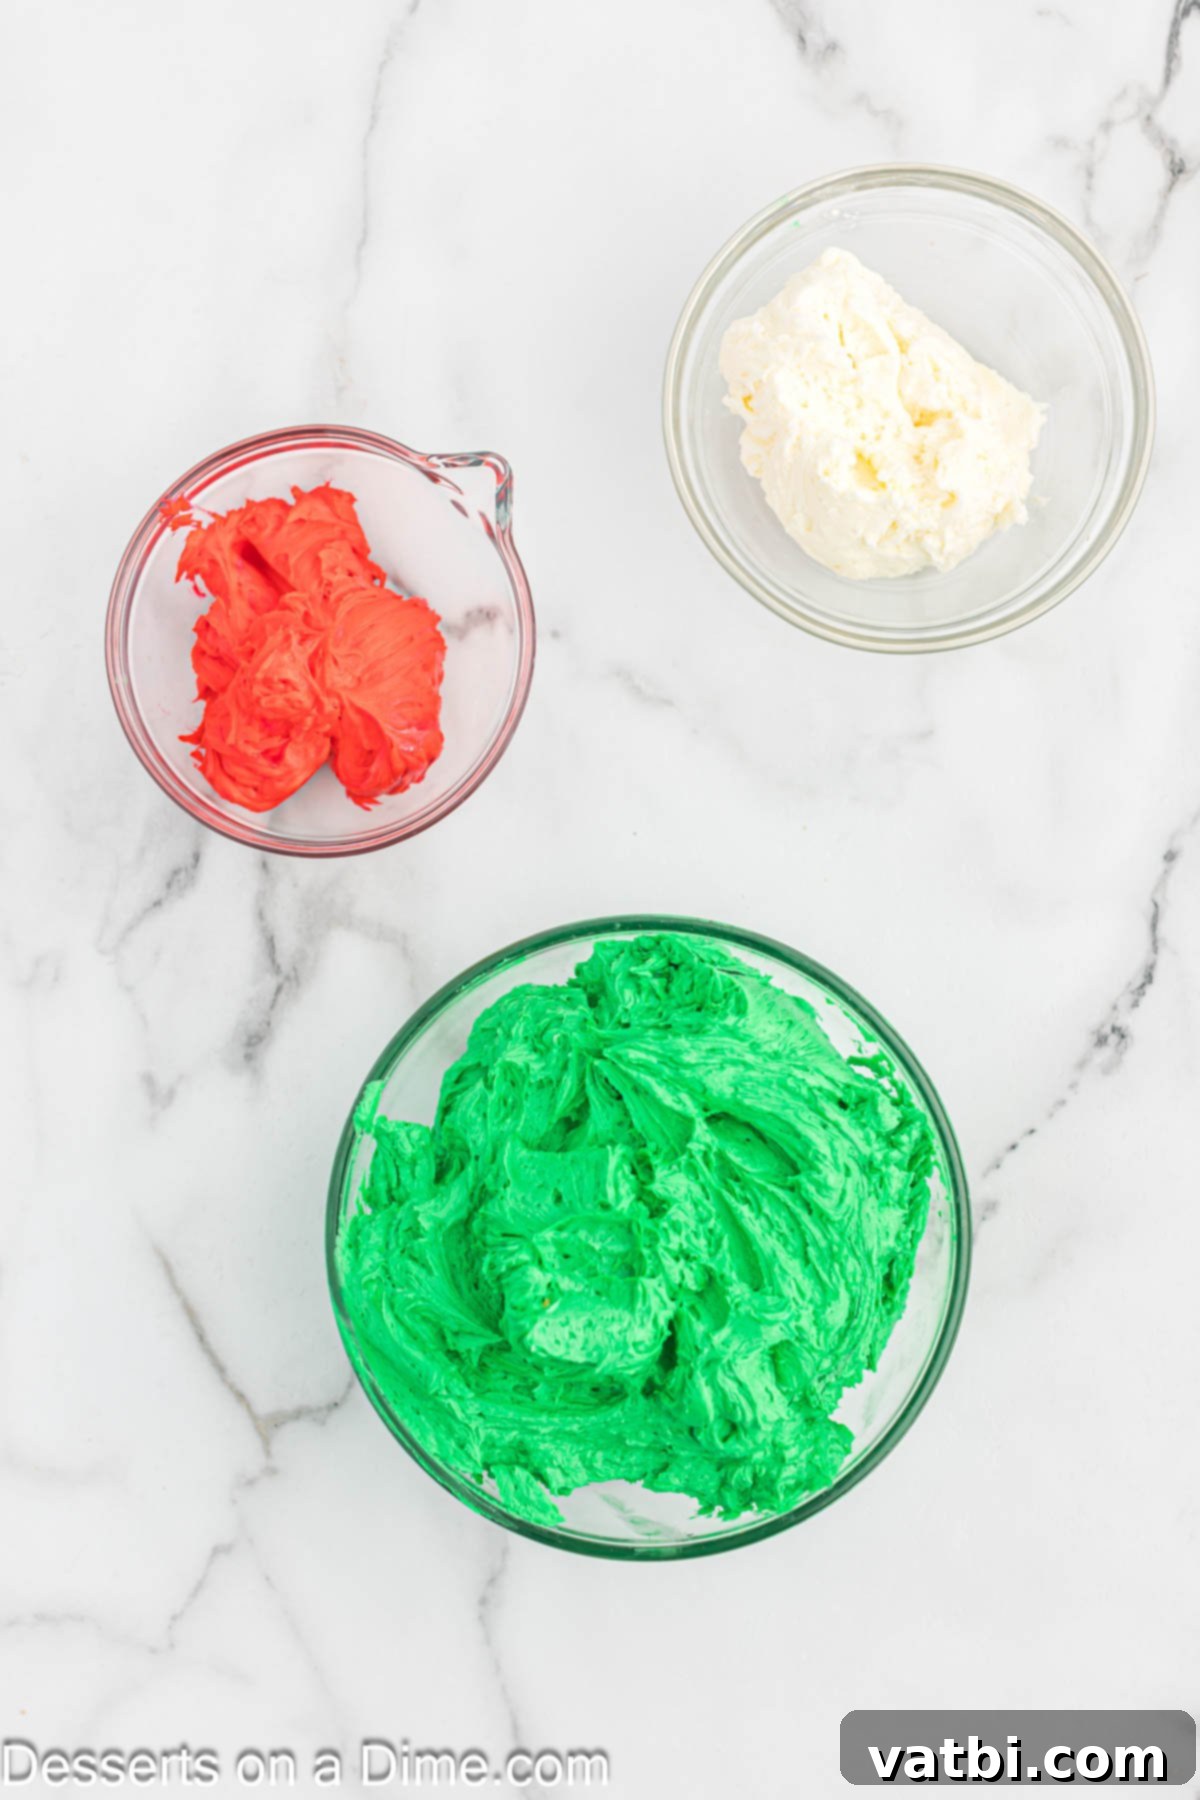
Step 4: Color the Frosting into Festive Hues. Now it’s time to bring your sweater to life with vibrant colors! Carefully spoon out approximately ¼ of the prepared white frosting into a separate medium-sized bowl. This portion will be reserved for your distinct white decorative elements. To the remaining, larger portion of frosting in the main bowl, add a few drops of green gel food coloring and mix thoroughly with a spatula or the electric mixer (on low speed) until you achieve a vibrant, uniform green color, truly resembling the primary color of a classic Christmas sweater. Next, take the ¼ portion of white frosting you set aside and divide it into two smaller bowls. Dye one of these smaller bowls with red gel food coloring, mixing until it’s a bright, festive red. Leave the frosting in the other small bowl plain white. You now have your three core holiday colors: green, red, and white, perfectly prepared and ready for your creative decorating!
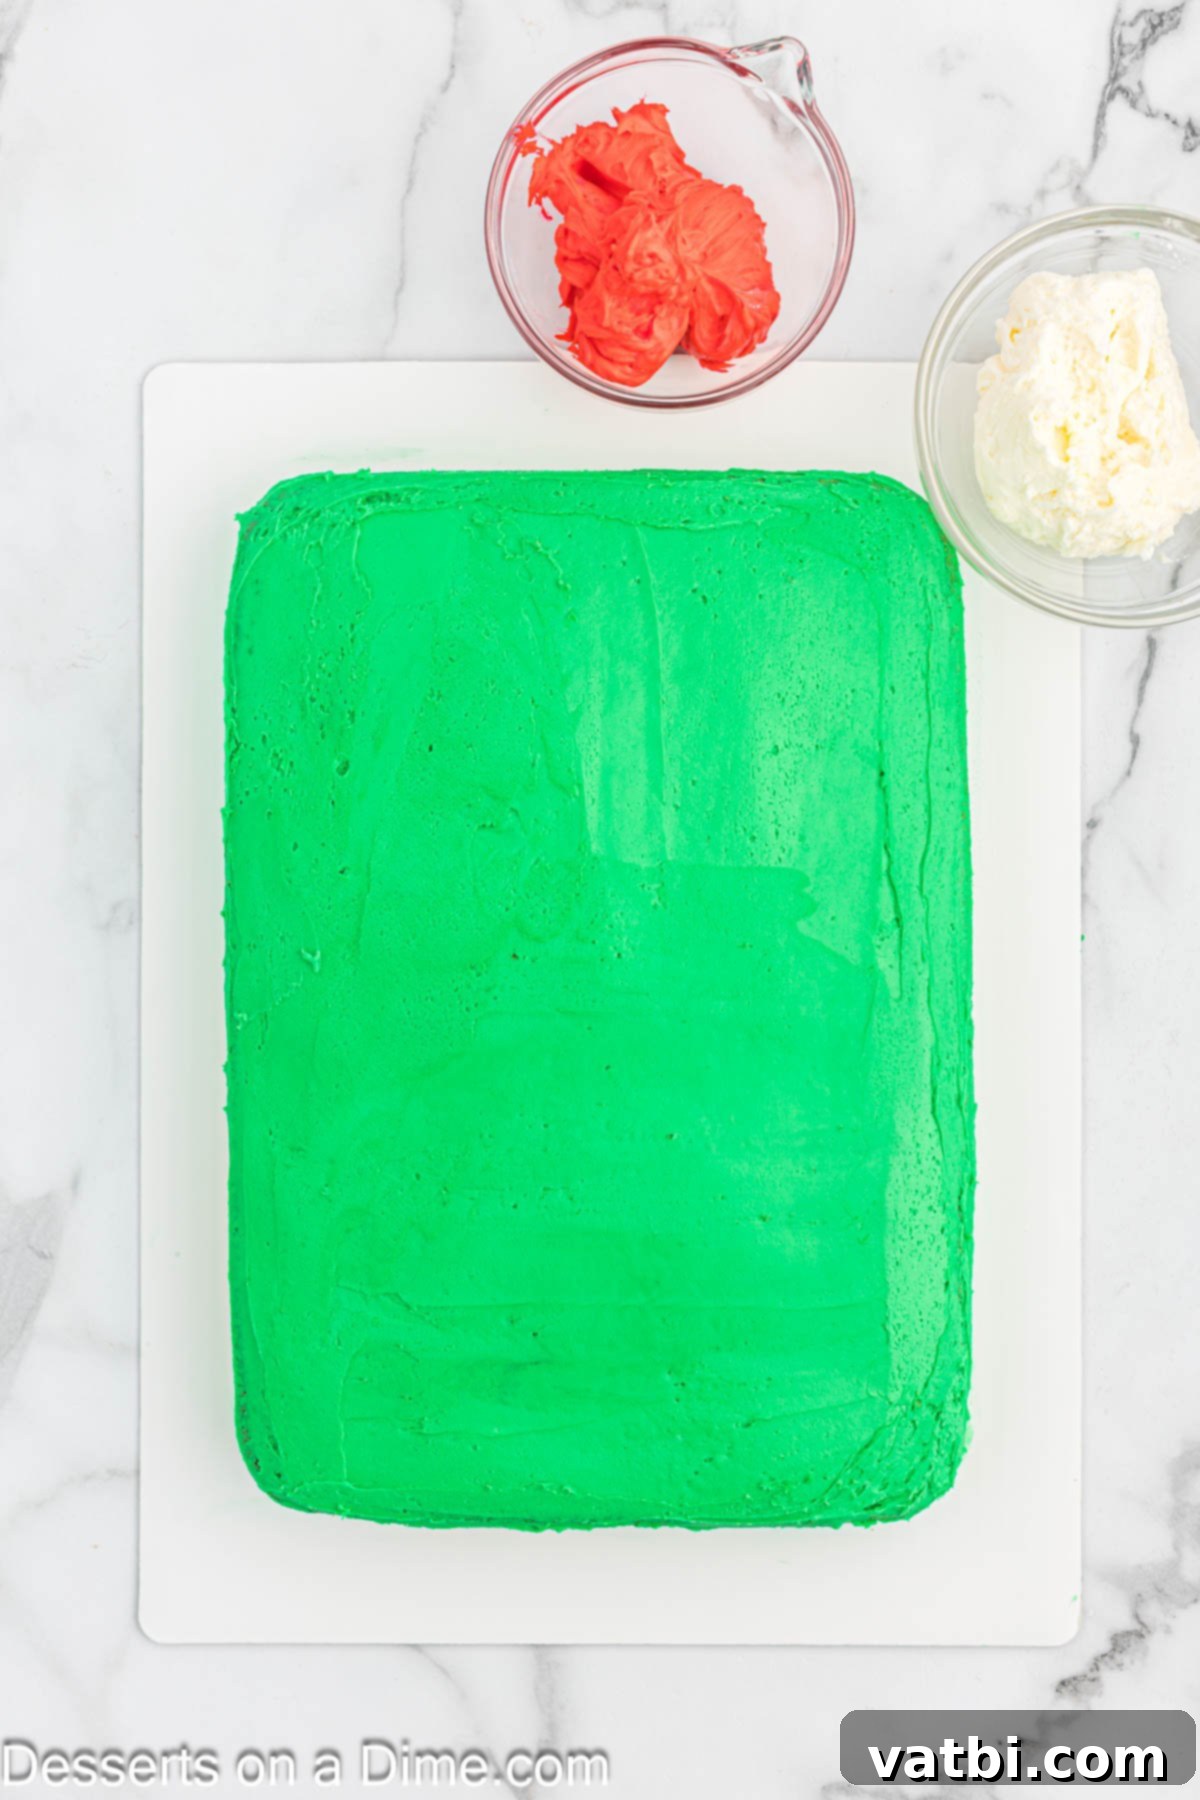
Step 5: Apply the Base Layer of Green Frosting. Take your generously sized bowl of vibrant green frosting and, using an offset spatula or a butter knife, carefully spread it evenly and smoothly over the entire top surface and all the sides of your completely cooled cake. Aim for a smooth and consistent coverage, as this green layer will serve as the primary “fabric” or base color of your ugly Christmas sweater. Don’t fret too much about achieving absolute perfection at this stage; the subsequent layers of piped frosting and an abundance of whimsical decorations will artfully hide any minor imperfections. This step effectively sets the broad canvas for your festive and unique design.
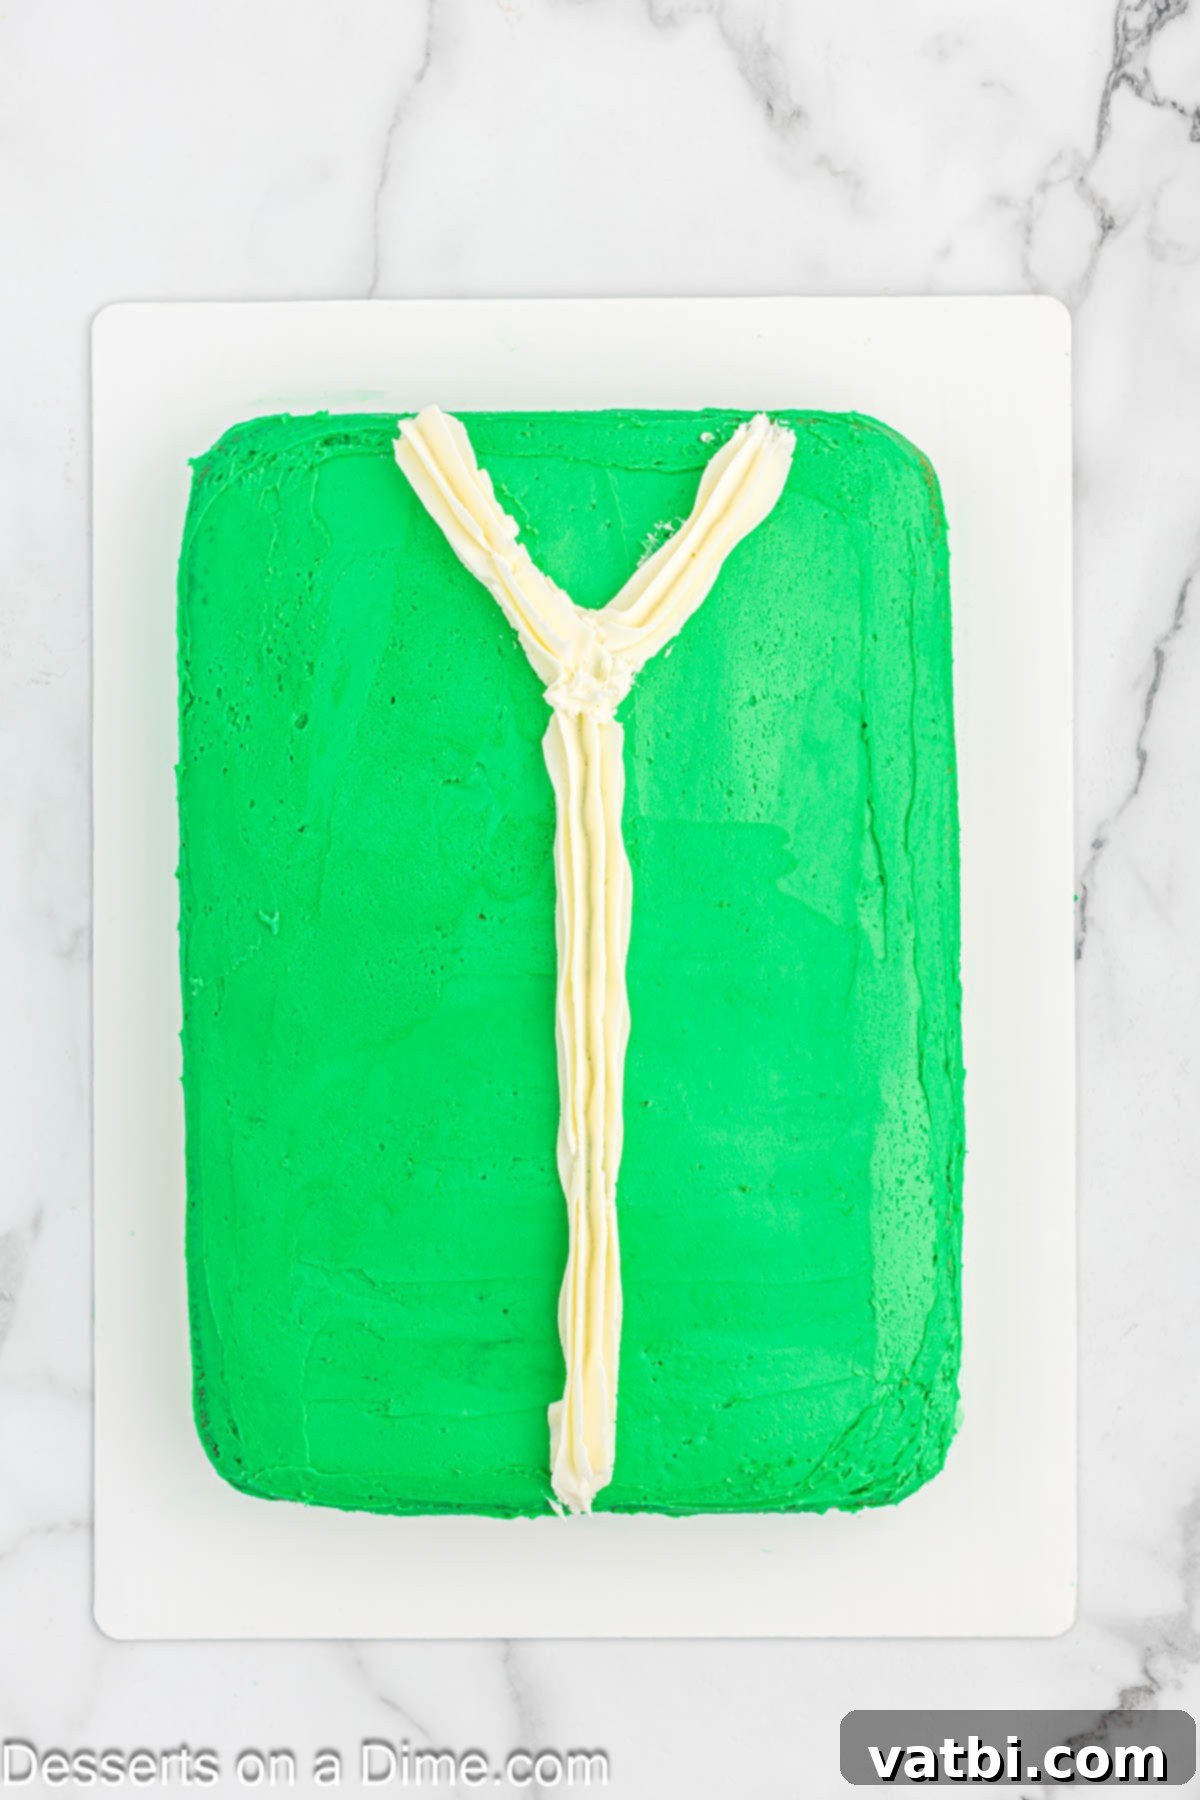
Step 6: Pipe Distinct White “Sweater” Details. Now, it’s time to define the structural elements of your sweater. Transfer your prepared white frosting into a piping bag fitted with a star tip (or any other decorative tip you prefer for detail work; alternatively, a Ziploc bag with a small corner snipped off works perfectly for simpler lines). Carefully pipe a clear V-neck shape at the top of the cake, mimicking the collar of a classic sweater. Following this, pipe a thick, straight line vertically down the center of the cake, extending from the point of the V-neck all the way to the bottom edge. These prominent white lines will serve as essential decorative divisions or fundamental design elements on your ugly sweater, creating distinct sections for further embellishment.
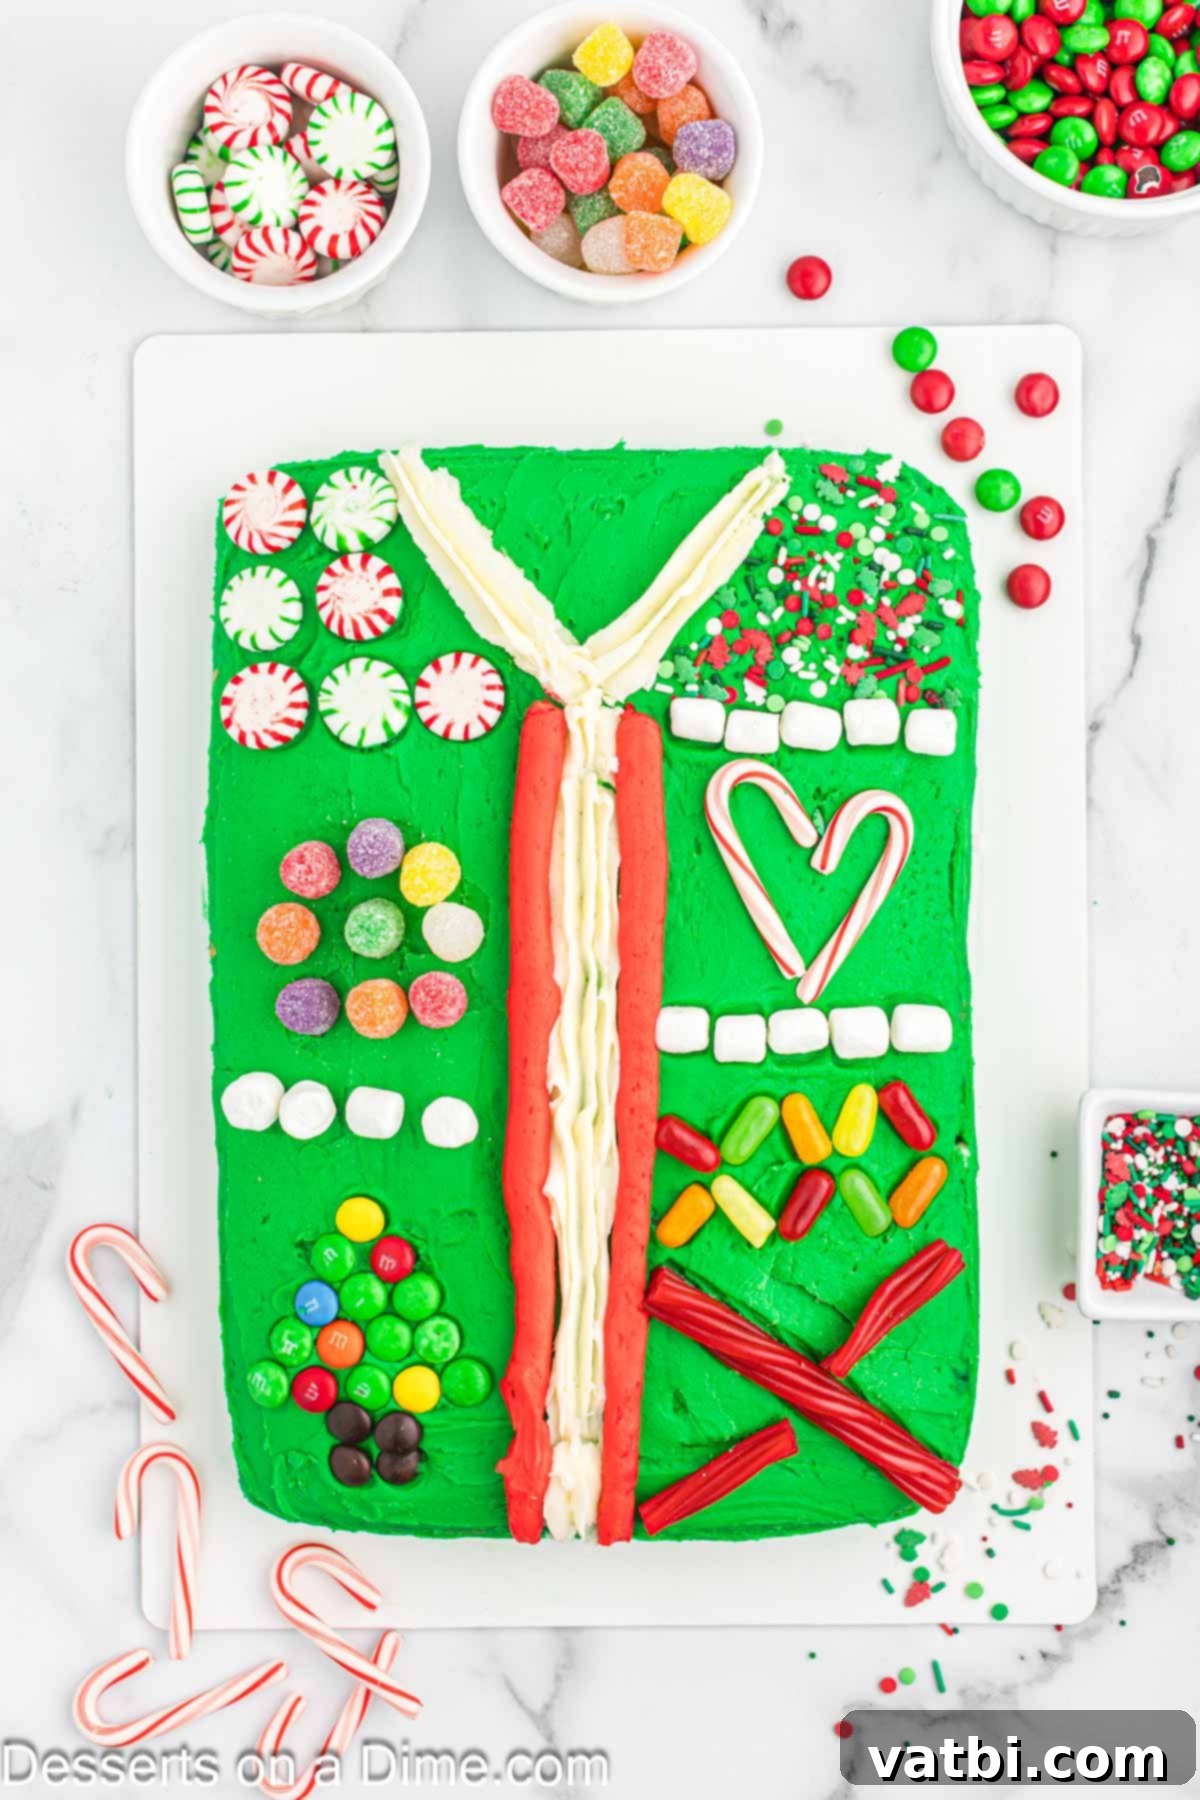
Step 7: Add Bold Red Accents. Now, introduce another pop of classic Christmas color to your evolving sweater design. Fill a separate piping bag with your prepared red frosting (again, a star tip or a simple round tip works wonderfully for this, or even a Ziploc bag with a slightly larger snip for thicker lines). Carefully pipe two distinct horizontal lines, positioning one on each side of the thick white line you just piped down the center of the cake. These red lines can be thin and delicate or thick and bold, perfectly straight or playfully wavy, depending entirely on the specific “ugly sweater” aesthetic you are aiming to achieve. This step adds another crucial layer of detail and a vibrant burst of color to your design, further dividing the cake into distinct decorative sections that are now ready for the final touches.
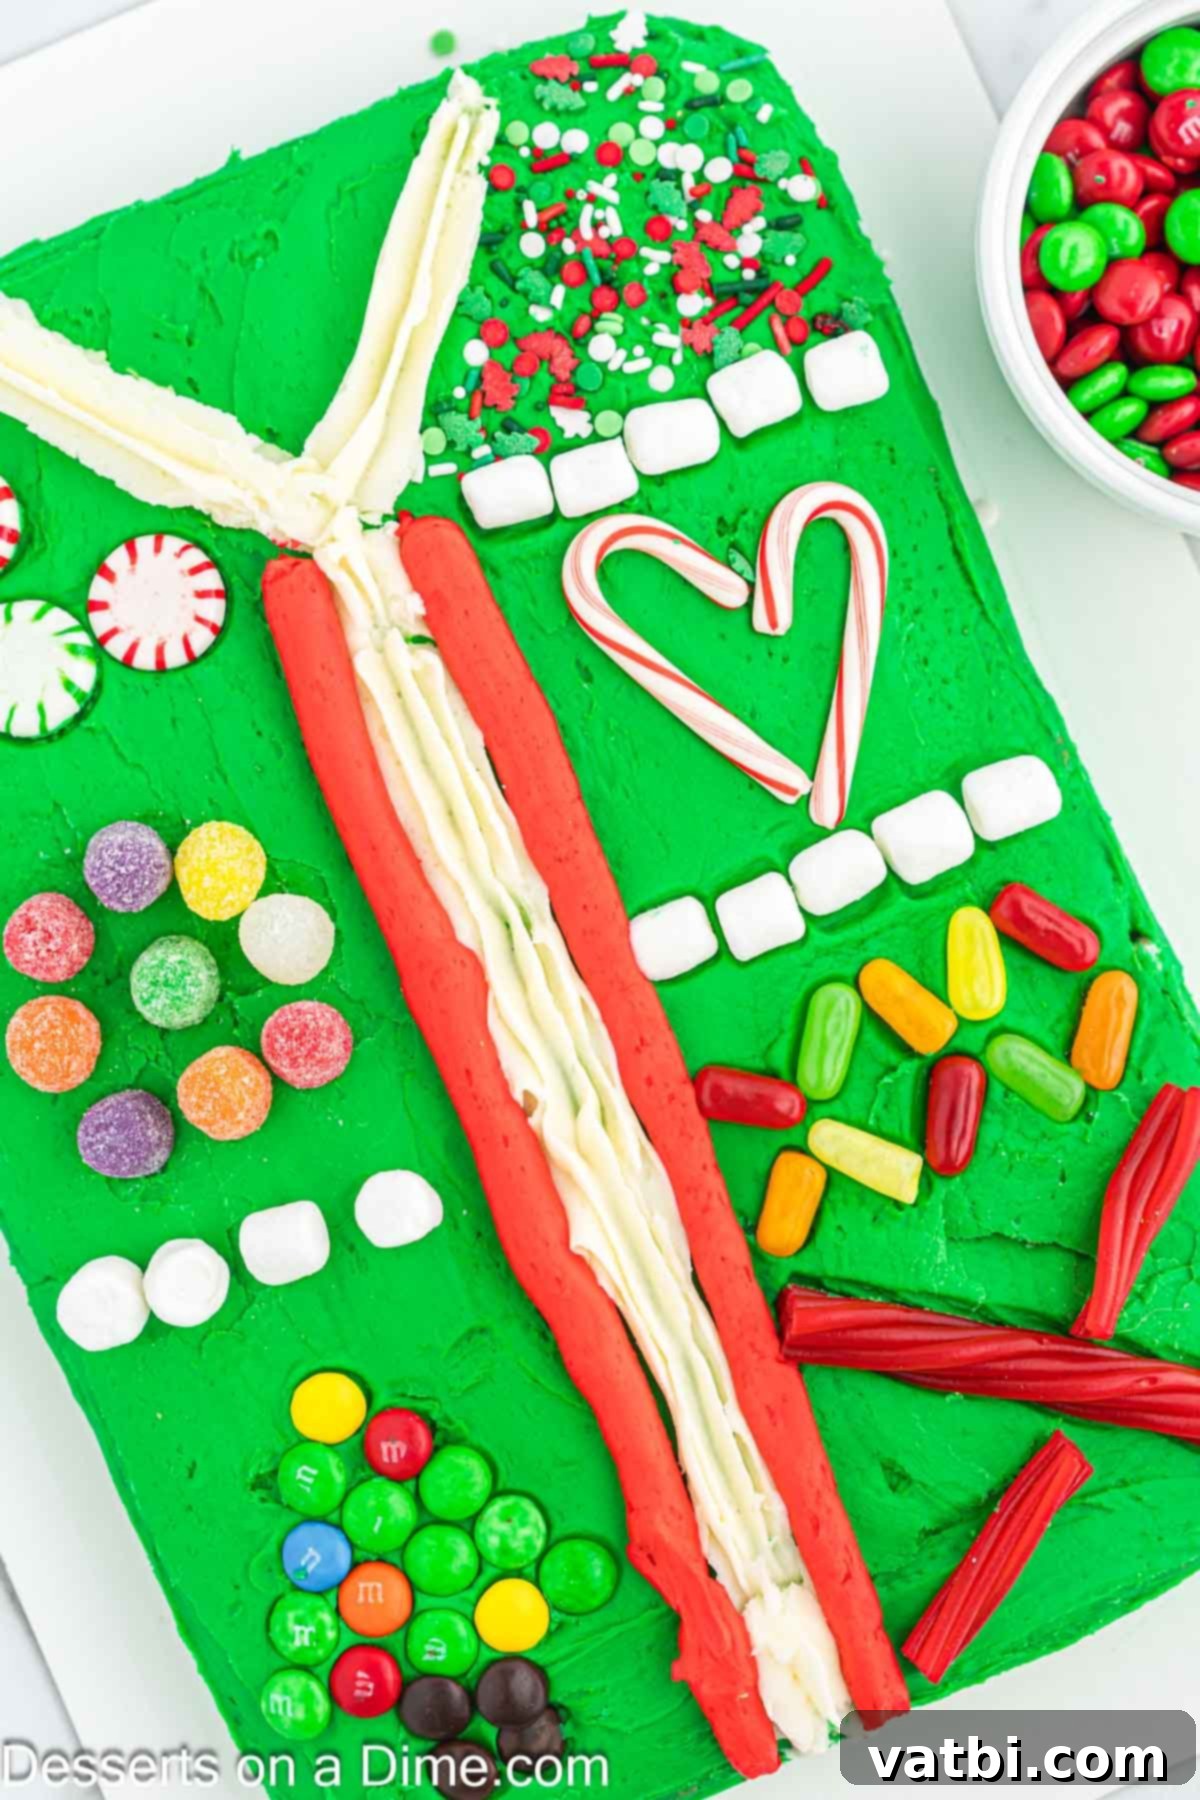
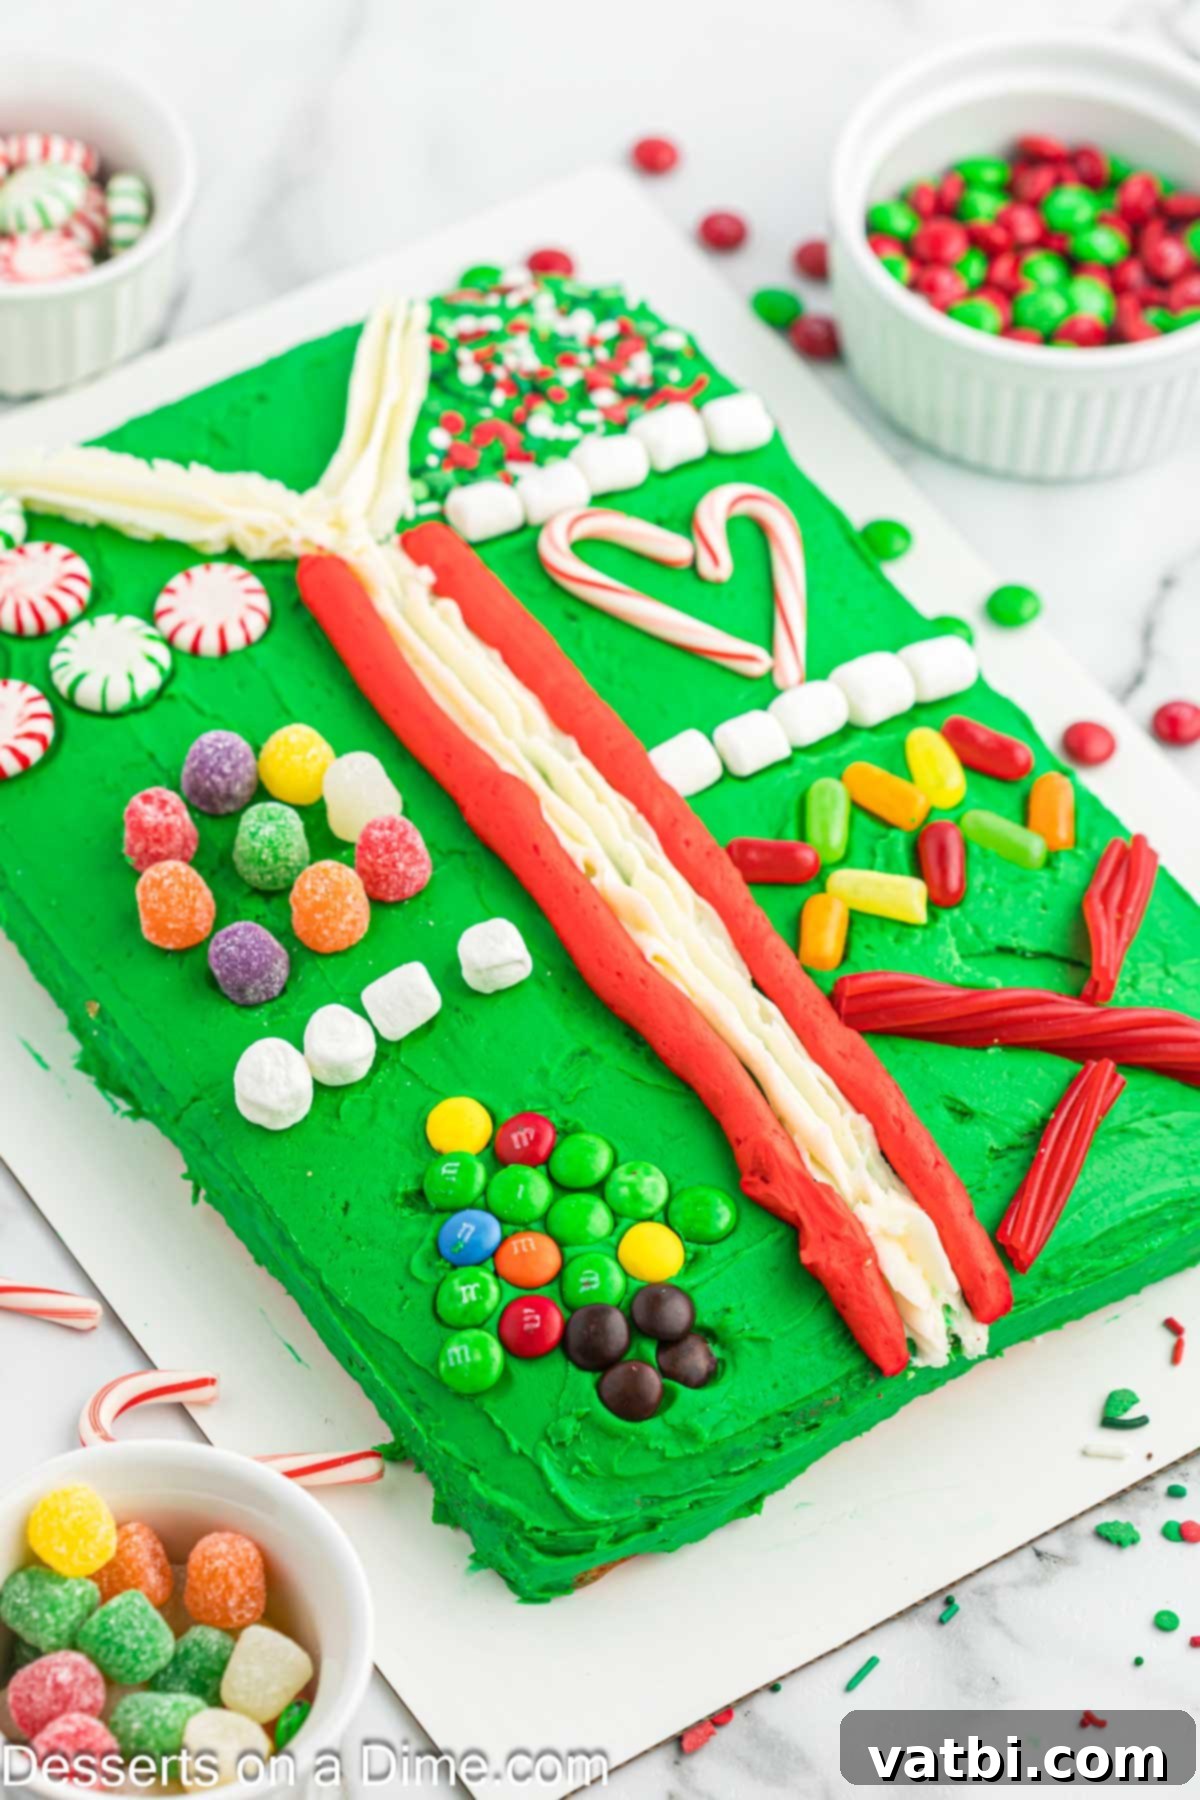
Step 8: The Grand Finale – Decorate with Candies and Sprinkles. This is the most exciting and customizable part of the entire process! Unleash your inner artist and liberally use your assortment of candies and Christmas sprinkles to decorate each section of the sweater differently. The ultimate goal is to make it wonderfully wacky, intensely festive, and utterly unique – just like a real ugly Christmas sweater. For example, you might fill one section with neat rows of M&Ms, create a playful border with miniature candy canes, use brightly colored gumdrops as “lights” strung along the white center line, or scatter a generous amount of Christmas sprinkles liberally over the remaining green areas for sparkle. Utilize Pull N Peel Twizzlers to create fun zigzag patterns, “stitched” details, or even a fringe effect. Arrange small peppermint candies as decorative buttons or create charming miniature scenes with mini marshmallows. The more varied, eclectic, and spontaneous your decorations, the more authentic and delightful your “ugly sweater” cake will be! Step back and admire your truly original creation, then get ready to slice and proudly serve your festive masterpiece!
Pro Tips for a Perfect Ugly Sweater Cake
Achieving a show-stopping Ugly Sweater Cake that looks fantastic and tastes even better is easier than you think, especially with a few clever tricks and insights up your sleeve. These professional tips will help ensure your cake is not only visually stunning but also holds up beautifully throughout your holiday celebrations, making your baking experience smooth and successful.
- Opt for a Rectangular Cake Pan: A 9×13-inch rectangular baking pan is your absolute secret weapon for this particular cake. Its elongated shape provides the perfect “torso” for your sweater, offering a wonderfully large and flat surface that is incredibly easy to frost and decorate with all your intricate designs. Avoid using round or bundt pans for this specific design, as they make achieving the recognizable “sweater” shape much more challenging.
- Cool Your Cake Completely: Patience is paramount when it comes to decorating! It is absolutely crucial that your cake is fully and completely cooled before you even consider applying any frosting. If the cake is even slightly warm, the frosting will melt, slide off the sides, and create a sticky, messy situation, undoing all your hard work. For the best possible results, consider baking the cake the day before and letting it cool overnight at room temperature, or ensure it has been in the refrigerator for a good hour after reaching room temperature.
- Level the Cake if Needed: For the smoothest possible canvas for your intricate and colorful “sweater” design, consider leveling the top of your cake. After it’s completely cool, use a long, serrated knife or a specialized cake leveling tool to gently and carefully trim off any domed top, creating a perfectly flat and even surface. This simple step ensures a stable and professional-looking base for all your frosting layers and elaborate decorations.
- Tint Small Batches of Frosting: When coloring your buttercream, it’s always a smart idea to separate your white frosting into several smaller bowls and tint only what you anticipate needing for each specific color. This strategic approach prevents unnecessary waste and allows you to easily adjust shades and achieve the desired vibrancy without over-coloring. Remember that gel food colorings are highly concentrated, so always start with a tiny drop and gradually add more until you reach your desired intense color.
- Plan Your Design First: Before you dive into piping and placing candies, take a thoughtful moment to visualize or even sketch out your “ugly sweater” design. Decide on your primary color scheme, where you want specific patterns to go, and which candies will be featured in which sections of the cake. Having a clear plan in mind will significantly help to streamline the entire decorating process, prevent last-minute indecision, and minimize potential mistakes.
- Utilize Piping Bags or Ziploc Bags: You absolutely do not need expensive, fancy pastry bags and specialized tips to create beautiful piped designs. Simple, sturdy Ziploc bags can be filled with colored frosting, and a small corner can be carefully snipped off to create a makeshift piping bag for basic lines and dots. For more defined lines and star-shaped patterns, however, investing in a basic set of reusable piping bags and star tips is a worthwhile endeavor for any aspiring baker. Practice a few lines on parchment paper before applying them to the cake.
- Keep All Decorations Handy: Prior to beginning the actual decorating process, take the time to organize all your various candies, sprinkles, and toppings. Place them neatly in small bowls or on a large tray within easy reach of your decorating station. This organized approach creates a stress-free decorating session, allowing you to quickly grab exactly what you need without interrupting your creative flow or getting frosting everywhere.
- Work Methodically in Sections: To maintain neatness, control, and ensure your design is cohesive, frost and decorate your cake one distinct area or section at a time. For instance, first apply your main green base frosting, then add your white and red piped lines to create divisions, and then carefully fill in each defined section with your chosen assortment of candies and sprinkles. This methodical approach helps to prevent colors from bleeding into each other and keeps your patterns looking crisp and intentional.
- Allow Time for Chilling: Once your whimsical masterpiece is complete, refrigerate the cake for at least 30 minutes to an hour. This crucial final step allows the buttercream frosting to firm up and set properly, ensuring that all your intricate piped designs and delicate candy decorations stay firmly in place, especially if you plan on transporting the cake to a party. A chilled cake is also much easier to slice cleanly.
Storage Tips for Your Ugly Sweater Cake
To ensure your delightful Ugly Sweater Cake remains fresh, irresistibly delicious, and visually appealing for as long as possible, proper storage is absolutely key. Different components of the cake and frosting can influence the best way to store it, so paying attention to these details will help preserve your festive creation.
- Room Temperature Storage (Limited): If your cake is unfrosted, or if it is frosted exclusively with a traditional butter-based buttercream and not decorated with any highly perishable items (such as fresh fruit or certain creams), it can generally be stored safely, covered, at cool room temperature for up to 2 days. Always ensure it’s kept in an airtight cake container or under a sturdy cake dome to prevent it from drying out, becoming stale, or absorbing any undesirable odors from your kitchen. Avoid direct sunlight or warm spots.
- Refrigerate for Extended Freshness: For cakes adorned with a generous array of candy decorations, intricate buttercream designs, or if you’ve opted for a more delicate frosting like cream cheese frosting, refrigeration is undoubtedly the best choice for extending its freshness. Store the decorated cake carefully in the refrigerator, ideally in an airtight container to protect the frosting and decorations, or at least loosely covered with plastic wrap. To truly enjoy the best texture and flavor, especially with buttercream, remember to remove the cake from the refrigerator and allow it to come to room temperature for at least 30-60 minutes before serving. This allows the butter in the frosting to soften back to its creamy consistency, enhancing the overall eating experience.
- Prevent Moisture Buildup: Condensation can be a persistent enemy of delicate candy decorations, often causing them to become sticky, lose their crispness, or even causing colors to bleed into the frosting, ruining your festive design. To effectively combat this common issue when refrigerating your cake, consider placing a piece of paper towel loosely over the frosted top of the cake before securely covering it with plastic wrap or aluminum foil. The paper towel will cleverly absorb any excess moisture that forms, thereby helping to preserve the pristine quality and vibrant appearance of your festive candy designs.
- Freeze for Future Enjoyment: You can significantly extend the life of your Ugly Sweater Cake, allowing you to enjoy it weeks later, by properly freezing it. For the absolute best results, it’s recommended to freeze unfrosted cake layers. Once your cake layers are completely cool, wrap each individual layer tightly in plastic wrap, and then wrap them again in a layer of aluminum foil. This double layer of protection is crucial for preventing freezer burn and maintaining moisture. These unfrosted layers can be frozen for up to 2 months. When you’re ready to decorate, simply thaw the layers at room temperature for several hours or overnight before proceeding with frosting. You can also freeze a fully decorated cake for a shorter period (1-2 weeks), but be mindful that some candy decorations might slightly alter in texture or appearance after undergoing the freezing and thawing process. Ensure the cake is fully firm in the freezer before tightly wrapping it to avoid crushing any delicate decorations.
More Cute Christmas Desserts to Try
If you’ve fallen in love with the festive spirit and creative fun of making the Ugly Sweater Cake, and are eager to explore more delightful holiday treats, here are some other charming and delicious Christmas desserts that are sure to bring smiles, sweetness, and a touch of magic to your celebrations. Each one offers a unique way to enjoy the most wonderful time of the year!
- Christmas Dirt Cups Recipe: A playful and incredibly easy-to-make dessert, perfect for engaging kids and pleasing adults alike. These individual cups feature delightful layers of crushed cookies (like Oreos) and creamy pudding, often topped with festive gummy candies to resemble a snowy landscape.
- Christmas Ice Cream Cake: A refreshingly cool and customizable dessert that brilliantly combines layers of moist cake with luscious ice cream. This treat is ideal for a unique holiday twist, offering a cool contrast to warm holiday meals and endless possibilities for flavor combinations and toppings.
- Festive Christmas Cake Pops: These charming, bite-sized treats are as fun to make as they are delightful to eat. Perfect for sharing at parties or as edible gifts, they can be easily decorated with an array of festive sprinkles, drizzles, and colors, allowing for miniature artistic expressions.
- Christmas Sprinkle Cookies: A simple, colorful, and wonderfully buttery cookie adorned with a generous coating of vibrant holiday sprinkles. These classic sugar cookies are a festive staple that never goes out of style, bringing cheer with every bite and a satisfying texture.
- Christmas Chocolate Covered Strawberries: These elegant and relatively healthy treats are quick to prepare and visually stunning. Fresh strawberries dipped in rich chocolate can be easily dressed up with festive white chocolate drizzles, red and green sprinkles, or edible glitter for a sophisticated yet seasonal dessert.
We sincerely hope you’ll be inspired to give this wonderfully fun and delightfully festive Ugly Sweater Cake a try this holiday season! It’s truly a special way to add a personal, creative, and memorable touch to all your celebrations, bringing genuine smiles and hearty laughter to everyone who sees and, of course, tastes it. Don’t forget to come back and leave a comment below with your experience and a star rating to let us know how your culinary creation turned out! Your valuable feedback not only helps other aspiring bakers but also allows us to share in the joy of your unique “ugly” designs and holiday baking successes!
Pin
Ugly Sweater Cake
Ingredients
For the Cake:
- 1 box White Cake Mix
- Ingredients to make the cake based on the package instructions (usually eggs, water, and oil).
For the Frosting:
- 1 1/2 cup Unsalted Butter room temperature
- 5 cups Powdered Sugar
- 1 tablespoon Clear Vanilla Extract
- 3 Tablespoons Heavy Cream
- Red Gel Food Coloring
- Green Gel Food Coloring
For the Decorations (Assorted Candies & Sprinkles):
- 5 Small Peppermint Candies
- M&Ms
- Miniature Candy Canes
- Christmas Sprinkles
- Gum Drop Candies
- Pull N Peel Twizzlers
- Mini Marshmallows
- Mike and Ike Candies
- Additional Miniature Candy Canes
Instructions
For the Cake:
-
1. Bake the Cake: Prepare and bake your chosen cake mix according to the package instructions. A 9×13-inch rectangular baking pan is ideal for achieving the perfect “sweater” shape. Ensure the cake is fully cooked by inserting a toothpick into the center; if it comes out clean, it’s done.
-
2. Initial Cooling in Pan: Allow the baked cake to cool in its pan for about 10-15 minutes on a wire rack. This initial cooling period helps the cake firm up slightly, making it easier to handle without breaking.
-
3. Invert onto Board: Place a sturdy cake board, serving platter, or cutting board on top of the cooling cake in the pan. Carefully invert the cake onto the board. This method prevents damage and ensures a flat surface for subsequent steps.
-
4. Complete Cooling: Let the cake cool completely to room temperature before you apply any frosting. This step is critical; a warm cake will cause the frosting to melt and slide off. For best results, allow at least 30 minutes, or even longer in a cooler room.
For the Frosting and Decoration:
-
1. Cream the Butter: In a large mixing bowl, using an electric mixer, beat the room temperature unsalted butter on medium-high speed until it becomes very creamy, light, and fluffy. This should take 2-3 minutes, ensuring air is incorporated.
-
2. Add Powdered Sugar Gradually: Reduce the mixer speed to low. Gradually add the powdered sugar, about ½ cup at a time, allowing each addition to be fully incorporated before adding more. This prevents a mess and creates a smooth frosting.
-
3. Add Liquid and Vanilla: With the mixer still on low, add the heavy cream and clear vanilla extract. Once combined, increase the speed to medium and beat for approximately 30 seconds to 1 minute, or until the frosting is light, fluffy, and has a smooth, spreadable consistency.
-
4. Divide and Color Frosting: Remove approximately ¼ of the white frosting and set it aside in a separate bowl. To the large remaining portion of frosting, add green gel food coloring and mix until a uniform, vibrant green is achieved.
-
5. Create Red and White Batches: Divide the ¼ portion of white frosting (that you set aside) into two smaller bowls. Dye one of these smaller bowls with red gel food coloring until a festive red is achieved. Leave the frosting in the other small bowl white.
