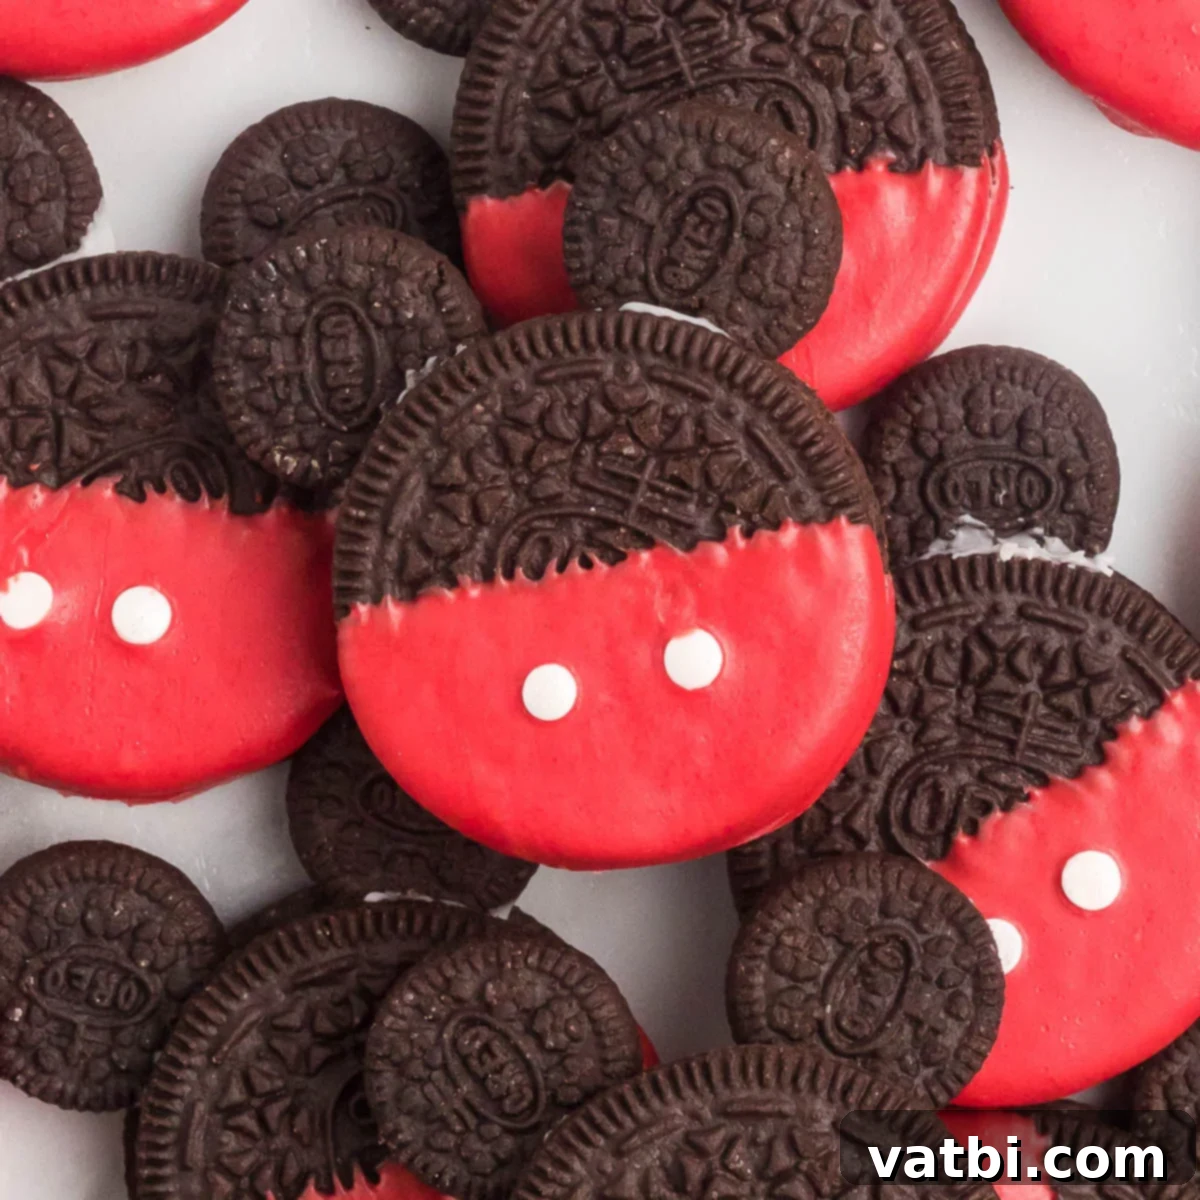
Delightful Mickey Mouse Oreo Cookies: Easy No-Bake Disney Magic for Any Occasion
These absolutely adorable Mickey Mouse Oreo Cookies are incredibly fun to make and even more delightful to eat! They are the perfect treat for parties, Disney-themed celebrations, or just bringing a little bit of magic into your everyday. What makes them truly special is how remarkably easy they are to create, requiring no baking and just a handful of ingredients. If you’re a fan of all things Disney, or simply looking for a charming, stress-free dessert, this recipe is an absolute must-try!
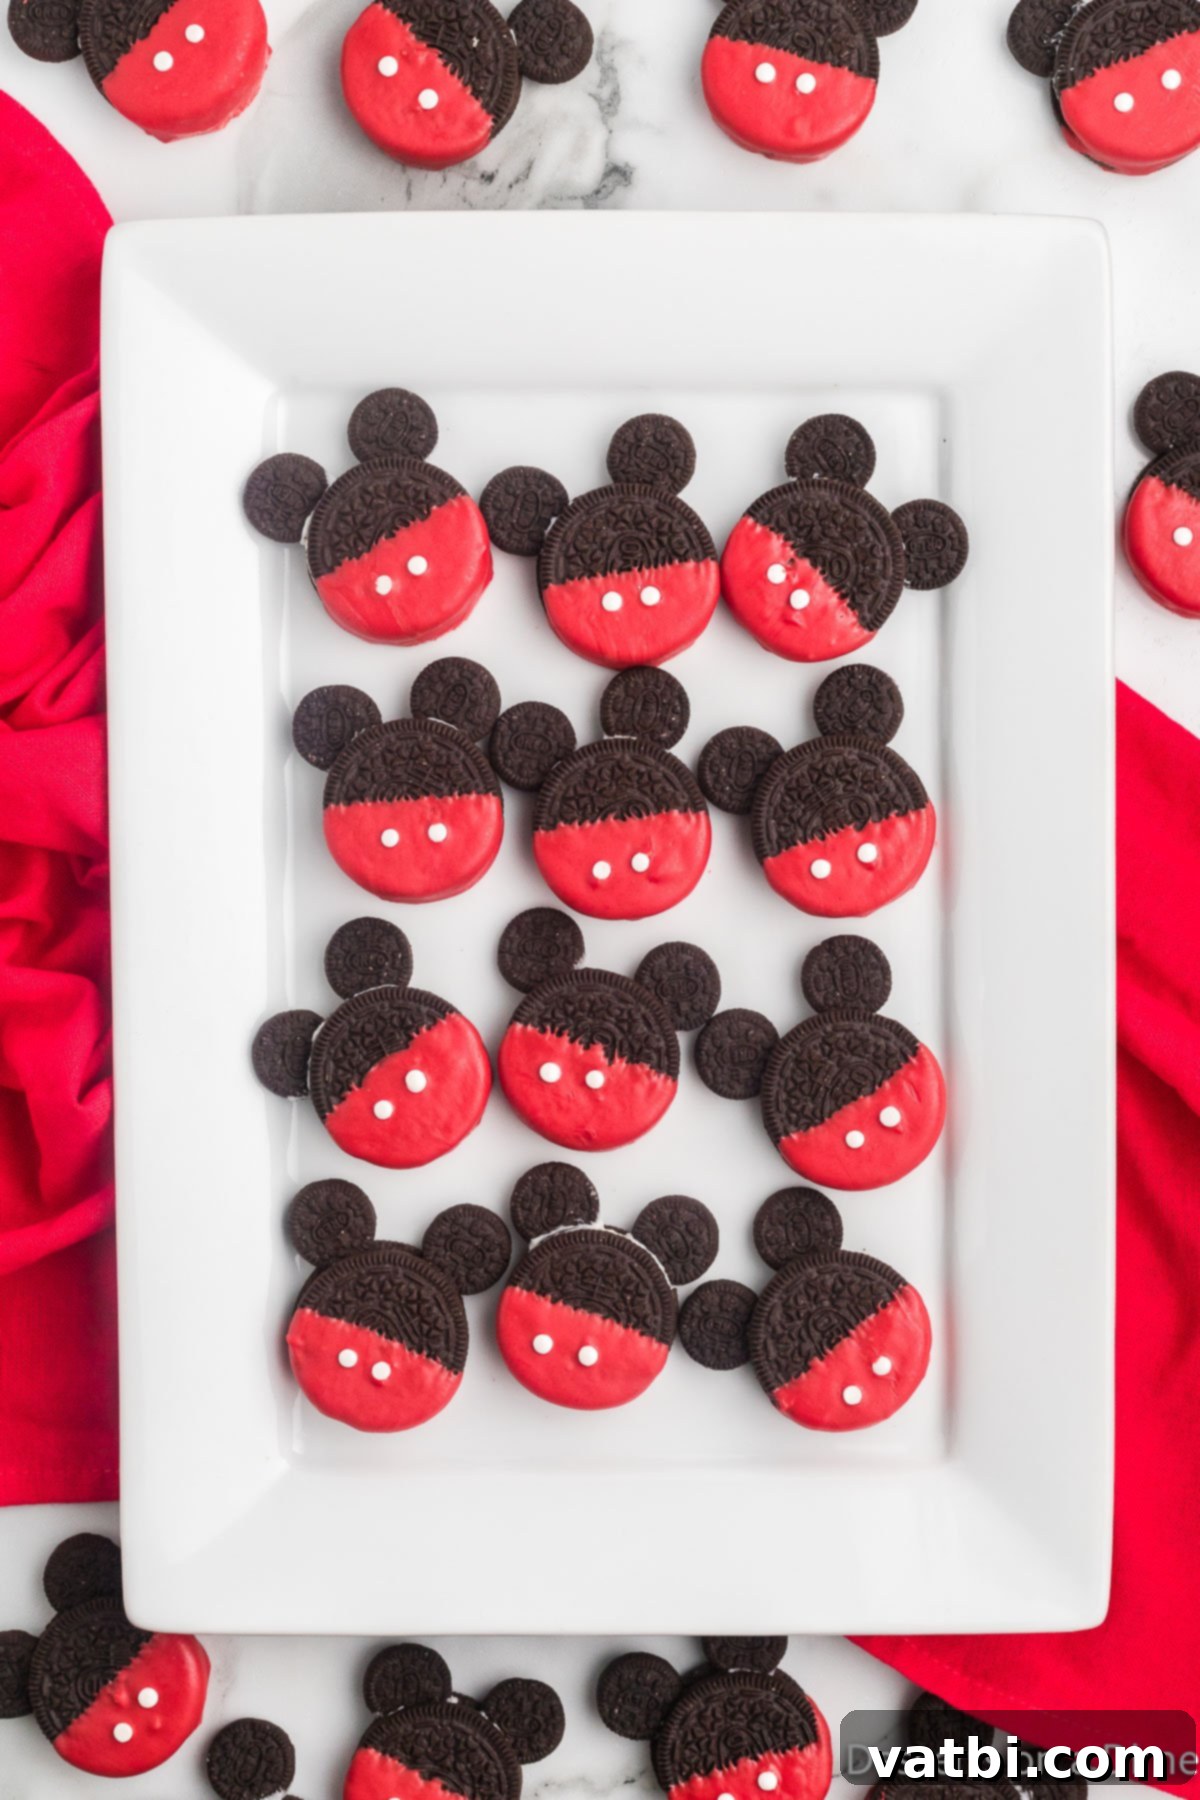
With a simple list of just 5 ingredients, these delightful Mickey Mouse treats come together in a flash, making them ideal for busy schedules or spontaneous cravings. This is undoubtedly one of the cutest no-bake dessert recipes you’ll ever encounter. Having explored many Disney-inspired recipes over the years, from our popular Copycat Disney Churro Recipe to classic Mickey Mouse Cookies, I can confidently say these Oreo versions are a hit with everyone, young and old.
This charming cookie recipe offers a fantastic way to infuse your home with that undeniable Disneyland magic. Imagine the smiles on your kids’ faces as they help create (and devour!) these iconic Mickey-themed treats. While they make fantastic Christmas cookies, their timeless appeal means they’re perfect for any holiday, birthday party, school event, or even just a cozy family movie night. They’re guaranteed to be a crowd-pleaser and a memorable addition to any spread.
What’s in this post: Mickey Mouse Oreo Cookies
- Why We Love This Recipe
- Ingredients
- Variations
- Step By Step Instructions
- FAQs
- Pro Tips
- More Fun Oreo Recipes
- Oreo Mickey Mouse Cookies Recipe
Why You’ll Adore This Mickey Mouse Oreo Cookie Recipe
There are countless reasons why these delightful Mickey Mouse Oreo cookies have become a cherished favorite in our home and are sure to be in yours too!
- So Much Fun for Special Occasions: These cookies aren’t just a dessert; they’re an experience! Their instantly recognizable Mickey shape brings a burst of joy and festivity to any event. They are absolutely perfect for Disney-themed birthday parties, adding a magical touch to the dessert table. Beyond birthdays, think school parties, movie nights, summer gatherings, Halloween celebrations, or even just a fun weekend activity with the kids. They transform a simple snack into a memorable occasion.
- Effortless No-Bake Recipe: The convenience factor of this recipe cannot be overstated. You don’t even need to preheat or use the oven, making it perfect for hot summer days or when you simply want a quick dessert without the fuss. This also means little hands can get involved safely in the creation process, fostering fun family memories. Plus, there’s no need for any specialized equipment like a Mickey Mouse cookie cutter, making it accessible to everyone.
- Adorable and Irresistibly Delicious: Not only do these cookies capture the iconic and beloved Mickey shape beautifully, but they also taste absolutely wonderful. The classic combination of rich Oreo cookies paired with a sweet, smooth candy coating is a match made in dessert heaven. Their vibrant appearance makes them a visual treat, while their delightful flavor ensures they’ll be devoured in no time.
- Minimal Ingredients and Quick Prep: With only five core ingredients, you can whip up a batch of these charming cookies in under 30 minutes. This makes them an ideal choice for last-minute party preparations or when you need a speedy yet impressive dessert.
Simple Ingredients for Magical Mickey Mouse Oreos
One of the best parts about this recipe is its simplicity. You only need a few readily available ingredients to bring these adorable Mickey Mouse Oreo cookies to life!
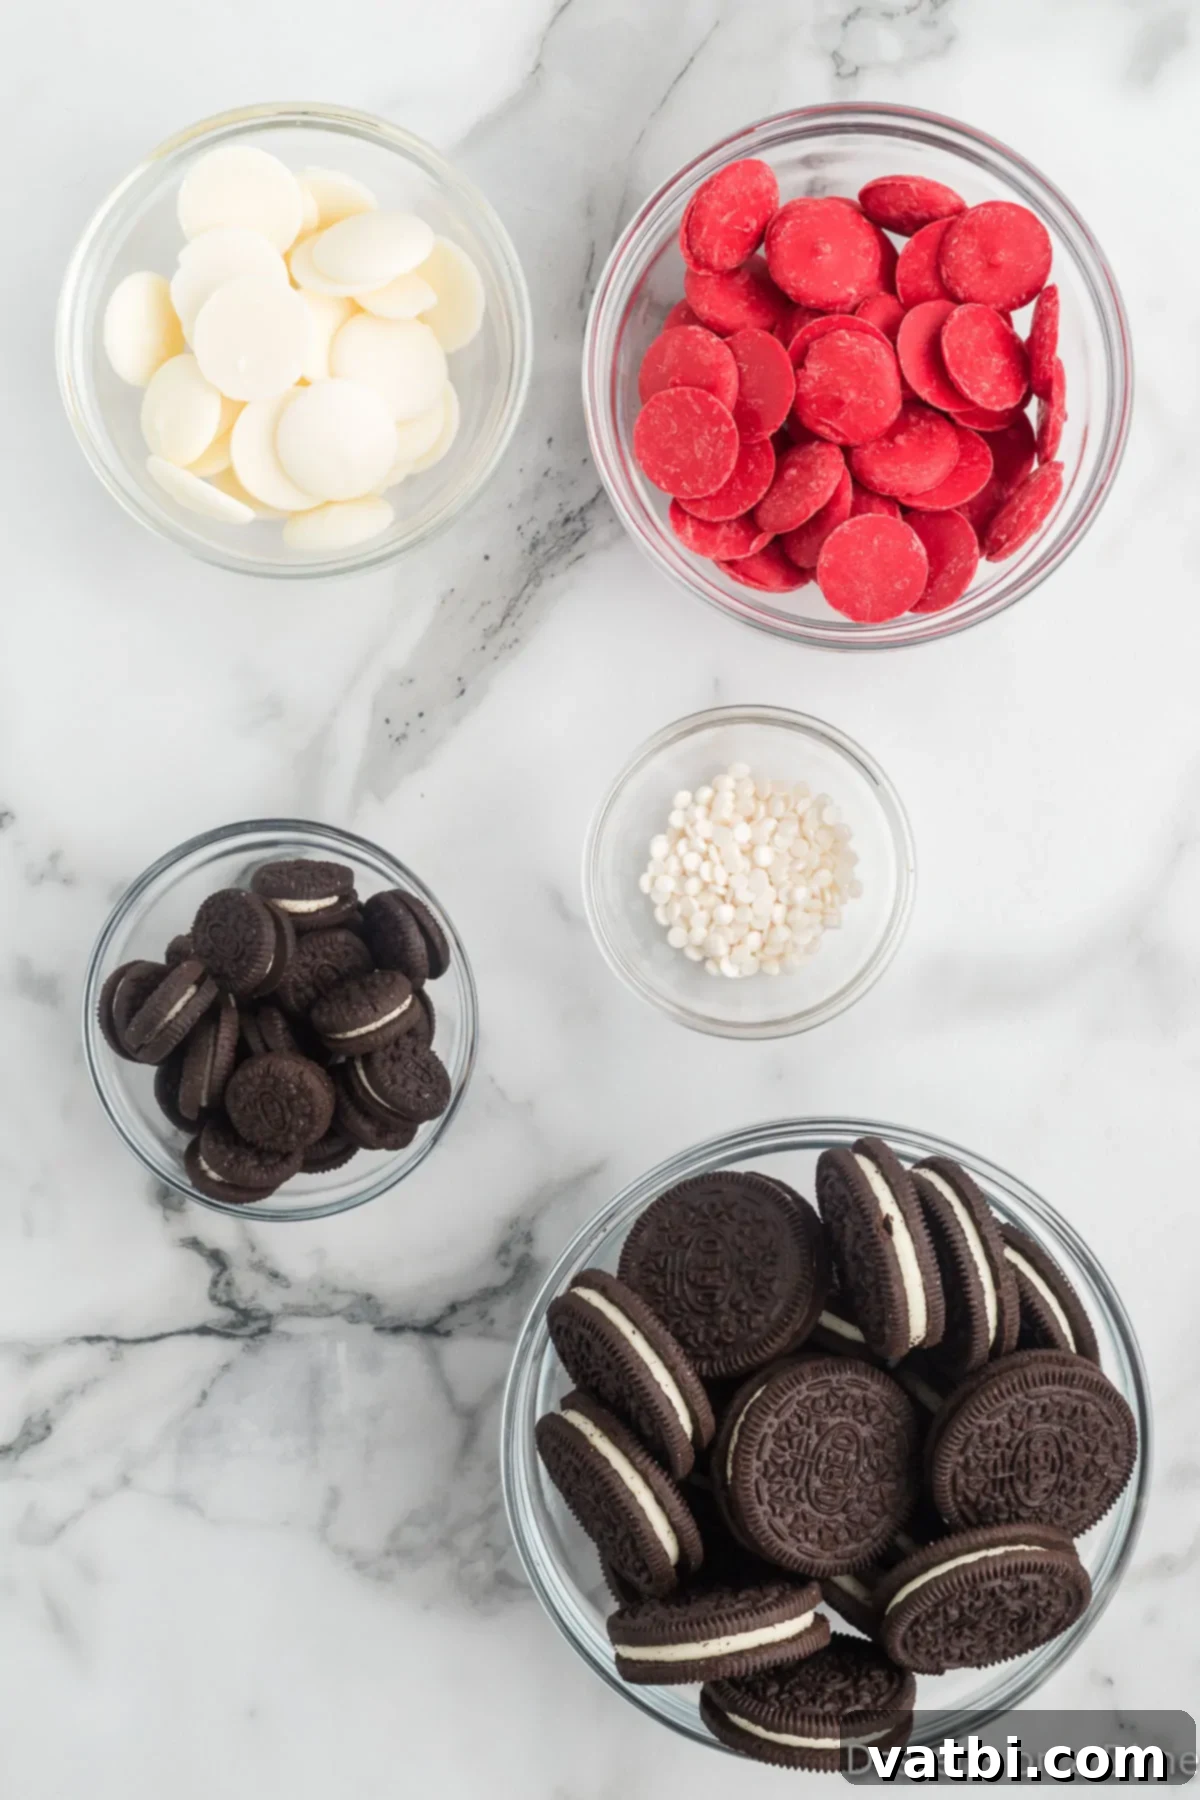
- Double Stuffed Oreo Cookies: These are the star of our show! We specifically recommend using double stuffed Oreos because their thicker cream filling provides a more stable base. This extra filling acts as a perfect adhesive to securely hold the mini Oreo “ears” in place, ensuring your Mickey shapes stay intact.
- Mini Oreo Cookies: These tiny treasures are absolutely essential for creating Mickey’s iconic ears. Their small size is perfectly proportionate to the larger Double Stuffed Oreos, giving you that classic silhouette. If mini Oreos are difficult to find, some people have successfully used Oreo thin bites cookies as an alternative, carefully breaking them to the right size.
- Candy Melts (White and Red): Candy melts are a game-changer for this recipe. Unlike regular chocolate chips, they are formulated to melt incredibly smoothly and harden quickly without needing tempering. This results in a beautiful, glossy, and vibrant coating for your cookies. You’ll need white for attaching the ears and red to create Mickey’s signature shorts. High-quality candy melts will give you the best results.
- White Circle Candy Sprinkles: These small, round sprinkles are used to replicate the iconic white buttons on Mickey Mouse’s shorts. The circular shape is crucial for authenticity. If you can’t find specific white circle sprinkles, white nonpareil sprinkles can work in a pinch, or you can even pipe small dots of melted white candy melts using a piping bag with a tiny tip (or a Ziploc bag with the corner snipped).
For the precise quantities, please refer to the detailed recipe card conveniently located at the bottom of this page.
Creative Variations to Customize Your Mickey Mouse Oreos
While the classic Mickey Mouse Oreo cookie is perfect as is, there are many fun ways to personalize these treats to suit different themes, holidays, or preferences. Get creative and make them uniquely yours!
- Mickey Mouse Cookie Pops: To transform your cookies into delightful lollipops, simply insert a sturdy sucker stick into the top center of each Double Stuffed Oreo before dipping them into the red candy melts. These make fantastic party favors or a fun grab-and-go treat. Just ensure the stick is firmly embedded into the cream filling for stability.
- Charming Minnie Mouse Cookies: Easily turn these into Minnie Mouse Oreo Cookies by swapping the red candy melts for pink candy melts. For Minnie’s iconic bow, you have a few options: you can use a small, red or pink candy bow sprinkle, or even fashion a bow using two small heart-shaped candies (like conversation hearts) inserted at the top center, with a small oval sprinkle in the middle. Add white polka dots using white sprinkles or piped white candy melts on the pink “dress” portion for an extra touch of Minnie charm.
- Alternative Coatings: While candy melts work wonderfully, you can experiment with other coatings. Dip the entire cookie in melted chocolate wafers (milk, dark, or white chocolate) or melted almond bark for a different flavor profile. Once dipped, you can still add the red bottom and white buttons. For a festive touch, top your dipped cookies with red sprinkles, pink sprinkles, or crystal sprinkles that match your party theme.
- Piped White Candy Melts for Buttons: If you struggle with placing tiny sprinkles, or simply prefer a smoother look, melt a small amount of white candy melts and transfer it to a small Ziploc bag. Snip a tiny tip off the corner of the bag and pipe small, even dots onto the red-dipped portion of the cookie to create the buttons. This method offers great control and a neat finish.
- Seasonal Color Schemes: Adapt the colors of the candy melts and sprinkles to match various holidays or events. For Halloween, use orange or purple candy melts. For a baby shower, try pastel blue or pink. The possibilities are endless!
Step-by-Step Guide to Making Mickey Mouse Oreo Cookies
Creating these magical Mickey Mouse Oreo cookies is a straightforward and enjoyable process. Follow these simple steps for perfect results every time!
- Step 1: Prepare Your Workspace
Start by lining a large baking sheet with either parchment paper or wax paper. This crucial step ensures that your dipped cookies won’t stick to the pan and makes for easy cleanup once they’ve set.
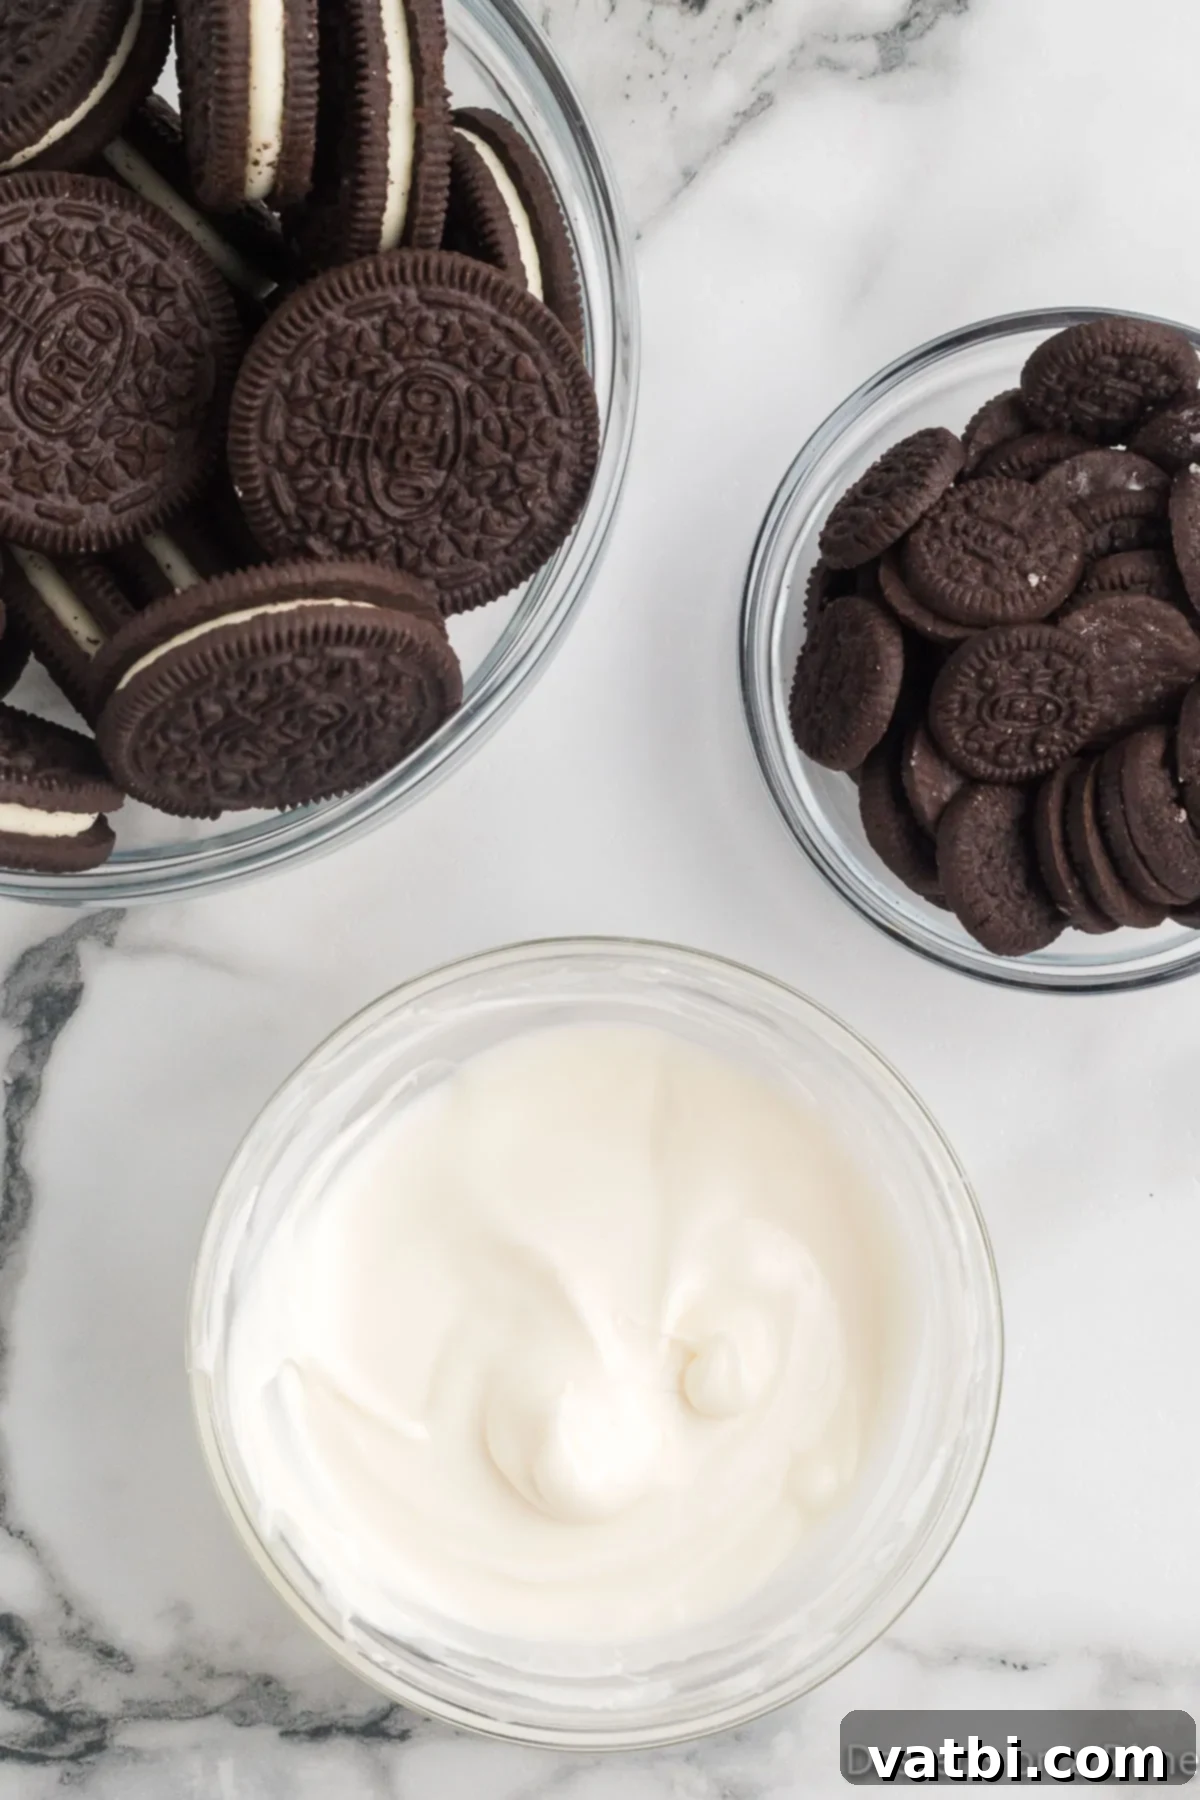
Step 2: Melt the White Candy Melts
Place the white candy melts in a microwave-safe bowl. Heat them in short 30-second increments, stirring thoroughly after each interval. Continue this process until the candy melts are completely smooth and free of any lumps. Stirring frequently prevents burning and ensures an even consistency.
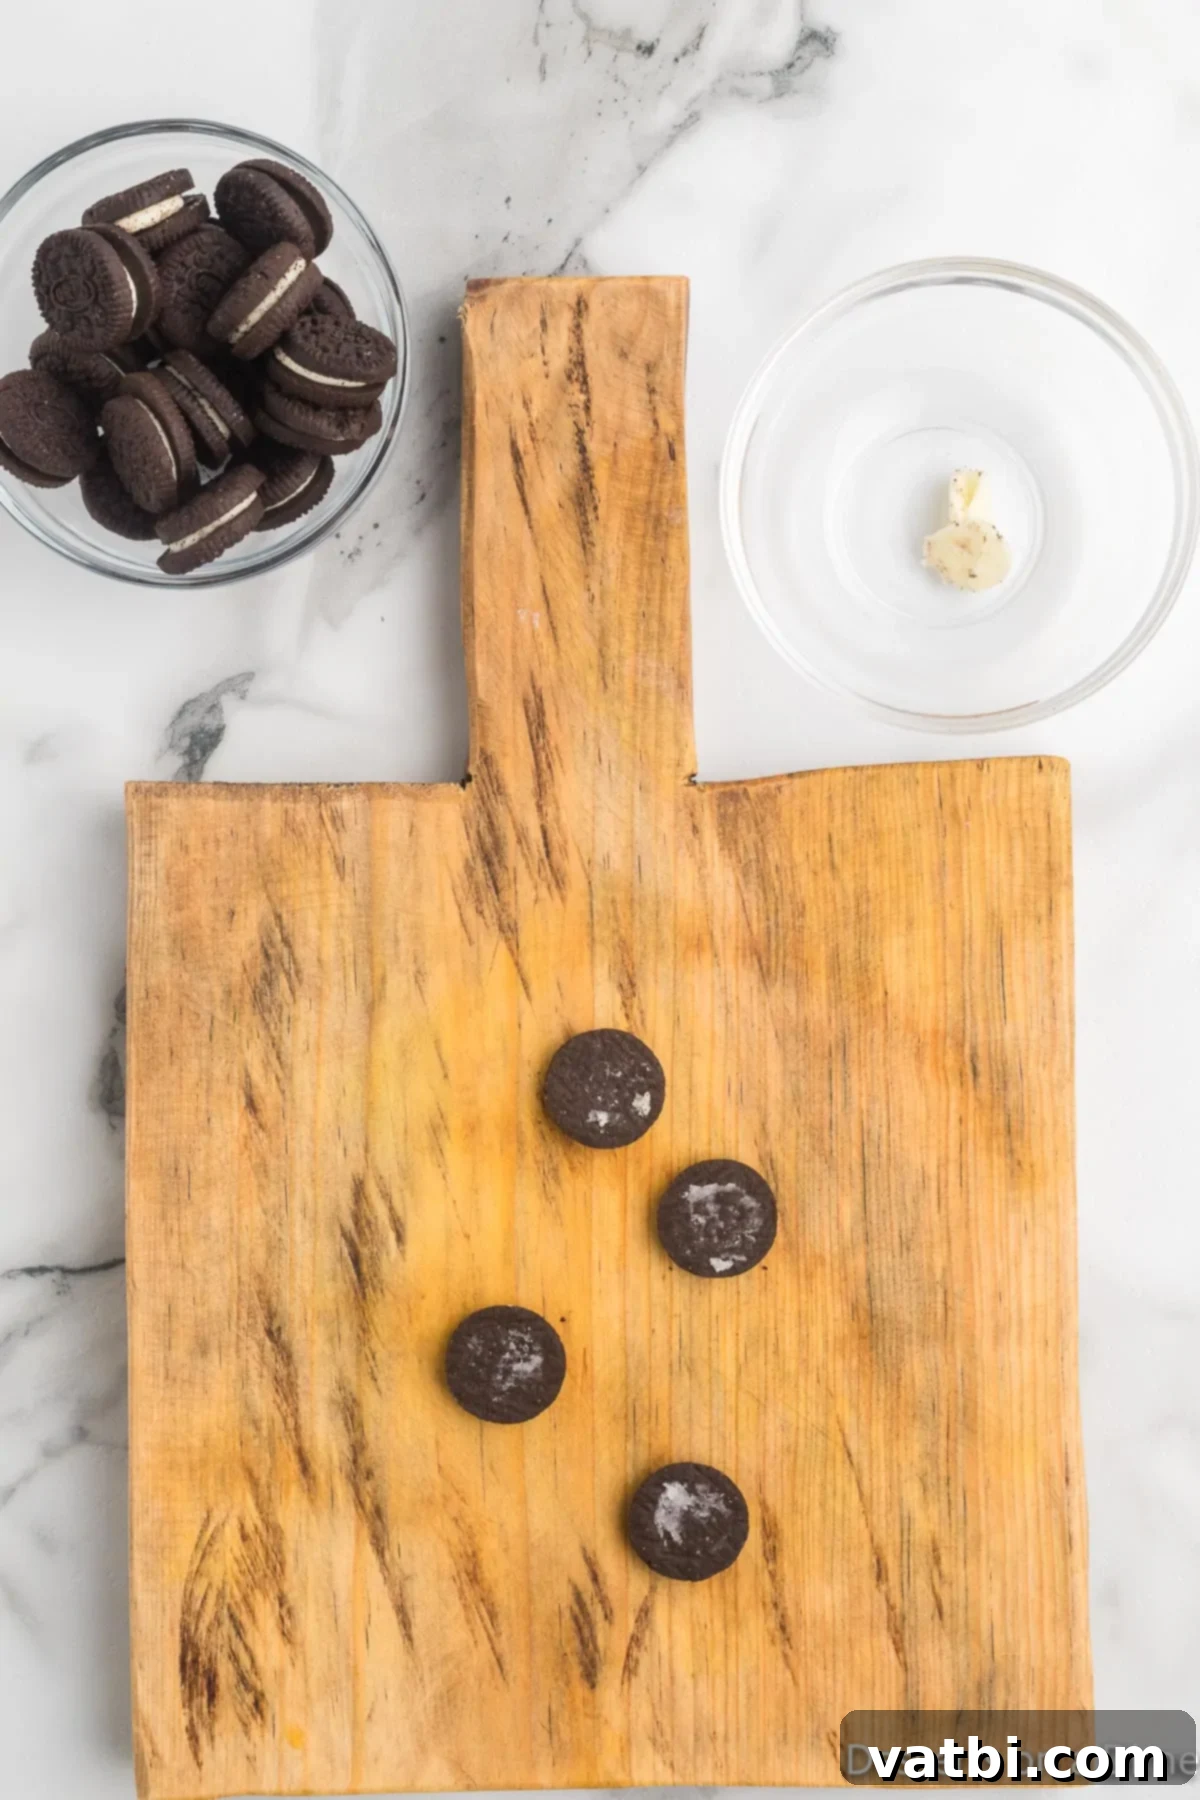
Step 3: Prepare the Mini Oreo Ears
Using a small knife, carefully twist apart the mini Oreo cookies. Gently scrape or wipe away the cream center from each half. We remove the cream to prevent the “ears” from being too heavy and to ensure they adhere better. Leave the separated mini cookie halves on your counter, ready for assembly.
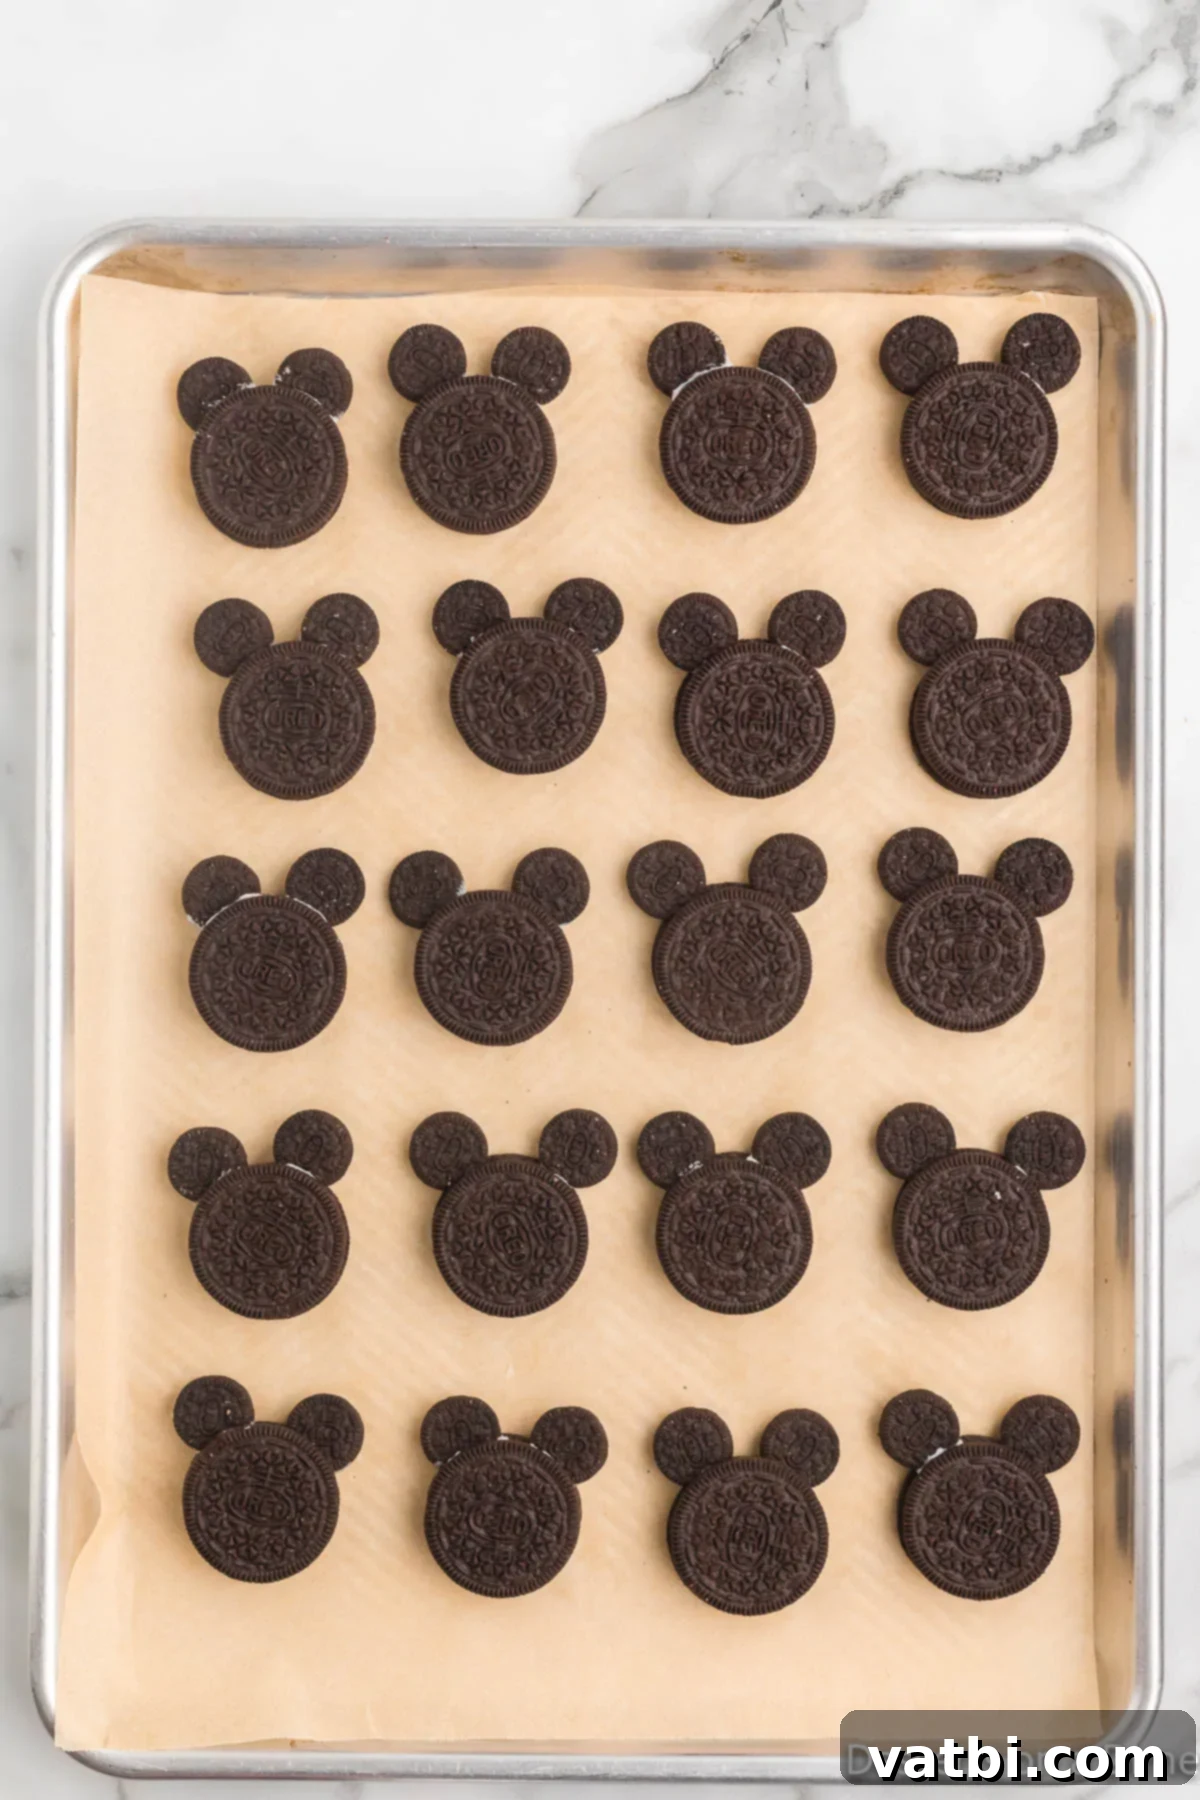
Step 4: Assemble Mickey’s Ears
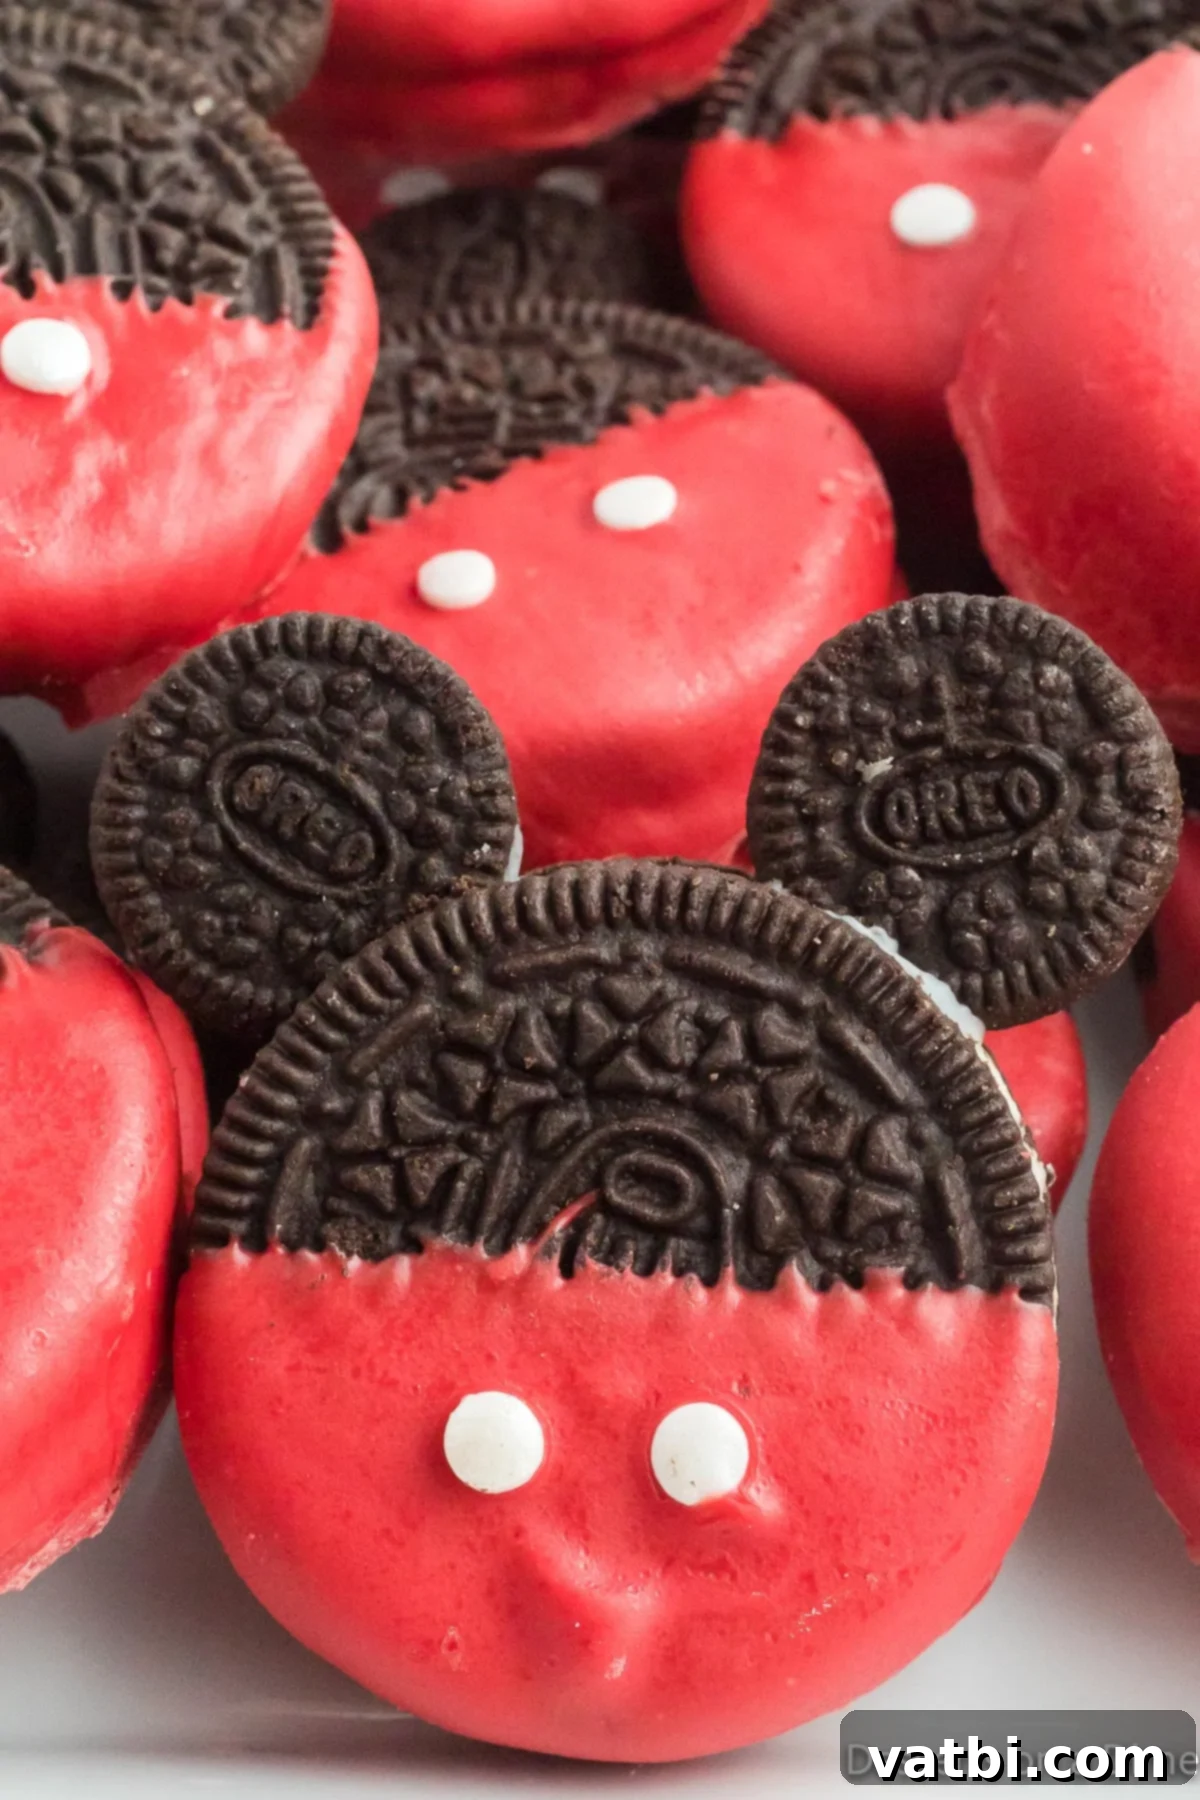
Dip one flat end of a mini Oreo half into the melted white candy. Immediately press this dipped end into the cream filling of a Double Stuffed Oreo cookie. Carefully place one mini Oreo half on each side of the top portion of the larger Oreo to perfectly resemble Mickey Mouse’s iconic ears. Arrange the assembled cookies on your prepared baking sheet.
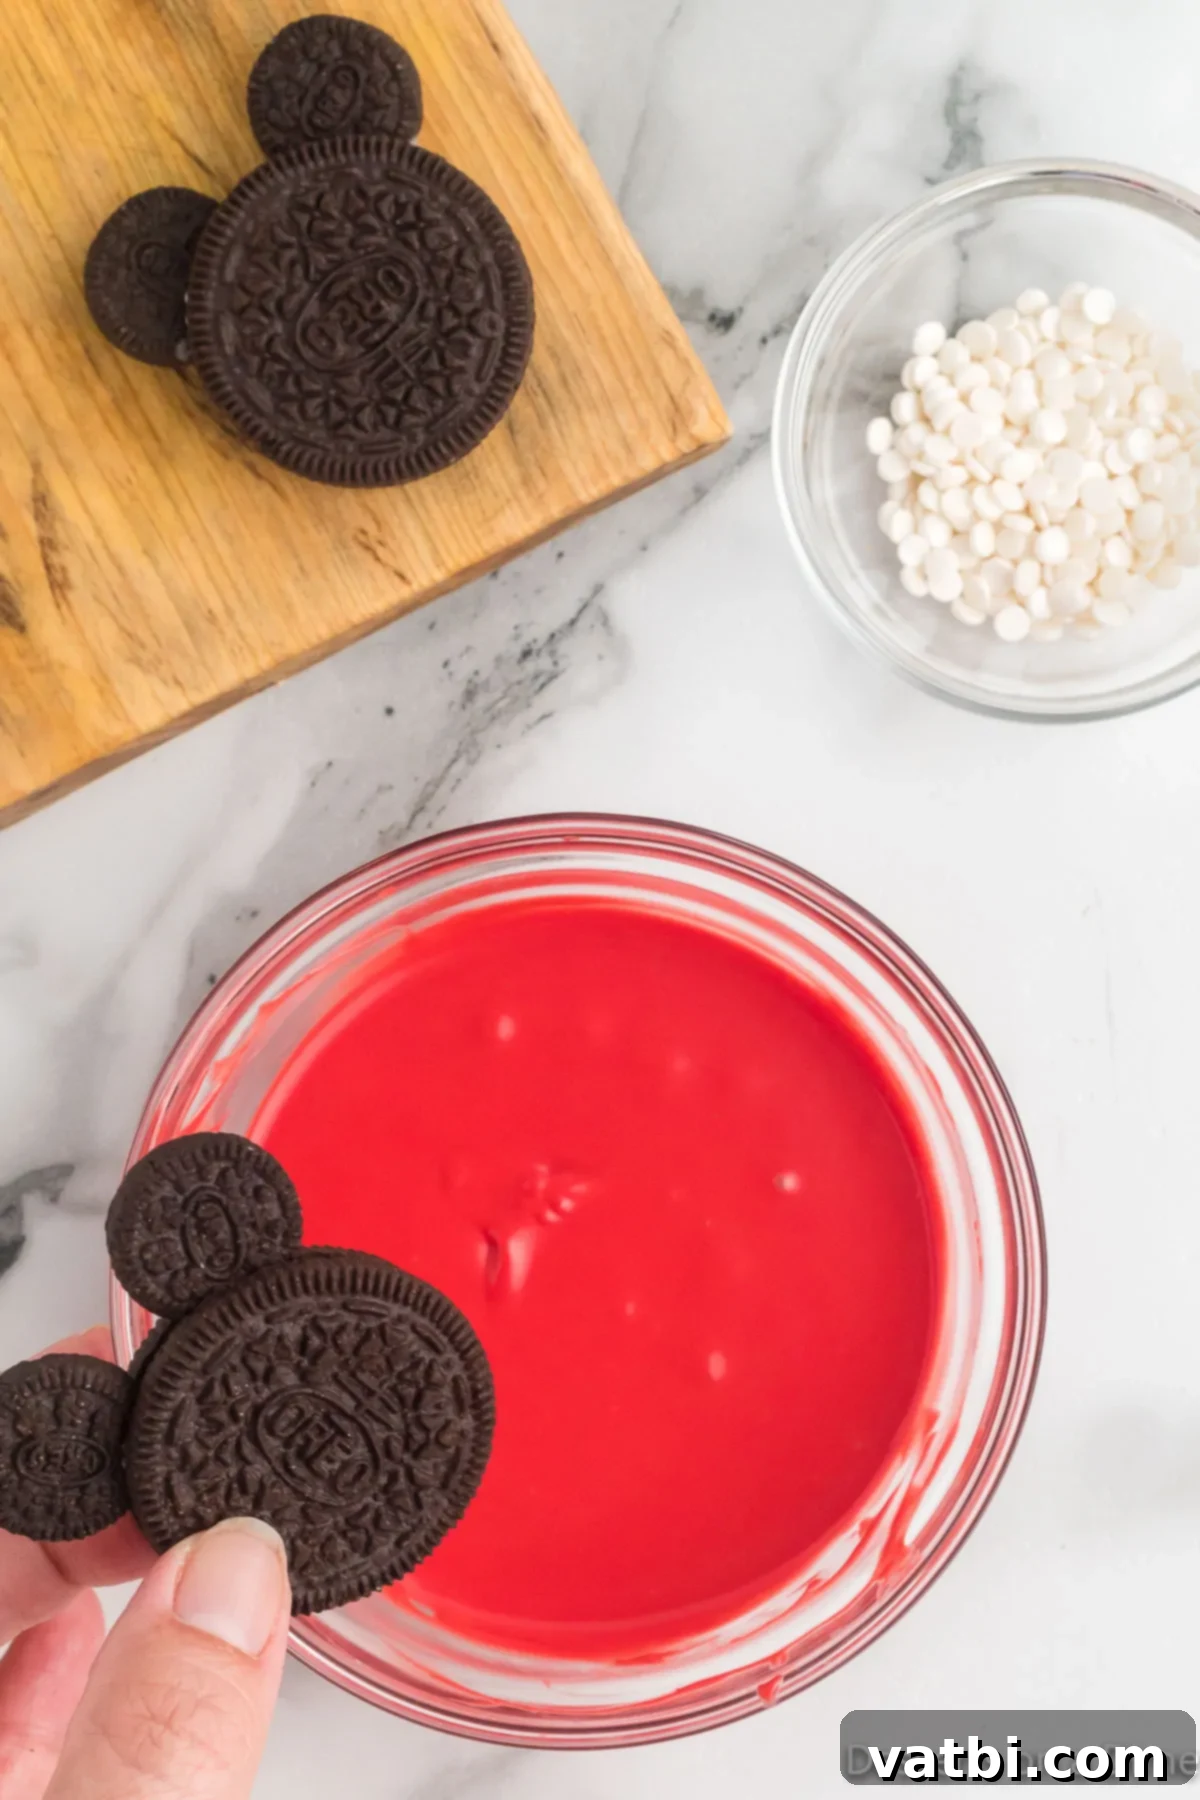
Step 5: Dip in Red Candy Melts
Next, melt the red candy melts following the same microwave instructions as the white candy melts (30-second intervals, stirring until smooth). Once melted, carefully dip the bottom half of each assembled Double Stuffed Oreo (the part that will be Mickey’s shorts) into the melted red candy. Gently tap the side of the bowl with a fork to remove any excess candy melts from the bottom edge, ensuring a clean finish. Place them back on the parchment-lined baking sheet.
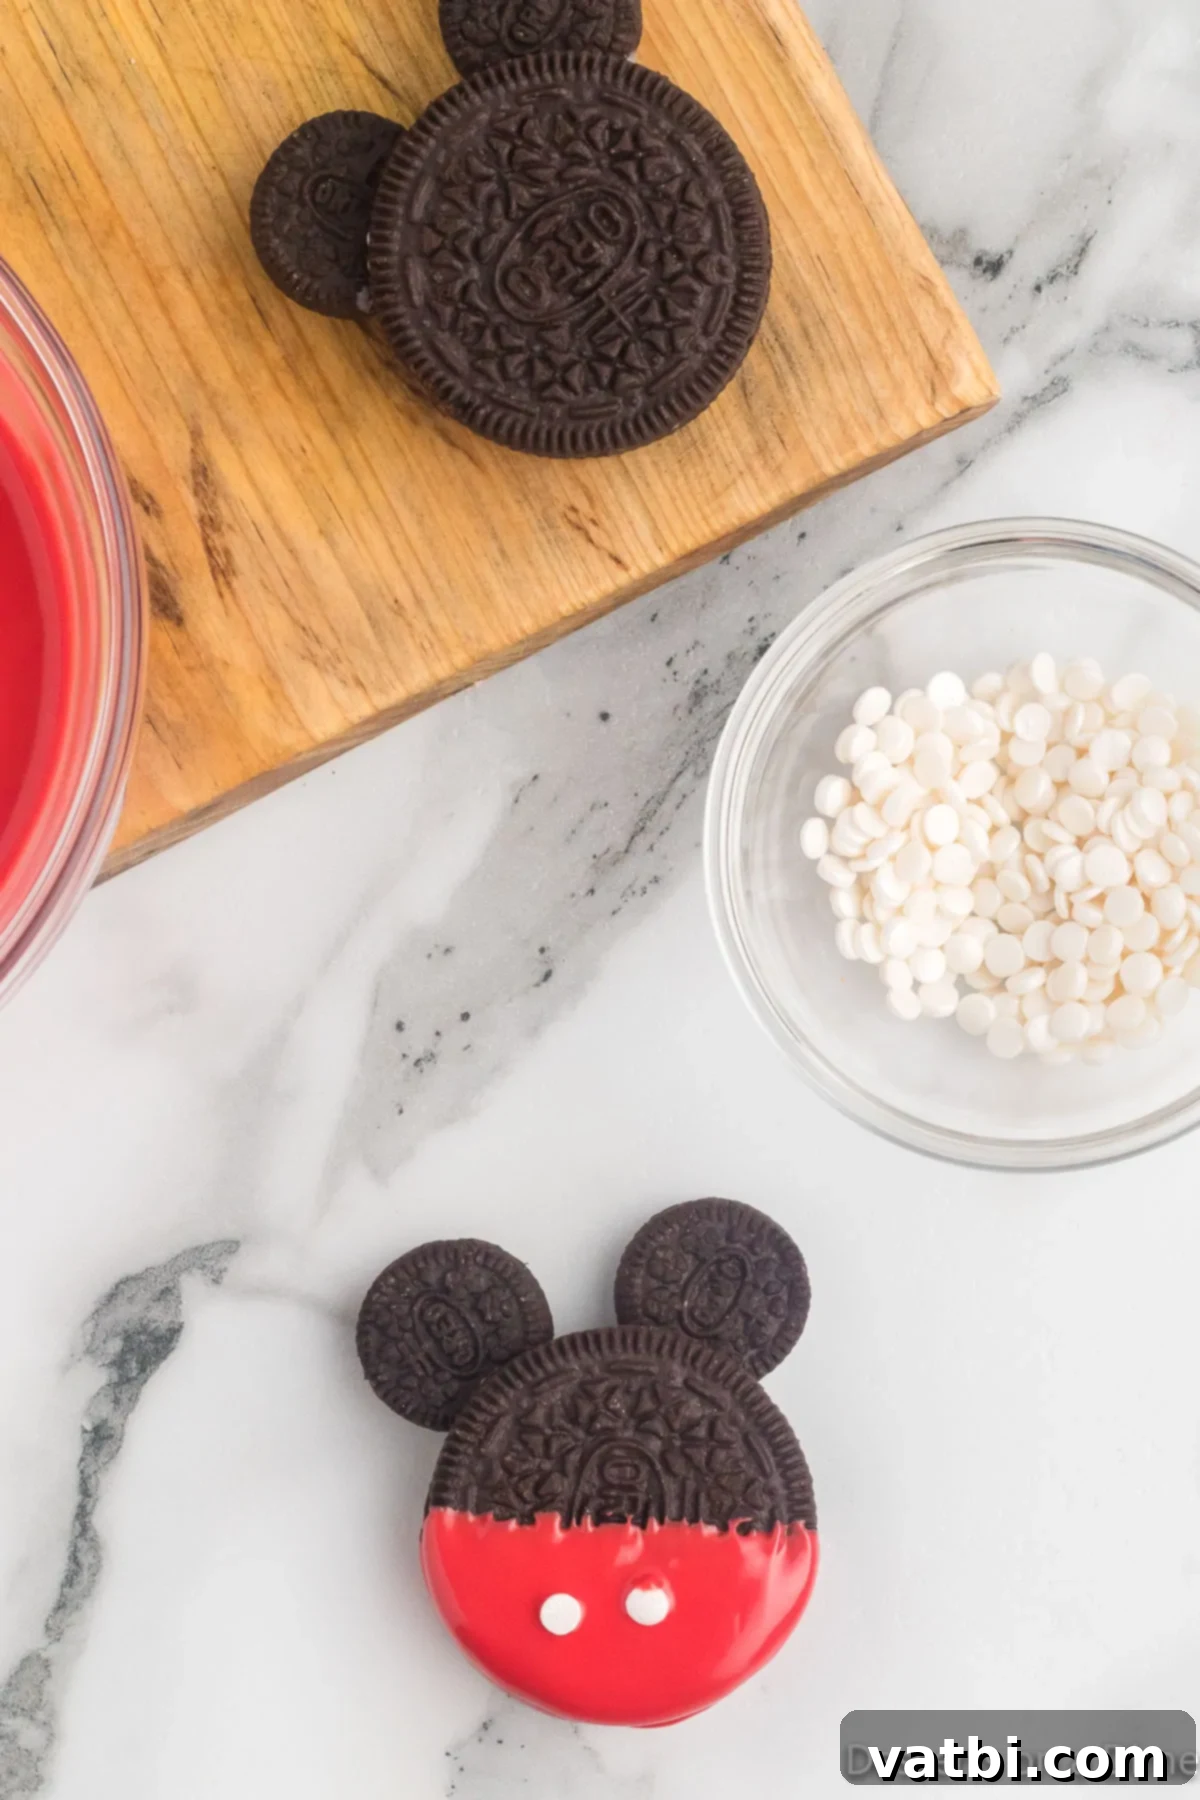
Step 6: Add Mickey’s Buttons
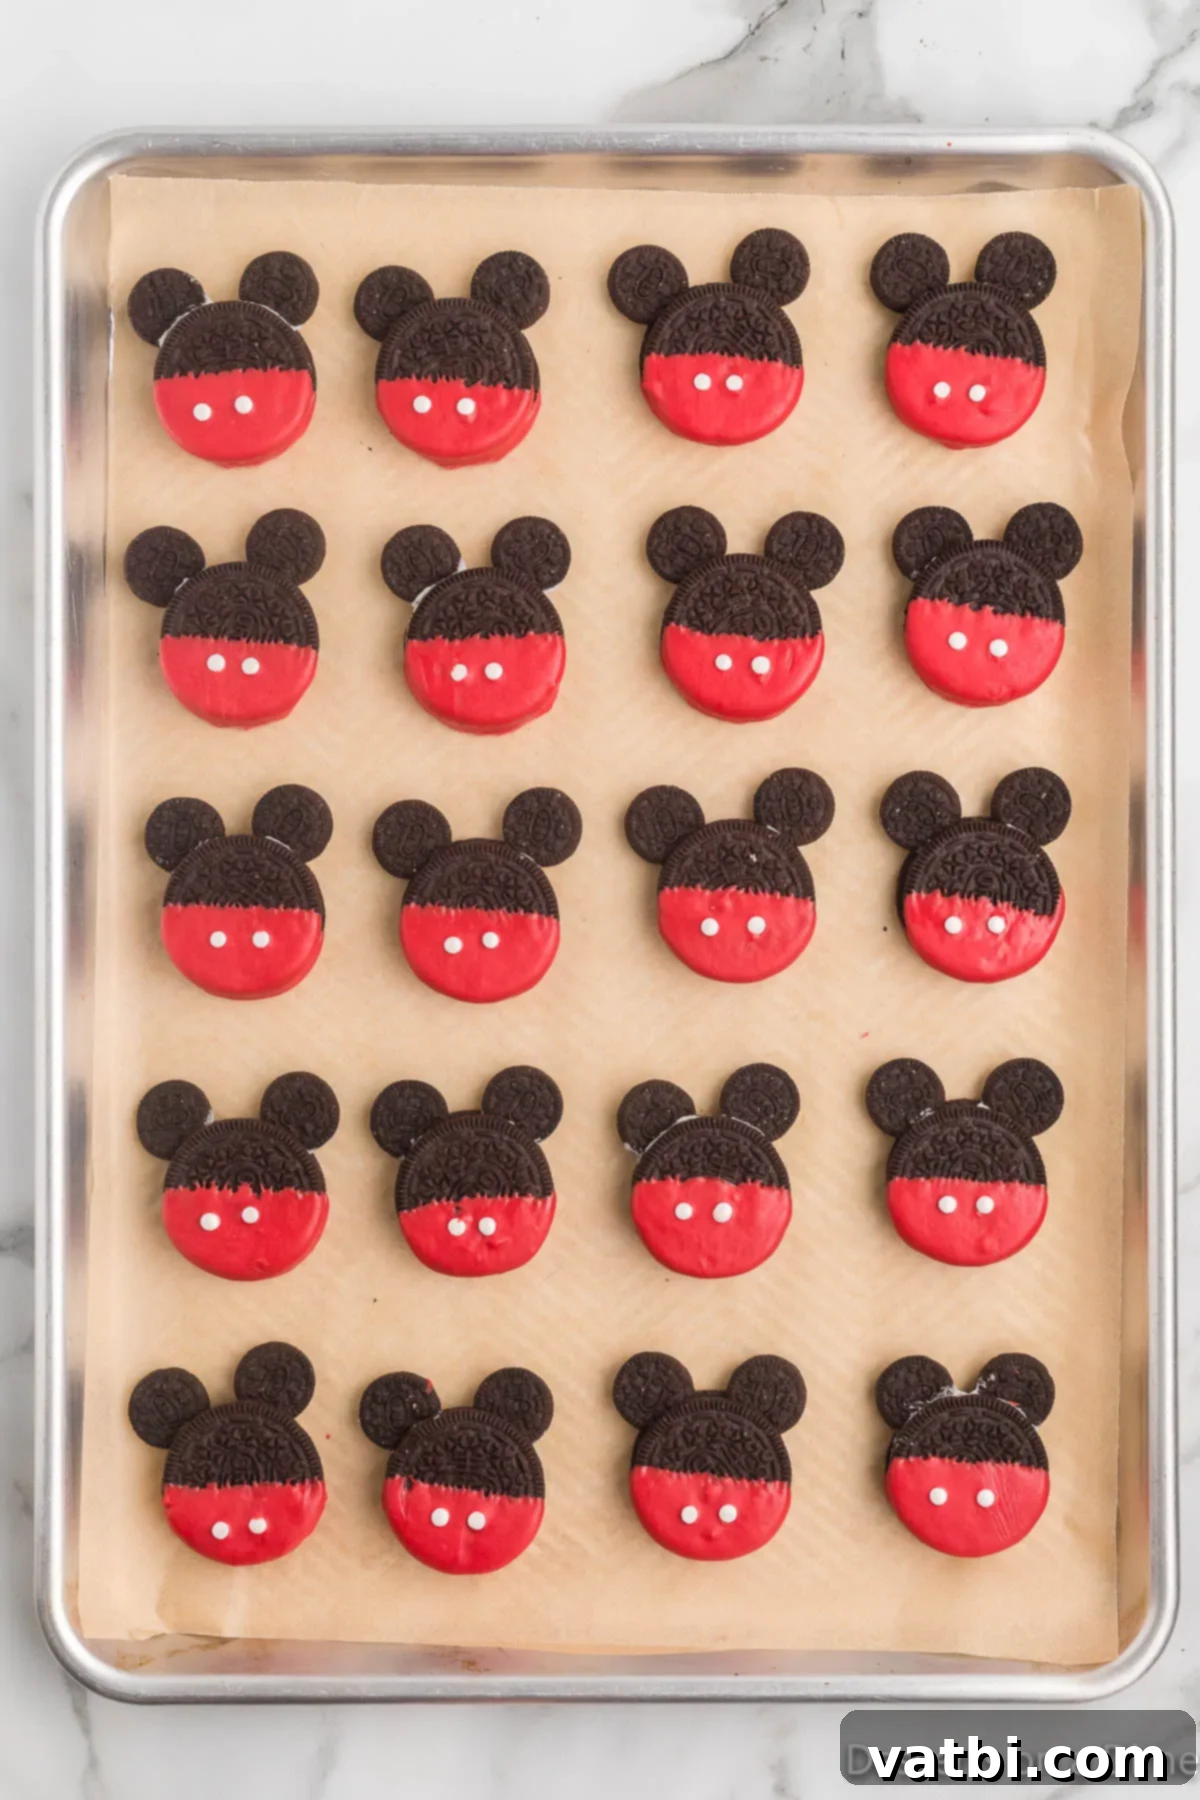
Quickly pour your white circle candy sprinkles into a small bowl. Before the red candy melts have a chance to set (this is crucial for adhesion!), carefully place two white circular sprinkles onto the red-dipped bottom half of each cookie. Position them to resemble Mickey’s signature buttons. Work efficiently to ensure the sprinkles stick firmly.
Step 7: Allow to Set and Serve
Continue these steps until all your cookies have been transformed into adorable Mickey Mouse heads with their signature shorts and buttons. Arrange them in a single layer on the cookie sheet. Allow them to set completely at room temperature, which usually takes about 15-30 minutes, or for faster results, place them in the refrigerator or freezer for 10-15 minutes. Once fully set, they are ready to be served and enjoyed!
Frequently Asked Questions About Mickey Mouse Oreo Cookies
To maintain their freshness and prevent them from melting, especially in warmer environments, store any leftover Mickey Mouse Oreo Cookies in an airtight container. You can layer them with parchment paper in between to prevent sticking. They will stay fresh and delicious for up to 1 week at room temperature in a cool, dry place. While you don’t necessarily need to store them in the refrigerator, it can help them set faster and is advisable if your kitchen is particularly warm.
Absolutely, feel free to get creative with your Oreo choices! While the classic Double Stuffed Oreos provide a familiar flavor and solid base, you can certainly swap them for other exciting flavors. Consider Golden Oreos for a lighter look, Mint Oreos for a refreshing twist (especially around holidays), or Peanut Butter Oreos for an extra indulgent treat. Just ensure they are still the Double Stuffed variety for optimal ear adhesion.
If you can’t find red or white candy melts, you can use white chocolate chips or almond bark and tint them with oil-based food coloring. Water-based food coloring will cause the chocolate to seize. You can also look for colored melting wafers in baking supply stores or online. Alternatively, you can use regular chocolate (milk, dark, or white) for the main dip and then use colored candy writers for the details.
Pro Tips for Perfect Mickey Mouse Oreo Cookies
Achieving picture-perfect and delicious Mickey Mouse Oreo Cookies is easy with a few insider tricks. Keep these professional tips in mind for the best results!
- Act Quickly with Sprinkles: This is a critical step! You must add the white circular sprinkles for Mickey’s buttons immediately after dipping the cookie into the red candy melts. If you wait even a minute for the candy to begin setting, the sprinkles will not adhere properly and will simply fall off.
- Remove Mini Cookie Filling: Always remember to remove the cream filling from the mini Oreo halves before using them as ears. If the filling remains, the mini cookies become too heavy, making them prone to falling off the larger Oreo and creating an unstable Mickey shape.
- Ensure Full Setting Time: Patience is a virtue here. The cookies need to be completely set and hardened before you attempt to move or store them. Handling them too soon can lead to smudges, drips, or even broken ears. Setting them in the refrigerator or freezer will significantly speed up this process.
- Tweezers or Toothpick for Sprinkles: The white circle candy sprinkles are quite small, and sometimes placing them with fingers can be tricky. For precision and ease, consider using a pair of clean food-safe tweezers or the tip of a toothpick to carefully position the sprinkles onto the wet candy melts.
- Keep Extra Oreo Cookies Handy: It’s always a good idea to have a few extra Double Stuffed Oreo cookies on hand than what the recipe calls for. Sometimes a few might break during handling, or you might want to practice your dipping technique. Having spares ensures you can complete your full batch without interruption.
- Thinning Candy Melts for Smooth Dipping: If your melted candy melts appear too thick or clumpy, preventing a smooth, even coating, you can thin them out. Add a teaspoon of coconut oil or vegetable shortening (not water!) to the melted candy and stir until incorporated. You can add up to a tablespoon of coconut oil per bag of candy wafers until you achieve a silky-smooth, pourable consistency.
- Set Up a Dipping Station: Organize your workspace by setting up a dipping station. Have your melted white candy, mini Oreo halves, melted red candy, and sprinkles all within easy reach. This streamlines the process and helps you work quickly before the candy melts set.
- Don’t Overheat Candy Melts: Overheating candy melts can cause them to seize, become grainy, or lose their smooth texture. Always heat in short bursts and stir frequently. If they get too hot, they can become unusable.
More Fun Oreo Recipes to Explore
If you loved making these Mickey Mouse Oreo Cookies, you’re in for a treat! Oreos are incredibly versatile and perfect for a wide range of no-bake and easy desserts. Here are some more fantastic Oreo-inspired recipes you’ll surely enjoy:
- Football Oreo Balls
- White Chocolate Covered Oreos
- Easy Oreo Fluff Recipe
- Oreo Cake Pops
- Cookies and Cream Muddy Buddies
I am genuinely so excited for you to try these incredibly easy and charming no-bake Disney cookies. They’re a fantastic way to add a touch of magic to any day. Make sure to come back and leave a comment once you’ve made them – I love hearing about your creations! These are truly sure to become your new favorite go-to recipe for fun and festive treats.
Pin
Oreo Mickey Mouse Cookies
Ingredients
- 20 Double Stuffed Oreo Cookies
- 20 Mini Oreo Cookies (halved with cream removed)
- 1/2 cup White Candy Melts
- 1 cup Red Candy Melts
- 40 White Circle Candy Sprinkles
Instructions
-
1. Line a large baking sheet with parchment paper or wax paper. This prevents sticking and makes for easy transfer.
-
2. Place the white candy melts in a microwave-safe bowl. Heat in 30-second increments, stirring well after each interval, until completely smooth and melted. Avoid overheating.
-
3. Carefully twist apart the mini Oreo cookies to separate the halves. Using a knife, gently scrape off and remove the cream filling from each half. Leave the cookie halves separated on your counter.
-
4. Dip one flat end of a mini Oreo cookie half into the melted white candy. Gently press this dipped end into the cream filling of a Double Stuffed Oreo cookie. Repeat with another mini Oreo half on the opposite side to create Mickey’s ears.
-
5. Place the assembled cookies on the prepared baking sheet to allow the white candy to set. For quicker results, you can place them in the refrigerator for 10-15 minutes.
-
6. While the white candy sets, place the red candy melts in a separate microwave-safe bowl. Heat in 30-second intervals, stirring after each, until fully melted and smooth.
-
7. Carefully dip the bottom half of each Double Stuffed Oreo (now with ears attached) into the melted red candy. Tap the cookie gently against the side of the bowl with a fork to remove any excess candy and achieve a clean line. Place them back on the baking sheet.
-
8. Immediately after dipping, and before the red candy sets, place two white circle candy sprinkles onto the red portion of each cookie to represent Mickey’s buttons. Work quickly!
-
9. Once all cookies are decorated, allow them to set completely at room temperature or chill them in the refrigerator/freezer for 10-15 minutes until firm. Once the candy melts have fully set, they are ready to serve and enjoy!
Recipe Notes
Nutrition Facts
Pin This Now to Remember It Later
Pin Recipe
