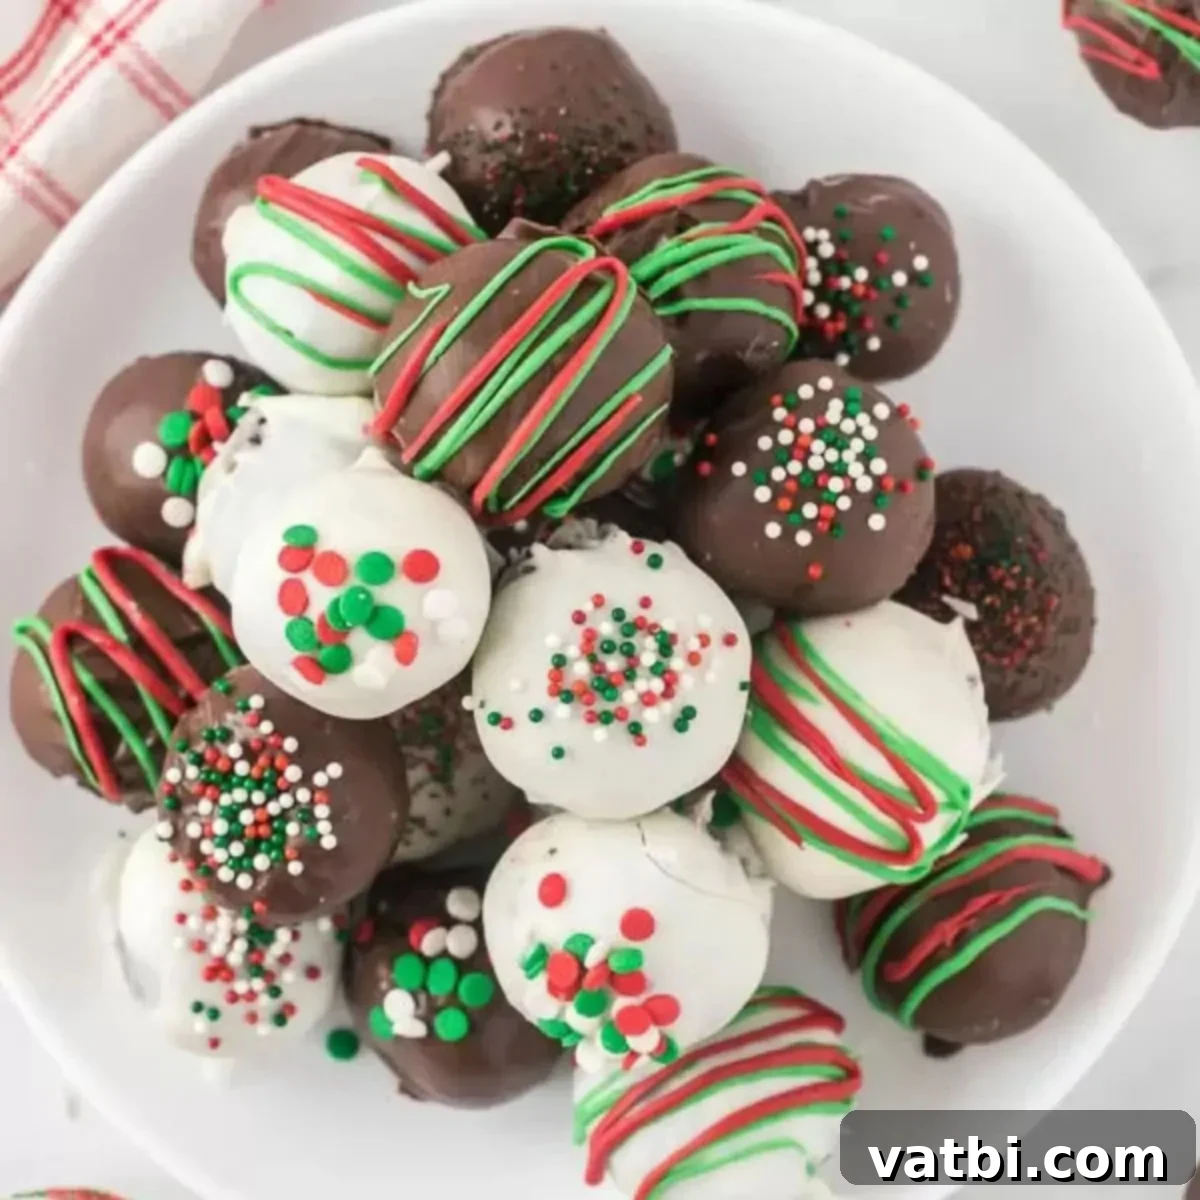
Irresistible Christmas Oreo Balls: Your Ultimate Guide to Easy No-Bake Holiday Treats
Get ready to delight your taste buds and impress your holiday guests with the easiest, most delicious treat of the season: Christmas Oreo Balls! These decadent no-bake truffles are a festive staple, combining the rich flavor of crushed Oreo cookies with a creamy filling, all enveloped in a smooth chocolate coating. Perfect for parties, gifts, or a cozy family night, this super easy recipe will quickly become a cherished part of your holiday traditions.
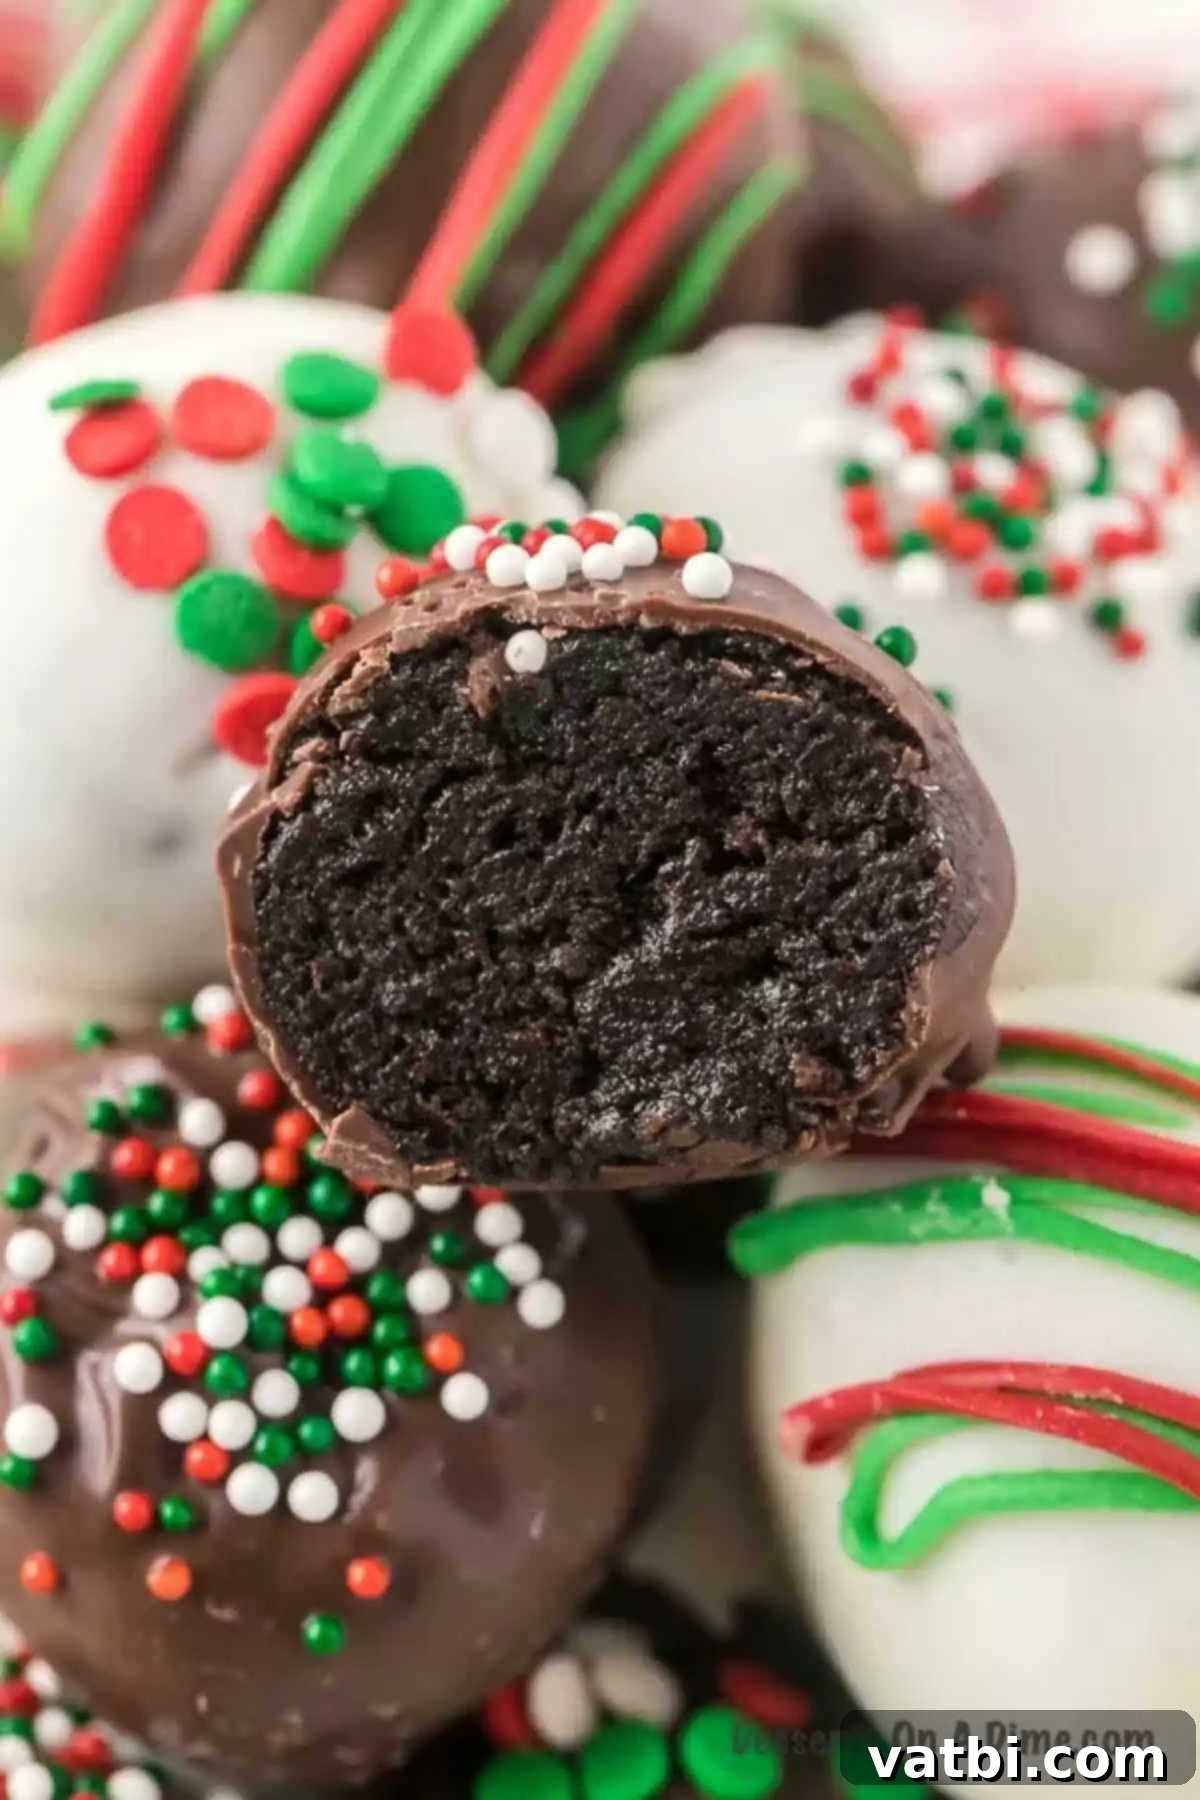
Crafting these delightful Oreo cookie balls takes surprisingly little effort, yet the results are consistently fabulous. The magic lies in a simple, two-ingredient filling: softened cream cheese perfectly blended with finely crushed Oreo cookies. This creates a rich, truffle-like center that is both moist and incredibly flavorful. Once rolled into bite-sized spheres, these cookie masterpieces are then dipped in luscious melted chocolate and adorned with vibrant Christmas sprinkles, transforming them into truly eye-catching and festive treats. Each bite is an explosion of sweet, creamy goodness, making them an undeniable crowd-pleaser.
Year after year, these no-bake treats are a highlight on our dessert table. Their stunning appearance and irresistible taste make them a favorite for holiday gatherings and potlucks. We love creating an impressive tiered tray featuring a variety of festive sweets, often including these Christmas Oreo Balls alongside other holiday favorites like Buckeye Balls, Red Velvet Cake Balls, or even playful Snowman Oreo Balls. Their versatility and appeal ensure they fit perfectly into any holiday dessert spread.
What’s in this post: Christmas Oreo Balls Recipe
- Why this Recipe is a Holiday Hit
- Essential Ingredients
- Creative Variations to Try
- How to Make Oreo Balls for Christmas (Step-by-Step)
- Expert Tips and Tricks for Perfect Oreo Balls
- Frequently Asked Questions
- More Festive Christmas Desserts
- Christmas Oreo Balls Recipe Card
Why This Christmas Oreo Balls Recipe is a Holiday Hit
This recipe consistently earns rave reviews and becomes a holiday tradition for many, and it’s easy to see why. First and foremost, its simplicity is unmatched. With only a few basic ingredients, you can whip up a batch of these impressive treats without any culinary expertise. There’s absolutely no need to heat up your oven, making it a perfect no-bake dessert when your oven is occupied with other holiday dishes or when you simply want to avoid extra heat in the kitchen. The entire process, from preparation to assembly, is quick and straightforward, allowing you to spend less time in the kitchen and more time enjoying the festive season with loved ones. Beyond the ease, the flavor profile is simply divine. The rich, creamy filling made with crushed Oreos and cream cheese offers an incredibly decadent texture that melts in your mouth, perfectly complemented by the crisp, smooth chocolate coating. These Oreo truffles are not just delicious; they are a delightful combination of textures and flavors that captivate everyone who tries them.
Essential Ingredients for Christmas Oreo Balls
You’ll be pleasantly surprised by how few ingredients are required to create such a spectacular dessert. Each component plays a crucial role in achieving the perfect balance of flavor and texture:
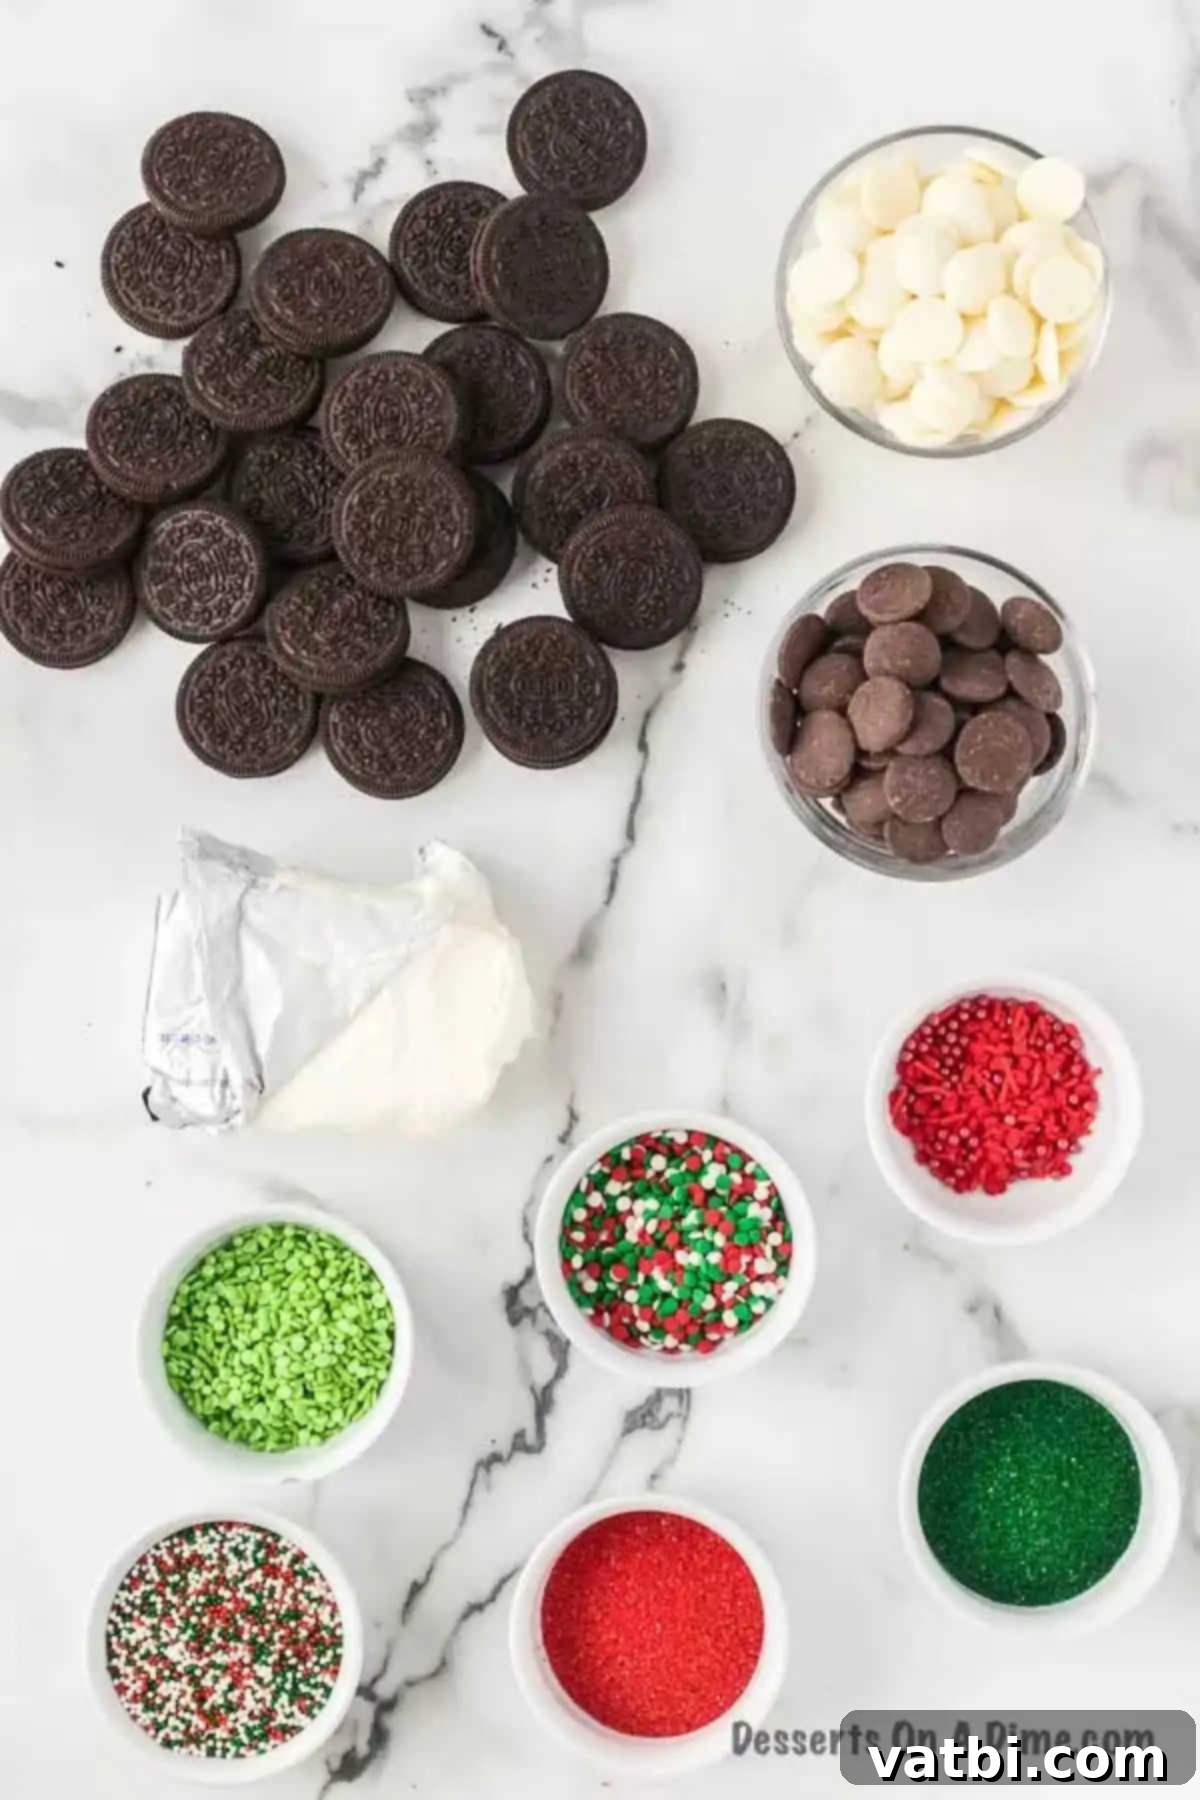
- Cream Cheese: The backbone of our creamy filling. Ensure it’s softened to room temperature for easy blending and a smooth texture. Full-fat cream cheese is highly recommended for the best flavor and consistency.
- Oreo Cookies: The star of the show! Regular Oreos (not Double Stuffed) work best for the ideal cookie-to-cream ratio in the filling.
- Chocolate Dipping Chips: These provide a rich, classic chocolate coating. High-quality melting wafers ensure a smooth, glossy finish that hardens nicely.
- White Chocolate Dipping Chips: For a beautiful contrast and another layer of flavor. White chocolate also provides a perfect canvas for festive sprinkles and colorful drizzles.
- Green Candy Melts: Essential for adding vibrant, festive green drizzles and decorations.
- Red Candy Melts: Paired with the green, these candy melts create that iconic Christmas color scheme through elegant drizzles.
- Christmas Sprinkles: The final touch! A mix of red, green, and white sprinkles instantly elevates the holiday appeal of these truffles.
The complete ingredient list with precise measurements and detailed instructions can be found in the comprehensive recipe card at the bottom of this post.
Creative Variations to Try for Your Oreo Balls
While the classic Christmas Oreo Ball recipe is a winner, there are endless ways to customize these delightful treats to suit your taste or different occasions. Don’t hesitate to get creative with these delicious modifications:
- Almond Bark: For an alternative to traditional chocolate dipping chips, you can easily substitute almond bark. It melts smoothly and provides a slightly different, often milder, flavor profile that many enjoy. Both vanilla-flavored and chocolate almond bark options are available.
- Dark Chocolate Coating: If you prefer a richer, more sophisticated flavor, coat your Oreo Balls in dark chocolate. The slight bitterness of dark chocolate beautifully complements the sweetness of the Oreo and cream cheese filling, creating a gourmet experience.
- Seasonal Sprinkles: The beauty of Oreo balls is their year-round versatility! Simply change your sprinkles to match any holiday or event. Think pastel sprinkles for Easter, orange and black for Halloween, patriotic red, white, and blue for the Fourth of July, or even school colors for graduation parties. The options are truly endless, making them a go-to treat for any celebration.
- Colorful Candy Melts: Beyond red and green for Christmas, explore the vast array of candy melt colors. Pink and red melts would be stunning for Valentine’s Day, while pastels are perfect for Spring or Easter. You can even use several colors for a vibrant, rainbow effect.
- Oreo Cake Pops: Transform your Oreo balls into fun-to-eat cake pops! Simply insert a lollipop stick into each formed Oreo ball before chilling and dipping them into chocolate. These are a massive hit with kids and add an extra layer of festivity and convenience for parties.
- Crushed Candy Toppings: For an extra burst of flavor and texture, top each freshly dipped Oreo ball with crushed candy. Crushed candy canes or peppermints are fantastic for a refreshing minty flavor, especially during the Christmas season. Other ideas include crushed toffee bits, mini M&M’s, or even finely chopped nuts like pecans or walnuts for an added crunch.
- Explore Oreo Flavors: While traditional Oreos are a classic choice, don’t be afraid to experiment with different Oreo cookie flavors. Mint-filled Oreos create an amazing mint chocolate truffle, while peanut butter Oreos would lend a delightful nutty twist. Seasonal flavors like pumpkin spice or gingerbread Oreos can add unique holiday flair.
- Crushed Cookie Crumbs: For an elegant and simple decoration, crush a few extra Oreo cookies and sprinkle the fine crumbs over your chocolate-coated truffles before the chocolate sets. This looks particularly striking when sprinkled over white chocolate-dipped balls, providing a beautiful contrasting texture and color.
- A Hint of Extract: Add a few drops of peppermint extract, almond extract, or even a dash of rum extract to the cream cheese-Oreo mixture for an enhanced flavor profile. Start with a small amount and taste as you go to avoid overpowering the classic Oreo flavor.
How to Make Christmas Oreo Balls (Step-by-Step)
Creating these festive truffles is a straightforward process, even for beginner bakers. Follow these simple steps for perfect Christmas Oreo Balls:
- Step 1: Prepare Your Workspace. Begin by lining a cutting board or a baking sheet with parchment paper. This non-stick surface will make it easy to place and remove your Oreo balls without them sticking, especially after chilling and coating.
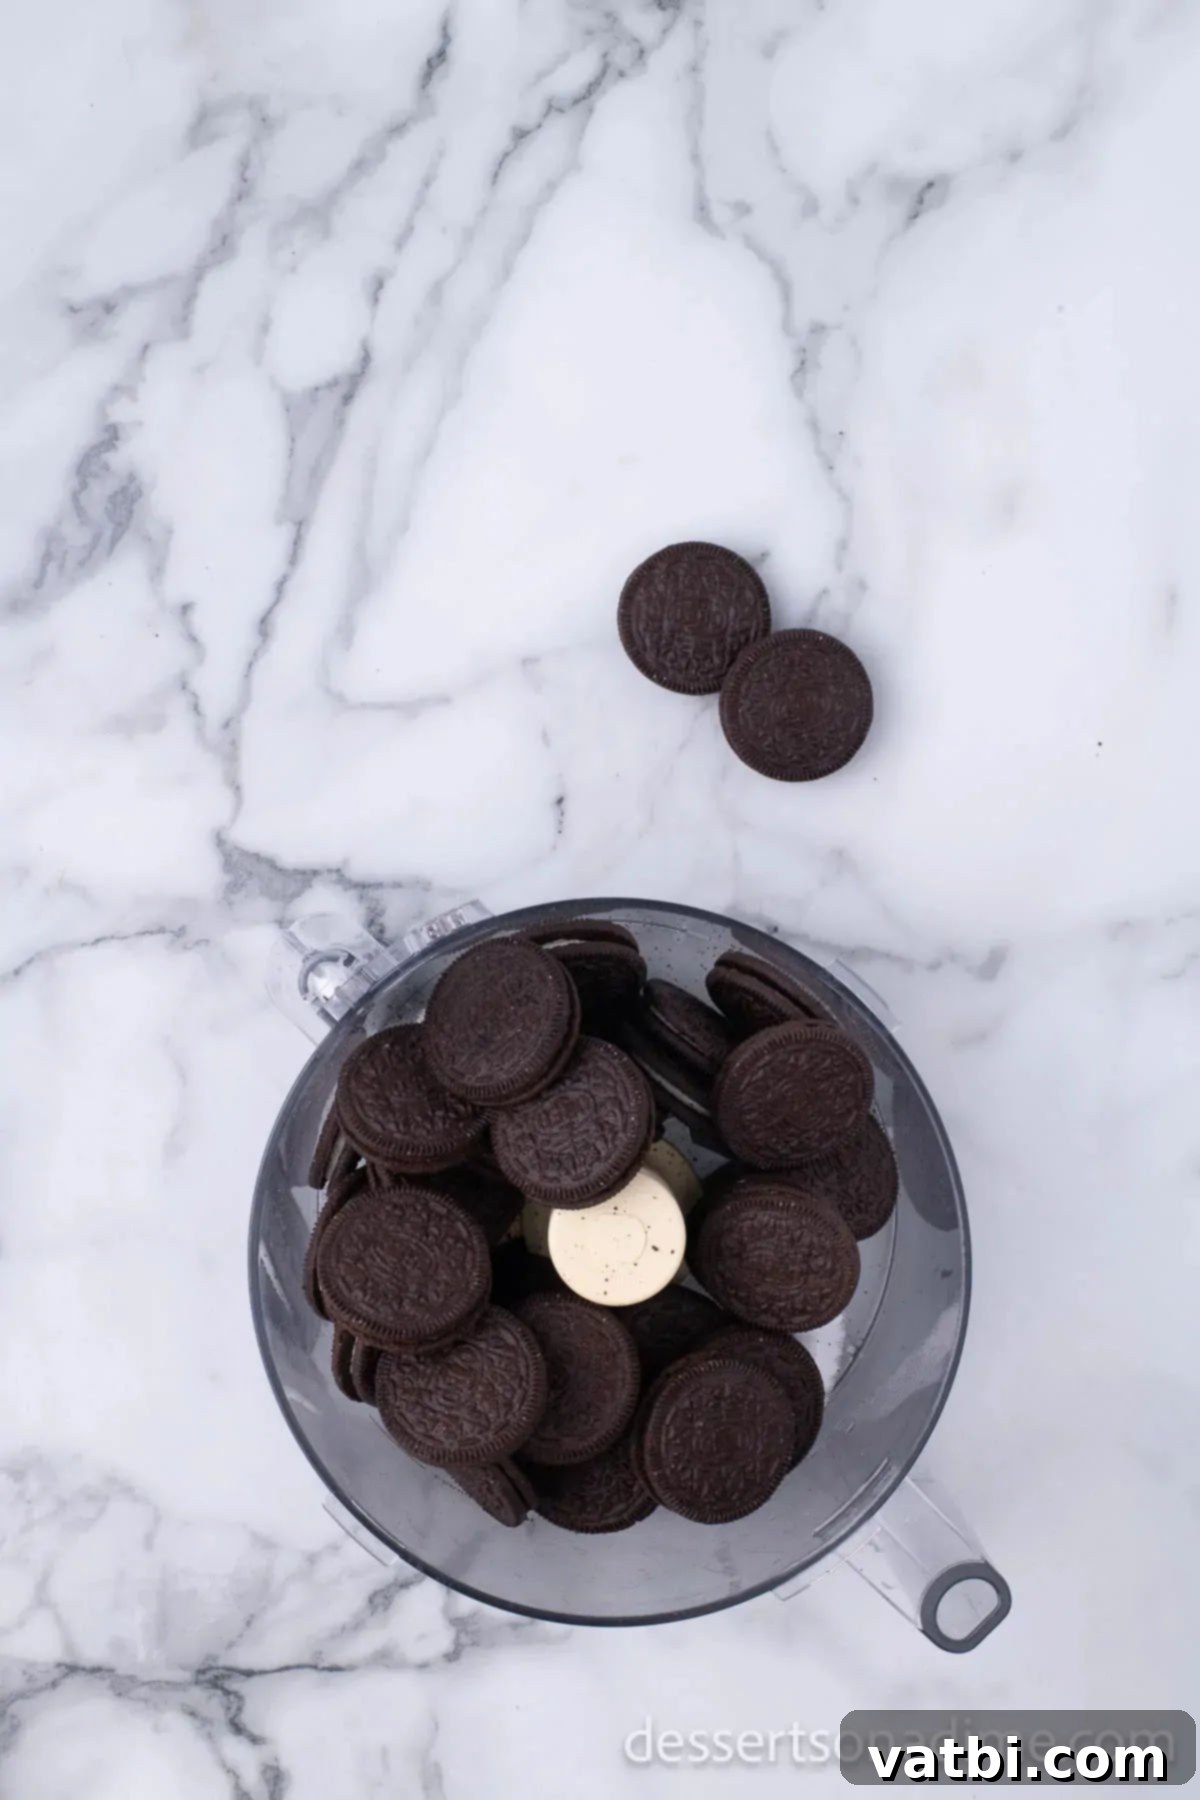
Step 2: Crush the Cookies. Place your Oreo cookies (including the cream filling) into a food processor. Pulse until they are finely crushed into uniform crumbs. The finer the crumbs, the smoother your truffle mixture will be. If you don’t have a food processor, see our tips below for an alternative method.
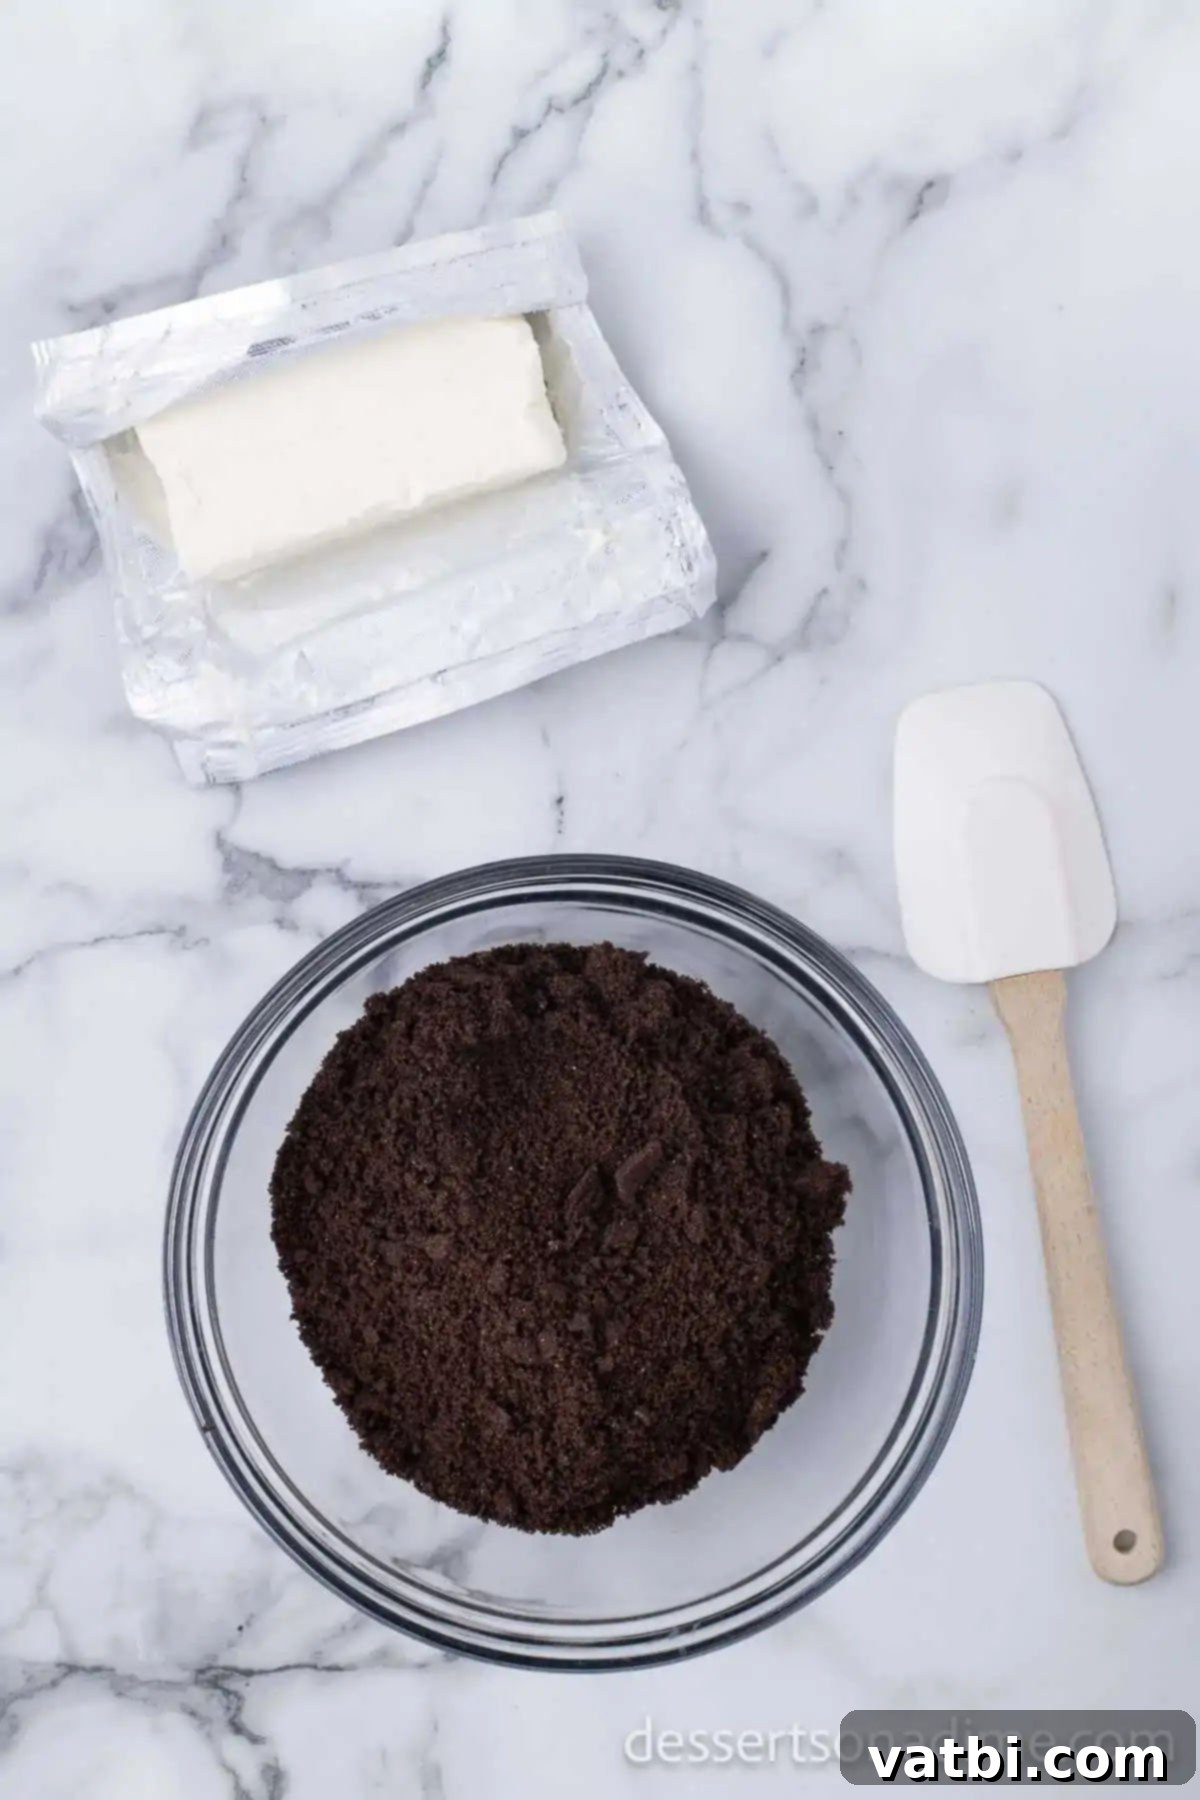
Step 3: Combine Ingredients. In a large mixing bowl, add the softened cream cheese and the finely crushed Oreo cookies. Using an electric mixer, beat the mixture on medium speed until the cream cheese is fully incorporated with the cookie crumbs, creating a uniform and well-blended dough.
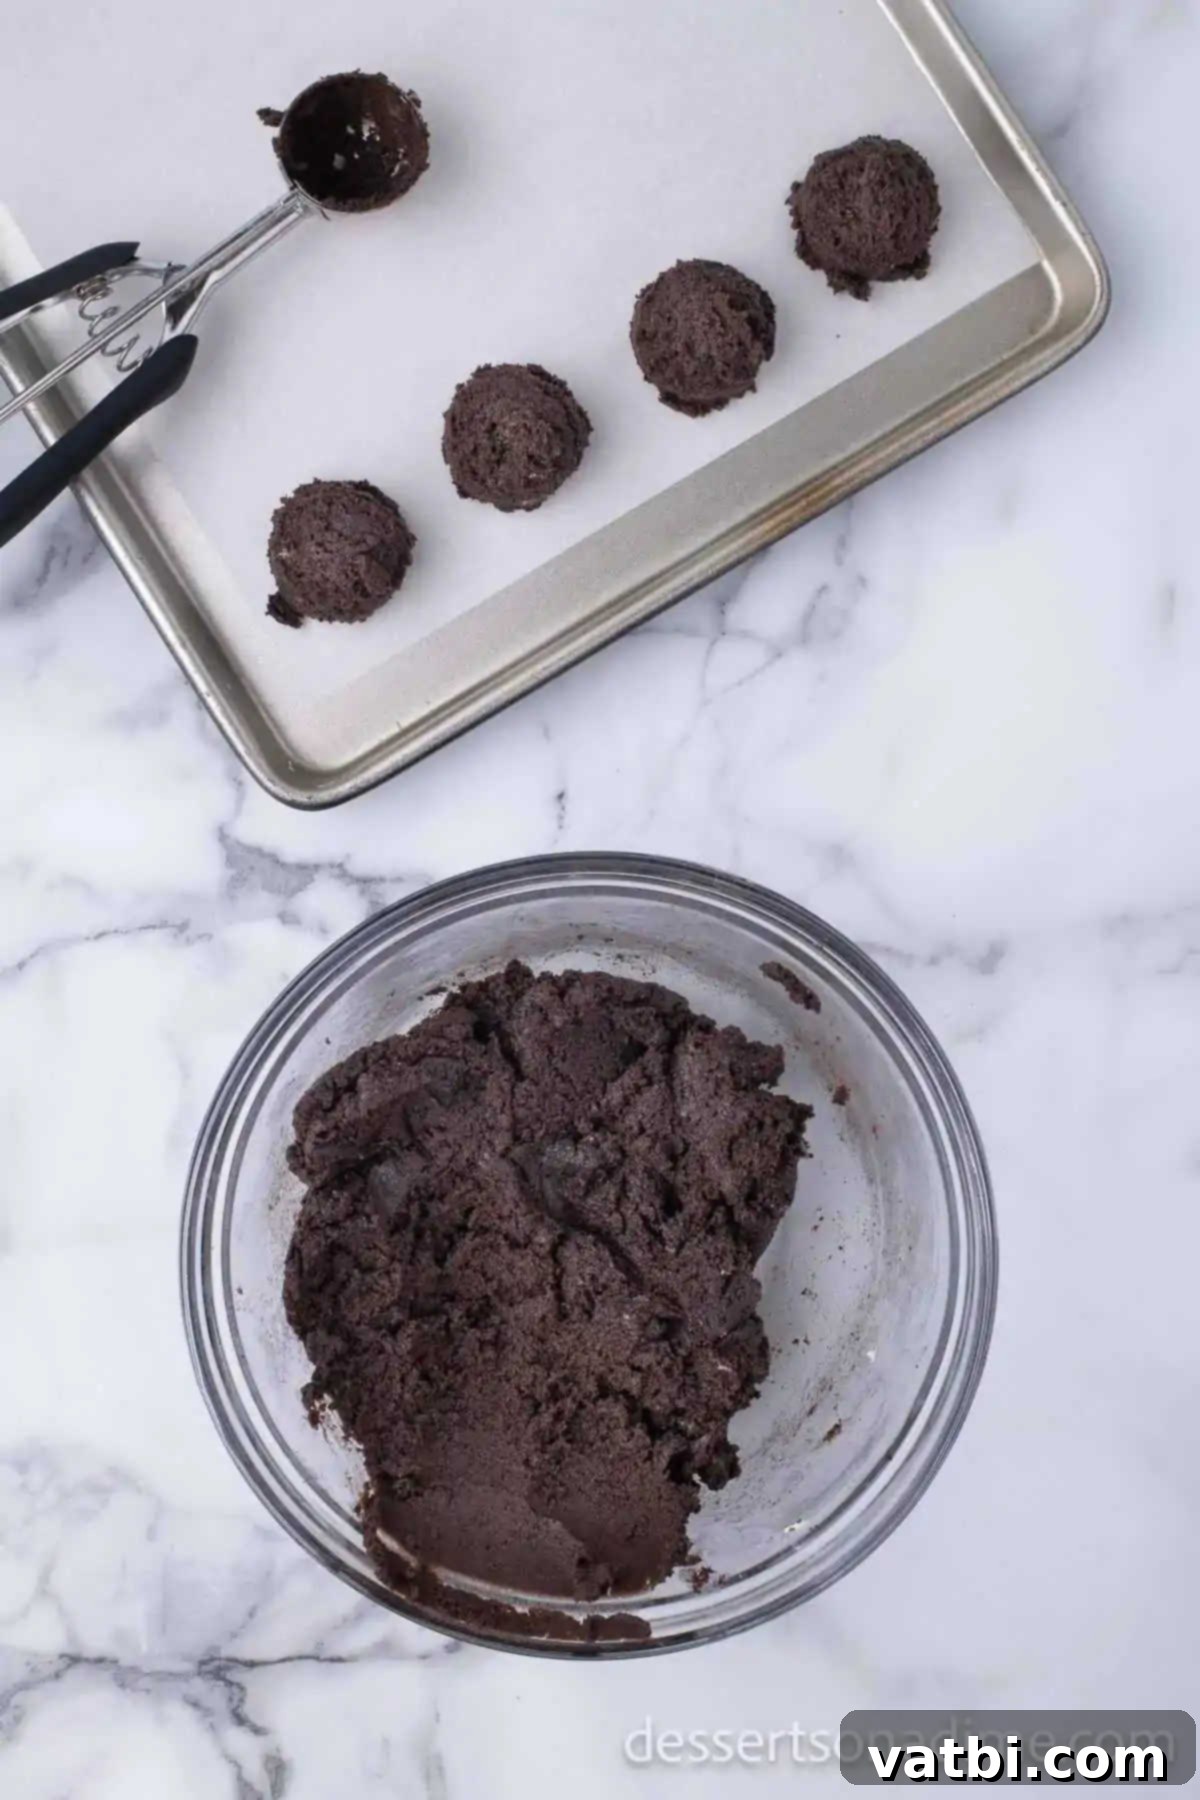
Step 4: Ensure Homogeneous Mixture. Continue mixing until the entire mixture is thoroughly combined, with no streaks of cream cheese visible. A stand mixer can also be used for this step if you prefer, offering hands-free convenience.
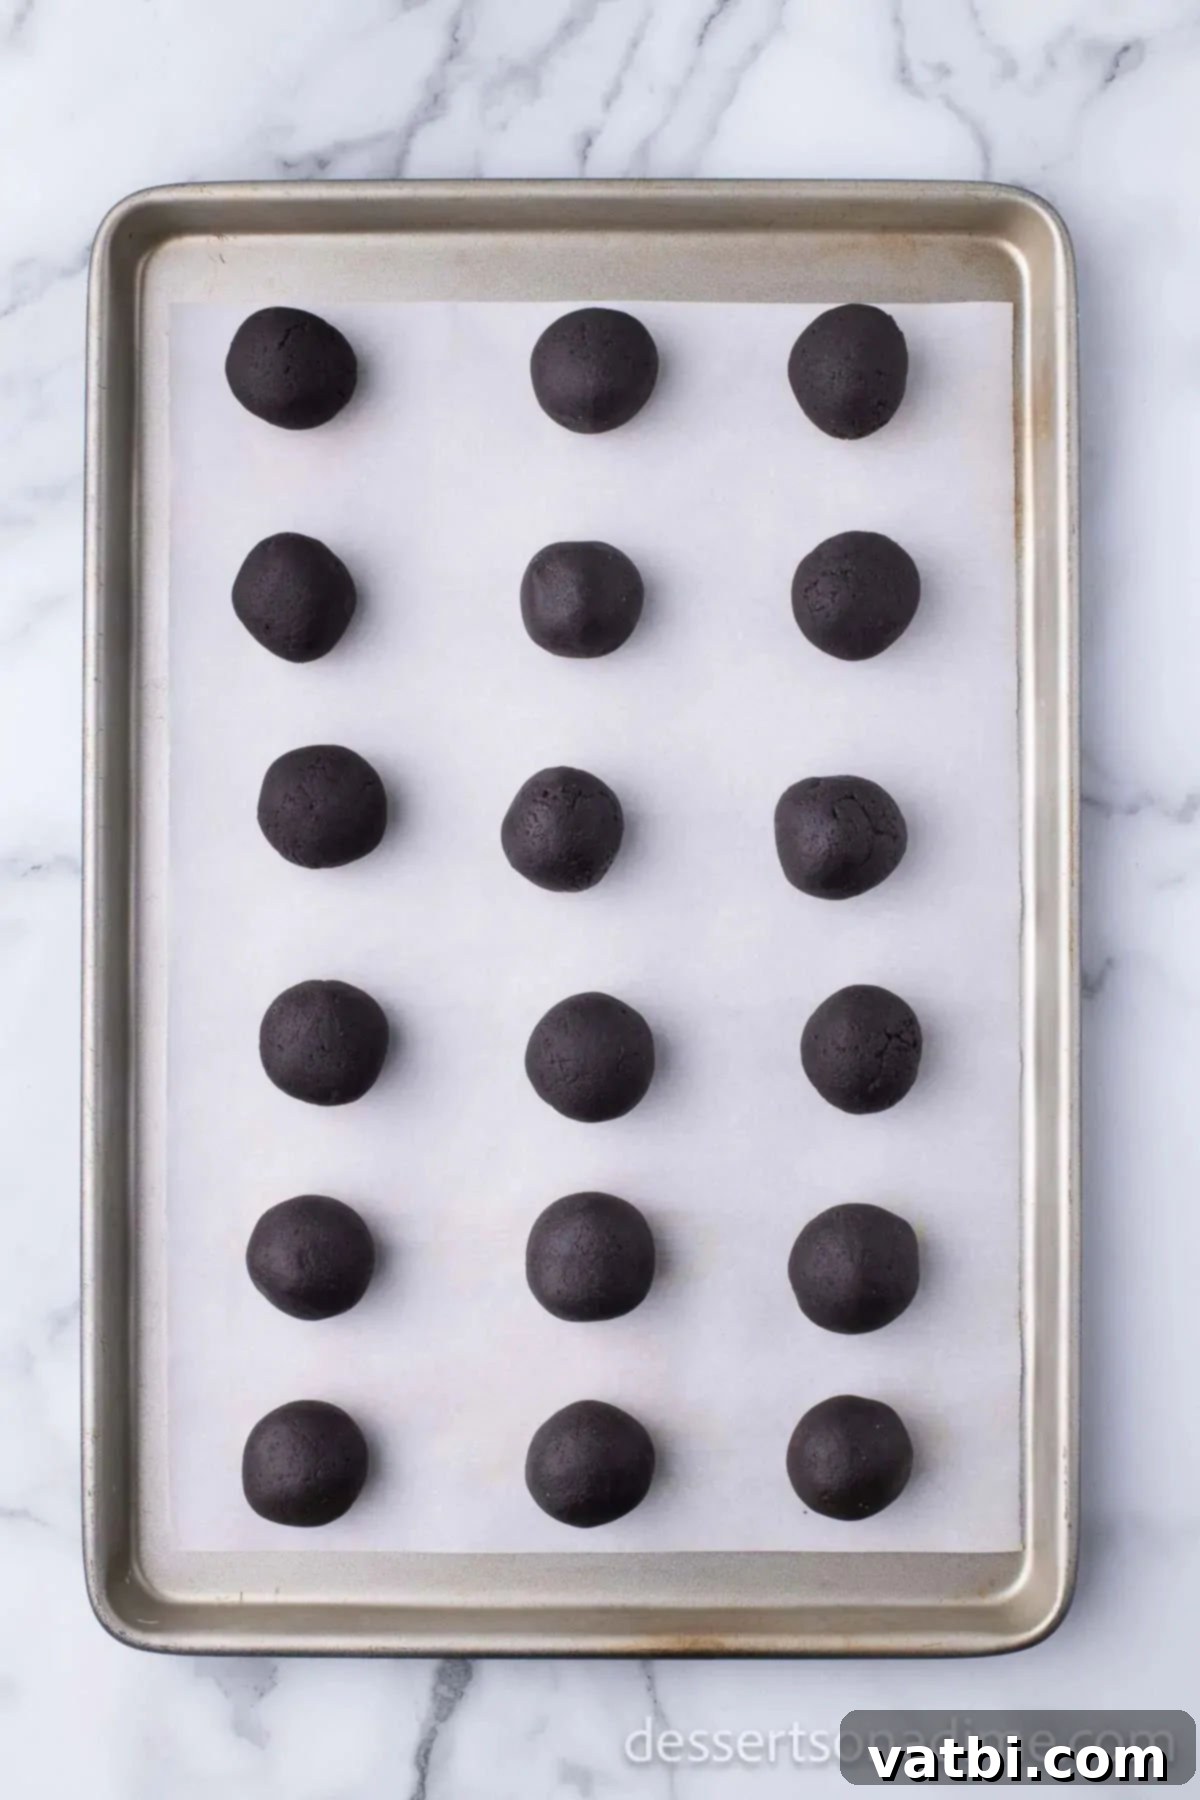
Step 5: Form and Chill the Balls. Roll the mixture into 1-inch (approximately 2.5 cm) balls. Aim for smooth, uniform shapes. Place them neatly on the prepared parchment-lined pan. Once all balls are formed, transfer the pan to the freezer for a minimum of 30 minutes. This chilling step is crucial for helping the balls firm up, making them much easier to dip in chocolate without falling apart.
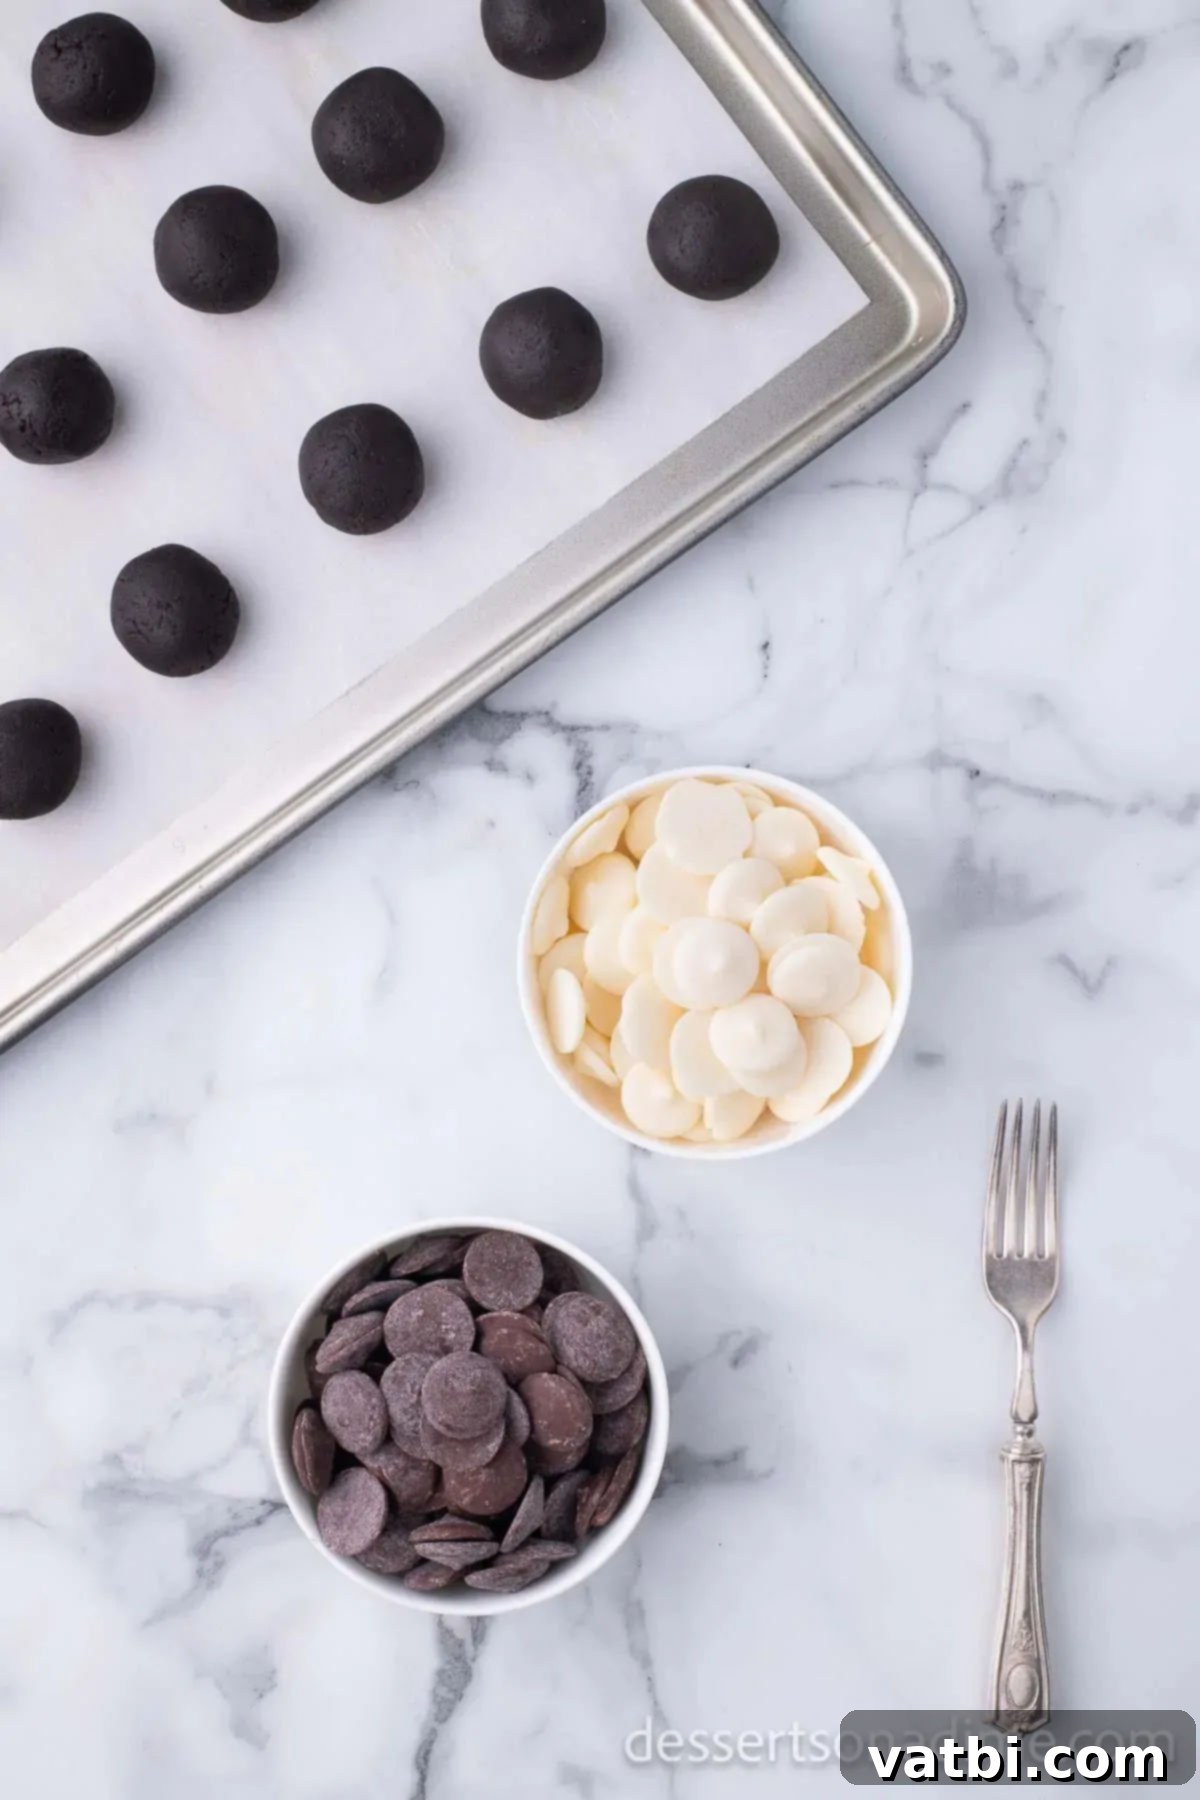
Step 6: Melt the Dipping Chocolate. While the Oreo balls are chilling, prepare your dipping chocolates. Place the chocolate dipping chips and white chocolate dipping chips into two separate microwave-safe bowls. Microwave each bowl for 1 minute, then stir thoroughly. Continue microwaving in 30-second intervals, stirring after each, until the chocolate is completely smooth and melted. Be careful not to overheat to prevent seizing.
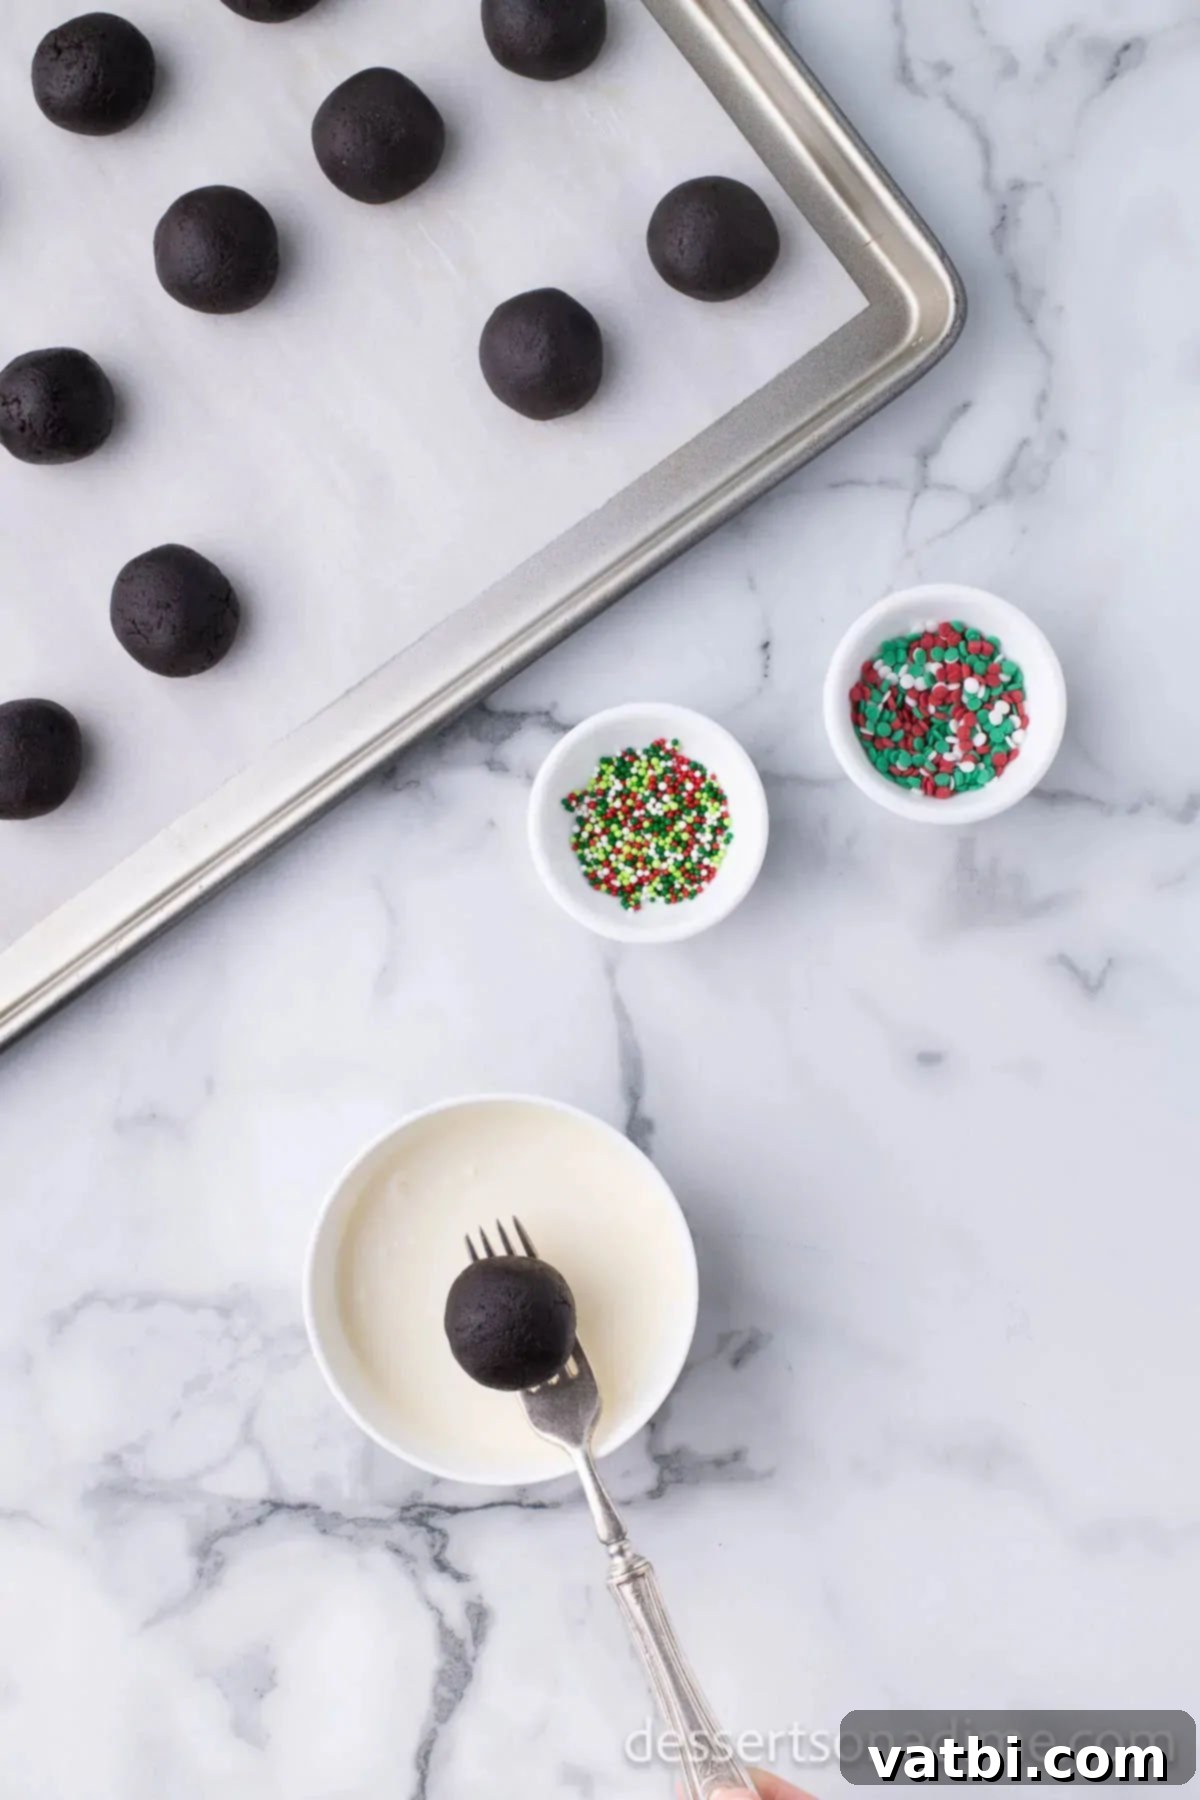
Step 7: Dip the Oreo Balls. Remove the chilled Oreo balls from the freezer. Using a fork (or a dipping tool), gently drop each ball into the melted chocolate, ensuring it’s completely coated. Lift the ball, allowing any excess chocolate to drip off, then carefully return it to the parchment-lined baking sheet. For a visually appealing variety, dip approximately half of your Oreo balls in the melted dark chocolate and the other half in the melted white chocolate.
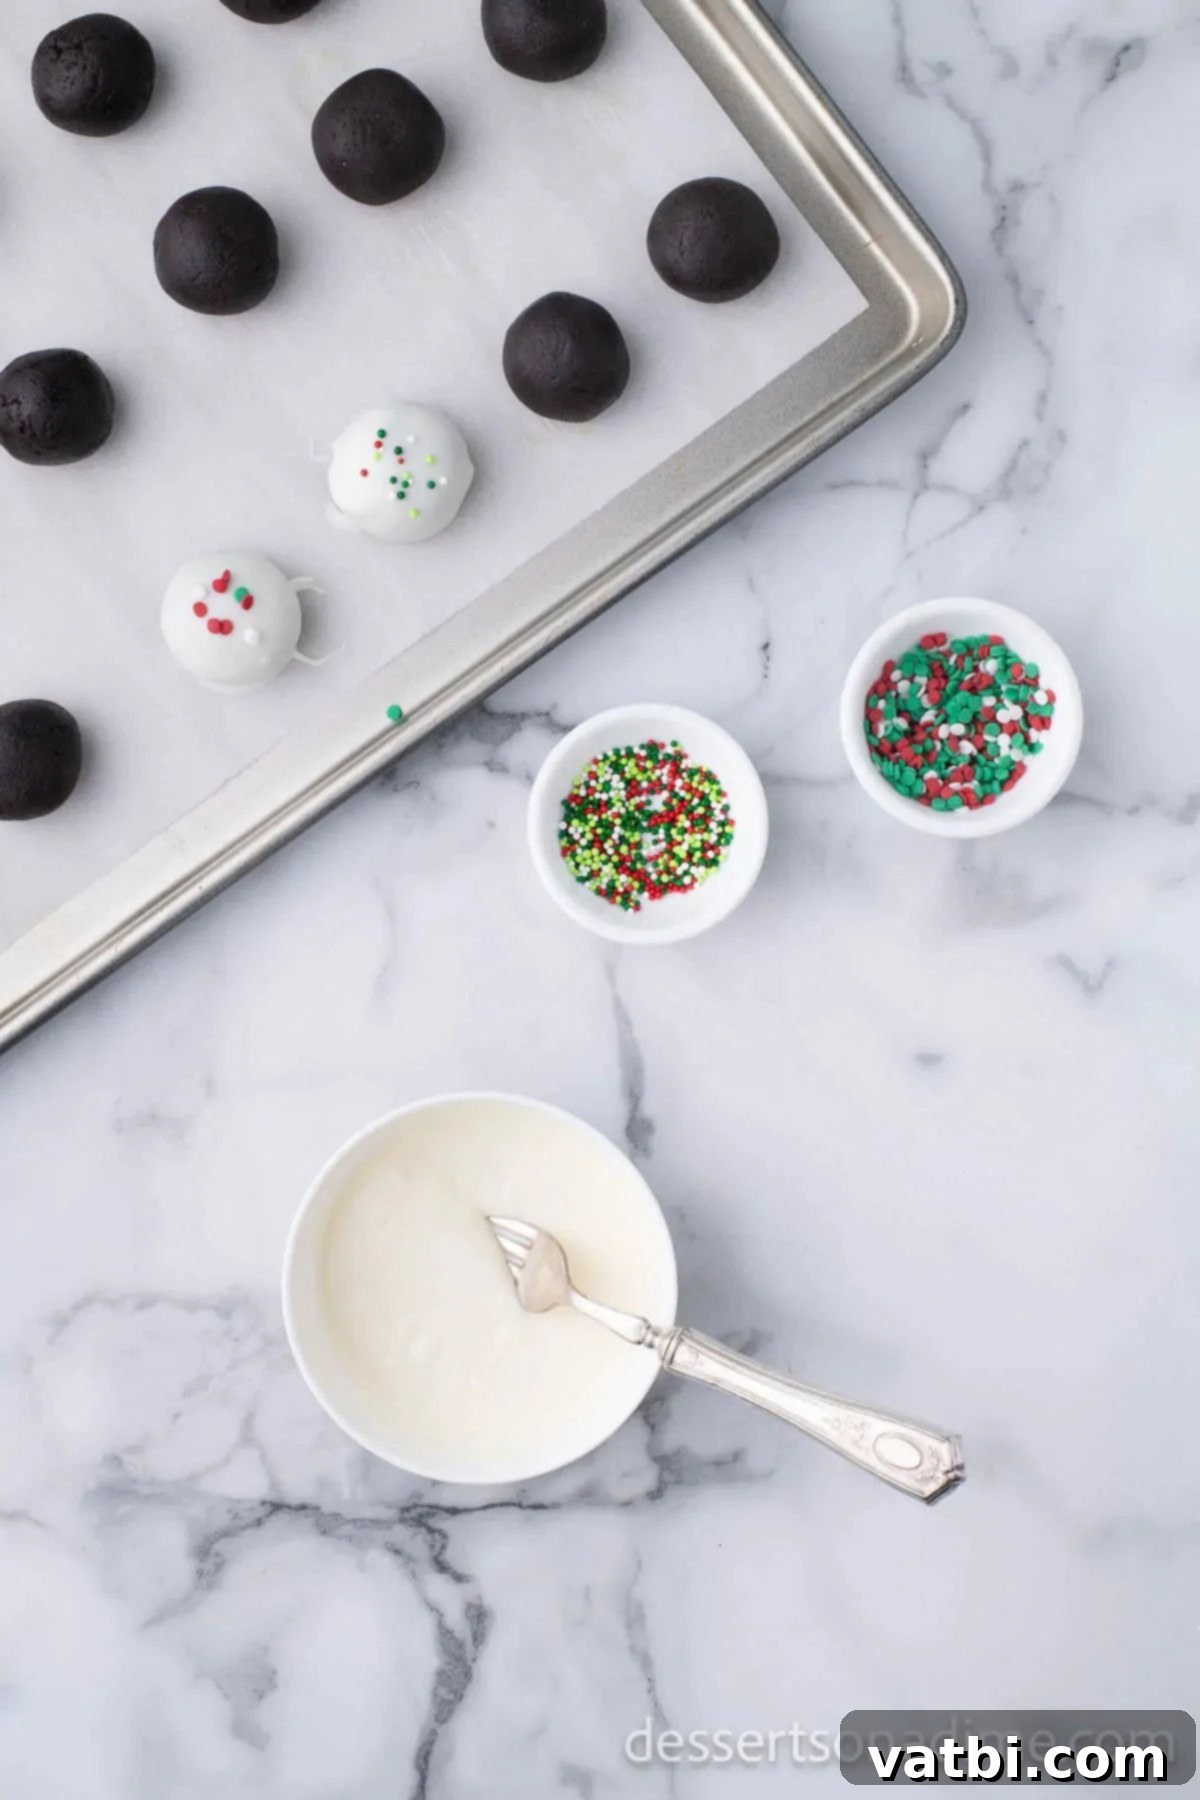
Step 8: Add Sprinkles (Immediately!). As soon as you dip an Oreo ball and place it back on the baking sheet, quickly sprinkle it with your Christmas sprinkles. The chocolate hardens rapidly, so it’s essential to add sprinkles while the coating is still wet to ensure they adhere properly. Continue this process for all the sprinkled truffles.
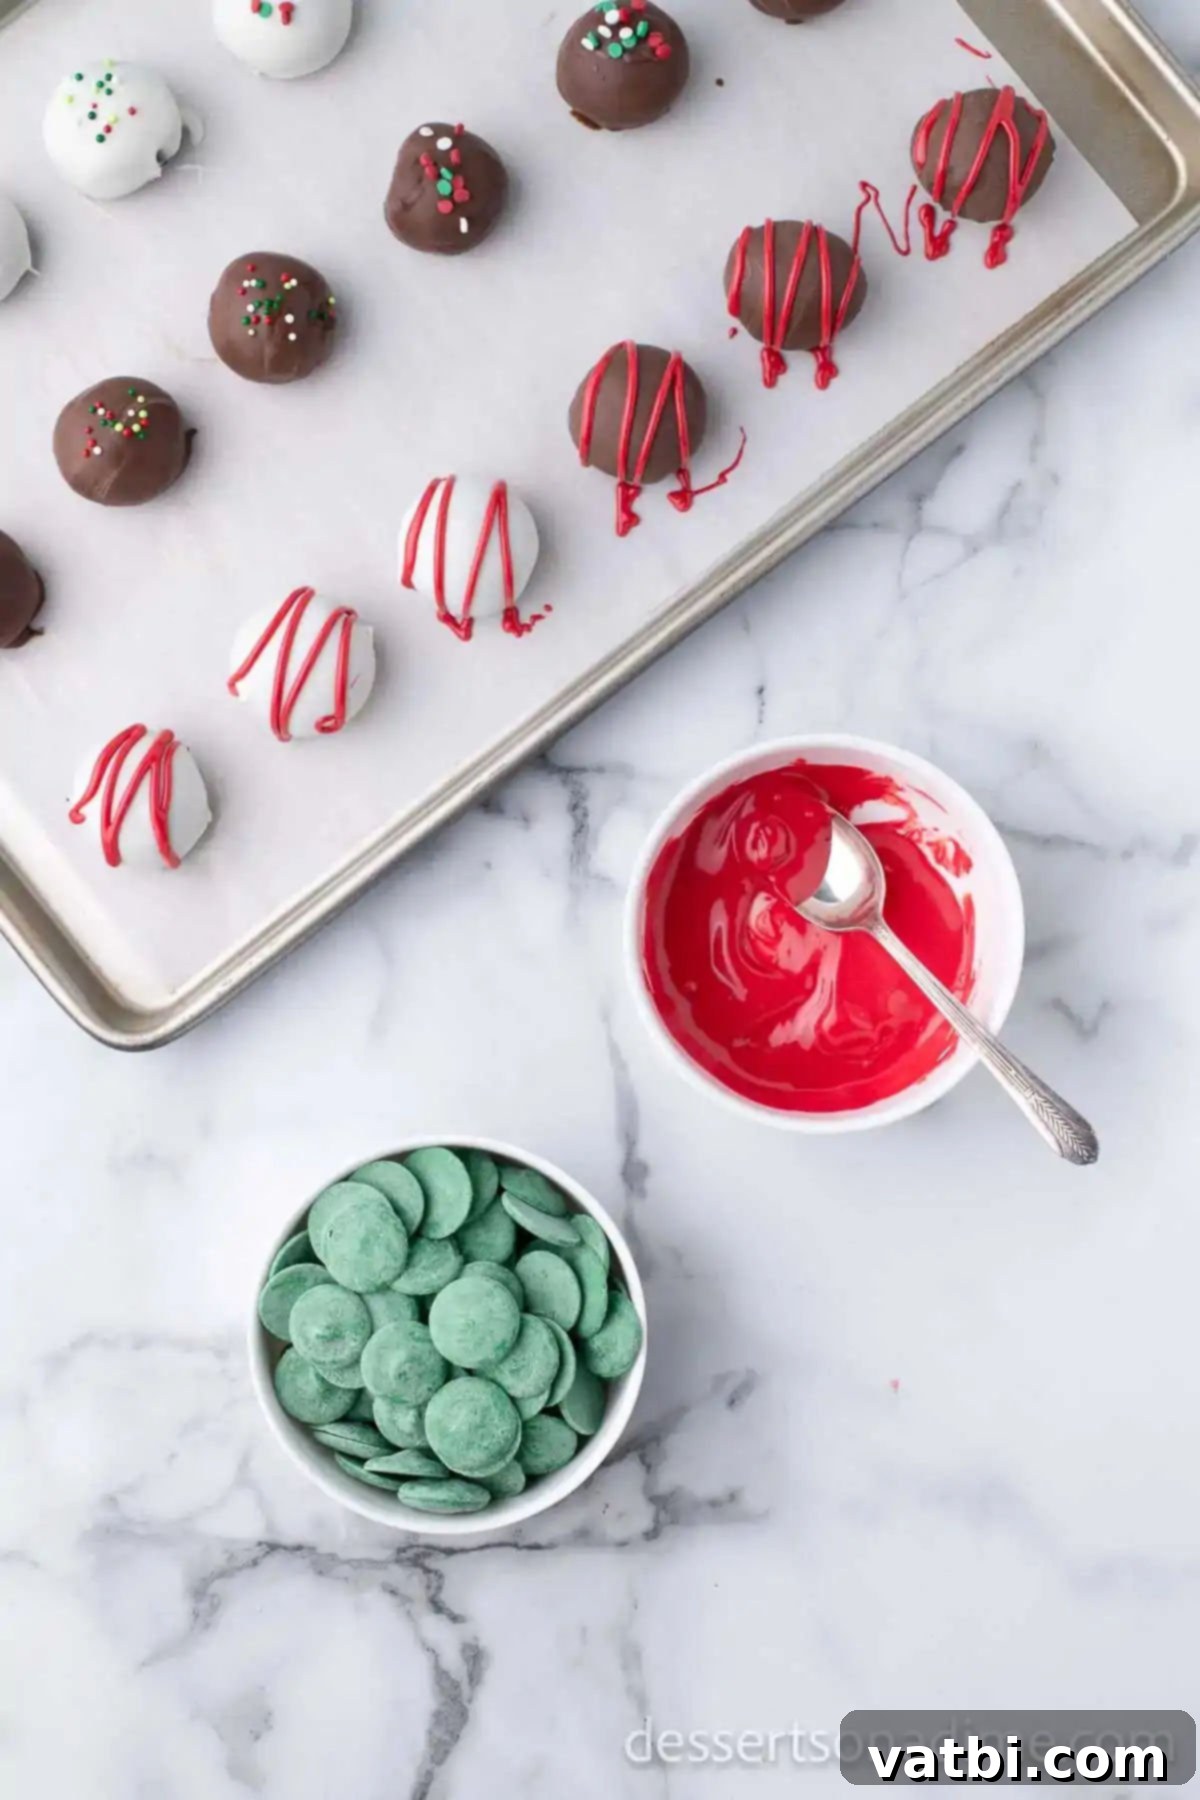
Step 9: Prepare Candy Melts for Drizzling. For the remaining Oreo balls (those without sprinkles), you’ll add colorful drizzles. Melt the red and green candy melts in two separate small bowls. Microwave them in 30-second intervals, stirring vigorously after each interval, until they are completely melted and smooth. Be mindful not to overheat to avoid a thick or clumpy texture.
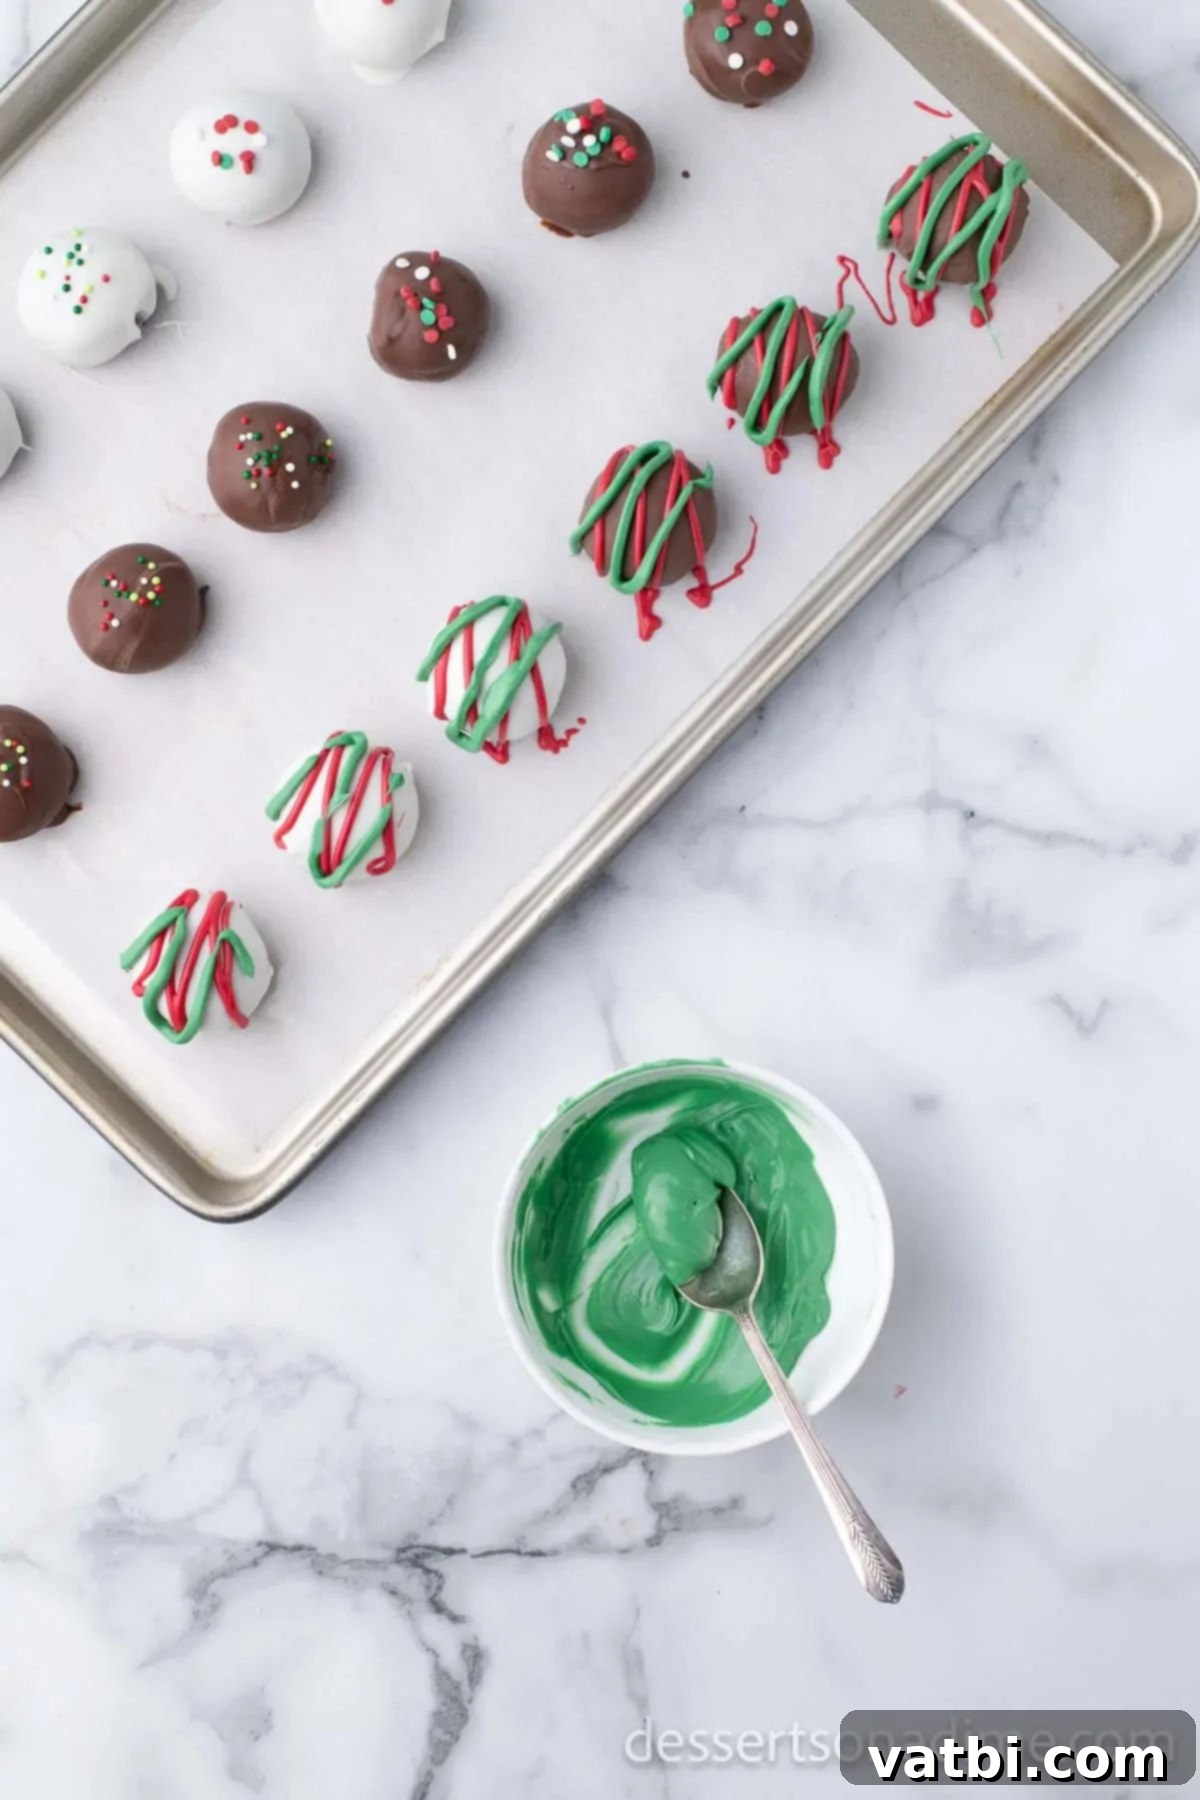
Step 10: Drizzle for Decoration. Dip a clean fork into one of the melted candy colors (red or green). Hold the fork about 6-8 inches above the Oreo truffles and drizzle the candy melts back and forth over them in a zig-zag pattern. You can apply one color first, let it set slightly, and then drizzle with the second color for a layered effect, or drizzle both simultaneously for a mixed look.
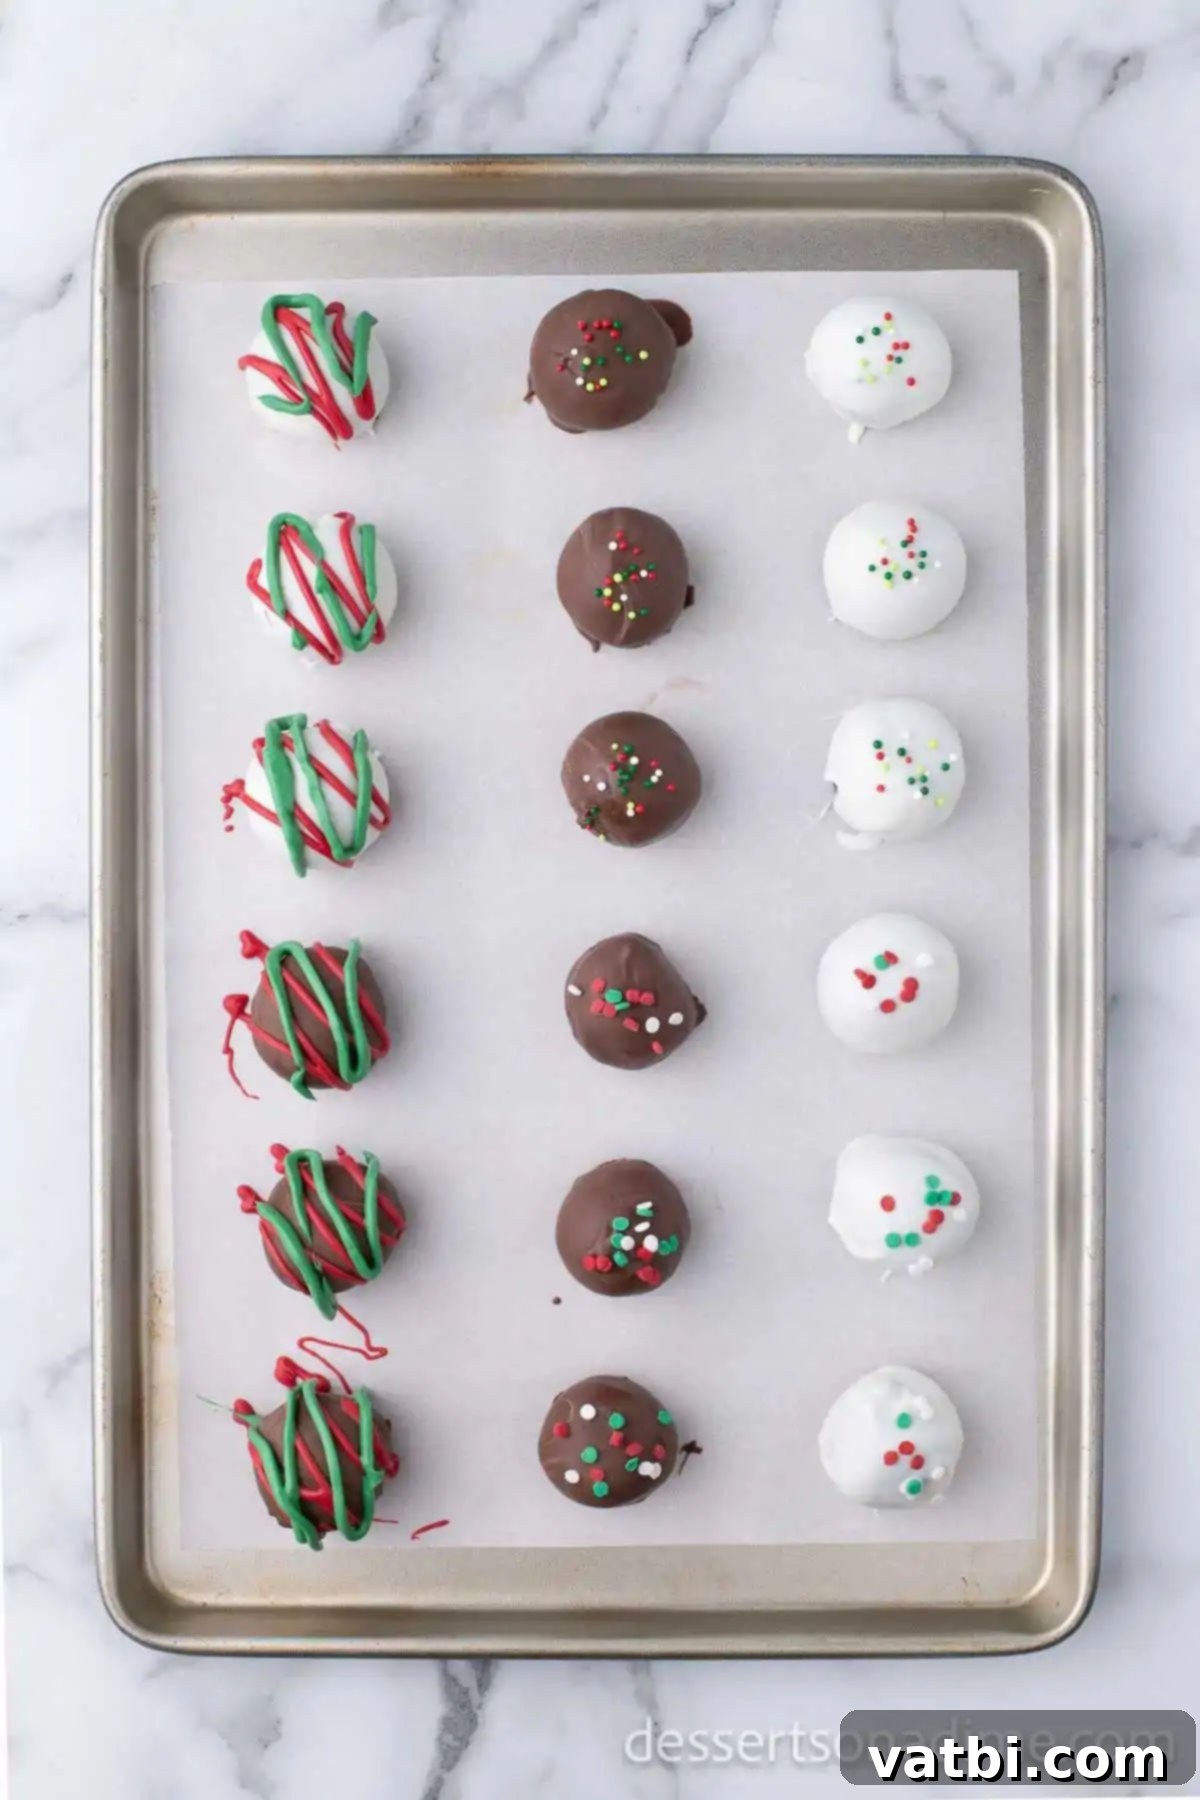
Step 11: Final Setting. Continue drizzling the melted candy until all the remaining truffles have been beautifully decorated. Once all decorations are complete, allow the chocolate and candy melts to fully harden and set at room temperature. This can take anywhere from 30 minutes to an hour, depending on your room temperature and humidity. Once set, your festive Christmas Oreo Balls are ready to be enjoyed!
Expert Tips and Tricks for Perfect Christmas Oreo Balls
Achieving perfectly uniform and delicious Oreo balls is simple with a few helpful hints:
- Use a Cookie Scoop for Uniformity: I highly recommend using a small cookie scoop (about 1-inch or 1.5-inch in diameter) to portion out the Oreo mixture. This makes it incredibly easy to form the balls and ensures they are all roughly the same size, which is important for even dipping and a professional-looking presentation. Consistency makes a big difference!
- Ensure Softened Cream Cheese: The texture of your cream cheese is crucial. Make sure your cream cheese is truly at room temperature and softened before mixing. This allows it to blend seamlessly with the crushed Oreos, creating a smooth, pliable, and easy-to-work-with mixture. Cold cream cheese will result in a lumpy, difficult-to-mix dough.
- Opt for Full-Fat Cream Cheese: For the absolute best flavor and luxurious texture, now is not the time to substitute with reduced-fat or fat-free cream cheese. Full-fat cream cheese provides the richness and creaminess that defines these decadent Oreo balls. It also helps the balls hold their shape better.
- Food Processor for Efficiency: Crushing the cookies to a fine crumb is fastest and easiest using a food processor. This ensures a consistent texture throughout the mixture. However, if you don’t have one, don’t worry! You can place the Oreo cookies inside a large, sturdy ziplock bag, seal it tightly, and then use a rolling pin or the back of a wooden spoon to pound and crush them until they are finely ground.
- Parchment Paper is Your Friend: Always line your baking sheets or cutting boards with parchment paper before placing the formed Oreo balls. This prevents sticking, especially after chilling or once the chocolate coating sets. It also makes cleanup a breeze, catching any stray chocolate drips or sprinkles.
- Chill Thoroughly: Do not skip or shorten the chilling time in the freezer. Freezing the balls for at least 30 minutes (or even longer) before dipping makes them firm and cold, which helps the chocolate coating set quickly and evenly without melting the truffles.
- Proper Dipping Technique: When dipping, use a fork or a candy dipping tool. Submerge the ball completely, then gently tap the fork against the edge of the bowl to shake off excess chocolate. This prevents a thick, clumpy coating and ensures a smooth, even layer.
- Work in Batches (If Needed): If you find your melted chocolate starting to cool and thicken, or if your Oreo balls become too soft, work in smaller batches. Reheat the chocolate as needed, and keep undipped Oreo balls in the freezer until ready to use.
Frequently Asked Questions About Christmas Oreo Balls
The easiest way to dip Oreo balls is to ensure they are well-chilled, ideally frozen for 15 to 30 minutes beforehand. Once firm, use a fork or a specialized candy dipping tool to gently submerge each ball into the melted chocolate. Lift it out, tapping the fork lightly against the side of the bowl to allow any excess chocolate to drip off. This technique helps achieve a thin, even coating and prevents a thick, messy layer. Place the dipped ball back onto your parchment-lined baking sheet.
Drizzling chocolate is a very simple yet effective way to decorate your Oreo balls. Just dip a clean fork into the melted candy melts or chocolate. Hold the fork a few inches above the Oreo balls and move it back and forth in a quick, controlled motion to create thin lines and patterns across the tops of the truffles. You can use more than one color, alternating between red and green candy melts, to create a beautifully festive design that truly pops!
Oreo truffles are quite resilient! They can be stored at room temperature in an airtight container for up to 1 week, making them a great make-ahead holiday treat. However, if you live in a particularly warm or humid climate, or if you prefer a firmer texture, it’s best to store them in the refrigerator to prevent the chocolate coating from melting or becoming soft. Always keep them in an airtight container to maintain freshness and prevent them from absorbing other odors.
Absolutely, these delightful treats are freezer-friendly, offering excellent flexibility for holiday meal prep! You have two primary options for freezing:
Freeze the coated Oreo balls: Once dipped and decorated, allow the chocolate to fully set. Then, place the finished Oreo balls in an airtight freezer-safe container. I recommend placing wax paper or parchment paper between layers to prevent them from sticking together and to help them stay intact. They can be frozen for up to 2-3 months.
Freeze the uncoated Oreo balls: You can make the Oreo mixture, roll it into balls, and freeze them unwrapped on a baking sheet until solid. Once solid, transfer them to a freezer bag or container. When you’re ready to serve, simply thaw them slightly, then proceed with dipping in chocolate and decorating. This method saves you significant prep work during the busy holiday season.
For more detailed tips and best practices on extending the life of your treats, learn How to Freeze Oreo Balls.
We recommend using regular Oreo cookies (the original size, not Double Stuffed or Thins). The classic cream filling within the regular Oreos contributes perfectly to the overall texture and flavor of the truffle mixture. While you can experiment with different flavors (like mint or peanut butter Oreos for variations), the standard variety yields the best results for this classic recipe.
While a double boiler can be used, it’s not strictly necessary. Melting chocolate in the microwave is much quicker and simpler. Just remember to use microwave-safe bowls and heat in short 30-60 second intervals, stirring well after each, to prevent the chocolate from overheating and seizing. If you prefer the double boiler method, ensure no water gets into the chocolate, as this can also cause it to seize.

More Festive Christmas Desserts You’ll Love:
If you’re looking to expand your holiday treat repertoire, here are some other fantastic Christmas dessert ideas:
- Easy Christmas Fudge Recipe
- Delightful Christmas Cake Pops Recipe
- Simple & Fun Christmas Tree Brownies
- Charming Christmas Wreath Cookies (Only 6 Ingredients!)
- Refreshing Peppermint Oreo Balls
Once you experience the joy of making and tasting these incredible Christmas Oreo Balls, you’ll undoubtedly be hooked! Their ease and irresistible flavor make them an instant classic. We genuinely hope you enjoy creating these holiday treats as much as we do. Please take a moment to leave a comment below and rate the recipe once you’ve had a chance to whip up your own batch of these delightful Oreo truffles. Happy holidays and happy baking!
Pin
Christmas Oreo Balls
Ingredients
- 8 oz softened Cream Cheese
- 14.5 oz Oreo Cookies regular not double stuff
- 8 oz Chocolate Dipping Chips
- 8 oz White Chocolate Dipping Chips
- 4 oz Green Candy Melts
- 4 oz Red Candy Melts
- Christmas Sprinkles
Instructions
-
Line a cutting board or baking sheet with parchment paper.
-
Finely crush Oreos in a food processor.
-
Combine cream cheese and crushed cookies until well blended in a large mixing bowl.
-
Form the mixture into 1″ balls and place them on the prepared sheet.
-
Place them in the freezer for 30 minutes.
-
Heat both of the dipping chocolates in 2 separate bowls by microwaving for 1 minute stirring and repeating until melted.
-
Using a fork, dip each ball into chocolate to completely coat. Shake off excess and return to the tray. Dip half of the Oreo balls in the melted chocolate and the other half in the melted white chocolate.
-
Top some of the Oreo balls with the Christmas Sprinkles before the chocolate hardens. Then allow the chocolate to harden at room temperature.
-
Then melt the candy melts in 2 separate bowls by microwaving them in 30 second intervals, stirring after each interval until fully melted.
-
Drizzle over the chocolate balls without the sprinkles. Allow to harden and then they are ready to enjoy!
Recipe Notes
Nutrition Facts
Pin This Now to Remember It Later
Pin Recipe
