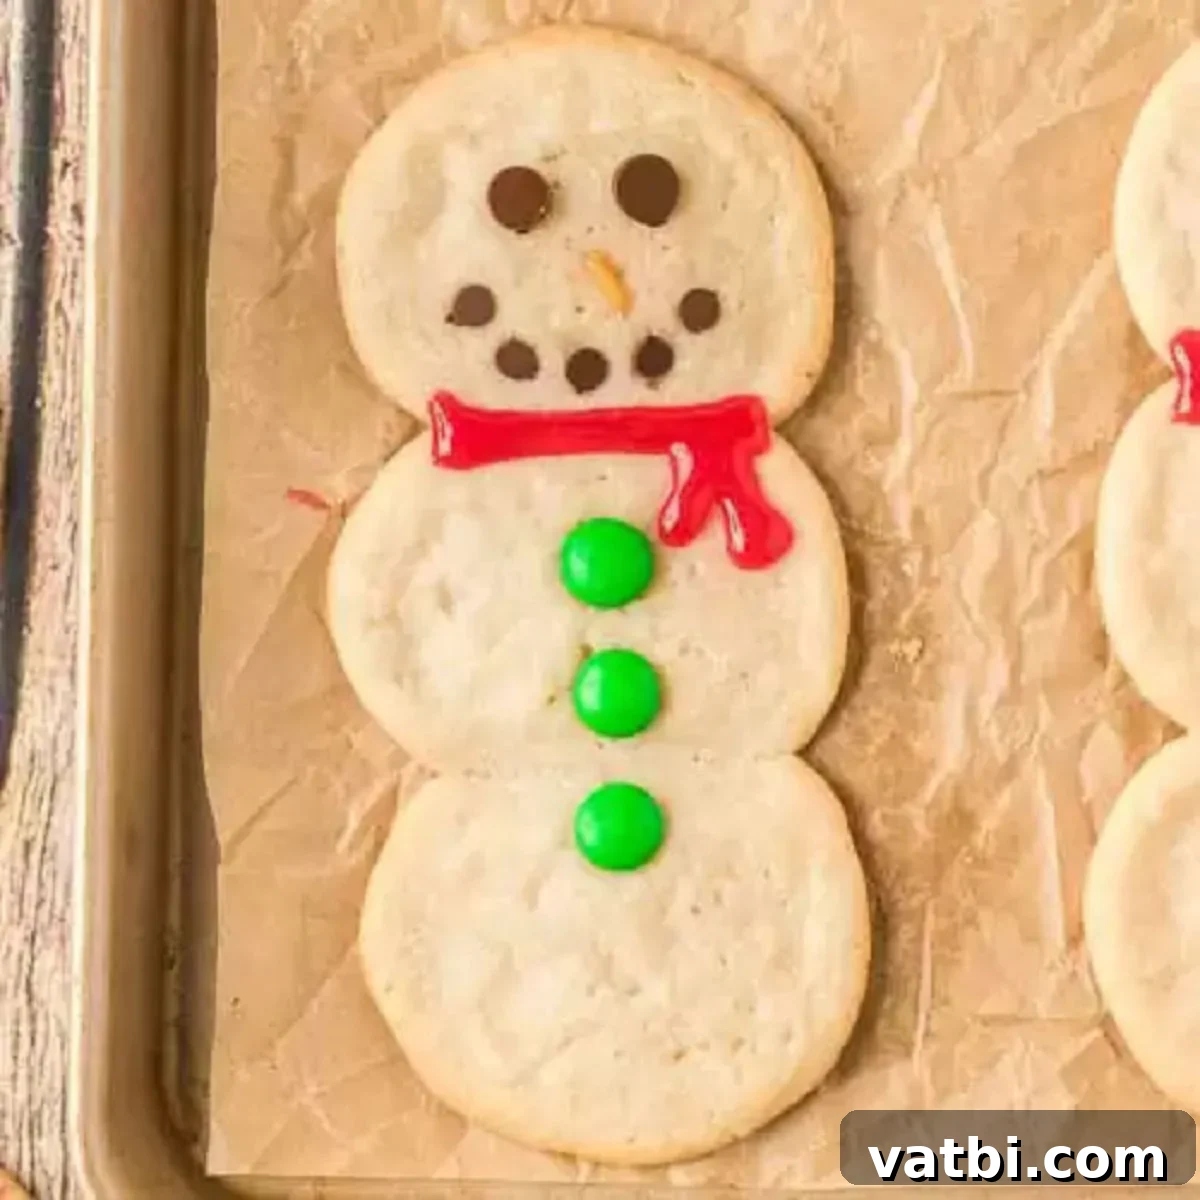
Easy Snowman Cookies: Your Ultimate Guide to Festive Sugar Cookie Fun
Embrace the joyful spirit of the holiday season with these irresistibly charming and incredibly **easy snowman cookies**! This recipe transforms simple sugar cookie dough into delightful, whimsical snowman treats that are sure to impress both young and old. With their soft texture and impressive appearance, these festive cookies offer a perfect blend of convenience and creative fun, making them an ideal project for holiday baking with the family or a delightful addition to any Christmas gathering.
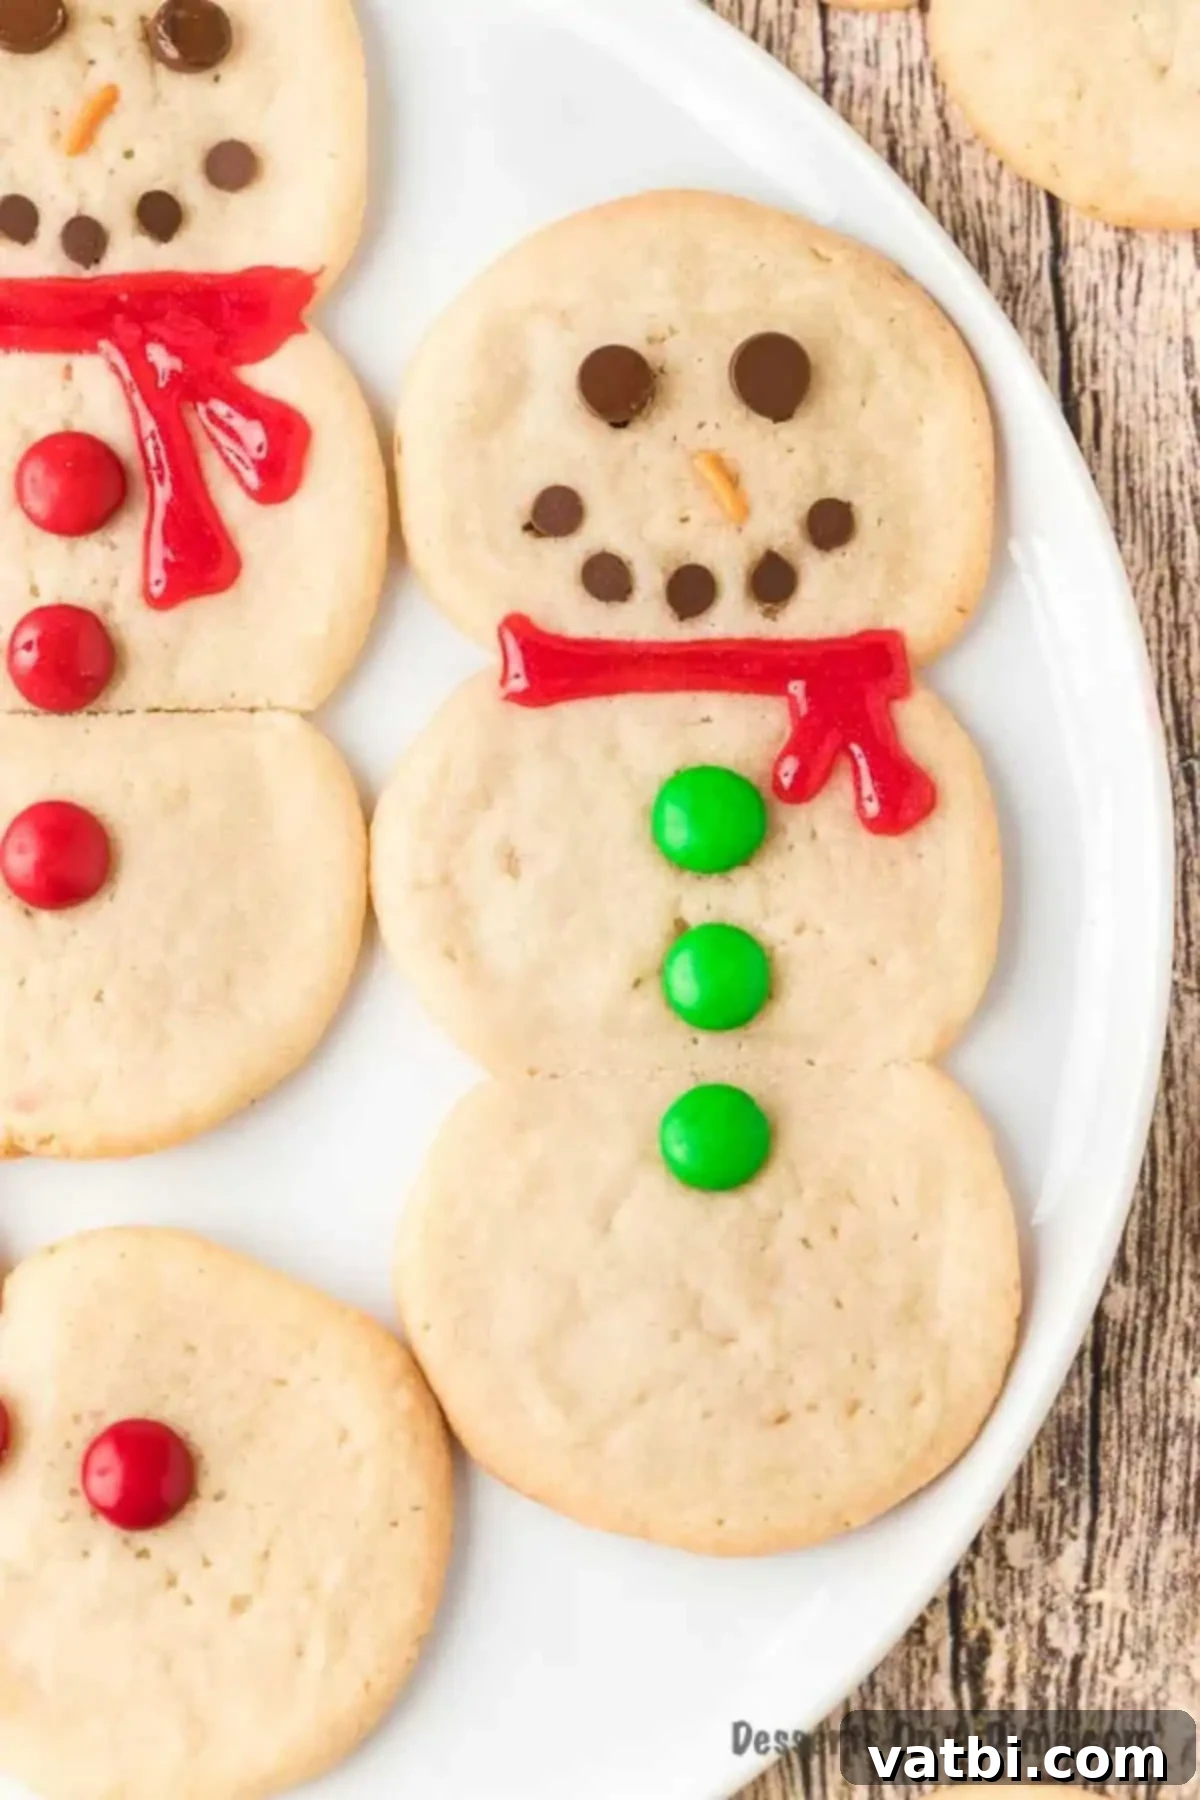
These festive **Christmas cookies** are truly the perfect Christmas dessert to create for holiday parties, school events, or even a cozy movie night at home. My family absolutely adores snowman-themed desserts, and every year we excitedly make Snowman Oreo Balls. Now, these adorable sugar cookie snowmen have earned their permanent spot on our holiday baking list!
If you’ve enjoyed making our popular Christmas Tree Sugar Cookies Recipe, then you’re in for a treat with this new, easy-to-follow recipe for snowman cookies. They share the same delightful base of soft sugar cookies, making them a familiar yet exciting new addition to your festive repertoire. Get ready for a baking experience that’s as simple as it is rewarding, yielding results that taste as good as they look!
Table of Contents
- Why You’ll Love This Easy Snowman Cookie Recipe
- Essential Ingredients for Snowman Sugar Cookies
- Creative Substitutions & Fun Additions
- How to Make Snowman Cookies Step-by-Step
- Expert Tips for Perfect Snowman Cookies
- Frequently Asked Questions
- More Festive Snowman Treats
Why You’ll Love This Easy Snowman Cookie Recipe
These delightful snowman cookies are more than just a sweet treat; they’re an experience waiting to happen. Here’s why this recipe will quickly become a cherished part of your holiday traditions:
- A Fantastic Family Activity: Beyond just eating them, the process of making these cookies is incredibly fun and engaging. It’s a wonderful way to spend quality time with family, especially with children who will adore helping to assemble and decorate their frosty friends. The joy of creating these whimsical treats together is truly priceless.
- Perfect for Any Holiday Occasion: Whether you’re participating in a cookie exchange, hosting a festive party, or simply looking for a fun activity on a snowy afternoon, these snowman cookies are an absolute hit. Their charming appearance makes them a standout on any dessert table, and their simple preparation means you won’t be stressed in the kitchen. They are truly an activity and a tasty treat all rolled into one delightful package!
- Budget-Friendly Ingredients: You don’t need fancy components or expensive supplies to create these adorable cookies. The ingredients are readily available, simple, and very inexpensive, making this a cost-effective way to enjoy holiday baking without breaking the bank.
- Impressive Results with Minimal Effort: Despite their intricate look, these snowman cookies are surprisingly quick and easy to prepare. Using refrigerated sugar cookie dough cuts down on prep time significantly, allowing you to focus on the fun part: decorating! You’ll achieve impressive, picture-perfect results with minimal fuss.
- Versatile and Customizable: This recipe serves as an excellent foundation for creativity. From choosing your favorite colors for scarves to adding unique details for facial features, there are endless ways to personalize each snowman. It’s a fantastic way to let individual personalities shine through each cookie.
Essential Ingredients for Snowman Sugar Cookies
One of the best aspects of this recipe is its simplicity, relying on a few key ingredients to create a magical outcome. Here’s what you’ll need to bring your snowman cookies to life:
- Refrigerated Sugar Cookie Dough: This is your secret weapon for speed and convenience! While homemade is always an option (and we offer a substitution idea below), using store-bought dough saves valuable time and ensures consistent results. Choose your favorite brand; most standard 16.5 oz (468g) packages work perfectly.
- Red Gel Icing: This pre-made icing in a tube is incredibly easy to use for creating those charming snowman scarves. Its vibrant color and precise application make decorating a breeze. You can find this in the baking aisle of most grocery stores.
- Chocolate Chips: Standard-sized chocolate chips are ideal for crafting the snowman’s “coal” eyes and mouth. Opt for a good quality brand for the best flavor, as they will be a prominent feature on your cookies.
- Mini Chocolate Chips: These tiny chocolate chips are perfect for the snowman’s delicate buttons or smaller eye details. Their miniature size ensures they fit perfectly without overpowering the cookie’s design.
- Red and Green M&M’s: These festive candies add a pop of color and can be used for additional buttons, or even a cute little nose! Grab a bag of seasonal M&M’s to enhance the holiday cheer.
The complete, detailed list of ingredients with exact measurements can be found in the recipe card at the bottom of this page. These basic items come together to create a stunning, delectable holiday treat!
Creative Substitutions & Fun Additions
While the basic recipe is fantastic as is, there are many ways to customize your snowman cookies to suit your taste, dietary needs, or simply to add an extra layer of creative flair. Don’t be afraid to experiment!
- Cookie Dough Options: We love the convenience of store-bought cookie dough, but feel free to elevate your snowman cookies with a homemade Sugar Cookies Recipe or your preferred classic cookie recipe. If using a mix, such as Betty Crocker, consider enhancing the flavor with extracts like a touch of almond extract for a nutty depth, or clear vanilla extract to maintain that pristine white cookie base.
- M&M’s Alternatives: We suggest holiday colors for a festive touch, but the beauty of M&M’s is their versatility. Feel free to use any color M&M’s you prefer! If you’re baking these in January, a cool blue would look absolutely beautiful, mimicking a winter wonderland. Small gumdrops or other colorful small candies can also work wonders for buttons.
- Icing Choices: Instead of candy, you can use various decorative icings to create the snowman’s face, scarf, and buttons. A royal icing recipe provides a smooth, crisp finish, perfect for intricate details. It’s fun to use different food colorings to create a vibrant scarf or rosy cheeks. Having a few disposable piping bags on hand with various small tips will make the decorating process much easier and more precise. Homemade Cream Cheese Frosting, tinted with gel food colors, is another delicious option for a softer, creamier decoration.
- Chocolate Varieties: While M&M’s are fun and colorful, any similar-sized candy will work for the snowman’s features. For a more classic or less colorful look, you could use additional chocolate chips for the buttons and even the nose, giving your snowman a more uniform, cocoa-rich appeal. White chocolate chips could also be used for a different aesthetic.
- Sprinkle Sensations: Don’t limit yourself! Feel free to add sprinkles or any other type of edible decorations you like. Orange sprinkles can make an adorable carrot nose, while clear or white sanding sugar can give your snowmen a glistening, freshly fallen snow effect. Edible glitter or tiny silver dragees can add extra sparkle.
- Pretzel Arms: For an extra special touch, use pretzel sticks to create little twig arms for your snowmen. Simply insert them gently into the sides of the middle cookie after baking. This optional addition adds charming detail and a delightful salty crunch to balance the sweetness.
- Melted Snowman Version: For a humorous and equally delicious variation, add a large marshmallow on top of a single cookie before or after baking to resemble our popular Melted Snowman Cookies Recipe. This creates a completely different, yet equally festive, look!
How to Make Snowman Cookies Step-by-Step
Creating these adorable snowman cookies is a straightforward process, thanks to the ease of refrigerated cookie dough. Follow these steps for perfect results:
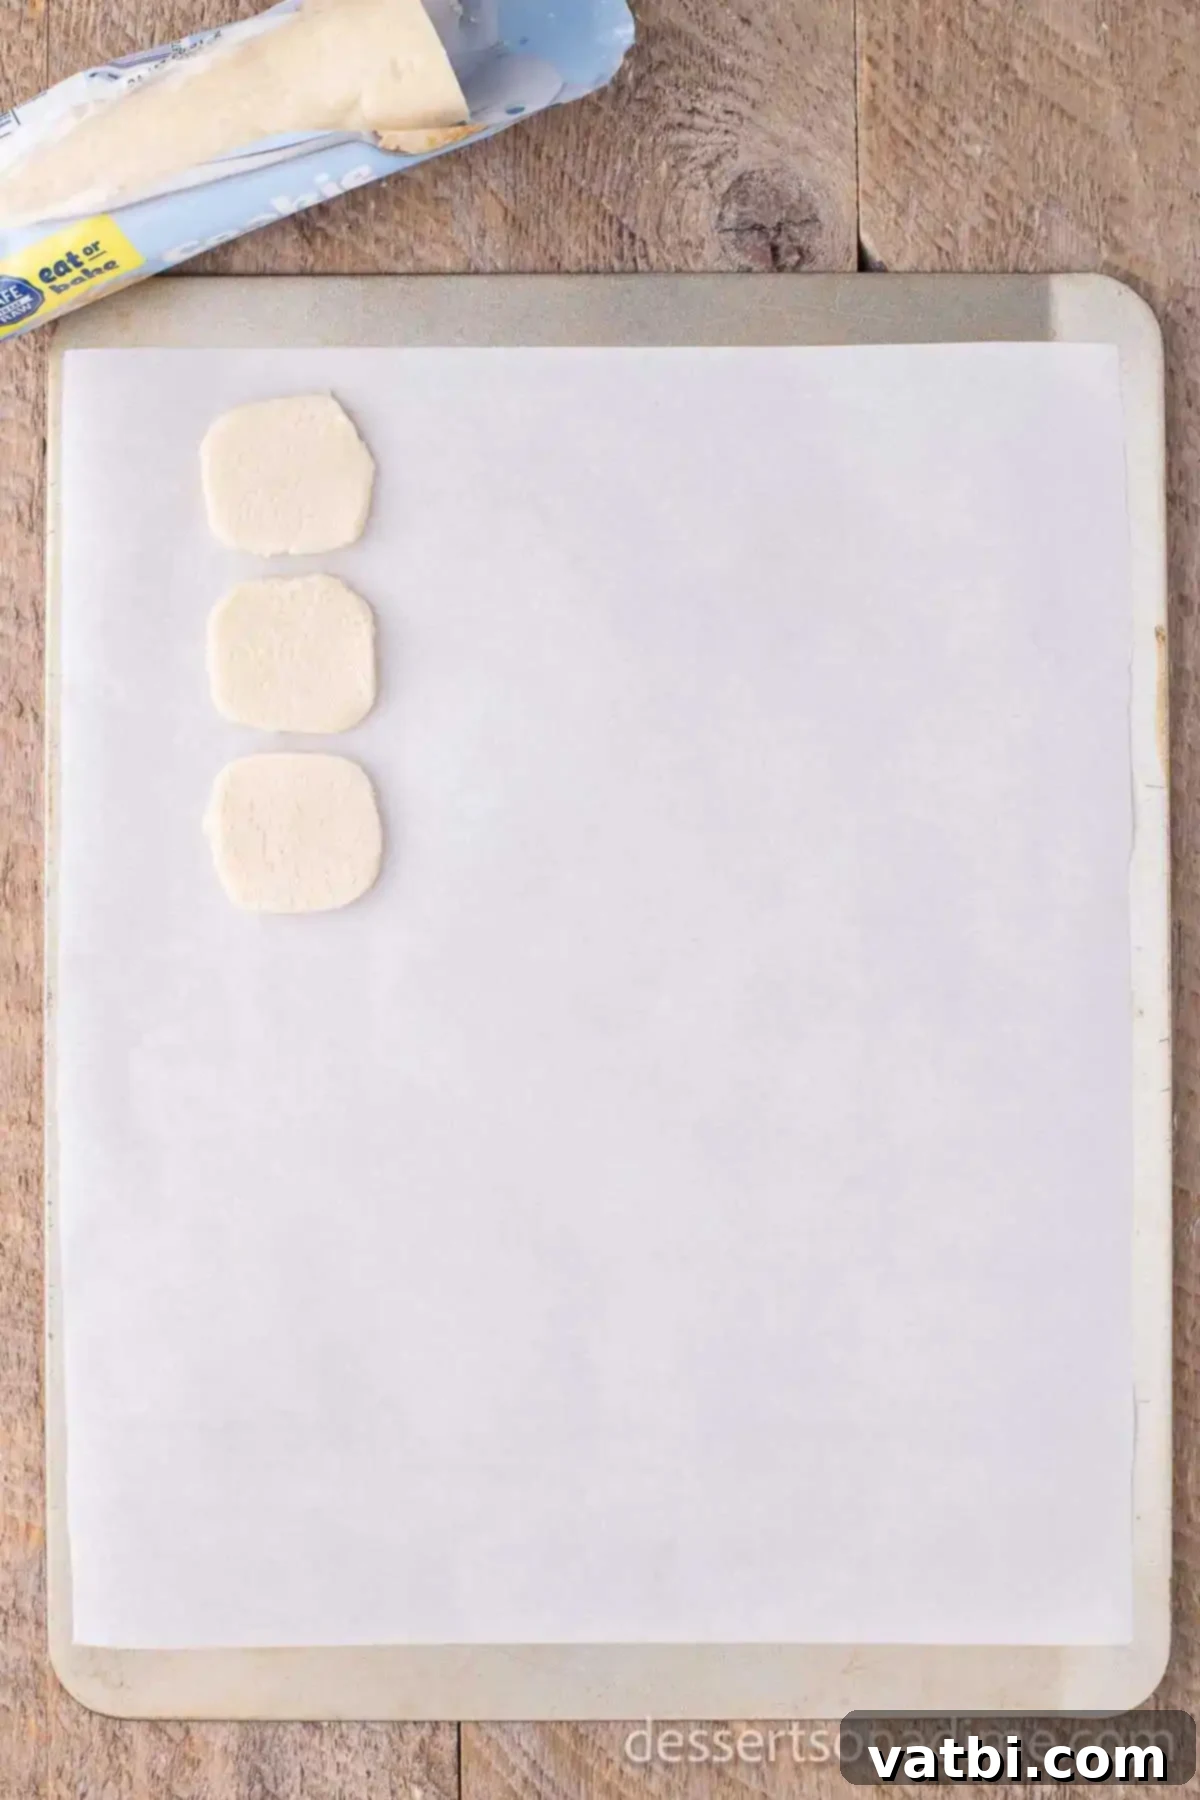
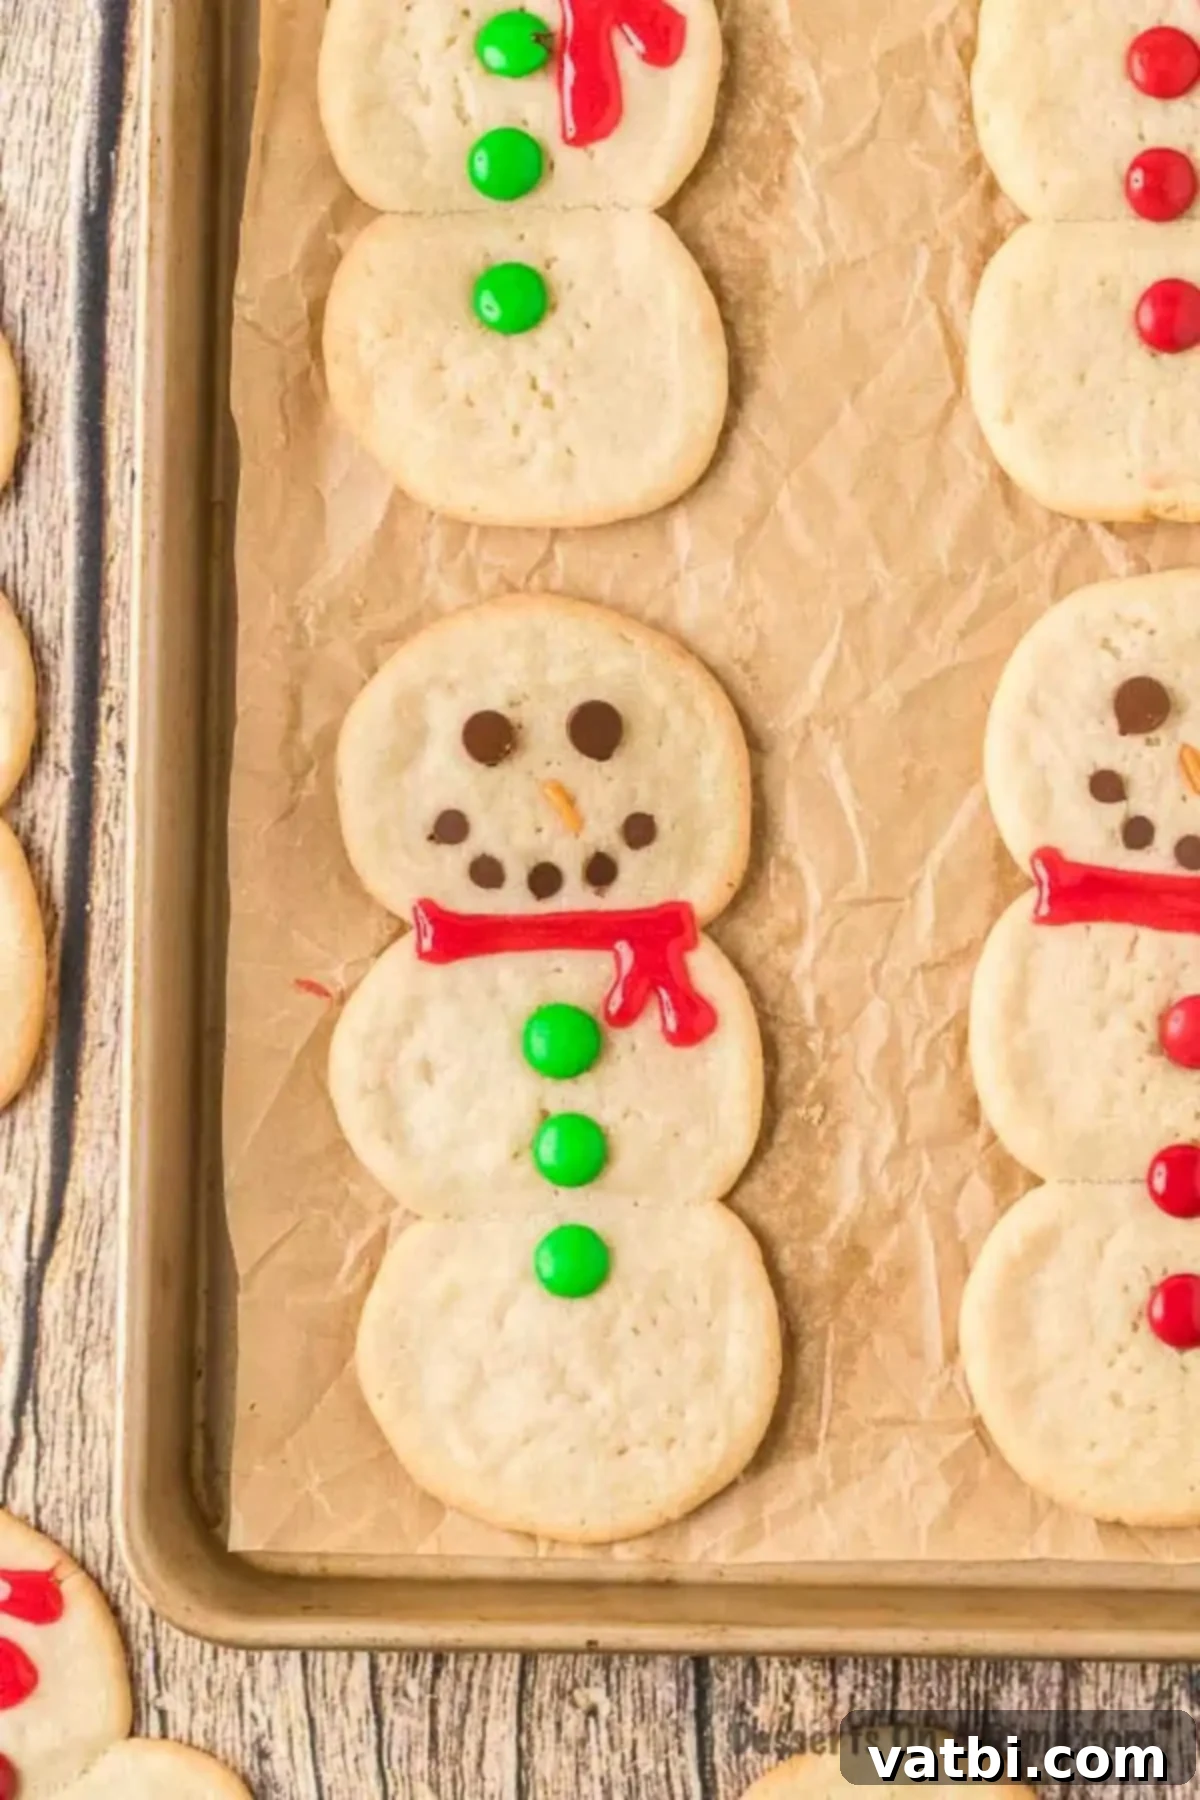
Step 1: Arrange the Dough. First, preheat your oven to the temperature specified on your cookie dough package. While the oven heats, take your refrigerated cookie dough and place individual portions onto a baking sheet that you’ve lined with parchment paper. Parchment paper is essential here as it prevents sticking and makes cleanup a breeze. The key to the snowman shape is to gently place three cookie dough portions together, forming a vertical column. This arrangement will allow them to bake into a cohesive snowman shape.
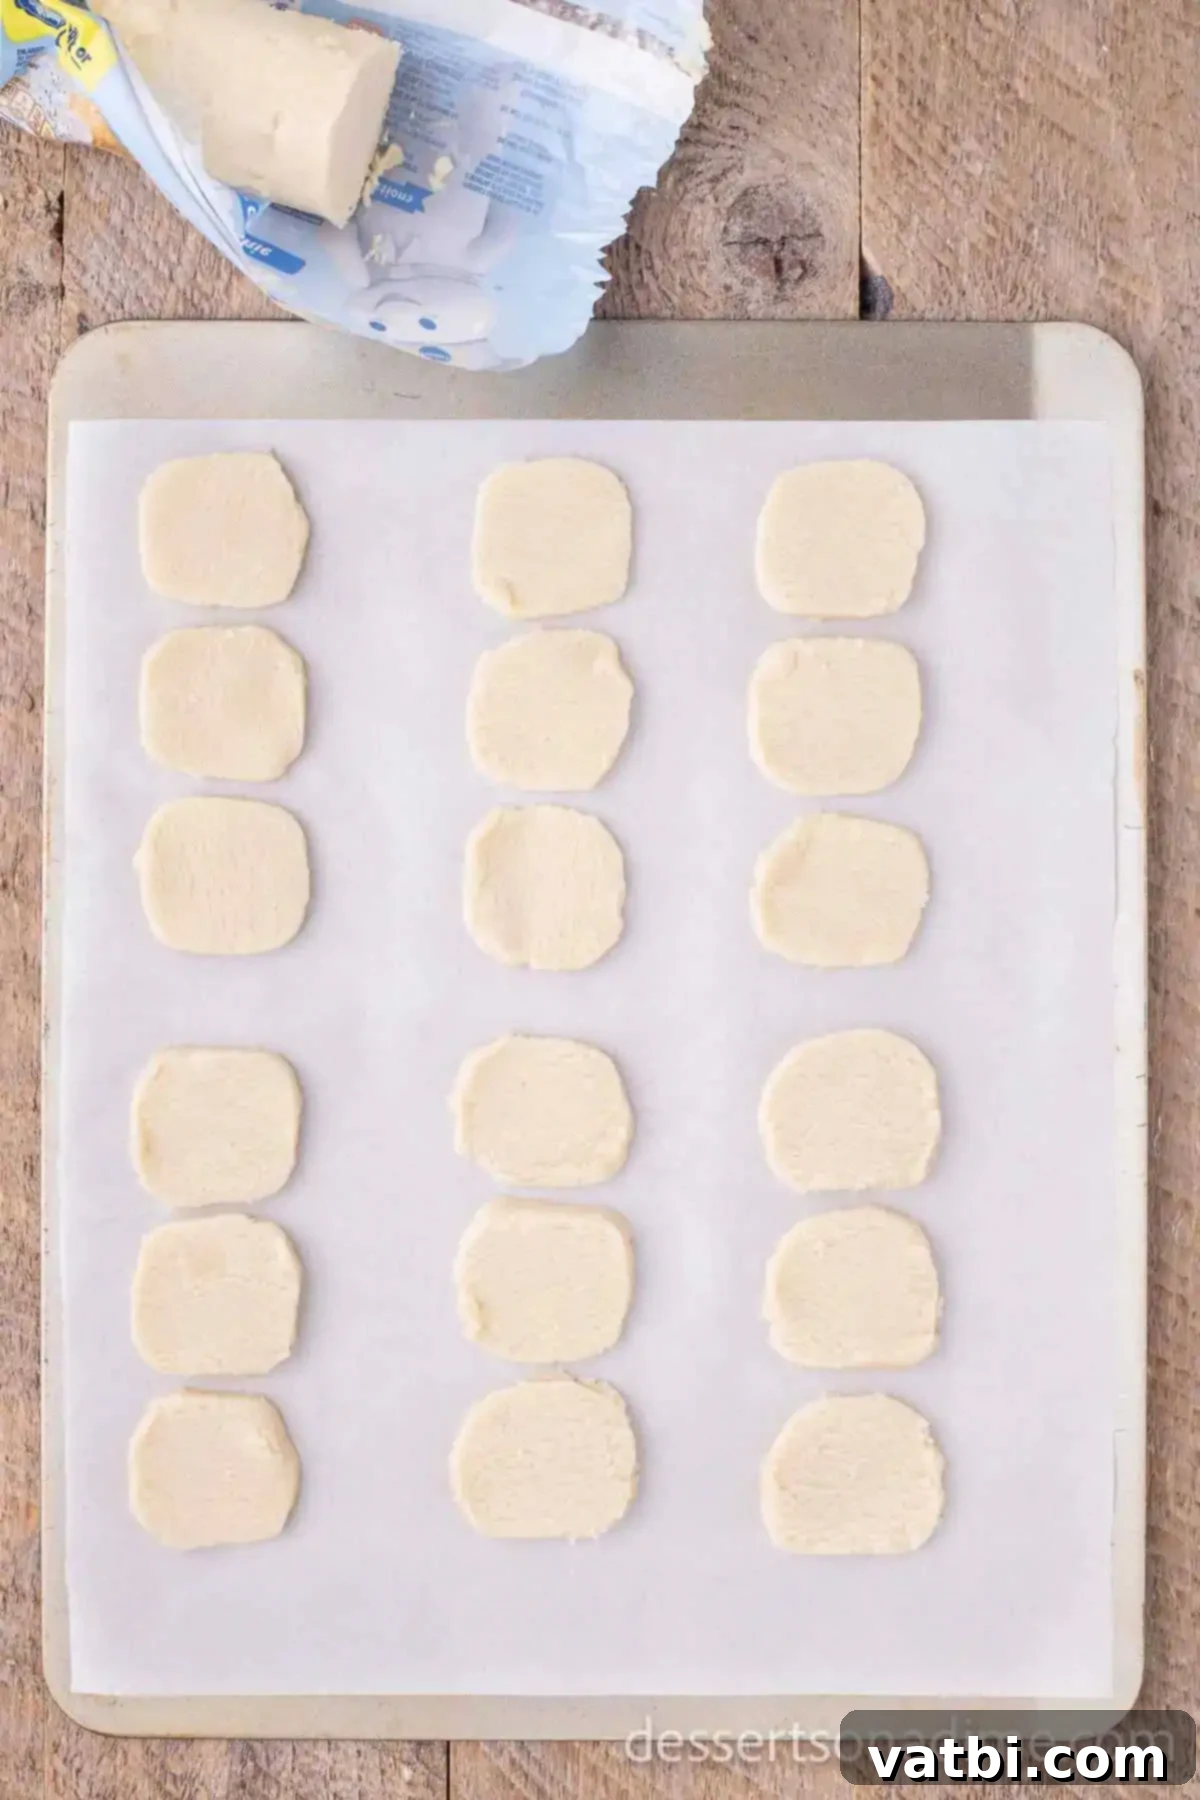
Step 2: Spacing for Perfection. Ensure that each set of three cookie dough portions is spaced about ½ inch apart from other snowmen on the baking sheet. This generous spacing is important to prevent them from merging into one giant cookie as they spread during baking. Using large baking sheets is highly recommended to give your snowmen ample room. As mentioned, always use parchment paper to line your cookie sheets for easy release and even baking, guaranteeing beautiful results every time.
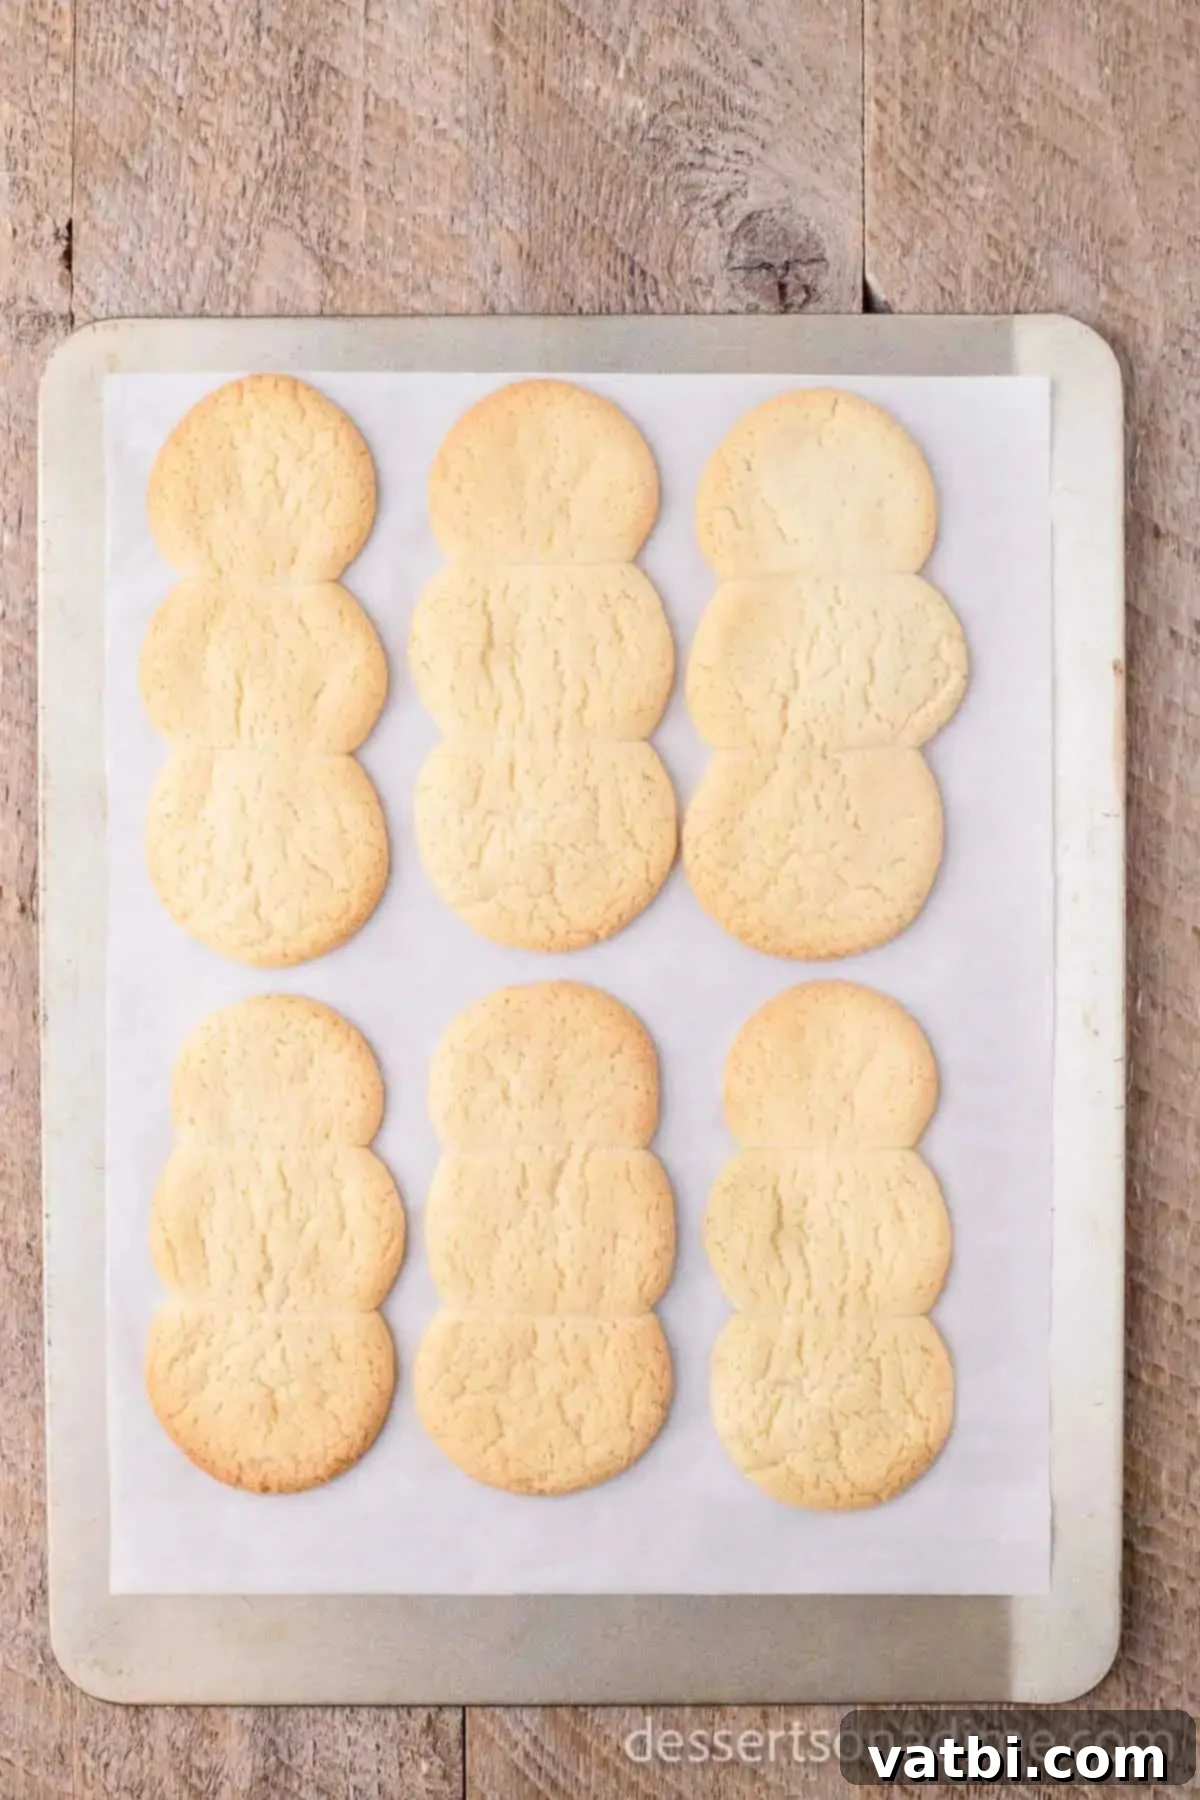
Step 3: Bake to Golden Perfection. Bake the cookies according to the directions on the package of your refrigerated sugar cookie dough. Keep a close eye on them; you want them to be lightly browned around the edges. This typically results in a cookie that is perfectly light, fluffy, and soft in the center. Over-baking can make them hard, so remove them promptly once they reach that beautiful golden hue.
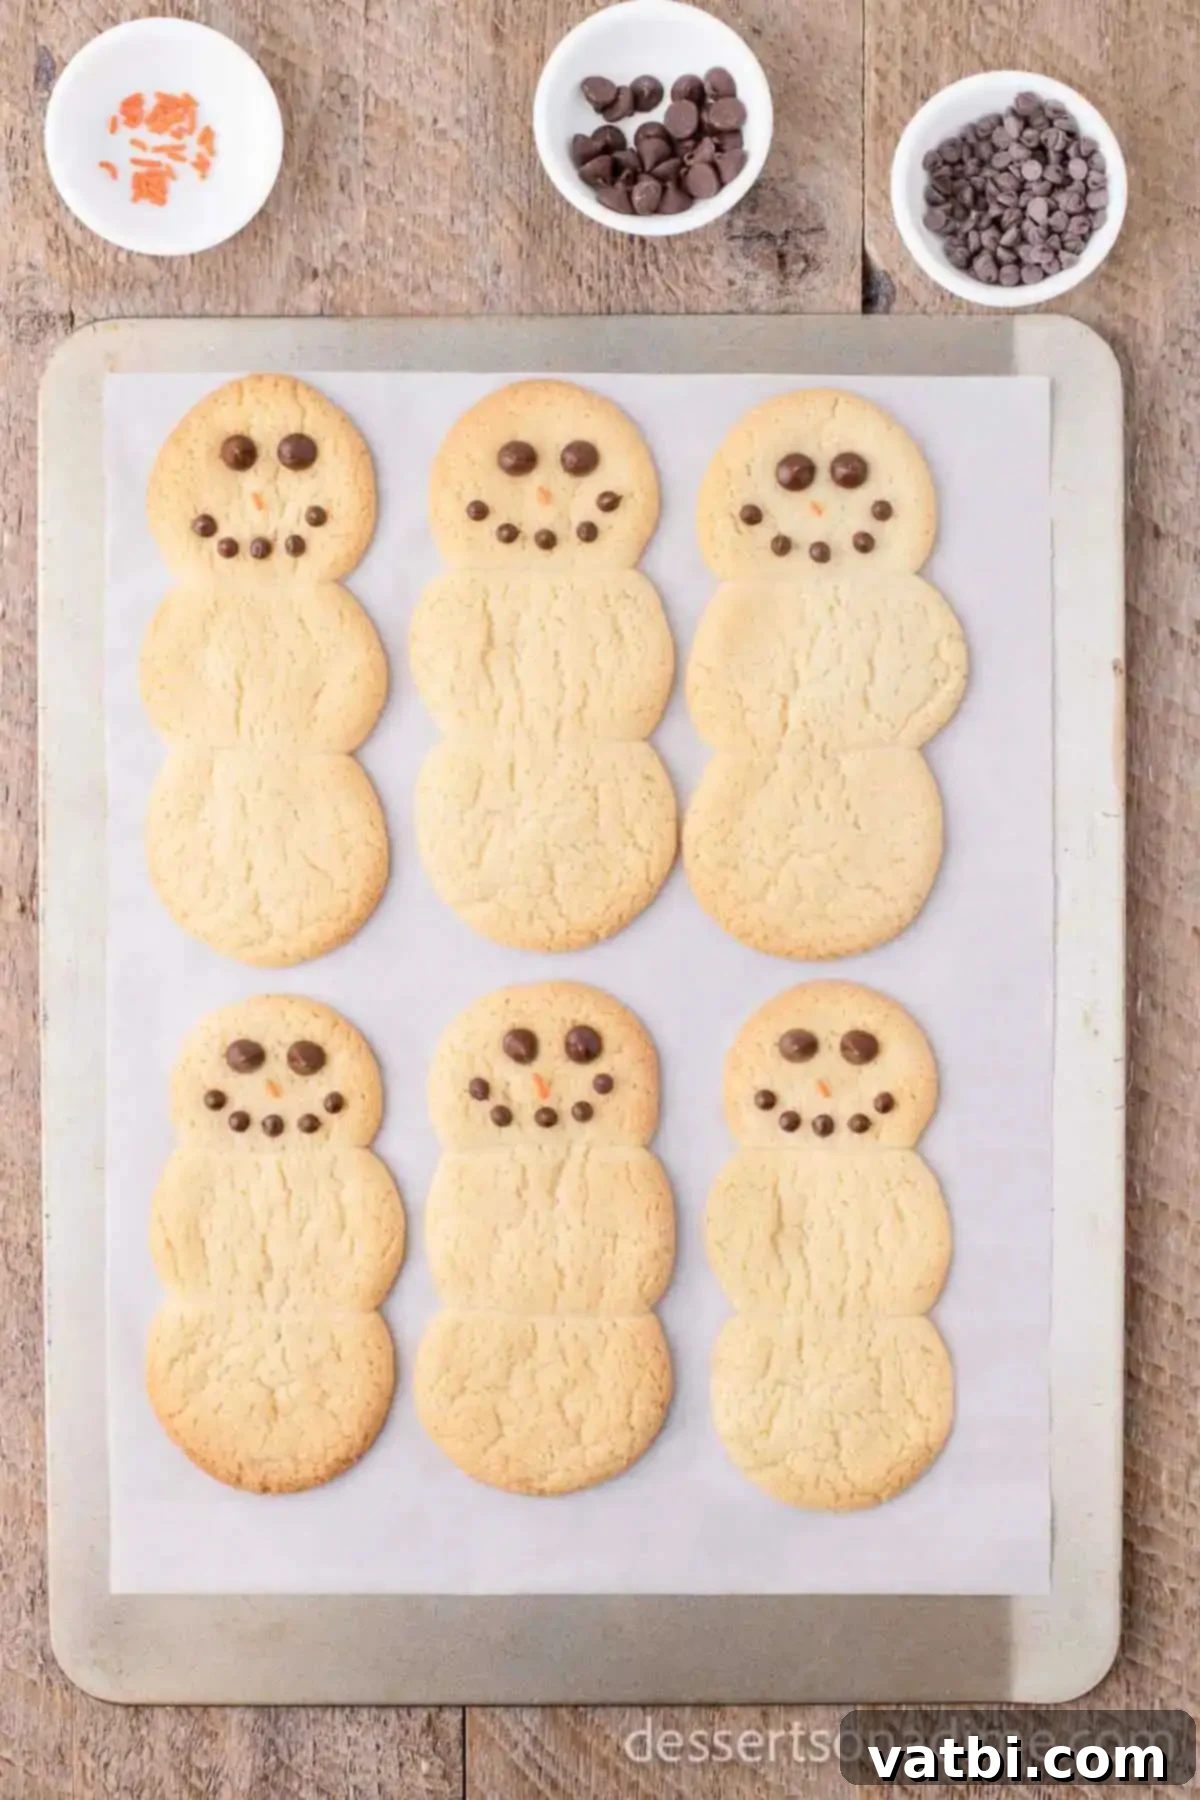
Step 4: Cool and Prepare for Decorating. Once baked, carefully remove the cookies from the oven. Let them cool on the baking sheet for a few minutes before transferring them to a wire cooling rack. Allow the cookies to cool completely on the rack before you begin the icing step. However, for the initial candy placements, you’ll want them slightly warm. This allows the chocolate to melt just enough to adhere to the cookie, ensuring your decorations stay put.
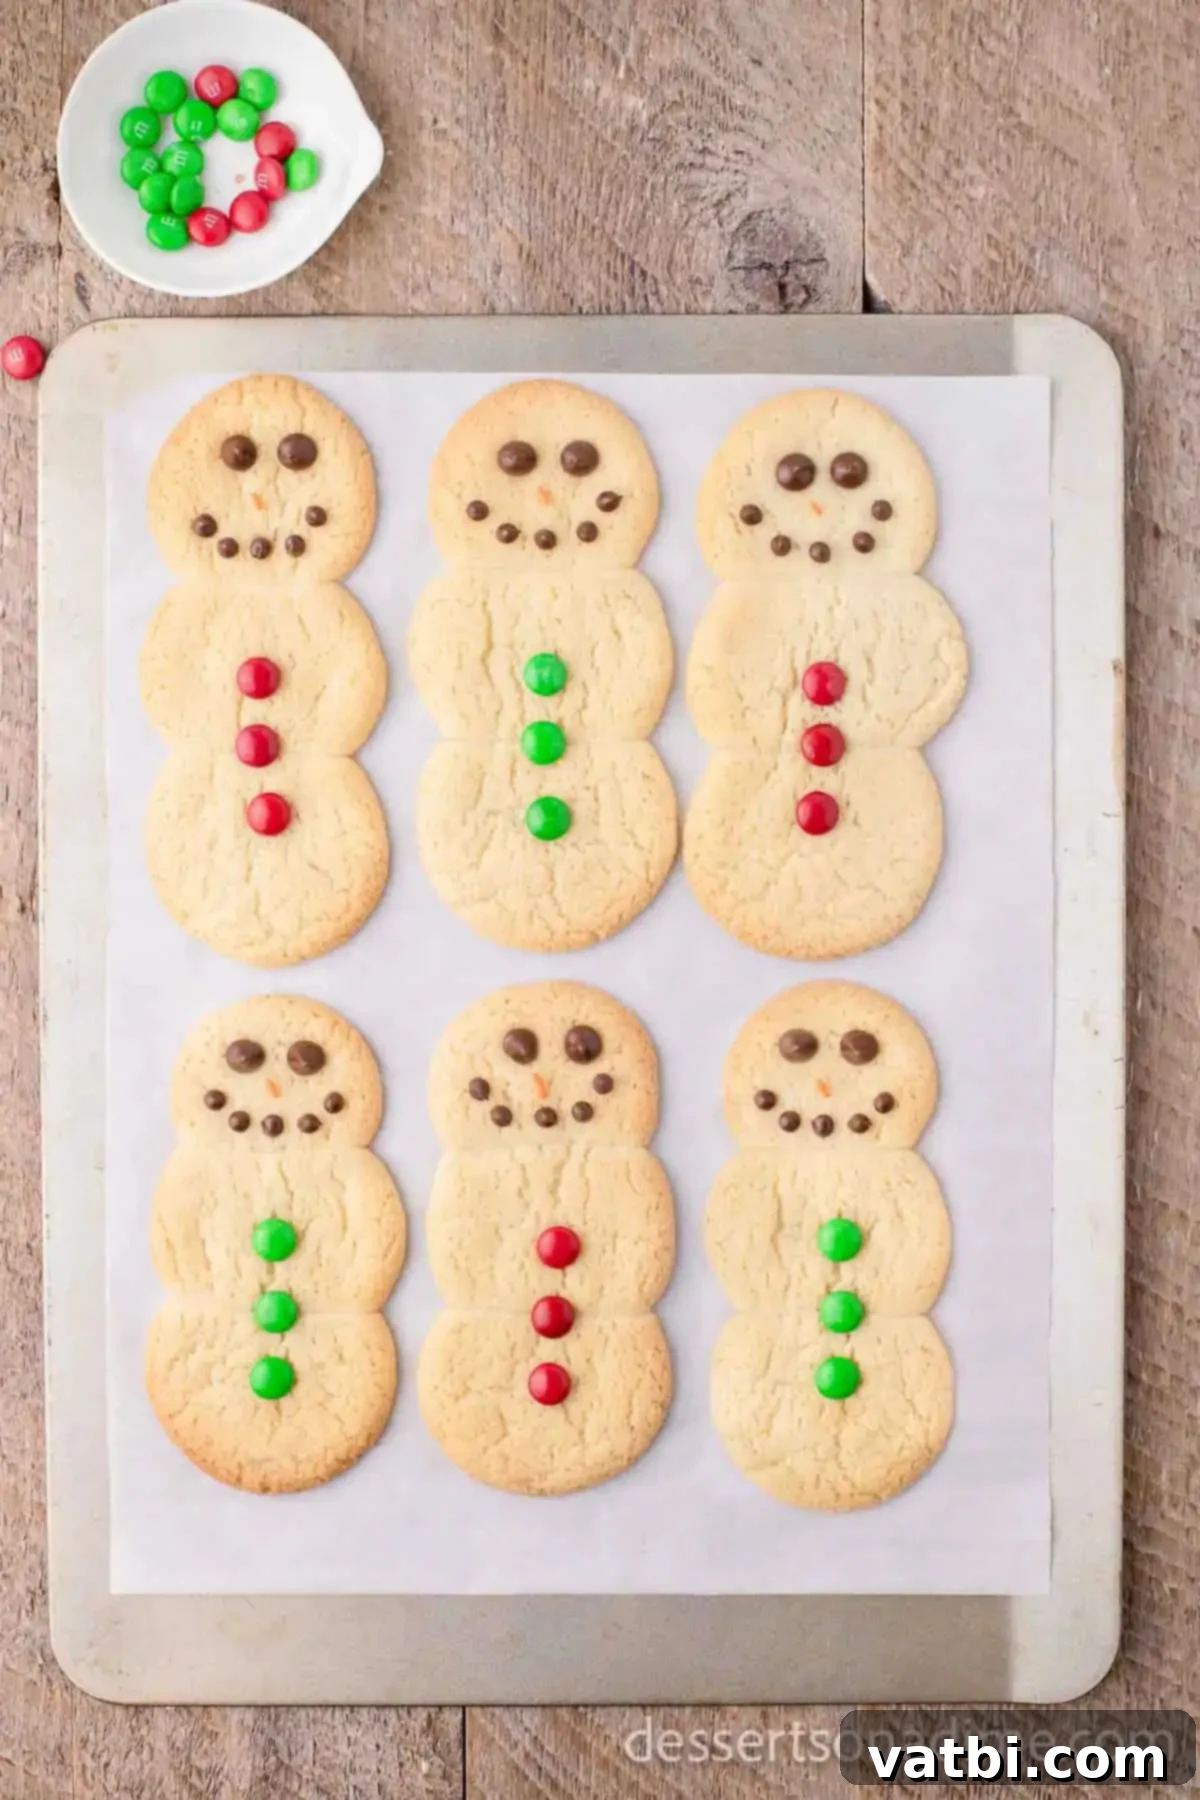
Step 5: Add Facial Features and Buttons. This is where your snowmen truly come to life! While the cookies are still slightly warm (not hot, just warm enough for candies to stick), begin decorating. Place two mini chocolate chips for the eyes on the top “head” portion of the snowman. Use regular chocolate chips to create a smiling mouth. Then, add colorful M&M’s down the middle “body” portion for the buttons. The residual warmth will help the chocolate and candies adhere firmly.
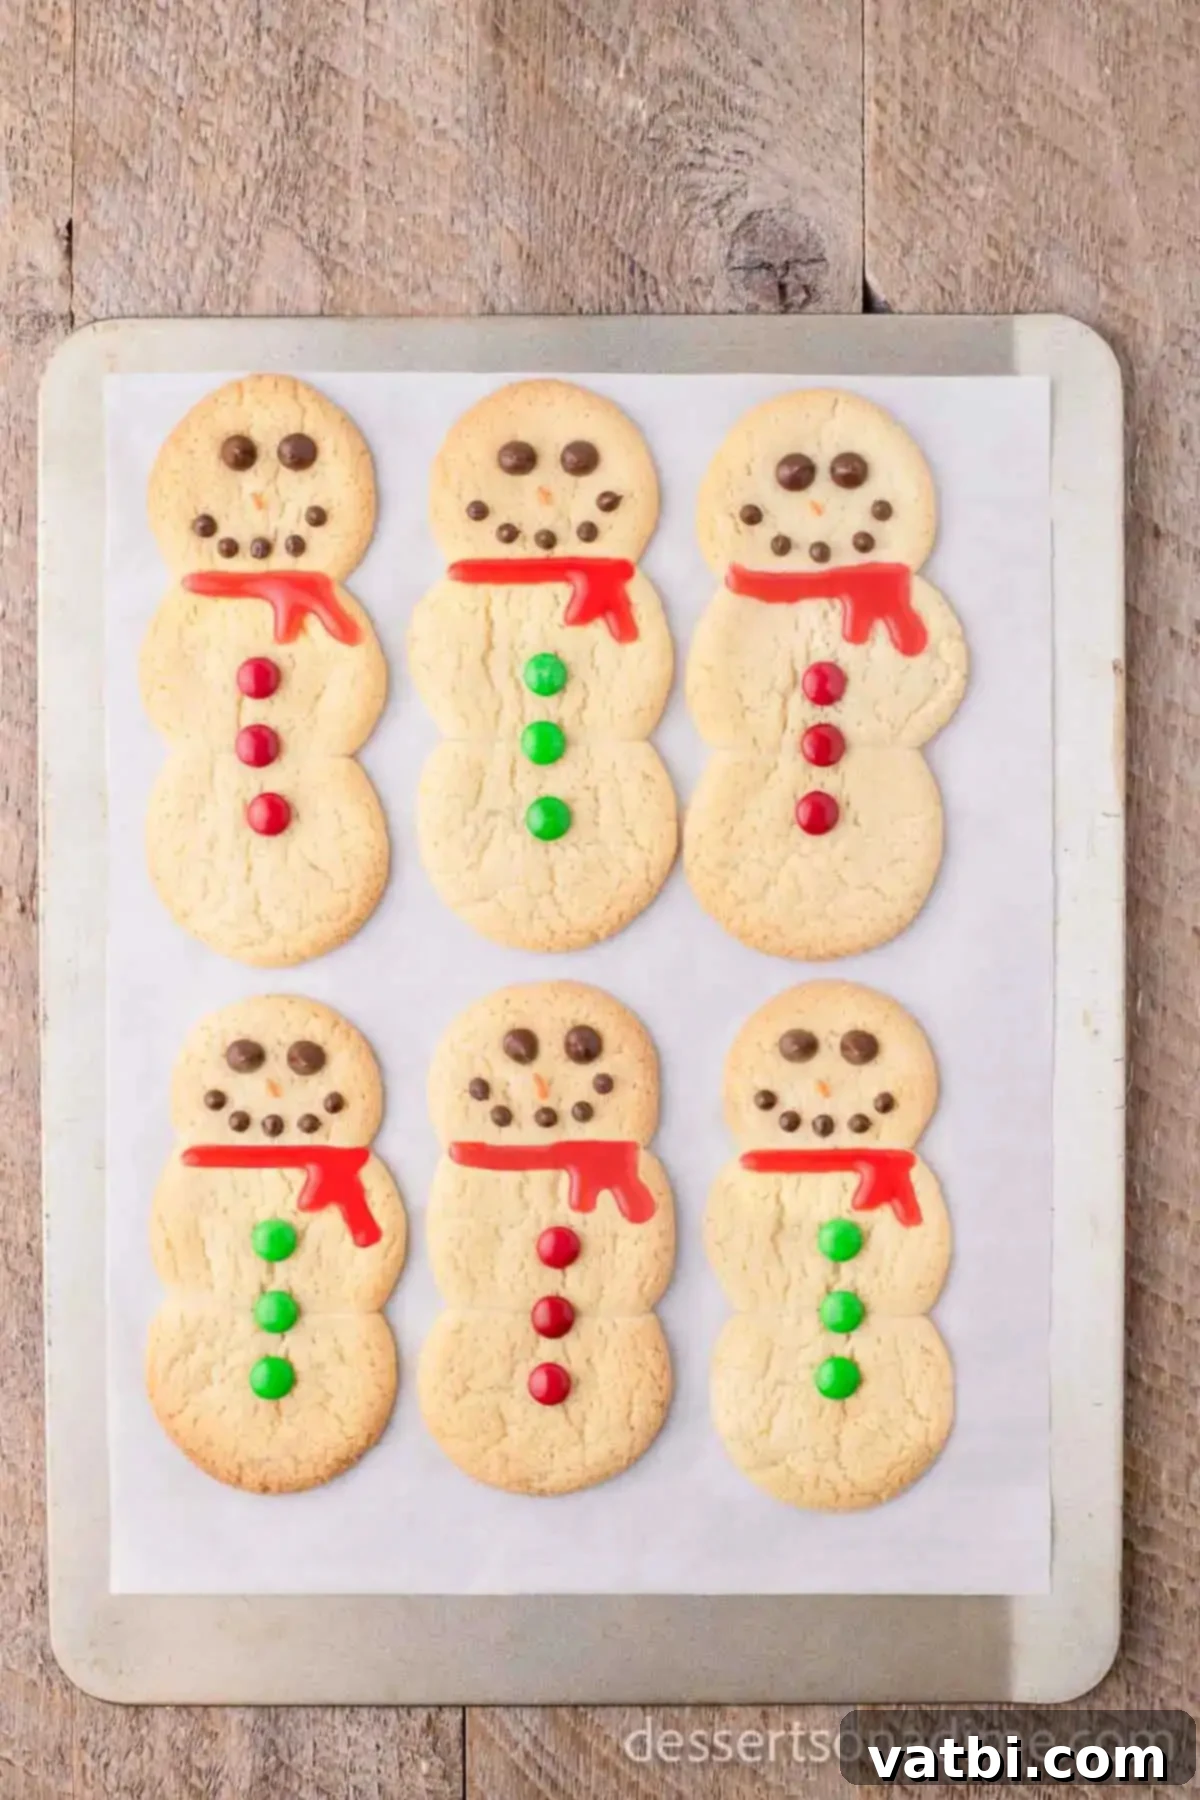
Step 6: Pipe the Scarf and Serve. Once the initial candy decorations are in place and the cookies have cooled completely, it’s time for the scarf! Use your red gel icing (or any color you prefer) to pipe a “scarf” design around the neck area where the top and middle cookies meet. You can create a simple line or a more elaborate loop and fringe. We used traditional red and green icing for a classic Christmas feel, but feel free to get creative with other colors! After decorating, arrange your adorable snowman cookies on a festive platter or in a decorative bowl for serving. They are now ready to bring joy to everyone!
Expert Tips for Perfect Snowman Cookies
Even with an easy recipe, a few insider tips can elevate your baking from good to absolutely fantastic. Here are some pointers to ensure your snowman cookies turn out perfectly every time:
- Don’t Overbake: Sugar cookies can go from perfectly soft to dry and crumbly very quickly. Watch for the edges to be just lightly golden. The centers might still look a little soft, but they will firm up as they cool.
- Use Parchment Paper: We can’t stress this enough! Parchment paper prevents sticking, ensures even baking, and makes cleanup a breeze. It’s a non-negotiable for successful cookie baking.
- Cool Completely Before Icing: While you’ll want the cookies slightly warm for the chocolate chips and M&M’s to adhere, ensure they are completely cool before applying gel icing or any other frostings for the scarf and finer details. If the cookies are warm, the icing will melt and spread, ruining your design.
- Quality Ingredients Matter: Even with simple ingredients, choosing good quality chocolate chips and fresh cookie dough can make a difference in the overall taste and texture of your cookies.
- Get Creative with Decorations: Don’t feel limited to the suggested decorations. Use orange sprinkles for a carrot nose, mini pretzels for arms, or even small candies for earmuffs. Let your imagination run wild!
- Practice Piping: If you’re using gel icing or homemade frosting, a quick practice run on a piece of parchment paper can help you get a feel for the pressure and flow before decorating your actual cookies.
- Store Properly: To keep your snowman cookies fresh and their decorations intact, store them in an airtight container at room temperature for up to 3-4 days, or in the refrigerator for up to 5 days. Layering them with wax paper will prevent sticking.
Frequently Asked Questions
Here are some common questions about making and storing these delightful snowman cookies:
To keep your snowman cookies fresh and delicious, place them in an airtight container. They will last up to 3-4 days at room temperature, or up to 5 days if stored in the refrigerator. However, our cookies rarely last that long because the kids (and adults!) love them so much! For best results and to prevent the decorations from sticking together, I always recommend placing a layer of wax paper or parchment paper between each layer of cookies during storage.
Absolutely, these snowman cookies freeze beautifully! To freeze them, first ensure they are completely cool after baking and decorating. Then, arrange them in a single layer on a baking sheet and freeze for about an hour until solid. Once frozen, transfer them to an airtight freezer-safe container, placing a layer of parchment paper between each cookie to prevent sticking and preserve their delicate decorations. They can be frozen for up to 3 months. When you’re ready to enjoy them, simply allow the cookies to thaw at room temperature for a few hours before serving. Freezing is a great way to bake ahead for holiday gatherings!
Yes, absolutely! While refrigerated dough makes this recipe super quick, you can certainly use your favorite homemade sugar cookie dough. Just make sure it’s a recipe that holds its shape well when baked. You’ll follow the same steps for arranging the three dough balls to form the snowman shape and bake according to your homemade recipe’s instructions.
No problem! You can use various alternatives for the snowman’s scarf. Melted white chocolate dyed with food coloring, a simple powdered sugar glaze (powdered sugar mixed with a tiny bit of milk or water), or even thin strips of fruit roll-ups can work as colorful scarves. Get creative with what you have on hand!
More Festive Snowman Treats
If you’re as enchanted by snowman-themed desserts as we are, you’ll love exploring these other creative and delicious recipes to complete your winter wonderland dessert table:
- Melted Snowman Bark: A delightful and easy no-bake treat.
- Melted Snowman Cookies Recipe: Another take on the melted snowman, perfect for a chuckle.
- Snowman Cupcakes Recipe: Fluffy cupcakes adorned with adorable snowman faces.
- Snowman Chocolate Covered Oreos: Simple, elegant, and always a crowd-pleaser.
We encourage you to try this incredibly easy and rewarding snowman cookie recipe today! It’s a fantastic way to add some festive charm to your holiday celebrations without the stress. Come back and leave a comment below with your feedback and photos of your adorable creations. We absolutely love hearing from you and seeing how your snowman cookies turn out!
Pin
Snowman Cookies
Ingredients
- Refrigerated Sugar Cookie Dough
- Red Gel Icing
- Chocolate Chips
- Mini Chocolate Chips
- Red and Green M&M’s
Instructions
-
Place your pre-made cookie dough on a lined cookie sheet so that they are about ½ inch apart.
-
Bake as directed on package.
-
Remove from oven, and while still warm, add your chocolate chips and M&M’s.
-
Allow cookies to cool completely and pipe on frosting gel around the top and middle cookies for a scarf.
-
Store in an air tight container in the refrigerator.
Nutrition Facts
Pin This Now to Remember It Later
Pin Recipe
