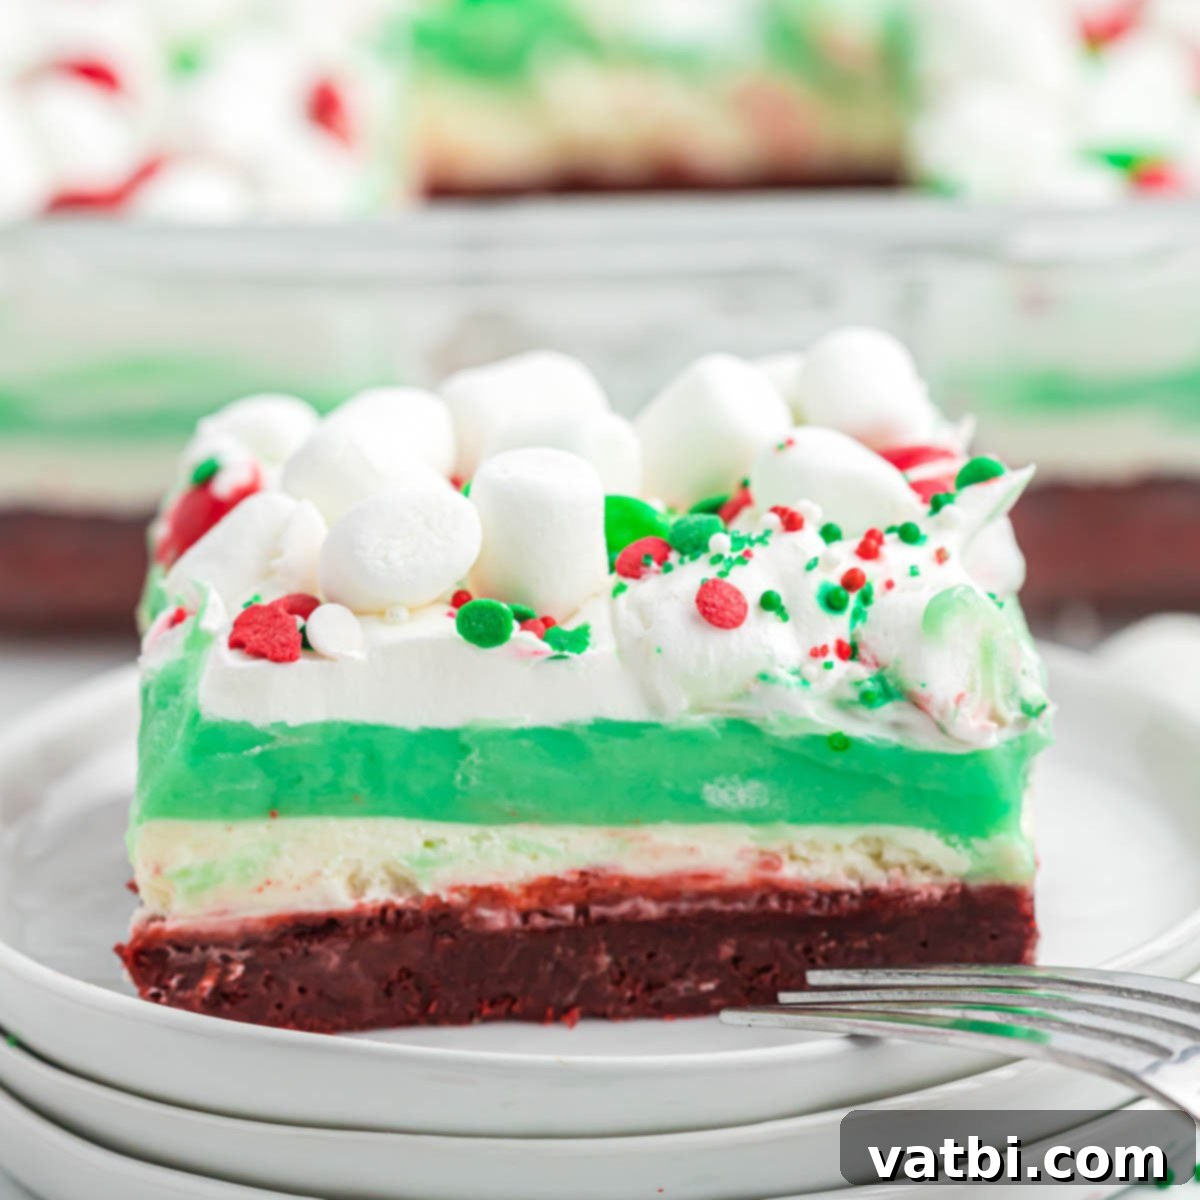
Ultimate Christmas Dessert Lasagna: A Festive, Easy-to-Make Layered Holiday Treat
Prepare to dazzle your holiday guests with this show-stopping Christmas Dessert Lasagna! This extraordinary dessert boasts four luscious layers, meticulously crafted to deliver a sweet, creamy, and undeniably delicious treat. It’s not just a recipe; it’s an effortless culinary creation designed for the bustling holiday season, promising an amazing Christmas dessert that will be the talk of any festive gathering. Simple to assemble yet incredibly impressive, this layered dessert is your secret weapon for holiday entertaining.
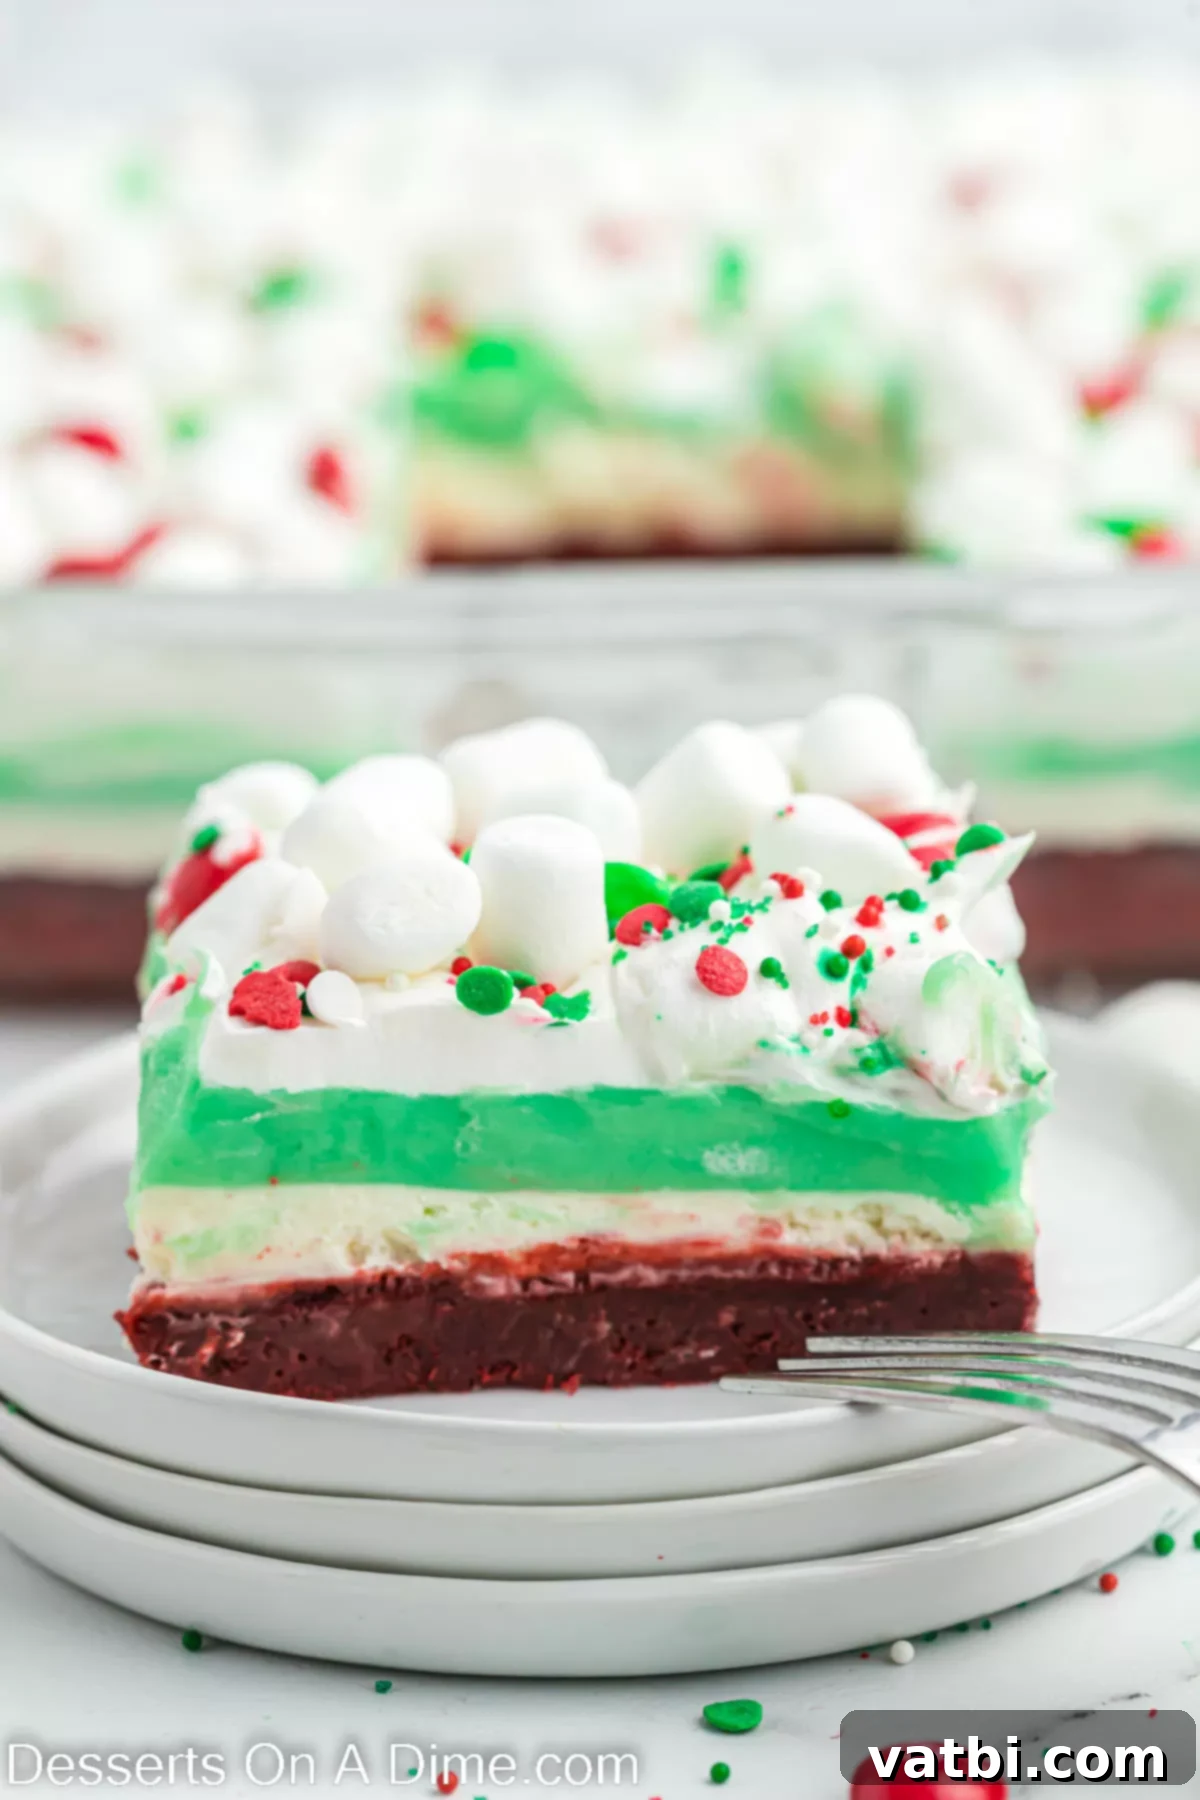
What truly sets this holiday dessert apart are its vibrant, eye-catching red and green layers, making it a perfectly festive centerpiece. Each slice reveals a beautiful cross-section of colors and textures, a visual delight that’s almost too pretty to eat – almost! Beyond its stunning appearance, every bite is a creamy, dreamy experience, a symphony of flavors that captures the spirit of Christmas. Whether you’re hosting a grand Christmas dinner or a cozy family gathering, this easy Christmas dessert lasagna is guaranteed to impress with its irresistible taste and festive charm.
Dessert lasagnas have been a beloved staple in my kitchen for years, bringing joy and a touch of effortless elegance to every occasion. They are incredibly fun to create, offering endless possibilities for flavor combinations and seasonal twists. Along with this festive treat, I frequently whip up crowd-pleasers like my classic Chocolate Lasagna Recipe and the ever-popular Peanut Butter Lasagna. This Christmas version takes the same easy-to-make concept and infuses it with delightful holiday flavors, ensuring a unique and memorable sweet experience for everyone.
What’s in this post: Christmas Dessert Lasagna
- What is Christmas Lasagna?
- Essential Ingredients for Christmas Lasagna
- Creative Substitutions and Additions
- Step-by-Step Guide: How to Make Christmas Lasagna
- Pro Tips for Perfect Christmas Lasagna
- Frequently Asked Questions
- More Festive Christmas Desserts to Try
- Christmas Dessert Lasagna Recipe Card
What is Christmas Lasagna?
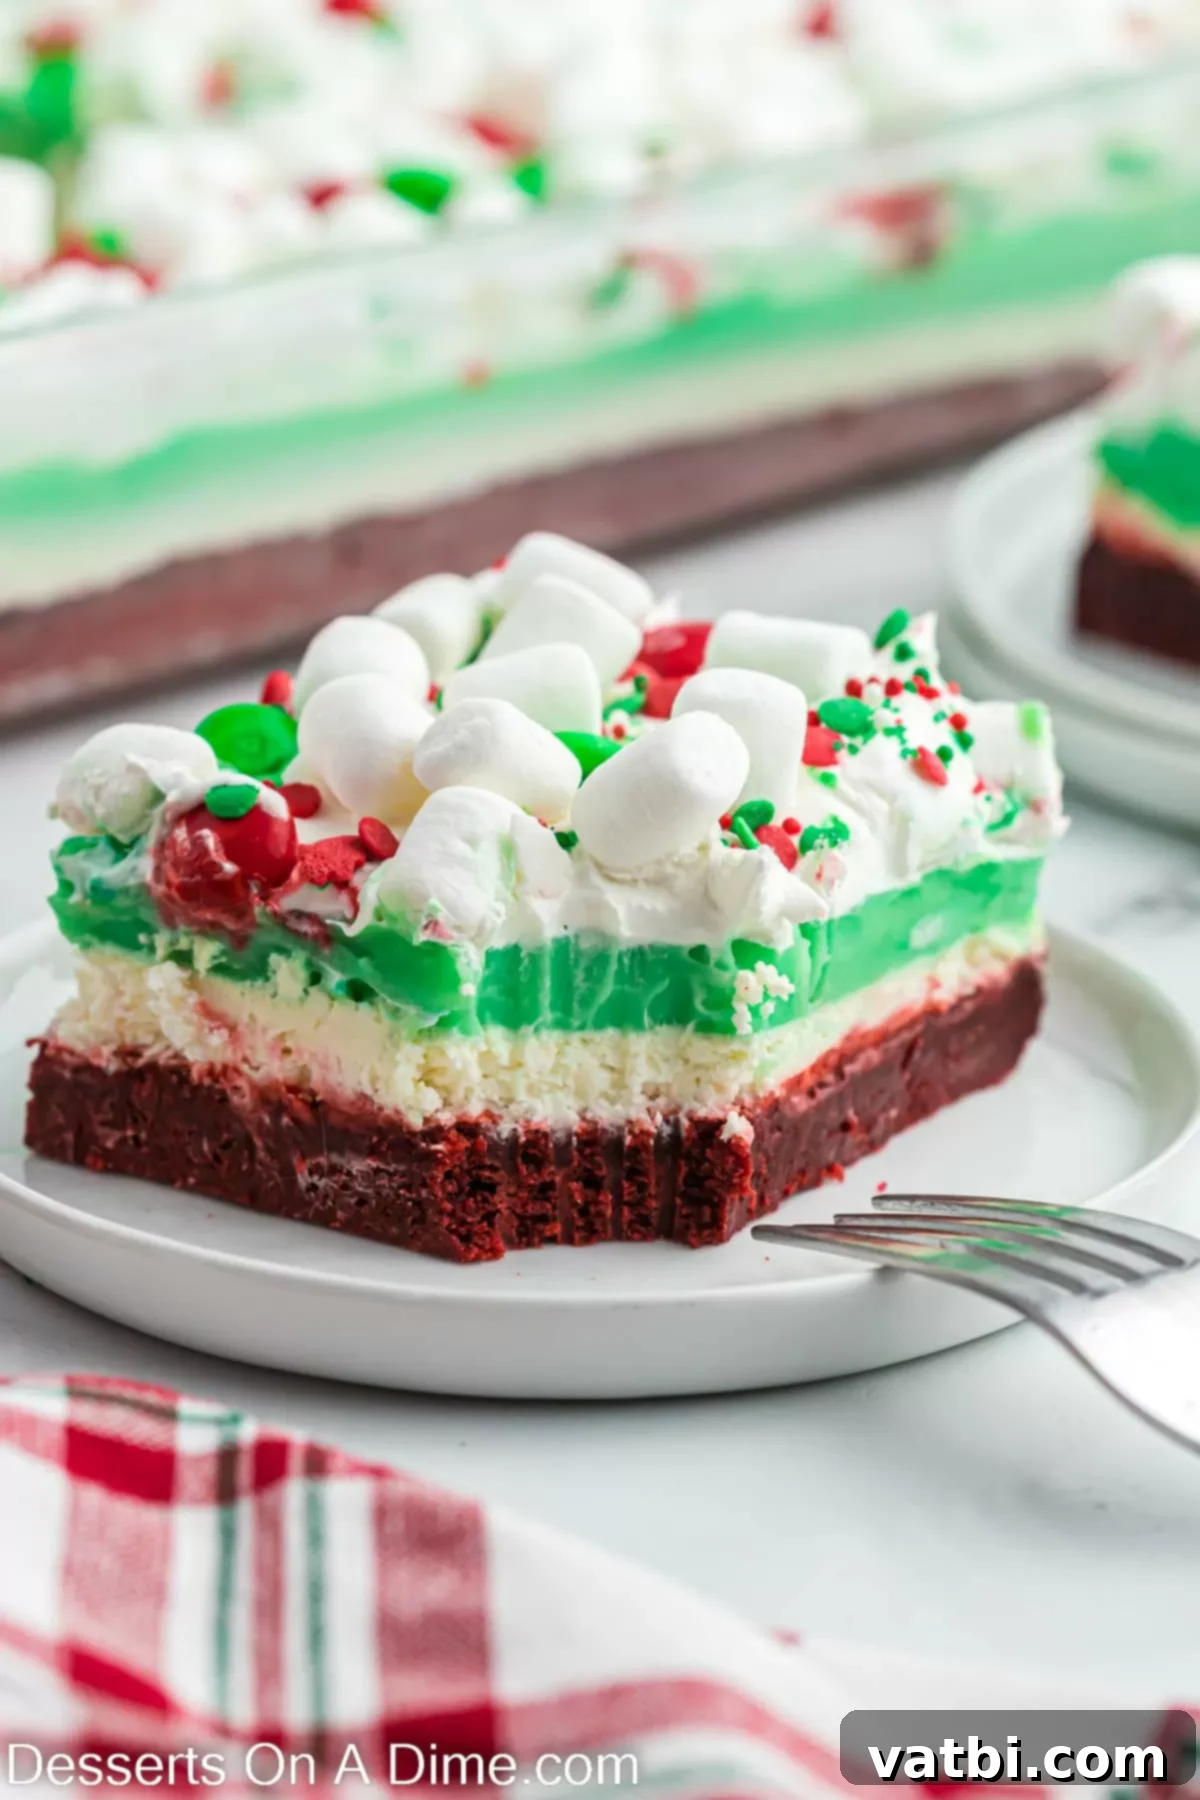
Christmas Lasagna is a delightful, no-bake layered dessert that perfectly encapsulates the festive spirit of the holidays. Unlike its savory namesake, this sweet “lasagna” doesn’t involve pasta, but rather a series of decadent, colorful layers chilled to perfection. At its foundation is a rich red velvet cake crust, offering a tender base. Above that, you’ll find a creamy, refreshing peppermint cream cheese layer, providing a crisp white contrast and a burst of holiday flavor. Next comes a vibrant green pudding layer, often made with instant white chocolate pudding tinted with food coloring, adding another dimension of sweetness and a pop of festive color. Finally, the entire dessert is crowned with a light, airy whipped cream topping and a generous scattering of holiday-themed candies and sprinkles.
Each forkful of this dessert lasagna is an explosion of texture and flavor – from the soft crust to the smooth, cool cream cheese and pudding, all culminating in a light, sweet finish. It’s a truly indulgent and visually stunning treat, making it an ideal candidate for your holiday dessert table. Its bright red, white, and green hues are specifically chosen to evoke the joy and warmth of Christmas, ensuring it’s not just a dessert, but a festive experience. While you might also enjoy making an Ugly Sweater Cake for fun, this Christmas Lasagna offers a simpler, more elegant solution for a holiday centerpiece that everyone will adore.
Essential Ingredients for Christmas Lasagna
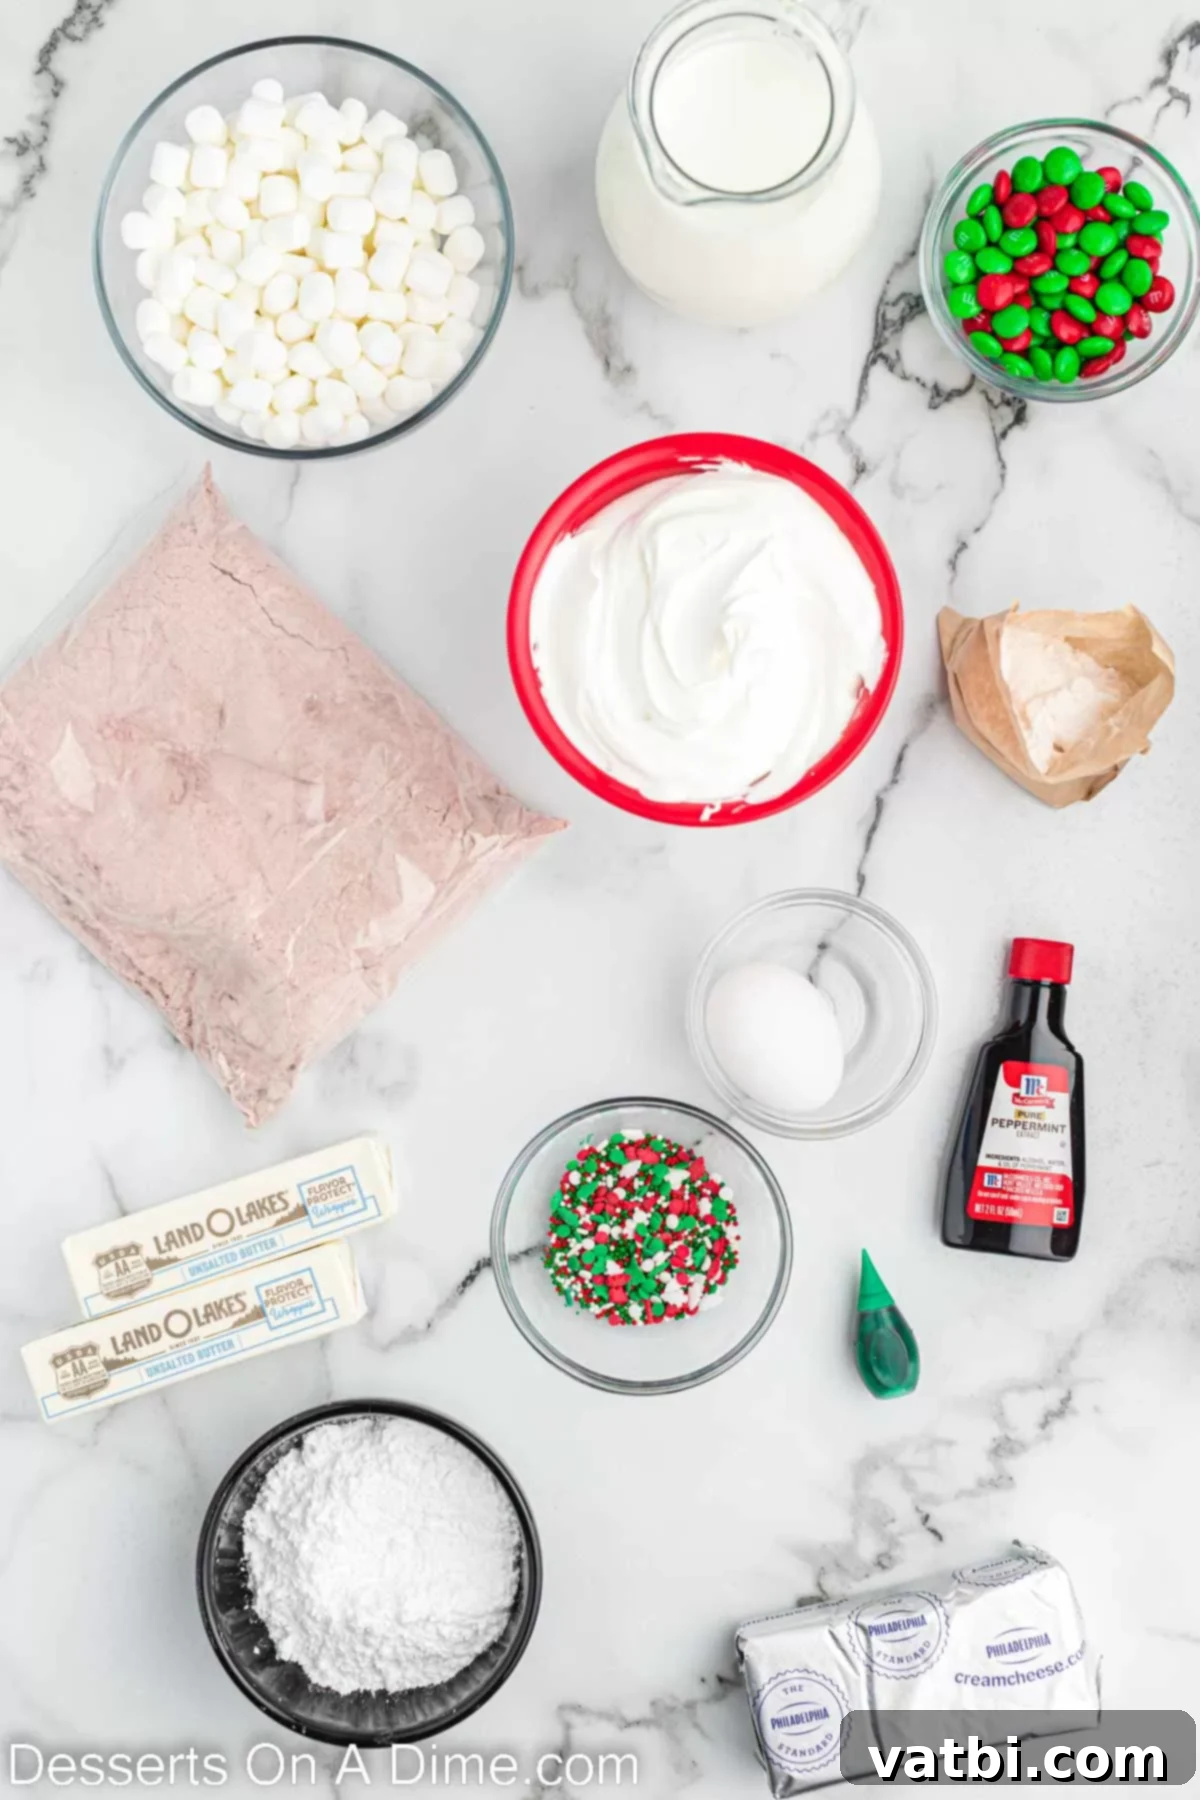
Crafting the perfect Christmas Dessert Lasagna begins with selecting the right ingredients. Here’s a detailed look at what you’ll need for each delightful layer:
For the Festive Red Velvet Crust
- Red Velvet Cake Mix: This forms the vibrant red base of our lasagna. Using a box mix makes the crust incredibly easy to prepare while ensuring a consistent, moist, and flavorful foundation. Feel free to choose any brand you prefer; they all work wonderfully.
- Unsalted Butter (melted): Essential for binding the cake mix and creating a rich, buttery crust. Ensure it’s fully melted to incorporate smoothly.
- Large Egg: Acts as a binder, helping the crust achieve the perfect crumbly yet cohesive texture after baking.
For the Creamy Peppermint Cheesecake Layer
- Full-Fat, Block-Style Cream Cheese (softened): This is crucial for the velvety texture and rich flavor of the cheesecake layer. Always use full-fat cream cheese, and ensure it’s softened to room temperature for a smooth, lump-free mixture.
- Unsalted Butter (softened): Adds extra creaminess and richness to the cheesecake layer. Like the cream cheese, it should be softened to room temperature for easy blending.
- Powdered Sugar: Provides sweetness and helps achieve that characteristic smooth, melt-in-your-mouth consistency without grittiness.
- Peppermint Extract: The star flavor of this layer, infusing it with a refreshing, cool minty taste that perfectly complements the holiday theme. A little goes a long way, so measure carefully.
- Cool Whip: This lightens the cream cheese mixture, making the layer airy and fluffy. For a homemade touch, you can substitute with Homemade Whipped Cream, just be sure it’s stabilized to hold its shape.
For the Vibrant Green Pudding Layer
- Instant White Chocolate Pudding Mix: Opt for instant pudding for quick preparation and a wonderfully smooth texture. White chocolate provides a sweet, neutral base that takes on the green coloring beautifully. Two 3.8 oz boxes are typically needed.
- Milk: Whole milk is recommended for a richer, creamier pudding, but 2% milk will also work.
- Green Gel Food Coloring: Gel food coloring is highly recommended over liquid drops as it provides a more intense, vibrant color without adding excess moisture or altering the pudding’s consistency. You’ll only need a few drops to achieve a beautiful festive green.
For the Delightful Topping
- Whipped Cream: A generous layer of whipped cream forms the final cloud-like topping for the dessert. You can use extra Cool Whip or fresh homemade whipped cream.
- Mini Marshmallows: These add a soft, chewy texture and a charming, snowy appearance to the top. The mini size is perfect for an even distribution.
- Christmas Sprinkles: Unleash your creativity! Choose your favorite festive sprinkles – stars, trees, snowflakes, or a classic red and green mix – to add sparkle and holiday cheer.
- Red and Green M&Ms: These colorful candies provide a delightful crunch and an extra pop of vibrant holiday color, making the dessert even more appealing.
For the complete ingredient list with precise measurements, simply scroll down to the bottom of the post and consult the detailed recipe card.
Creative Substitutions and Additions
One of the best things about this Christmas Dessert Lasagna is its versatility! Feel free to customize it to your heart’s content with these delightful variations:
- Elevated Toppings: Beyond the classic mini marshmallows and M&Ms, consider a variety of other delicious additions. White chocolate chips or curls can add elegance and a complementary flavor. Crushed candy canes would introduce a lovely minty crunch, perfectly echoing the peppermint layer. You could also sprinkle with shredded coconut for a “snowy” effect, or add finely chopped nuts for extra texture.
- Candy Cane Dessert Twist: Transform this Christmas lasagna into a stunning “candy cane” dessert! Instead of green food coloring for the pudding layer, simply use red food coloring. This will create beautiful alternating red and white dessert layers (the red velvet crust, white peppermint cheesecake, red pudding, and white whipped cream). The visual resemblance to a candy cane is incredibly festive and unique, offering a different but equally charming look.
- Embrace Natural Tones – Omit Food Coloring: If you prefer a more natural aesthetic or wish to avoid food dyes, you can absolutely leave the pudding as is. The white chocolate pudding will remain a creamy off-white color, which will still look lovely against the red velvet crust and peppermint cheesecake layer. The dessert will retain all its delicious flavor, just with a more subdued color palette.
- Enhance the Red Velvet Cake Layer: To achieve an even more intensely bright red hue for your cake crust, feel free to add a few extra drops of red food coloring (gel is best) directly to the cake mixture before baking. This simple step can significantly enhance the visual impact of your bottom layer, making it pop.
- Alternative Pudding Flavors: While white chocolate pudding is excellent, you could experiment with other instant pudding flavors. Vanilla pudding would be a classic choice, or even a pistachio pudding for a different kind of green hue and nutty flavor profile. Just be mindful of how the flavor will integrate with the peppermint cheesecake layer.
- Gourmet Whipped Cream: Instead of Cool Whip for the top layer, you can prepare fresh whipped cream and sweeten it to your liking. For added stability, consider adding a teaspoon of unflavored gelatin or cream of tartar when whipping to ensure it holds its shape beautifully for longer.
Step-by-Step Guide: How to Make Christmas Lasagna
Creating this festive Christmas Dessert Lasagna is surprisingly simple, yet yields a truly impressive result. Follow these easy steps to assemble your delicious holiday treat:
Step 1 – Prepare Your Baking Dish and Preheat the Oven: Begin by setting your oven to preheat to 350 degrees F (175 degrees C). While the oven is heating, take a 9×12 inch baking pan and generously grease its bottom with non-stick cooking spray. This crucial step ensures that your red velvet crust will not stick and can be easily removed once cooled.
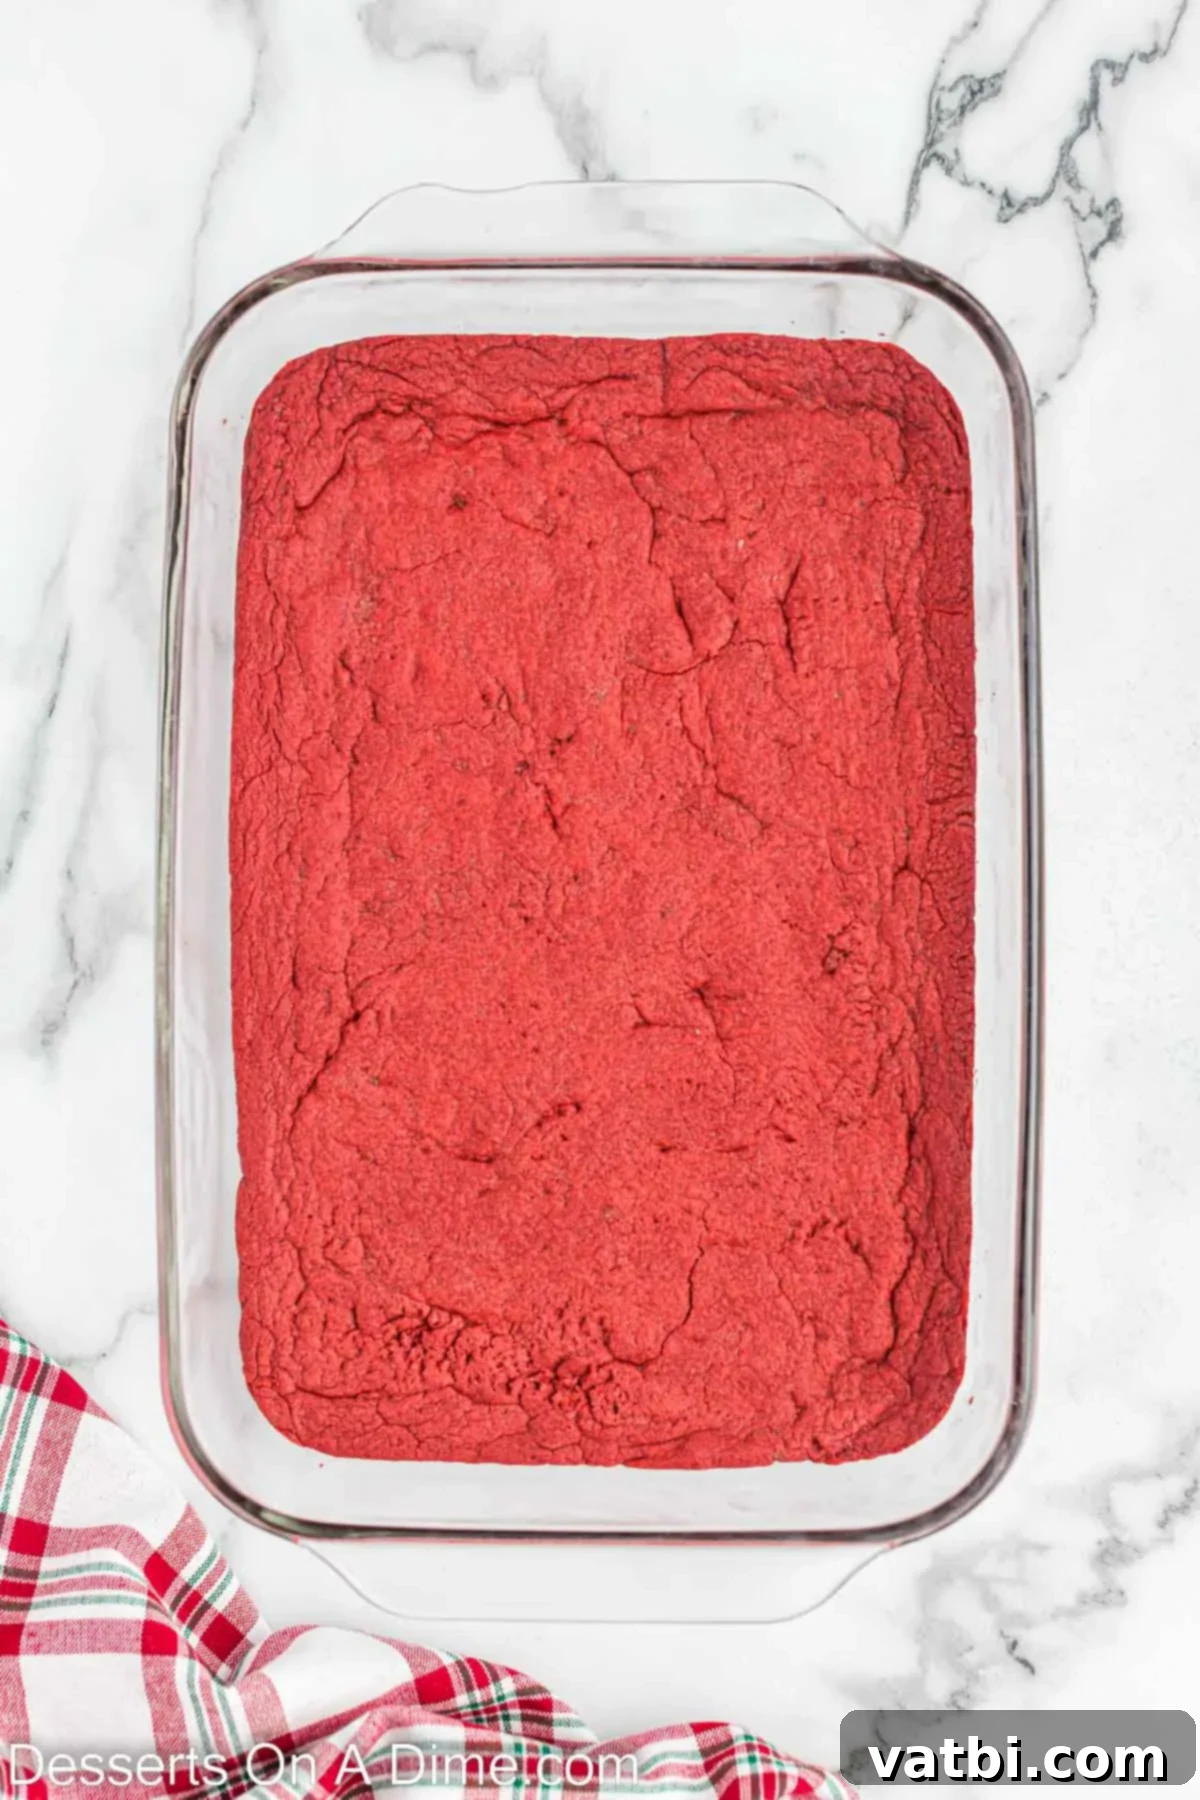
Step 2 – Bake the Red Velvet Crust: In a large mixing bowl, combine the red velvet cake mix, ½ cup of melted unsalted butter, and the large egg. Stir these ingredients thoroughly until a thick, uniform batter forms. Press this mixture evenly into the bottom of your prepared 9×12 baking dish. Bake for approximately 15-18 minutes, or until the edges are lightly golden and the center is set. Once baked, remove the pan from the oven and allow the crust to cool completely at room temperature. A fully cooled crust is essential for the next layers to set properly.
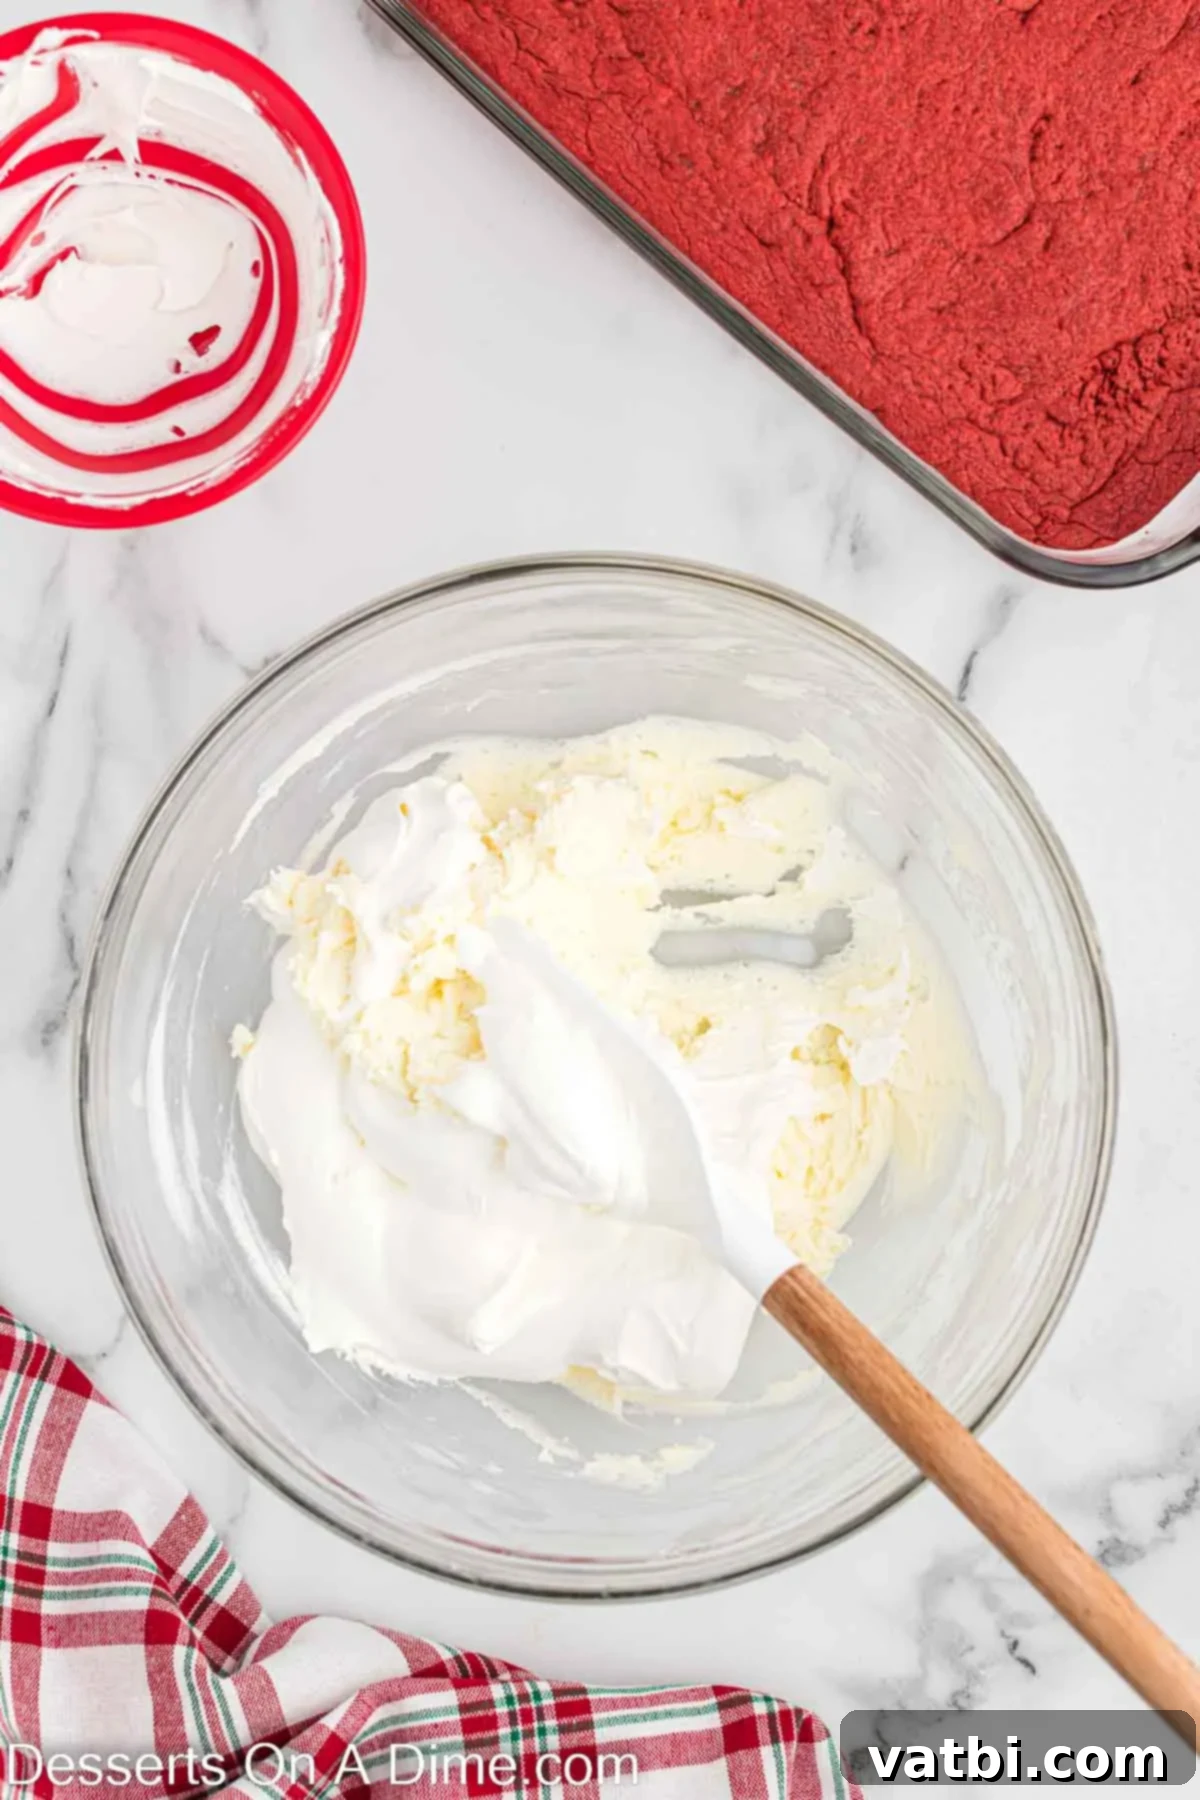
Step 3 – Create the Peppermint Cheesecake Layer: In a clean mixing bowl, beat together the softened cream cheese, ½ cup of softened unsalted butter, 1/2 cup of powdered sugar, and 1 teaspoon of peppermint extract. Use an electric mixer to beat until the mixture is wonderfully creamy and smooth, with no lumps. Gently fold in 1 ¼ cups of Cool Whip until just combined, maintaining its light, airy texture. Evenly spread this luscious peppermint cheesecake mixture over the completely cooled red velvet crust. Place the pan in the refrigerator or freezer for at least 30 minutes to allow this layer to firm up significantly before proceeding.
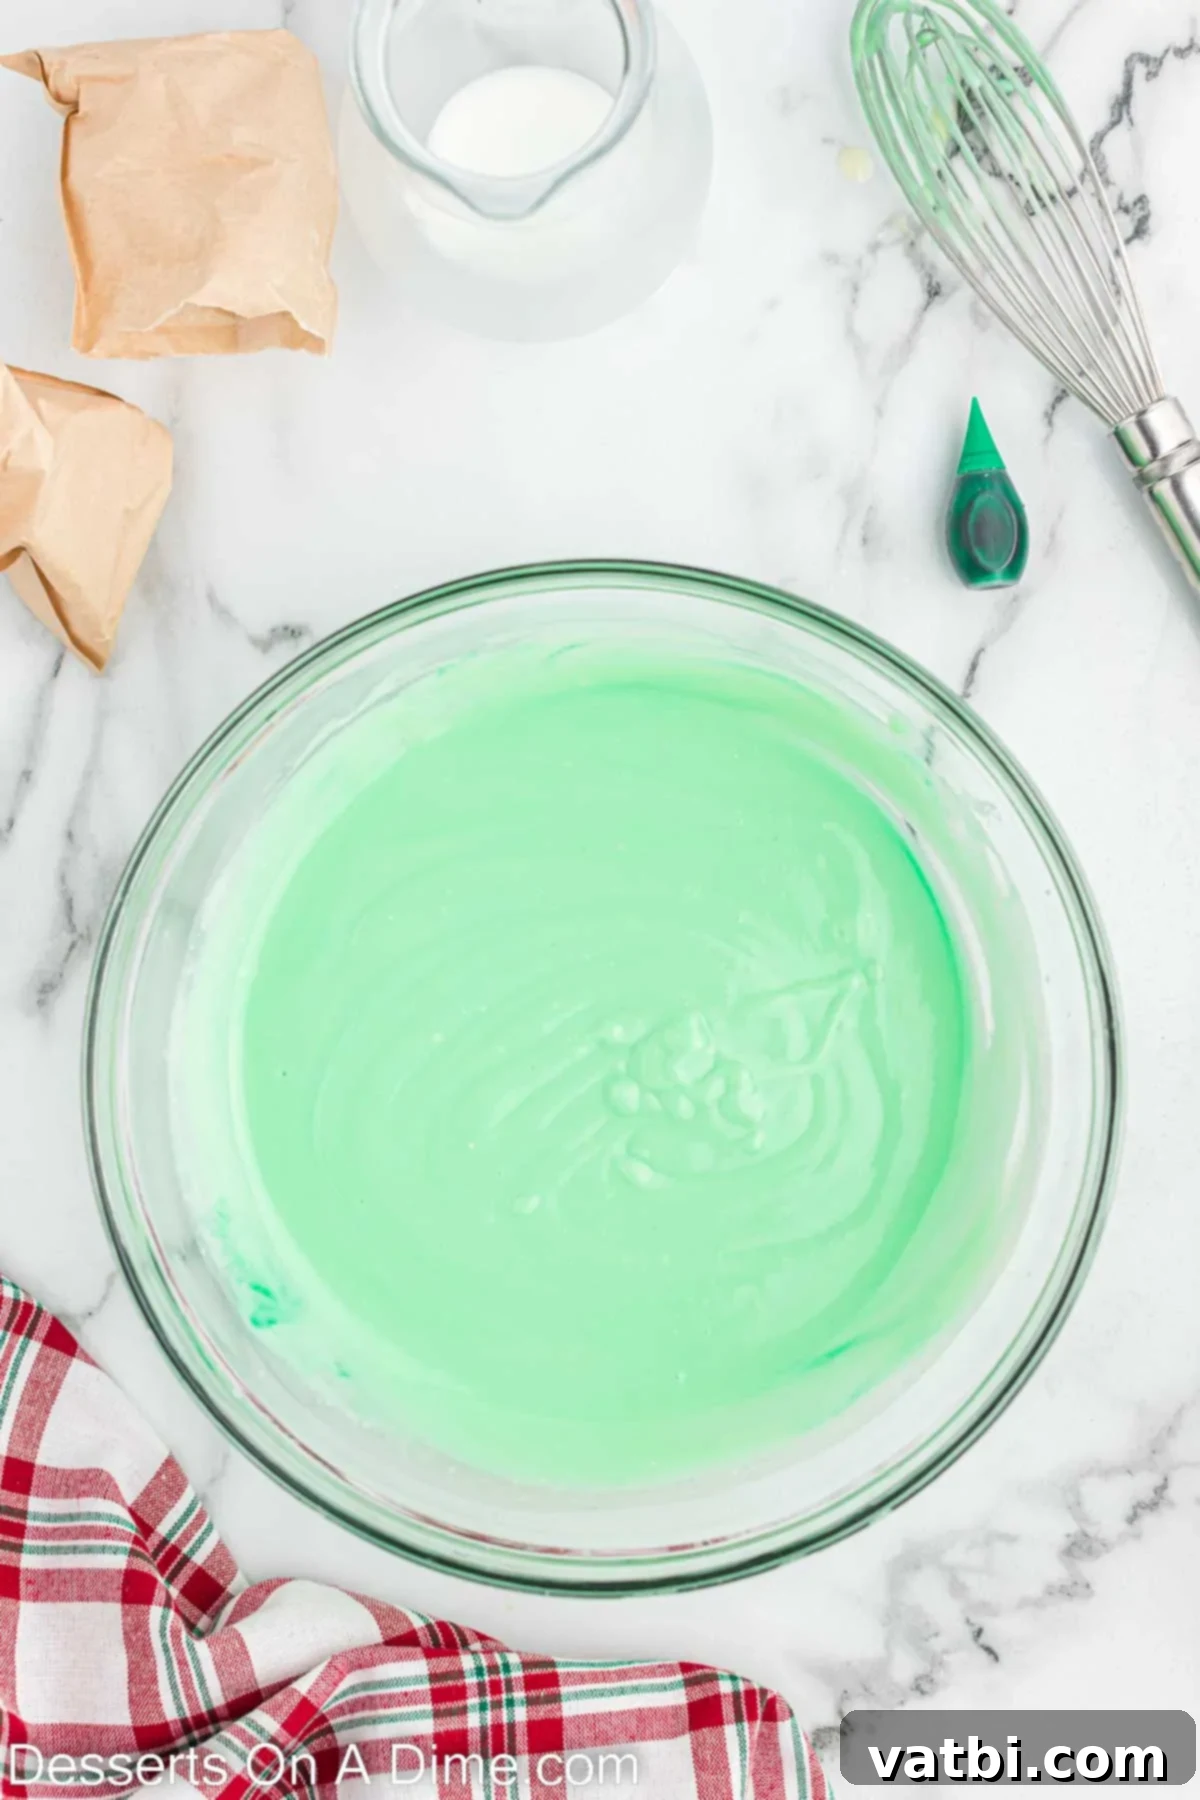
Step 4 – Prepare the Green Pudding Layer: In a separate bowl, whisk together the two 3.8 oz packages of instant white chocolate pudding mix and 2 ¾ cups of milk. Continue whisking vigorously until the pudding starts to thicken, which usually takes a couple of minutes. Once thickened, add your green gel food coloring, a few drops at a time, mixing well after each addition, until you achieve your desired vibrant green hue. Gel coloring works best for a rich, deep color without watering down the pudding.
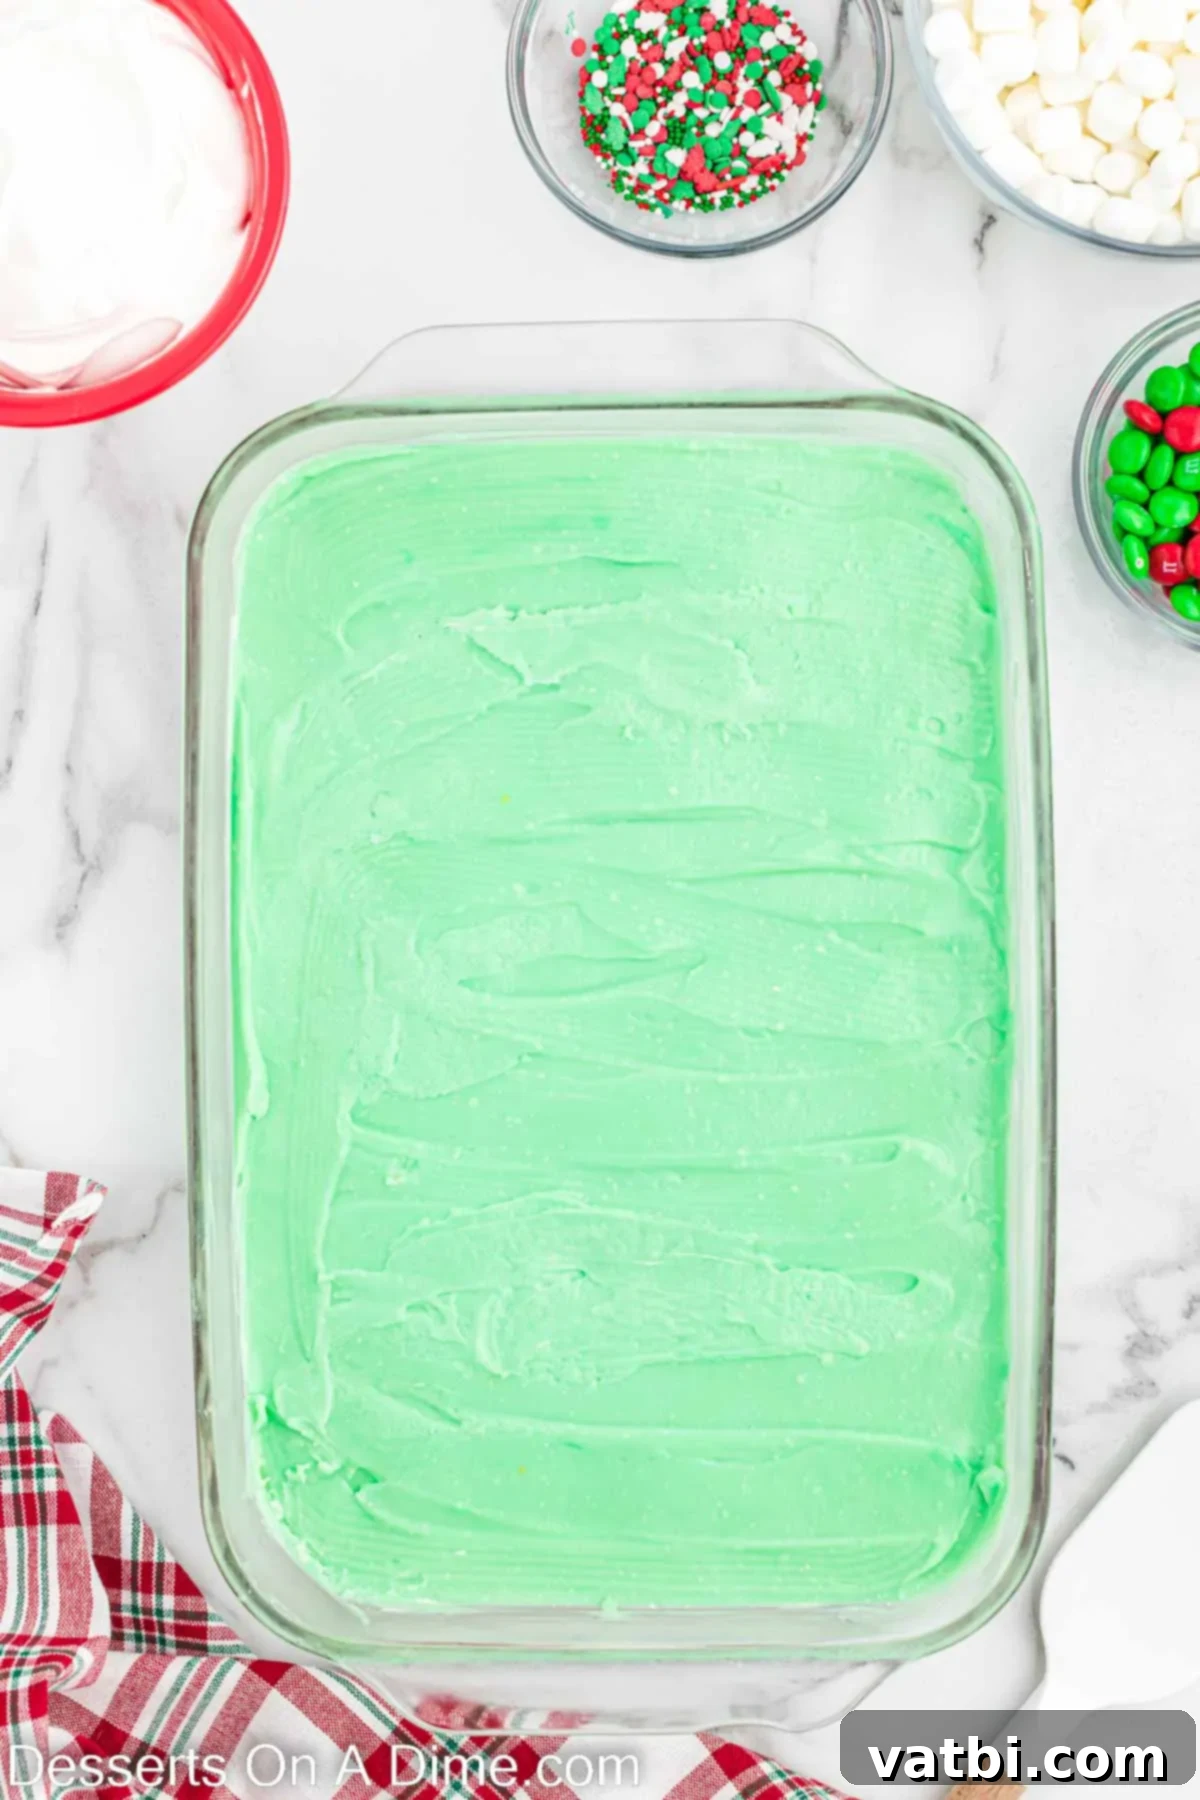
Step 5 – Apply and Set the Green Pudding Layer: Carefully spread the prepared green pudding mixture evenly over the firm peppermint cheesecake layer. Work gently to avoid mixing the layers. Once spread, return the pan to the refrigerator or freezer for another 30-60 minutes to allow the pudding layer to fully set and firm up. This will help maintain distinct, clean layers when sliced.
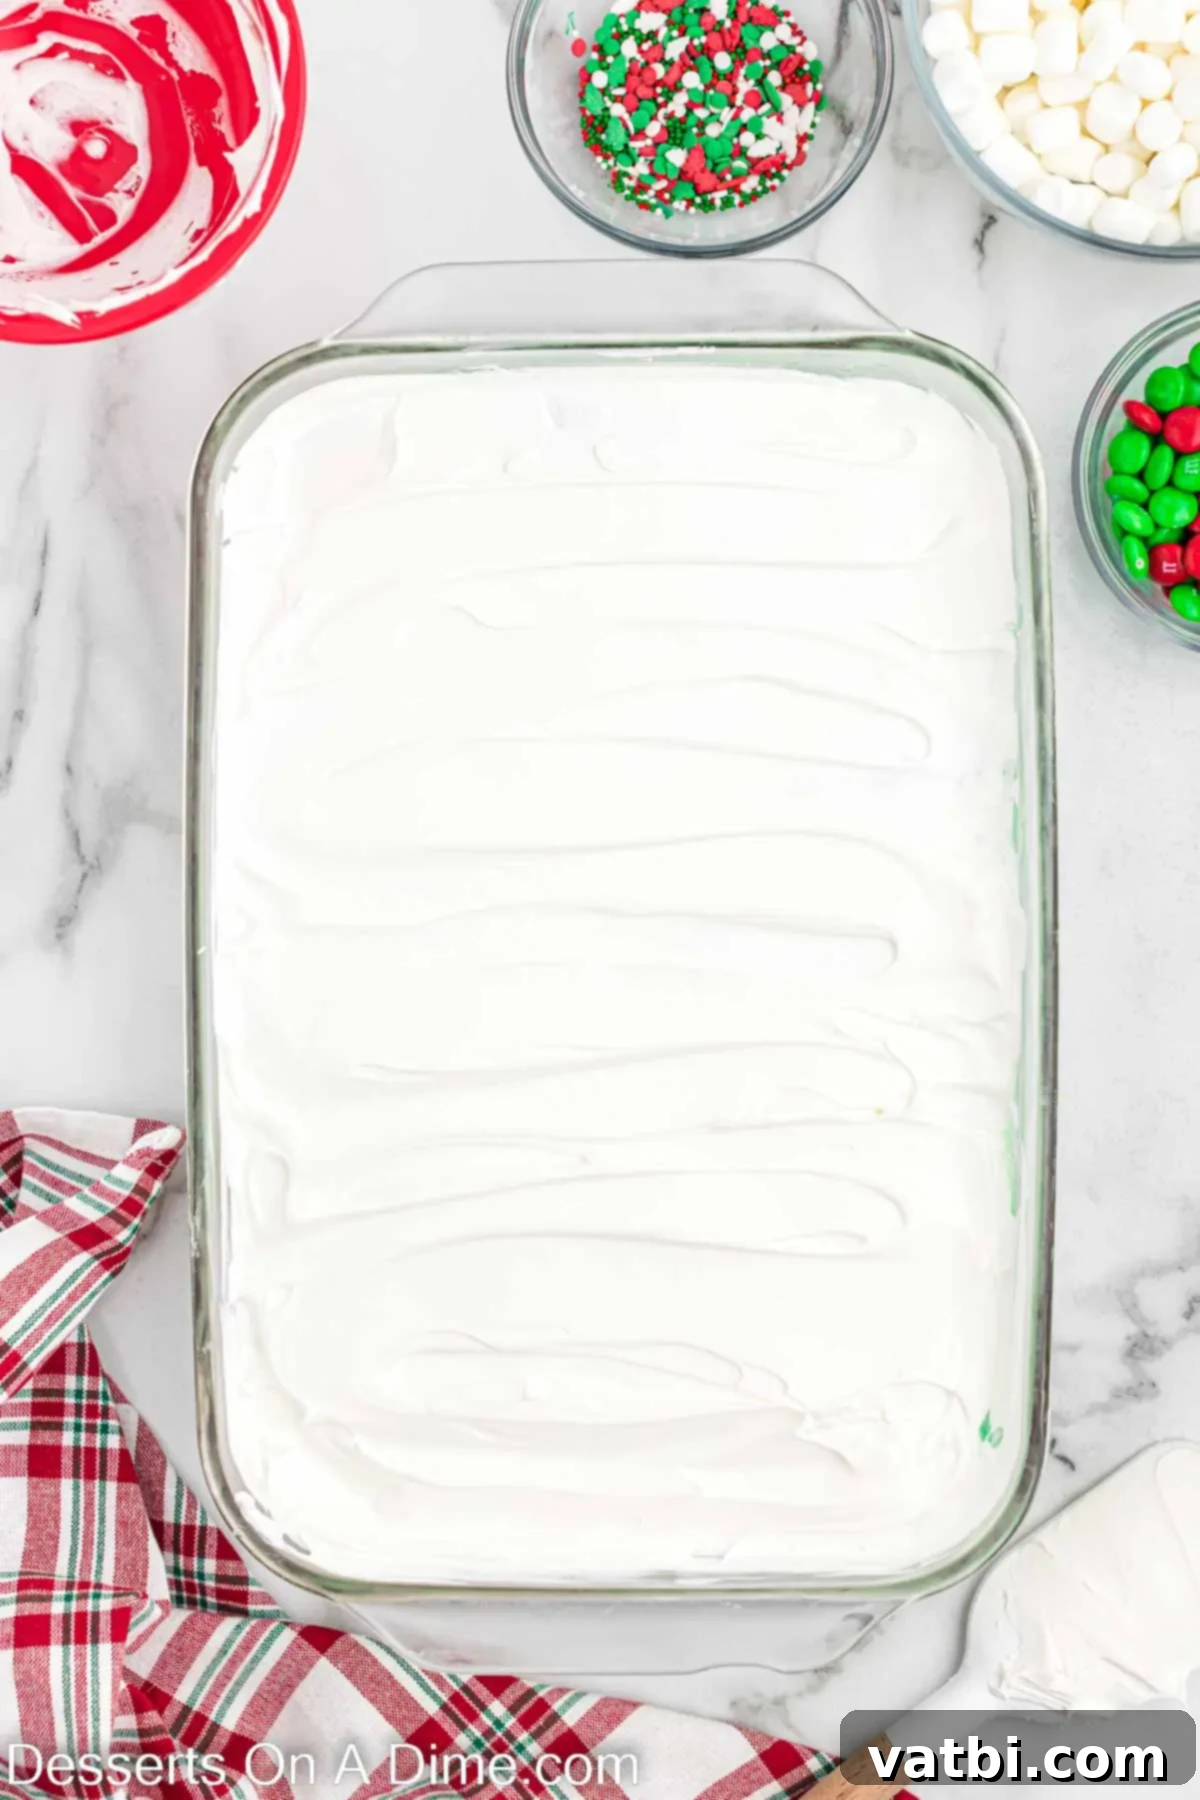
Step 6 – Add the Final Whipped Cream Layer and Chill: Once the green pudding layer has set, gently spread the remaining 1 ½ cups of whipped cream (or Cool Whip) evenly over the top. This forms the final, airy layer of your dessert lasagna. For the best results and to allow all the flavors to meld beautifully, cover the pan tightly with plastic wrap and place it in the refrigerator for at least a few hours, or ideally, overnight. Chilling overnight makes the dessert easier to slice and enhances its creamy texture.
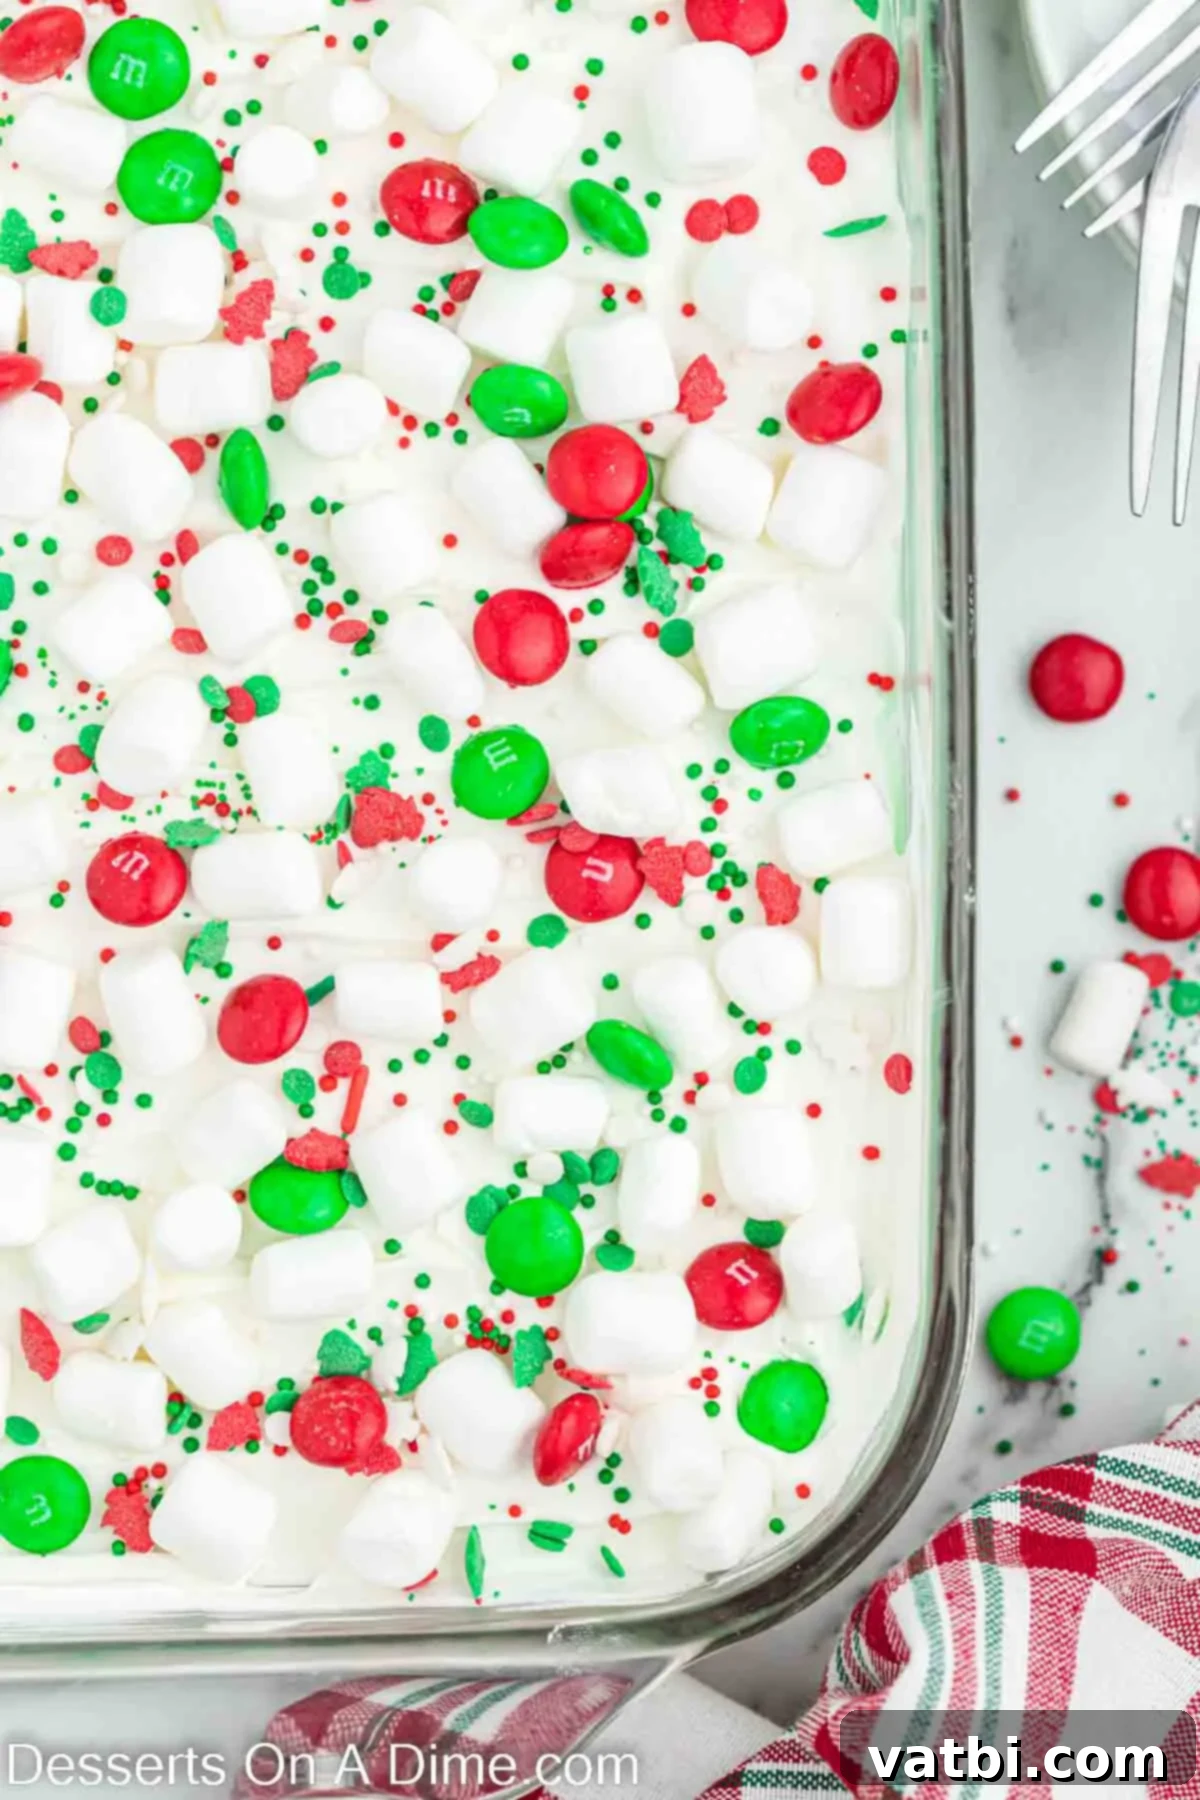
Step 7 – Decorate and Serve: Just before you are ready to serve this stunning Christmas dessert, sprinkle 2 cups of mini marshmallows evenly over the whipped cream topping. Then, scatter your favorite Christmas sprinkles and the red and green M&Ms across the top for that perfect festive flourish. Slice into squares using a sharp, clean knife, and serve chilled. Enjoy the delight on your guests’ faces!
Pro Tips for Perfect Christmas Lasagna
Achieving a picture-perfect and incredibly delicious Christmas Dessert Lasagna is easier with a few expert tips:
- Ignore Boxed Cake Mix Instructions: When preparing the red velvet crust, remember not to follow the instructions on the cake mix box. You only need the specific ingredients listed in this recipe (cake mix, melted butter, and egg). Following the box instructions will result in a cake, not the firm, delicious crust we need for this layered dessert.
- Chill Each Layer Thoroughly: Patience is key for a beautifully structured dessert. Each layer needs sufficient time to cool or set completely before you add the next one. This ensures clean, distinct lines between the red velvet crust, peppermint cheesecake, green pudding, and whipped cream, preventing them from mixing and creating a messy appearance. Aim for at least 30 minutes to an hour of chilling per layer in the refrigerator or freezer.
- Add Toppings Just Before Serving: For the freshest look and best texture, wait to add the mini marshmallows, sprinkles, and M&Ms to your Christmas Dessert Lasagna until you are ready to serve. This prevents the candy colors from bleeding into the whipped cream, the marshmallows from becoming too soft, and ensures everything looks vibrant and appealing. While it will still taste great if the colors run, it won’t look as pretty.
- Room Temperature for Creamy Layers: Ensure your cream cheese and softened butter for the peppermint layer are at proper room temperature. This will allow them to whip together smoothly and prevent any lumps, resulting in a perfectly creamy and velvety texture for your cheesecake layer.
- Use Gel Food Coloring for Vibrant Hues: As mentioned, gel food coloring is superior to liquid drops for the pudding layer. It provides a more concentrated color without adding extra liquid, ensuring your green layer is vibrant and festive without altering the pudding’s consistency.
- Clean Slices for a Gorgeous Presentation: When it’s time to cut and serve, use a sharp, thin-bladed knife. For perfectly clean cuts that showcase each beautiful layer, wipe your knife clean with a damp cloth or paper towel between each slice. This simple trick prevents layers from dragging and smearing, ensuring a gorgeous presentation every time.
- Plan Ahead for Best Results: This dessert is an excellent make-ahead option. Preparing it the day before allows all the flavors to fully meld and the layers to set firmly, often resulting in an even more delicious and easier-to-handle dessert.
Frequently Asked Questions
To keep your Christmas Dessert Lasagna fresh and delicious, ensure it is tightly covered with plastic wrap or placed in an airtight container with a lid. Store it in the refrigerator for up to 4 days. Always keep it chilled to maintain the integrity of its creamy layers.
Absolutely! This Christmas Dessert Lasagna is conveniently freezer-friendly, making it perfect for preparing far in advance. Once prepared and fully chilled, cover the entire dessert tightly with several layers of plastic wrap to prevent freezer burn. For an extra layer of protection, wrap it again in aluminum foil. It can be frozen for up to 1 month. When you’re ready to enjoy, allow it to thaw in the refrigerator overnight or at room temperature for about 30 minutes before slicing and serving. Thawing gently helps maintain the creamy texture of the layers.
Yes, making this dessert in advance is highly recommended! It’s an ideal option for holiday entertaining as it significantly cuts down on your day-of prep work and frees up precious oven space. I often prepare it up to 2-3 days in advance of a Christmas party or celebration. In fact, many find that the flavors meld and the layers firm up even better after chilling completely overnight in the fridge, enhancing both taste and texture. This makes it a perfect stress-free addition to your holiday menu.
For the most appealing presentation, use a very sharp knife to cut this dessert into neat squares or rectangles. The key to clean lines that beautifully showcase each vibrant layer is to wipe any excess dessert off the knife with a warm, damp napkin or paper towel after each cut. This simple trick prevents layers from smearing and ensures every slice looks as gorgeous as it tastes, truly highlighting the festive red, white, and green layers.
A 9×13 inch (or 9×12 inch) baking pan is ideal for this recipe. This size provides enough surface area for the layers to spread evenly and ensures the dessert sets to a good thickness, making it easy to slice and serve. Using a pan that is too small might result in overly thick layers that are difficult to manage, while one that is too large might yield layers that are too thin.
More Festive Christmas Desserts to Try
If you love this easy Christmas Dessert Lasagna, you’re in for a treat! The holiday season is all about delicious sweets, and I have many more festive recipes that are sure to bring cheer to your table:
- Copycat Little Debbie Christmas Tree Cakes: Recreate a classic holiday favorite at home.
- Easy Christmas Dump Cake Recipe: A simple, festive cake that requires minimal effort.
- Irresistible Magic Cookie Bars: A delightful combination of sweet and crunchy layers.
- Colorful Christmas Jello Poke Cake Recipe: A vibrant, moist cake perfect for holiday parties.
- Effortless Crock Pot Christmas Candy Recipe: Delicious homemade candy made simple in your slow cooker.
- Festive Christmas Oreo Balls Recipe: Bite-sized, chocolatey treats that are always a hit.
I am confident that everyone will thoroughly enjoy this incredible Christmas Lasagna Recipe, making it a guaranteed favorite for the holiday season! Once you’ve had the chance to whip up this festive treat, please do me a favor and leave a comment below with your feedback and a star recipe rating. Your thoughts help others discover and enjoy this delicious dessert too!
Pin
Christmas Dessert Lasagna
Ingredients
For the Crust:
- 1 box Red Velvet Cake Mix
- ½ cup unsalted butter-melted
- 1 Large Egg
Peppermint Cheesecake Layer:
- ½ cup unsalted butter-softened
- 8 oz. cream cheese-softened
- 1/2 powdered sugar
- 1 teaspoon peppermint extract
- 1 1/4 cups cool whip
Green Pudding Layer:
- 2 3.8 oz. White chocolate instant pudding mix
- 2 ¾ cups milk
- Green Food Coloring
Topping:
- 1 ½ cups whipped cream
- 2 cups mini marshmallows
- Christmas Sprinkles
- Red and Green M&Ms
Instructions
-
Preheat the oven to 350 degrees F (175 C) and generously grease a 9×12 inch baking pan with non-stick cooking spray, ensuring no sticking.
-
In a large mixing bowl, combine the red velvet cake mix, ½ cup of melted unsalted butter, and the large egg. Stir until well combined. Press this mixture evenly into the prepared pan and bake for 15-18 minutes, or until set. Allow the crust to cool completely at room temperature.
-
To make the peppermint cheesecake layer, beat the softened cream cheese, ½ cup of softened unsalted butter, ½ powdered sugar, and 1 teaspoon of peppermint extract until the mixture is wonderfully creamy and smooth.
-
Gently fold in 1 ¼ cups of Cool Whip into the cream cheese mixture until just combined. Evenly spread this luscious mixture over the cooled crust and place the pan in the fridge or freezer for at least 30 minutes to firm up.
-
For the green pudding layer, in a separate bowl, whisk together the two 3.8 oz instant white chocolate pudding mixes and 2 ¾ cups of milk until it begins to thicken. Gradually add green gel food coloring, a few drops at a time, until you achieve your preferred vibrant green shade. Carefully spread this pudding over the firm cheesecake layer. Return the pan to the fridge or freezer for another 30-60 minutes to allow this layer to set completely.
-
Once the pudding layer has firmly set, gently spread 1 ½ cups of whipped cream evenly over the top. Cover the pan tightly with plastic wrap and refrigerate for at least a few hours, or ideally overnight, to allow all the layers to fully meld and firm.
-
Just before serving, sprinkle 2 cups of mini marshmallows over the whipped cream. Finish by generously topping with your favorite Christmas sprinkles and the red and green M&Ms for a truly festive finish.
-
Slice into squares with a clean, sharp knife (wiping between cuts for neatness) and serve this delightful Christmas Dessert Lasagna chilled. Enjoy every delicious, festive bite!
Recipe Notes
Nutrition Facts
Pin This Now to Remember It Later
Pin Recipe
