Magical Harry Potter Butterbeer Fudge Recipe: Easy Homemade Treat for Wizarding Fans
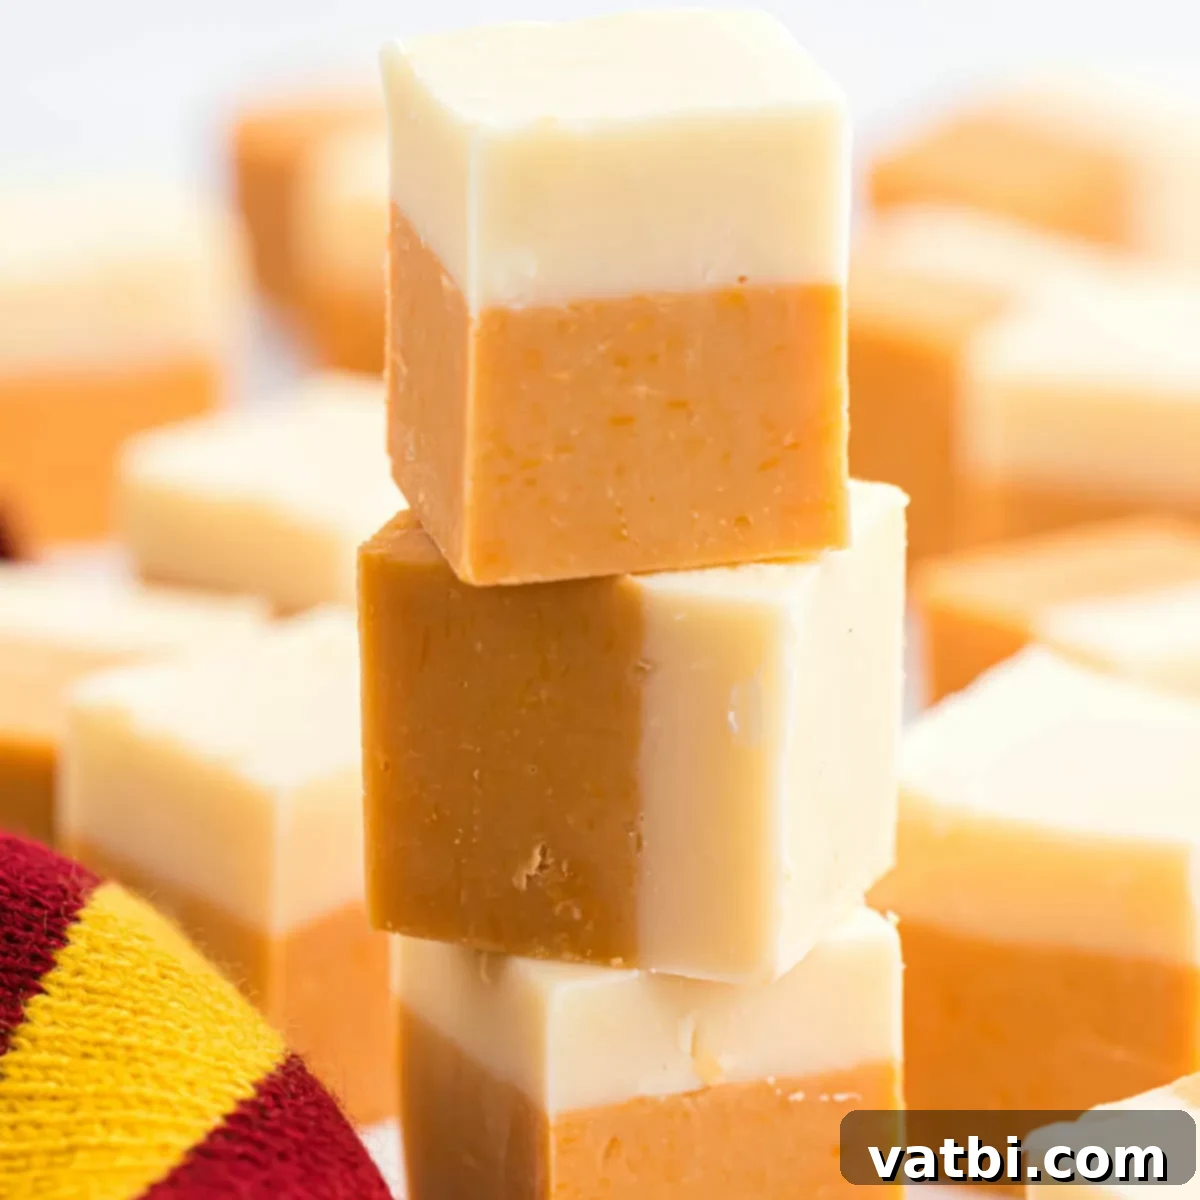
Step into the enchanting world of Harry Potter right in your kitchen with this incredible Harry Potter Butterbeer Fudge recipe! If you’ve ever dreamt of sipping on a frothy Butterbeer at the Three Broomsticks in Hogsmeade or Diagon Alley, this rich, creamy, and utterly irresistible fudge brings that iconic flavor directly to you. Bursting with sweet butterscotch notes and a hint of vanilla, this magical confection is a must-try for any true Potterhead or anyone who simply adores a delightful homemade treat. It’s surprisingly easy to make, requires no fancy equipment like a candy thermometer, and is guaranteed to be a hit at themed parties, holiday gatherings, or as a special, thoughtful gift for fellow wizarding enthusiasts.
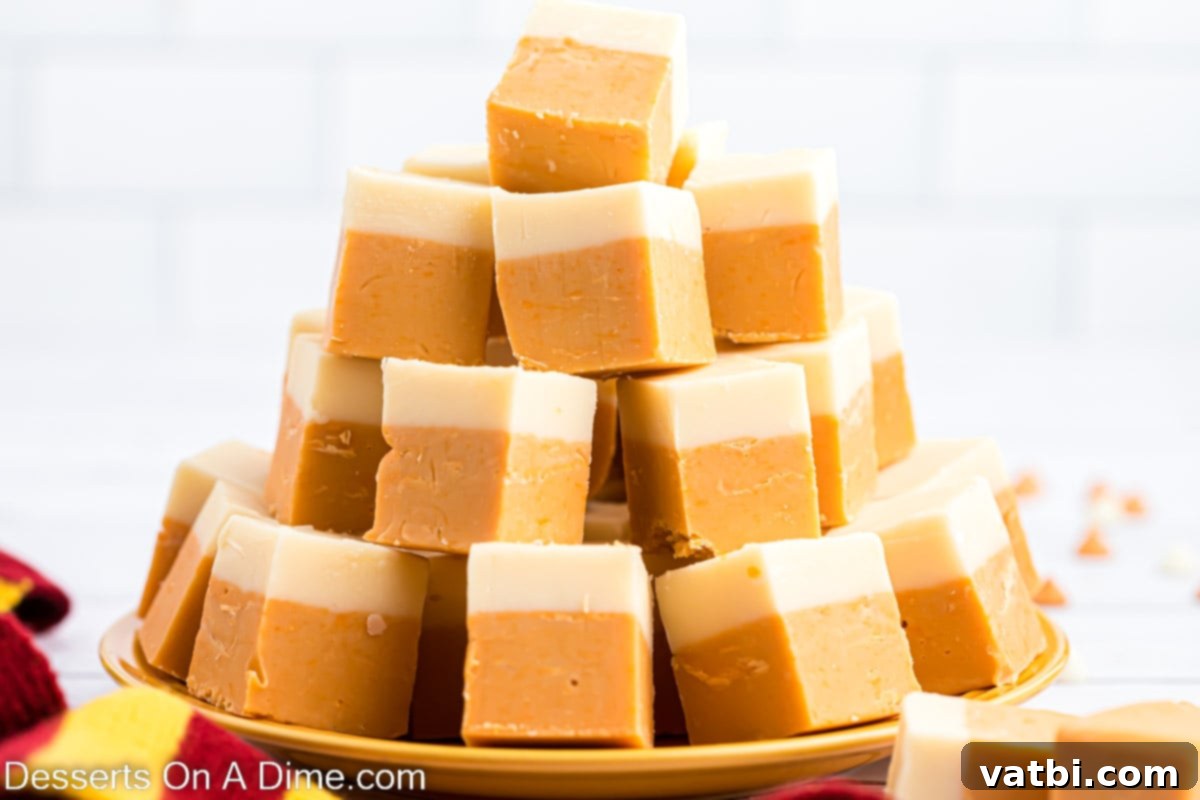
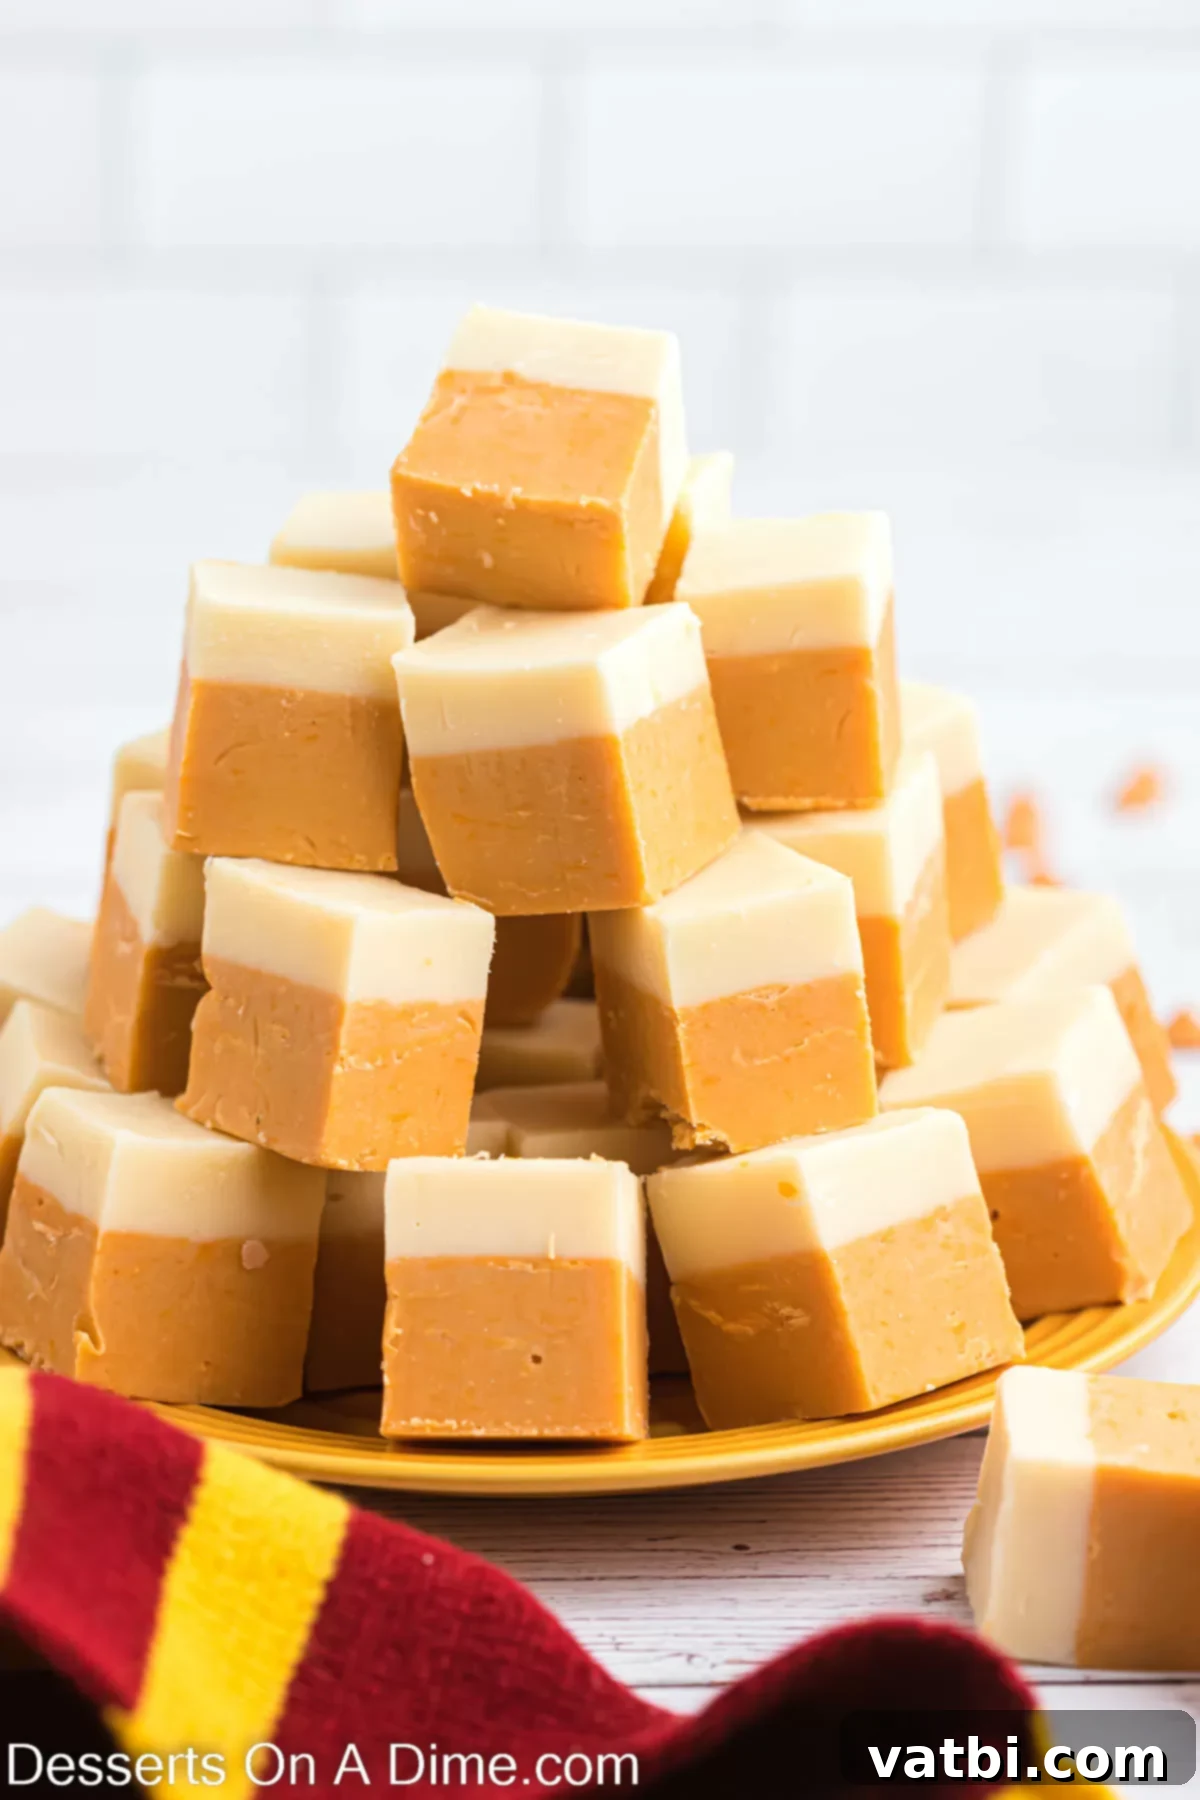
For millions of fans worldwide, the Harry Potter universe offers a magical escape, and the taste of Butterbeer is a central part of that experience. This delightful Butterbeer Fudge recipe captures the very essence of that beloved wizarding drink, transforming its iconic flavors into a convenient, melt-in-your-mouth dessert. Imagine the rich, smooth texture as it melts, followed by an explosion of sweet, buttery butterscotch, perfectly balanced with a subtle vanilla undertone. The two distinct layers – a golden butterscotch base and a creamy vanilla top – are not only visually appealing but also work together to recreate the complex flavor profile of the drink we all know and love. Whether you’re planning a Harry Potter-themed party, looking for a unique holiday gift, or simply craving a sweet escape to the magical realm, this easy fudge recipe is your golden ticket. Forget the long lines; now you can enjoy the enchanting taste of homemade Butterbeer Fudge from the comfort of your own kitchen, anytime!
If you’re already a connoisseur of Harry Potter-inspired treats and enjoy crafting magical desserts, you might also enjoy exploring these other enchanting recipes to complete your wizarding feast:
- Enchanting Butterbeer Ice Cream Recipe: A cool and creamy twist on the classic drink.
- Delightful Harry Potter Butterbeer Cookies: Chewy cookies infused with the magical flavor.
- Magical Harry Potter Cupcakes: The perfect whimsical dessert for any wizarding celebration.
Table of Contents: Your Guide to Crafting Magical Butterbeer Fudge
- Why You’ll Adore This Butterbeer Fudge Recipe
- Gather Your Magical Ingredients for Butterbeer Fudge
- For the Golden Butterscotch Layer
- For the Creamy Vanilla Foam Layer
- How to Conjure Up Butterbeer Fudge (Step-by-Step Guide)
- Expert Tips for Crafting Perfect Butterbeer Fudge Every Time
- Storing Your Wizarding Sweets for Lasting Freshness
- Freezing Butterbeer Fudge for Future Magical Moments
- Discover More Easy and Delicious Fudge Recipes to Try
Why You’ll Adore This Harry Potter Butterbeer Fudge Recipe
This Harry Potter Butterbeer Fudge isn’t just a dessert; it’s an immersive culinary experience that brings a piece of the Wizarding World into your home. Here’s why this recipe is destined to become your new favorite magical treat:
- Authentic Harry Potter Inspiration: This fudge truly captures the nostalgic, magical essence and iconic flavor profile of the classic Butterbeer drink. Each bite transports you straight to the bustling streets of Hogsmeade or the cozy atmosphere of The Leaky Cauldron. It’s a taste that resonates deeply with fans of the magical series.
- Irresistible Two-Layer Design: The distinct golden butterscotch base and the creamy, lighter vanilla top layer come together in a visually appealing and perfectly balanced sweet bite. This layered approach not only looks impressive but also provides a delightful contrast in flavor and texture, mimicking the frothy top of a real Butterbeer.
- Incredibly Easy to Make: Forget complicated candy-making with precision temperatures and tricky techniques! This recipe is designed to be straightforward and accessible, requiring no specialized equipment like a candy thermometer. It’s an ideal project for beginners or anyone looking for a quick yet impressive homemade dessert.
- The Ultimate Party Treat: Whether you’re hosting a Harry Potter movie marathon, a themed birthday party, or any holiday gathering, these Butterbeer Fudge squares are a guaranteed crowd-pleaser. Their unique flavor and connection to a beloved fictional world make them an instant conversation starter and a memorable addition to any dessert table.
- Perfect for Thoughtful Gifting: Homemade treats always make the best gifts. Wrap up individual squares or arrange small boxes of this homemade Butterbeer Fudge for a unique, personal, and utterly charming present that any Harry Potter fan (or simply a fudge enthusiast!) will adore and appreciate.
- Convenient Make-Ahead Option: One of the best features of this recipe is its excellent shelf life. This fudge stores exceptionally well in the fridge or freezer, allowing you to prepare it far in advance for busy events or simply to have a magical treat on hand whenever a craving strikes. Its make-ahead friendly nature reduces stress and ensures fresh, delicious fudge whenever you need it.
Gather Your Magical Ingredients for Butterbeer Fudge
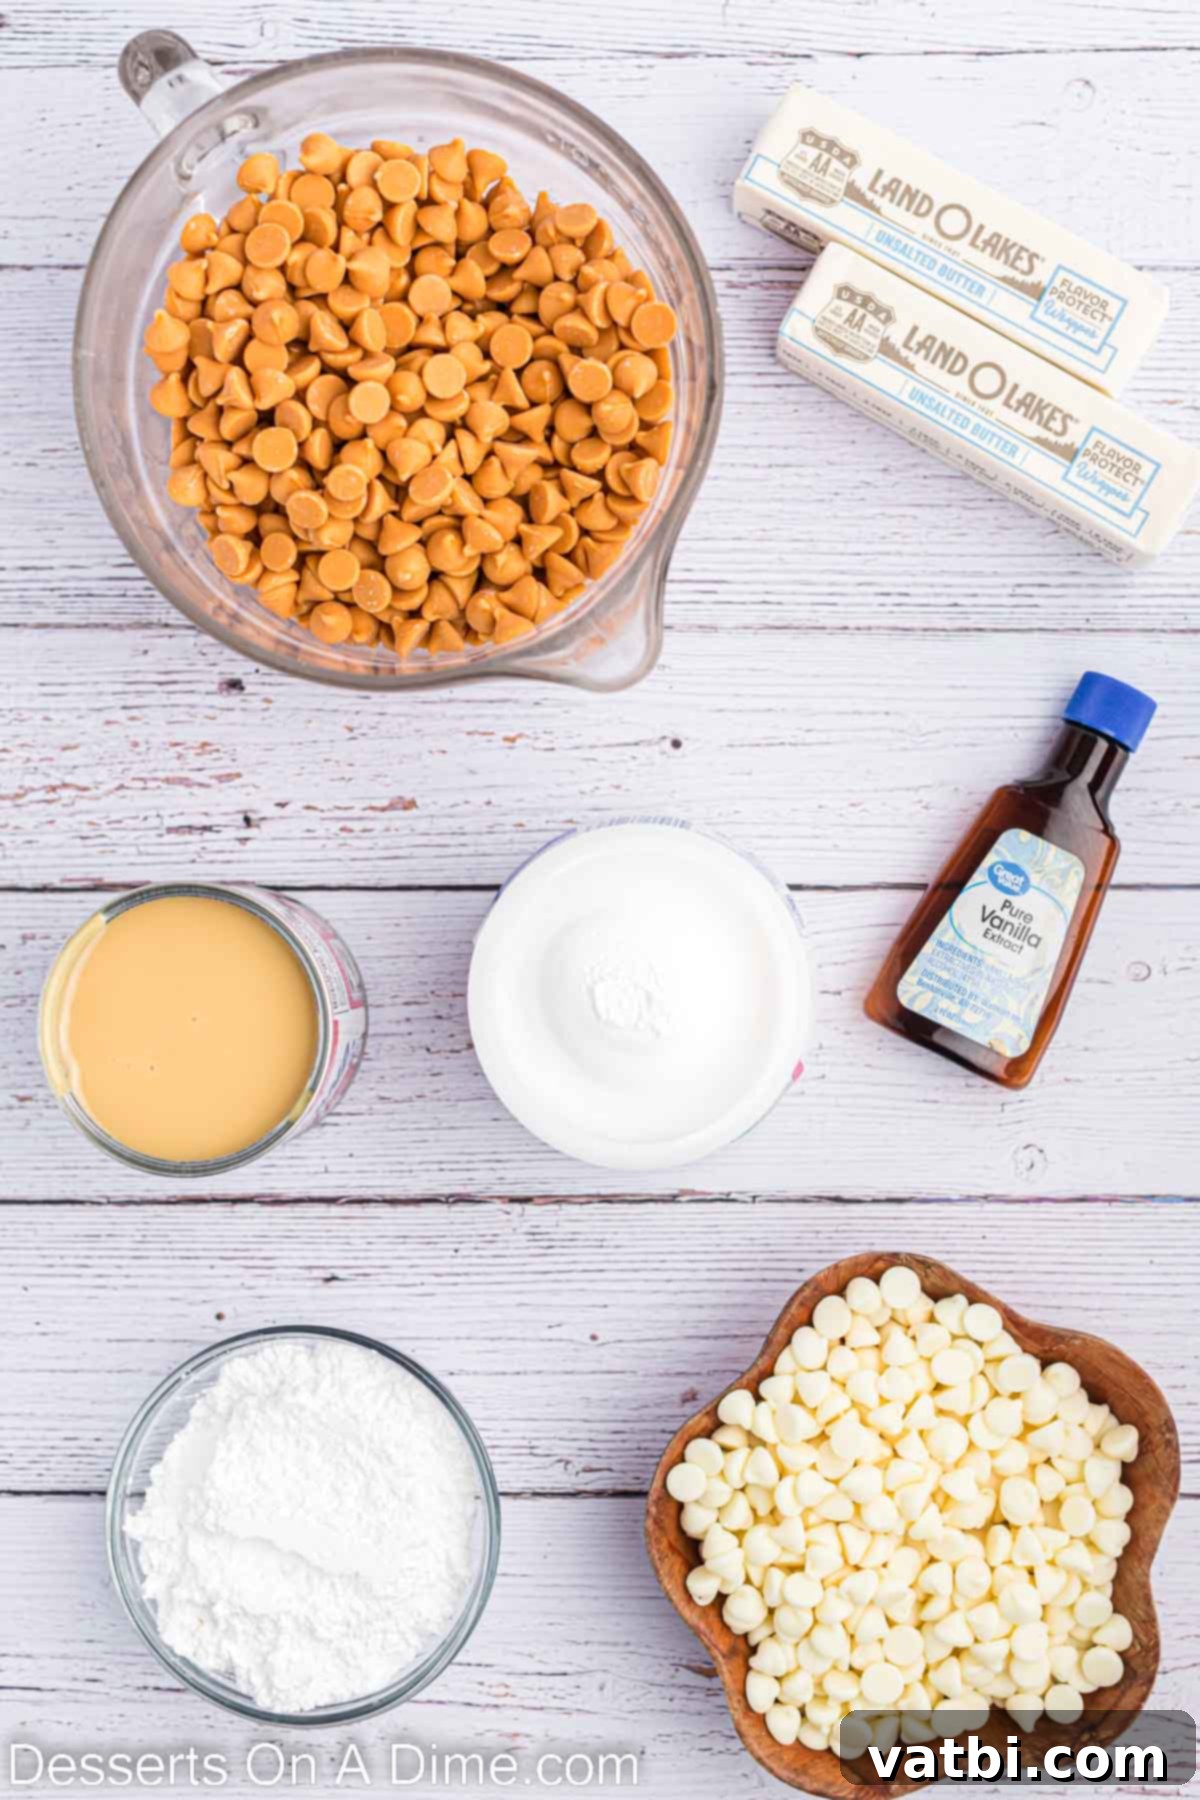
Creating this enchanting Harry Potter Butterbeer Fudge requires a few simple, yet key ingredients. The quality of your ingredients can significantly impact the final taste and texture, so choose the best you can find for truly magical results. Before you begin the cooking process, make sure to have all your ingredients measured, prepared, and ready to go – this will make the fudge-making process smooth and enjoyable.
For the Golden Butterscotch Layer
This forms the foundation of our Butterbeer Fudge, delivering the rich, caramel-like flavor that defines the beloved drink.
- Butterscotch Chips: These are the absolute star for achieving that authentic Butterbeer taste. We highly recommend opting for a good quality brand, as it will significantly enhance the richness and decadent flavor of your fudge.
- Sweetened Condensed Milk (14 oz can): This ingredient is a cornerstone of no-bake fudge, crucial for its creamy, smooth texture and perfect level of sweetness. It acts as a binder, helping the fudge set beautifully without the need for a candy thermometer.
- Powdered Sugar (½ cup): Also known as confectioners’ sugar, this fine sugar adds both structure and an extra layer of sweetness to the fudge. It’s worth the extra moment to sift the powdered sugar, as this prevents any tiny lumps and ensures a silky-smooth, professional-quality fudge.
- Butter (¾ cup): Always use real unsalted butter for the best flavor and texture in your fudge. It contributes significantly to the richness and helps achieve that signature melt-in-your-mouth quality that makes fudge so irresistible.
- Marshmallow Creme (4 oz): This ingredient is a secret weapon in fudge-making, ensuring a super soft, incredibly creamy, and perfectly smooth consistency. Store-bought marshmallow creme works perfectly, or if you’re feeling adventurous, you can even use a Homemade Marshmallow Fluff recipe for an extra touch of homemade goodness.
For the Creamy Vanilla Foam Layer
This lighter layer provides a delightful contrast and mimics the frothy top of a fresh Butterbeer.
- White Chocolate Chips (1 ½ cup): These chips form the basis of our lighter, creamy top layer. They provide a subtle sweetness and a beautiful visual contrast to the golden butterscotch. While Ghirardelli white chocolate chips are a popular choice for their quality, any good quality brand will melt smoothly and work beautifully.
- Butter (½ cup): Once again, real unsalted butter is key for contributing richness and ensuring a smooth, luscious consistency in this vanilla layer, making it just as decadent as the bottom.
- Sweetened Condensed Milk (7 oz): Similar to the bottom layer, this provides the essential base for the creamy texture and sweetness, binding the ingredients together to create a perfectly set fudge.
- Marshmallow Creme (3 oz): Crucial for ensuring the top layer is just as soft, fluffy, and smooth as the bottom layer, creating a cohesive and delightful texture throughout the entire fudge block.
- Powdered Sugar (¼ cup): Sifting the powdered sugar for this layer is just as important as for the bottom. It helps to prevent any gritty texture and ensures a perfectly smooth and uniform vanilla fudge.
- Vanilla Extract (¼ teaspoon): Pure vanilla extract will truly elevate the flavor of this top layer. It adds a classic, aromatic sweetness that beautifully complements the rich butterscotch, completing the authentic Butterbeer profile.
You’ll find the complete, detailed list of ingredients with precise measurements in the comprehensive recipe card located towards the bottom of the page. It’s designed to make gathering everything you need as straightforward as possible.
How to Conjure Up Harry Potter Butterbeer Fudge (Step-by-Step Guide)
Creating this magical Butterbeer Fudge is a surprisingly straightforward process, making it an excellent project even for beginner bakers. Follow these steps carefully to ensure a perfectly set, deliciously layered, and truly enchanting treat:
- Step 1 – Prepare Your Baking Pan with Care: Begin by selecting either an 8×8 inch or a 9×9 inch square baking pan. Line the entire pan generously with parchment paper or tin foil. Make sure to leave a substantial overhang on all sides – these overhangs will serve as convenient “handles” later, allowing you to easily lift the entire block of fudge out of the pan. Once lined, lightly spray the parchment paper or foil with a non-stick cooking spray. This crucial preparatory step ensures that your delicious fudge won’t stick and can be cleanly and effortlessly removed for cutting once it’s set.
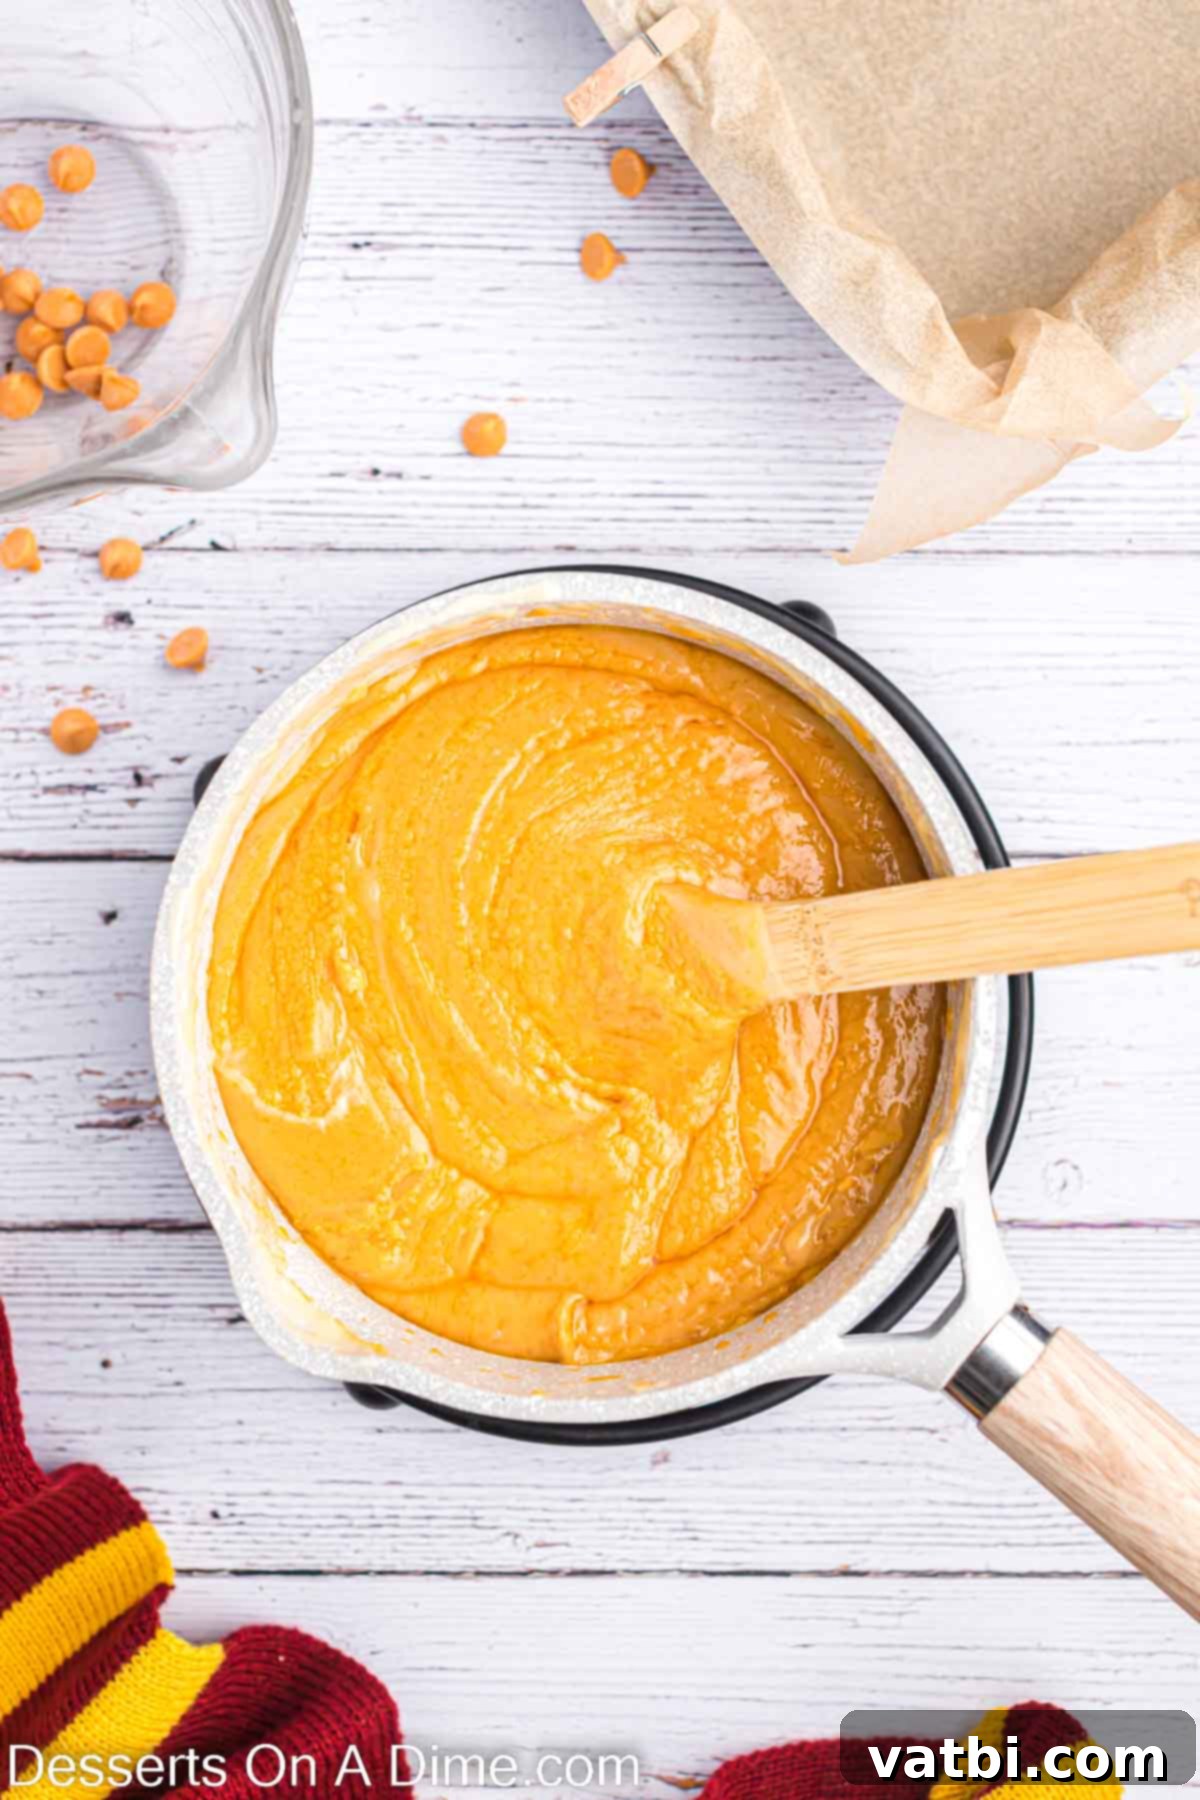
Step 2 – Prepare the Golden Butterscotch Layer: In a medium-sized, heavy-bottomed saucepan or a sturdy pot, combine the precise measurements of powdered sugar, butter, marshmallow creme, and sweetened condensed milk for the bottom layer. Place this saucepan over medium heat. It is absolutely essential to begin stirring immediately and to continue stirring constantly throughout this stage. Heat the mixture, maintaining constant agitation, until it gradually comes to a gentle, slight boil. Once it begins to boil, continue to boil and stir vigorously for approximately 5 minutes. Consistent stirring is paramount to prevent the mixture from scorching or sticking to the bottom of the pan. After the 5-minute boiling period, promptly remove the saucepan from the heat and immediately stir in the butterscotch chips until they are completely melted and the mixture is smooth, uniform, and glossy.
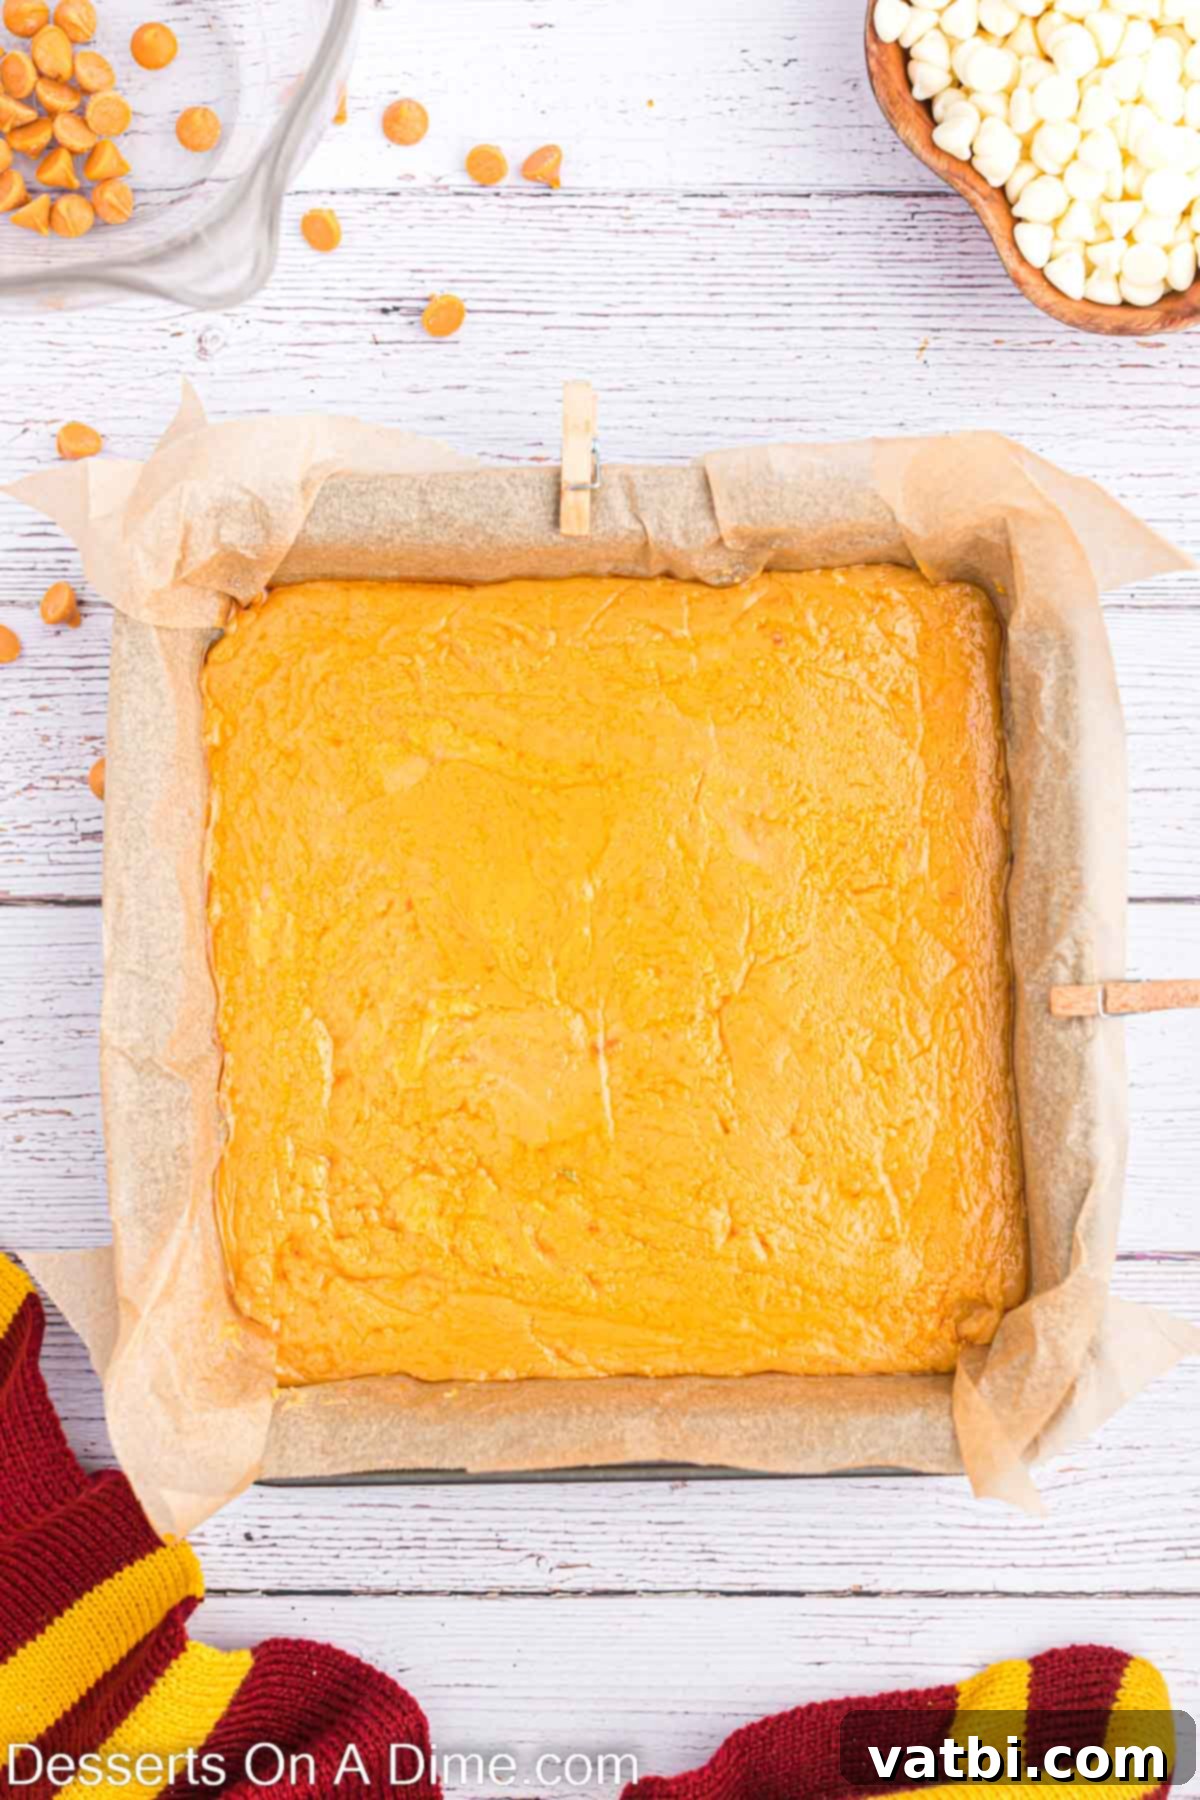
Step 3 – Set the Butterscotch Layer for Perfection: Carefully and evenly spread the warm butterscotch fudge mixture into the bottom of your prepared baking dish. Use an offset spatula or the back of a spoon to ensure a smooth, level surface. To guarantee that the two distinct fudge layers remain beautifully defined and do not blend into one, immediately place the pan into the freezer. This rapid chilling period is crucial for helping the bottom butterscotch layer set quickly and firmly while you proceed to prepare the creamy vanilla top layer.
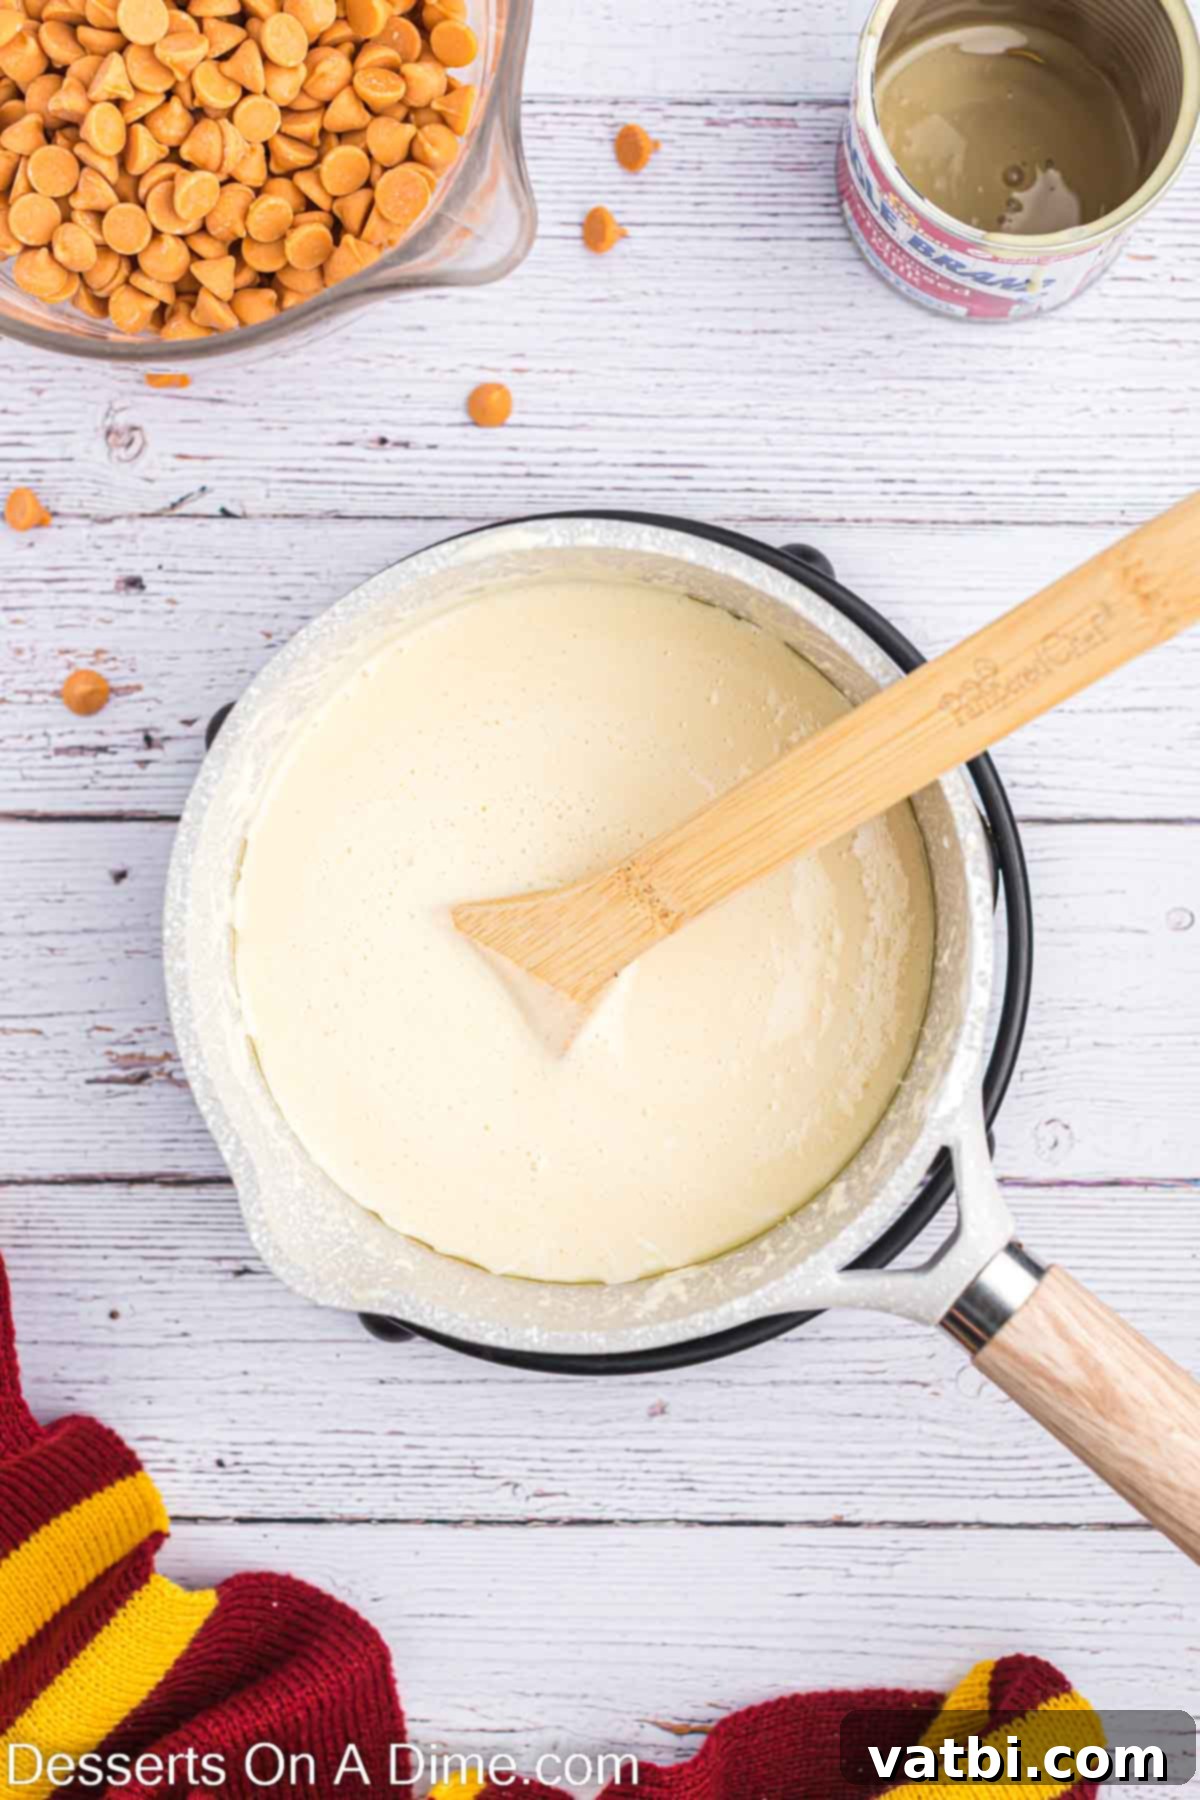
Step 4 – Begin the Creamy Vanilla Foam Layer: Now, using a separate small saucepan (or, if absolutely necessary, thoroughly clean and dry the first one), combine the specified amounts of butter, sweetened condensed milk, marshmallow creme, and powdered sugar for the top layer. Place this saucepan over medium-high heat. As before, it is imperative to begin stirring constantly from the very moment you put the pan on the heat to ensure an even cook and prevent any sticking.
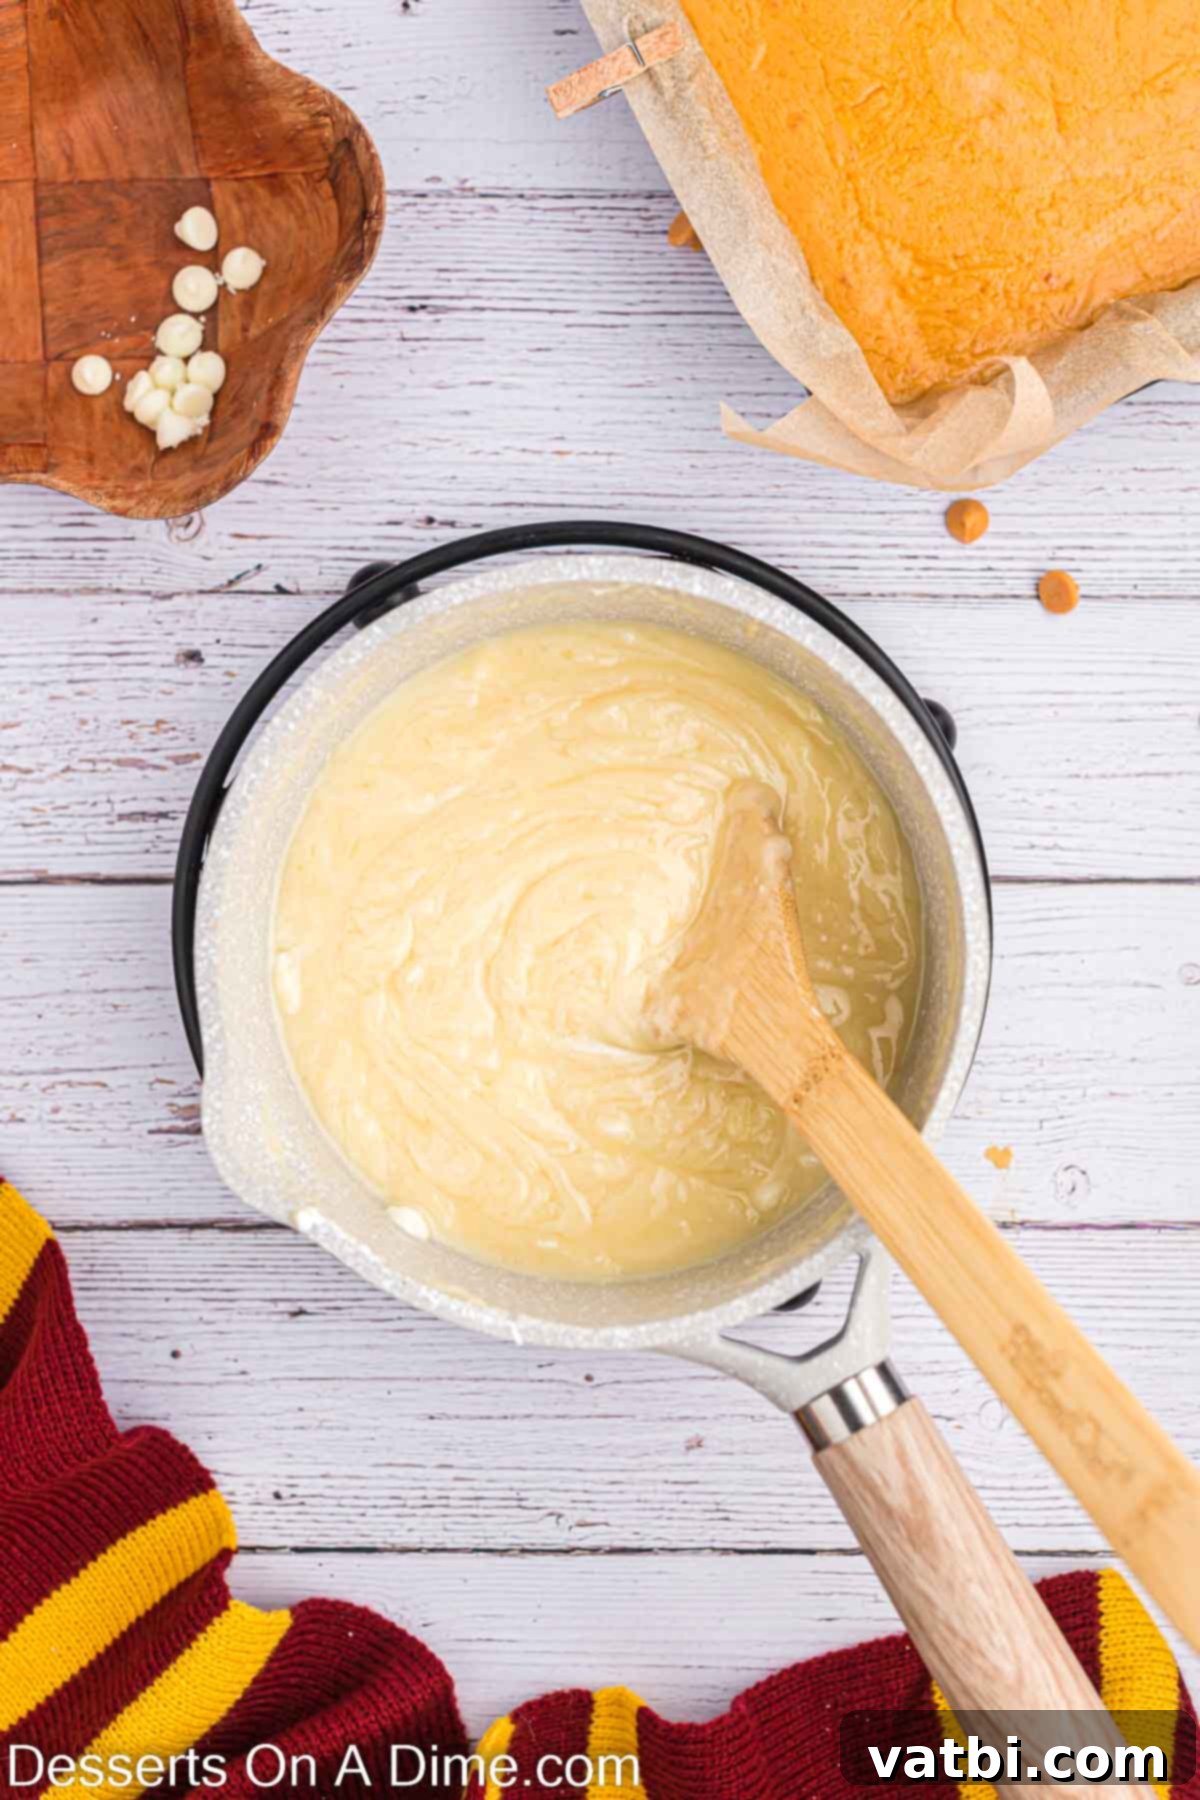
Step 5 – Boil the Vanilla Mixture for Consistency: Continue to stir the vanilla mixture constantly. Once the mixture starts to boil, continue cooking and stirring for an additional 2-3 minutes. This careful boiling process is absolutely vital for the fudge to achieve the correct soft-set consistency and to ensure it firms up properly when chilled. Do not, under any circumstances, stop stirring during this phase to prevent the delicate mixture from scorching or burning at the bottom of the pan.
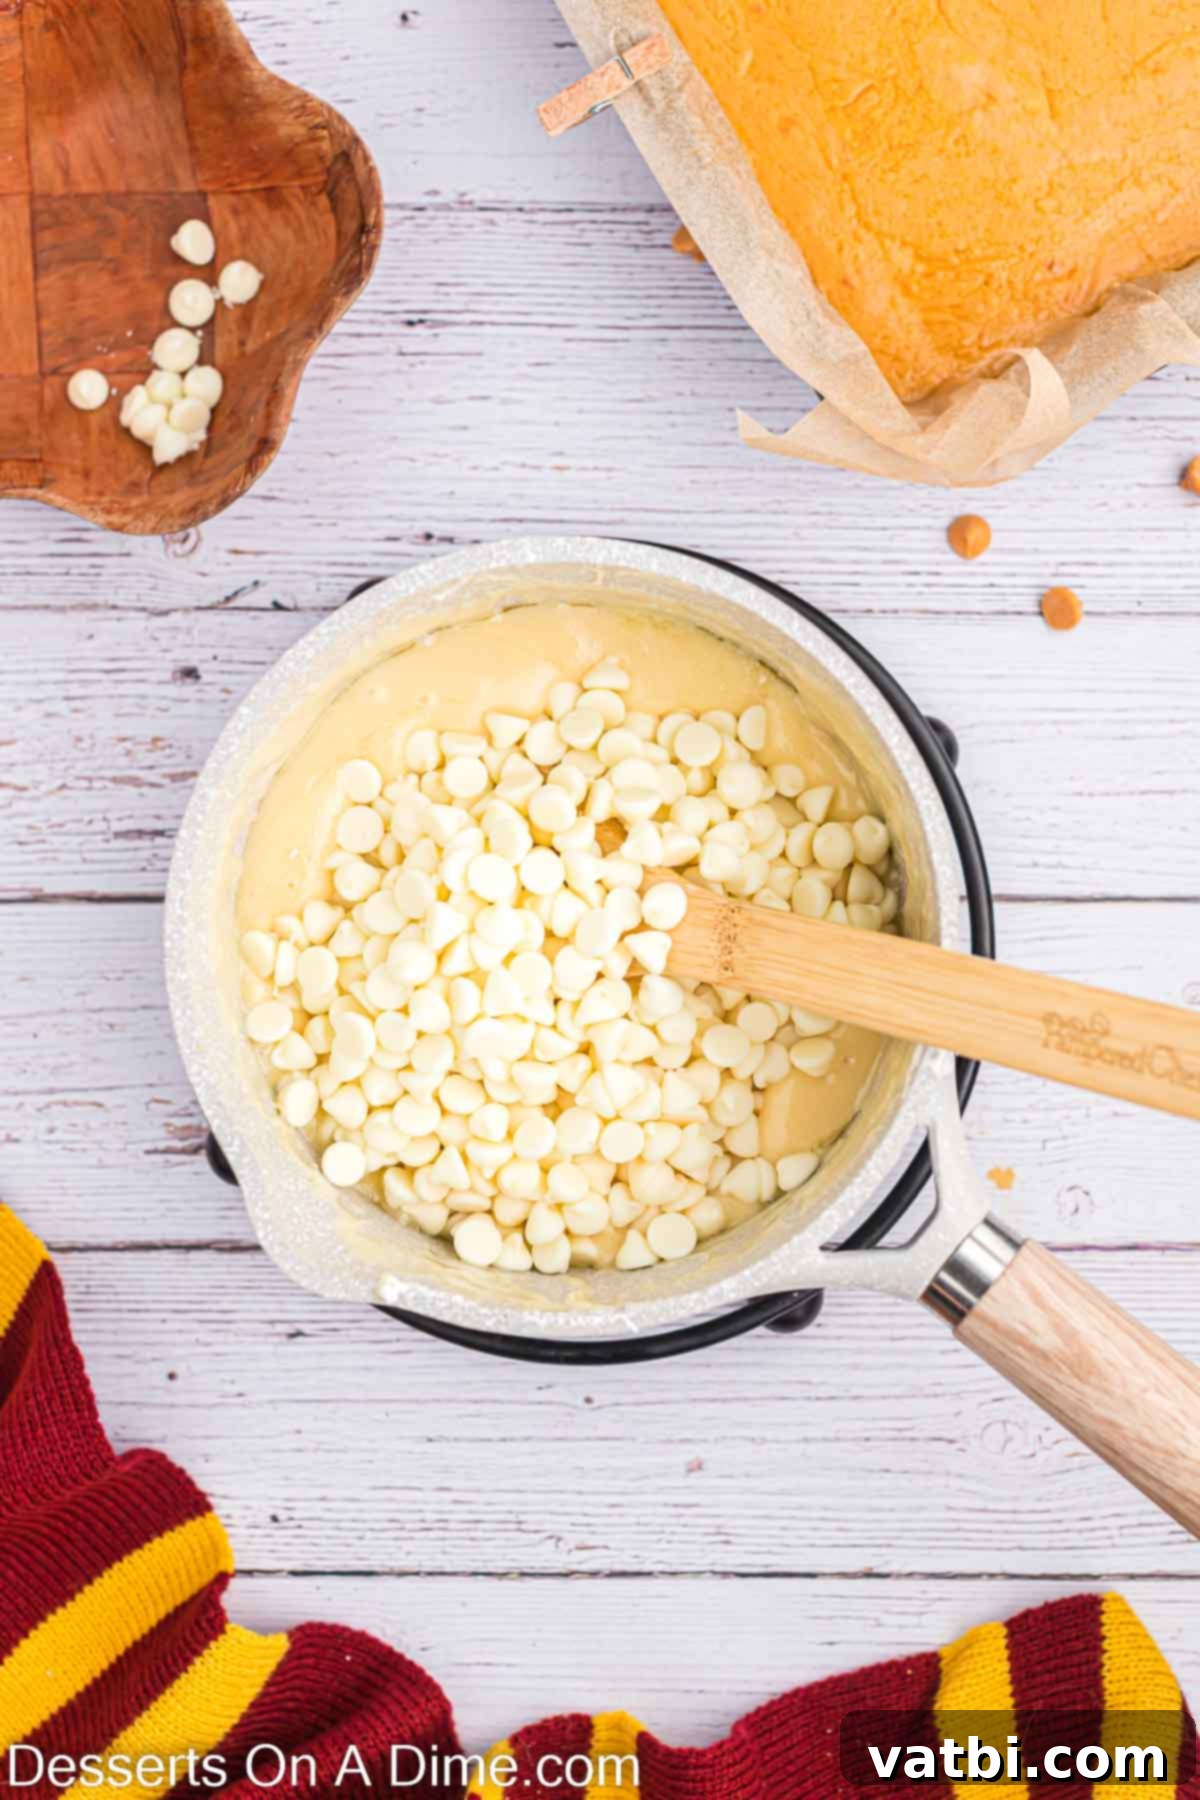
Step 6 – Incorporate White Chocolate and Vanilla: Immediately remove the saucepan containing the vanilla mixture from the heat once the boiling time is complete. This step is critically important to prevent the white chocolate chips from seizing (becoming stiff and grainy) or burning due to residual heat. Stir in the white chocolate chips vigorously along with the vanilla extract until they are completely melted and smoothly incorporated into the vanilla mixture. This creates the creamy, pale top layer that beautifully mimics Butterbeer’s foam.
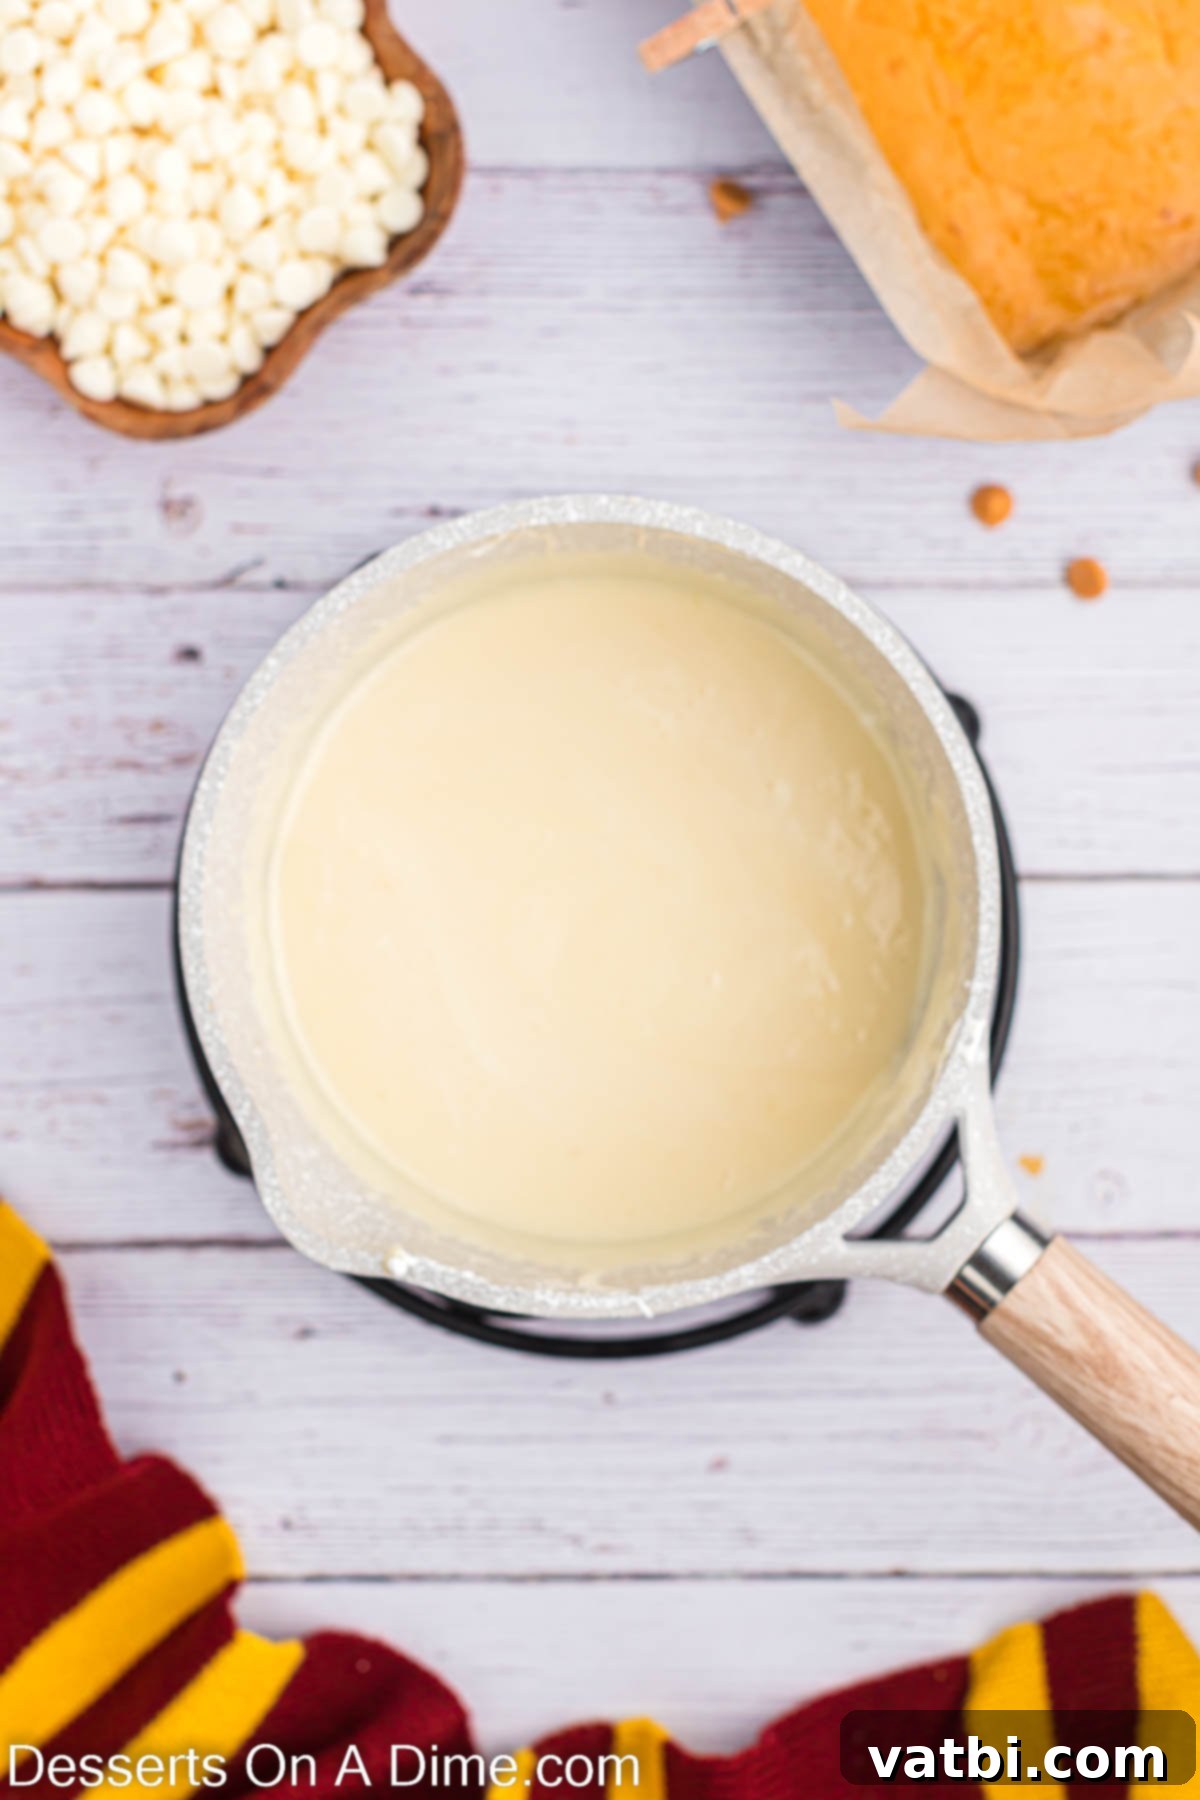
Step 7 – Achieve Perfect Smoothness: Continue to stir the white chocolate and vanilla mixture until it is perfectly melted, absolutely smooth, and completely combined. Ensure there are no lingering lumps of chocolate or streaks, aiming for a consistent, glossy, and thick consistency. This careful mixing ensures a silky finish for your top layer.
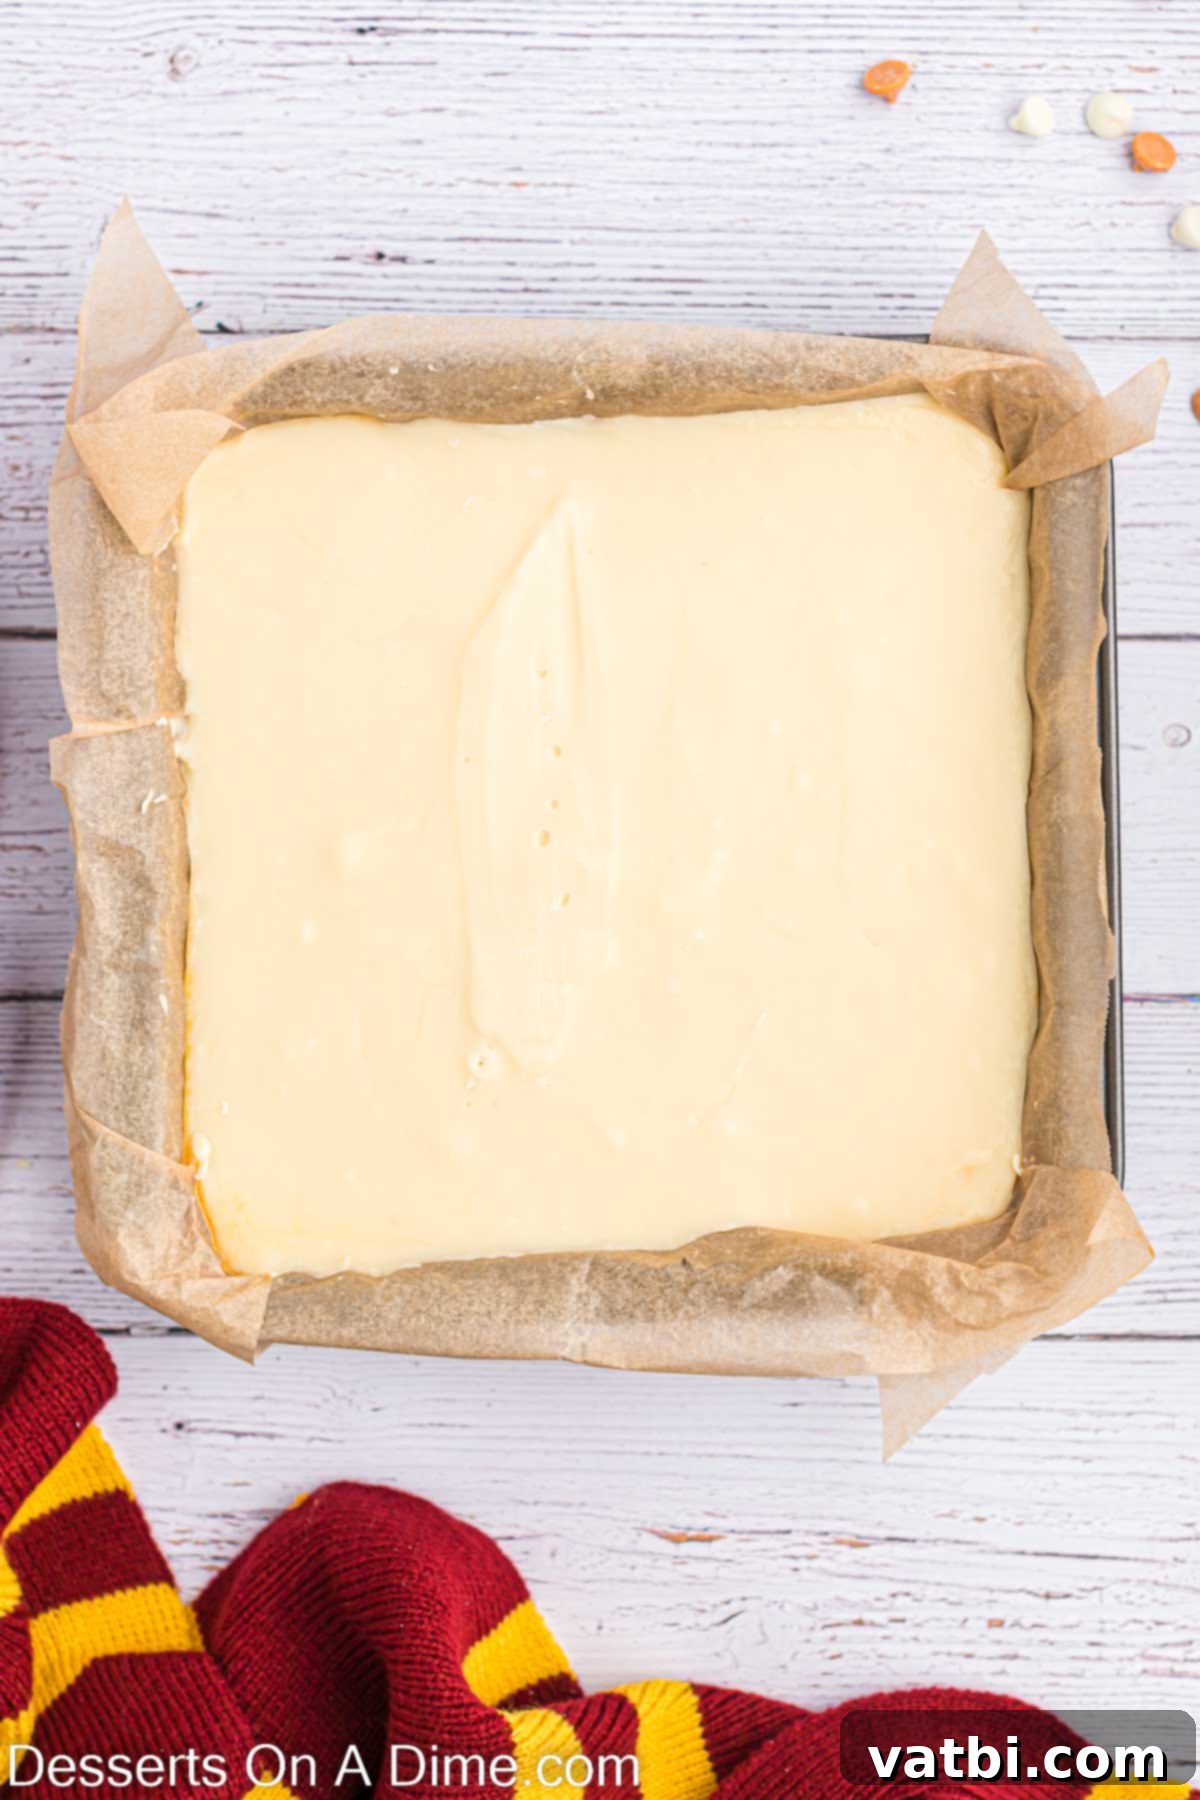
Step 8 – Layer and Smooth for Distinct Layers: Retrieve your baking pan, with its firmly set butterscotch bottom layer, from the freezer. Carefully and gently pour the warm white vanilla fudge mixture directly over the butterscotch layer. Work efficiently but gently. Use an offset spatula or the back of a spoon to delicately spread and smooth the vanilla fudge, ensuring it forms an even, level layer on top without disturbing or mixing into the bottom layer. This step is key to maintaining the beautiful two-toned appearance of your Butterbeer Fudge.
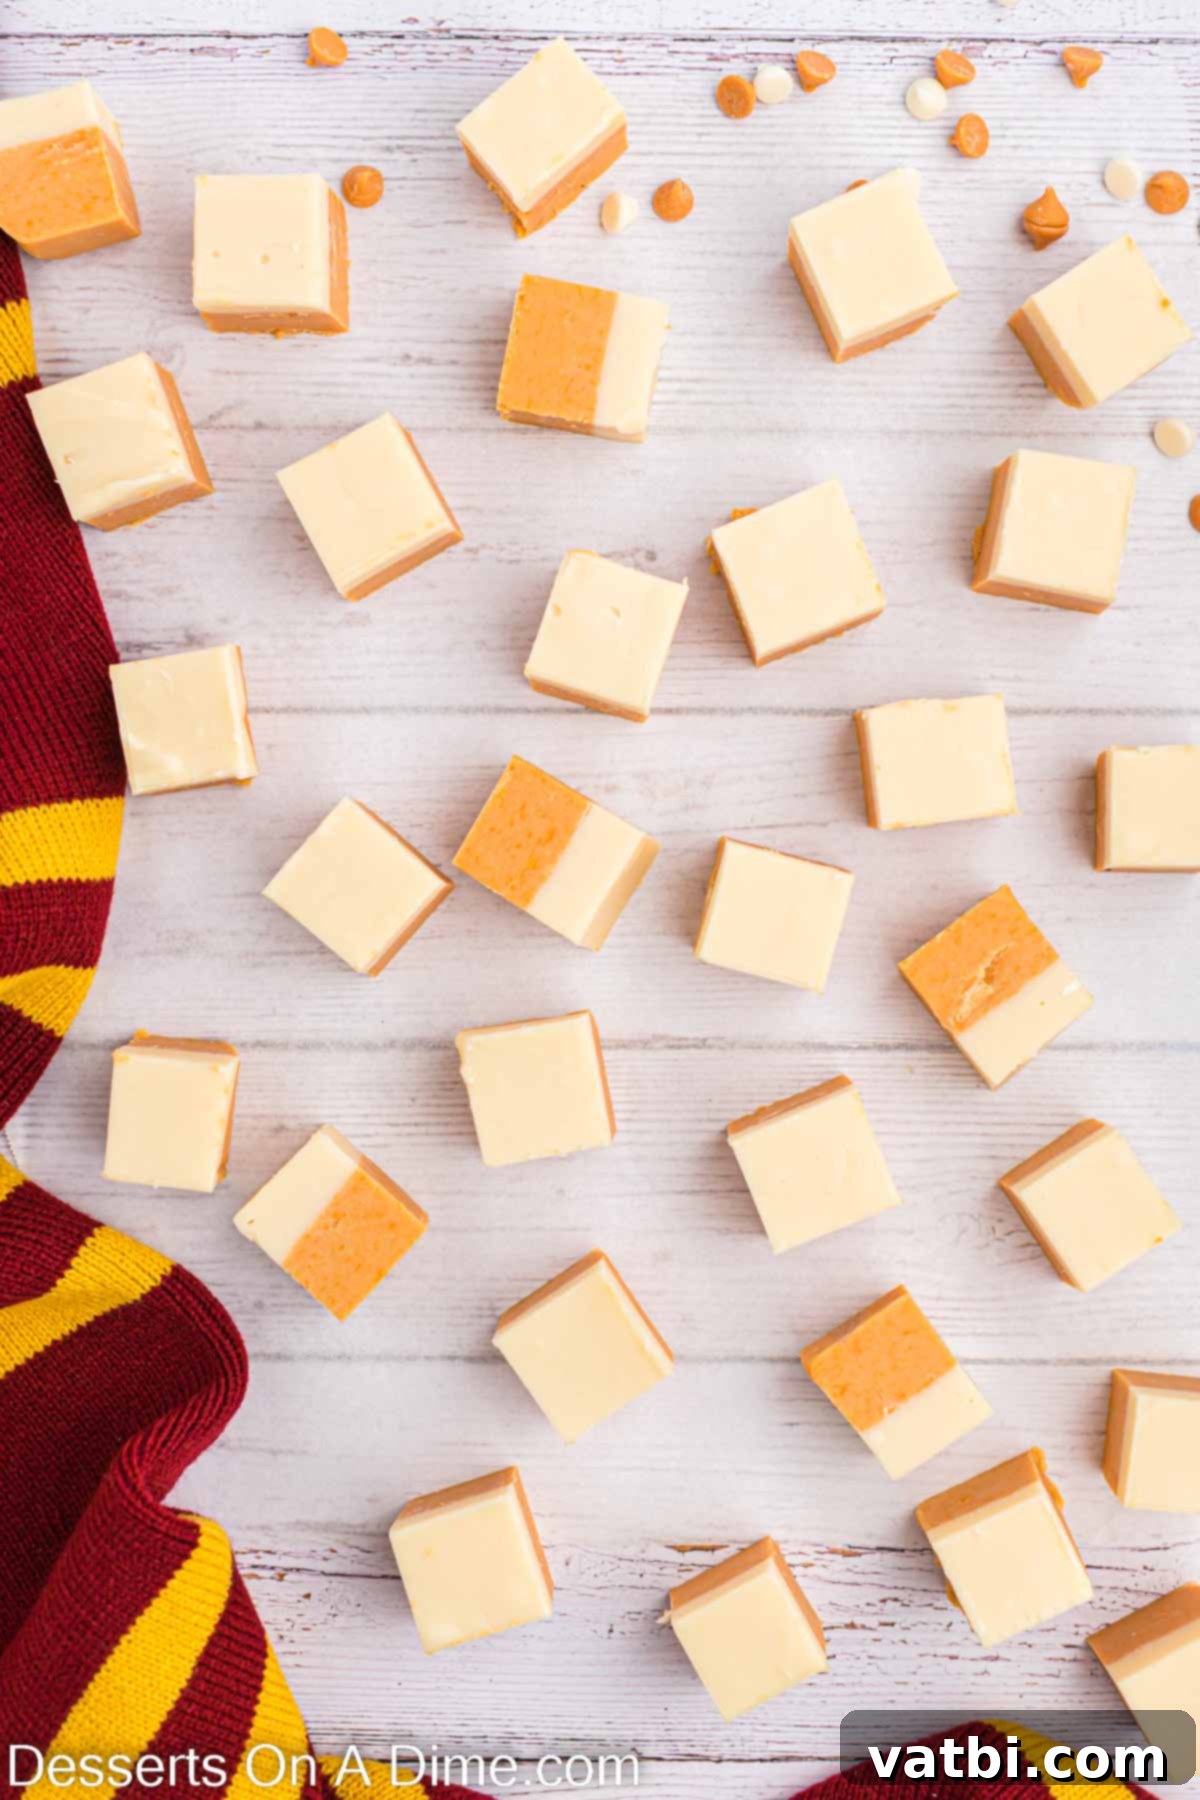
Step 9 – Chill, Cut, and Savor the Magic: Once both layers are smoothly in the pan, carefully transfer the entire dish to the refrigerator. Allow it to chill for at least 2-3 hours, or ideally, leave it overnight. This extended chilling time is absolutely crucial for the fudge to fully set, firm up, and become easily sliceable. Once completely set, use the parchment paper or foil overhangs to gently lift the entire fudge block out of the pan. Transfer it to a clean cutting board and use a sharp knife (lightly oiled if you find it sticking) to cut it into your desired squares. Now, serve your magical Harry Potter Butterbeer Fudge and savor the enchanting, delicious flavors!
Expert Tips for Crafting Perfect Butterbeer Fudge Every Time
Achieving perfectly smooth, creamy, and distinct layers of Butterbeer Fudge is easier than you think, especially with these insider tips and tricks from experienced fudge makers:
- Continuous Stirring is Absolutely Essential: This is arguably the most critical tip for any stovetop fudge recipe. While the fudge mixture is heating and boiling, you must stir constantly and without interruption. Failing to do so will almost certainly result in the mixture burning and sticking to the bottom of the pan, which will impart an unpleasant flavor and grainy texture to your fudge. Start stirring as soon as your ingredients are combined and do not stop until the pan is completely removed from the heat.
- Precisely Mind Your Boiling Time: The specific boiling duration for each fudge layer (5 minutes for the butterscotch base and 2-3 minutes for the vanilla top layer) is not arbitrary; it is vital for the fudge to achieve the correct soft-set consistency. Use a kitchen timer to ensure accuracy. Over-boiling can lead to fudge that is too hard and crumbly, while under-boiling might result in a fudge that is too soft and won’t set properly.
- Remove from Heat Before Adding Chocolate Chips: When it comes time to incorporate the chocolate chips (whether butterscotch or white chocolate), always remove the saucepan entirely from the heat first. This crucial step prevents the delicate chocolate from seizing (where it becomes stiff, grainy, and unworkable) or burning due to residual heat in the pan. Adding chips off the heat ensures a smooth, glossy, and perfectly melted consistency.
- Crucial Bottom Layer Setting in the Freezer: Allowing the bottom butterscotch layer to set in the freezer while you prepare the top layer is a non-negotiable step for a truly professional-looking fudge. This rapid chilling ensures that the two layers remain beautifully defined and distinct, preventing them from blending together into a single, less visually appealing, mixture. Don’t skip this quick freeze!
- Thorough Pan Preparation is Your Best Friend: Properly lining your baking pan with parchment paper or heavy-duty aluminum foil and then liberally spraying it with non-stick cooking spray is essential for a stress-free experience. This meticulous preparation makes removing the finished fudge block from the pan incredibly easy. You’ll be able to simply lift the entire block of fudge out, transfer it to a cutting board, and slice it neatly without any sticking or mess.
Storing Your Magical Butterbeer Fudge for Lasting Freshness
To keep your delicious Harry Potter Butterbeer Fudge fresh, creamy, and delightful for as long as possible, proper storage techniques are important. Store any leftover fudge in an airtight container at room temperature for up to 5-7 days. For extended freshness, especially in warmer climates, it’s best to keep the fudge in an airtight container in the refrigerator, where it will last wonderfully for up to 2-3 weeks. For optimal results and to prevent the individual fudge squares from sticking together, we highly recommend placing sheets of wax paper or parchment paper in between the layers of fudge within your container. This ensures each piece remains perfectly individual, easy to grab, and retains its beautiful appearance.
How to Freeze Butterbeer Fudge for Future Magical Moments
Yes, you can absolutely freeze this delightful Harry Potter Butterbeer Fudge! Freezing is an excellent option if you want to prepare a batch far in advance for an upcoming event, extend its shelf life, or simply save some for a future magical craving. To freeze your fudge, first, cut the completely set fudge into individual squares of your desired size. Then, create layers of wax paper or parchment paper in between the fudge squares to prevent them from sticking together during the freezing process. Carefully arrange these stacked fudge pieces into an airtight, freezer-safe container or a heavy-duty freezer bag. When properly wrapped and stored, the fudge will maintain its quality exceptionally well in the freezer for up to 3 months.
When you’re ready to enjoy your frozen Butterbeer Fudge, the thawing process is simple. Transfer the desired number of fudge squares from the freezer to the refrigerator and allow them to thaw gradually overnight. Once thawed in the fridge, for the best possible taste and texture, let the fudge come to room temperature for about 15-30 minutes before serving. This allows the fudge to soften slightly, regaining its optimal creamy texture and rich, enchanting flavor. It’s like a little bit of magic, preserved!
Discover More Easy and Delicious Fudge Recipes to Try
If you’ve fallen in love with the simplicity and deliciousness of making easy, no-fail fudge recipes, here are a few more delightful concoctions to expand your confectionery repertoire and continue your sweet adventures in the kitchen:
- Festive Eggnog Fudge: A seasonal favorite, perfect for holiday gatherings with its creamy, spiced flavor.
- Classic Easy Peanut Butter Fudge Recipe: A timeless and incredibly simple recipe for all peanut butter lovers.
- Decadent Chocolate Peanut Butter Fudge Recipe: The ultimate combination of two beloved flavors in a rich, layered fudge.
- Refreshing White Chocolate Peppermint Fudge Recipe: A cool, minty, and visually appealing fudge, ideal for winter festivities.
We truly hope you give this Copycat Butterbeer Fudge Recipe a try and bring a little bit of authentic wizarding magic into your home and kitchen. It’s a truly enchanting dessert that’s perfect for any occasion, from casual cravings to grand celebrations. We would absolutely love to hear your thoughts and see your magical creations, so please feel free to let us know how it turns out for you in the comment section below!
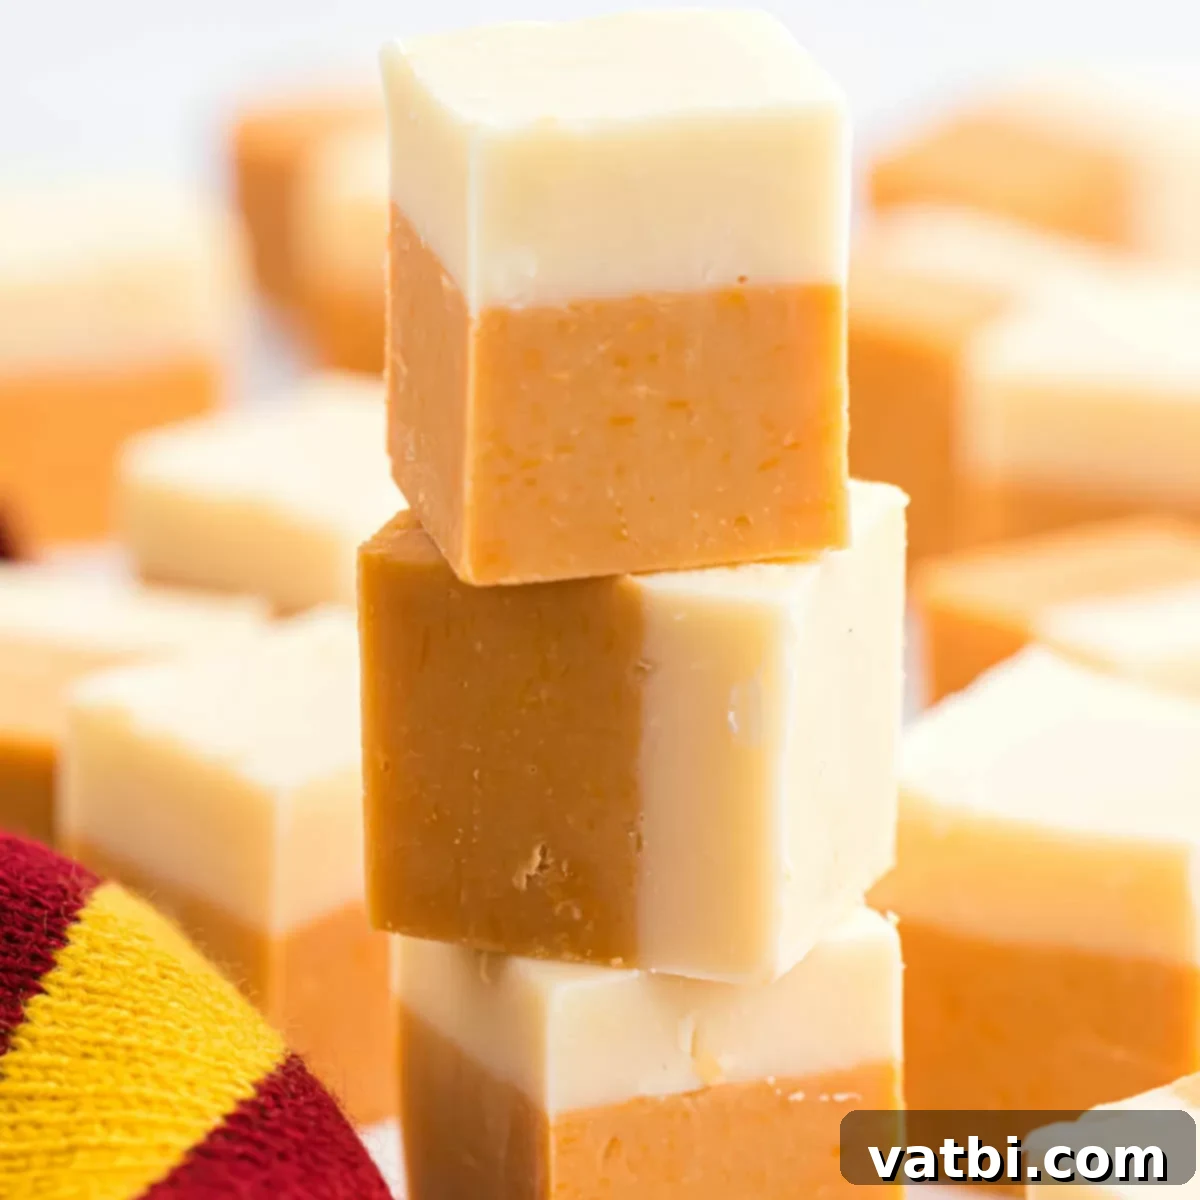
Harry Potter Butterbeer Fudge
Harry Potter Butterbeer Fudge is packed with all the delicious flavors of butterbeer straight from the magical world of Harry Potter. It is incredibly simple to prepare and boasts a wonderfully creamy texture.
Ingredients
For the Golden Butterscotch Layer:
- 3 cups Butterscotch Chips
- 1 can Sweetened Condensed Milk (14 oz can)
- ½ cup Powdered Sugar (sifted)
- ¾ cup Butter (unsalted)
- 4 oz Marshmallow Creme
For the Creamy Vanilla Foam Layer:
- 1 ½ cup White Chocolate Chips
- ½ cup Butter (unsalted)
- 7 oz Sweetened Condensed Milk
- 3 oz Marshmallow Creme
- ¼ cup Powdered Sugar (sifted)
- ¼ teaspoon Vanilla Extract (pure)
Instructions
- Prepare Pan: Line an 8×8 or 9×9 inch baking dish with parchment paper or tin foil, leaving an overhang. Lightly spray with non-stick cooking spray.
- Bottom Layer – Combine: In a medium saucepan, combine 3 cups butterscotch chips, 1 can (14 oz) sweetened condensed milk, ½ cup sifted powdered sugar, ¾ cup butter, and 4 oz marshmallow creme.
- Bottom Layer – Cook: Heat over medium heat, stirring constantly, until it begins to boil. Continue to boil and stir for 5 minutes. Remove from heat.
- Bottom Layer – Melt Chips: Stir in the butterscotch chips until completely melted and smooth.
- Bottom Layer – Spread & Chill: Spread the butterscotch mixture evenly into the prepared pan. Place in the freezer to set while preparing the top layer.
- Top Layer – Combine: In a separate small saucepan, combine 1 ½ cup white chocolate chips, ½ cup butter, 7 oz sweetened condensed milk, 3 oz marshmallow creme, and ¼ cup sifted powdered sugar.
- Top Layer – Cook: Heat over medium-high heat, stirring constantly. Once it boils, cook for 2-3 more minutes, continuing to stir.
- Top Layer – Melt Chips: Remove from heat. Stir in the white chocolate chips and ¼ teaspoon vanilla extract until melted and smooth.
- Top Layer – Layer & Smooth: Pour the white vanilla layer gently over the chilled butterscotch layer. Gently smooth the top evenly with an offset spatula.
- Chill & Serve: Refrigerate for 2-3 hours (or overnight) to set completely. Lift the fudge from the pan using the parchment handles, cut into squares, and enjoy!
Recipe Notes
Store leftovers in an airtight container at room temperature for up to 5-7 days or in the refrigerator for up to 2-3 weeks. Place wax paper between layers to prevent sticking. For freezing, cut into squares, layer with wax paper in an airtight container, and freeze for up to 3 months. Thaw in the fridge, then bring to room temperature before serving for optimal texture and flavor.
Nutrition Facts
Calories: 279kcal, Carbohydrates: 40g, Protein: 2g, Fat: 13g, Saturated Fat: 8g, Polyunsaturated Fat: 0.5g, Monounsaturated Fat: 3g, Trans Fat: 0.3g, Cholesterol: 31mg, Sodium: 161mg, Potassium: 102mg, Fiber: 0.02g, Sugar: 37g, Vitamin A: 309IU, Vitamin C: 1mg, Calcium: 77mg, Iron: 0.1mg
