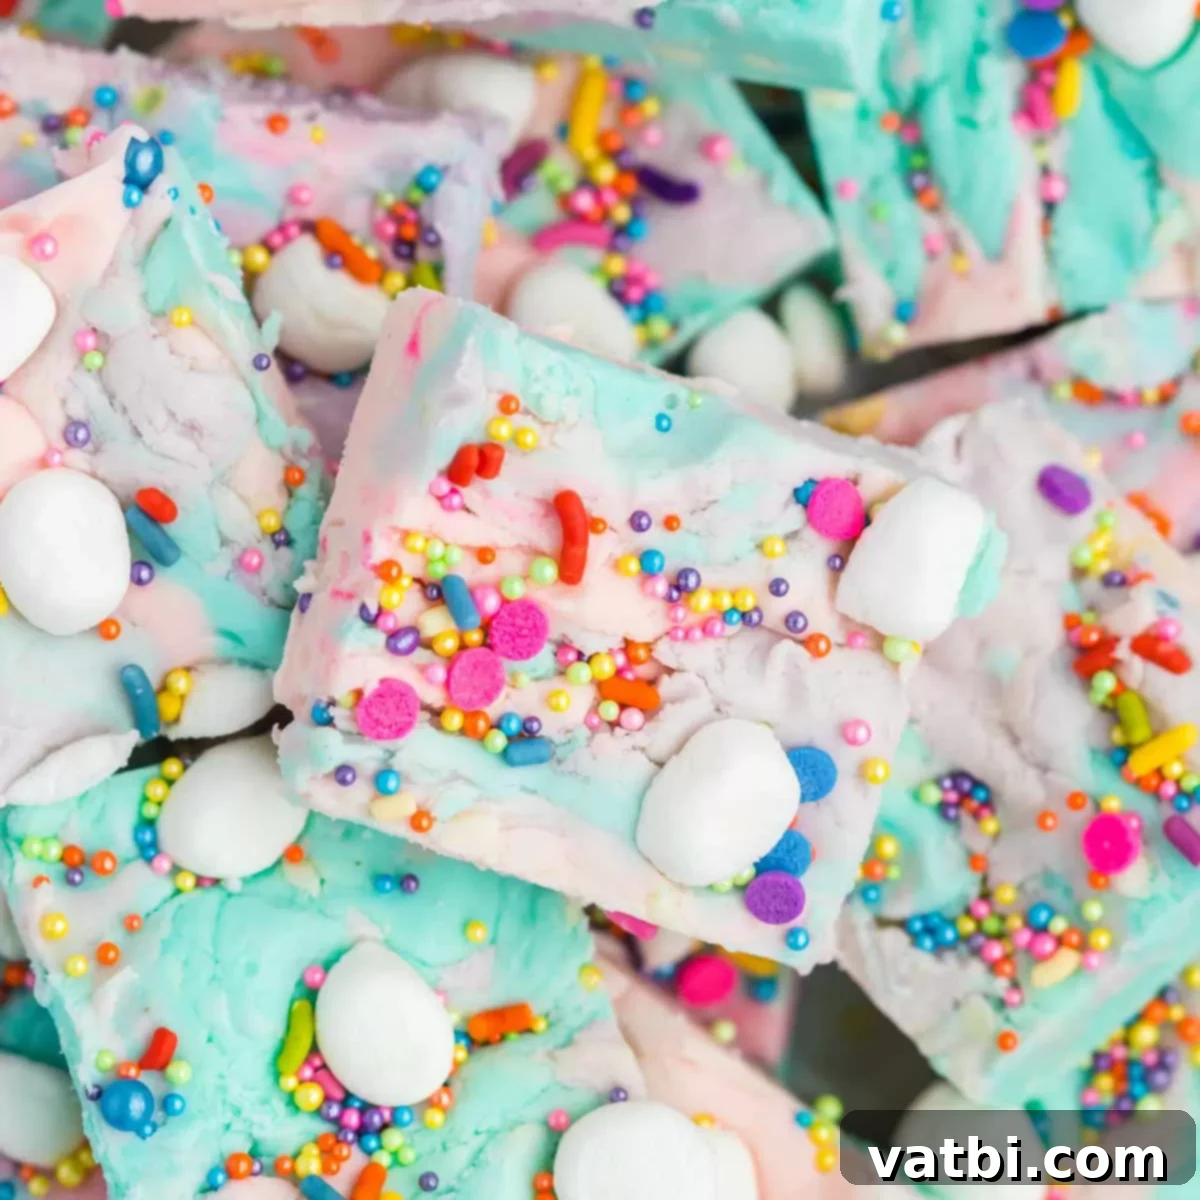
Magical No-Bake Unicorn Fudge: An Easy 5-Ingredient Recipe for Whimsical Treats
Get ready to sprinkle some magic into your dessert repertoire with our incredibly easy and utterly enchanting Unicorn Fudge recipe! This delightful, no-bake confection is a burst of vibrant color and creamy sweetness, guaranteed to captivate both young and old. Requiring just five simple ingredients and minimal effort, you can whip up a batch of this magical fudge in no time, making it the perfect show-stopping treat for any celebration or a fun, whimsical project for a rainy afternoon.
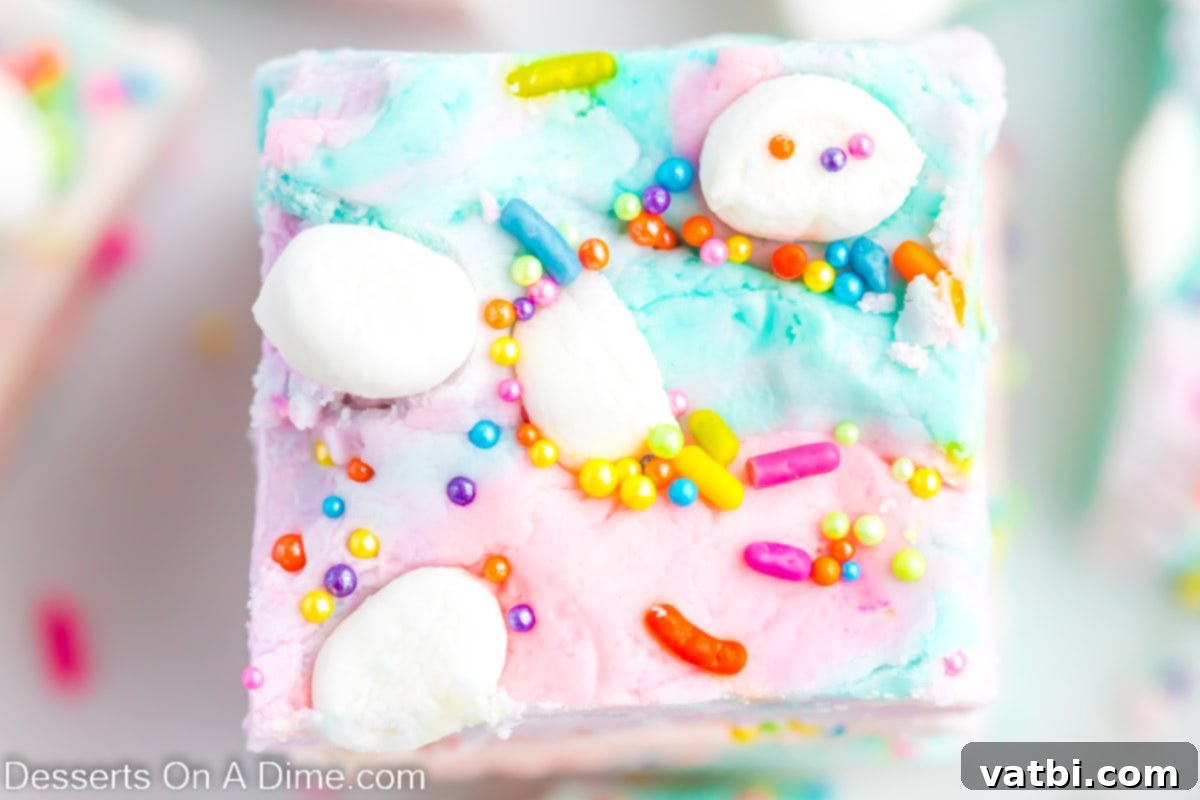
Unicorn fudge is more than just a dessert; it’s a celebration in every bite. With its mesmerizing swirls of pink, purple, and blue, generously adorned with rainbow sprinkles, it instantly transforms any occasion into a fairytale. Whether you’re planning a dazzling birthday party, a charming baby shower, or simply seeking a fun kitchen adventure with your kids, this recipe delivers on both stunning aesthetics and irresistible flavor. Forget complicated baking processes; our easy, no-bake approach ensures a hassle-free experience, allowing you to focus on the joy of creating and sharing.
If you’re hosting a unicorn-themed event, this vibrant easy fudge recipe will be an absolute centerpiece on your dessert table. And for those who can’t get enough of unicorn-inspired delights, be sure to also try our enchanting Unicorn Cupcakes, playful Unicorn Poop Cookies, and delightful Unicorn Dip. Each recipe promises a touch of magic and a whole lot of fun!
Table of Contents
- Why You’ll Adore This Unicorn Fudge
- Simple Ingredients for Magical Fudge
- Creative Variations & Substitutions
- Step-by-Step Guide: How to Make Unicorn Fudge
- Proper Storage for Fresh Fudge
- Expert Tips for Perfect Unicorn Fudge
- More Irresistible Easy Fudge Recipes
Why You’ll Adore This Unicorn Fudge
- Fun and Festive: This fudge isn’t just delicious; it’s a visual spectacle! The vibrant pink, purple, and blue hues, combined with a generous scattering of sprinkles, make it the ultimate showstopper for any birthday, holiday, or themed party. It instantly brightens up any dessert spread and brings a smile to every face, making it a memorable treat for all ages.
- No-Bake & Effortlessly Easy: Say goodbye to ovens and complicated baking steps! This recipe is incredibly simple, relying on just a few pantry staples and a microwave. It’s a quick and efficient way to create a stunning dessert, perfect for busy schedules, impromptu gatherings, or when you need a last-minute magical treat without the fuss.
- Kid-Friendly & Engaging: Involving children in the kitchen can be a magical experience, and this unicorn fudge is the perfect project. Kids will delight in swirling the different colors and adding their favorite sprinkles, fostering creativity and a love for cooking without the mess or danger of a hot oven. It’s a wonderful activity that yields delicious rewards.
- Versatile & Customizable: While we love the classic unicorn colors, this recipe is a blank canvas for your creativity! Easily swap out food coloring to match different party themes, seasonal holidays, or personal preferences. Experiment with various types of sprinkles, edible glitter, or even different extracts for unique flavor profiles and endless possibilities.
- Sweet & Irresistibly Creamy: Beyond its dazzling appearance, this fudge boasts a rich, smooth, and melt-in-your-mouth texture that is simply divine. It strikes the perfect balance of sweetness, making it an indulgent treat that everyone will crave. The creamy base provides the ideal backdrop for the fun colors and toppings.
- Perfect for Gifting: Homemade gifts are always special, and this unicorn fudge is no exception. Once set, cut it into charming squares, arrange them in a decorative box or cellophane bag, and tie with a pretty ribbon. It makes for a thoughtful, personalized, and delicious present for teachers, neighbors, friends, or as unique party favors.
Simple Ingredients for Magical Fudge
Creating this enchanting unicorn fudge requires only a handful of readily available ingredients. Opting for quality ingredients ensures the best flavor and a wonderfully smooth texture. Here’s a closer look at what you’ll need to bring this whimsical dessert to life:
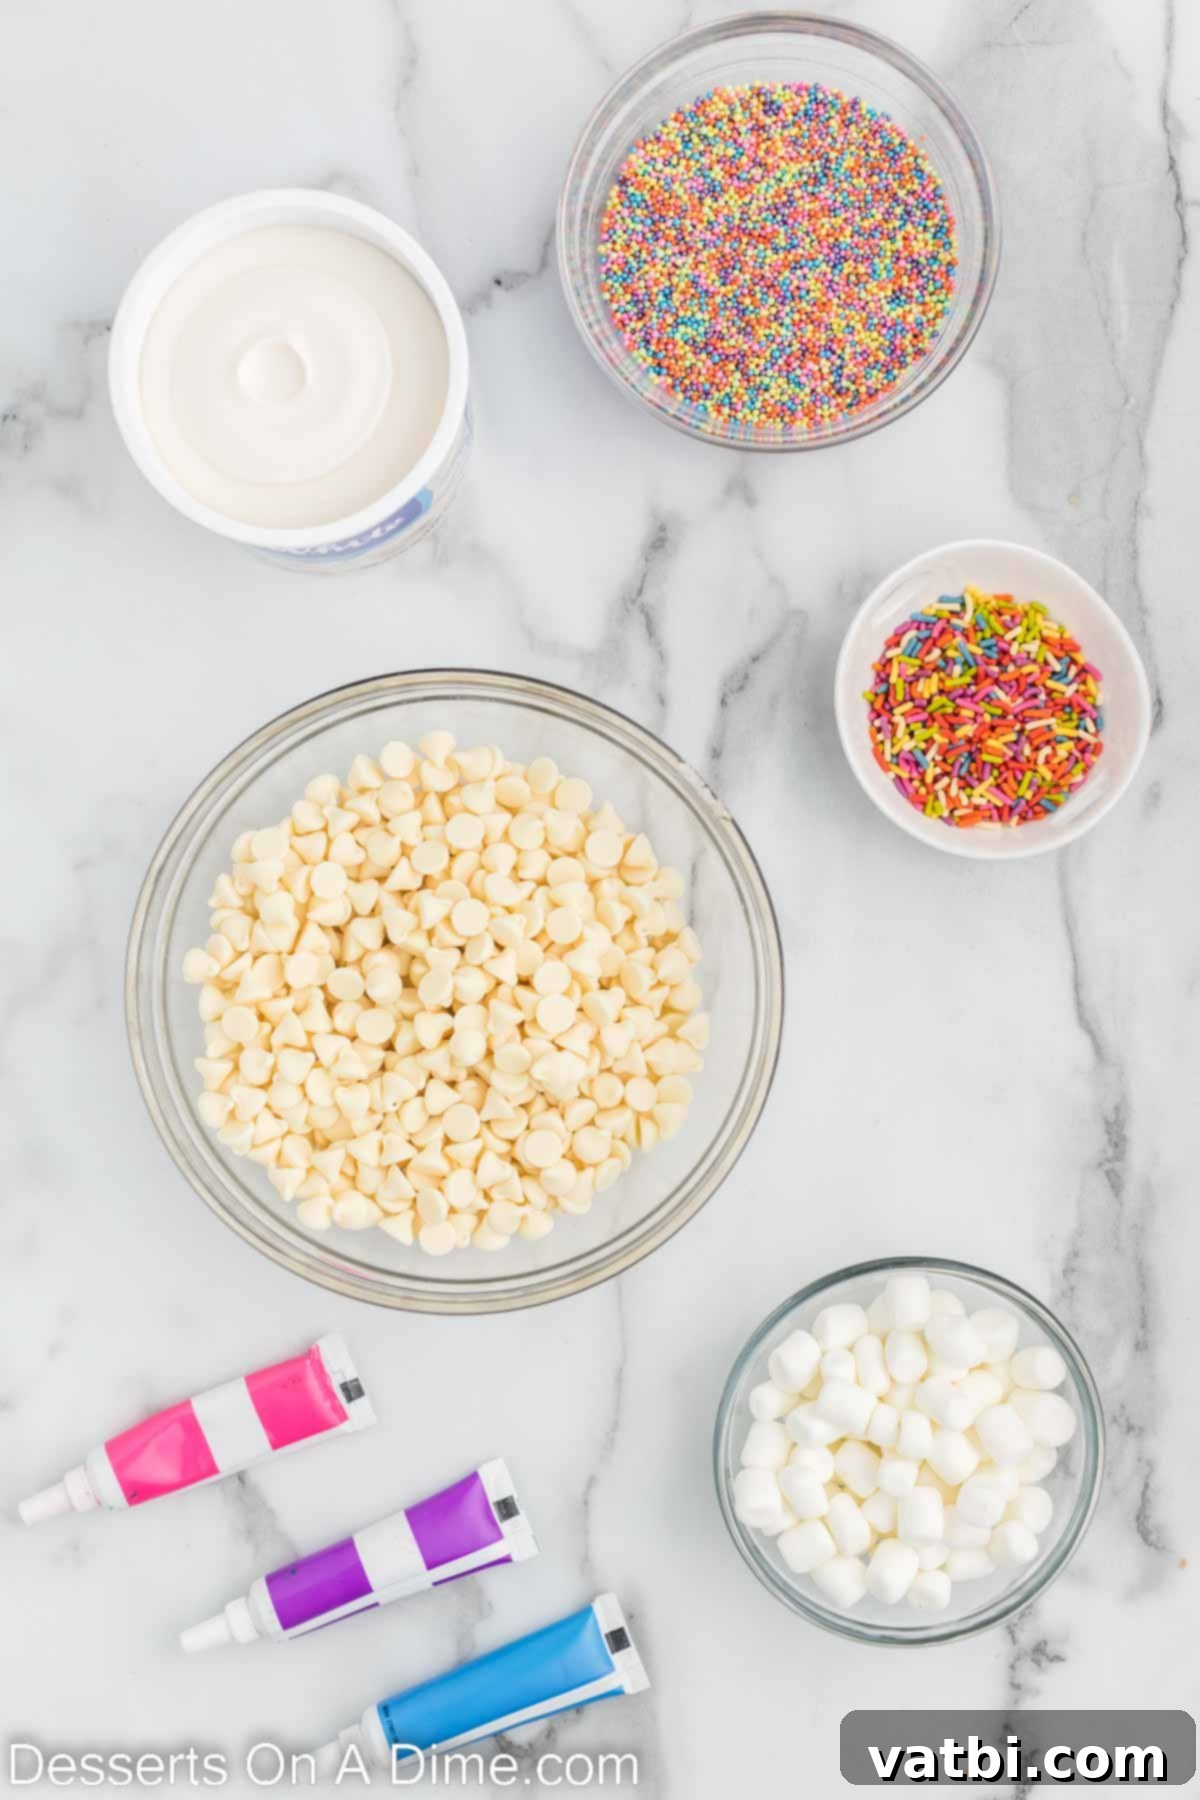
- White Chocolate Chips: These form the creamy foundation of our fudge. It’s essential to use high-quality white chocolate chips for the best flavor and a smooth, consistent texture that melts beautifully. Brands like Ghirardelli or Guittard are excellent choices that provide a rich, sweet base without being overly sweet.
- White Frosting: This is our clever shortcut to achieving that perfect, soft fudge consistency without the need for a candy thermometer. A standard store-bought vanilla frosting (suchad as Betty Crocker or Duncan Hines) works perfectly, keeping this recipe quick, easy, and ensures a wonderfully smooth and set fudge.
- Food Coloring (Pink, Purple, Blue): These vibrant gel food colorings are what give our fudge its iconic unicorn aesthetic. Gel colors are highly recommended over liquid varieties because they provide a much more intense hue with only a few drops, without adding excess moisture that could affect the fudge’s texture. You can customize the shades to be as pastel or as bold as you desire.
- Mini Marshmallows: These small, soft marshmallows add a delightful chewiness and an extra layer of soft texture throughout the fudge. Their miniature size ensures they blend seamlessly into the mixture, creating pleasant pockets of sweetness without overpowering the fudge itself.
- Rainbow Sprinkles: The essential final touch that brings the entire unicorn theme together! Choose an assortment of bright rainbow sprinkles that will beautifully complement your chosen fudge colors. Beyond just visual appeal, they add a fun, playful crunch and an extra element of magic to each square.
For the precise measurements of each ingredient, please refer to the complete and detailed recipe card found at the bottom of this article.
Creative Variations & Substitutions
One of the best things about this unicorn fudge recipe is how incredibly adaptable it is. Don’t hesitate to get creative and customize it to suit your taste, specific event theme, or dietary preferences! Here are a few ideas to get you started on your fudge-making adventure:
- Topping Adventures Beyond Rainbows: While rainbow sprinkles are classic for unicorn fudge, the possibilities for toppings are endless. Consider adding edible glitter for an extra magical shimmer that catches the light beautifully. You could also try different shaped sprinkles like stars, hearts, or even unicorn horn shapes for themed parties. For a textural contrast, mini chocolate chips, chopped white chocolate chunks, or crushed freeze-dried berries can add both flavor and visual interest. Don’t forget that seasonal sprinkles can effortlessly adapt this recipe for other holidays like Christmas, Halloween, or Valentine’s Day.
- Chocolate Base Alternatives: If white chocolate chips aren’t readily available, or if you prefer a slightly different base, you have options. White baking chocolate bars (chopped into smaller pieces for easier melting) or almond bark are excellent alternatives that will still provide a smooth, meltable base for your fudge. Always remember to melt them slowly and carefully, following the same microwave instructions as for chocolate chips, to prevent seizing.
- Color Palette Perfection: The true magic of this fudge lies in its vibrant colors. While pink, purple, and blue are quintessential unicorn shades, you are free to experiment with any food coloring to match various holidays, team colors, or specific party themes. Imagine festive green and red for Christmas, spooky orange and black for Halloween, cheerful pastel shades for Easter, or vibrant neons for a summer celebration! Simply divide the warm fudge mixture into as many bowls as you have colors and mix in your desired shades until you achieve the perfect hue.
- Flavor Boosters: A few drops of extract can dramatically transform the flavor profile of your fudge. Beyond the classic vanilla, consider adding almond extract for a subtle nutty note that complements white chocolate beautifully. Peppermint extract can give it a festive, cool twist, especially when combined with red and green colors. A hint of fruit extract (like strawberry or raspberry) can also enhance the sweetness and provide a lovely aroma that pairs wonderfully with the vibrant colors. Add these extracts when stirring in the frosting for even distribution.
- Nutty or Crunchy Add-ins: For those who enjoy a bit of crunch in their creamy fudge, finely chopped nuts (such as almonds, pecans, or walnuts) can be gently folded into one or all of the colored fudge portions before spreading into the pan. This adds a delightful textural contrast and a rich, earthy flavor. Similarly, crushed cookies (like shortbread or golden Oreos) could be folded in for a different kind of sweet crunch.
Step-by-Step Guide: How to Make Unicorn Fudge
Creating this dazzling unicorn fudge is a surprisingly simple process, even for beginner bakers. Follow these detailed steps for a perfectly vibrant, creamy, and delicious treat that will impress everyone:
- Step 1 – Prepare Your Pan for Easy Release: Begin by preparing an 8×8 inch baking pan. This crucial first step ensures your fudge can be removed effortlessly once set. Line the entire pan with either aluminum foil or parchment paper, making sure to leave a generous overhang on all sides. These overhangs will serve as convenient “handles” to lift the firm fudge slab out later. For extra assurance and to prevent any sticking, lightly spray the foil or parchment paper with a non-stick cooking spray. This guarantees clean, crisp edges when you cut your magical squares.
Step 2. Melt the White Chocolate Chips Slowly: Place your white chocolate chips into a large, microwave-safe bowl. White chocolate is delicate and can seize or burn easily if overheated, so patience is key. Heat the chips in short bursts of 30 seconds at a time, stirring thoroughly and vigorously after each interval. Continue this process until the chocolate is completely melted, smooth, and glossy. This usually takes about 1.5 to 2 minutes in total, depending on your microwave’s wattage, but always err on the side of caution to avoid overheating.
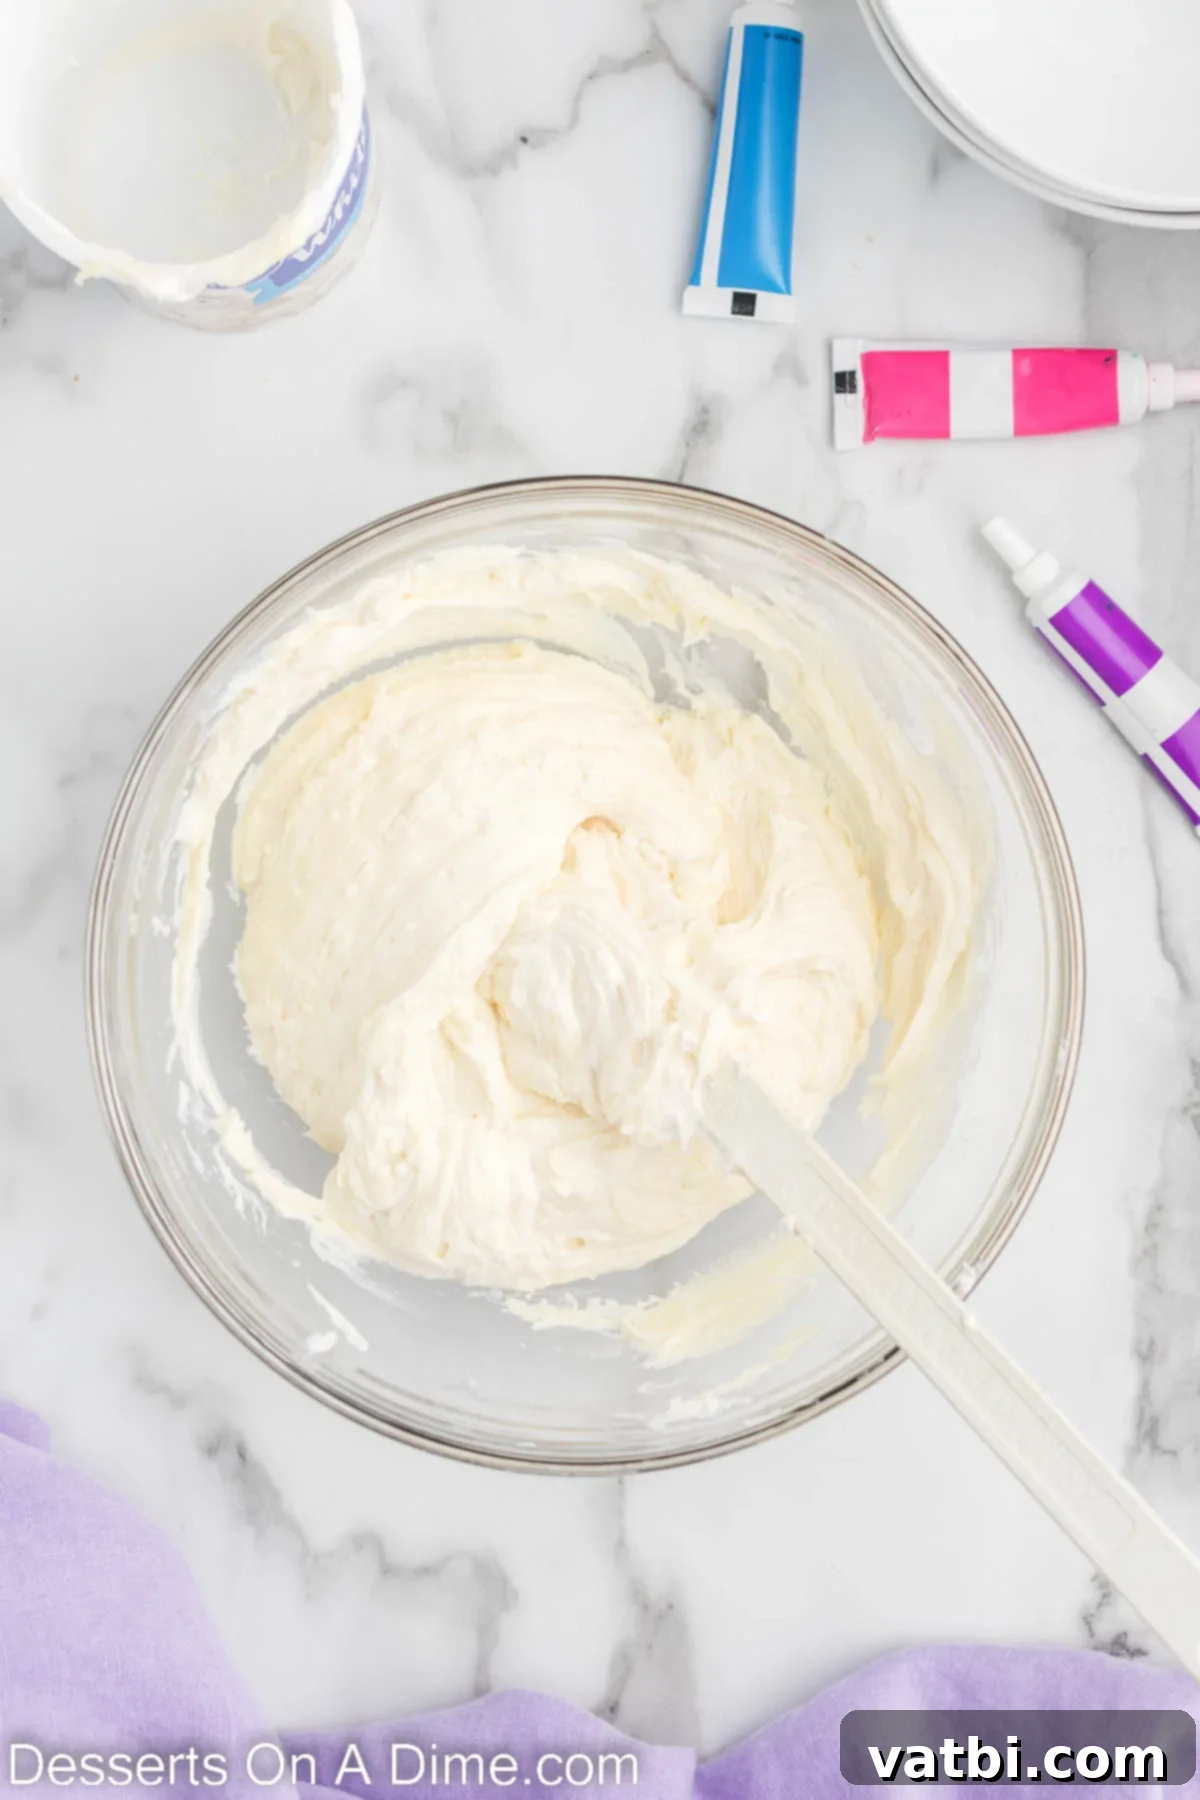
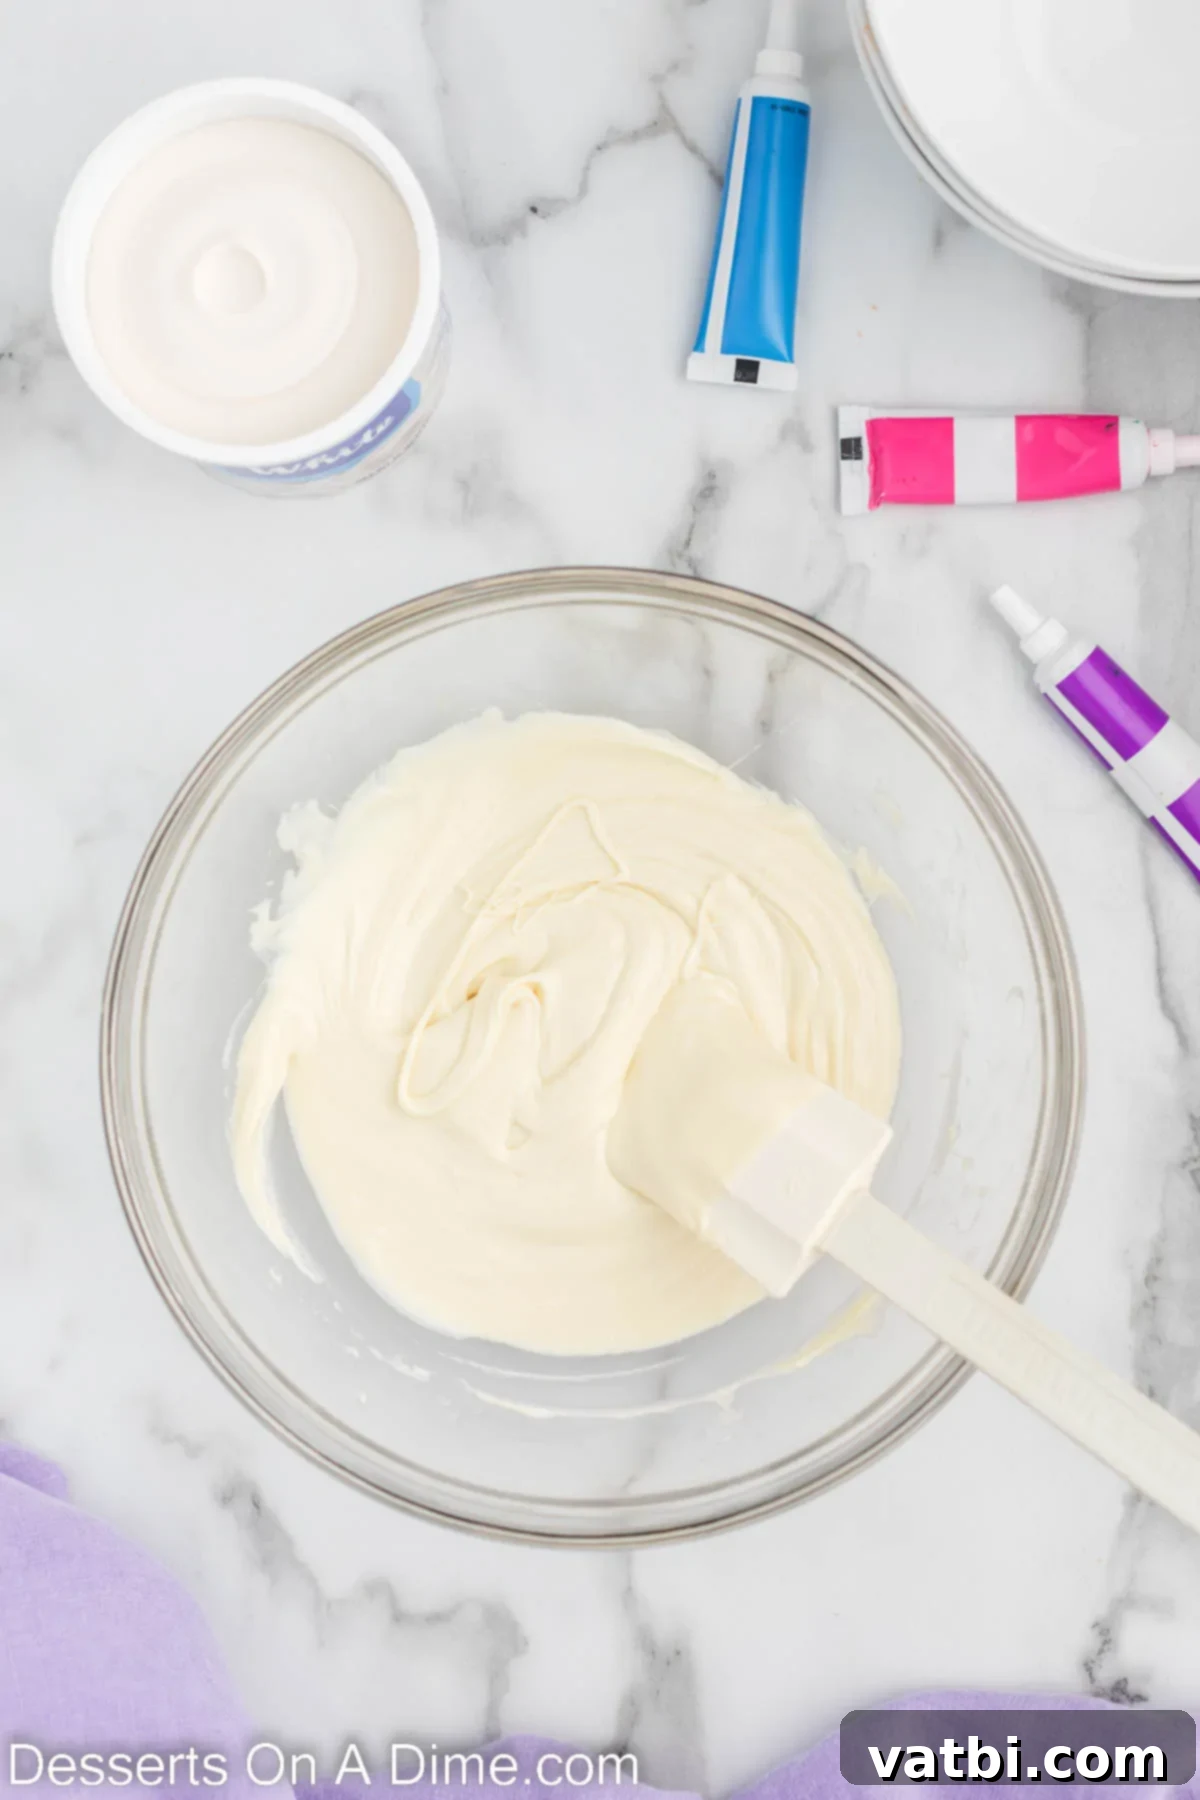
Step 3. Incorporate the Vanilla Frosting: Once your white chocolate is perfectly melted and smooth, add the entire container of white vanilla frosting to the bowl. Using a sturdy spatula or spoon, stir the mixture vigorously until the frosting is fully combined with the melted chocolate. You’ll notice the mixture becoming thick, creamy, and wonderfully homogeneous. Work quickly during this step, as the fudge will start to cool and set relatively fast once combined.
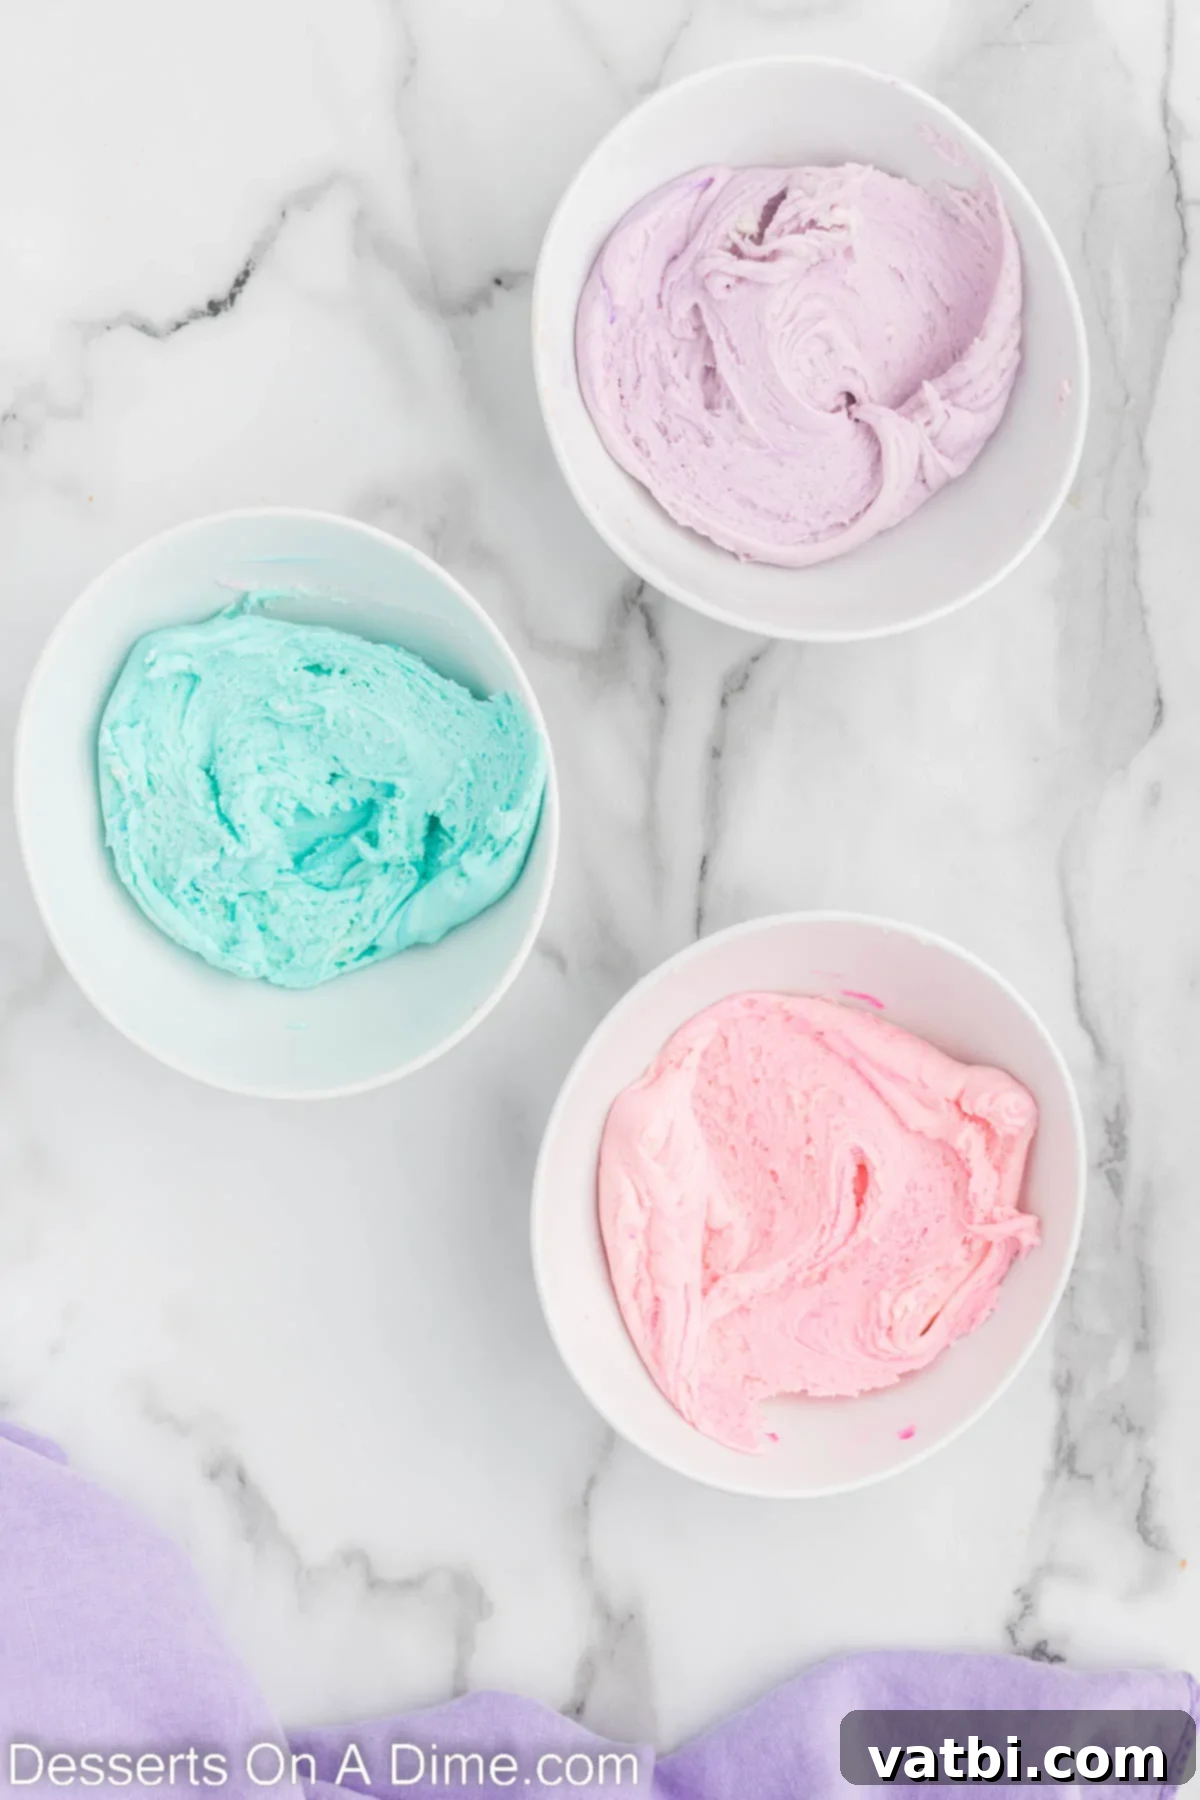
Step 4. Divide and Color Your Fudge: Now for the artistic part! Divide the warm, creamy fudge mixture evenly into three separate bowls. To each bowl, add a few drops of your desired food coloring – pink to one, purple to another, and blue to the third. Stir each bowl thoroughly until you achieve your desired vibrant shades. Remember, gel food coloring is potent, so start with a small amount and add more gradually until you reach the perfect, distinct, and bright colors for that true unicorn effect.
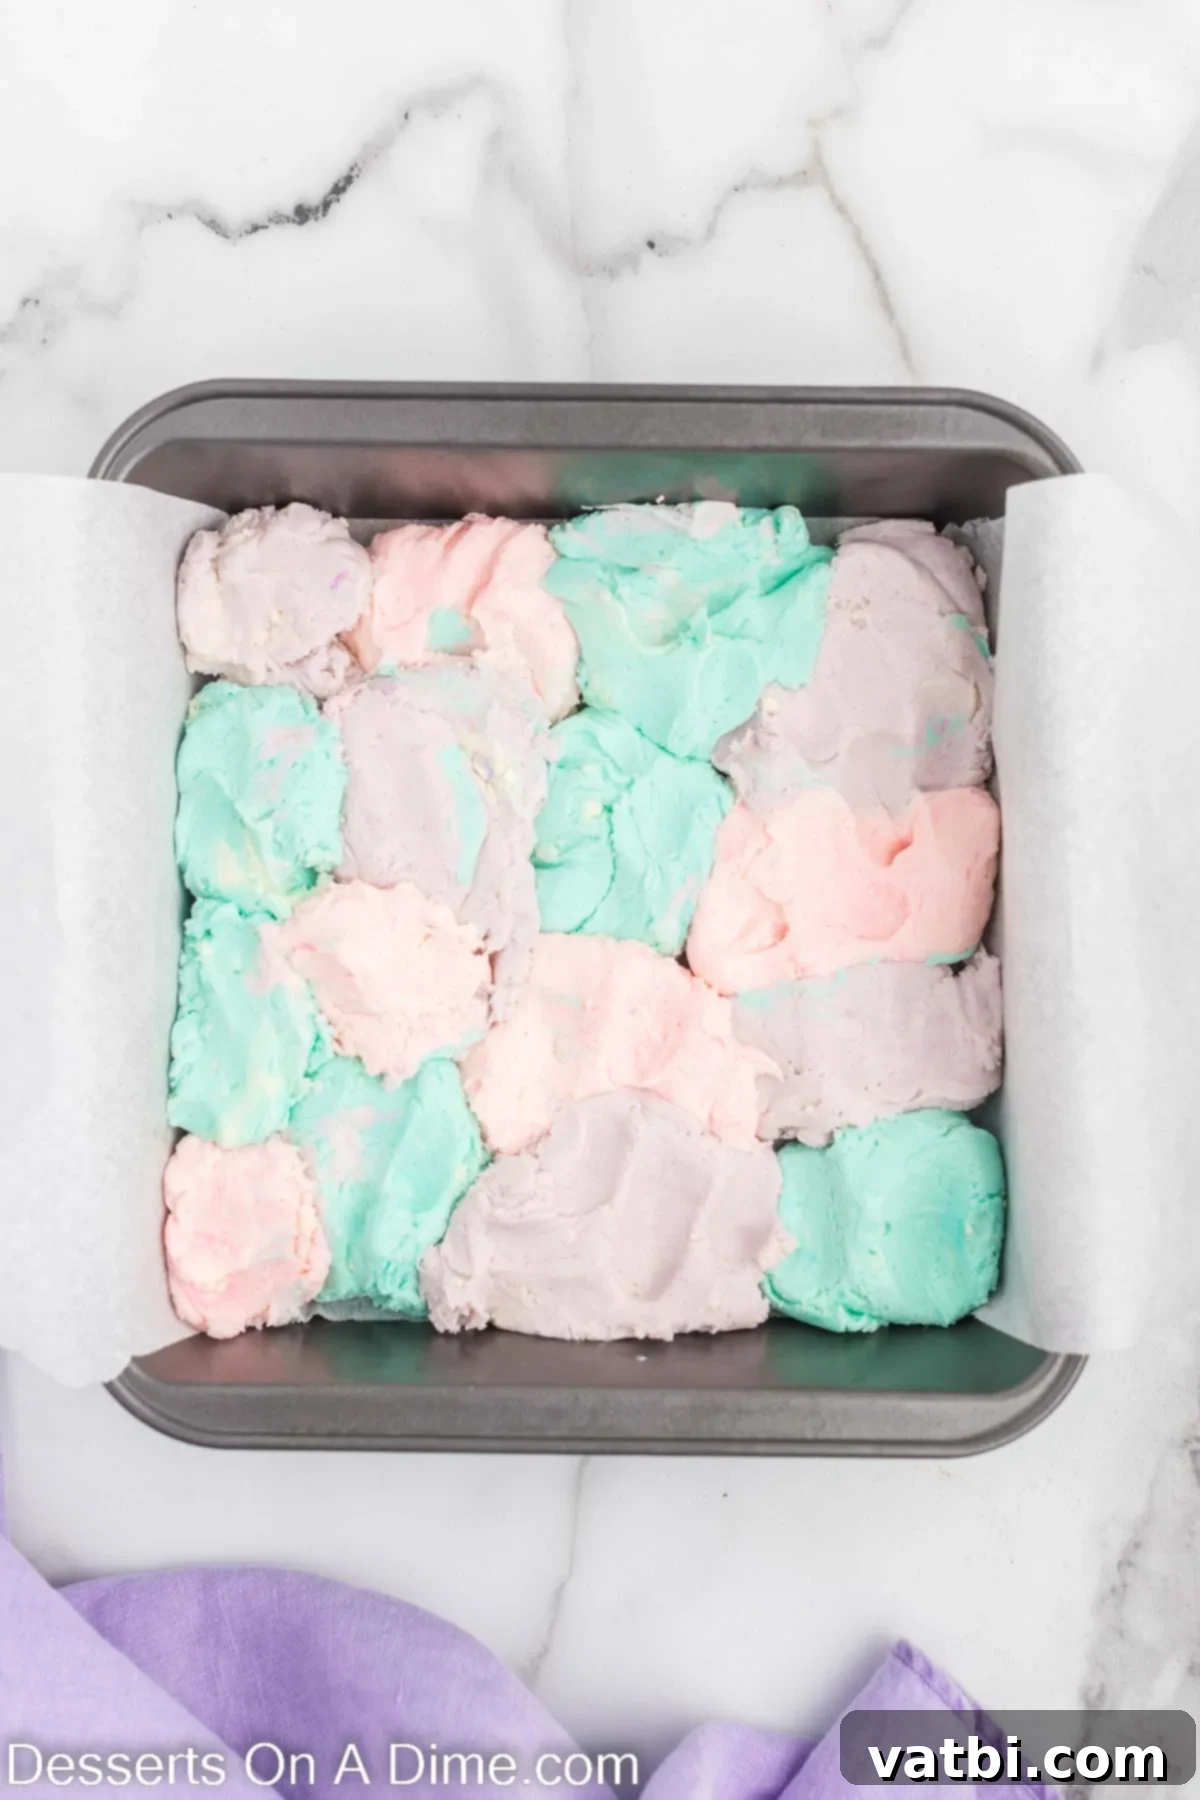
Step 5. Create Your Colorful Base in the Pan: Using a spoon, carefully and randomly dollop spoonfuls of each colored fudge mixture into your prepared 8×8 inch pan. There’s no need to be overly precise; the goal is to create an alternating and somewhat scattered pattern of colors across the pan. This random distribution will ensure beautiful, unique swirls when you gently mix them in the next step. Work relatively quickly here as the fudge continues to cool and firm up.
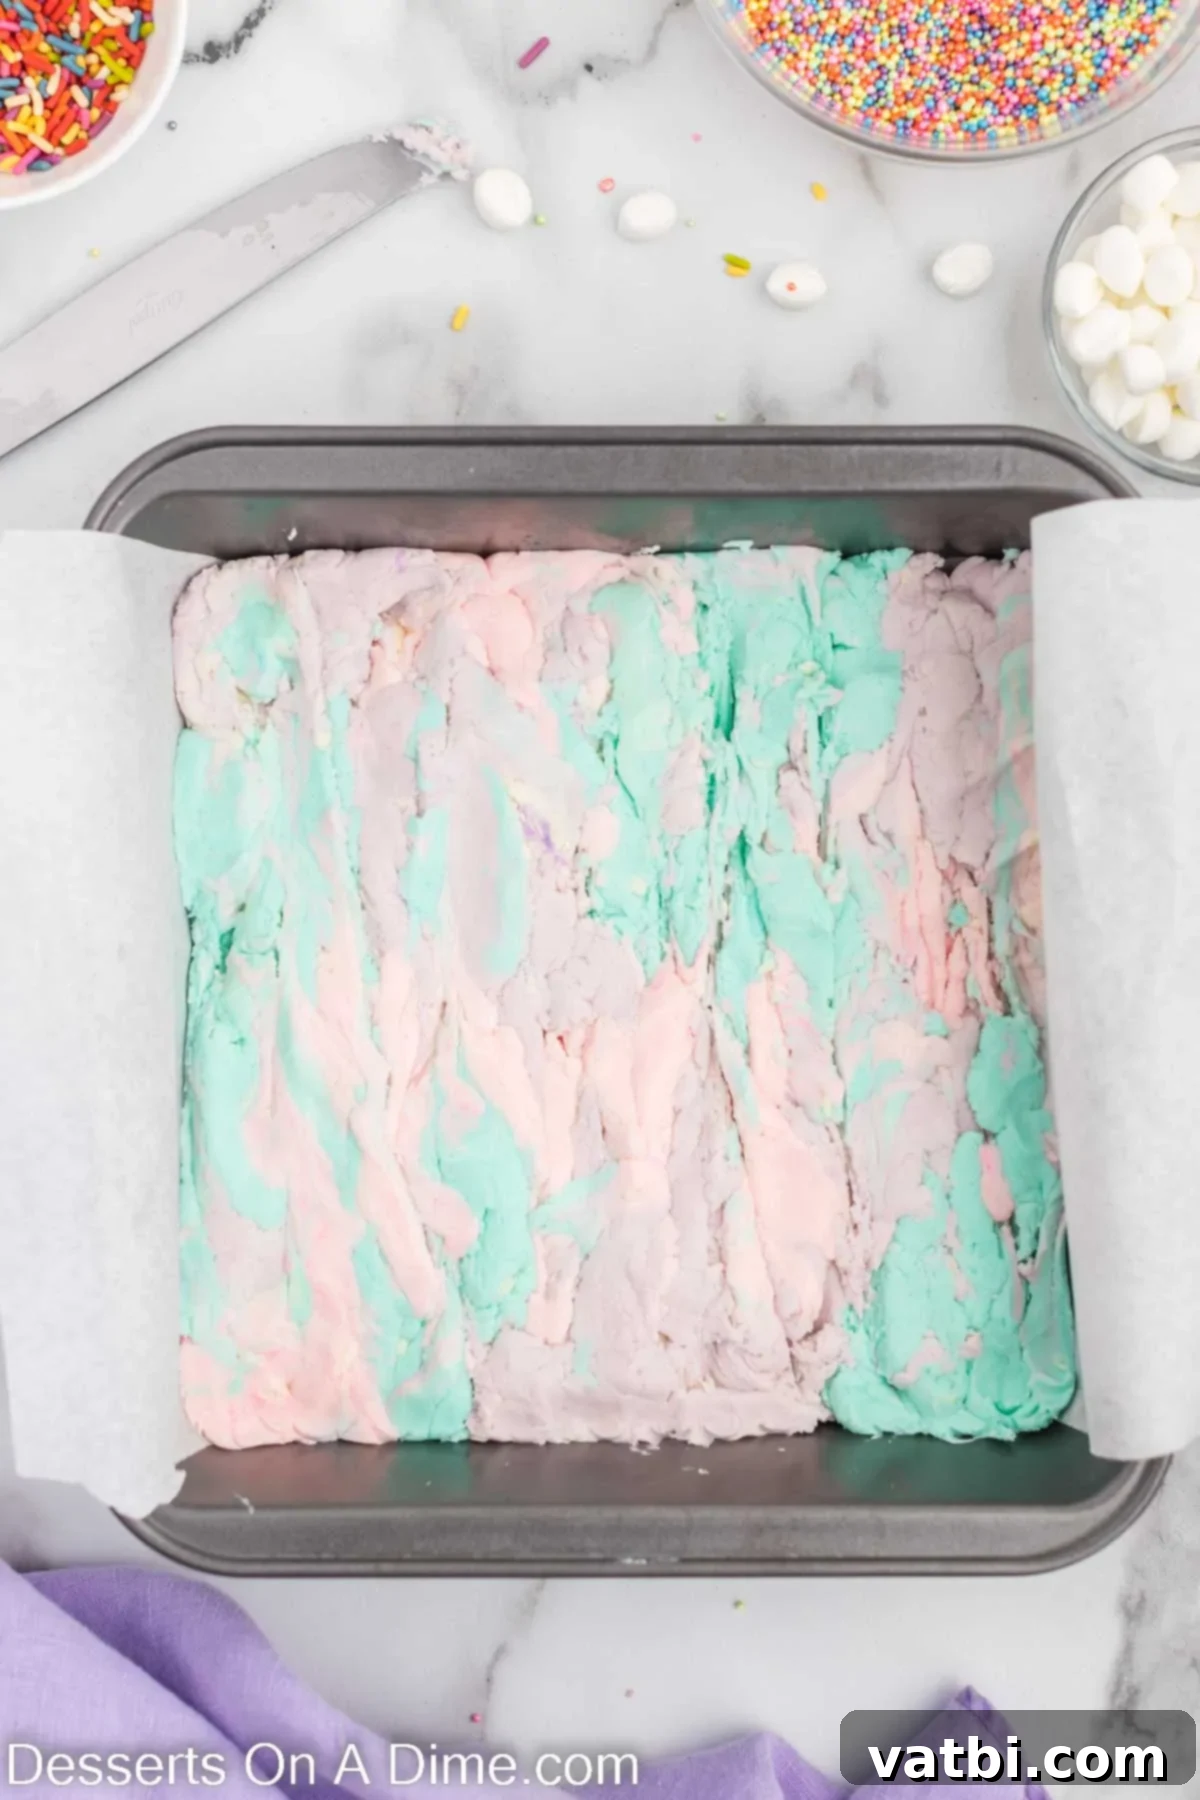
Step 6. Swirl the Magic: This is where the unicorn effect truly comes alive! Take a butter knife, a wooden skewer, or even a toothpick, and gently run it through the dolloped fudge in a swirling, figure-eight motion. The aim is to create beautiful, distinct marbled patterns, not to completely blend the colors. Swirl just enough to achieve that magical, wispy, and ethereal unicorn effect, ensuring the individual colors are still visible and vibrant. Avoid over-swirling at all costs, as this can cause the colors to mix into a less appealing, muddy brown hue.
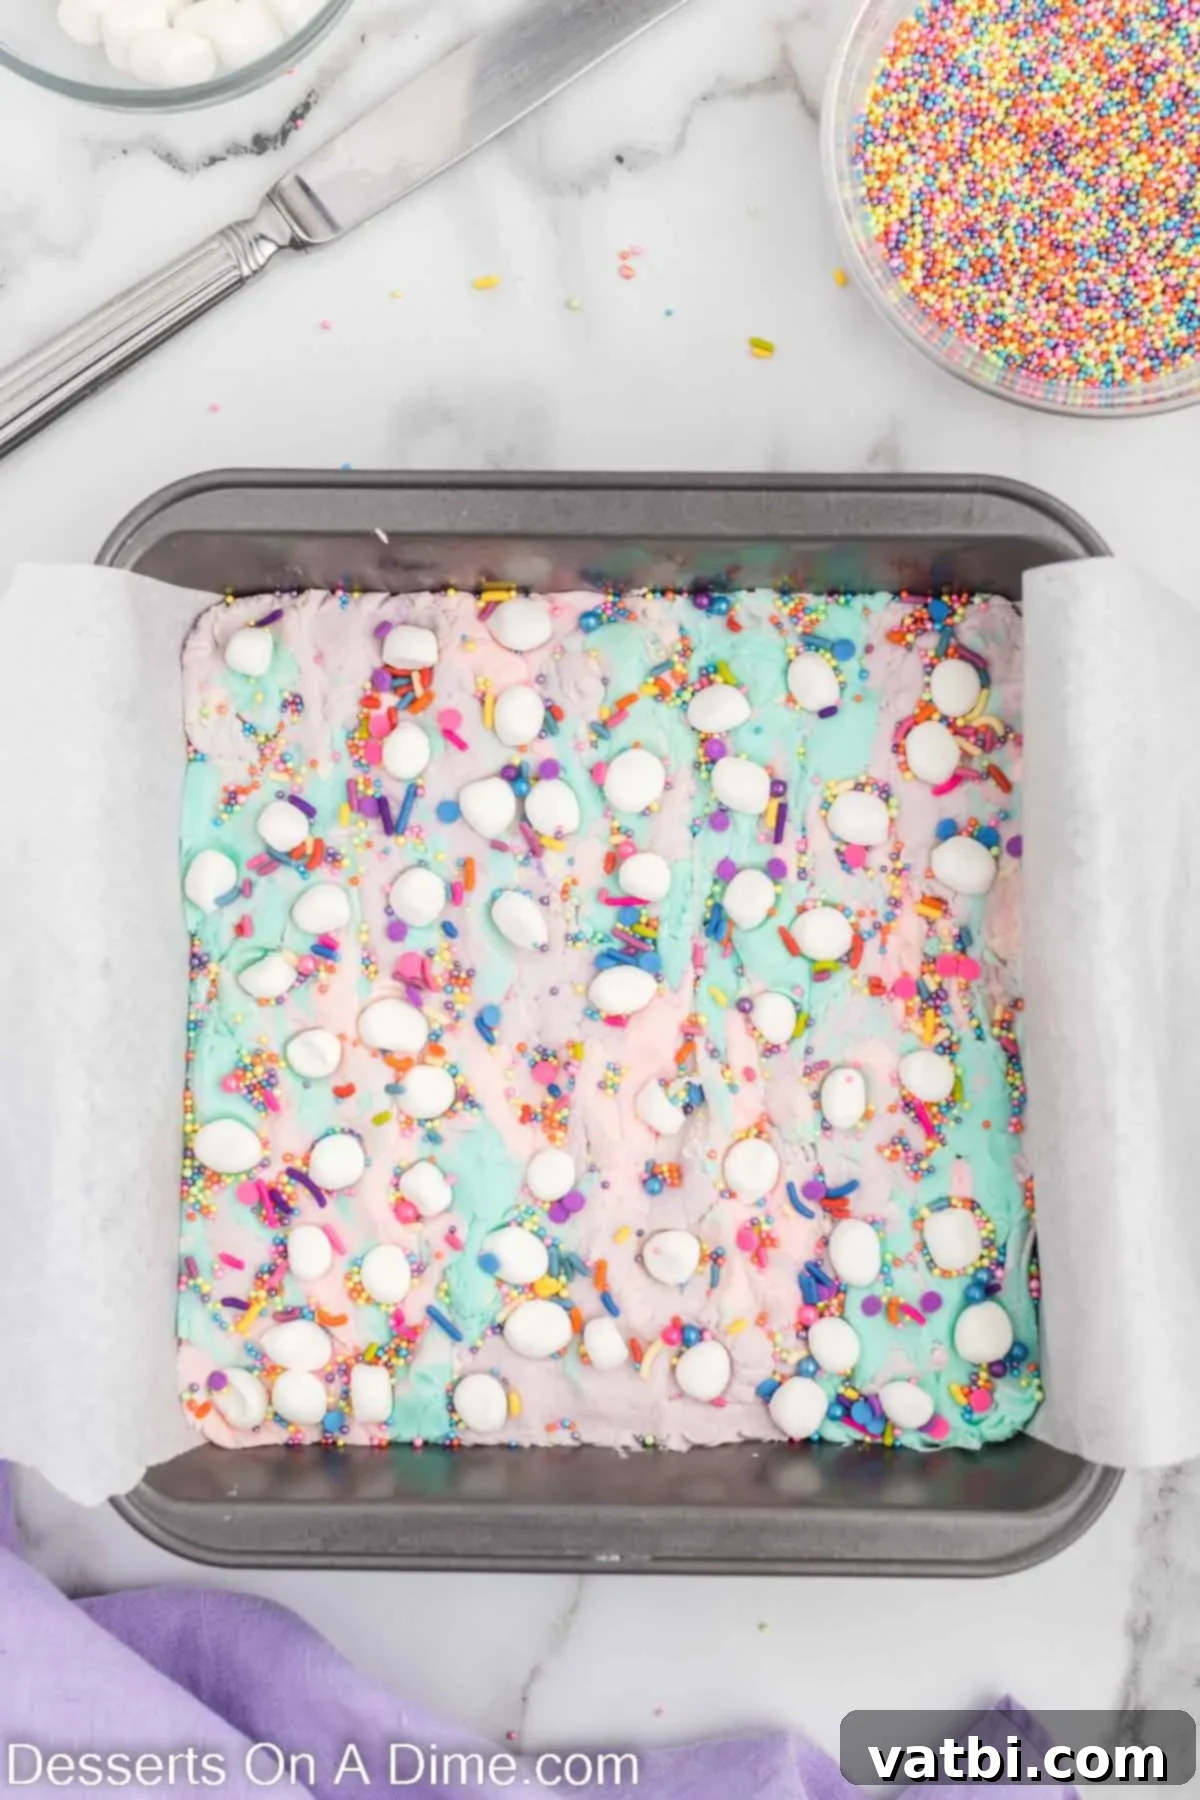
Step 7. Add Toppings and Chill to Perfection: Immediately after you’ve created your stunning swirls, generously sprinkle the mini marshmallows and rainbow sprinkles over the entire surface of the fudge. Gently press them down a little with your palm or a flat spatula to ensure they adhere securely to the still-soft fudge. This step needs to be done quickly, as the fudge will continue to firm up. Once topped, transfer the pan to the refrigerator and chill for a minimum of 2-3 hours, or until the fudge is completely firm and set. This crucial chilling time allows the fudge to fully firm up and hold its shape perfectly when cut.
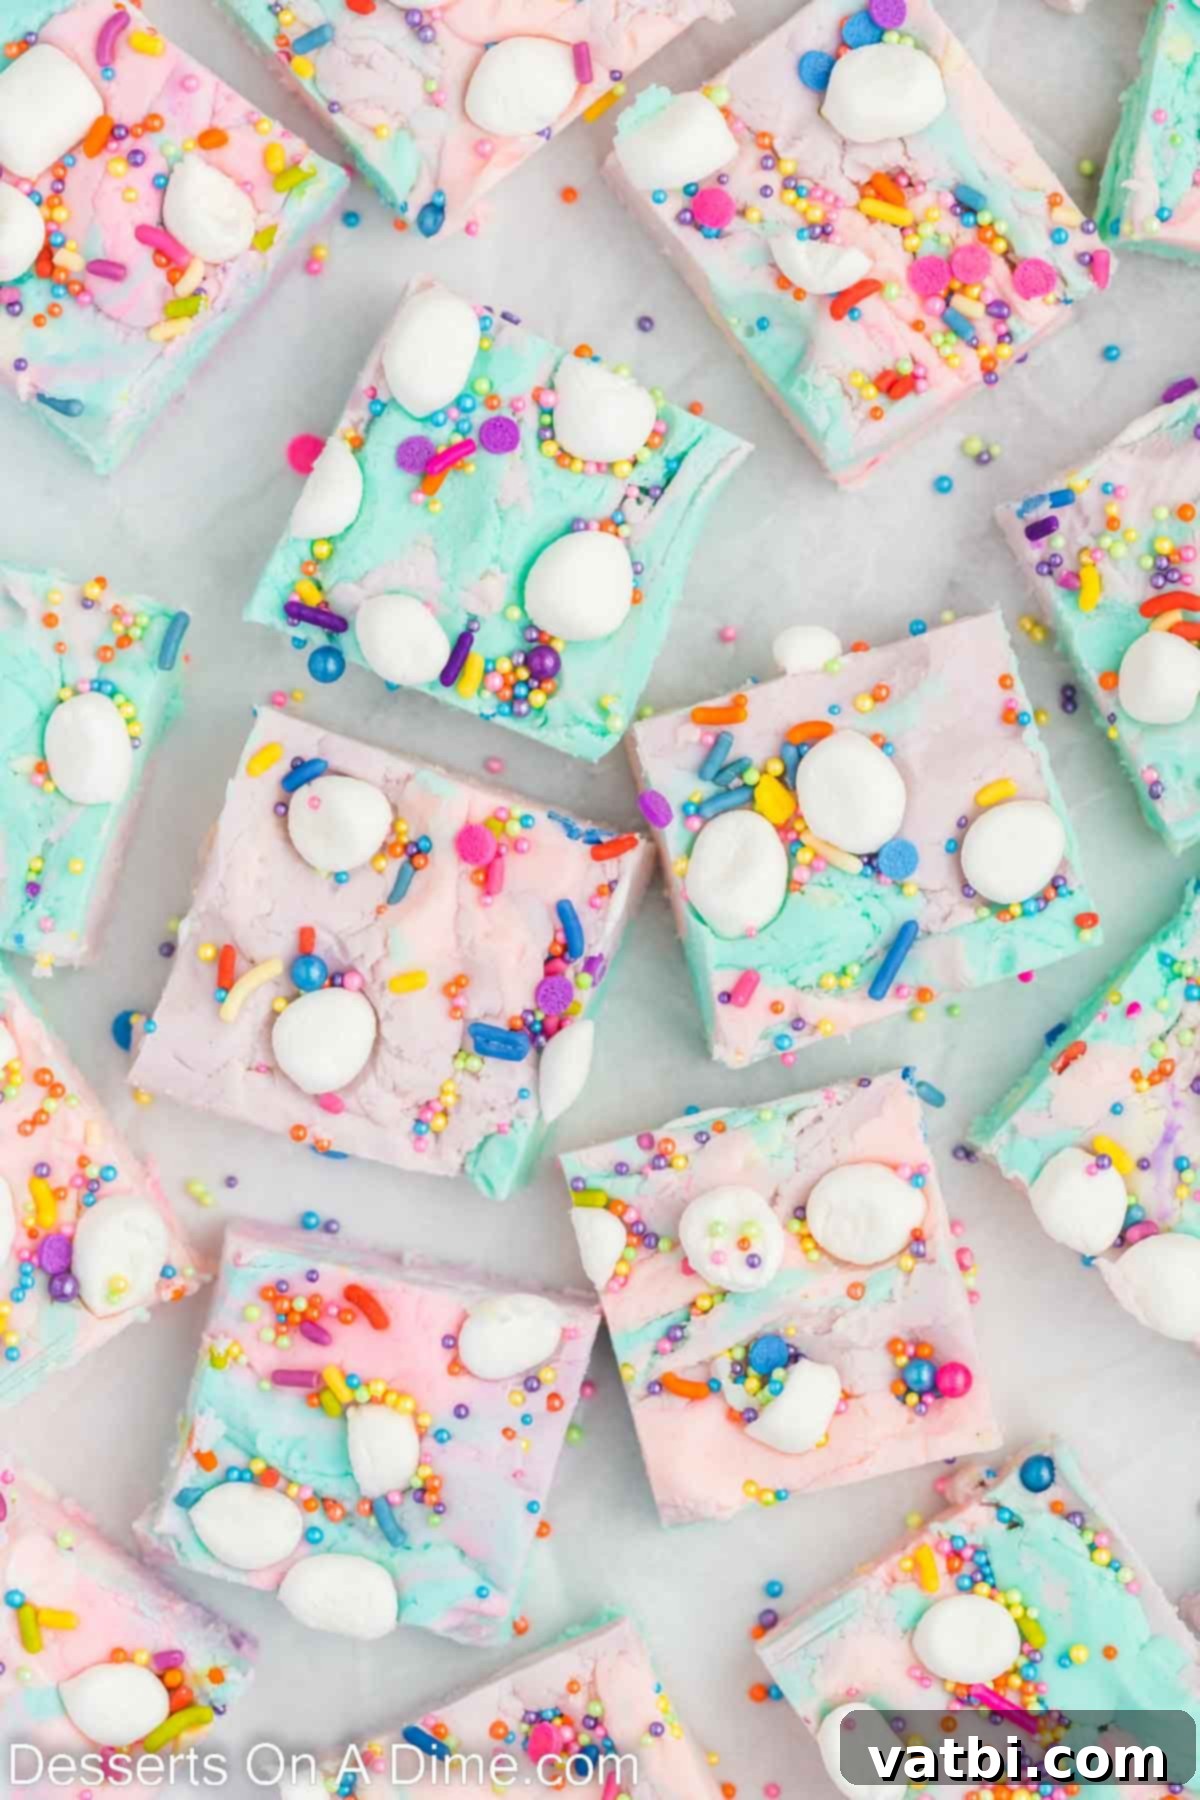
Once your unicorn fudge is perfectly chilled and firmly set, use the foil or parchment paper overhangs to gently lift the entire slab out of the baking pan. Place it on a clean cutting board, use a sharp knife to slice it into your desired squares or fun shapes, and prepare to delight in your homemade magical treat!
Proper Storage for Fresh Fudge
One of the many fantastic benefits of this no-bake unicorn fudge is its excellent shelf life, making it perfect for preparing ahead of parties or enjoying over an extended period. Proper storage ensures your fudge remains fresh, creamy, and as delicious as the day you made it:
- Room Temperature Storage (Up to 1 Month): For short to medium-term enjoyment, store any leftover unicorn fudge in an airtight container. Keep the container at cool room temperature, away from direct sunlight, heat sources, or excessive humidity, which could cause the fudge to soften or melt. When stored correctly on the countertop, your fudge will maintain its delicious quality for up to 1 month.
- Refrigeration (Up to 2 Months): While not strictly necessary for short-term storage, refrigerating the fudge can extend its freshness slightly and keep it firmer, especially in warmer climates or during humid periods. Store it in an airtight container in the refrigerator for up to 6-8 weeks. To enjoy the best, creamiest texture, allow the fudge to come to room temperature for about 15-20 minutes before serving. This softens it just enough for that melt-in-your-mouth experience.
- Freezing for Longer Periods (3-4 Months): For extended storage, unicorn fudge freezes beautifully without significant loss of quality. To freeze, first wrap individual pieces or layers of fudge tightly in plastic wrap to protect them from freezer burn. Then, place the wrapped pieces in a freezer-safe airtight container or a heavy-duty resealable freezer bag. Layering wax paper or parchment paper between the pieces will prevent them from sticking together. Properly frozen fudge can last for an impressive 3 to 4 months.
- Thawing Frozen Fudge: When you’re ready to enjoy your frozen fudge, simply remove it from the freezer and transfer it to the refrigerator overnight, or let it thaw gradually at room temperature for several hours. This slow, gentle thawing process is crucial as it helps maintain the fudge’s creamy texture and prevents it from becoming crumbly. Avoid thawing in the microwave, as rapid heating can alter the consistency and make the fudge greasy.
Expert Tips for Perfect Unicorn Fudge
Achieving that picture-perfect, delectable unicorn fudge is easier than you think, especially with a few insider tips. These pointers will help ensure your fudge turns out beautifully, with vibrant colors and a delightful creamy texture, every single time:
- Use a Sharp, Clean Knife for Cutting: For the cleanest, most precise cuts that truly showcase your vibrant swirls, always use a very sharp knife. For even smoother results and to prevent the fudge from sticking, warm the blade slightly under hot, running water, then wipe it completely dry before each cut. Wiping the blade clean between slices is also essential to prevent colors from smudging and to maintain distinct lines.
- Melt White Chocolate Gradually and Carefully: White chocolate is more delicate than milk or dark chocolate and is prone to seizing (thickening and becoming grainy) or burning if overheated. To ensure a smooth, luscious base for your fudge, always melt it in a microwave-safe bowl using short intervals of 15-30 seconds. Stir thoroughly after each interval, even if it doesn’t look fully melted. This gentle approach prevents overheating and ensures a perfect, creamy consistency.
- Swirl Gently, Don’t Overmix the Colors: The key to achieving those distinct, beautiful unicorn swirls is a light and artistic touch. Use a toothpick, a wooden skewer, or a butter knife to gently create patterns. You want to marble the colors, not blend them completely. Avoid excessive swirling, as this will cause the colors to mix too much, resulting in a muted, less magical, and often brownish appearance rather than vibrant, separated hues.
- Add Toppings While Fudge is Still Soft: Timing is everything when it comes to adhering your toppings. Ensure you have your marshmallows, sprinkles, or any other chosen decorations prepped and ready to go before you even start swirling the colors. Sprinkle them generously over the fudge immediately after swirling, and gently press them down with your palm or a flat spatula. This ensures they adhere firmly to the still-soft fudge before it begins to set and harden.
- Line Your Pan for Hassle-Free Removal: Do not skip lining your baking pan! Using parchment paper or aluminum foil with a generous overhang is a game-changer for this recipe. It not only makes lifting the entire slab of fudge out of the pan incredibly easy once it’s set, but it also simplifies cleanup significantly. A light spray of non-stick cooking spray on the liner adds an extra layer of protection against sticking.
- Work Efficiently and Be Prepared: Once the melted white chocolate and frosting are combined, the fudge mixture will start to cool and firm up relatively quickly. To avoid a stiff, unworkable mixture, ensure all your components – separate bowls, food colorings, and toppings – are prepped and within easy reach before you begin combining. Working swiftly ensures you have ample time to color, dollop, swirl, and top the fudge before it becomes too stiff to manipulate.
- Chill Thoroughly to Set Completely: Patience is a vital virtue when it comes to setting fudge. Refrigerate your fudge for a minimum of 2-3 hours, or even longer (up to 4 hours or ideally overnight) to ensure it’s completely firm throughout. A well-chilled fudge will cut cleanly without crumbling, hold its shape perfectly, and have that delightful, firm-yet-creamy texture you desire.
More Irresistible Easy Fudge Recipes
If you’ve fallen in love with the simplicity and deliciousness of this unicorn fudge, you’ll be thrilled to discover more easy fudge recipes to satisfy your sweet tooth and expand your no-bake dessert repertoire:
- Butterscotch Fudge: A rich and buttery classic that’s wonderfully nostalgic and incredibly easy to make.
- Peanut Butter Chocolate Chip Fudge: The ultimate sweet and salty combination, packed with delightful mini chocolate chips for extra texture.
- 2 Ingredient Chocolate Peanut Butter Fudge: Unbelievably simple and quick, yet incredibly satisfying for a fast and delicious fix.
- Sugar Cookie Fudge Recipe: Tastes just like your favorite frosted holiday cookies, transformed into a decadent fudge form.
- Harry Potter Butterbeer Fudge Recipe: A truly magical treat inspired by the wizarding world, perfect for fans and a unique flavor experience.
- Easy Rocky Road Fudge Recipe: A delightful mix of rich chocolate, chewy marshmallows, and crunchy nuts for a textural and flavor-packed delight.
This no-bake Unicorn Fudge recipe truly is as whimsical as it is delicious, bringing a touch of magic to any moment and making dessert time an enchanting experience. We hope you have as much fun making it as you will eating it! Give it a try, then come back to leave a comment and a star rating to let us know how your magical creation turned out. Your feedback helps other dessert lovers discover and enjoy this delightful, enchanting treat!
Pin Recipe
Print Recipe
Unicorn Fudge
Unicorn Fudge is a magical mix of easy ingredients. Rainbow Unicorn Fudge is perfect for parties and makes the best sweet treat.
- Prep Time
- 20 mins
- Refrigerate Time
- 2 hrs
- Total Time
- 2 hrs 20 mins
- Servings
- 24
- Cuisine
- American
- Course
- Dessert
- Calories
- 116 kcal
- Author
- Carrie Barnard
Ingredients
- 12 oz White Chocolate Chips
- 1 Container White Frosting (vanilla)
- Pink, Purple, and Blue Food Coloring (gel recommended)
- ½ cup miniature marshmallows
- Rainbow Sprinkles
Instructions
- Line an 8X8 baking dish with foil or parchment paper, leaving an overhang on the sides, and spray with a non-stick cooking spray for easy removal of the fudge.
- Melt the white chocolate chips in a microwave-safe bowl. Heat in 30-second increments, stirring thoroughly between each, until the chocolate is completely melted and smooth. Avoid overcooking the white chocolate.
- Stir in the vanilla frosting until thoroughly combined and smooth.
- Then, separate the mixture evenly into 3 bowls.
- Stir in the pink food coloring into one bowl, purple into another, and blue into the third until each bowl reaches your desired vibrant shade.
- Drop spoonfuls of each colored fudge mixture into the prepared 8X8 pan using a random, alternating pattern.
- Take a knife or skewer and gently run it through the fudge to create a beautiful swirl pattern. Avoid over-swirling to maintain distinct colors.
- Quickly top the fudge with the miniature marshmallows and rainbow sprinkles. Gently press them down into the fudge to ensure they stick.
- Refrigerate the fudge for 2-3 hours (or until fully set) to firm up.
- Once set, use the foil or parchment paper overhang to lift the fudge from the pan. Cut into squares and enjoy your magical treat!
Recipe Notes
Store leftover unicorn fudge in an airtight container at room temperature for up to 1 month, or freeze for 3-4 months. If frozen, thaw at room temperature before serving for the best texture.
Nutrition Facts
- Calories
- 116 kcal
- Carbohydrates
- 15 g
- Protein
- 1 g
- Fat
- 6 g
- Saturated Fat
- 3 g
- Polyunsaturated Fat
- 1 g
- Monounsaturated Fat
- 2 g
- Cholesterol
- 3 mg
- Sodium
- 29 mg
- Potassium
- 43 mg
- Fiber
- 0.03 g
- Sugar
- 14 g
- Vitamin A
- 4 IU
- Vitamin C
- 0.1 mg
- Calcium
- 29 mg
- Iron
- 0.1 mg
Pin This Now to Remember It Later
Pin Recipe
