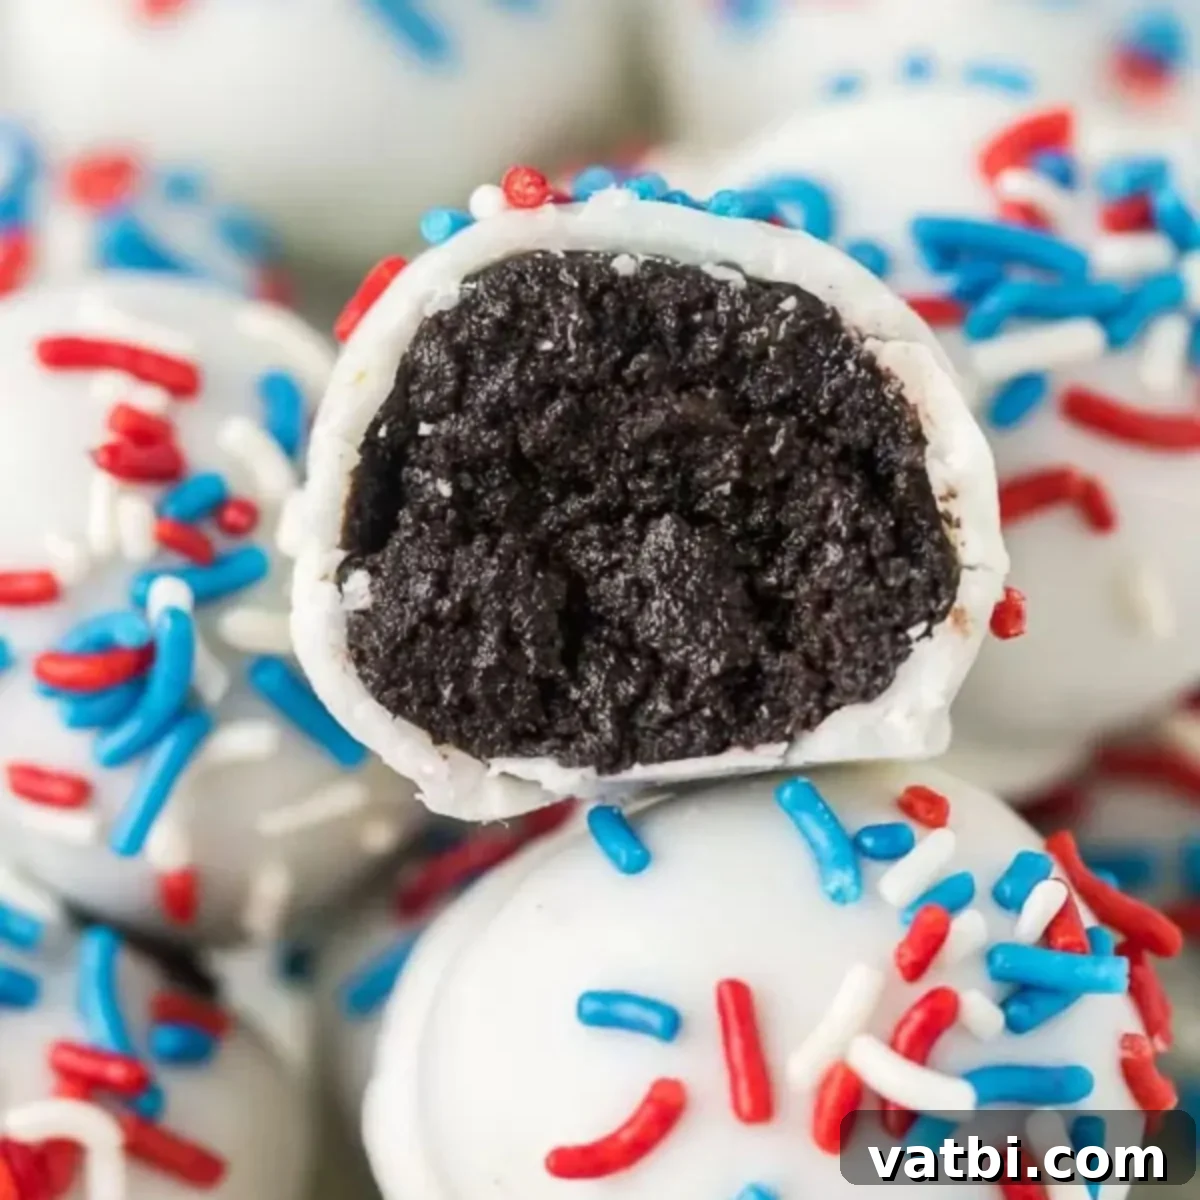
Easy Patriotic Oreo Balls: Your Ultimate No-Bake 4th of July Dessert!
Prepare to wow your guests with these incredibly easy and festive Patriotic Oreo Balls! Requiring just four simple ingredients, this creamy, delicious, and visually stunning treat is perfect for celebrating national holidays. Whether you’re planning a 4th of July barbecue, a Memorial Day gathering, or simply want a vibrant, no-bake dessert, these Oreo truffles are sure to be a hit. They combine the classic irresistible flavor of Oreo cookies with a patriotic twist of white chocolate and a shower of red, white, and blue sprinkles.
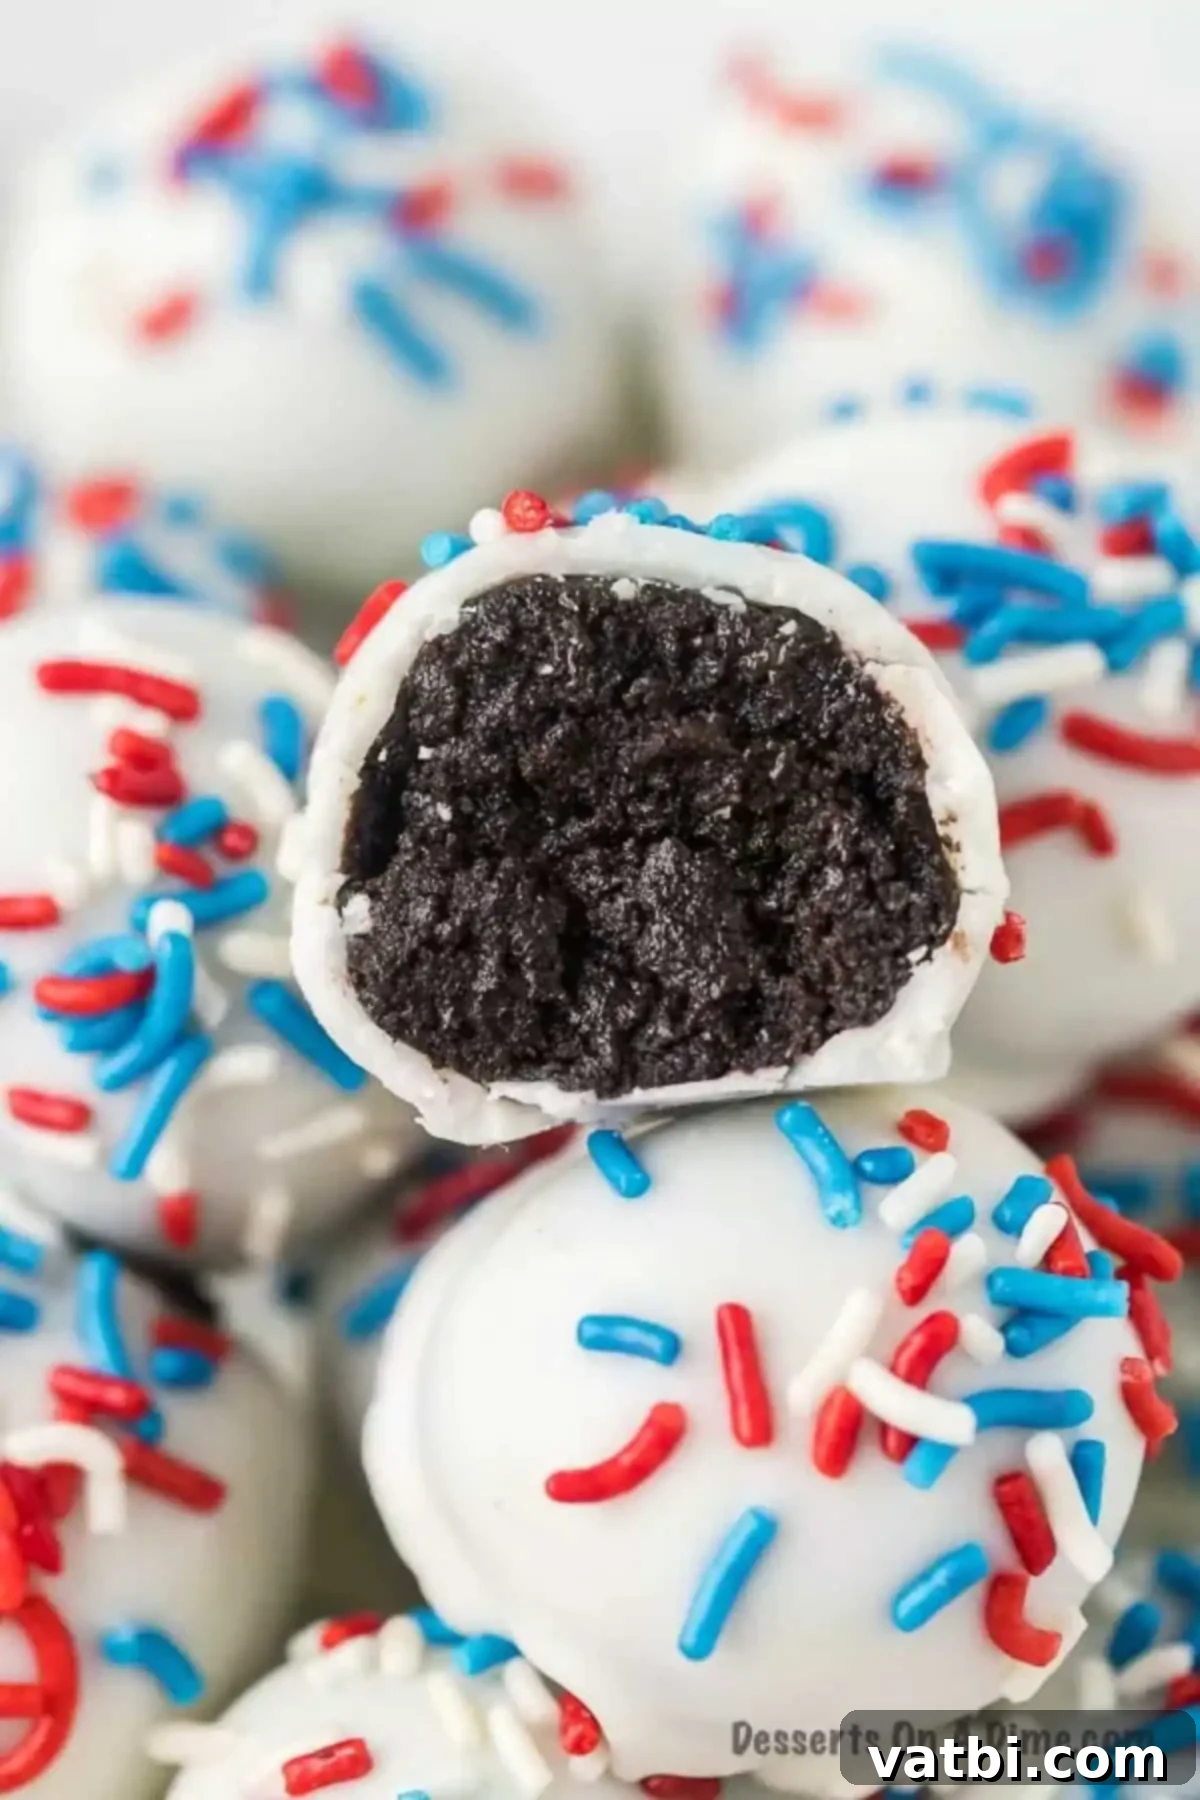
The beauty of this recipe lies in its simplicity and versatility. Traditional Oreo Balls have long been a crowd-pleaser, known for their rich flavor and minimal effort. I envisioned how delightful they would look adorned in a striking red, white, and blue theme, transforming a beloved classic into the quintessential no-bake dessert recipe for summer holidays like the 4th of July and Memorial Day. This festive version offers all the familiar deliciousness of the original, enhanced with a smooth white chocolate coating and vibrant patriotic sprinkles that truly make them shine. They’re an effortless way to add a celebratory touch to any spread, and their bite-sized nature makes them incredibly easy for guests of all ages to enjoy.
These festive truffles will instantly elevate any dessert table. Imagine them artfully arranged on baking trays and platters, alongside other themed treats like Red White and Blue Chocolate Covered Pretzels, Patriotic Whoopie Pies, or even a delightful assortment of Red White and Blue Desserts. Their eye-catching appearance and delightful taste make them a perfect contribution to any patriotic celebration. If you’re a fan of Oreo-based desserts and appreciate an easy, satisfying recipe, you might also enjoy our Oreo Dirt Cake Recipe for another family-favorite treat that consistently earns rave reviews.
Table of Contents
- Why This Recipe Works
- Ingredients You’ll Need
- Fun & Easy Variations
- Step-by-Step Instructions for Perfect Oreo Balls
- Storage Tips for Freshness
- Expert Pro Tips for Success
- More Delicious Oreo Desserts to Try
Why This Recipe Works: Simple, Delicious, and Perfectly Festive
This Patriotic Oreo Balls recipe is a true culinary marvel for a multitude of compelling reasons. Foremost, its simplicity is unmatched – it requires just four readily available ingredients and absolutely no baking! If you’ve ever had the pleasure of preparing our traditional Oreo Balls recipe, you’re already familiar with just how effortlessly delicious and straightforward they are to make. This festive iteration takes that beloved simplicity and elevates it with a vibrant, celebratory flair, making it the ideal dessert for any special occasion that calls for a touch of red, white, and blue.
The magic happens with the perfect synergy of crushed Oreo cookies and softened cream cheese, which unite to create an irresistibly rich, dense, and creamy truffle-like center. This smooth filling forms the heart of each treat, offering a delightful contrast to the crisp outer shell. The coating, a luscious layer of white almond bark or melting wafers, provides a sweet, smooth finish that sets quickly, encasing the creamy interior in a beautiful, pristine white. Finally, the generous scattering of red, white, and blue sprinkles not only makes these Oreo Balls visually stunning but also adds a delightful, playful crunch and an extra burst of sugary charm. It’s a truly foolproof dessert that comes together with remarkable speed, allowing you to spend less time in the kitchen and more time enjoying the festivities with your loved ones!
Essential Ingredients You’ll Need for Patriotic Oreo Balls
You’ll be genuinely amazed at how such a concise list of humble ingredients can transform into such a spectacular and crowd-pleasing dessert. Each component selected for this recipe plays a crucial, distinct role in achieving the perfect balance of texture, flavor, and festive appeal for these delightful no-bake truffles.
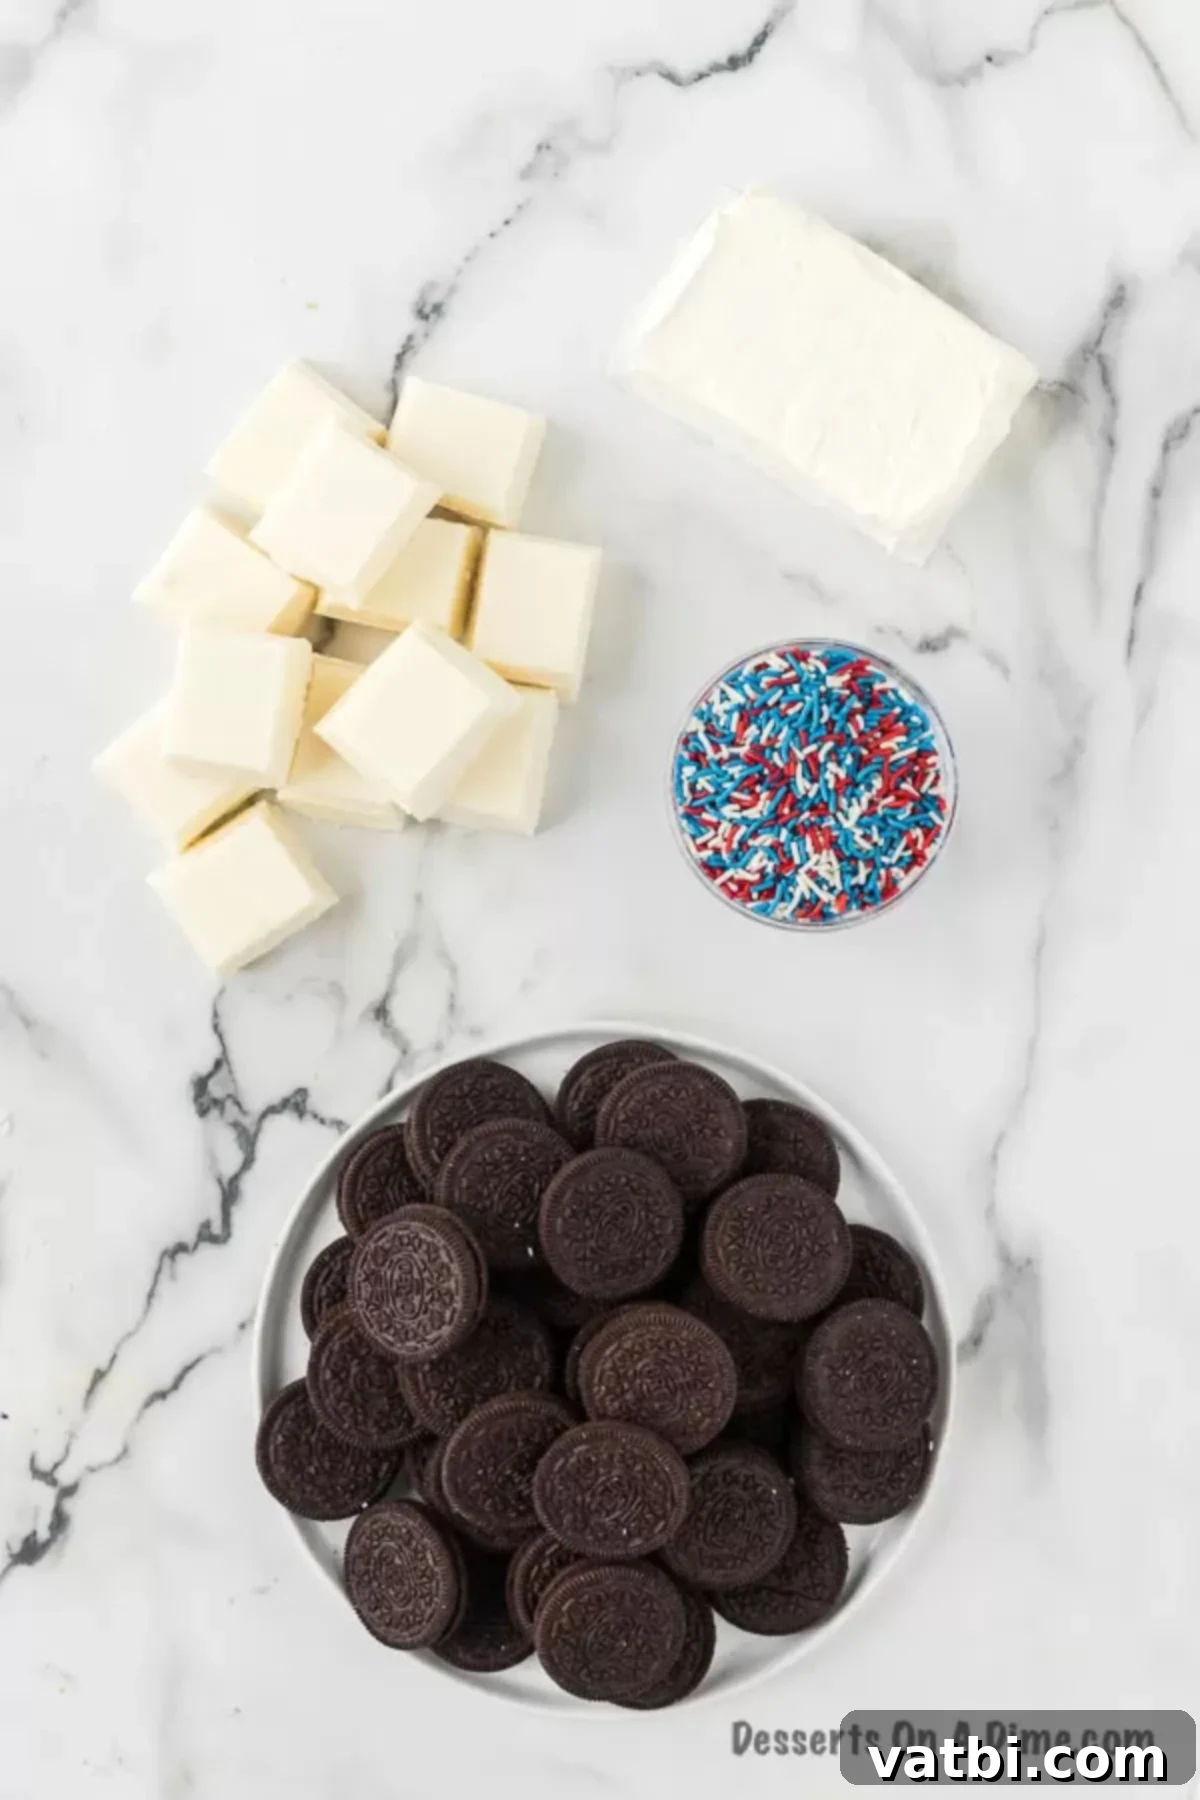
- Cream Cheese: For optimal results, it is absolutely essential that your cream cheese is softened to room temperature. This seemingly small detail is paramount for achieving a perfectly smooth, homogeneous, and lump-free mixture when it’s combined with the finely crushed cookie crumbs. If the cream cheese is too cold, it will resist blending evenly, leading to an undesirably chunky and uneven truffle texture. We highly recommend using full-fat cream cheese for the creamiest, richest, and most decadent flavor profile, which truly elevates the overall taste of these Oreo Balls.
- Oreo Cookies: A standard 14.3 to 15.3 oz package of original Oreo cookies is the ideal choice for this recipe. It is very important to consciously avoid using “double stuffed” or any other extra-filled varieties of Oreos. The increased amount of cream filling in these variations can significantly alter the overall consistency of your cookie-cream cheese mixture, making it excessively soft, overly moist, and consequently much harder to form into firm, cohesive balls that hold their shape. Sticking to the classic ensures the perfect balance and structural integrity for your truffles.
- White Almond Bark: This ingredient is your secret weapon for creating a flawlessly smooth, easily meltable, and quick-setting coating. White almond bark, often marketed as vanilla candy coating or confectionery coating, melts beautifully into a liquid consistency and hardens rapidly, providing a crisp, sweet, and aesthetically pleasing shell for your Oreo Balls. If white almond bark is unavailable, high-quality white melting wafers or white chocolate chips can serve as suitable alternatives. When using white chocolate chips, consider adding a tiny amount (about a teaspoon) of coconut oil or vegetable shortening to aid in achieving a smoother, more fluid, and dippable consistency.
- Red, White, and Blue Sprinkles: These vibrant sprinkles are not merely decorative; they are absolutely essential for imbuing your Oreo Balls with their unmistakable festive patriotic appearance! You have a wide array of choices: a classic mix of jimmie sprinkles, delicate nonpareils, or even specially themed sprinkle mixes explicitly designed for the 4th of July or Memorial Day. The brighter and more diverse the sprinkle assortment, the better! These sprinkles contribute not only a burst of color but also a delightful, subtle textural contrast that enhances each bite.
For the complete, precise list of ingredients and their exact measurements, please refer to the comprehensive printable recipe card conveniently located at the bottom of this page. This easy recipe typically yields approximately 3 dozen delightfully delicious and patriotic Oreo truffles, making it perfect for sharing at any festive gathering!
Fun & Easy Variations for Any Occasion Imaginable
While these Patriotic Oreo Balls are undeniably fantastic and perfectly satisfying in their original form, the inherent brilliance of this base recipe lies in its incredible adaptability. It’s remarkably easy to modify them to perfectly suit virtually any holiday, theme, or even your personal taste preferences. Don’t be afraid to unleash your creativity with these wonderfully versatile ideas!
- Sprinkles Galore for Every Holiday: The sprinkles are arguably the most transformative element, allowing these Oreo Balls to effortlessly transition from one celebration to another. Break free from patriotic colors for a moment! For festive Christmas treats, adorn them with a cheerful blend of red and green sprinkles. Valentine’s Day practically begs for charming pink and red heart-shaped sprinkles or delicate nonpareils. Soft pastel hues are absolutely perfect for celebrating Easter or a joyous spring-themed gathering. And when Halloween rolls around, think spooky black and vibrant orange sprinkles to create eerie yet delicious bites. The sheer breadth of possibilities is truly endless, empowering you to perfectly customize these delightful treats for any event you can dream up!
- Diverse Chocolate Coating Options: If the subtle sweetness of white chocolate isn’t your preferred choice, or if you’re looking to introduce an additional layer of complex flavor, consider dipping these delectable Oreo truffles in rich milk chocolate or decadent dark chocolate. A coating of smooth milk chocolate provides a more comforting, classic flavor profile that many adore, while a dark chocolate shell introduces a sophisticated, slightly bitter contrast that beautifully balances the sweetness of the Oreo filling. You can also experiment by dipping them in one type of chocolate and then artfully drizzling another contrasting color of melted chocolate or vibrant candy melts on top, either in place of or as an exquisite addition to the sprinkles.
- Explore the World of Oreo Cookie Flavors: While I remain a steadfast devotee of the traditional Oreo cookie for its iconic taste, the astonishing array of innovative Oreo flavors available today opens up an exciting new universe of possibilities for these truffles. Imagine crafting a celebratory treat using fun Birthday Cake Oreos, infusing a delightful nutty essence with Peanut Butter Oreos, or achieving a stunningly beautiful crimson center with Red Velvet Oreos. Golden Oreos, with their vanilla base, offer a wonderfully neutral canvas that pairs exceptionally well with a variety of brightly colored candy melts. Don’t hesitate to experiment with seasonal flavors to perfectly match the time of year – imagine the cozy appeal of pumpkin spice Oreos for autumn gatherings! Just always remember to opt for standard-filled Oreo varieties to ensure the optimal and most consistent truffle texture.
- Get Creative with Extra Toppings: Beyond the charming simplicity of sprinkles, there are numerous imaginative ways to crown these delightful treats. For an extra pop of patriotic flair, artfully drizzle melted blue candy melts or vibrant red candy melts over the hardened white chocolate coating. For precision and elegance, you can utilize a small piping bag (or even a makeshift one fashioned from a Ziploc bag with a tiny corner snipped off) to create neat, intricate lines or patterns. For a more dramatic and bold visual statement, consider dipping the entire ball in one of these striking colored candy melts and then artfully drizzling contrasting white chocolate lines on top for a truly stunning visual effect. Other tempting additions could include finely crushed nuts for added texture, mini chocolate chips for a double dose of chocolate, or even a delicate dusting of powdered sugar for a touch of classic elegance.
Step-by-Step Instructions for Perfectly Patriotic Oreo Balls
Creating these delightful no-bake Oreo truffles is an incredibly straightforward and enjoyable process. By diligently following these detailed, easy-to-understand steps, you’ll be guaranteed to produce perfectly formed, deliciously rich, and wonderfully festive treats every single time. Gather all your ingredients and tools, and let’s embark on this fun culinary adventure!
- Step 1: Prepare Your Baking Sheet. Before you even think about mixing, take a moment to prepare your workspace. Line a baking sheet or a large, flat cutting board with parchment paper. This non-stick surface is absolutely essential for several reasons: it prevents your formed Oreo balls from sticking, ensures your chocolate-dipped truffles lift off cleanly without damage, and makes for significantly easier cleanup later on. Alternatively, wax paper can also be used effectively. Once prepared, set this aside as your designated workstation for both forming and chilling your delicious truffles.
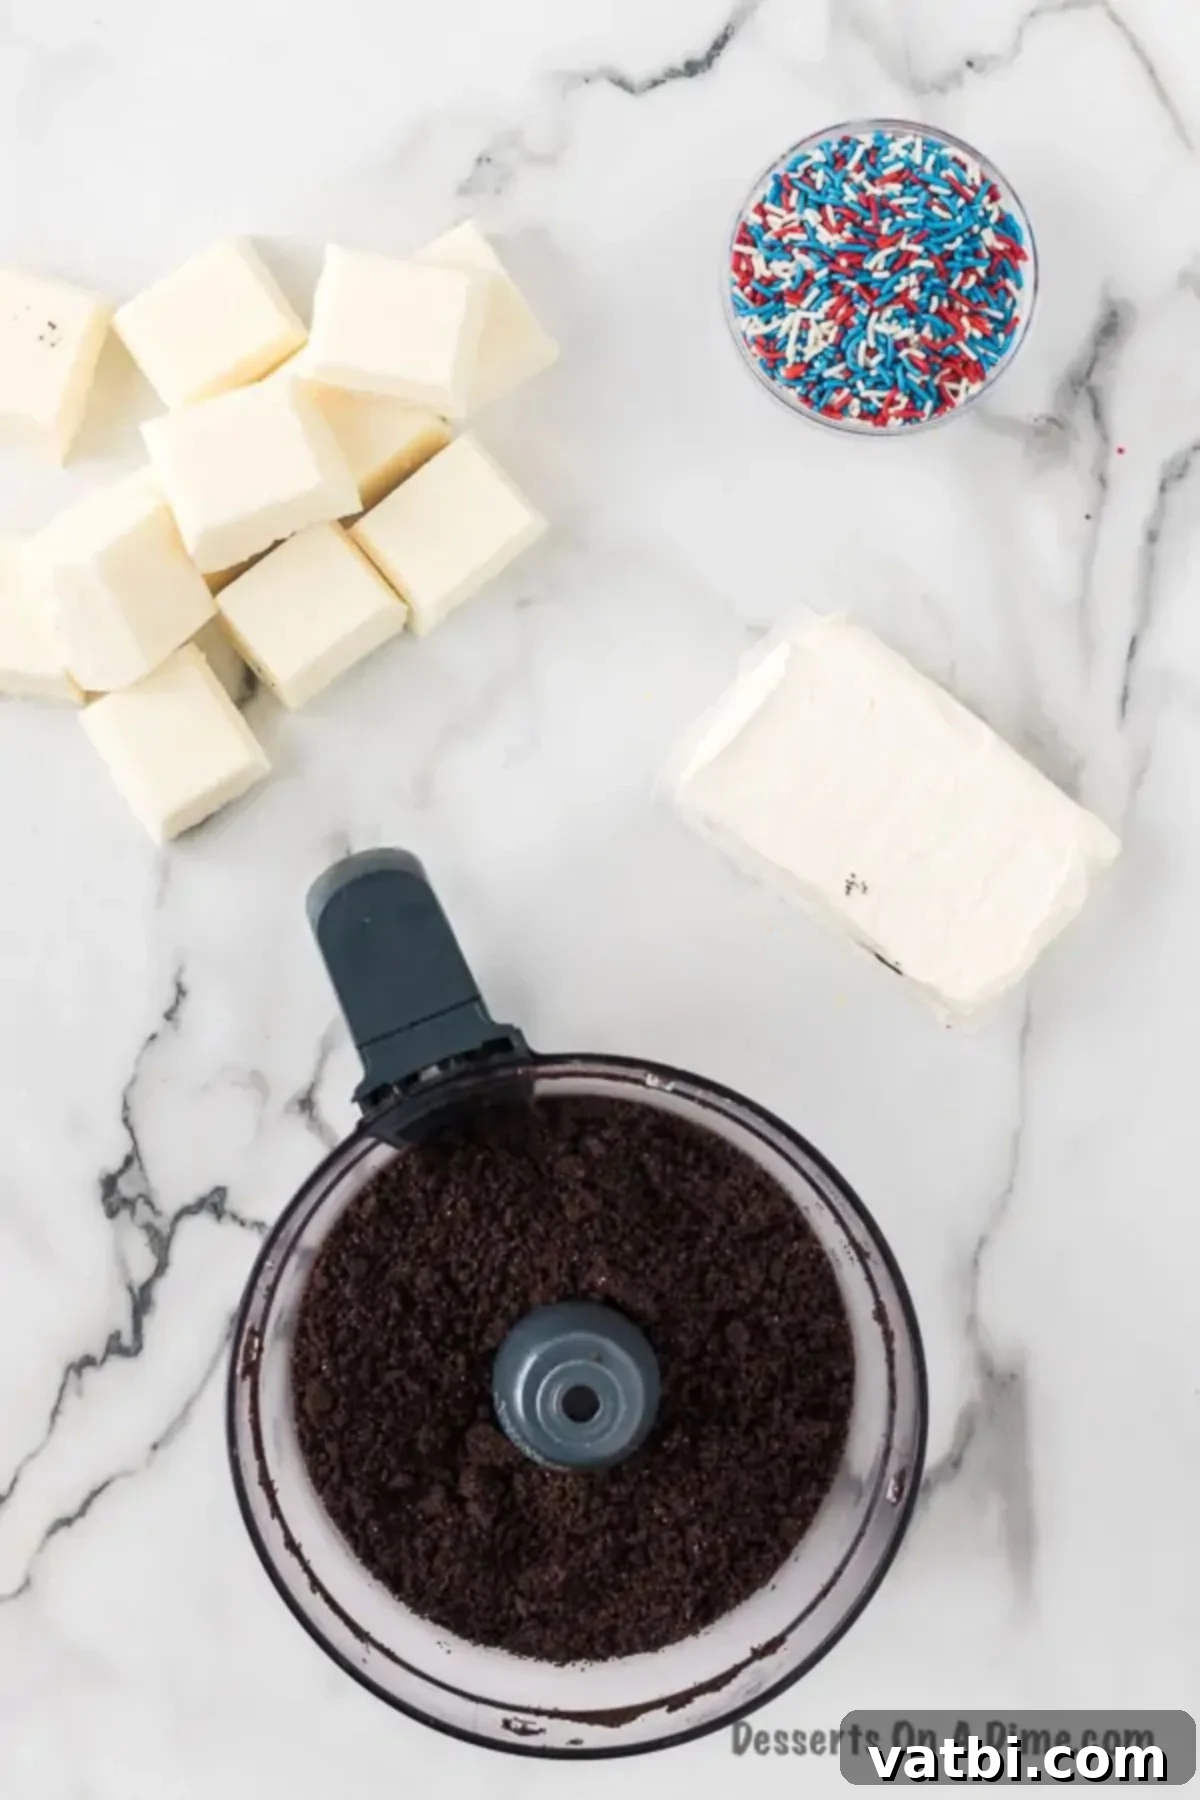
Step 2: Crush the Oreo Cookies into Fine Crumbs. The next critical step is to efficiently transform your entire package of Oreo cookies into a heap of perfectly fine crumbs. The absolute easiest and fastest method to achieve this uniform consistency is by utilizing a food processor. Simply add the whole Oreo cookies (yes, cream filling and all – no need to separate them!) directly into the food processor bowl and pulse them repeatedly until they resemble fine, powdery, and even crumbs. A powerful blender can also perform this task quite effectively. If you happen to lack either of these appliances, don’t fret! You can still achieve great results by placing the cookies in a large, sturdy Ziploc bag, sealing it securely, and then crushing them thoroughly with a rolling pin or the bottom of a heavy glass. The key is to ensure there are absolutely no large chunks or pieces remaining, as consistently fine crumbs are crucial for a smooth and delightful truffle texture.
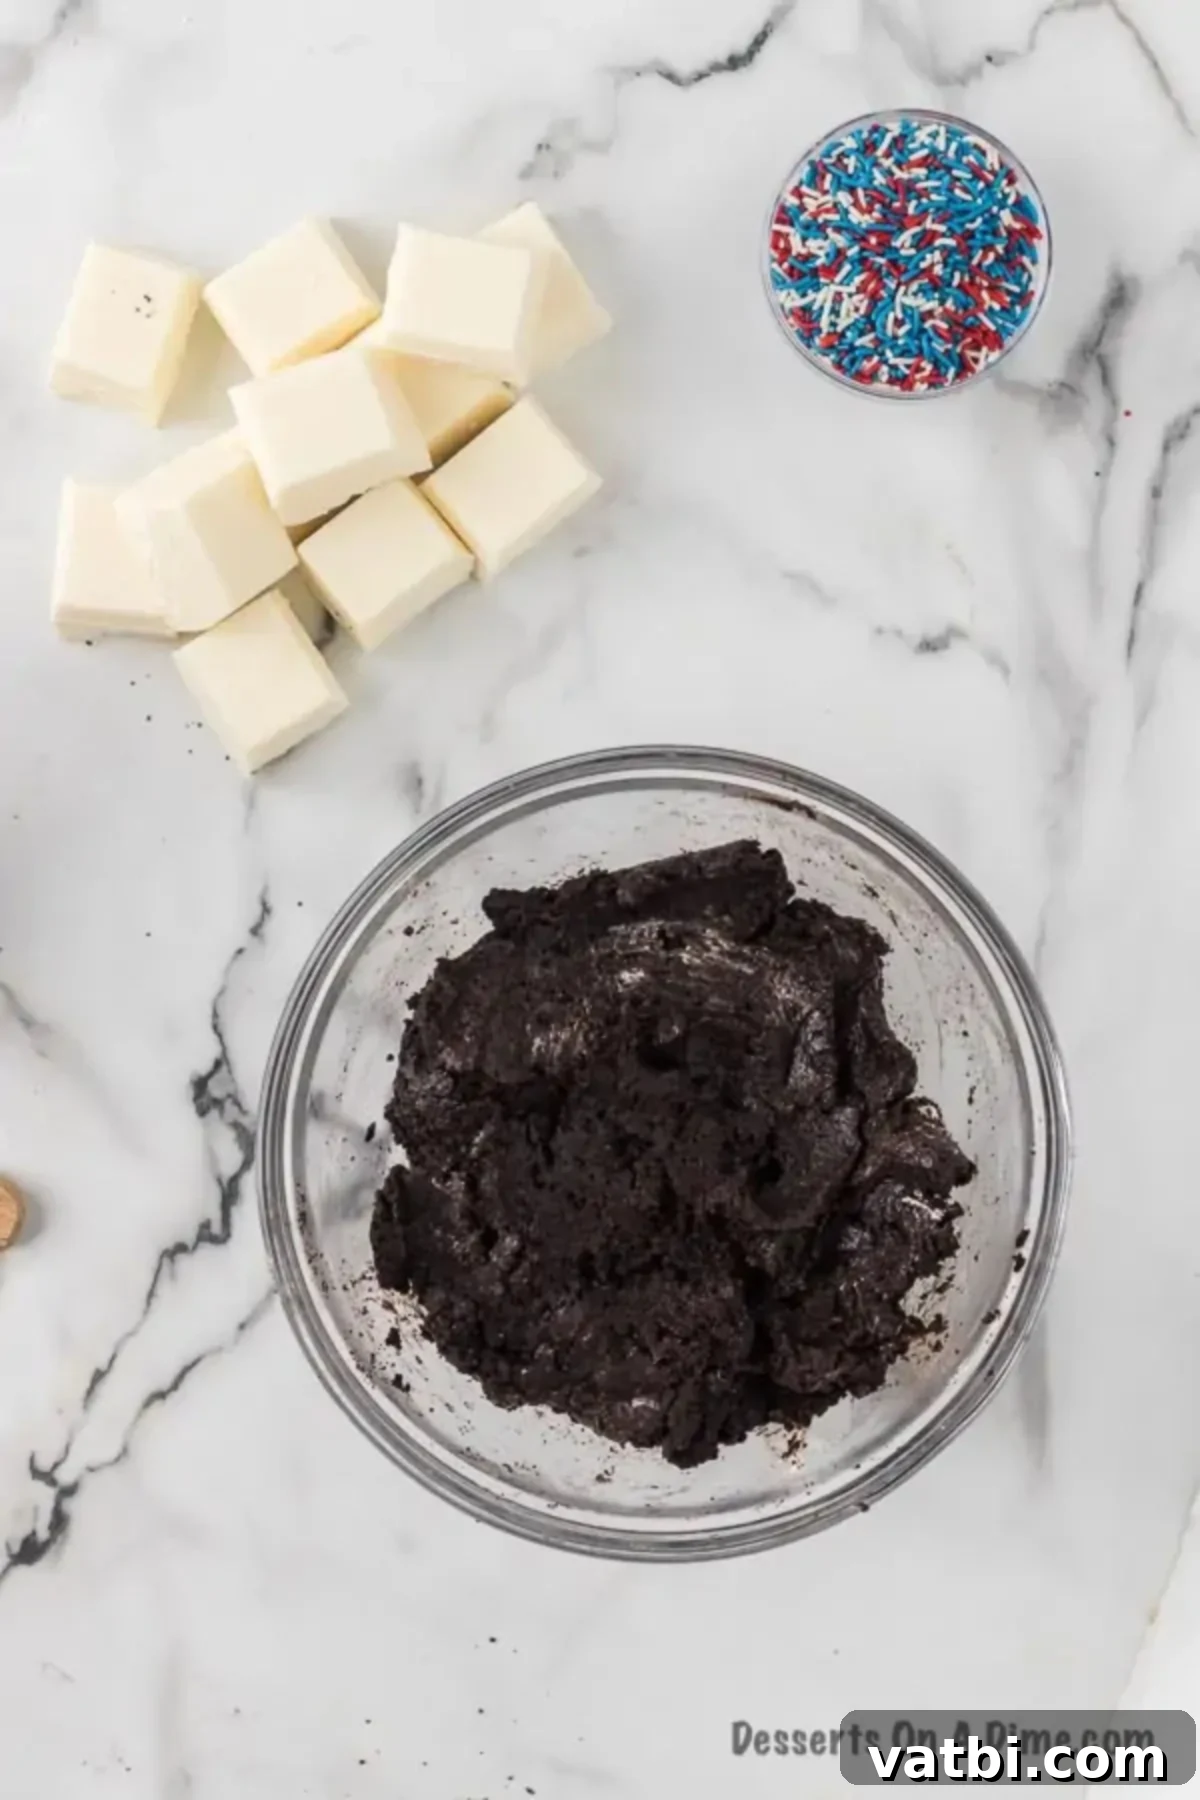
Step 3: Thoroughly Combine Cookies and Cream Cheese. Once your Oreo cookies have been meticulously crushed into fine crumbs, transfer them directly into a large, spacious mixing bowl. Now, add your block of softened cream cheese to the bowl alongside the cookie crumbs. This is the moment to unite these two simple yet powerful ingredients until they are thoroughly and homogeneously blended. You can employ a sturdy rubber spatula, a durable spoon, or even your impeccably clean hands for this step – hands often provide the best feel for proper mixing. The resulting mixture should possess a consistent, uniform dark color and texture, feeling pleasantly sticky and pliable enough to easily hold its shape when gently pressed. Be diligent in ensuring there are no visible streaks or pockets of unmixed cream cheese left, as this will affect the final truffle consistency.
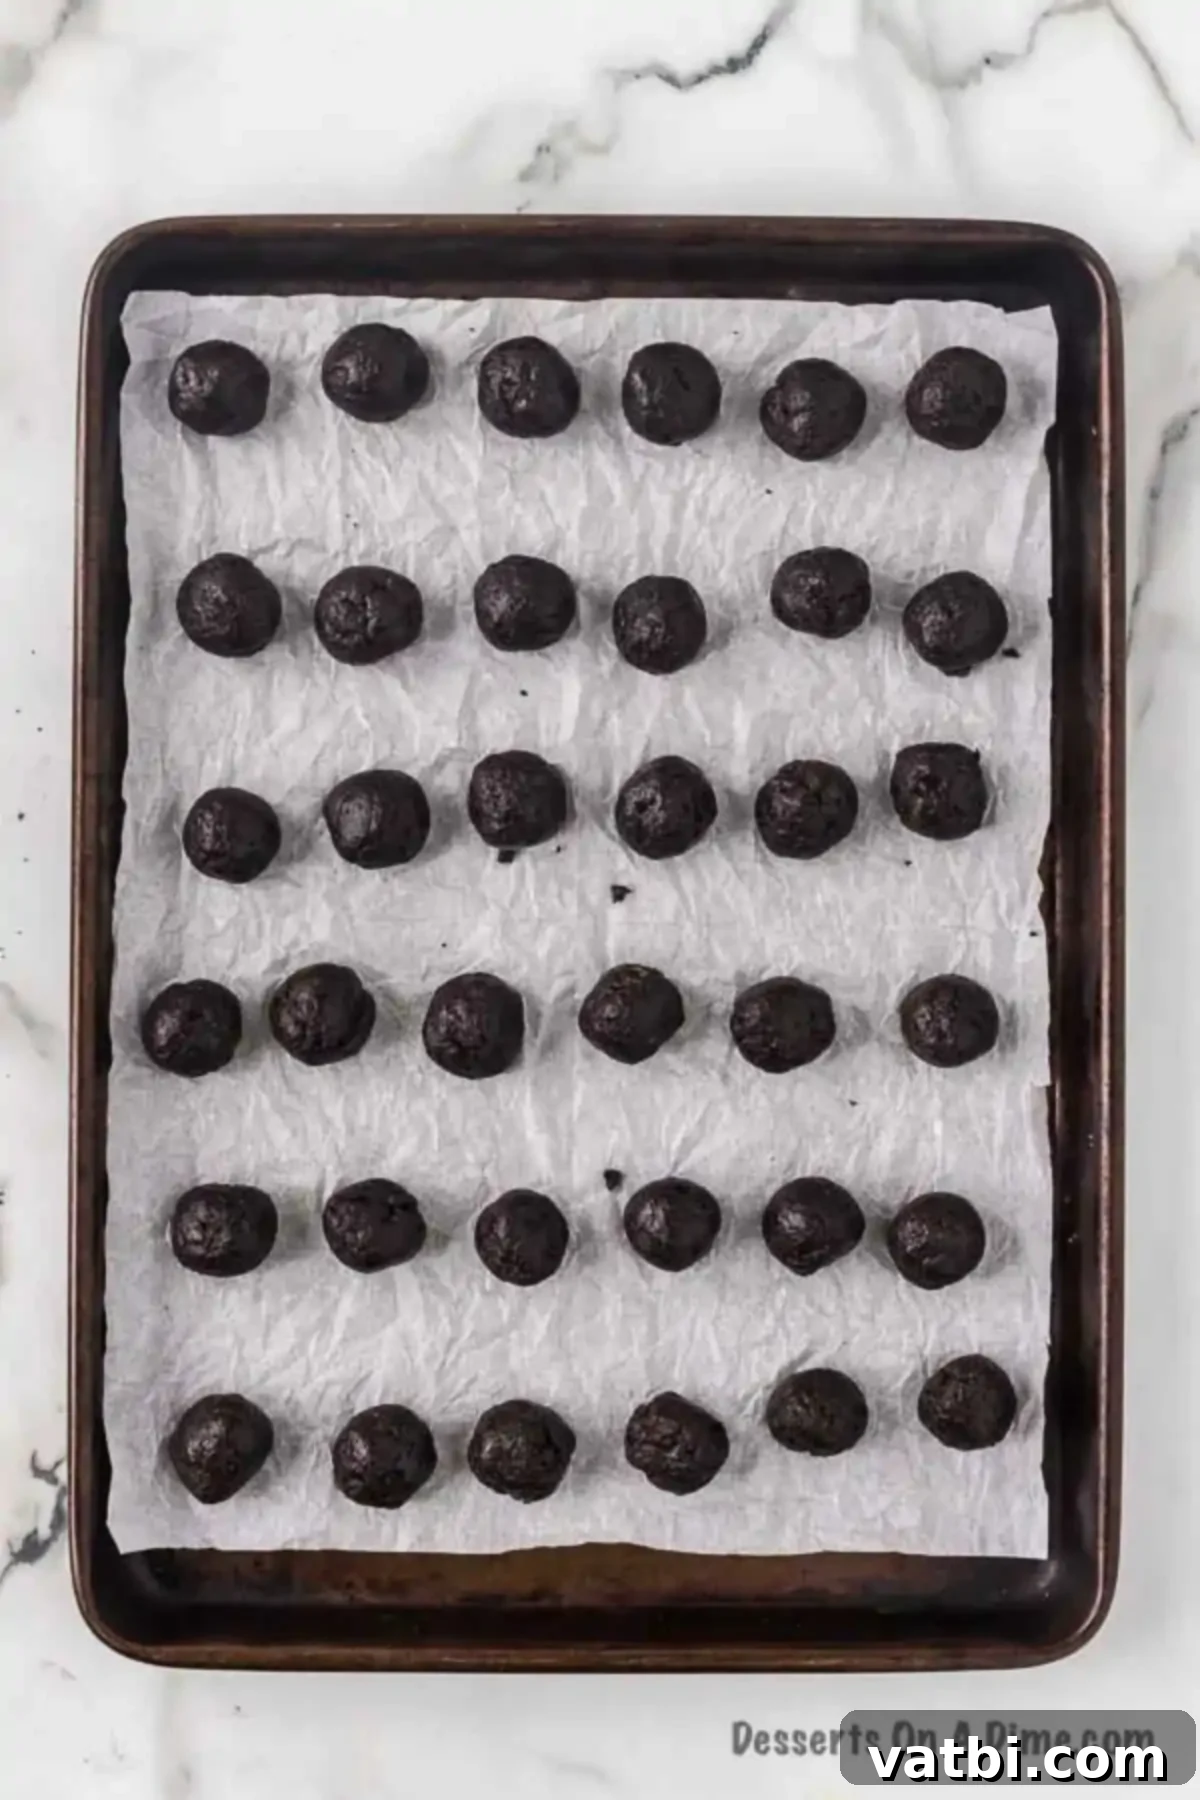
Step 4: Form the Balls and Chill Them Properly. To create beautifully uniform and professional-looking Oreo balls, employing a small cookie scoop (a 1-inch scoop works absolutely perfectly for this size) is highly recommended. It’s a game-changer for consistency and efficiency. Scoop out portions of the mixture and then gently roll each portion between your clean palms to form smooth, perfectly round balls. As you form each one, carefully place it onto your already prepared parchment-lined baking sheet. Once all of the cookie mixture has been transformed into balls, transfer the entire baking sheet to the freezer for a minimum of 30 minutes. This chilling period is a critically vital step; it firms up the Oreo balls significantly, making them far easier to dip into melted chocolate without disintegrating or causing the chocolate coating to become excessively thick or uneven. While the refrigerator can work, the freezer provides a quicker and more effective chill.
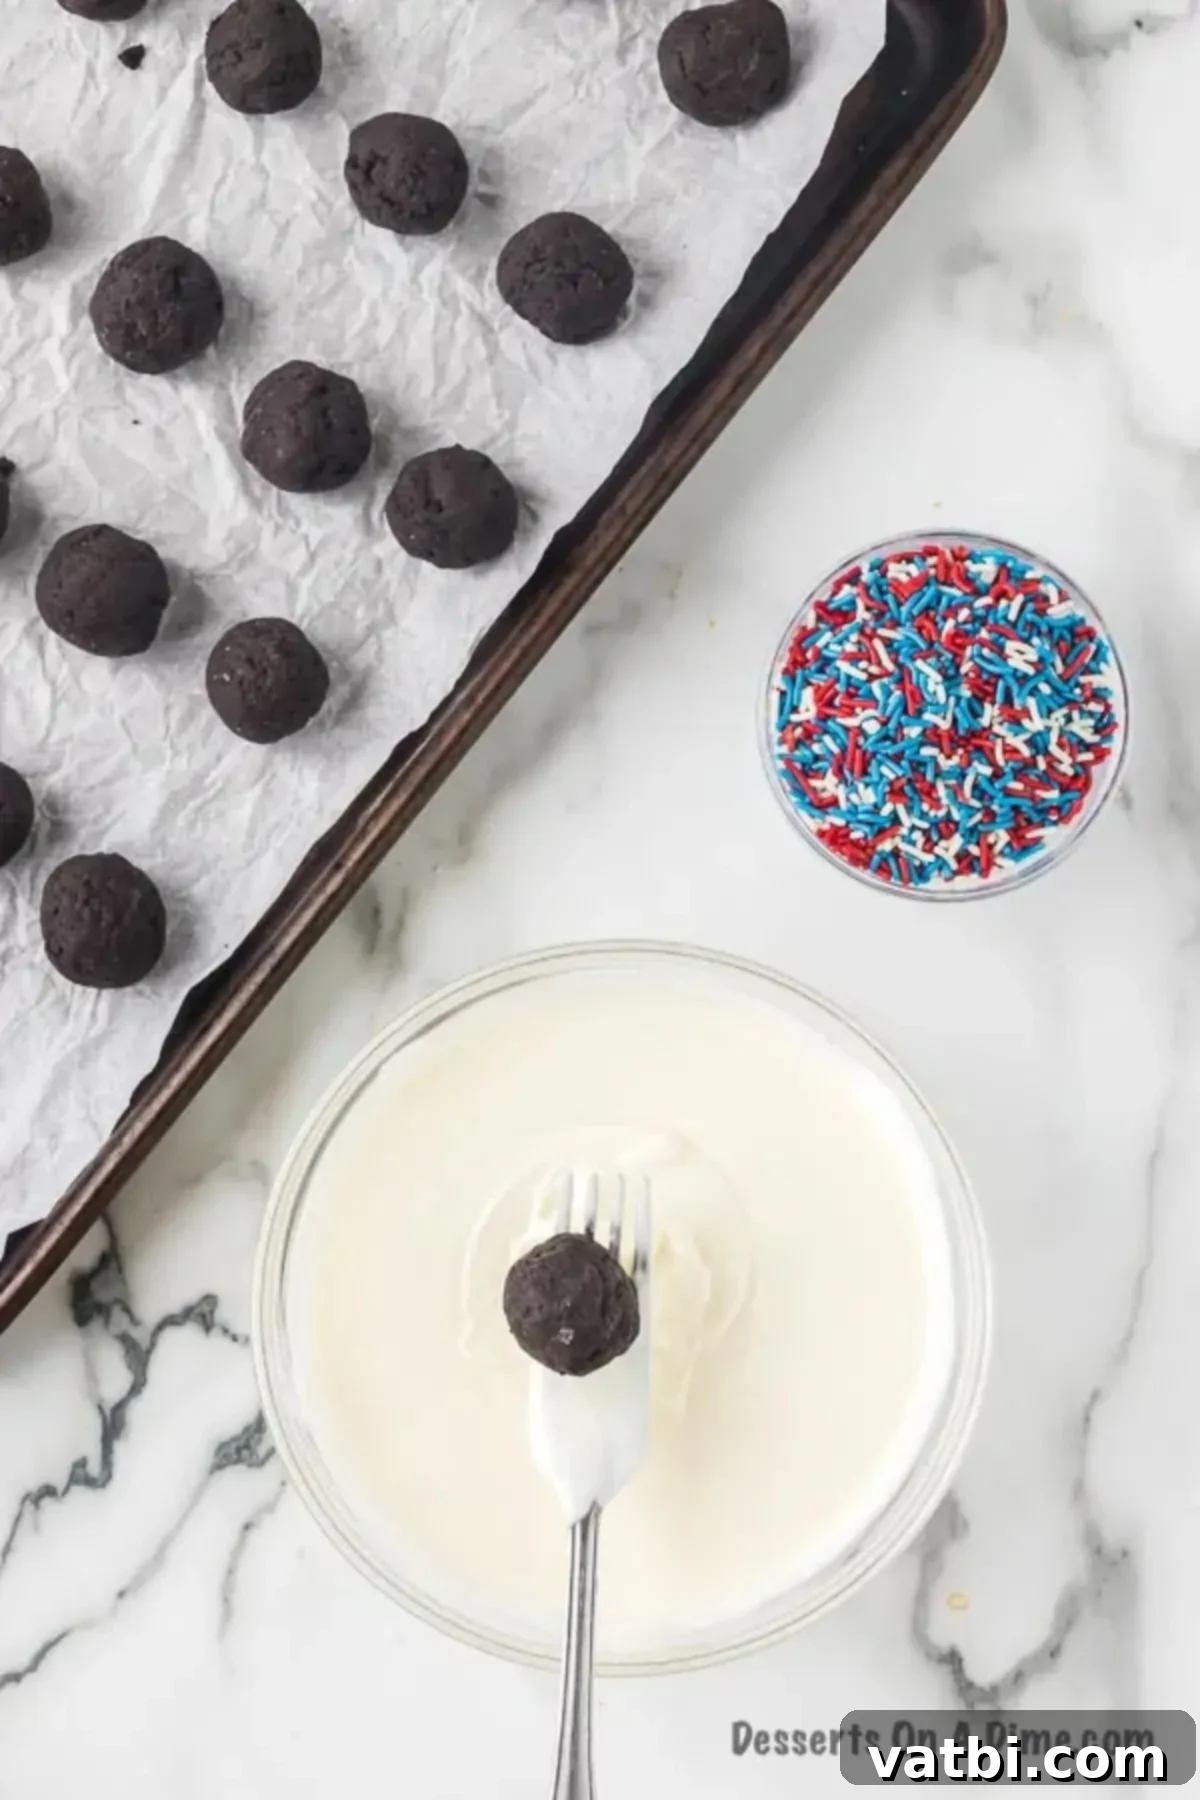
Step 5: Expertly Melt the Candy Coating. While your Oreo balls are luxuriating and firming up in the freezer, it’s time to prepare your white almond bark (or chosen candy coating). Break the almond bark into smaller, more manageable pieces and place them into a clean, microwave-safe bowl. Heat the candy coating in short bursts: begin with 30-second to 1-minute intervals, carefully stirring the contents thoroughly after each interval. This cautious approach is paramount to prevent overheating the chocolate, which can cause it to seize (become stiff and unusable) or develop an unappealing clumpy texture. Continue this gentle heating and stirring process until the almond bark is completely melted, smooth, and gloriously fluid. The desired consistency should be thin enough to allow for easy, even dipping. If you find it slightly too thick, incorporating a tiny bit (half to one teaspoon) of coconut oil or vegetable shortening can often help thin it out, though quality almond bark usually melts beautifully on its own.
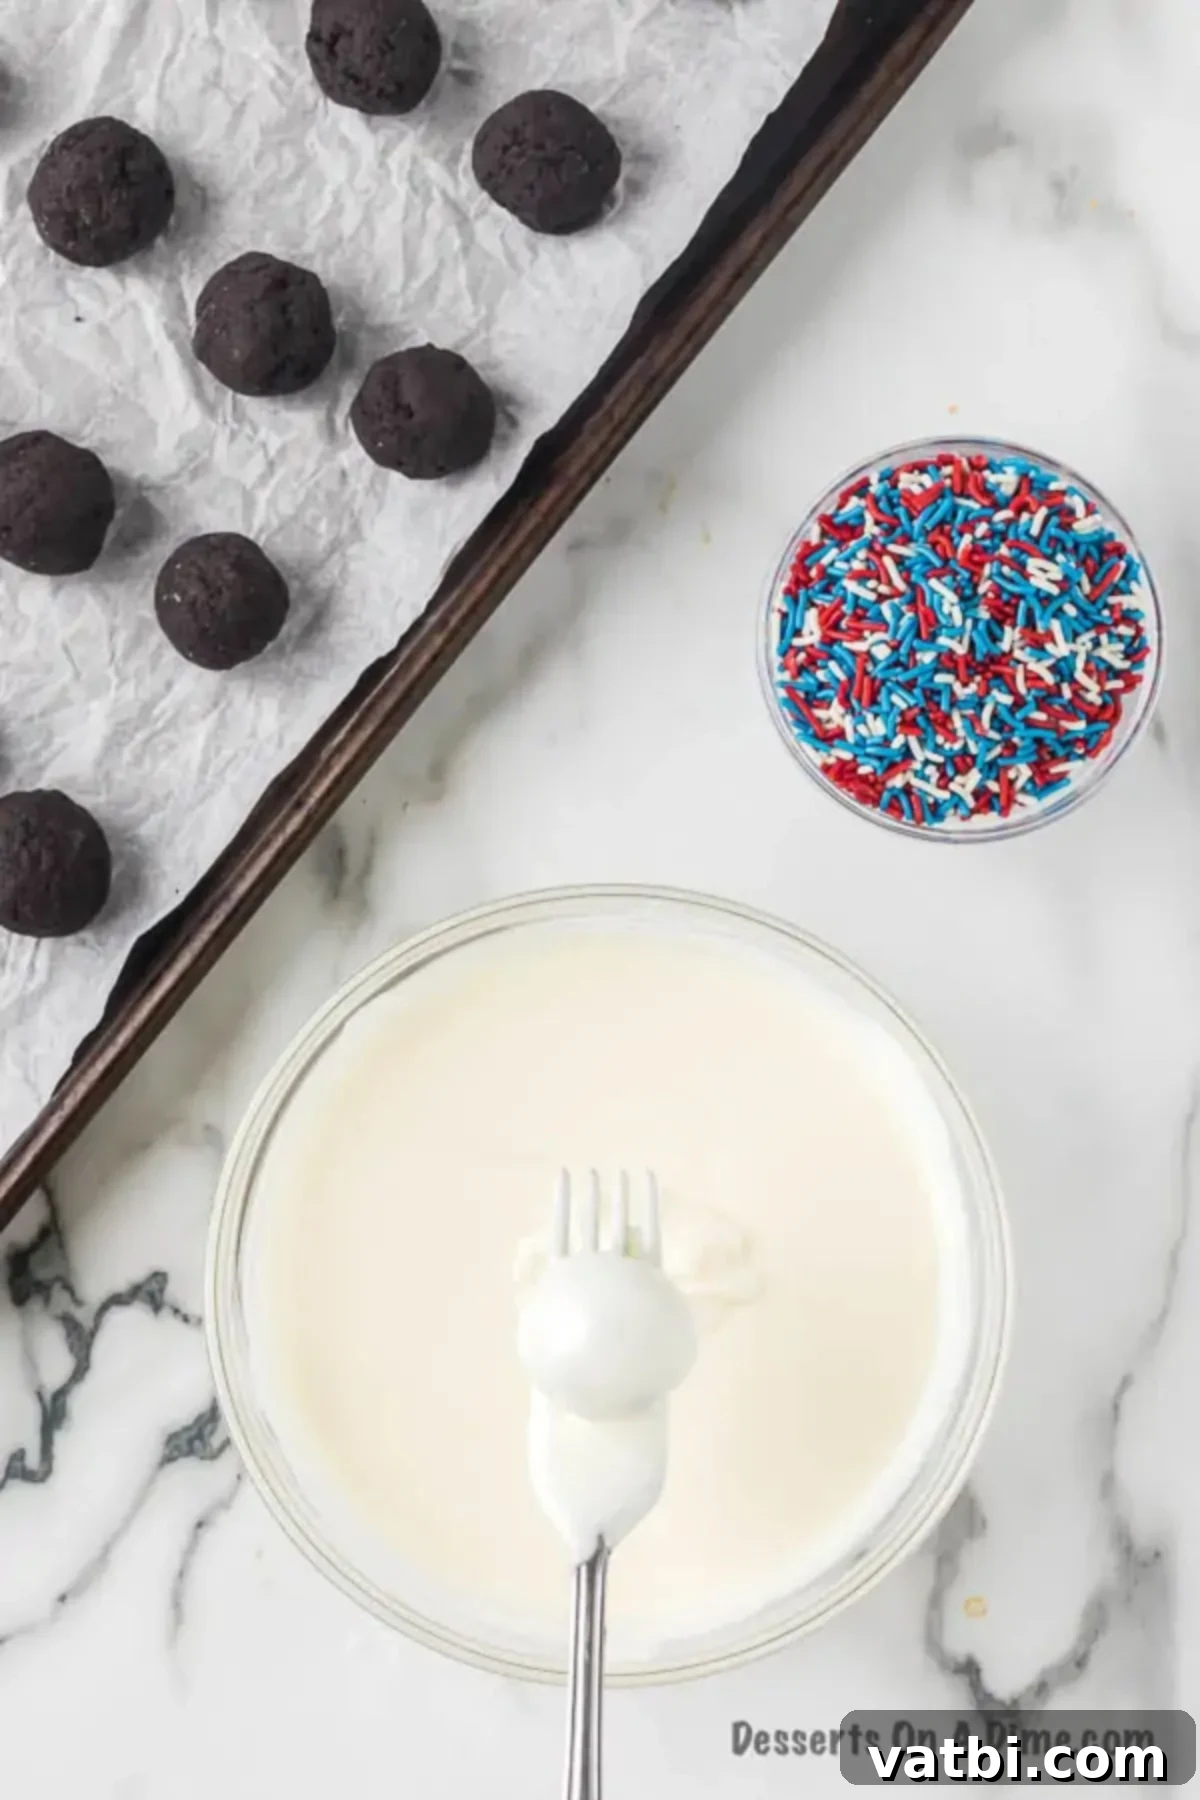
Step 6: Dip Each Oreo Ball Flawlessly. This is the exciting stage where your Patriotic Oreo Balls truly begin to come to life with their festive coating! Retrieve the firmly chilled Oreo balls from the freezer. Using a sturdy fork or a clean toothpick (gently insert it just slightly into the center of each ball for stability), carefully lower each one into the bowl of melted white chocolate, ensuring it becomes completely enveloped and covered. As you lift the ball out, gently tap the fork or toothpick against the rim of the bowl. This seemingly minor action is incredibly crucial: it allows any excess chocolate to gracefully drip back into the bowl. This step helps in creating a perfectly smooth, even coating on your truffles and, crucially, prevents the formation of unsightly chocolate “puddles” or thick bases once they set. Once dipped and excess chocolate removed, carefully place the coated ball back onto your parchment-lined baking sheet.
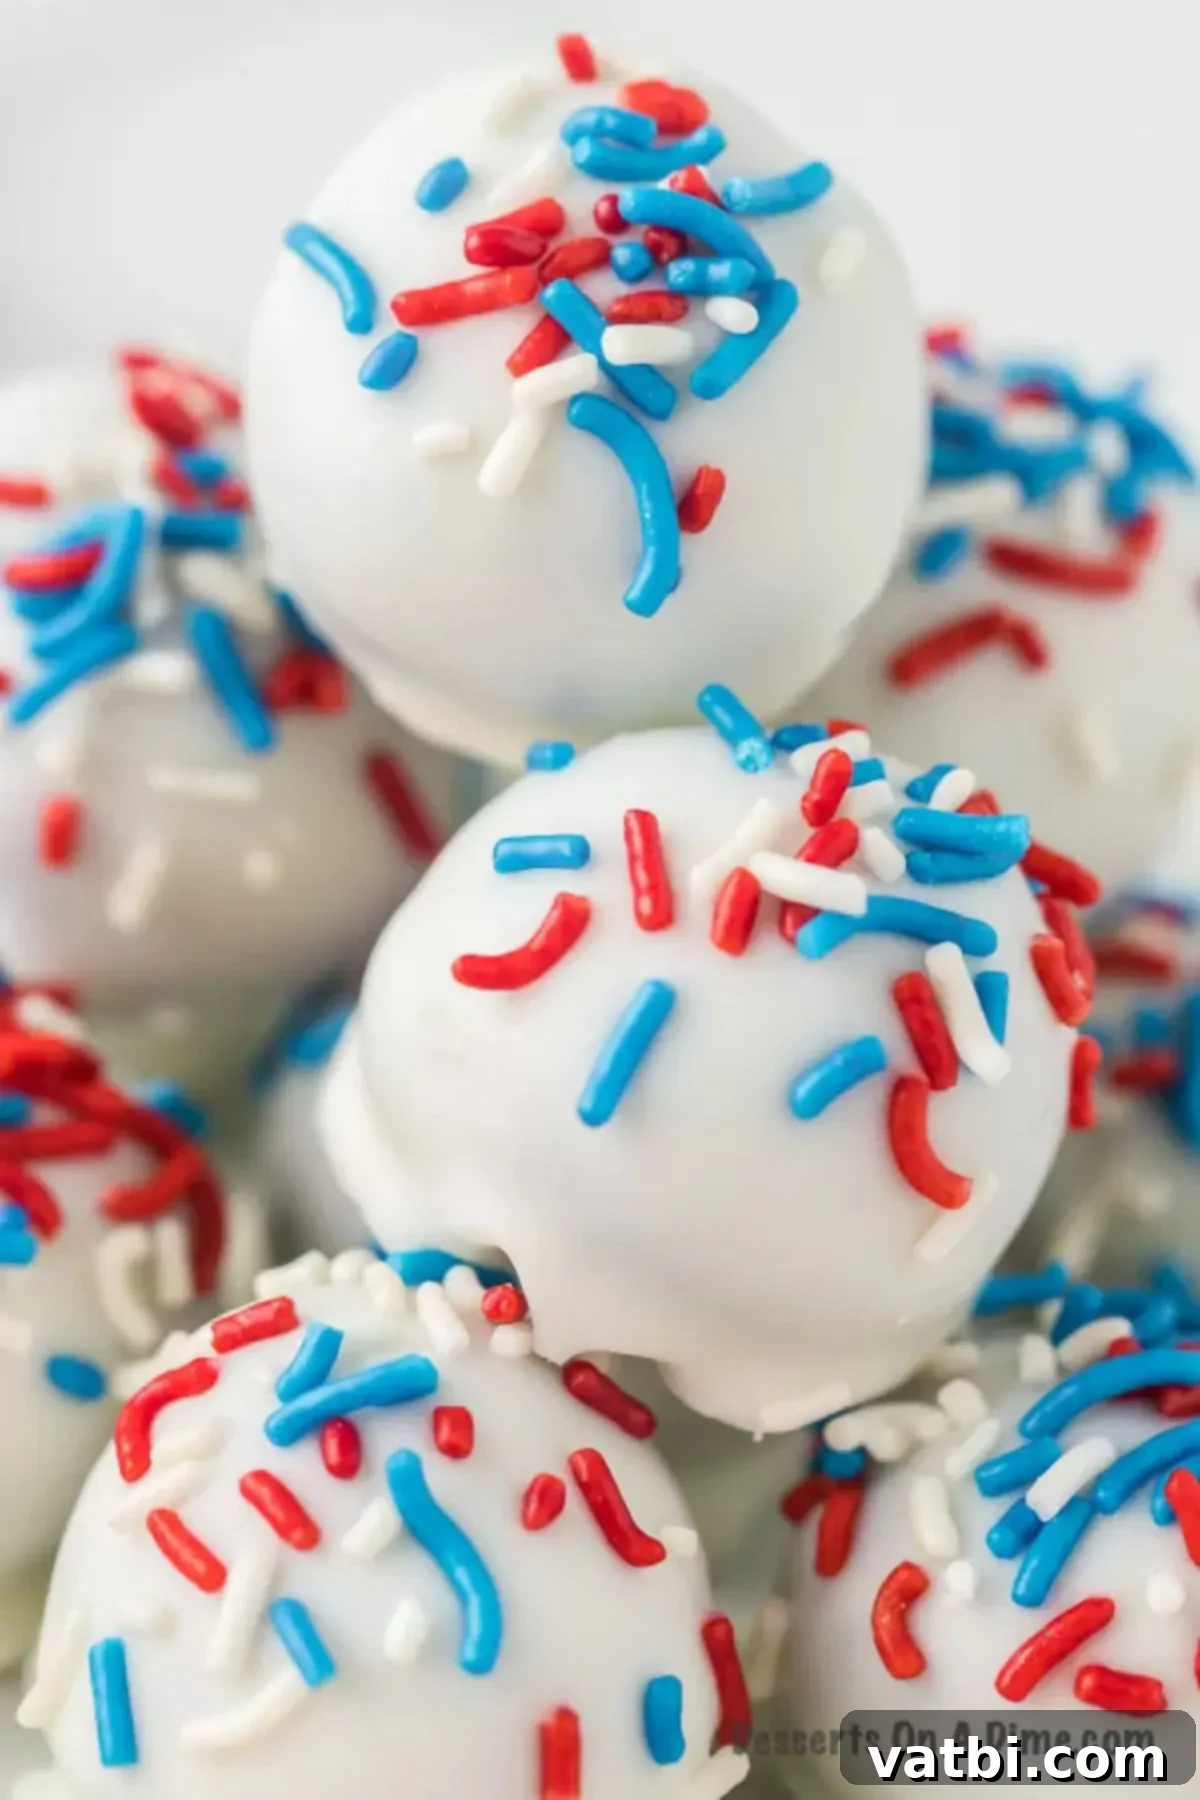
Step 7: Decorate with Sprinkles and Serve with Pride. The final, fun step is to decorate your beautiful Oreo Cookie Balls! Immediately after dipping each Oreo ball (and crucially, before the chocolate has a chance to set), generously shower it with your festive red, white, and blue patriotic sprinkles. The still-wet chocolate will act as a perfect adhesive, ensuring the sprinkles stick beautifully and securely. Continue this dipping and decorating process swiftly until all your Oreo balls are coated and vibrantly adorned. Once complete, you can gently place the entire tray back into the refrigerator for approximately 15-20 minutes. This will allow the chocolate coating to fully harden and set, creating that satisfying snap. Once set, artfully arrange these stunning treats on a festive platter and proudly serve them to your eager guests. They are not only an absolute delight to the taste buds but also an irresistible feast for the eyes, perfectly capturing the spirit of celebration!
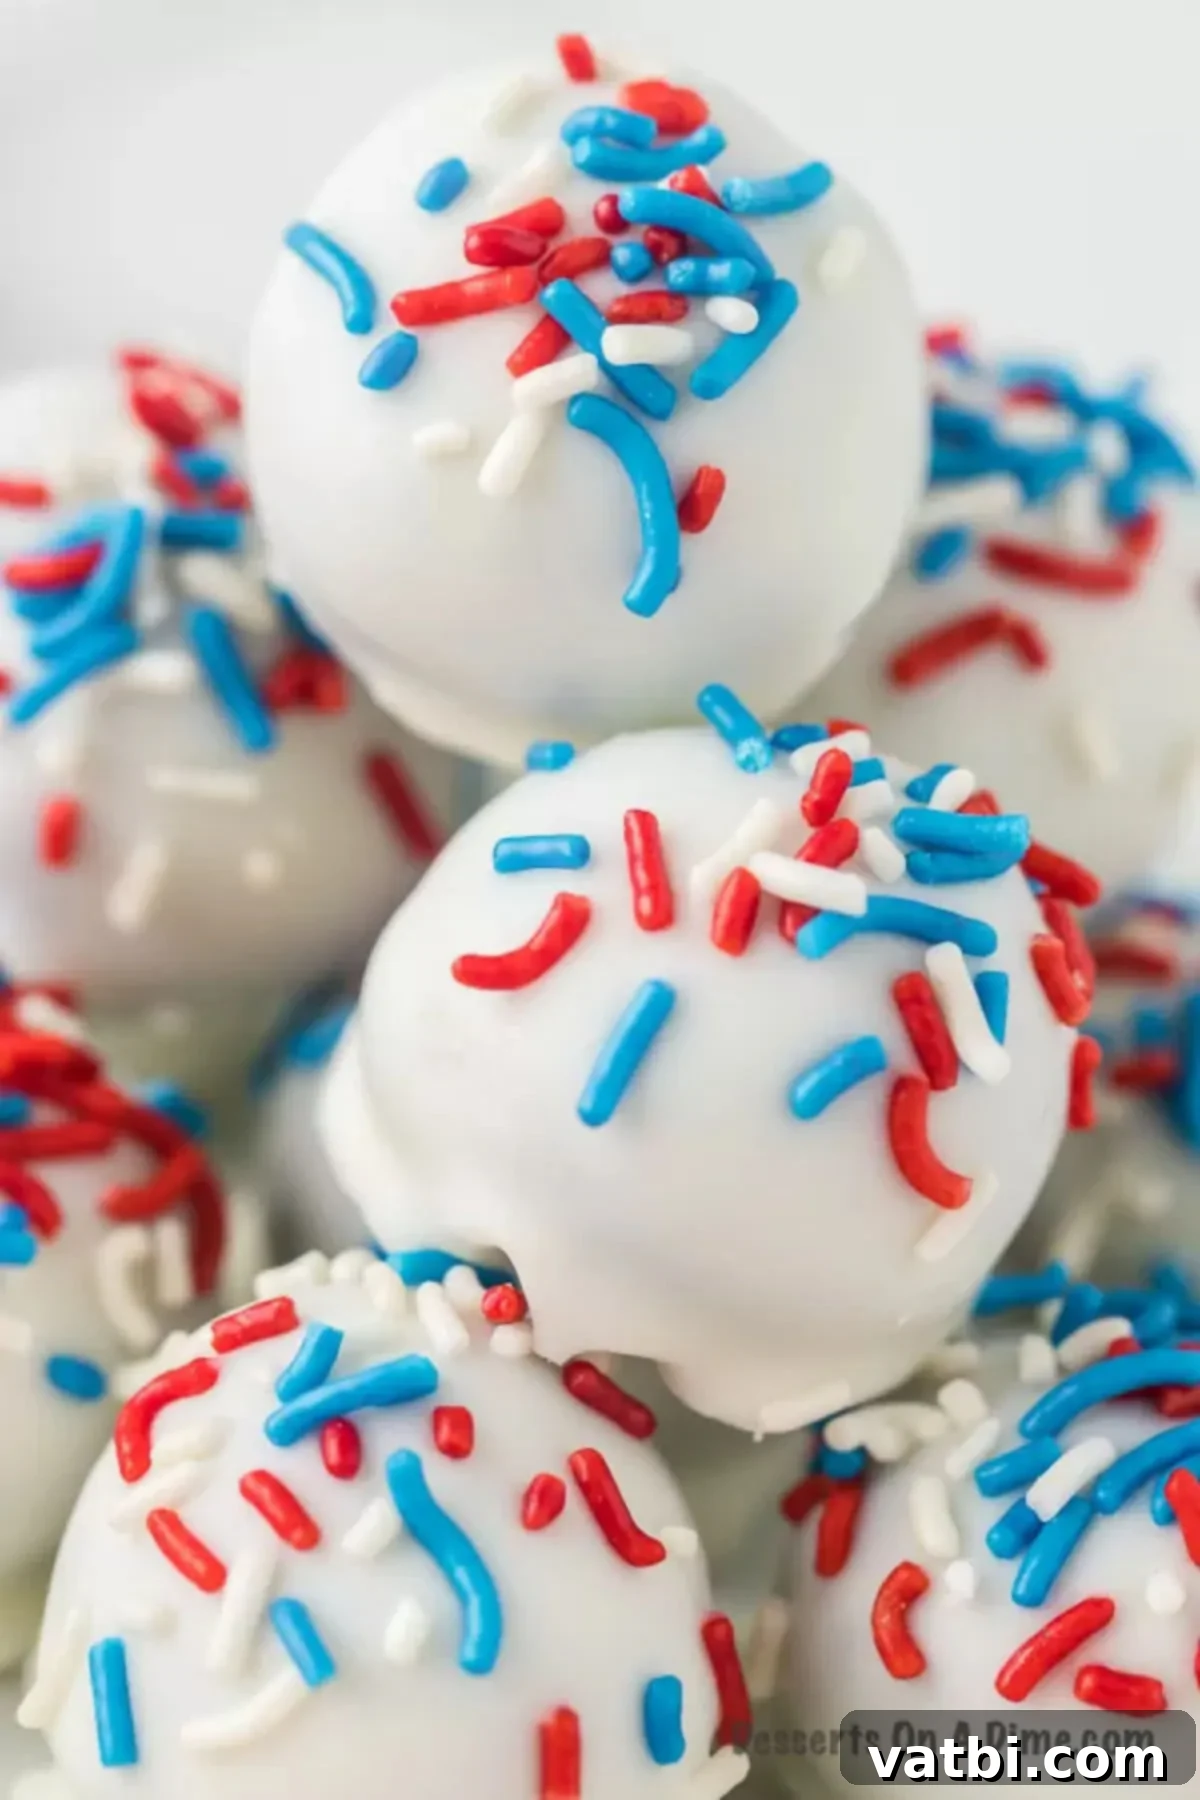
Storage Tips for Optimal Freshness and Longevity
Proper storage is absolutely essential for keeping your homemade Patriotic Oreo Balls as fresh, flavorful, and visually appealing as possible. Given that these delightful truffles contain cream cheese in their filling and are generously coated in chocolate, they demand correct storage methods to maintain their ideal texture and, crucially, to prevent the chocolate from softening or melting, especially in warmer environments.
Always store your finished Oreo balls in an airtight container in the refrigerator. To prevent them from sticking together or damaging their delicate coating, it’s a good practice to layer them with sheets of parchment paper in between if you need to stack them. When stored correctly in the fridge, these festive treats will remain fresh and wonderfully delicious for an impressive period of up to 1-2 weeks. It is vitally important to avoid leaving them out at room temperature for extended durations, particularly in warm weather, as the chocolate coating will inevitably begin to soften and melt, and the cream cheese-based filling could potentially spoil. For the most enjoyable experience, we recommend taking them out of the refrigerator approximately 10-15 minutes before you plan to serve them; this allows them to soften ever so slightly and permits the rich flavors to truly meld and develop beautifully.
Did you know that you can also successfully freeze Oreo balls? This is a truly fantastic and convenient option if you’re preparing them well in advance for a large party or if you simply wish to enjoy them over an extended period. To freeze them effectively, first place the fully set Oreo balls in a single layer on a baking sheet and freeze them for about an hour, or until they are completely solid. Once they are firm, transfer them to a freezer-safe airtight container or a heavy-duty freezer bag, making sure to layer them again with parchment paper to prevent sticking. When stored properly, they can be kept in the freezer for an impressive duration of up to 2-3 months without compromising quality. When you’re ready to indulge, simply transfer the frozen Oreo balls to the refrigerator to thaw gradually overnight, or allow them to sit at room temperature for approximately 30 minutes until they reach your desired soft and chewy consistency. For even more detailed and helpful instructions on how to best freeze Oreo balls and maintain their quality, be sure to check out our comprehensive guide: Can you Freeze Oreo Balls?
Expert Pro Tips for Achieving Success Every Single Time
Crafting bakery-quality Patriotic Oreo Balls is much simpler than you might imagine, especially when armed with a few expert tips and tricks. These invaluable suggestions are designed to streamline your preparation process, minimize potential hiccups, and ultimately ensure that your truffles are consistently perfect in both appearance and taste, bite after delightful bite.
- Invest in a Food Processor: While not an absolute necessity, acquiring a food processor is undeniably a game-changer for this specific recipe. It effortlessly pulverizes the Oreo cookies into perfectly fine, uniform crumbs in a matter of mere seconds, saving you a substantial amount of time and manual effort. This consistent, fine crumb texture is a critical factor for achieving a silky-smooth and cohesive truffle filling. If you frequently engage in baking or cooking, a good quality food processor is an incredibly worthwhile kitchen investment that you’ll use constantly.
- The Unsung Hero: A Cookie Scoop: A cookie scoop, particularly one that yields a 1-inch ball, will quickly become your absolute best friend when it comes to forming the individual Oreo balls. Its primary benefit is ensuring that each and every truffle is flawlessly uniform in size, which contributes significantly to a professional and aesthetically pleasing presentation. Beyond uniformity, it also dramatically speeds up the ball-forming process and helps keep your hands considerably cleaner, making the entire experience much more enjoyable. Uniformly sized balls also ensure more consistent chilling and more even chocolate coating.
- Transform Them into Festive Cake Pops: Are you looking to infuse even more fun and make these treats effortlessly portable for a party? Easily transform your Oreo balls into delightful patriotic “cake pops”! Simply insert a sturdy lollipop stick gently into the center of each thoroughly chilled Oreo ball just before you begin the dipping process. This simple addition instantly converts them into an adorable, mess-free, grab-and-go treat that proves especially popular and engaging for children and adults alike. Remember to insert the sticks with a gentle, twisting motion to prevent any cracking or splitting of the chilled Oreo balls.
- Master the Art of Tapping Off Excess Chocolate: After you’ve dipped each Oreo ball into the melted coating, gently tap the fork or stick against the side of your bowl. This seemingly minor action is incredibly significant and absolutely crucial for allowing any excess chocolate to gracefully drip off. Why is this step so important? It effectively prevents the formation of thick, uneven coatings that can make your truffles look amateurish, and more importantly, it eliminates those unsightly chocolate “puddles” that often form around the base of your truffles once they set. A thin, perfectly even coating not only enhances the visual appeal but also allows the rich, delicious Oreo flavor to truly shine through without being overwhelmed by too much chocolate.
- Work Smart: Dip in Batches: To maintain the ideal firmness of your Oreo balls for dipping and to prevent the melted chocolate from setting too quickly (especially if your kitchen is warm), it’s highly advisable to work in small, manageable batches. Keep the majority of your perfectly formed Oreo balls stored in the freezer while you dip only a few at a time. This intelligent strategy ensures that the balls remain perfectly chilled and firm throughout the entire process, making the dipping much smoother, more efficient, and significantly less messy.
- Decorate Immediately for Best Adhesion: This tip is simple but critical for achieving beautiful, sprinkle-laden truffles. Once you dip an Oreo ball into the melted chocolate, you must add your chosen sprinkles right away! The chocolate needs to be in its wet, unset state for the sprinkles to adhere properly and securely. If you delay this step even for a minute, the chocolate will begin to set, and your festive sprinkles will simply roll off, leaving you with plain, unadorned truffles that lack that patriotic pizzazz.
More Festive Patriotic Desserts for Your Celebration
Easy Candy
Patriotic Crack
Easy 4th of July Desserts
Red White and Blue Puppy Chow
Easy 4th of July Desserts
4th of July Poke Cake Recipe
More Incredible Oreo Desserts You’ll Absolutely Love
If you’re as devoted a fan of Oreo cookies as we are, then you understand that their remarkable versatility extends far beyond these delightful patriotic truffles. Oreos serve as a phenomenal foundation for an almost endless array of desserts, ranging from simple no-bake pies to exquisitely decadent cheesecakes. Their unique chocolatey crunch and creamy filling add an unparalleled depth and texture to any sweet creation. Here are even more of our absolute favorite Oreo-inspired recipes that we wholeheartedly encourage you to try. Each one offers a distinct and incredibly delicious way to savor those iconic chocolate sandwich cookies, guaranteeing a new favorite for every occasion!
- Easy Caramel Cheesecake Recipe with Oreo Crust
- Oreo Magic Bars
- No Bake Oreo Pie
- Easy Baseball Oreo Pops
- Football Oreo Balls
- Oreo Icebox Cake Recipe
Whether you’re proudly celebrating the 4th of July, honoring Memorial Day, or simply searching for an easy-to-make yet undeniably impressive dessert that will delight everyone, these Patriotic Oreo Balls are absolutely guaranteed to be a resounding hit. Their irresistibly creamy texture, rich chocolate flavor, and gorgeously festive appearance combine to make them an unforgettable treat for any gathering or celebration. Don’t hesitate to give this fantastic recipe a try, and prepare yourself for an abundance of compliments and rave reviews!
I absolutely love hearing from you, our wonderful readers, and seeing your fantastic culinary creations. So, please don’t hesitate to leave a comment below and share how your Patriotic Oreo Balls turned out. Your feedback, questions, and photos genuinely brighten my day and help our community grow!
Pin
Patriotic Oreo Balls
Ingredients
- 8 oz softened Cream Cheese
- 14.5 oz Oreo Cookies
- 1 pound white almond bark
- red white and blue sprinkles
Instructions
-
Line a cutting board or baking sheet with parchment paper. This prevents sticking and makes for easy cleanup.
-
Finely crush the Oreo cookies into fine crumbs using a food processor or blender. Ensure no large chunks remain for a smooth truffle.
-
In a large bowl, combine the crushed Oreo cookies and softened cream cheese. Mix thoroughly until everything is well blended and uniform in texture.
-
Using a 1-inch cookie scoop, form the mixture into small, uniform balls. Place these formed balls onto your prepared parchment-lined sheet.
-
Place the baking sheet with the Oreo balls into the freezer for at least 30 minutes. This chilling process is crucial for firming them up, making them easier to dip.
-
While the balls chill, melt the white almond bark. Heat it in a microwave-safe bowl in 30-60 second intervals, stirring well after each, until completely smooth and melted. Be careful not to overheat.
-
Using a fork or toothpick, dip each chilled Oreo ball into the melted chocolate, ensuring it’s completely coated. Gently tap off any excess chocolate before returning the coated ball to the parchment-lined tray.
-
Immediately after dipping each Oreo ball (before the chocolate sets), generously add your red, white, and blue sprinkles. Once all balls are dipped and decorated, place the tray back in the refrigerator for 15-20 minutes to fully set the chocolate. Serve and enjoy!
Nutrition Facts
Pin This Now to Remember It Later
Pin Recipe
