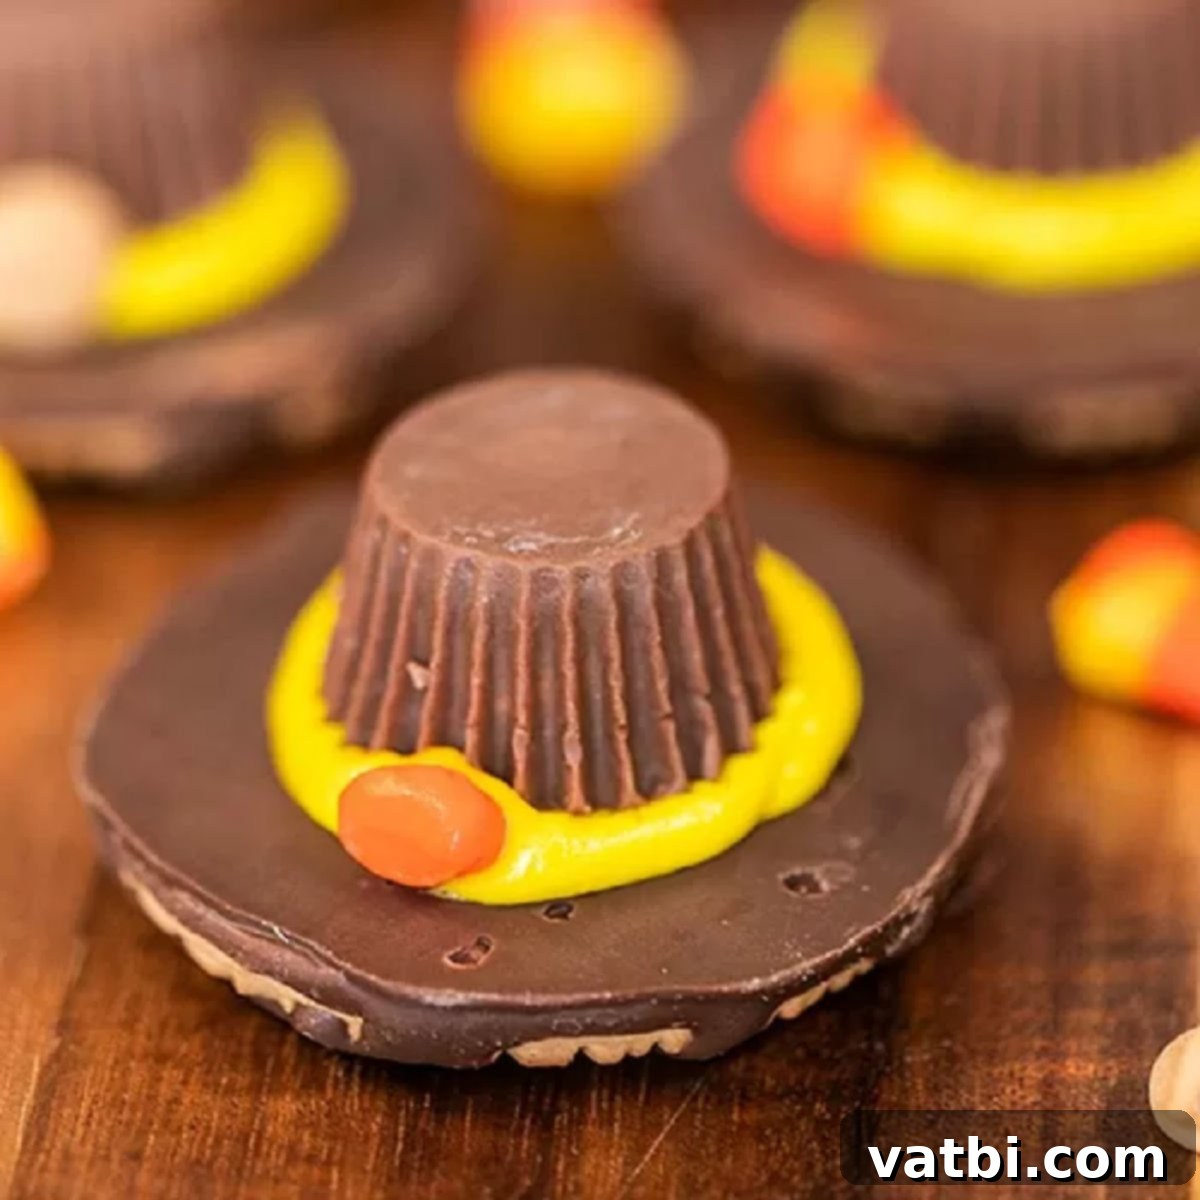
Easy No-Bake Pilgrim Hat Cookies: The Perfect Fun Thanksgiving Treat for Kids
Get ready to delight your family and friends this Thanksgiving with these absolutely adorable and incredibly easy-to-make Pilgrim Hat Cookies! This festive dessert is a true holiday gem, requiring just four simple ingredients and absolutely no baking. Whether you’re a seasoned baker or a complete beginner, these no-bake cookies are a foolproof way to add a touch of charm and whimsy to your Thanksgiving celebration.
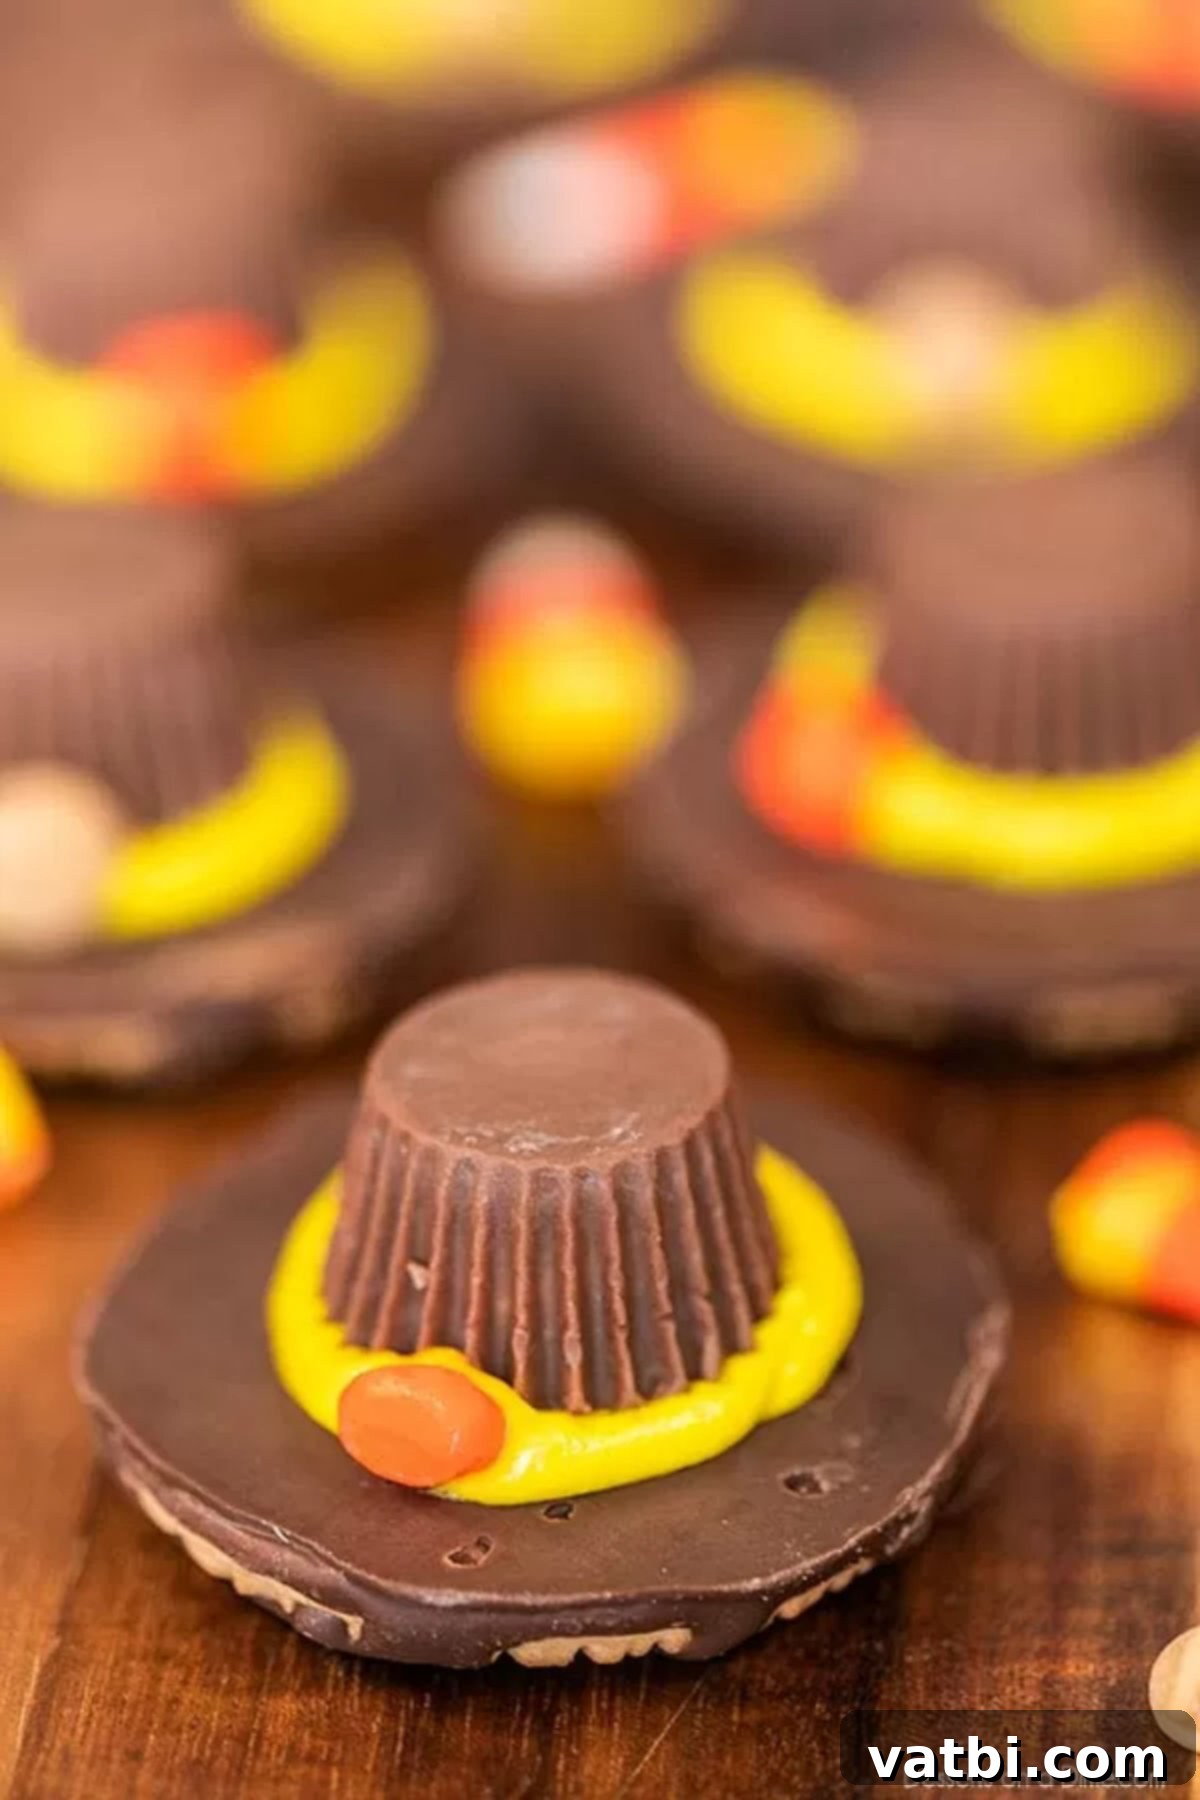
Looking for a super cute and stress-free dessert idea for your Thanksgiving feast? These no-bake Thanksgiving pilgrim cookies are an absolute winner. They are not only incredibly fun to assemble but also consistently steal the show at any holiday gathering. With a minimal list of readily available ingredients, anyone, regardless of their culinary skill level, can whip up a batch of these charming treats in no time.
Children will absolutely adore these fun little pilgrim hat cookies, and let’s be honest, adults will too! Their delightful appearance and tasty combination of flavors make them an instant favorite. These cookies are perfect for school parties, family potlucks, or simply as a special homemade dessert to enjoy at home. Beyond these pilgrim hats, you might also want to explore our extensive collection of Thanksgiving Cookies Recipes, or perhaps try our delightful Thanksgiving Cake Pops Recipe for more festive inspiration.
If you’re a fan of easy no-bake delights, we also love creating treats like Witch Hat Cookies for Halloween and our popular Turkey Cupcakes Recipe for a different take on Thanksgiving fun. No-bake desserts truly embody the spirit of easy, enjoyable holiday crafting, allowing you to focus on the festivities rather than being stuck in the kitchen.
For those who do enjoy a bit of baking, don’t miss our comprehensive guide to 51 Easy Thanksgiving Cupcakes, or learn how to make delicious Cake Mix Cookies to simplify your holiday baking even further. We believe that holiday treats should be both special and accessible for everyone.
Table of Contents
- The Charm of No-Bake Thanksgiving Desserts
- Why These Pilgrim Hat Cookies Are a Must-Make
- Simple Ingredients for Pilgrim Hat Cookies
- Get Creative with Recipe Variations
- Step-by-Step Guide to Assemble Your Pilgrim Hats
- Pro Tips for Perfect Pilgrim Hat Cookies
- Storage and Make-Ahead Options
- Making Thanksgiving Memories with Kids
- Other Delightful Thanksgiving Treats
The Charm of No-Bake Thanksgiving Desserts
Thanksgiving is a time for feasting, family, and gratitude. But let’s be honest, it can also be a whirlwind in the kitchen! Oven space becomes prime real estate, and time is often at a premium. This is precisely where no-bake desserts shine brightest. Our Pilgrim Hat Cookies are a prime example of how you can create an incredibly festive and delicious treat without ever turning on your oven. This means less stress, more time to spend with loved ones, and an easy cleanup – all invaluable during the busy holiday season. No-bake recipes like this offer a fantastic alternative to traditional baked goods, allowing you to diversify your dessert spread effortlessly. They are especially perfect for busy hosts or for involving children in the holiday preparations without the complexities of baking.
Why These Pilgrim Hat Cookies Are a Must-Make
There are countless reasons why these Pilgrim Hat Cookies have become a staple in our Thanksgiving celebrations. First and foremost, their incredible ease of preparation is unmatched. You can have a batch ready in less than 30 minutes, making them perfect for last-minute additions to your dessert table or as a fun activity when guests arrive. We’ve even used them as charming centerpieces, adding a whimsical touch to our holiday décor. Beyond their quick assembly, these cookies are exceptionally budget-friendly, requiring only four common ingredients that are usually easy to find in any grocery store. This makes them accessible to everyone and a smart choice for feeding a crowd without breaking the bank. They bring a smile to every face, perfectly capturing the festive spirit of Thanksgiving in a bite-sized treat that everyone can enjoy, young and old alike.
Simple Ingredients for Pilgrim Hat Cookies
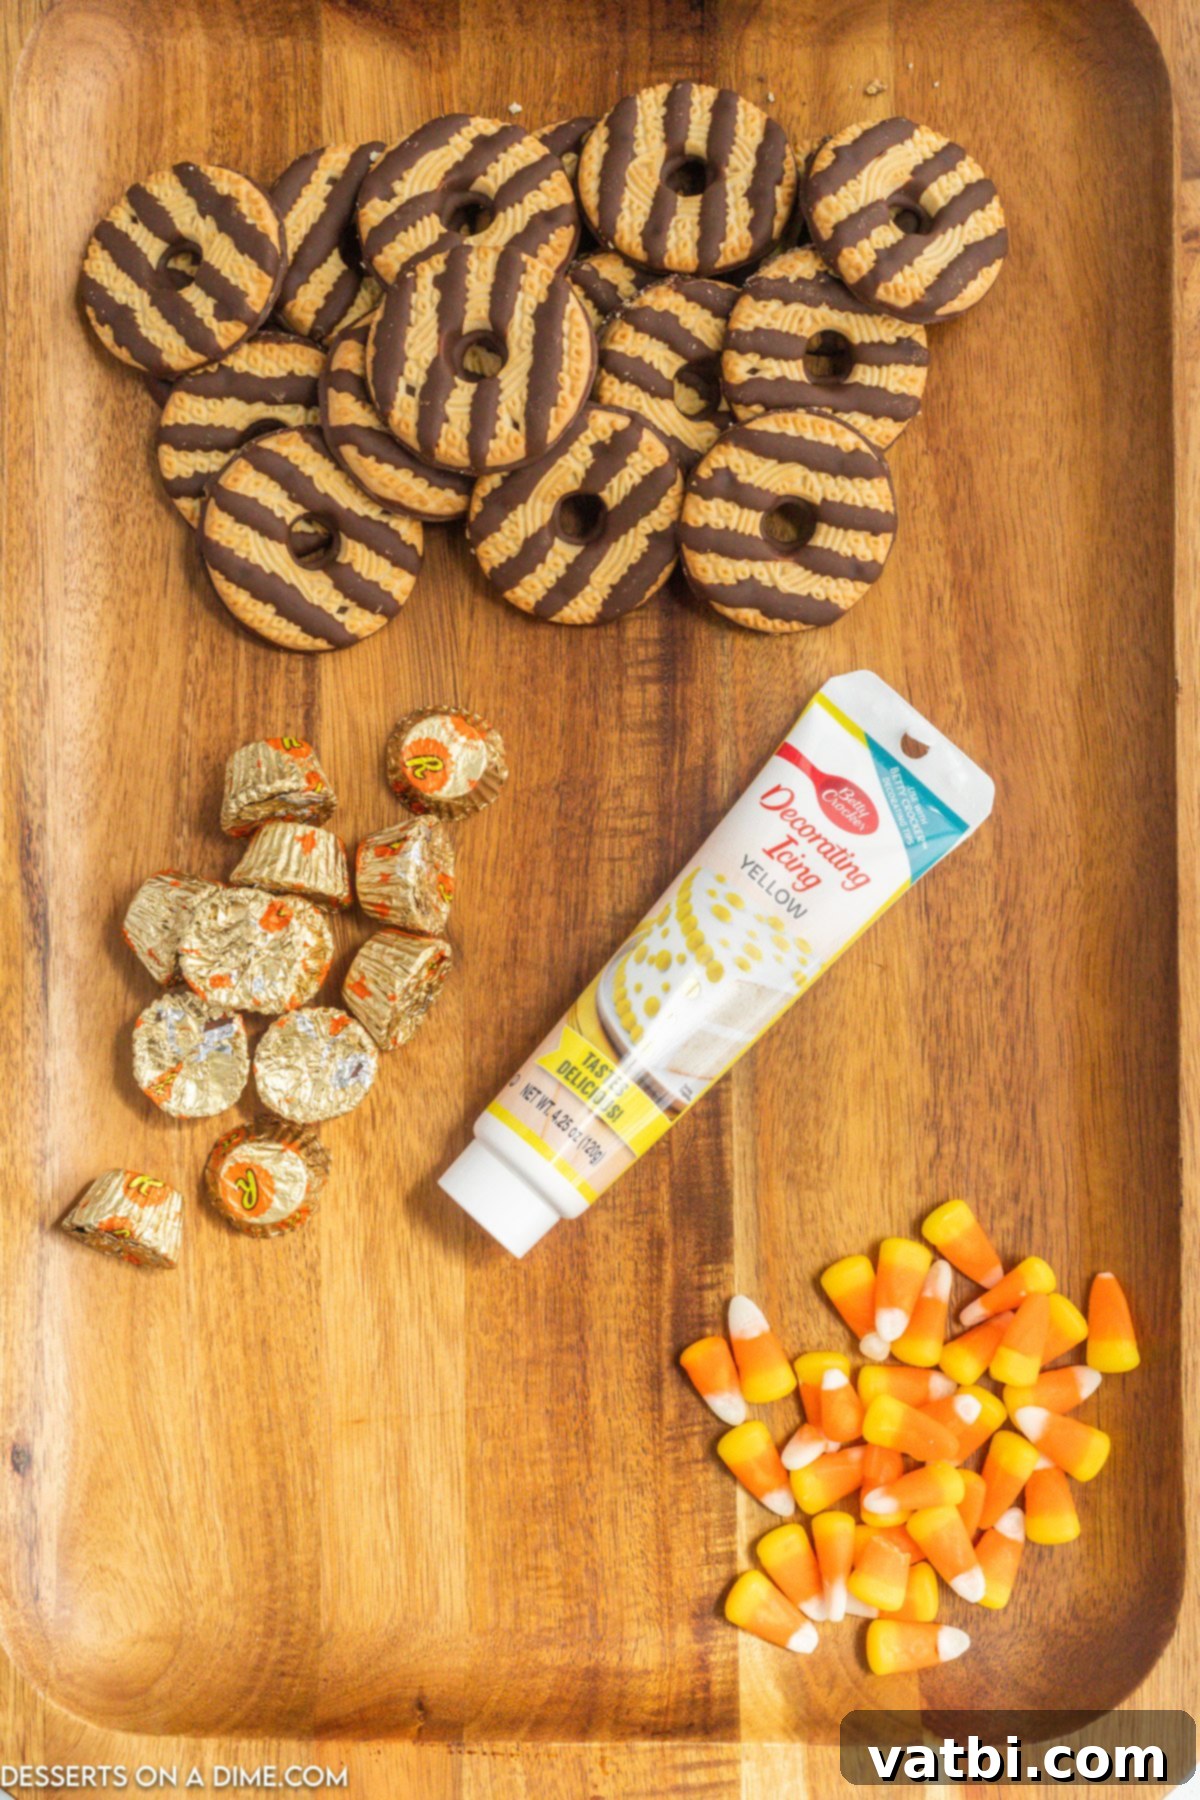
The beauty of this recipe lies in its simplicity, thanks to a short list of readily available ingredients. You won’t need to hunt for obscure items; everything can be found at your local grocery store. Each component plays a specific role in creating the iconic pilgrim hat look and delicious flavor:
- Fudge Stripe Cookies: These cookies are truly the star of the show, forming the perfect base for our pilgrim hats. Their distinct circular shape, ridged edges resembling a hat brim, and pre-coated chocolate make them ideal, saving you time and effort. The chocolate coating also helps the Reese’s cup adhere better and provides a rich flavor foundation.
- Miniature Reese’s Peanut Butter Cups: A universally loved treat, these miniature delights form the “crown” of our pilgrim hats. Make sure to grab the miniature size and have them unwrapped and ready to go before you begin assembly. The classic combination of chocolate and peanut butter is irresistible and a guaranteed crowd-pleaser.
- Pieces of Candy Corn: We’ll be using the distinctive orange piece of candy corn to create the “buckle” on our hats. This adds a pop of traditional fall color and a fun, recognizable detail that instantly shouts “Thanksgiving!” If candy corn isn’t your favorite, don’t worry, there are plenty of alternatives for the buckle!
- Yellow Decorating Icing: Forget making frosting from scratch! These convenient store-bought tubes of yellow icing are perfect for creating the iconic brim on the pilgrim hat and also act as the “glue” to hold everything together. Its vibrant color makes the hat pop and ensures the Reese’s cup stays firmly in place.
You’ll find the complete, precise list of ingredients with quantities in the recipe card at the bottom of this page. Gather these few items, and you’re well on your way to creating a memorable Thanksgiving treat that will impress everyone!
Get Creative with Recipe Variations
While the classic Pilgrim Hat Cookie recipe is delightful on its own, it also lends itself beautifully to creative variations. Don’t hesitate to experiment and customize these treats to your taste, to match a different holiday theme, or simply to use ingredients you already have on hand. Personalizing these cookies can be half the fun!
- Change the Candy for the Buckle: Not a fan of candy corn? No problem! You can easily substitute the orange candy corn piece with other small candies or edible decorations. Peanut butter chips make an excellent alternative, adding more peanut butter flavor and a nice texture contrast. M&M’s, small chocolate chips, red hots, or even tiny square pieces of yellow fruit leather could work wonderfully to create the buckle effect, allowing for different color schemes as well.
- Cookie Base Alternatives: Fudge Stripe Cookies are ideal due to their consistent shape and chocolate coating, but almost any flat cookie can serve as the base for this Thanksgiving treat. Consider using chocolate wafers for a darker hat, shortbread cookies for a buttery flavor, or even vanilla sandwich cookies (with the cream removed for a flatter surface) if you want to switch things up. The key is to choose a cookie that provides a relatively flat and sturdy surface to support the Reese’s cup.
- Frosting Fun and Colors: While yellow icing is traditional for the “buckle” detail and brim, feel free to have fun with your frosting choices. You can use homemade buttercream frosting and dye it any color with food coloring, or opt for other festive colors in store-bought tubes. Orange frosting, for example, would tie in perfectly with general fall themes, or even brown frosting for a more monochromatic hat. Chocolate frosting could create a sleek, uniform look, or white icing with a touch of food coloring for any desired hue.
- Decorating the Hats: Unleash your inner artist and make each pilgrim hat unique! Beyond the basic design, there are many ways to further decorate your Pilgrim Hats. Add a sprinkle of edible gold or silver glitter around the brim for a touch of elegance, mini chocolate chips for extra texture, or even a dusting of powdered sugar to mimic snow (if adapting for a winter holiday). You could also use different colored icing to draw small intricate details on the brim or the top of the hat.
These variations ensure that your Pilgrim Hat Cookies can be tailored for any occasion, offering endless possibilities for a truly personalized and memorable holiday dessert that reflects your creativity and taste.
Step-by-Step Guide to Assemble Your Pilgrim Hats
Creating these charming Pilgrim Hat Cookies is a quick and enjoyable process, perfect for a family activity during the holiday season. Follow these simple steps, and you’ll have a delightful batch ready in no time at all. This guide walks you through each stage with clear instructions and helpful visual cues:
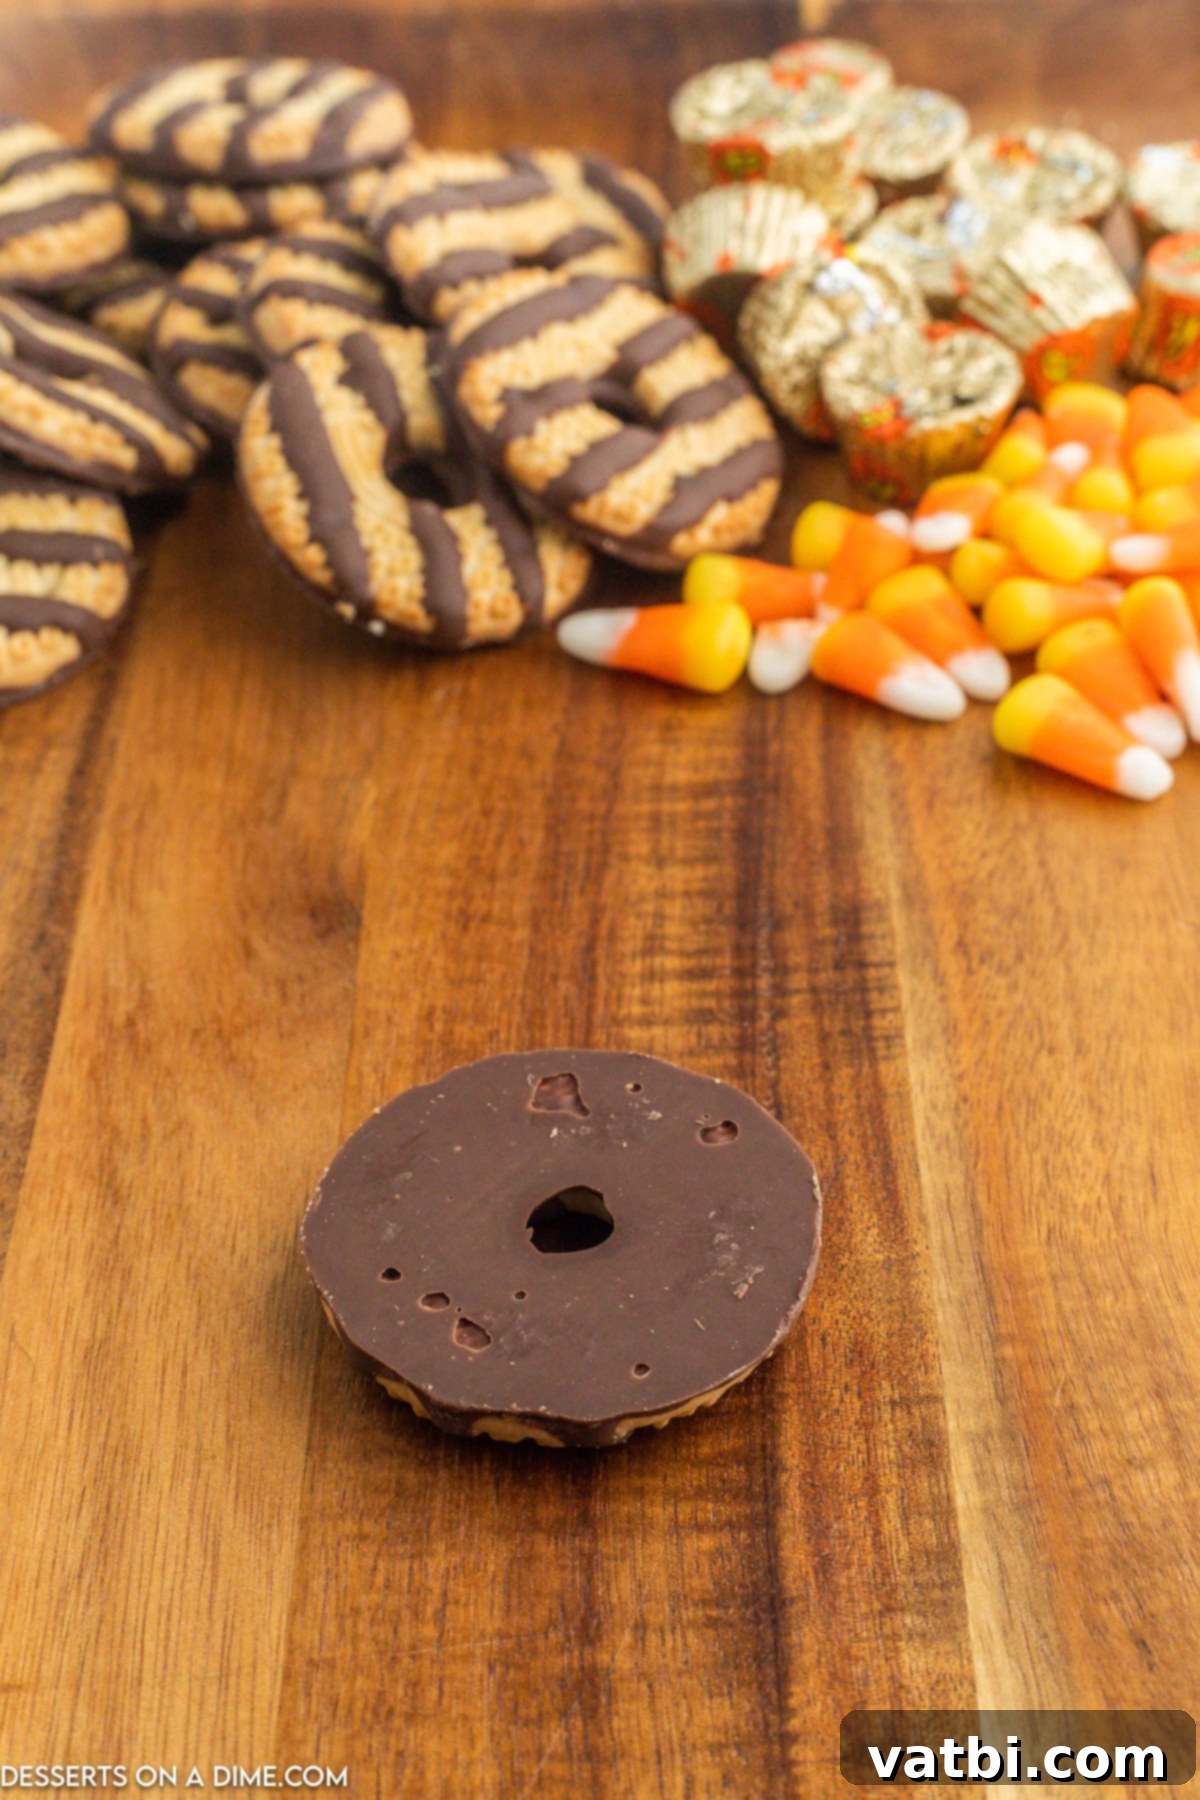
Step 1 – Prepare Your Cookie Base: Take your Fudge Stripe Cookies and place them upside down on a flat work surface. The chocolate-coated side, which usually faces down, should now be facing upwards. This chocolate layer will form the essential bottom of our hat brim, providing a sturdy and delicious foundation.
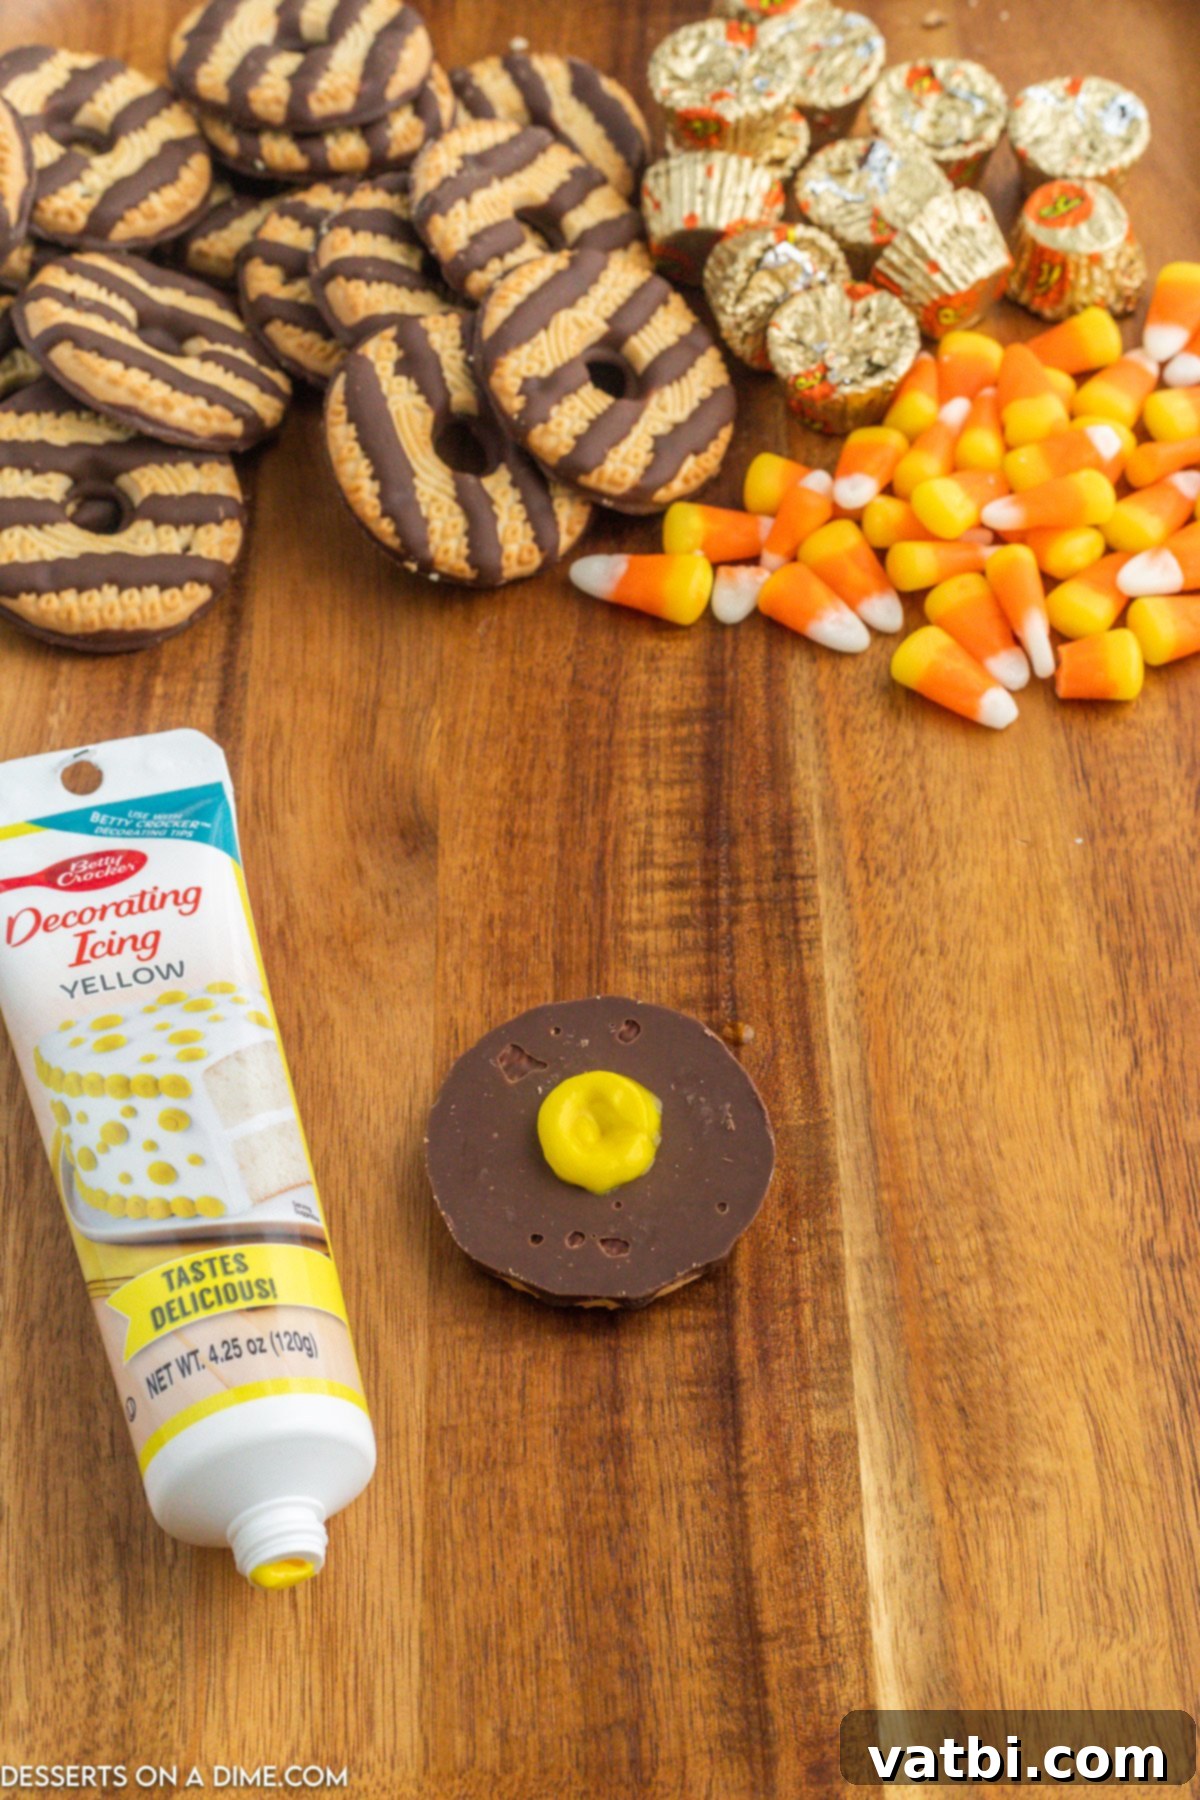
Step 2 – Apply the Icing Adhesive: Using your tube of yellow decorating icing (or a piping bag with your chosen frosting), carefully pipe a circle of icing around the very center of the chocolate-coated cookie. This circle of icing is crucial, as it will act as the adhesive to secure the Reese’s cup and will also visually form part of the hat’s brim.
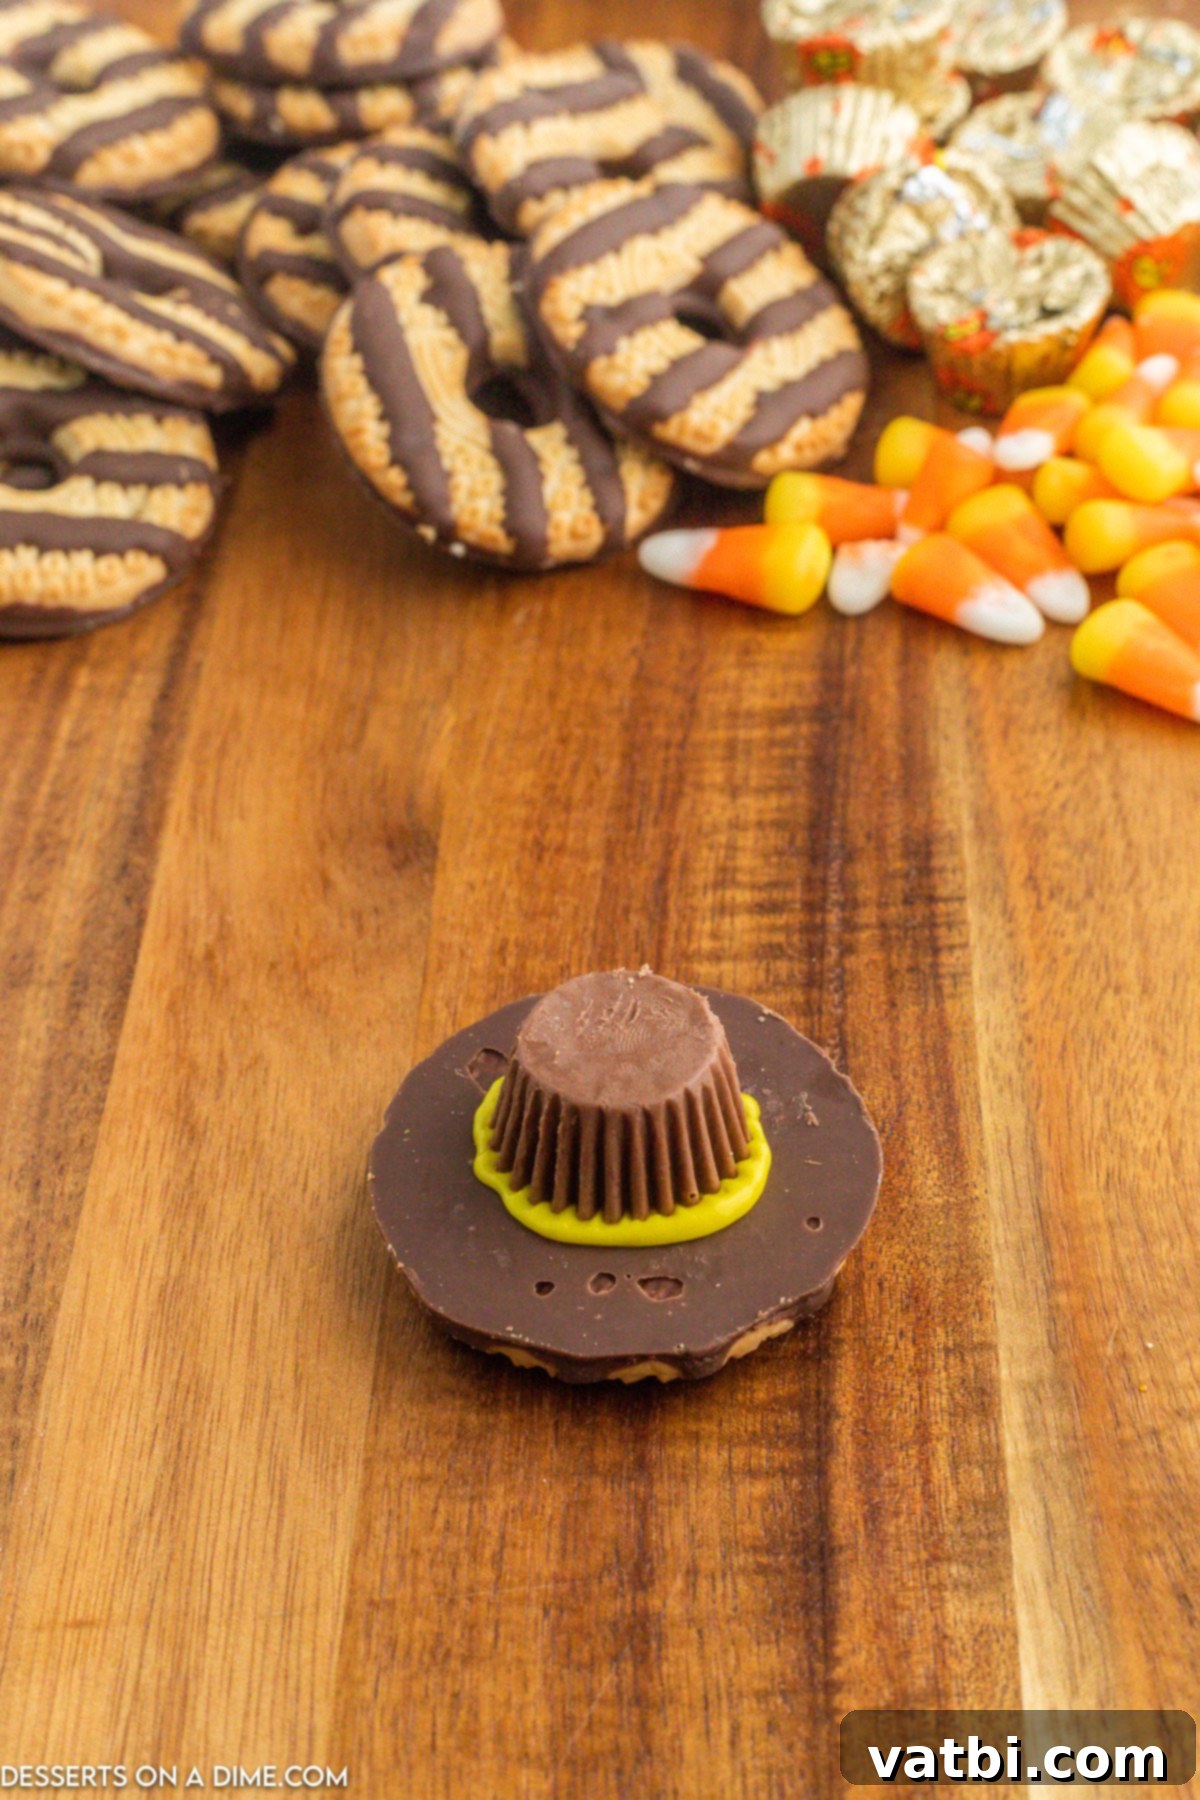
Step 3 – Add the Hat’s Crown: Gently take an unwrapped miniature Reese’s Peanut Butter Cup and press it firmly, yet carefully, upside down onto the middle of the piped icing circle. Ensure it is well-centered to give your hat a balanced and neat appearance.
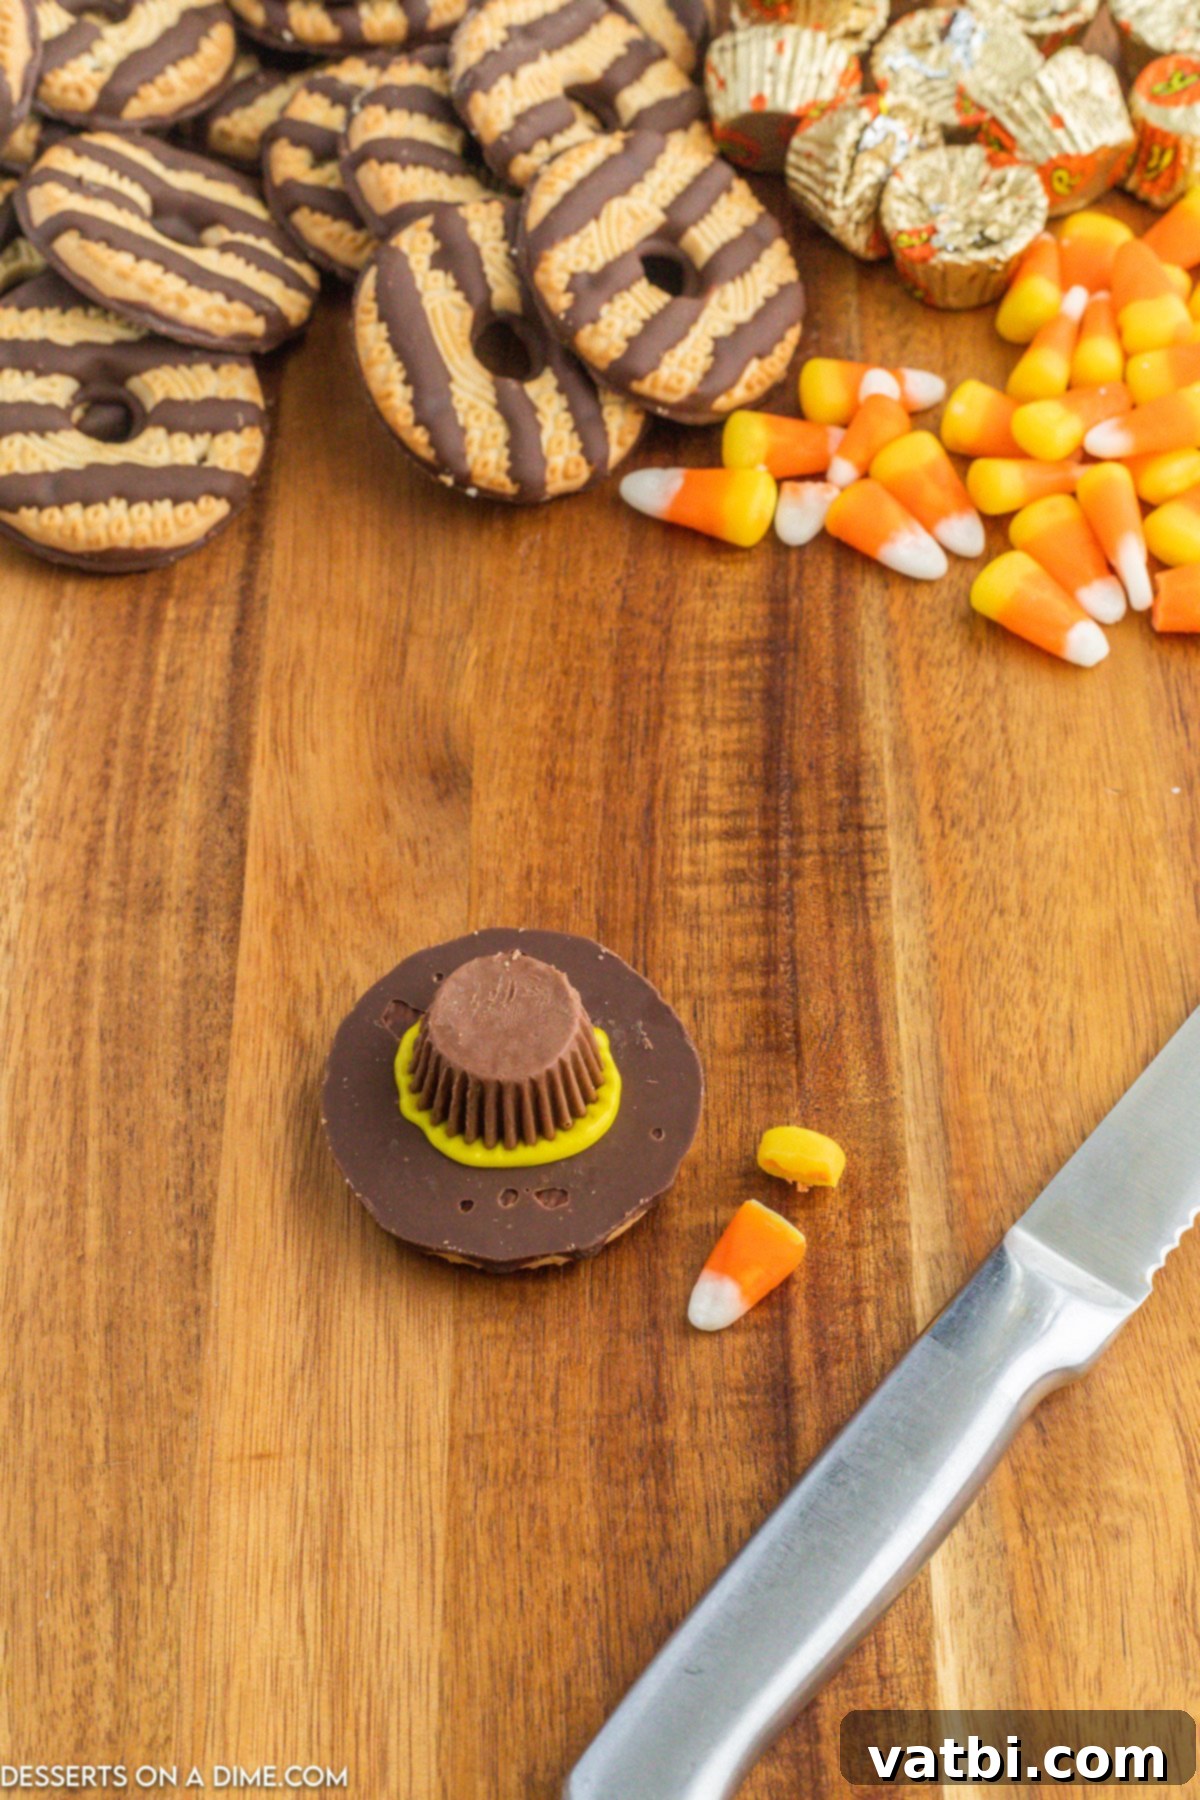
Step 4 – Form the Brim: As you press the Reese’s cup down, allow the yellow icing to naturally seep out from the sides, spreading slightly to meet the chocolate cookie base. This creates the visual effect of a distinctive hat brim, giving your cookie its classic pilgrim hat appearance. Don’t worry if it’s not perfectly uniform; a little rustic charm is part of the fun of homemade treats!
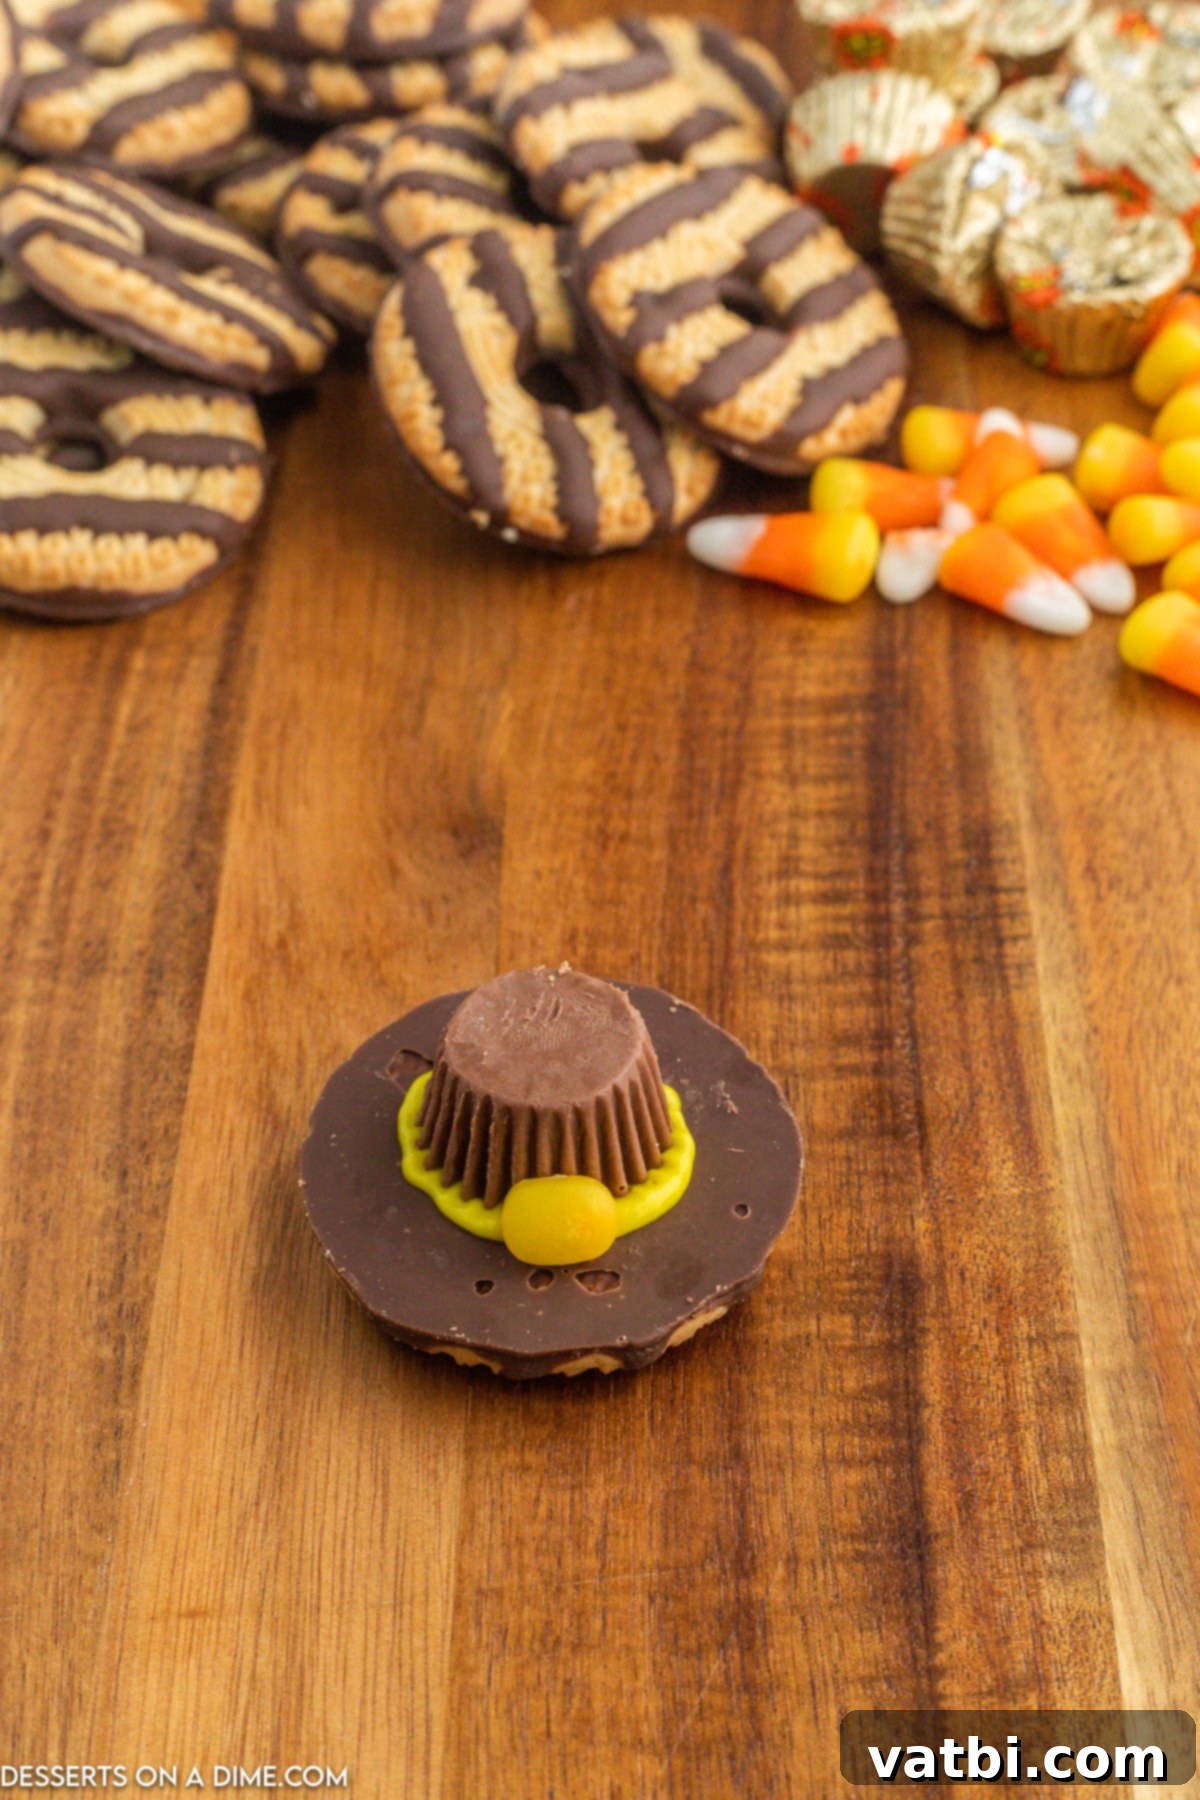
Step 5 – Add the Iconic Buckle: Carefully cut off the orange portion of each candy corn piece. Then, gently press this orange piece onto the front center of the yellow icing brim, just below the Reese’s cup. This creates the iconic buckle detail that completes the pilgrim hat look, adding an authentic touch. For an alternative, a small peanut butter chip also works perfectly here and provides a delicious flavor match.
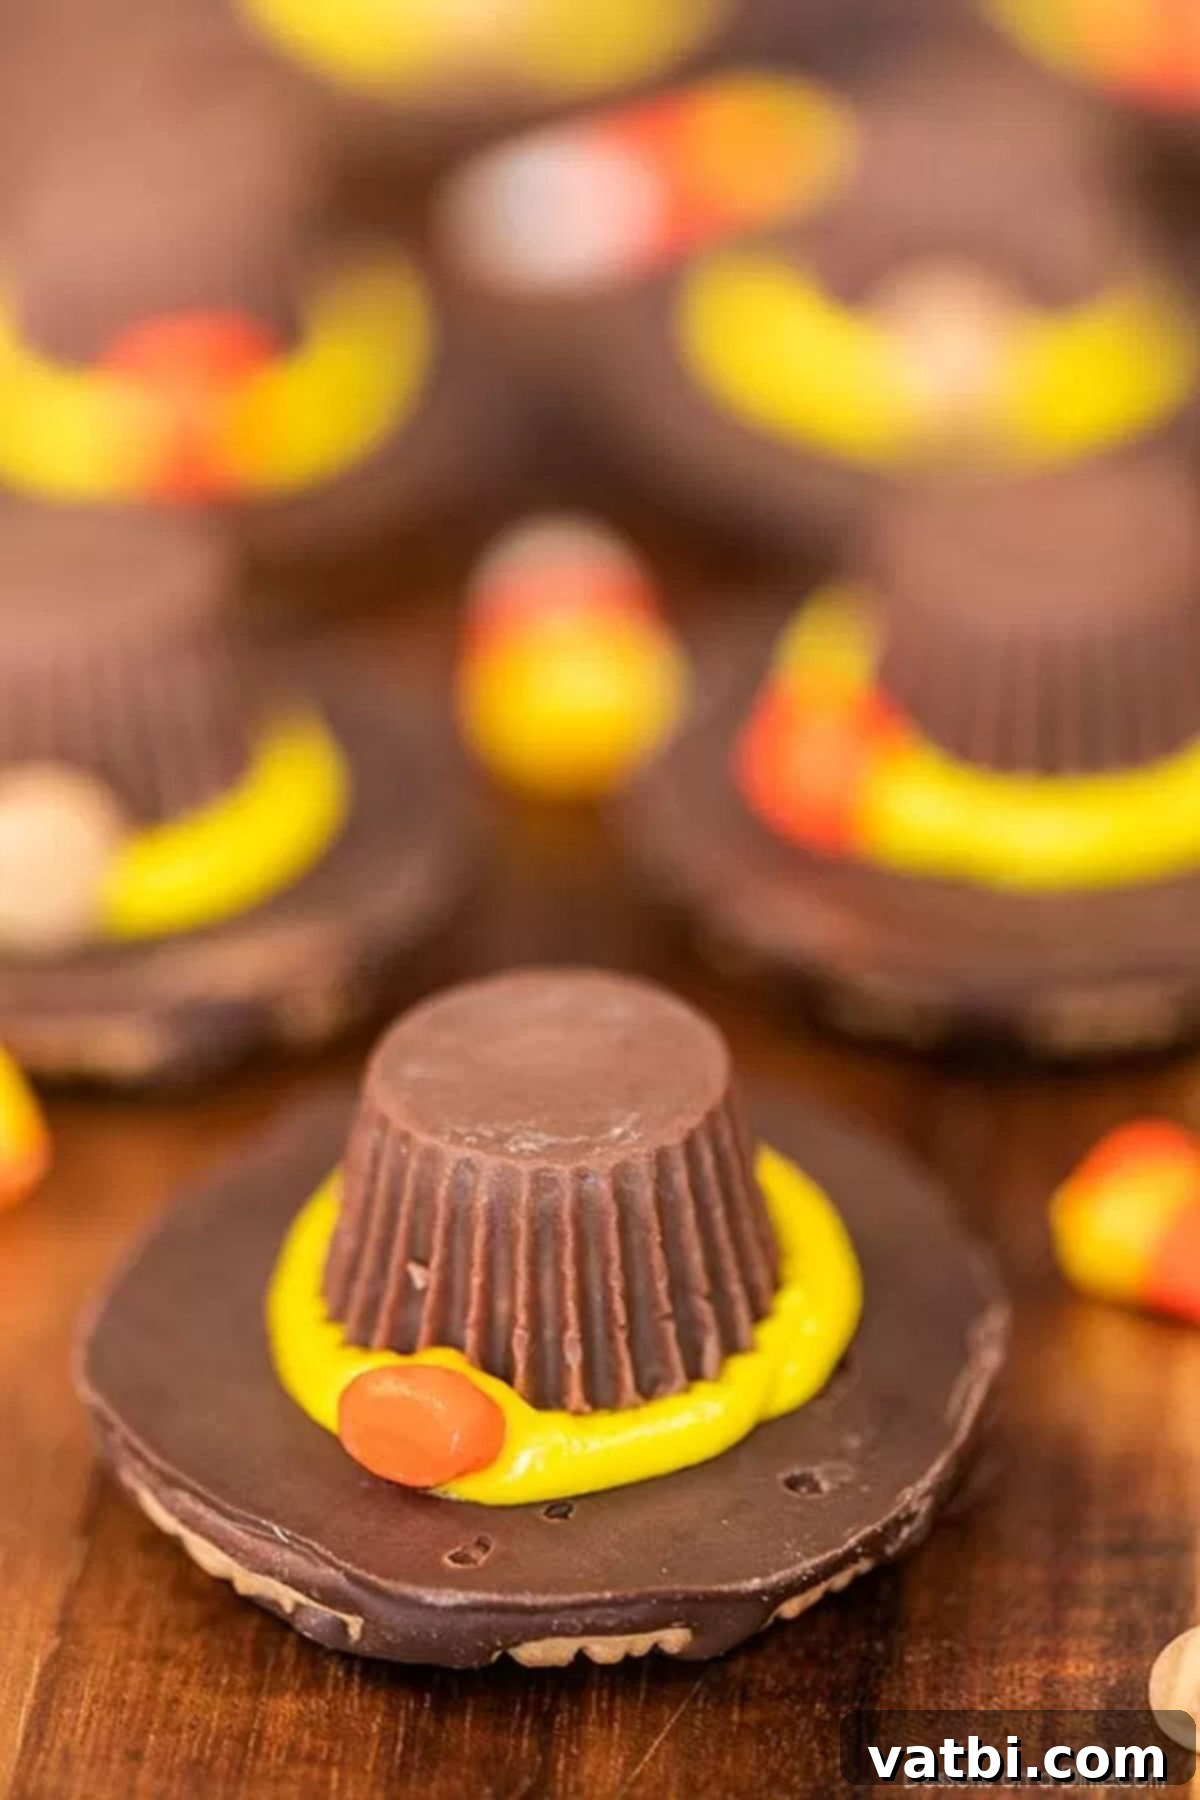
Step 6 – Serve and Enjoy: Once all your cookies are assembled, allow them a few minutes for the icing to set slightly. This ensures everything is firm and stable. Then, arrange them beautifully on a platter and watch as everyone marvels at your creative and delicious Pilgrim Hat Cookies!
Pro Tips for Perfect Pilgrim Hat Cookies
Even the simplest recipes can benefit from a few expert tips to ensure your results are consistently perfect and your experience is enjoyable. Here’s how to ensure your Pilgrim Hat Cookies turn out beautifully every time and how to make the most of the experience, from assembly to serving:
- Icing Application for Precision: While store-bought tubes of decorating icing are super convenient, for a smoother application and more precise control, consider using a frosting bag fitted with a small round tip. If you don’t have one, a sturdy Ziploc bag with a tiny corner snipped off works just as well. This allows for clean and even piping of the yellow brim around the Reese’s cup.
- Make it a Family Affair – Involve the Kids: These cookies are an ideal easy Thanksgiving dessert to make with children. Set up an assembly line, assign different tasks (like unwrapping the Reese’s, piping the icing, or carefully placing the candy corn buckles), and let them get creative with decorating. It’s a fantastic way to bond, foster their creativity, and create lasting holiday memories together in the kitchen.
- Ensure a Stable Work Surface: Always place your fudge stripe cookies on a flat, stable work surface, such as a baking sheet lined with parchment paper. This makes assembly much easier, prevents cookies from sliding around, and minimizes mess. Parchment paper also has the added benefit of preventing sticking and making cleanup a breeze once you’re done.
- Allow the Icing to Set: For best results and to ensure that all the components stay firmly in place, especially when stacking or transporting, allow the icing to set for at least 15-20 minutes after assembly before handling or serving the cookies. If your home is particularly warm, a brief stint (5-10 minutes) in the refrigerator can speed up this setting process significantly.
- Master the Make-Ahead Option: These cookies are excellent for making ahead of time, which is a huge bonus during the busy Thanksgiving week. You can assemble them a day or two before your celebration. Store them in an airtight container at room temperature. For longer storage, they can be frozen for up to 3 months when stored properly in a freezer-safe, airtight container, with layers separated by parchment paper. Thaw them at room temperature for an hour or two before serving.
- Presentation Matters: Elevate your dessert table by arranging your finished Pilgrim Hat Cookies on a festive platter. You can intersperse them with autumn leaves, small gourds, mini pumpkins, or other Thanksgiving-themed decorations to create a beautiful and inviting display that enhances your holiday décor. They also make wonderful, thoughtful edible gifts for hosts or guests!
Storage and Make-Ahead Options
Proper storage is key to keeping your Pilgrim Hat Cookies fresh and delicious, ensuring they can be enjoyed throughout the holiday season. These cookies are fantastic for making in advance, which is a huge bonus during the busy Thanksgiving season, as it helps alleviate last-minute stress in the kitchen.
Once assembled, allow the icing to fully set for at least 30 minutes to an hour. Then, carefully place the cookies in an airtight container. To prevent them from sticking together or damaging their delicate decorations, it’s highly recommended to separate layers with sheets of parchment paper. Store them at room temperature, and they will remain fresh and tasty for about a week. This makes them a perfect make-ahead treat, allowing you to focus on other Thanksgiving preparations on the big day itself without worrying about desserts. If you live in a particularly warm climate, or if you prefer a firmer icing, you can store them in the refrigerator, but allow them to come to room temperature briefly (about 15-20 minutes) before serving for optimal flavor and texture. For even longer storage, these cookies freeze beautifully for up to three months in an airtight, freezer-safe container.
Making Thanksgiving Memories with Kids
Thanksgiving is often synonymous with large family gatherings, and keeping the little ones entertained and engaged can be a delightful challenge. These Pilgrim Hat Cookies offer the perfect solution! This simple, no-bake recipe is incredibly kid-friendly, allowing children of various ages to participate actively in the holiday preparations. From unwrapping the miniature peanut butter cups to carefully piping the yellow icing and placing the candy corn buckles, each step is manageable and fun for small hands. This activity isn’t just about making delicious cookies; it’s about fostering creativity, developing fine motor skills, and creating cherished memories together in the kitchen. Plus, they get the immense satisfaction of enjoying the fruits of their labor, making the holiday even more special and personal for them. It’s a wonderful way to introduce them to the joy of cooking and contributing to family traditions.
Other Delightful Thanksgiving Treats
While Pilgrim Hat Cookies are certainly a showstopper and a crowd-pleaser, Thanksgiving offers a wonderful opportunity to explore a variety of festive desserts. Expand your holiday menu with these other beloved and equally charming recipes, perfect for adding more flavor and fun to your holiday spread:
More Thanksgiving Treats
Thanksgiving Desserts
Thanksgiving Sugar Cookies Recipe
Classic sugar cookies adorned with beautiful fall-themed icing, a delightful treat for all ages.
Thanksgiving Desserts
Thanksgiving Cake Pops Recipe
Bite-sized cake pops decorated with fall colors, a fun and elegant addition to any dessert table.
Cookies
Oreo Turkey Cookies
Another fantastic no-bake option, these adorable turkey cookies made with Oreos are always a hit with kids.
No bake Dessert
Chocolate Acorns
Simple and charming chocolate acorns, a rustic and delicious no-bake treat that captures the essence of autumn.
Pin
Pilgrim Hat Cookies
Ingredients
- 24 Fudge Stripe Cookies
- 24 Miniature Reese’s Peanut Butter Cups Unwrapped
- 24 Pieces Candy Corn
- 4 oz Yellow Decorating Icing
Instructions
-
Place the fudge strip cookies upside down so that the chocolate part is facing up.
-
With the pre-made frosting, place a circle around the center the cookie.
-
Press the peanut butter cups upside down onto the middle of the icing. Allow the icing to seep out of the sides of the peanut butter cups to give the appearance of a hat brim.
-
Cut off the orange portion of each candy corn and place them on the center the of the rim to create the buckle on the hat. We also used some Peanut Butter chips as well for an alternative!
-
Serve and enjoy these festive Pilgrim Hat Cookies!
Recipe Video
Recipe Notes
Nutrition Facts
Pin This Now to Remember It Later
Pin Recipe
