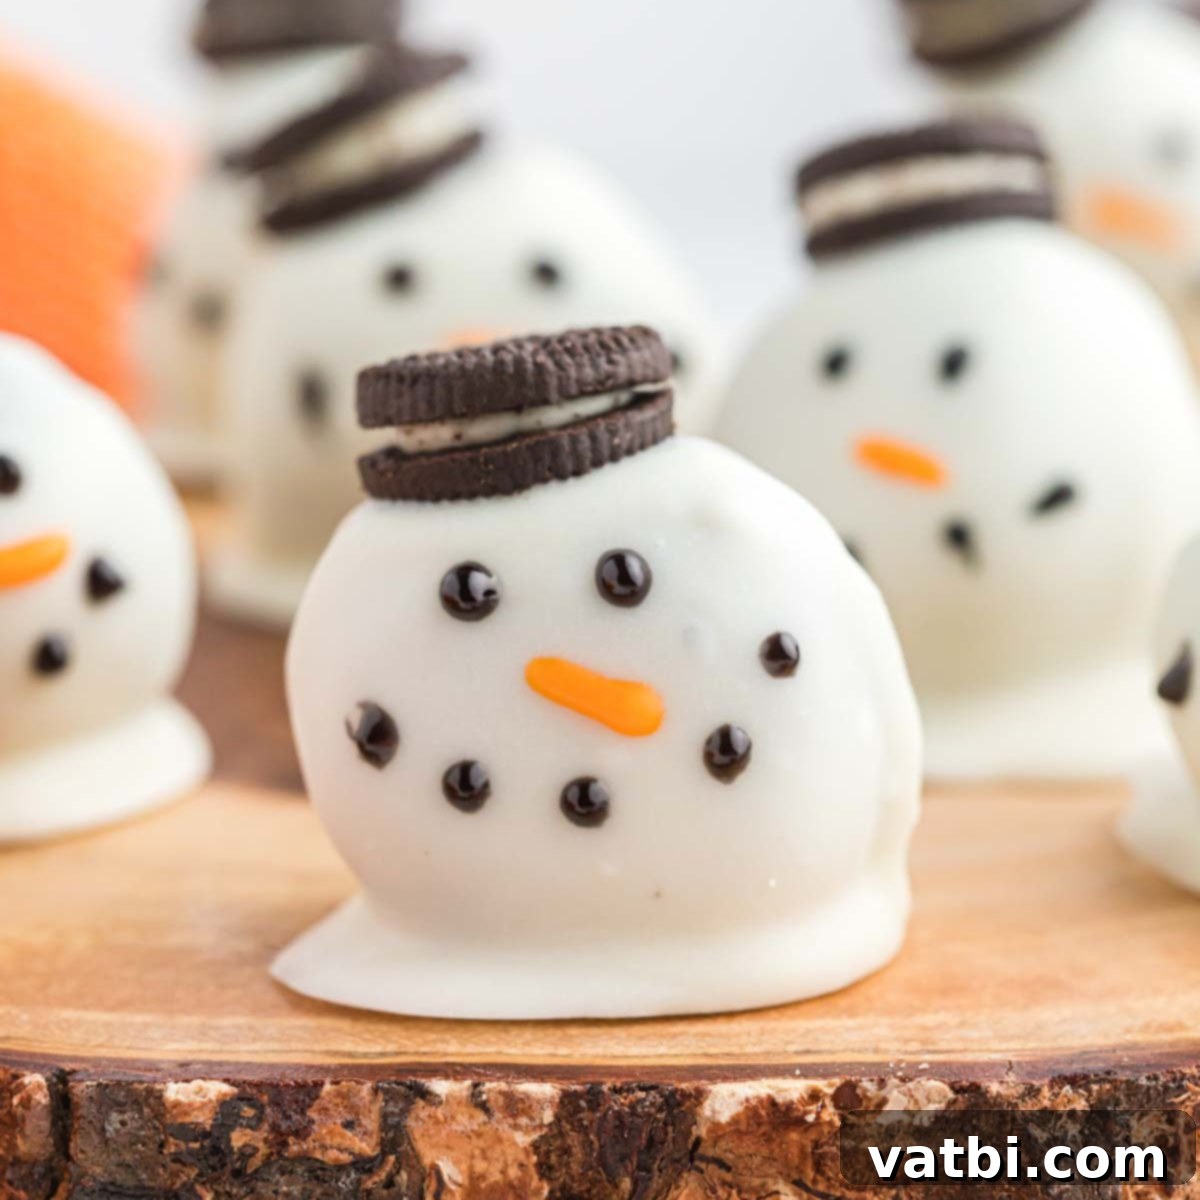
Delightful No-Bake Snowman Oreo Balls: The Ultimate Festive Treat for Your Holiday Table
Welcome to the most enchanting dessert of the holiday season! Our recipe for Snowman Oreo Balls offers a truly fun, no-bake experience that children and adults alike will adore. These whimsical treats are not just incredibly cute and charming; they also boast an irresistible flavor that makes them perfect for any festive gathering, winter celebration, or simply a delightful snack on a cozy evening. Imagine the classic richness of Oreo cookies blended with creamy goodness, then transformed into charming little snowmen ready to melt hearts (and in your mouth!). This easy-to-make dessert is an ideal choice when you want to impress without the hassle of baking, adding a touch of magic to your holiday dessert spread.
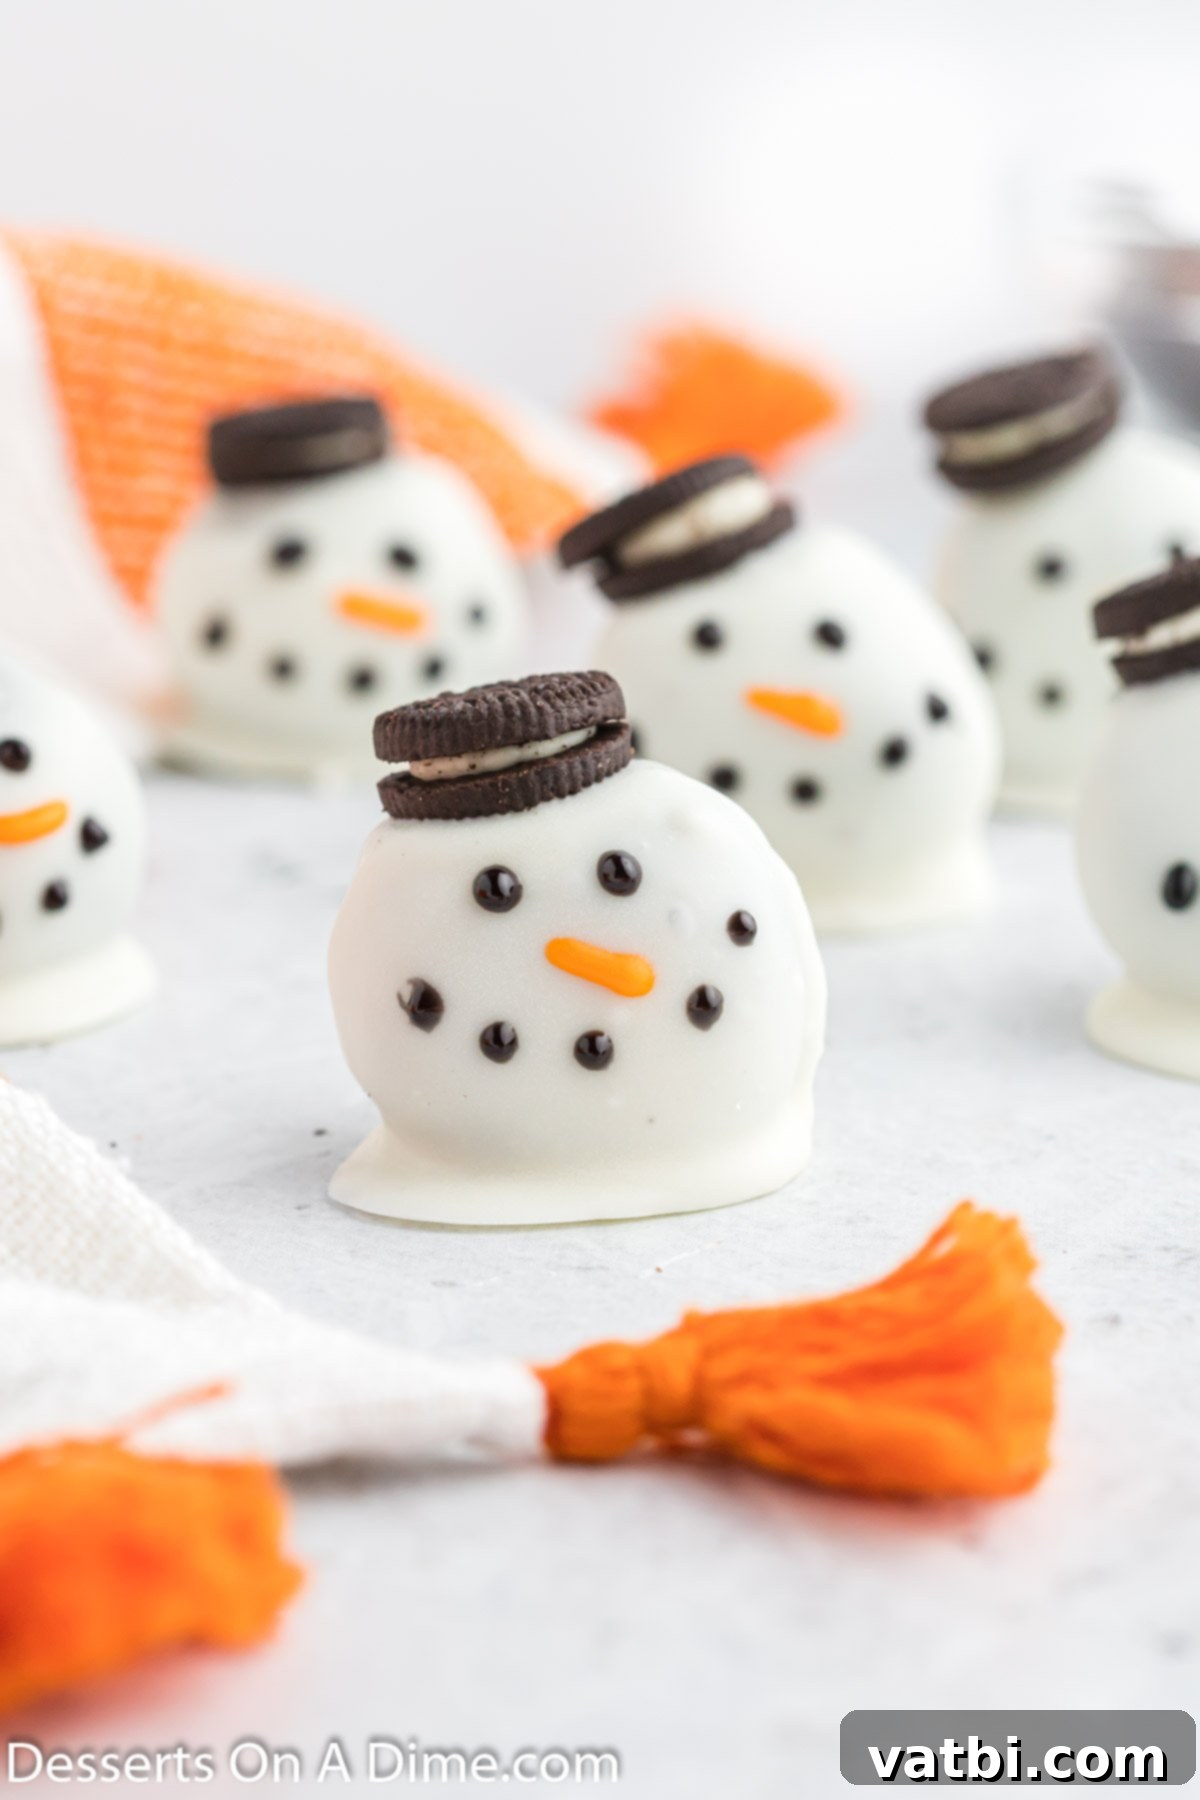
Transforming simple ingredients into these adorable Snowman Oreo Cookie Balls is a joyous activity, making them the perfect centerpiece for holiday parties or a sweet surprise for loved ones. Every time these cute Christmas desserts make an appearance, guests always rave about their delightful taste and charming presentation. If you’re a fan of our popular No-Bake Oreo Balls Recipe, you are going to absolutely fall in love with this festive, winter-themed version. It’s specially crafted for those times when you crave a delightful snowman theme. Beyond these, our family also enjoys making other seasonal favorites like Snowman Chocolate Covered Oreos and the refreshing Peppermint Oreo Balls.
What’s in this post: Snowman Oreo Balls
- What is a Snowman Oreo Ball?
- Why You’ll Love This Recipe
- Ingredients You’ll Need
- Additions and Substitutions for Customization
- How to Make Snowman Oreo Balls: Step-by-Step Instructions
- Tips for Perfect Snowman Oreo Balls
- Frequently Asked Questions
- More Holiday Desserts to Try
- Snowman Oreo Balls Recipe Card
What is a Snowman Oreo Ball?
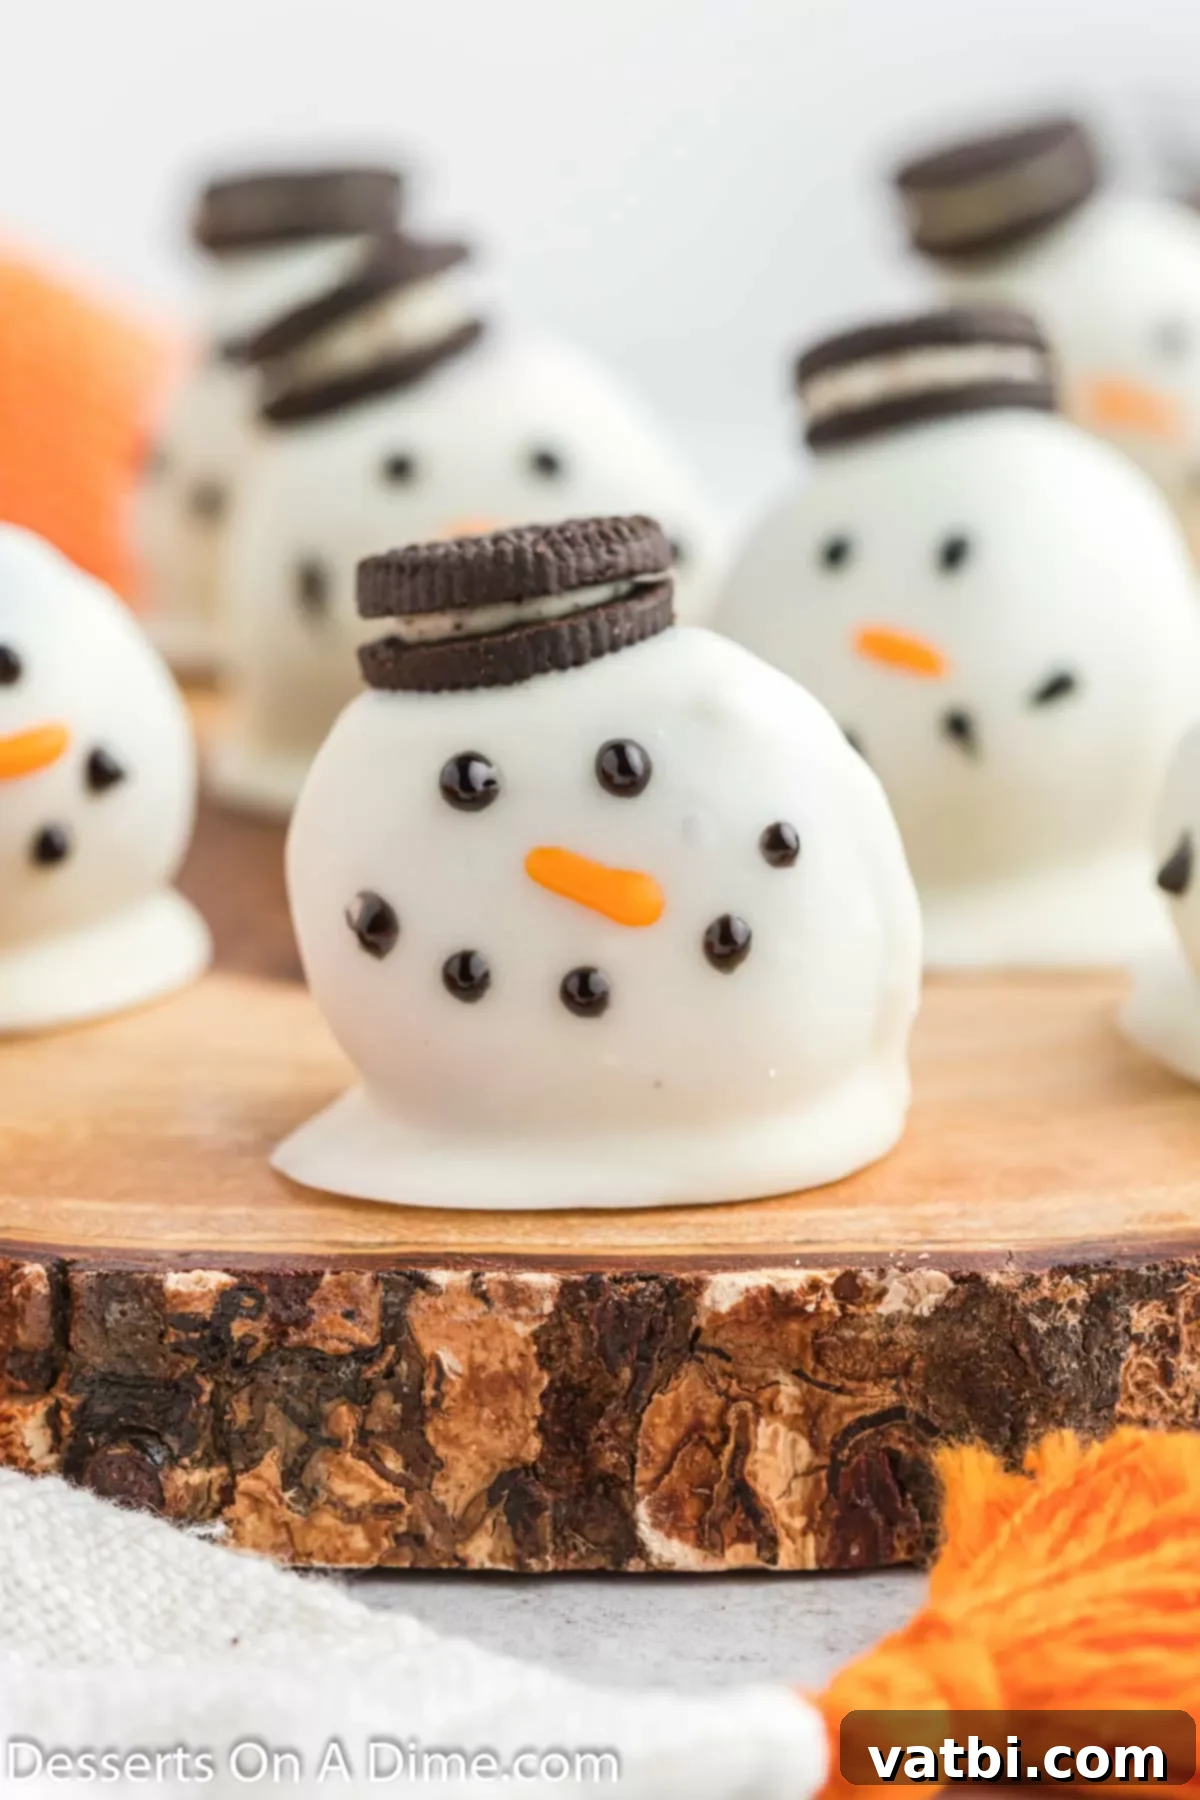
Essentially, a Snowman Oreo Ball is a delightful twist on the classic Oreo truffle, artfully decorated to resemble an endearing snowman. It starts with the beloved combination of finely crushed Oreo cookies and softened cream cheese, mixed together to form a rich, pliable dough. This mixture is then rolled into small, uniform balls and chilled to firm up. The magic truly comes alive when these creamy cookie balls are dipped in a smooth, white confectionery coating, such as almond bark or melted white chocolate. Once coated, each ball becomes a perfect canvas for its transformation into a festive snowman, adorned with a mini Oreo cookie hat and charming facial features piped with icing. The process is incredibly straightforward, involving just a few easy steps, but the results are always spectacular: irresistible, adorable, and perfectly themed snowman Oreo balls that are sure to be the highlight of any festive occasion.
The beauty of these truffles lies in their simplicity and the minimal effort required for maximum visual impact and taste. You get all the beloved flavor of an Oreo cookie in a creamy, truffle-like consistency, elevated with a seasonal decoration. They’re a fantastic project for a snowy afternoon and a guaranteed crowd-pleaser.
Why You’ll Love This Recipe
There are countless reasons why these Snowman Oreo Balls will become your new favorite holiday tradition. First and foremost, they are a **no-bake dessert**, which means no oven time is required, freeing up your oven for other holiday dishes. This also makes them incredibly accessible for beginner cooks and a fantastic activity for kids. Their **kid-friendly appeal** extends beyond just making them; children absolutely adore decorating these little snowmen, transforming simple truffles into edible art. Each bite offers a **delicious combination** of crunchy Oreo cookies and smooth, tangy cream cheese, all enveloped in a sweet white chocolate shell. The rich flavor profile is simply irresistible.
Beyond taste, their **charming and festive appearance** makes them an instant hit at any holiday party or family gathering. They add a whimsical touch to your dessert table and are sure to spark conversation. Furthermore, these Oreo balls are **perfect for gifting**. Package a few in a decorative box, and you have a thoughtful, homemade present that anyone would love to receive. They are also incredibly **versatile**, allowing for easy substitutions and additions to suit various tastes or dietary needs. Quick to prepare and even quicker to disappear, these delightful treats offer joy in every aspect.
Ingredients You’ll Need
Crafting these adorable Snowman Oreo Balls requires just a handful of simple ingredients, most of which you likely already have or can easily find at any grocery store. The key is using high-quality components to ensure the best flavor and texture for your festive treats. Make sure your cream cheese is softened to room temperature for the smoothest possible mixture!
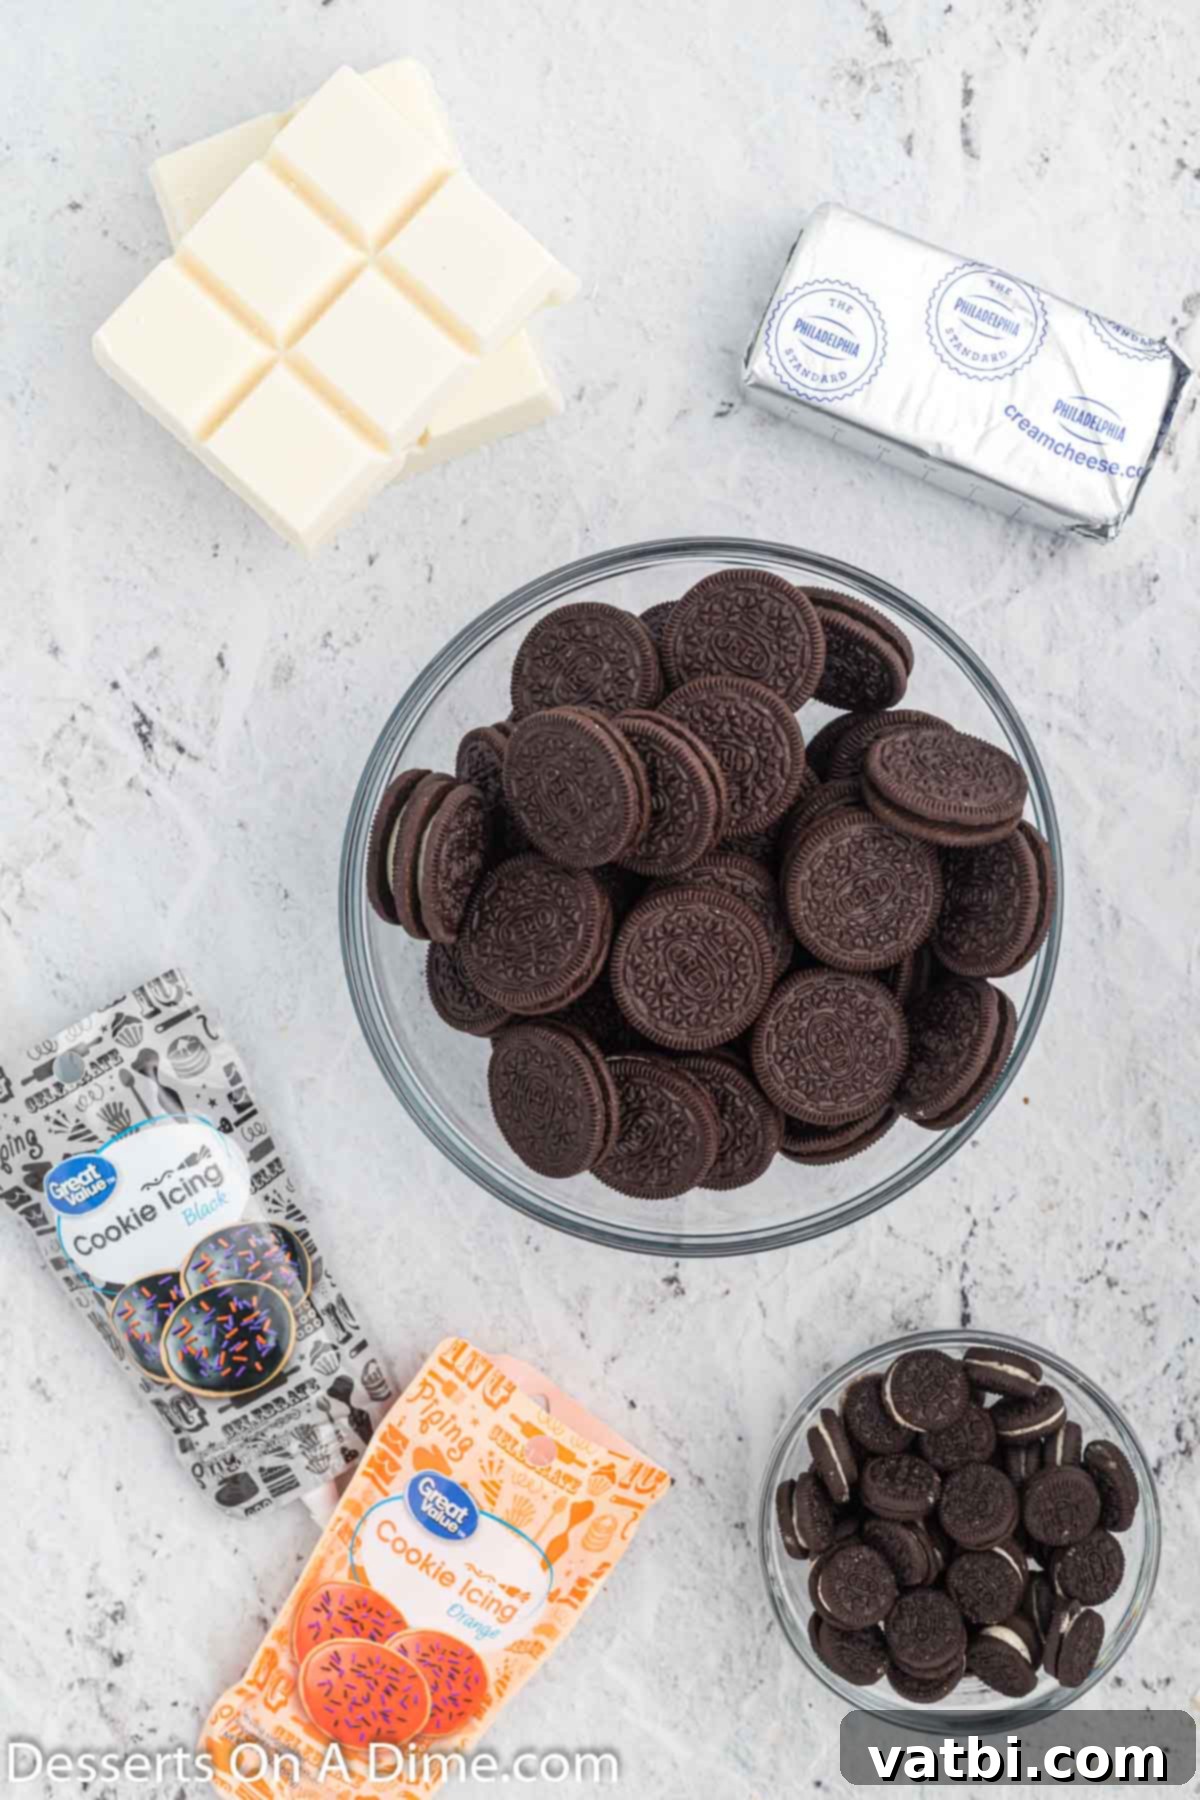
- Softened Cream Cheese: Essential for binding the cookie crumbs and creating that smooth, truffle-like consistency. Make sure it’s at room temperature for easy mixing.
- Oreo Cookies: The star of the show! A standard 14.5 oz package of original Oreos works perfectly for the base.
- Vanilla Almond Bark: This provides a smooth, easy-to-melt coating that sets quickly and gives a lovely white finish. It’s often preferred over white chocolate for dipping as it’s less prone to seizing.
- Mini Oreo Cookies: These will serve as the adorable hats for your snowmen, adding another layer of Oreo goodness.
- Orange Decorating Icing: Used to pipe the iconic carrot noses for your snowmen.
- Black Decorating Icing: Perfect for creating the eyes and a charming dotted mouth for your snowman faces.
For the complete, precise ingredient quantities and detailed recipe instructions, please scroll down to the printable recipe card at the bottom of this post.
Additions and Substitutions for Customization
One of the best things about this Snowman Oreo Balls recipe is its flexibility. You can easily customize it with various additions and substitutions to match your preferences or whatever you have on hand. Don’t hesitate to get creative!
- White Chocolate Chips or Melting Wafers: While almond bark is fantastic for its ease of melting and smooth finish, you can absolutely use high-quality white chocolate chips or white confectionery melting wafers instead. If using white chocolate chips, you might want to add a teaspoon of coconut oil or shortening to help it melt smoother and achieve a better dipping consistency.
- Rolo Candies or Miniature Peanut Butter Cups: For a different hat option, consider using Rolo candies or even miniature Reese’s Peanut Butter Cups. Their shape and size make for a charming alternative, adding a delicious caramel or peanut butter flavor twist to your snowman’s ensemble. You can secure them with a tiny dab of melted white chocolate.
- Holiday Oreos or Flavored Oreos: Don’t limit yourself to just classic Oreos! Experiment with different types of Oreos to change the flavor profile. Holiday-themed Oreos with red or green creme can add an extra festive touch to the interior, while flavors like Mint Oreos, Golden Oreos, or Peanut Butter Oreos can introduce exciting new tastes.
- Sprinkles: Before the white coating completely sets, you can add festive sprinkles (red, green, blue, silver) around the base of the snowman for a “snowfall” effect or even on the mini Oreo hat.
- Edible Glitter: A dusting of edible glitter can make your snowmen truly sparkle, giving them an extra magical frosty appearance.
- Mini Chocolate Chips: Instead of piping black icing for the eyes and mouth, you can use tiny mini chocolate chips, strategically placed for a different texture and look.
- Pretzel Sticks: For a more detailed snowman, thin pretzel sticks can be broken into small pieces and inserted into the sides of the Oreo ball as “arms” before the coating sets.
- Red Pull-and-Peel Licorice: Cut small strips of red licorice to create tiny scarves for your snowmen, adding an extra pop of color and charm.
How to Make Snowman Oreo Balls:
Making these adorable Snowman Oreo Balls is a fun and straightforward process. Follow these detailed steps to create your batch of festive treats!
- Prepare Your Workspace: Begin by lining a large cutting board or a baking sheet with parchment paper. This non-stick surface will be essential for placing your Oreo balls after they are formed and dipped, preventing them from sticking.
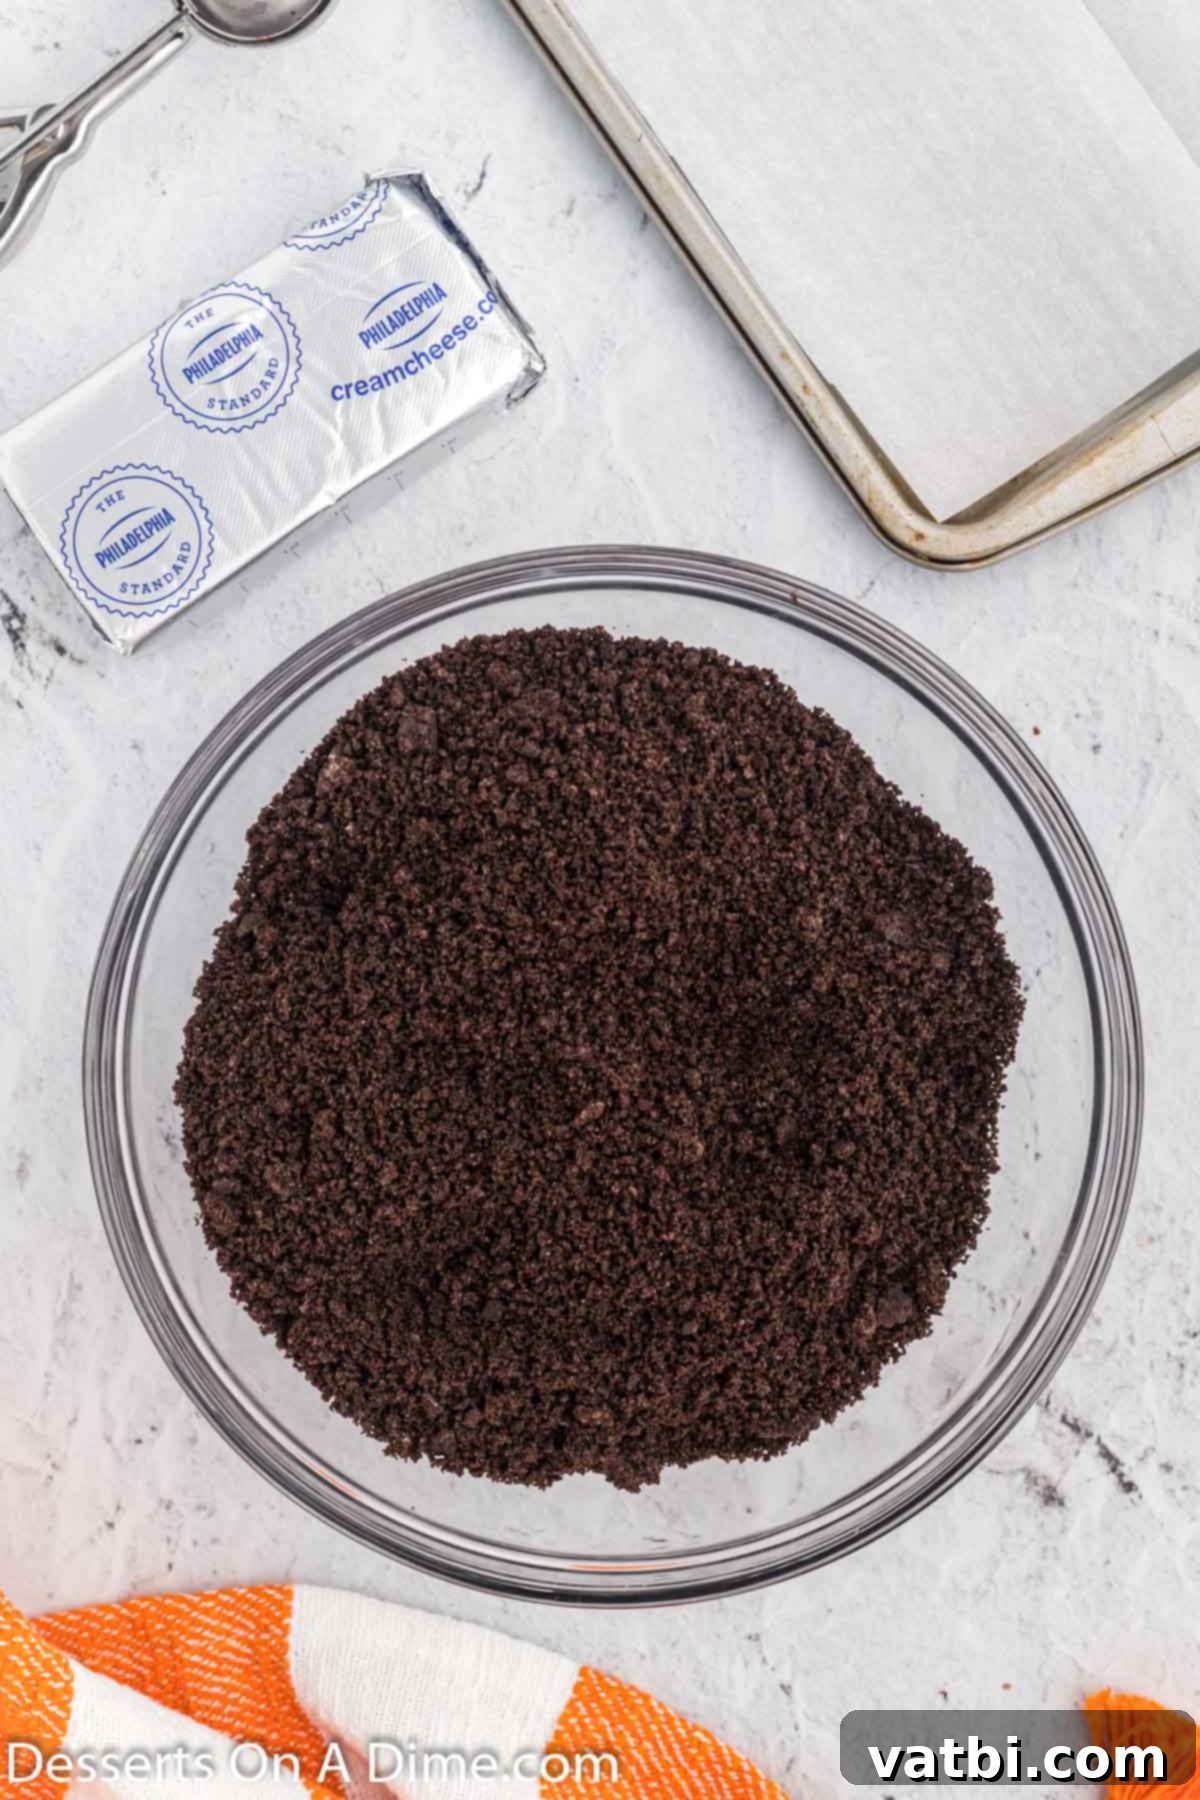
Step 1: Crush the Oreo Cookies. Take your package of Oreo cookies and finely crush them. The easiest method is to use a food processor to achieve fine, uniform crumbs, similar to sand. If you don’t have a food processor, you can place the cookies in a large Ziploc bag, seal it, and crush them with a rolling pin until thoroughly pulverized.
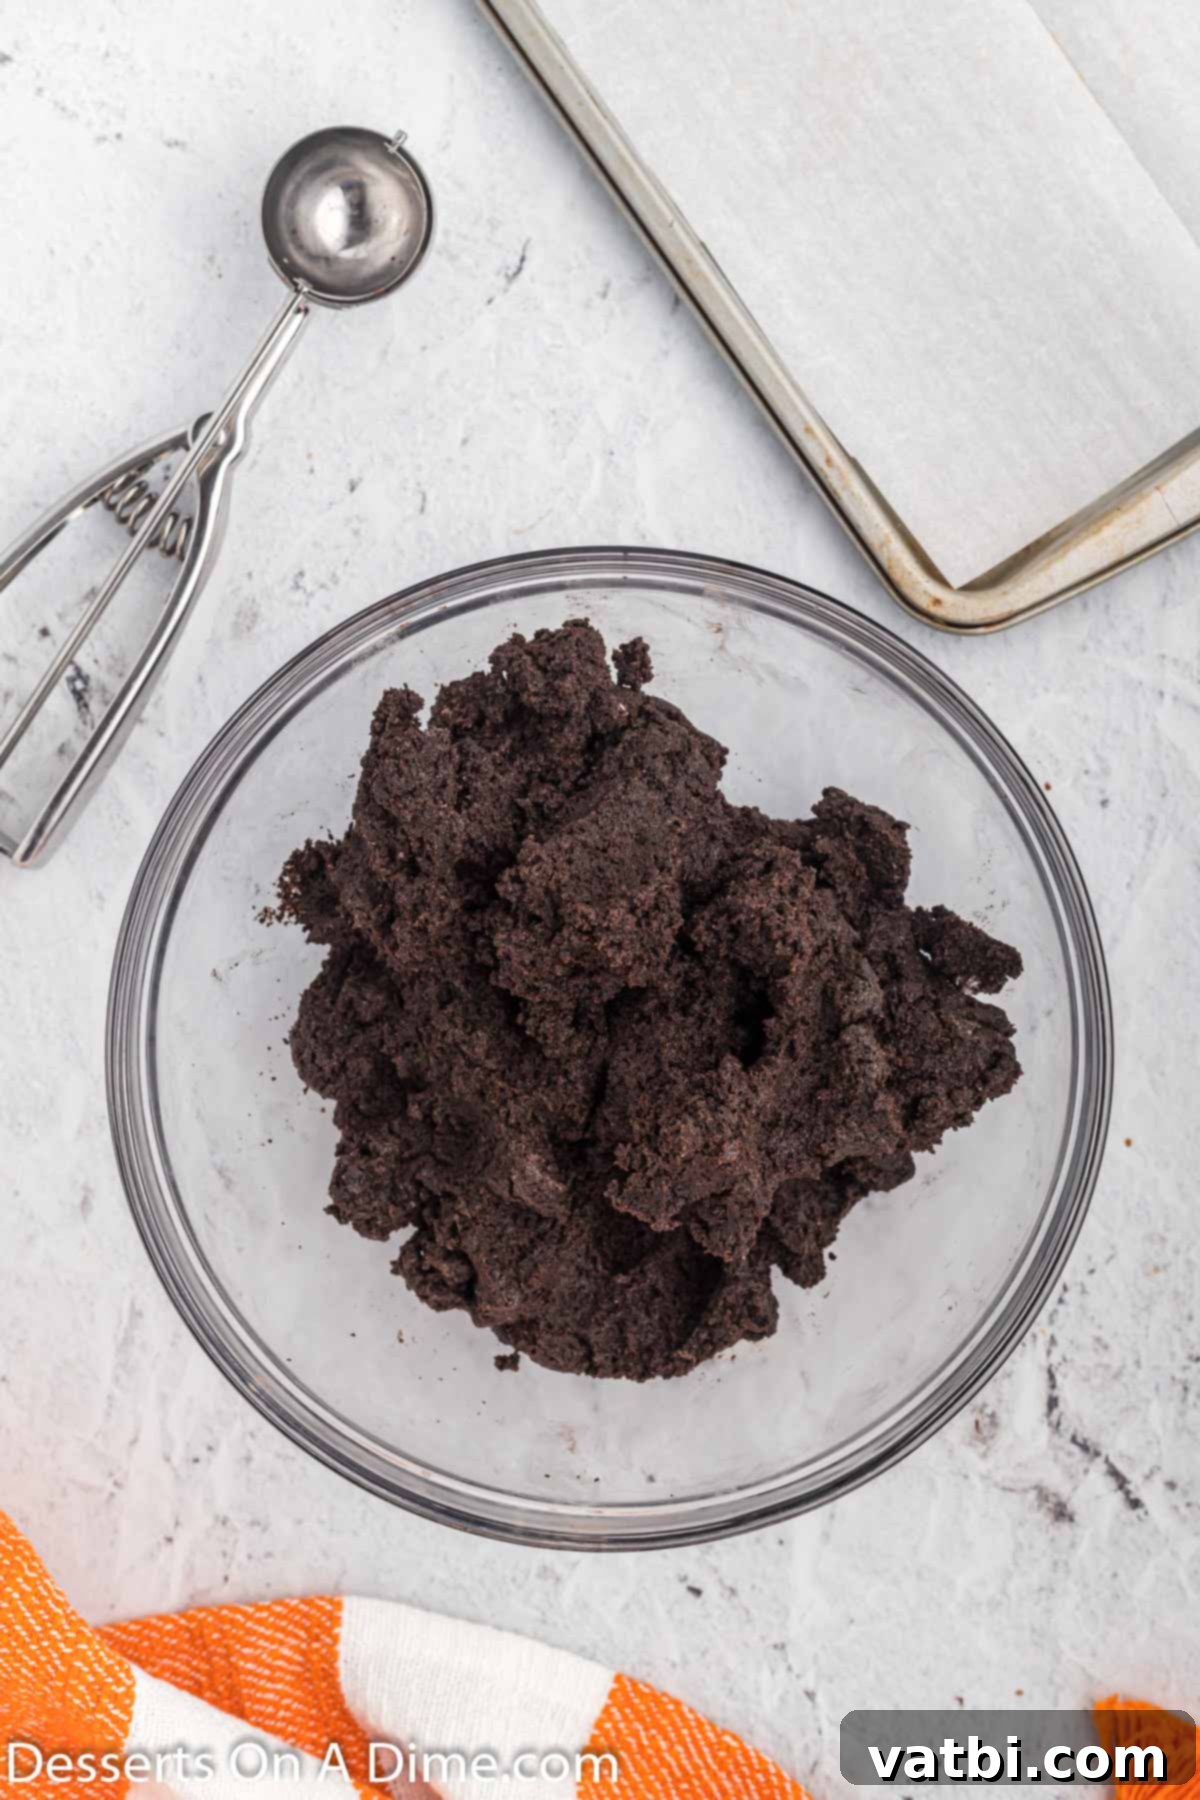
Step 2: Combine Cookies and Cream Cheese. Transfer the crushed Oreo crumbs into a medium-sized mixing bowl. Add the softened cream cheese to the bowl. Using a sturdy spoon, a stand mixer, or your hands, thoroughly mix the cream cheese with the cookie crumbs until they are completely combined and form a thick, uniform dough-like consistency. Ensure there are no streaks of plain cream cheese remaining.
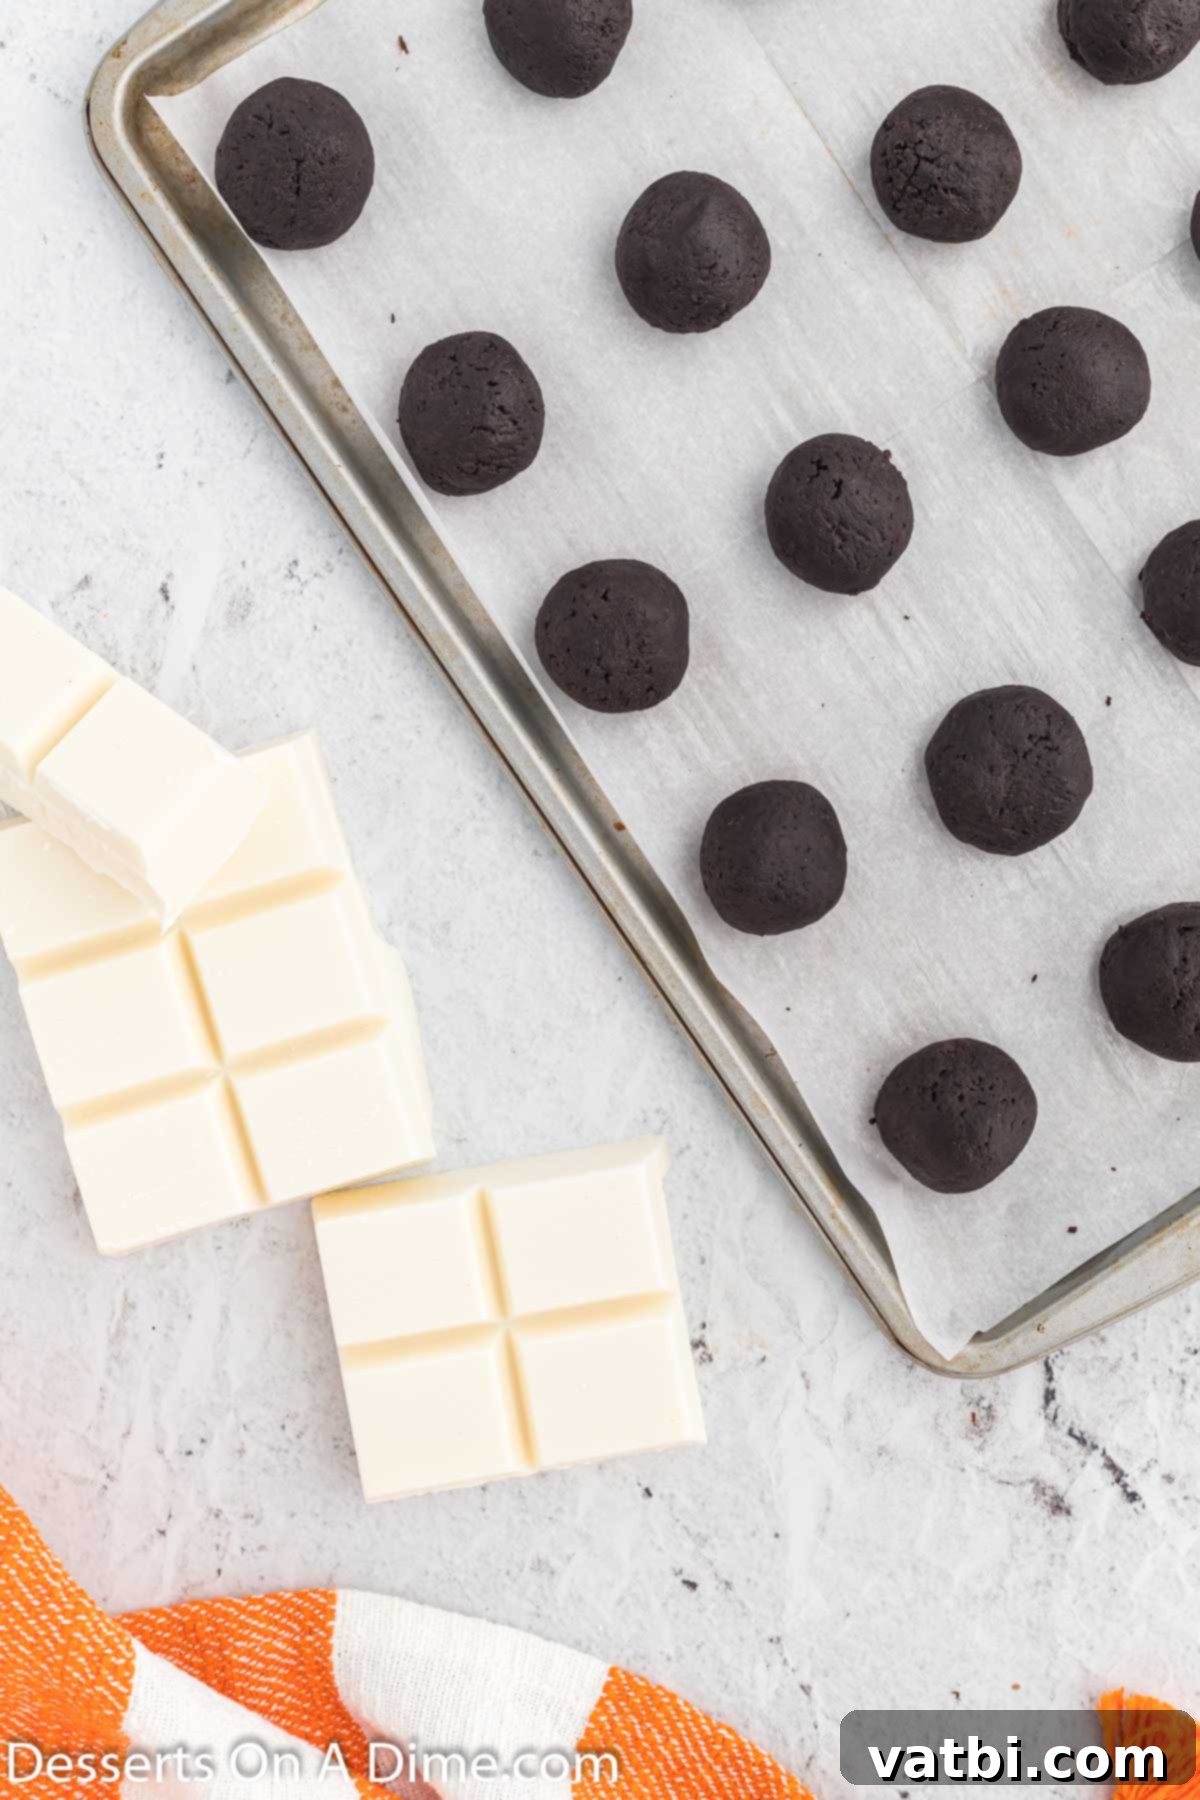
Step 3: Form and Freeze the Balls. Using a small cookie scoop or a tablespoon, scoop out portions of the Oreo mixture and roll them between your palms to form smooth, uniform 1-inch balls. Place these balls onto your prepared parchment-lined baking sheet, ensuring they are not touching. Transfer the sheet to the freezer and chill for 15 to 20 minutes. This freezing step is crucial as it helps the balls firm up, making them much easier to dip in the melted coating without falling apart.
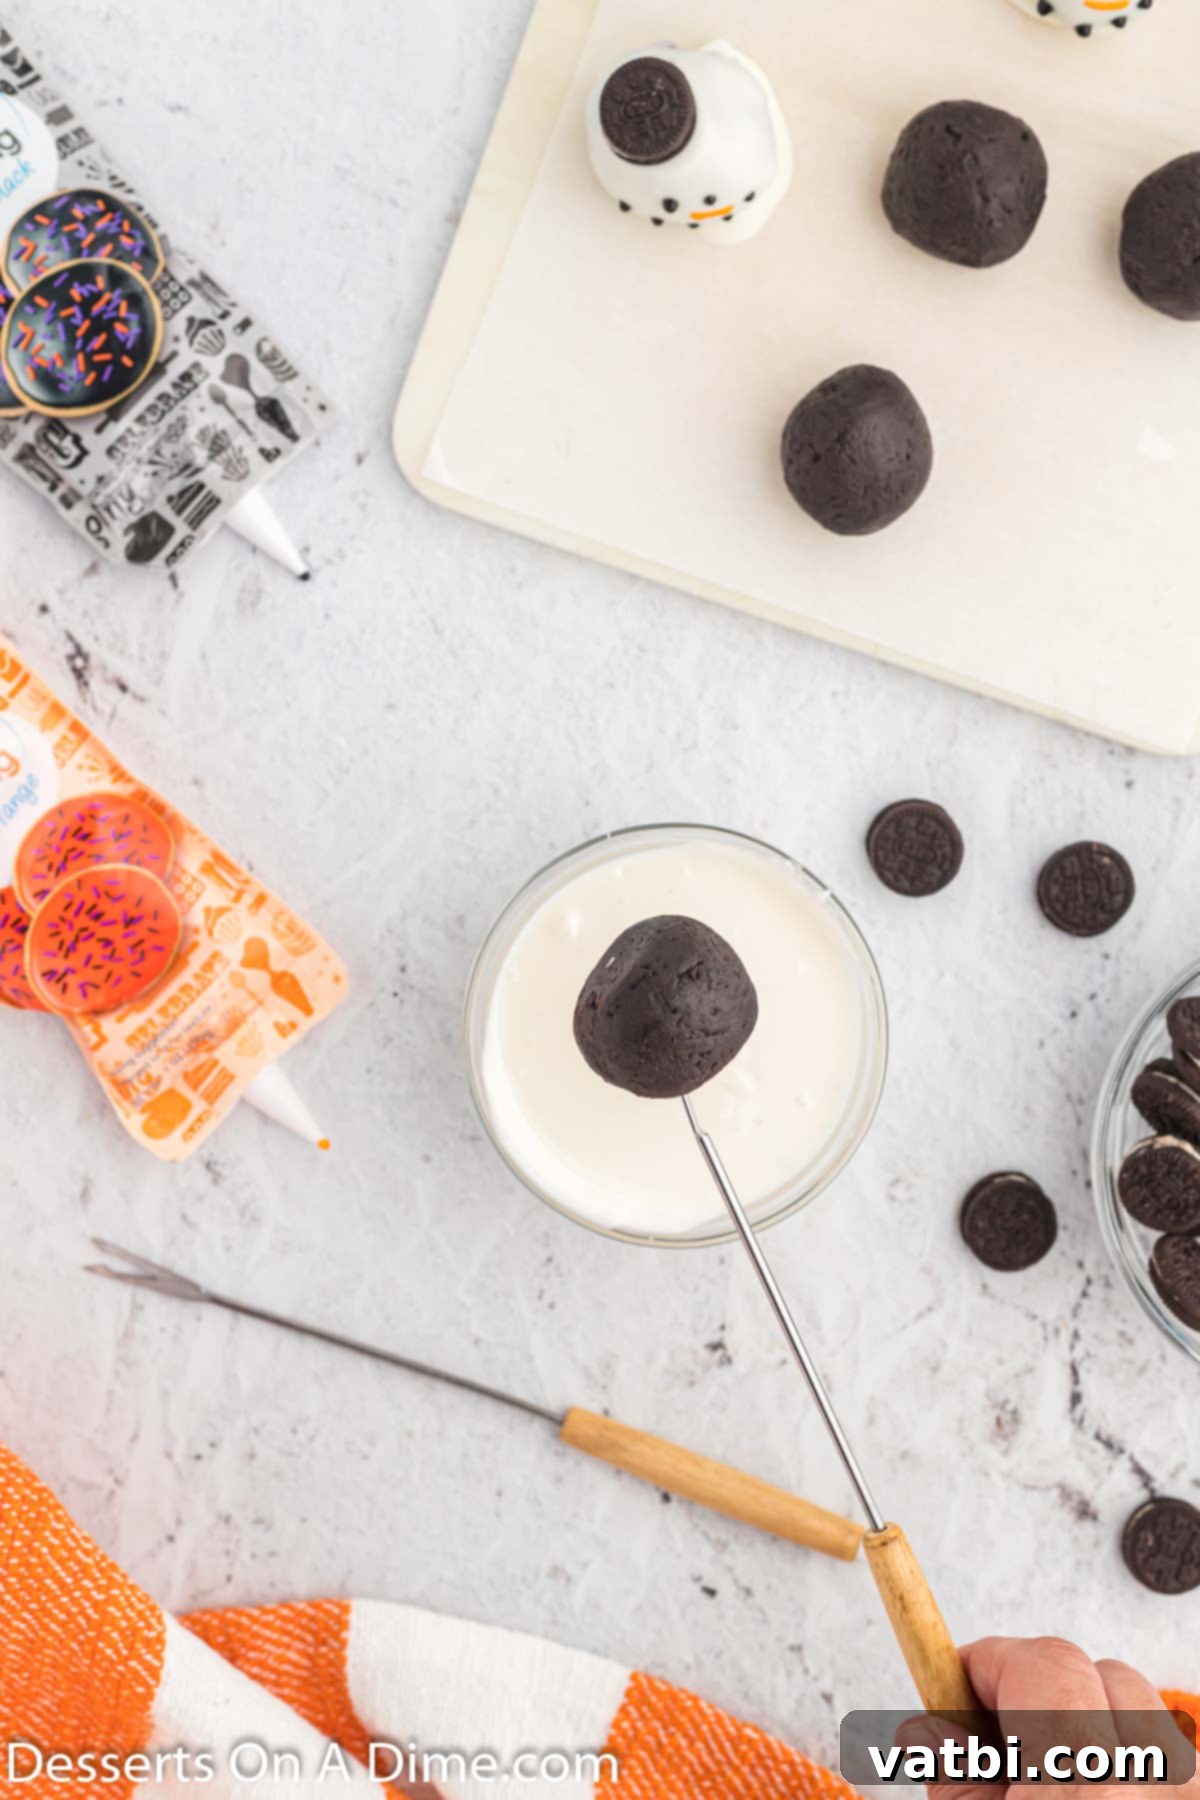
Step 4: Melt the Almond Bark and Dip. While the Oreo balls are chilling, break the vanilla almond bark into pieces and place it in a microwave-safe bowl. Microwave in 30-second intervals, stirring thoroughly after each, until the almond bark is completely melted and smooth. Be careful not to overheat it. Using a fork or a dipping tool, carefully dip each frozen Oreo ball into the melted almond bark, ensuring it’s fully coated. Lift the ball, allowing any excess coating to drip back into the bowl.
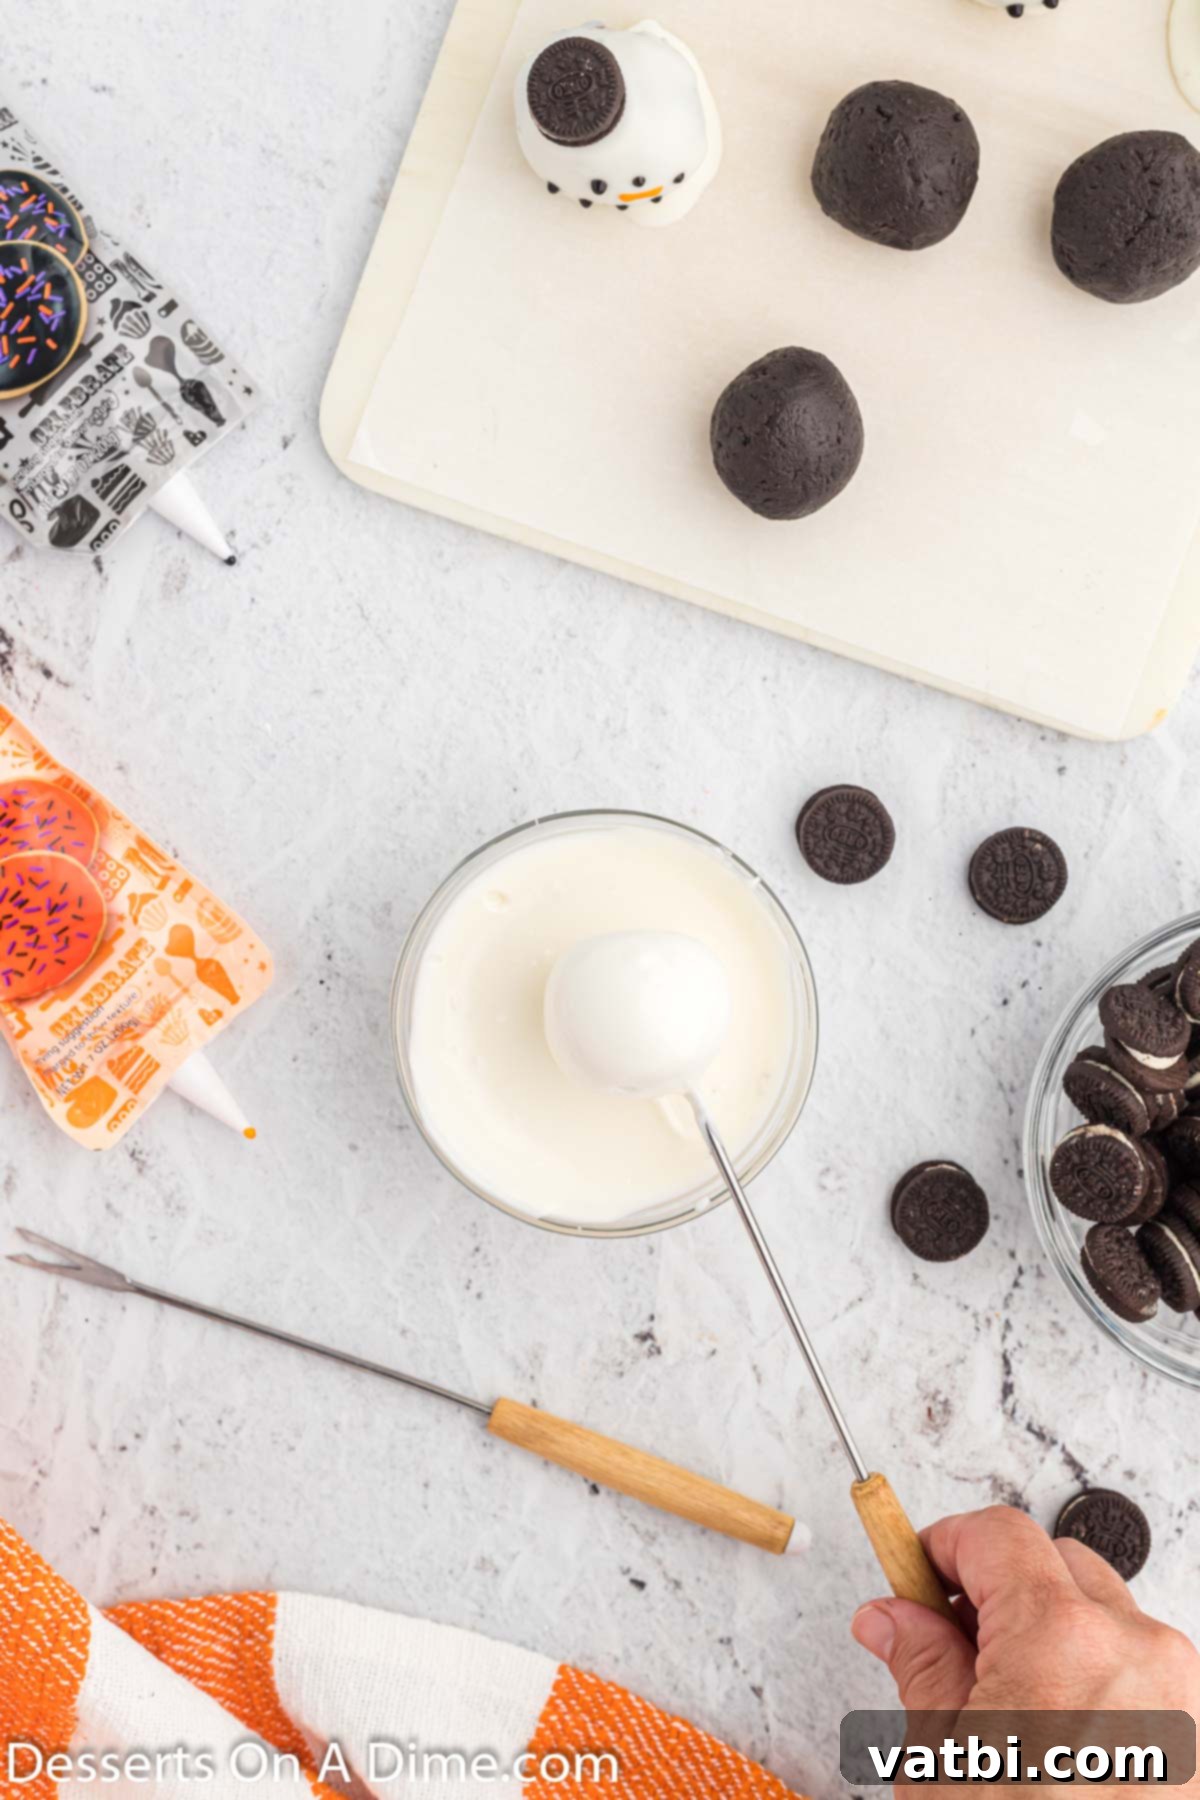
Step 5: Remove Excess Coating. After dipping, gently tap the fork against the side of the bowl to remove any excess melted candy melts from the coated Oreo ball. This step ensures a clean, smooth finish, preventing unsightly puddles or thick bases on your finished snowmen. Carefully place the coated Oreo ball back onto the parchment-lined baking sheet.
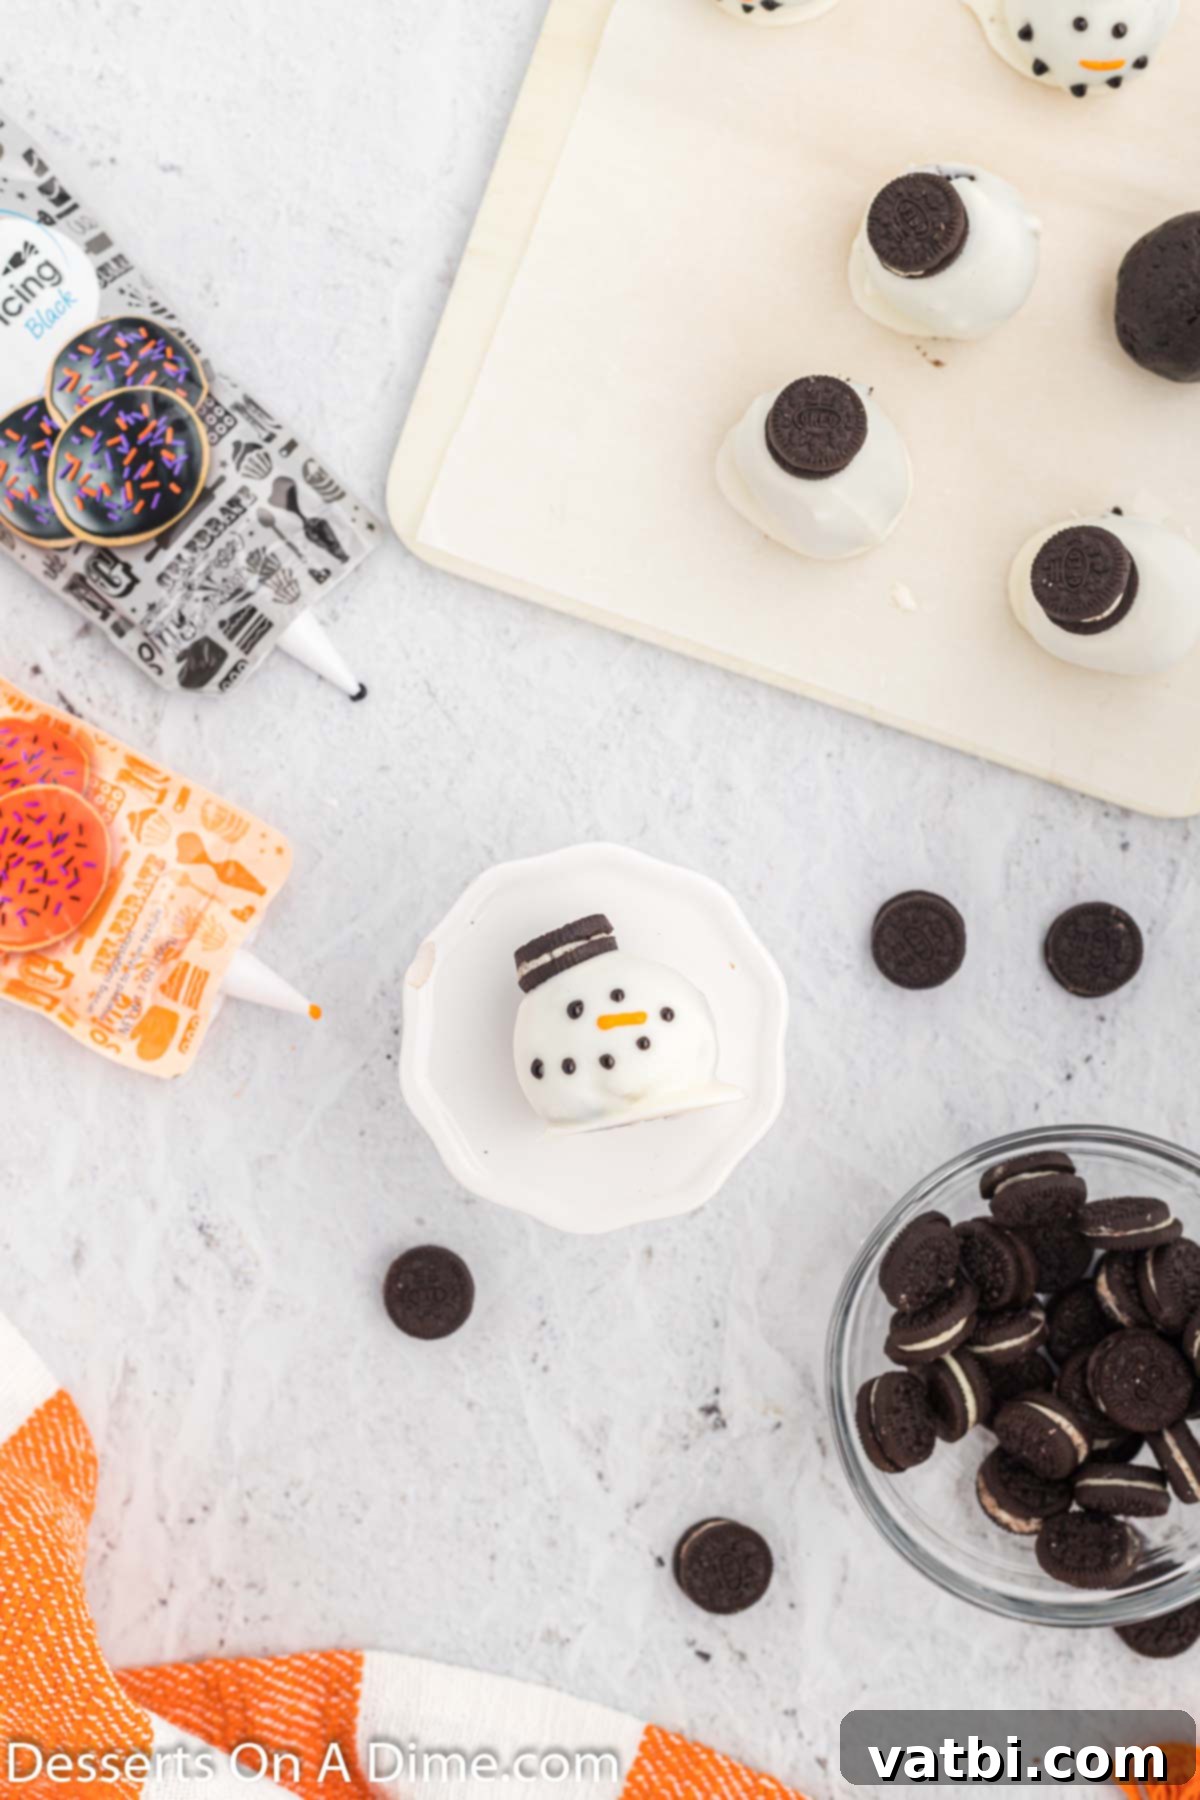
Step 6: Decorate Your Snowmen. This is where your snowmen come to life! Immediately after dipping and while the white chocolate coating is still wet (or at least tacky), gently press a mini Oreo cookie onto the top of each coated Oreo ball to create the snowman’s hat. Once the coating has set, use the black decorating icing to pipe two small dots for eyes and a few more for a dotted mouth. Then, use the orange decorating icing to draw a small, triangular line for the carrot nose. Allow all the icing decorations to set completely before handling or storing.
Tips for Perfect Snowman Oreo Balls
To ensure your Snowman Oreo Balls turn out perfectly every time, keep these helpful tips in mind:
- Room Temperature Cream Cheese: This is crucial! Softened cream cheese mixes much more easily with the cookie crumbs, resulting in a smooth, uniform truffle base. Cold cream cheese will leave lumps.
- Fine Oreo Crumbs: The finer your Oreo crumbs, the smoother your truffle mixture will be. A food processor is highly recommended for this. Larger chunks can make the balls less cohesive and harder to roll.
- Chill Thoroughly: Don’t skip the freezer step! Chilling the Oreo balls makes them firm, which is essential for easy dipping. If they’re too soft, they might break apart or melt into the warm coating.
- Melt Coating Carefully: When melting almond bark or white chocolate, use short intervals (30 seconds at a time) and stir well in between. Overheating can cause it to seize and become thick or clumpy. If it does thicken, a tiny bit of coconut oil or vegetable shortening (about ½ teaspoon) can sometimes help thin it out.
- Work Quickly While Dipping: The chilled Oreo balls will cool the coating quickly. Dip one ball at a time and place it back on the parchment paper immediately.
- Decorate While Wet: For the mini Oreo hats, you must press them onto the white coating while it’s still wet or tacky so they adhere properly. If the coating sets, you might need a tiny dab of extra melted bark to “glue” them on.
- Piping Bag Alternatives: If you don’t have decorating icing in tubes, you can melt a small amount of white chocolate and tint it with food coloring, then transfer it to a small Ziploc bag, snip off a tiny corner, and use it as a makeshift piping bag.
- Storage: Proper storage is key to maintaining their fresh taste and perfect appearance. Always keep them in an airtight container.
Frequently Asked Questions
To maintain their freshness, texture, and delightful snowman appearance, any leftover Oreo balls should be stored in an airtight container. They can typically be kept at room temperature for up to 1 week in a cool, dry environment. However, if you live in a humid climate or your home is particularly warm, it’s highly recommended to store them in the refrigerator. Humidity and heat can cause the white chocolate coating to become soft, sticky, or even melt, which will unfortunately cause your adorable snowmen to lose their neat look. Proper storage is crucial to prevent them from becoming messy and ensure they remain delicious and visually appealing for as long as possible.
Absolutely! These delightful treats are excellent for making ahead and can be frozen for up to 3 months. To freeze them properly, first ensure that the white coating and all icing decorations are completely dry and set. Once fully set, arrange the Oreo balls in a single layer in an airtight freezer-safe container. For multiple layers, separate them with sheets of parchment paper to prevent them from sticking together and to protect the delicate snowman decorations. It’s essential to be extremely careful when arranging them, especially due to the mini Oreo hats and piped facial features, as they can be fragile. When you’re ready to enjoy them, simply transfer them from the freezer to the refrigerator for a few hours or allow them to come to room temperature on the counter. Freezing is a fantastic way to prepare for holiday entertaining well in advance! Learn more about how to freeze Oreo Balls.
If your almond bark or white chocolate becomes too thick, try stirring in a teaspoon of coconut oil or vegetable shortening at a time until it reaches a smooth, dippable consistency. If it seizes (becomes lumpy and hard), it might be due to overheating or getting a drop of water in it. Unfortunately, once white chocolate seizes, it’s very difficult to revive, so it’s best to start with a fresh batch, melting slowly and carefully.
Yes, absolutely! While classic Oreos are used in this recipe, feel free to get creative. You can use Holiday Oreos for an extra festive look (as their red or green creme will show inside), Golden Oreos for a vanilla twist, or even Mint Oreos for a refreshing flavor. Just be aware that the flavor of the cookie will slightly alter the final taste of your truffle.
More Holiday Desserts to Try
If you loved making these charming Snowman Oreo Balls, you’re in for a treat! The holiday season is a wonderful time to experiment with festive recipes. Here are some more delightful holiday desserts that are sure to bring joy to your table and perfectly complement your winter celebrations. Each one is designed to be fun, delicious, and a fantastic addition to your festive menu:
- Ice Cream Cone Christmas Trees: A creative and edible way to decorate, perfect for kids!
- Christmas Tree Cake Pops: Bite-sized delights decorated to look like miniature Christmas trees.
- Melted Snowman Bark: Another adorable snowman-themed treat that’s incredibly easy to make.
- Peppermint Oreo Balls: A cool and refreshing twist on the classic Oreo ball, ideal for winter flavors.
- Homemade Christmas Brownies: Fudgy brownies dressed up for the holidays with festive toppings.
We encourage you to try this delightful and festive dessert recipe today! Your family and friends will be utterly charmed by these cute and tasty Snowman Oreo Balls. Once you’ve whipped up a batch and seen the smiles they bring, please come back and leave a comment to let us know how much you loved them. Happy holidays and happy baking (or no-baking)!
Pin
Snowman Oreo Balls
Ingredients
- 8 oz Cream Cheese softened
- 1 pkg Oreo Cookies 14.5 oz (regular Oreos)
- 16 oz Vanilla Almond Bark
- 36 Mini Oreo Cookies
- Orange Decorating Icing
- Black Decorating Icing
Instructions
-
Line a cutting board or baking sheet with parchment paper to prevent sticking.
-
Finely crush the entire package of Oreo cookies in a food processor until they resemble fine crumbs.
-
In a large bowl, combine the softened cream cheese with the crushed cookies. Mix thoroughly until well blended and a uniform dough forms.
-
Using a 1-inch cookie scoop or a tablespoon, form the mixture into neat balls. Place them onto your prepared parchment-lined sheet.
-
Place the tray of formed balls into the freezer for 15-20 minutes. This chilling step helps them firm up for easier dipping.
-
Heat the almond bark in a microwave-safe bowl. Microwave in 30-second intervals, stirring well after each, until it’s completely melted and smooth. Be careful not to overheat.
-
Using a fork or dipping tool, dip each chilled Oreo ball into the melted almond bark, ensuring it’s fully coated. Gently shake off any excess coating and return the ball to the baking sheet.
-
Before the almond bark completely cools and sets, gently place a mini Oreo cookie on top of each coated ball to create the snowman’s hat. This needs to be done while the coating is still tacky to ensure adhesion.
-
Allow the almond bark coating to fully set. You can place them back in the refrigerator for a few minutes to speed up this process.
-
Once the coating is set, decorate the Oreo balls using the black and orange icing. Use small dots of black icing for the snowman’s eyes and mouth. With the orange icing, pipe a tiny triangular line to resemble a carrot nose on each snowman.
-
Allow the piped icing decorations to set completely. Once firm, your delightful Snowman Oreo Balls are ready to be served and enjoyed!
Recipe Notes
Nutrition Facts
Pin This Now to Remember It Later
Pin Recipe
